Supercalifragilisticexpialidocious!

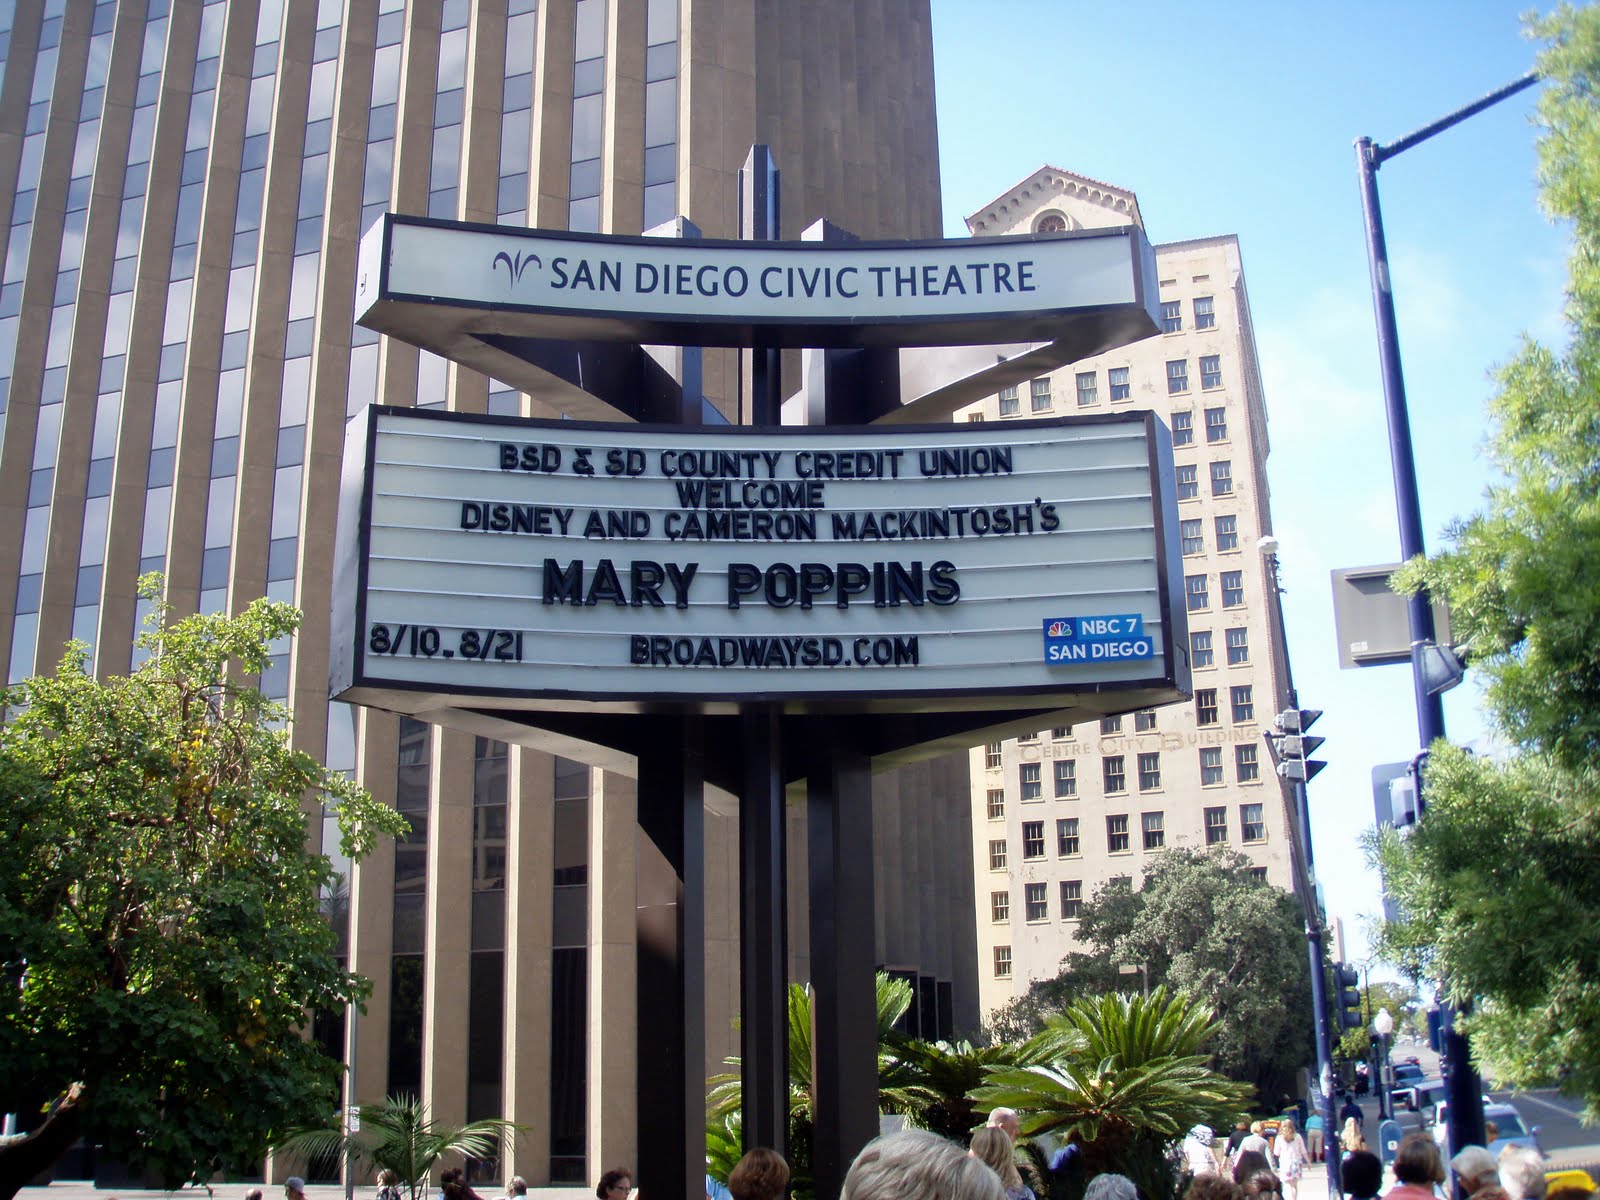
Yesterday afternoon my husband and I were lucky enough to see Mary Poppins at the San Diego Civic Theater in Downtown San Diego. It was a surprise trip to the theater for both of us since we didn’t actually purchase the tickets. The tickets were gifted to us by the wonderful Barbara Feldman when she realized that she would be out of town on the date of the performance. Her generosity is much appreciated and we are very thankful that we were given the opportunity to see this amazing production. 

As soon as the show started we knew we were in for a treat. Burt, played by Nicolas Dromard, did an amazing job setting the scene and preparing the crowd for what was to come.The star of the show, Mary Poppins, played by Steffanie Leigh, was quite good as well. She fit the role of Ms. Poppins perfectly and made most everyone chuckle, laugh, and fall in love with her character. I was equally impressed with the talents of Q. Smith who played a very convincing Miss Andrew, as well as Queen Victoria and Miss Smythe. Her voice was stunning and the different notes she hit were amazing. I would go back just to watch her perform.

As the play went on I became more and more excited to see what costumes would appear next and what the stage would transform into. The design and colors were just fabulous. I especially loved the glitter and sparkle on the chimney sweep costumes in the second act. In fact, the chimney sweep act (Step in Time) was my favorite scene of the whole play. It made me want to get up and tap along with them… however I have no tap skills at all and would have made a total fool of myself. I also loved the set design. The Banks home on Cherrytree Lane changed and flowed with each scene change. It was quite a perfect set for the production. Bob Crowley, the set designer, must be a genius!

If you share the excitement of seeing Miss Poppins “in person,” then please come and watch the production anytime from AUGUST 10-21, 2011 at the San Diego Civic Center and celebrate the kick off to Broadway/San Diego’s 2011-2012 35th Anniversary Season!

My friend, Angela, over at The Pinky Project is excited to extend a Mary Poppins special offer for a a family 4-pack of tickets for $99 in Section B. Click here to view a detailed seating chart of the Civic Center. The offer is good for weeknight performances – Tuesday, Wednesday and Thursday.

To purchase your tickets, visit Ticketmaster, select “find tickets” under the weeknight performance you and your family would like to attend, select your desired seats and type “4PAK” in the promotion code box to receive the special Mary Poppins family 4-pack special offer. The offer is available now through Sunday, August 21, 2011. So get your tickets NOW! You don’t want to miss out.

How to Strip Cloth Diapers

Due to a few inquires from others on my Washing Cloth Diapers post I thought it might be beneficial to also go over how to strip your cloth diapers as well. You see, as you wash and use your cloth diapers a build up can sometimes occur. Usually that build up is due to the detergent you use. There isn’t anything wrong with your detergent, it’s just something that naturally happens over time.

In order to get rid of that build up and increase the absorbency of your diaper (as well as reduce the chance of irritation for your baby) it’s best to strip your diapers from time to time. I usually strip my diapers once a month but I know other mamas who do it every few washes. Basically when you start to notice that your diapers either a. are getting a little smelly or b. aren’t as absorbent you want to strip them.

There are two different products I’ve seen out there that cloth diapering mamas use:

Bac-Out
Bac-Out is a product made by Bi-O-Kleen and it’s an amazing neutralizer. It eliminates the most difficult, organic stains, odors and waste the way nature intended. Bac-Out is a very unique blend of natural living enzyme cultures and botanical extracts, with more strains of cultures for more effective performance than commercial brands.

 Dawn
Yes, it’s true. You can use Original Dawn to strip your cloth diapers. But remember to buy the original blue Dawn, not the scented or foaming Dawn. You can also use this product to strip other things like your clothes and towels. If Dawn can cut through oil on a baby duck then it can take care of your diapers! There are also a few other uses for Dawn too highlighted on a few blogs. Check out Blissfully Domestic or Wise Bread for more suggestions.

Now to get to stripping… no, not that kind of stripping. Diaper stripping. Stripping your diapers is super easy. Just follow these steps and you’ll have clean and absorbent diapers in no time!

How to Strip Cloth Diapers

1. Wash With Hot Water
To strip your diapers you will need the hottest water possible. If your washer machine does not have hot, hot water you may consider boiling a large pot of hot water and adding it to the wash to make the water hotter. Once you have the hot water add a squirt or two of Dawn, or Bac-Out, to the water (I literally just take the whole bottle, put it upside down and squirt the product into the water). Once the Dawn dissipates into the water add your diapers.

2. Rinse, Rinse, Rinse
Once your diapers have gone through the wash cycle it may take a few rinse cycles to get rid of the soapy bubbles. I rinse my diapers in cold water 2-3 times or until there are no more soapy bubbles. Don’t confuse soapy bubbles with bubbles caused by agitation. Soapy bubbles will linger whereas agitation bubbles will disappear pretty quickly.

3. Air Dry
I like to air dry my diapers after I’ve stripped them. I feel as if I’m freshening them up by stripping them so why not freshen them up some more with some clean air. And the sunshine only adds to the cleaning process (plus it bleaches out any lingering stains). Pop the dried diapers in the dryer and dry on low for 10-15 minutes to fluff them up and you’re ready to go!

And if stripping your diapers doesn’t take care of the stink or absorbency problem please do not hesitate to contact the diaper manufacturer. They will more than likely be willing to help you out in finding a solution. You might have a yeast problem and yeast sucks. But don’t give up hope! Pinstripes and Polkadots has a few suggestions for yeast problems and prevention. Some other great resources and suggestions on alternative methods to strip your diapers can be found on Zany Zebra Designs and Lite Green Living.

Washing Cloth Diapers {How To}

I’ve highlighted my love for cloth diapers (CDs) on this blog before but since having my daughter I haven’t talked much about our cloth diapering experience with her. Honestly it’s because it’s been going very well. We haven’t run into one issue with the diapers we bought for her. Mainly, I think, because we are using all of the diapers we grew to love with our son. I still have the Happy Heiny and Bum Genius love but more than likely I’m grabbing for a prefold and Thirsties cover in the closet then a pocket or all-in-one diaper.

One question I have received a few times is how I clean them. Most assume I use a service. And they’re surprised to hear that I take care of the washing (poop and all) myself. It’s actually quite easy! So I figured I’d break it down for those who were curious and/or interested in cloth diapering. Just remember that this is how I wash my diapers. Always consult the manufacturers instructions for their recommendations before jumping in. We’ll start with the basics and go from there.

Stuff You’ll Need:

  • CD friendly detergent (check out this website for comparisons)
  • Vinegar
  • Original (blue) Dawn or Bac-Out (to strip your diapers if needed)
  • Dryer Balls
  • Clothes line with clothes pins

What You Do
Washing cloth diapers is pretty simple. After the initial prep wash, which we’ll go over, you can wash all of your cloth diapers together in the same load. The only thing you won’t be able to throw in the wash are your wool covers. That will be another post! Before washing make sure that when baby has a poopy diaper you clean it out by either spraying, scraping or plopping the waste in the toilet before putting your diaper in your wet bag.

Prep Wash
When you first get your cloth diapers you will need to do a bit of prep washing to maximize the absorbency of the diaper (so it holds more pee). With this initial prep wash you will need to separate natural fibers like hemp from your synthetic fibers. The natural fibers release oils during this initial wash that you don’t want coating your other diapers.

Most diapers only need that first initial prep wash. But if you are buying prefolds brand new it can take anywhere from 3-5 wash and dry’s to fully get the absorbency needed. An easy way to test your diapers to see if they’re pee-ready is to put a few drops of water on them. If the diapers immediately absorb the water with no problem then they’re ready to go. If the water beads up then the diapers need another go through or two.

To prep your diapers just do the following:

  • separate natural and synthetic fibers
  • wash diapers in cold water with a small amount of detergent (usually 2 tablespoons)
  • dry the diapers on low heat until fully dry or line dry diapers
  • repeat 2-4 times until diapers absorb water (prefolds will quilt up)

Washing Diapers
When you have about 24-30 dirtied diapers in your diaper pail or bag it’s time to do some wash! Don’t be scared. Diaper laundry will come as natural to you as washing your clothes. There are just a few simple steps you will need to add to the routine.

1. Set your water level to the highest it goes
Do NOT lower the water level to the level your diapers reach in the wash. It’s important to fully submerge the diapers and give the diapers some room to move around to get all the ickies out.

2. Rinse your diapers first with cold water
Include a small amount of detergent with this rinse to freshen things up. The rinse will remove any excess poo that may still be on your diapers and will also wash the diapers out a bit so that when they are being washed they’ll get cleaner.

3. Wash your diapers with hot water, rinse again with cold
There’s no need to use the sterilize cycle if you have it but please feel free to do so. I prefer just using the hot wash/cold rinse. Add in the recommended amount of detergent. This usually ends up being roughly 1/2 the amount you would use with your regular clothes.

After the wash is complete add some vinegar (about 1/4 cup) to the laundry for the rinse. This will reduce the need for dryer sheets or fabric softener. It’s also a great alternative for your regular laundry too. You can also purchase a downy ball and throw the downy ball (filled 1/2 way with vinegar) to the wash so you don’t have to listen to when the second rinse occurs.

4. Dry your diapers on low heat or on the clothes line
Some prefer to dry their diapers on medium or high heat but in order to save a little energy I dry on low. I also add dryer balls to the dryer to beat out any static that may be lingering. Try not to use fabric softener or dryer sheets in the washer and dryer you use for your cloth diapers. These products leave a film on your clothes and your washer and dryer. The build up of this film will reduce the absorbency of your diapers.

When the weather is nice I like to dry my diapers on low for 10 minutes and then pull them out and line dry them until fully dry. I then pop them back in the dryer with some dryer balls for another 10-15 minutes with the dryer balls to fluff them up. Best thing about line drying in the sun? The natural bleaching the sun does to the diapers. Natures miracles. Then you simply just take the diapers out of the dryer, stack together or stuff and stare in awe at your stash. Oh, wait. Maybe I’m the only one that does that. I may have a sick obsession with how much I love the fluff.

So basically it’s cold rinse, hot wash, cold rinse, dry and you’re done!

Need help stripping your diapers? Check out my Stripping Diapers post for more information.

*** This giveaway is now closed ***

Taking a Baby to BlogHer ’11

Now I know I need to start posting about my experience at BlogHer’11 before I start forgetting very important details but I needed some time to decompress before jumping in. And I really need to clean the house… 3-4 days away from the home and it looks like a disaster area! Now that I’ve decompressed I can push the house cleaning to the side and jump in to share my experience(s) at BlogHer. I thought the best way to do this would be to write about different aspects of BlogHer. I will start by talking about my experience taking Miss M with me to attend the conference on Friday and Saturday.

Before I even signed up to go to BlogHer back in February I knew I would more than likely be taking my little girl with me. So I kept my eyes and ears open for any and all suggestions for taking nurslings. Luckily a lot of people on twitter, including the ladies at BlogHer themselves, eased my mind and made it very simple to figure out how to work things out.

Not only did I have the support of 3000+ women (including many, many moms) but I also had the support of the conference itself. BlogHer set up a special Lactation Room that could double as a changing station and storage room. I was able to drop off my diaper bag each day so I didn’t have to lug it around with me and I was provided with nursing pads, wipes, and samples of other Lasinoh products. There was even food for M. The awesome ladies at the Ella’s Kitchen booth in the Expo let me grab a few puree pouches for her to try and guess what? She loved them! I’ll definitely be buying those for Hawaii at the end of the month.

During meal-time there was always a smiling face and pair of hands for my daughter to go to while I ate. None of this scarfing food down in 30 seconds or less before having to stop a hand from grabbing food out of my mouth. Friends and strangers alike were more than happy to have Molly sit in their laps. And I let them! I even met an amazing woman at the Quaker Breakfast with Bob Harper who not only held M for me but also gave her an adorable knit bunny toy! How awesome is that? I have to get a picture of M and her new toy.

And while I was oogling Bob while asking him a question he surprised me by complimenting me on how beautiful M is. Swoon! Maybe next time he’ll hold her while I eat. Healthy food, of course. She was also my ticket to getting a picture with him. He couldn’t pass up an adorable, sleeping baby.

Each session I walked into was like a breath of fresh air. All of the women around me would smile at M and myself and those who I sat with would reassure me that they were there to help me out if I needed it. I brought a small Aden & Anais blanket with me and used it to let M play on the floor when she wasn’t sleeping or nursing. She even started to fuss during (in my opinion) the most informative and inspiring session, How to Put the Professional in Professional Blogging, and Jessica Rosenburg of ItsJessicasLife.com and Tiny Prints turned to me, smiled and mouthed, “It’s ok!” as I rocked and shushed M in hopes that she’d go to sleep. Luckily shortly after she did pass out and I got to enjoy one of the best sessions of the weekend. Check out a great recap here on Vampy Varnish’s blog.

I was lucky enough to meet up with Jessica of And Then There Were 4 and scored some awesome Smart Mom Teething Bling including a necklace and bangle bracelet. This kept M entertained during sessions and while I was walking around from location to location. I am pretty sure there are many pictures out there of M gnawing on mine or Jessica’s necklaces. Another lifesaver was my Ergo carrier. As I’ve posted before… I love my Ergo. M never once complained. I guess I wouldn’t either if I had the option to be carried around. All throughout the conference women commented on how pretty the design was. They had never seen embroidery on the Ergo before. It definitely made the carrier more appealing to those I talked to.

If you are planning on going to BlogHer’12 next year and are thinking of bringing a nursling or small baby I say go for it! It’s totally doable (and you may just get more coupons and samples from the vendors at the Expo). Just remember to:

  • Bring a carrier or stroller
  • Be open to having the supportive women around you help by holding/playing with your baby
  • Locate the lactation lounge right away (also a great place to make bottles and store breast milk/formula)

I hope to see you (and your baby) there! There’s no way I’m missing another BlogHer now that I know what all the hype is about. I’ll be the one offering to hold your little munchkin next time. Maybe your little one will learn to wave like mine did. See a video of her doing it (at home) below.

And stay tuned for more fun posts about all of the great memories I’ve made over the past few days (like the Flash Mob I was in and an awesomely amazing limo ride!!) and to thank the generous sponsors who hosted the amazing parties I hung out at with my friends (old and new). I’ll also be hosting a few giveaways that I’m very excited about.

Great Snack Ideas for Kids {Tips and Tricks}

You know the saying, “Variety is the spice of life”? This really holds true when it comes to toddlers and food. I sometimes get in a rut when I go grocery shopping. I buy the same fruits, veggies and snacks over and over again. And I notice that after a few weeks of the same handful of choices my son starts to lose interest in those foods. He even started to turn down berries for breakfast or dessert so I knew things had to change.

This summer I have been buying strawberries, grapes and apples weekly. On a quick trip to Trader Joe’s with my son he saw the oranges from across the store and literally ran to them with glee. He practically begged me to buy some for him. So I obliged and threw in a bag of oranges. I asked him if any of the vegetables looked tasty and he grabbed a crown of broccoli. We got home and immediately he asked for an orange. I peeled it and he devoured it in minutes. Then at dinner time he asked to help make the broccoli so I let him break some up to put in the steamer. He ate that as well (along with a few bites of chicken).

It seemed as though having him choose a few items that he was willing to try lead to him eating more than normal. So I started looking for great suggestions to keep him excited about the food we served him so he would be more willing to eat. Now I don’t expect him to eat like a champ every day. Toddlers eat like cavemen. They scavenge for a few days and just snack a tiny bit and  then they have what I call eating days where they seem to not get enough. Eating days maybe come every 4-5 days… Below are a few tidbits I’ve found from various sources that now help me keep things exciting for him when he does decide to eat.

1. Get the Kids Involved in Meal Planning
Starting the week off with a list of meals to make each day not only saves time but ultimately helps save money as well. Adding the kids into the mix will also save tears and aggravation at dinner time when your child doesn’t like what’s been put in front of them. Let your child help you meal plan so they can choose what they want to eat. Perhaps start by letting one choose one meal a week. Or if you have younger children like me, let them choose the side dish (carbs, starches or veggies). If my son has chosen his veggie than he more than likely eats at least 3 bites of it when served to him at dinner.

2. Take the Kids Grocery Shopping
I know, I know. It’s a pain to take the kids in the grocery store. I used to dread shopping with both of mine and would wait till the weekend to do all of my grocery shopping alone and kid-less (plus I got to indulge in a coffee that wasn’t cold while I shopped). But then, like I mentioned before, my son got excited about eating the food he chose. And I’ve been taking him alone without the baby so he feels like he has my complete attention when I shop. It’s a great bonding time that I actually look forward to now! Plus as your children help choose the meals and then see what ingredients go into the meals they may just start to get interested in making the meals.

3. Let the Kids Help in the Kitchen
Grab that stool from the garage or closet and push it up to the counter. Find odd jobs while prepping for dinner that are safe for your child to do. I purchased a child-safe knife from Pampered Chef that my son uses along side me to chop up herbs while I chop up veggies. He also helps rip up lettuce for salad, add pre-measured cups of ingredients to the bowl and crack eggs. When he starts cooking with me he gets excited about the food he is working with. He’s even taken to eating lettuce and salads without prompting because he prepares the salads for mealtime.

All of these three things will lead to your child not only being proficient in making meals for your family but will also help your child stay on the healthy track. By giving your child the opportunity to make smart choices about food, and then showing them how to prepare the meals to eat, they will know what to do when they get older and have to think about food on their own. My greatest challenge to myself right now is to try and lead a healthier life for my children so that I am the role-model they look to when they choose how they’re going to eat and live.

A great tidbit I heard in a panel discussion at BlogHer’11 from one of the speakers was that the old saying “Do as I say, not as I do” holds no value. What you do says a lot and kids are going to follow your lead. So keep a variety of healthy choices available for your children and get them involved!

Chemical Pregnancies {Miscarriage & Pregnancy Loss}

Just because you were only pregnant for a fraction of a second doesn’t mean you weren’t pregnant. No matter how early or late you lose a pregnancy, you are affected by your loss.

A chemical pregnancy is the clinical term used for a very early miscarriage. A chemical pregnancy occurs when a fertilized egg does not implant into the uterine wall. If a pregnancy test is taken just at the right time it will be positive, however, when a repeat test is taken several days later it will be negative. In many cases, the positive pregnancy test was achieved before your period was due but a miscarriage occured before a sac or heartbeat was able to be seen on an ultrasound.

Chemical pregnancies are unfortunately very common. 50 to 60% of first pregnancies end in miscarriage very early in pregnancy. Many occur without the woman even knowing that she was pregnant, but this is not always the case. I have had a few friends experience chemical pregnancies and one friend, Amy, has dedicated a whole page on her blog that defines what a chemical pregnancy is and any questions you may have about chemical pregnancies.

I’ve highlighted her answers to the most common questions about chemical pregnancies below (with her permission, of course):

What causes a chemical pregnancy?


Most chemical pregnancies are due to chromosomal problems in the developing fetus. Other possible causes are inadequate uterine lining, uterine abnormalities both congenital or acquired like fibroids, low hormone levels, luteal phase defect, possible immunological causes or certain infections.
How can I prevent chemical pregnancies?


Most chemical pregnancies can not be prevented. If you have recurring chemical pregnancies, your doctor should be able to investigate and help you formulate a treatment which is best for you. Potential treatments include vitamin B6 (at least 50mg a day), progesterone cream or supplementation, estrogen supplementation, immunological treatments, and baby asprin. Be sure to discuss potential testing and treatment with your doctor.

How should I feel about having a chemical pregnancy?

After having a chemical pregnancy many women are surprised by how sad they feel, even though they only knew of the pregnancy for a few days or a week. However, experiencing these feelings of deep grief is completely normal. While you may not experience the same physical symptoms of a later miscarriage, you are still mourning the loss of the dream of that baby. When you saw those lines on the pregnancy test you thought, “I’m pregnant!!” and began to connect with your baby, even if it was taken away from you so quickly. Do not be ashamed or embarrassed about your feelings. Allow yourself to experience and sort through your grief as you need to.

How long do I have to wait to try again after a chemical pregnancy?

Different doctors will tell you different things, but generally they advise that you wait one full cycle (until after your next, regular period) to try again. We didn’t wait after our first chemical pregnancy and I ended up getting pregnant again before my next period came, and that pregnancy was successful. HOWEVER, after my 2nd chemical pregnancy, we decided not to wait because of what happened the first time, and I ended up having my 3rd chemical pregnancy. So, I would recommend that you follow your doctor’s advice. I can’t tell you how often I beat myself up and wonder if I caused the 3rd loss by not waiting.

Will I be able to have a healthy pregnancy after a chemical pregnancy?


While there are no guarantees, the good news is that the vast majority of women go on to have healthy pregnancies following a chemical pregnancy. My first pregnancy was a chemical pregnancy, and then I immediately became pregnant again and gave birth to my son. My bigger troubles have begun while trying to have a second child, but I did go on to have one healthy child after my first chemical pregnancy.

If you have had a chemical pregnancy before please know that you are not alone. There are a lot of resources out there for you to help you through this hard time. Should you need more information about chemical pregnancies or links to great forums or sites to learn more please feel free to email me at simmworksfamily (at) gmail.com and I would love to connect you with other women who have gone through this same process.

Sign4Baby Turns 4 {KidVentures Review}

Molly loved watching Signing Storytime

This past Friday I headed over to Kid Ventures to celebrate with Sign4Baby as they turned 4. We were a bit late to the party due to a busy morning and a napping M but when we arrived we quickly found that we hadn’t missed a thing! We met up with our new friend Elodie and her mom, Kari. We met them during our first 6 weeks of sign language class and the girls are almost the same age (Elodie is a month younger).

I had never been to Kid Ventures before but have gone to similar type places around town. The first thing I noticed when I walked in was the layout of the location. There was an eating area in the center of the room and a KV snack area to the left. To the right there were two strutures that can’t be missed. A huge castle and pirate ship! Kids were laughing and smiling all around me as they ran in the castle and slid down the slide attached.

The cafe and layout of the rooms

We found a seat right away because signing story time was starting.

The theme for this month’s signing story time is Sea Life so Joann cleverly went with a Celebrate The Sea theme. We listened to a Hullabaloo song about the sea and then Joann read an adorable book by Karen Katz called Where’s Baby’s Beach Ball? Since we read Where’s Baby’s Belly Button? to M already she was very interested in the story.

Throughout signing story time Joann signed along with the book and the music. The children were very interested in watching her through the whole thing and would get excited when they heard or saw something they recognized. M stayed pretty interested in the signing but after a little it she wanted to explore. She loved all of the friendly faces around her and felt right at home with the fun energy that came with a room full of excited children.

Sign4Baby’s Signing Storytime

As we explored we found out that there is a police department, grocery store, fire department, disco room, nursery, restaurant, library and art store in addition to the cool castle and pirate ship.Wow! And each room is completed with outfits, toys and activities for the kids to partake in. I know how much my two year old is into pretend right now and these different rooms would just make his day.

After a very fun storytime and scavenger hunt a raffle was held for those who chose to purchase raffle tickets. All of the proceeds for the raffle went to the San Diego Center for Children. There were many prizes being raffled off. Some of them included the following:

M’s friend, Elodie, was lucky enough to win one of the 3M Shoot n Share camcorder projectors plus lots of other great prizes. And I was lucky enough to win a 30 minute facial with Karen of Firefly Wellness. This mama needs some relaxation! I’m sure you’ll be seeing a review of my experience at Firefly Wellness in the near future.

Pickle and the KV Pirate

The great part about Kid Ventures is that even though it was a packed house I never felt crowded. Their layout gives kids the room to play together or independently without having to play on top of one another. I know that my son will love this place the next time we go! And I’m definitely considering using Kid Ventures as a venue for his next birthday party. With all of the fun we had at Joann’s party I know that our friends and family would have an equally great time at this place.

The only drawback I found was that there wasn’t a labeling or numbering system where you child and you have identification to prove that you belong to one another. I don’t make it a habit to take my eyes off my kids but if there was a distraction I wouldn’t want my kid to walk out with another family. Because I know my son would do this 🙂 

Here’s some more information on Kid Ventures

  • Kid Ventures is a socks only facility (this includes babies)
  • They have two San Diego locations — Pacific Beach & Eastlake
  • They have drop-in times, camps and classes where parents and children can participate together
  • The Parents’ Cafe has a selection of drinks, salads and sandwiches available for purchase, and the seating area is within a few “footfalls” from where their children are playing
  • Adults must stay with their children, as they are not a child care or child services facility
  • And the best part… Sign4Baby will be offering their sign language classes at this location soon!

 If you are looking for a fun, kid-safe place to go with your kids I highly recommend checking out Kid Ventures at either their Eastlake or Pacific Beach location. And remember to bring socks!

Molly and her buddie, Elodie

*** Disclaimer: In exchange for this blog post I was offered free admission to the event (but didn’t have to use it since non-walking babies are free) and 6 raffle tickets to enter the drawing. This in no way altered my opinion of Sign4Baby or Kid Ventures ***

Kid Ventures Blogger Contest Badge, I participated

Tips and Tricks for Green Cleaning in Every Room

Looking to go green? These tips and tricks for green cleaning in every room can help you tackle your daily cleaning chores without worrying about nasty chemicals! 


Ever since the birth of my son I’ve been on the hunt for ways to go green and stay as organic as possible. So when I started looking under the sink and in the closet at all of the cleaners we had I knew we had to make some changes. Thinking of my little one crawling on a ground where harsh chemicals resided and putting his mouth all over surfaces where I cleaned with chemicals made me change quickly. I have received many tips from other mamas as well as other websites so I figured why not share them here too.

The most important part of my arsenal of tools for green cleaning is vinegar. I buy it in the huge gallon size and use it for just about anything from cleaning toilets to freshening up my laundry. I mix vinegar together a few other natural cleaners to create the perfect solution for different problem areas. I’m going to list my “must have” ingredients and then will go into detail by room on how I mix and use them.

Must Have Green Cleaners

  • Vinegar
  • Water
  • Tea Tree Oil
  • Dr. Bronner’s Liquid Soap
  • Baking Soda
  • Oxy Clean
  • Lemons
  • Salt
  • Vanilla Extract
  • Cedar Hanger Rings
  • Wash Cloths or Cloth Rags
  • Sponges
  • Stiff Bristle Brush
  • Steam Mop

The Kitchen

Tile Floors
Any hard floor surface in my house is cleaned with the steam mop. The hot steam paired with the cloth, re-usable pad cleans my floors deeply. I have purchased extra pads so that I can clean more than one room at once. I’ve found that one pad gets dirty after cleaning 1/2 of my living room or all of my kitchen and I don’t want to have to wait to get the energy to start cleaning again. Side Note – I recently broke the handle off my steam mop because I am apparently a very deep cleaner 😉 I’m hoping to upgrade to the steam pocket mop soon!

Counters
My all purpose cleaner for any surface in my house consists of the following:

  • 1 part water
  • 1 part vinegar
  • 10 drops tea tree oil

I place this solution in a spray bottle and use it to spray down the counters, stove top, oven door, microwave door and fridge. I wipe everything down with a sponge  

Cutting Boards
To clean my cutting boards I sprinkle them with salt and use 1/2 a lemon to scrub the salt into the wood. I then rinse with a wet wash cloth and let air dry. This also works great for the counter tops if there are bits and pieces to be scrubbed off.

Sink
When the sink needs shining (every morning ;)) I sprinkle baking soda all around and spray with the vinegar solution given above. I then scrub down with the abrasive side of my sponge and rinse down with water.

Microwave
The most favorite solution I have in my cleaning arsenal is the solution I have for my microwave. I not only love how well it works but also love how it leaves my kitchen smelling!

Take a microwave safe bowl and fill it with water. Then sprinkle in a few drops of either lemon or vanilla extract (based on my mood) and place a microwave safe wooden spoon into the water to reduce the chance of a boil over. Then set the microwave to heat for 3 minutes.

Let the bowl cool a bit before removing from the microwave and be careful! It’s hot. Take a wash cloth and wipe off the sides, top and bottom of the microwave. Any food bits and pieces should come off easily without the need to scrub.

Oven
Confession… I’ve never cleaned my oven. And I use it. Like a lot. But if I were to clean my oven I’d use the simple tips from The Daily Green and would make a paste out of baking soda and water. I’d then spread the paste all over the inside of my oven and would leave it overnight. Then I’d use an abrasive sponge and would scrub the inside down (with gloves on, of course). After I scrubbed like crazy I’d use a wet wash cloth to wipe down one last time.

The Living Room

Laminate Wood Floors
I use the steam mop on my laminate wood floors as well. I make sure to wipe them down with a towel after if the water doesn’t evaporate right away just in case. I don’t want them to warp on me 🙂 My husband has also used a dry cloth mop before with Bona wood floor cleaner if he thinks my steam mop isn’t doing a good enough job.

Tables
When we had our table resurfaced when we got married we were told by the wood worker to only use water and a wash cloth to wipe down the table. So we’ve stuck with this. I make sure to wipe it down soon after we eat our meals so nothing sticks.

Couches and Chairs
I’m not sure about you but I just vacuum my couch and chairs off. I also wipe down my leather chairs and wooden dining room chairs with water. Sometimes, if needed, I use the vinegar solution but I try to stay away from any cleaners for fear of discoloring them

Windows
I clean my windows the same way I clean my mirrors. I spray them with my vinegar solution and use newspaper to wipe it up. No streaks and no dirt! Although I do confess that I clean the windows maybe


The Bathroom 

Laminate Floors
Due the the small space in the bathroom we usually just sweep it every day and mop with a regular mop and a solution of water, Dr. Bronners, vinegar and tea tree oil. I then dry with a towel (usually a bath towel that needs to be washed). I could also use this solution with my kitchen floors if I’m too lazy to get the steam mop out. 

Sink/Mirror/Toilet Surfaces
I use my vinegar/water/tea tree oil solution to clean the sink. That way I can spray everything in the bathroom down at the same time. I then wipe the sink and toilet (in that order) off with a clean towel or wash cloth and dry the mirror with newspaper so no streaks or particles are left behind.

If there is something stuck to the sink or surface and I need a deeper clean I just sprinkle with baking soda then I spray with the vinegar solution and scrub with a sponge or stiff brush.

Tub
My disinfectant solution for the bathroom is a simple solution of:

  • 2 cups water
  • 3 tablespoons of Dr. Bronners 
  • 15-20 drops of tea tree oil

I put this solution into a spray bottle and keep it under the sink. When my children are done bathing I squirt down the tub and take a wash cloth to wipe everything away. I then spray the surfaces with the shower head and let air dry.

Once a month (or more frequently if needed) I take all of the toys out and soak them in the disinfectant solution given above while I deep clean the tub. I sprinkle the tub with baking soda and spray the vinegar solution over the baking soda. I then use a scrub brush to scrub the tub down. I then rinse off with water.

Clogged Drains
Now most of the time if my tub is clogged I use this nifty little tool my husband picked up at the hardware store. Seriously. This thing stays in our bathroom and is used once a week. It always gives us results. No matter how gross they may be (and being 7 months postpartum I’m still shedding like crazy). I highly suggest keeping one of these in your bathroom. You can even buy it on Amazon if you don’t find it at Pro-Build!

But if your drain gets really bad and the Zip It can’t fix it just pour some baking soda (about 1/4 to 1/2 a cup) and boiling water into the drain and wait a few minutes. Then rinse with water from the tub spout. You can also use this for your toilet as well.

Trash Cans
The trash cans in each of our bathrooms are lined with plastic bags that we receive at the grocery store when we fail to remember our reusable bags. If we don’t have any plastic bags we use paper bags in their place. We try to clean the trash cans with the disinfectant solution once a week to get the funk out of them and allow them to air dry before placing a bag in them. 

The Bedroom

Carpet/Rugs
The best natural deodorizer and stain remover out there is baking soda. You can sprinkle a little bit of baking soda directly on your carpet or rug and just vacuum it right up. Or if you have a spot to remove, mix a little water into the baking soda to create a paste and spread it on the stain. Scrub it into the spot with a terry cloth towel and let dry. Once it’s dried just vacuum the remnants up.

We also get our carpets professionally cleaned every 6 months. We have a fabulous carpet cleaner who has been helping us keep our carpets beautiful since my son was a newborn. And all of his cleaners are safe for my children. He even has a heavy duty cleaner that takes care of any doggy or kid problems you may have.

 Closets
A great and natural way to keep the moths away (and other bugs as well) are cedar disks or planks. Just line the closet with cedar or grab a few cedar disks to hang on your hangers and those pesky bugs will look elsewhere for things to eat. 

The Laundry Room

Washing
We don’t use anything special here. We wash our clothes with Kirkland brand eco friendly detergent. I used to pay more for a special eco friendly powder detergent on Etsy but after a few months I couldn’t justify the cost and switched over to the Costco stuff.

Rinse
Another room where vinegar is the star is the laundry room. Instead of using static dryer sheets and leaving a film on our clothes (and the dryer) we use a 1/4 cup of vinegar in the rinse cycle of our wash. You can also buy a downy ball and fill that 1/2 way up with vinegar so you don’t have to wait for the rinse cycle to add the vinegar. Don’t worry, your clothes won’t smell like vinegar afterwards! The scent washes off completely

Drying
Whenever possible we try to either line dry outside, hang dry in the garage or dry our clothes in the dryer on the lowest setting. Using either the natural power of the sun and heat outside or the lowest setting on the dryer saves energy and is also less harsh on your clothes (meaning you don’t have to buy new clothes as often). We also use dryer balls in the dryer to aid in the reduction of static in the dryer.

Stain Remover
The best stain remover for white clothes is the sun. When you set out wet clothes to dry the sun acts as a bleaching agent and will bleach out any stains (or color) from your clothes. This method works the best for removing stains out of cloth diapers as well.

We also use oxyclean in our wash to remove other stains in our darks and lights. If there’s a lot of stains on one piece of clothing or if there’s a stain that I don’t think the regular wash will handle I will create an oxyclean soak in a large 5 gallon bucket and add a concentrated amount of oxyclean to warm water to soak the clothes before the wash.

I’m sure you’ve noticed that throughout the post I haven’t mentioned bleach. I don’t like bleach. It scares me a bit to be honest. There’s lots of articles about the harmful effects of bleach so I won’t preach about it here 🙂 

Sources: The Daily Green, Natural Rug Cleaning Secrets

I know I have to be missing something so if you have a question on a particular room or spot in your house please let me know! And if you have any tips to add please feel free to share them 🙂 I’ll make sure to add them and give you a link back for credit.

Read more: 

Kids Cleaning Tips

Trading Clean Time for Screen Time

5 Tips for Cleaning the House Before a Party

Sign4Baby Sign & Play Class {Review}

My Background in Signing

Gorilla

My first signing experience was in the 3rd grade (my FAVORITE year of school out of the lot of them). My teacher had (has… I’m sure) a deaf sister who taught at a school for the hearing impaired and wanted to set us up with pen pals for the year. She assured us that if we kept at it and learned a few signs we might just get the chance to meet our pen pals in person at the end of the school year.

So as the months passed we learned the alphabet, learned how to say “my name is” and learned a few more signs including the Pledge of Allegiance and America the Beautiful. And as promised we were able to meet our deaf pen pals at an ice cream social at the end of the year. It was pretty fun being able to actually practice our signs and it was pretty funny when we got quizzical looks and our pen pals grabbed our hands to show us the correct way to sign. Out of all that was learned that year the only thing I remember is the alphabet and how to say “My name is”.

My First Experience with E
But because learning sign language had such an impact in me at a young age and sparked such an interest I knew I wanted to use this form of communication with my children. So even before my son was born I started trying to learn simple signs. My sister in law passed on some baby sign language books that I read from cover to cover, practicing every once in a while and I received a Baby Einstein sign language DVD for my shower from my husband’s cousin.

One of E’s favorites when he was younger – Music

But by the time E came I was so exhausted from just figuring out the whole how to be a mother thing that I didn’t start regularly signing with him until he was about 6 months old. Sure I signed nurse/milk and diaper change every once in a while before that but never with any real excitement for him to learn. As he got closer to the one year mark I knew I needed a better way of communicating with him so we started signing more frequently.

Bear

And we started to go to Sign4Baby’s Signing Story Time at the local libraries. E would get excited to play with the other kids in class and loved listening to the stories and dancing to the songs. At the end of each story time was a special treat. He got to play with the bubbles Joann blew to the kids! That just made everything even better. Going to the story time events helped me expand my signing vocabulary and in turn I was able to teach E more and more signs. And between 15-18 months his signing vocabulary (and speaking vocabulary) exploded. He would sign when he didn’t know a word to let me know what he wanted. And sometimes he’d sign along with whatever he was saying to give greater emphasis on the word. Communication was getting easier!

I joined Sign4Baby’s playgroup on Meetup.com so I could keep up with all of the fun signing events. I started seeing a monthly zoo trip included on the calendar so we started to go with the group to the zoo to learn more signs as well. Since E is very interested in animals I knew this would go over well. And it did! He loved learning more animal signs just as much as I loved teaching him. 

My Experience with M and Sign4Baby Review

Time/Watch

When M came into our lives I knew I wanted to sign with her as well. But I wasn’t quite sure when to start. A few months ago I saw a special being run by Sign4Baby. If we signed up for classes by May we could get 12 classes for the price of 6! Now that’s an awesome deal! I talked about the deal with my mother in law (she was already a fan of Sign4Baby’s facebook page and had seen it also) and she surprised me by purchasing the classes as a gift to M.

So at the end of May, just shy of turning 6 months, we started our Sign4Baby sign classes at Java Mama. In the first six week session we learned about:

  • animals
  • family
  • colors
  • feelings
  • play time
  • weather

And two weeks into the second six week session we’ve already learned about first signs and food. And a representative from Happy Baby even came in to help teach us about healthy eating for baby and toddler. We’re going to be learning about bath and body, diapering, getting dressed and meal time in the coming weeks!

The class is not only fun and educational but holds M’s interest the whole time! Between reading stories, talking about the signs and how to incorporate them into our everyday lives, and singing fun songs (sometimes getting up and dancing too!) it’s hard NOT to learn what Joann is teaching. And I’m pleased to announce that M has signed her first sign! She’s starting to sign dog regularly. She has been showing an interest in the milk sign as well if she wants to nurse. She giggles, laughs and starts pulling at me when I ask her and do the sign. So I know she’s catching on!

I definitely know I couldn’t have taught my children all they know about sign language without Joann’s help. I have come to find that the structure of the classes is a must for anyone who wants to teach their children signs. I know from experience how hard it was to teach E signs with just signing story time and meetups alone. And with the aid of songs, books and other educational tools, Joann provides all of the resources a caregiver would need to aid in the development of their child’s vocabulary and communication skills.

Dance!

By adding the classes with Joann to our arsenal of sign language tools I know that M’s sign vocabulary will not only improve but will more than likely start developing sooner than her brother if not only for the fact that she’s seen other mamas and babies sign every week since she was 6 months old. Plus after these 12 weeks of classes I can continue to learn from Joann since I won 6 MORE weeks of classes through the Baby Bump and Beyond’s blog! I’m hoping to wait a bit before jumping right back in since our schedule has been very full this summer but can’t wait to start again.

I recommend Joann’s Sign4Baby classes to anyone who wants to take the next step in teaching their child sign language. She is just a wonderful educator who not only gives you the signs but teaches you the skills to best present the signs to your child so that they watch and learn from you. And I cannot wait to see what M’s going to sign next! Below are a few photos from our last Sign & Learn session of the first 6 weeks. All families and children photographed agreed to have their photo posted on my blog 🙂

Snacks are always welcomed
Exploring is mandatory
Plenty of toys to aid the children in learning
Building blocks … a must-have sign in this house

Colored scarves help aid in teaching the colors of the rainbow
Parents are encouraged to sign along

M LOVED watching Joann sign and sing

An Update to Our Potty Training Breakdown

So it’s been a little over a week since I went off about our potty training journey. And I really think that we’ve hit the worst of the worst. Since then E has only had 2 accidents with me. And one of them was totally my fault. We were at the zoo,  I saw him dancing around and didn’t take him to the potty right away since he said he didn’t have to go. Well… he didn’t WANT to go because he was with his friends looking at cool reptiles. Lesson learned. Again.

He’s filled up his sticker chart and was able to pick out his prize from Comic Con (he got a plush Woody and Buzz)! Way better than choosing a prize from Target although Daddy gave in and bought him two dinosaurs tonight while we were at Target. And while I thought we were a ways off from him completely turning around and getting back on track he’s even started TELLING me when he needs to go! Seriously. I will ask him if he needs to go and sometimes a few seconds or minutes later he will tell me he needs to go potty. This makes outings amazingly easy.

And the biggest thing I’m proud of is that he’s been working on trying to go poop on the potty more than once. He is starting to realize that sometimes things take time. And he’s starting to realize that his body will help him and let him know when he needs to go. He still isn’t back to his “regular” self but he’s starting to go poop on the potty every other or every third day. I hope we get him back to his every day routine since that seems to be best for all of us (he gets grumpy when he doesn’t go!).

All in all I am so proud of my boy. This potty training drives me crazy but I know that he was ready. I didn’t push him into this. Sure, he’s not yet 2 1/2 and he’s a boy but that doesn’t automatically mean he’s not ready to potty train. And now I know he’s one smart cookie who likes to push boundaries and see what I’ll put up with.


© A Crafty Spoonful - All Rights Reserved
It is OK to use one of my photos provided a link back and/or proper credit is given. It is NOT ok to copy and paste a whole post including instructions. Please do not remove watermarks or alter images in any way. Please contact me with any questions at danielle@acraftyspoonful.com

.