Vendor Review: San Diego Funhouse Rentals

So in planning the party I didn’t even think twice about the weather. I mean, come on, it’s been beautiful for weeks now. Even feeling a bit summery for February. So I booked a jump house from San Diego Funhouse. And was sooo excited about it since E has loved every jump house he’s been in. Plus it was a great way to get all of that energy out of the kids expected to come to the party. What parent doesn’t want their kid to be completely exhausted from a party?

Our plans were all set. We had enough room outside to make the inside not as crowded and I wasn’t worried at all about the 40+ people I invited. I mean, it wasn’t like the 60+ people who were invited to his first birthday party… where it poured down rain and everyone was stuck inside 3-4 rooms of our small 1200 square foot house. Luckily Joseph was smart enough last year to put tarps up in the back patio to allow for some guests to go outside to get some air if needed. 50 people in a small house can really turn up the heat even when it’s raining!

Then I heard from a friend at another friend’s birthday party that it was supposed to rain on E’s birthday party day. What the heck? Why again?? Why me? I called the jump house rental guy and asked what their policy was regarding weather changes. He said as long as it wasn’t too muddy and unsafe than he could still set up the jump house but if it was raining he wouldn’t be able to set it up and would refund me the money we paid. This was a bit of a relief for me and I didn’t stress about the weather anymore. The weather forecast even changed to say that it’d be sunny for the few hours of the party so I felt even better about everything.

Until I read the forecast at 7 in the morning on the day of the party. Rain. All.Day.Long. No breaks 🙁 So I called and canceled the bounce house and was super sad about it. A few hours later we were putting the finishing touches on the house (and Joseph was re-creating the tarp enclosure in the back yard just in case) and I noticed that it hadn’t rained for a bit. Oh, and it was even a bit sunny too! So after a bit of deliberation and talking with Joseph and Aunt Louise I decided to call the bounce house yet again and see (30 minutes before the party) if they were able to come even though we already canceled.

The owner told me that he’d contact his driver and see if there was any way he could swing by. He called back to let me know that they could come!! But it would be between 1:30 and 2pm. That was ok with me! So they ended up showing up right as people were finishing up with their lunch. It was PERFECT. The sun was shining, the kids were having a blast and everyone was happy. Everyone came in for cupcakes and it started to rain again so we just covered up the jump house.

After cupcakes it was clear so we got the jump house going again and burned off some of those delicious cupcake calories. We got to keep the jump house until 5pm and used it until close to the very end when it started sprinkling… again.

I don’t know what I did but I was very lucky! Everything worked out perfectly and everyone seemed to really enjoy the jump house and the party. The jump house was super clean and in great shape and the customer service I received from San Diego Funhouse was phenomenal! I will definitely be using them again for all of our jump house needs 🙂

Oh, and a little background on ordering… I called to find out how to book a jump house and they said to just simply do everything online. I did and it was awesome. I did kind of worry about if the booking went through since I didn’t receive a confirmation email or a phone call but I did receive a receipt when I paid via credit card. But two days before the event San Diego Funhouse did call to confirm the rental and the drop off time so I really had nothing to worry about. And on the day of the party when I left a message to cancel I received a call back an hour later after leaving the message. When I called back to see if we could still get it I was able to get a hold of the owner on the second ring.  Definitely awesome customer service!!
Ethan’s 2nd Birthday Party!! – Pictures of the fun

M got all dressed up for her brother’s big day! I bought this dress for her for Christmas but she was still too small for it. Now it fits perfectly. I didn’t know how much fun dressing up a little girl is! Just wait till you see her Easter ensemble. Daddy picked it out and it is CUTE!

Belle saying Hi!

E’s favorite meal of hot dogs, berries & grapes

E enjoyed greeting his guests at the gate. He LOVED that everyone was there to celebrate him and he knew it. He wore this goofy grin on his face for the first half of the party.

I wanted to make sure that all of the little kids got fed as soon as possible to reduce the chance of mini-meltdowns. It worked for a bit… until my child had a not-so-mini meltdown! Luckily he wasn’t the only one as I was told later on. Oh the joy of a 2 year old!

 We had originally booked the jump house and than the morning of the party the weather forecast changed their mind and called for rain all throughout the party. So I called and canceled the jump house at 7am. Then the weather forecast  changed AGAIN and it was supposed to be sunny up until 6pm. So after talking to Aunt Louise and Joseph I decided to call and see if there was any way we could get the jump house delivered. I called 30 minutes before the party.

And guess what?? They called back and said they could deliver it between 1:30 and 2!! So perfect. Enough time for everyone to eat lunch and than go out and play. This was such a blessing because the kids got to really get out their energy and then when we did cupcakes and sang “Happy Birthday” it started raining again. Then when the kids were all done eating and ready to go back the rain stopped!!

There were a LOT of kids in the jump house when it first went up and E got a bit overwhelmed. Add that to the fact that he didn’t nap at all before the party and that added up to a very overtired and emotional toddler. He had a bit of a breakdown. He wanted to be in the jump house but didn’t want to be bounced around by all of the kids in there with him so he wanted out but wanted in at the same time if that makes any sense. So we decided to get him out and do cupcakes!

This pleased him! He had also been singing “Happy To You” all week and even sang it with Aunt Louise earlier that day so he knew what was coming when everyone gathered around him. He got his very own cookie cupcake complete with a chocolate chip cookie in the monster’s mouth! And he knew what to do when we told him to blow out his candle. But I still had to help him a little bit in the end so he wouldn’t end up spitting all over his cupcake.

Grandma, Grandpa and Aunt Carly posed for a quick picture before they took off. Aunt Carly’s birthday was the day before the party so I’m sure they were off to celebrate with Carly’s friends after our party.

Grandma Ann and Cousin Aaron enjoyed some time together as we ate cupcakes.

And Great Grandma Joanne enjoyed holding Molly for a bit. Brother always likes to know what sister is doing and quickly came over to say hi!

My messy living room after the kids came and played with everything. This is actually a bit cleaner than the mess that came with opening gifts later on (gift opening photos will be in a separate post since Grandma Ann took all of those photos). Do you see Ethan in the middle? Yeah, he’s watching Dinosaur Train in between playing with friends.

Uncle Jeremy took Molly outside for a bit to enjoy the break in the rain while E, Cousin Aaron and Joseph enjoyed the jumpy after most of the guests left.

Ethan was so thankful for all of his new toys, clothes, books and games!

Happy Birthday E! – 2 Year Photos

So since we splurged on newborn photos for Molly not too long ago we didn’t have much in the budget for 2 year photos for Ethan on top of what we were spending for his party. Yeah, we could have gone to a picture place like Picture People, JC Pennys or Sears but I really don’t like the studio photo look. I definitely don’t knock it and it works for most people but I love the way pictures look in a natural setting outside.

With the outside in mind I decided to take him out to Balboa Park two weeks ago to see what I could do behind the camera. Now I want to put it out there that I am in NO way even close to being a pro photographer. Nor do I want to be. I’ll leave that to the experts.

But I am very interested in photography and in getting the best pictures I can of my kids when behind the camera. I mean, that’s why we invested in a nice DSLR, right? So I’ve taken a class, read tutorials and am now starting to practice more and more to get better shots. The shots below have their flaws (like one being out of focus, others may not have the right lighting) but that’s what I love about photography. You can’t get better without practice.

So I took photos of Ethan. Lots and lots of photos. In manual. Yup… my 50mm lens doesn’t have the option to take photos in auto so I HAVE to focus manually and I have to remember to change the settings. And boy is that hard to remember when you don’t do it every day. It made me stop and consciously think about the settings I had and what to do to make a better picture depending on the light, E’s position, etc.

And below is the result. These photos (and a handful of others) were the best that I got from the 200 shots I took…

Photo by Danielle Simmons

Photo by Danielle Simmons

Photo by Danielle Simmons

Photo by Danielle Simmons

Photo by Danielle Simmons

Photo by Danielle Simmons

Photo by Danielle Simmons

Photo by Danielle Simmons

Photo by Danielle Simmons

Photo by Danielle Simmons

Photo by Danielle Simmons

Photo by Danielle Simmons

Ethan’s 2nd Birthday Party!! – The Planning Coming Together

 First off, I cannot believe my baby will be 2 on Tuesday!! It just doesn’t seem possible! And second, I am going to do a separate post filled with tons of photos of the happy day (I have to wait for some from Grandma Ann)! This post is just to showcase the decorations and all of the fun planning ideas I had put into play. Starting with the dessert/favor table below!

I wanted to use some of the photos I took of E for his 2 year photos (more to come in a separate post) so I just printed out a few 4x6s (actually I printed about 185 photos all from his second year of life!) to showcase under his birthday sign. I used double sided sticky tape and put them on the ribbon to add a bit more color. You can see the cookie favors, the cupcakes and the cake pop favors. More about all of these later.

I found an adorable balloon wreath tutorial over on How Does She. I thought this would be a great decoration to start the party off right since every guest had to pass by the door to get to the party. But looking back I wonder if many realized that it was there since our door was wide open for most of the party so people could come in and out as they pleased.

But the wreath was super simple to make and I can now reuse it every year for the kids parties so it was worth it. I can even change out the balloons for different colors if needed. And I love the sign that Adrienne made to fill the hole in the middle of the wreath. It tied everything else in perfectly.

I saw some cute Elmo and Cookie Monster cupcakes all over the internet so I decided to ask Melissa over at Le Petit Kupkak if she could recreate them for me. She also did E’s cupcakes for his first birthday too. And she did an amazing job again! Not only did the cupcakes taste amazing, they were so fun. Everyone raved about them as they were grabbing a second 🙂

Cupcakes are just perfect for kids parties. No need for plates and forks and they’re somewhat mess-free. Unless your kid is like mine and likes to eat their cupcake with no hands. Ya know, just goes right in head first? At least it gave us some fun pictures!

In keeping with the Cookie Monster theme I made 120 chocolate  chip cookies to give away as favors to all of the guests (including the adults!). I really wanted to put some sort of note on the cookies so I started looking into favor tag designs. I wanted something very simple and basic and finally decided on a simple picture of Cookie Monster and Elmo with a nice Thank You on the back of the tags as a way of showing our thanks for those who came to the party. I used a 1/8″ punch to make the hole for the ribbon.

From the reactions we received from our guests they were very happy to get some yummy chocolate chip cookies! I was really worried that we were going to get “stuck” with a few bags that we’d have to consume within the next few days. Luckily it didn’t come down to that as every bag but one was taken and happily eaten by someone other than me.  I already had to worry about the two extra cupcakes that kept calling my name from the fridge…

I also made some cake pops. I’d been dying to try them out ever since I saw them on Bakerella’s blog years back and I finally jumped in and did it. I really do think it was a great decision even though they weren’t as pleasing to the eye 🙂 What can be bad about chocolate cake, vanilla frosting and a chocolate coating? Plus they were on sticks!
I purchased a Happy Birthday banner for E’s birthday last year and bought one that I could use up until he was 5 years old (it had interchangeable numbers). So I didn’t stress too much about a Happy Birthday sign. Until Janelle asked to borrow it for Charlie’s birthday and I couldn’t find the banner! I found the numbers… but no banner. So I started to search for a cute looking banner for the occasion. I figured why not go with the Cookie and Elmo theme and make the banner match the favor tags. 
I didn’t want a long, continuous banner so I saw this idea from an Etsy vendor and decided to try it out. I had Adrienne print out the 3.5″ circles and I just used my trusty standard hole puncher and put two holes on either side of the circles. I then put some ribbon through the holes and staggered the rows to achieve the look I wanted. 

Adrienne threw in some extra 5″ circles of Elmo and Cookie Monster so I took full advantage and used them for other decorations around the house. I used some paper streamers to decorate some of the walls and used the Cookie and Elmo cut outs to go in the middle of each draped loop. This  completed the look and theme of the whole party. I didn’t even think of it before hand but will now use it whenever I use the paper streamers! I was also able to make a little “Happy Birthday” sign from the extra wreath circle and left over Cookie circle (see what Elmo is holding below at the snack bar…)

When I decided on food I wasn’t quite sure how to go. I knew it needed to be kid friendly and it needed to please a large group of people. Oh, and it couldn’t be too expensive. Cause then we wouldn’t be able to get the jump house. And every 2 year old’s party needs a jump house 😉

So I went with E’s favorite things. I ordered pizza from Costco, made hot dogs and had various other favorites available for the guests to snack on. E loves fruit so we got a fruit tray that included his favorite, cantalope. We also put out popcorn, chocolate chip cookies, and potato chips. There was even a little kiddie snack bar set up with bowls of cheerios, cat cookies and pretzels.

When I’m at a party I am all about easy access to food. Because when E is hungry I want to jump at the opportunity for him to eat and don’t want to wait for something to be offered to me to feed him. As soon as I wait 5-10 minutes for food to be served he’s already busy with the next task and might refuse to eat until the next meal some few hours later. Typical toddler…

So this is why I always have a variety of snacks for people to munch on before and after the “main meal” is ready.

I also included pictures of E’s 2nd year in a picture frame that used to have our wedding photos in it. I was going to make a sign but ran out of time 🙂 I’m pretty sure most people missed this little “decoration” but that’s ok! I had 185 pictures developed at Costco and was planning on making a photo album for guests to view as well if they got bored (they didn’t…) but never got around to buying the album. So that’ll be a project I’ll have to tackle soon. We’re now enjoying the pictures and reflecting on the last year as we talk about each one. It’s been quite a fun journey!

More party pictures to come!!!


The World of Breastfeeding: When Your Infant Refuses to Take A Bottle

Now that Miss M is two months old I feel comfortable talking about our success (and failures) in breastfeeding. Miss M is completely different from her brother in many ways and eating is one of them. Now she’s a champ at latching and sucking just like he was but she’s not as driven by hunger (or she’s more successful at nursing long enough to get enough hindmilk to fill her up). She lets me know when she’s hungry but she never acts ravenous like E did. I can let her go 2-3 hours and she’ll let me know by her facial expressions and coos when she’s ready to eat. Her brother wouldn’t let me go much past 2 hours for the first two months of life much less past 1.5 hours!

Now the problem comes with her taking a bottle. I feel totally fine leaving the house for 2-3 hours at a time while Joseph watches her but anything beyond that and I have to rush home. Sometimes she doesn’t even last that period of time for him and is screaming by the time I arrive at the front door. She has only once successfully taken a (pumped) bottle and that was two ounces from me when I decided to try on a whim a few Fridays ago. She has yet to take another and is quite irritated that we keep offering it to her. I really hope she starts taking it soon! I have started a pretty good freezer stash for when I return to work and I don’t need the added stress of her not eating to add to the craziness of returning to work…

Another problem we’ve run into is Thrush. She’s basically had it since day one. It’s a yeast build up in the mouth and hasn’t quite effected me the same as it did when Ethan had it (oh the excruciating pain!) and I think we’ve managed to keep it under control. But we’ve been giving her medication for it since she was a week old and it’s still there! I HATE yeast! I’m hoping we can clear things up at her next pedi appointment this week.

Now the yeast isn’t hurting her. She probably doesn’t notice that anything is off or different but when that yeast goes to me and starts to build up or worse, create an infection, then I’ll be in a world of hurt. Itching, burning pain. Yes, it’s treatable but I want to prevent it from even happening! So I’m currently taking probiotics and eating yogurt every day to build myself some resistance from it. And hopefully this is transferring to her through my breastmilk.

I have been really lucky with these two wonderful children. Breastfeeding for the most part has come quite naturally to them and with the help of nurses, lactation consultants and friends I’ve grown to be very educated and confident in breastfeeding. I nursed E until he was just over 18 months and hope to be as successful in breastfeeding Miss M. We’ll start with the same goals I set for her brother in that if she makes it to six months we’ll try for a year and if we make it to a year we’ll leave it up to her to decide when she wants to wean. I pray that things go as well as they are now and am prepared to do what I can to keep it going. Now we just have to work on that darn bottle!

Molly Claire’s Birth Story

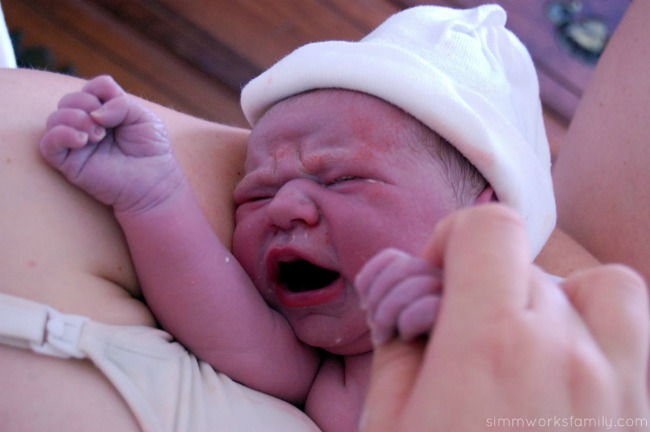
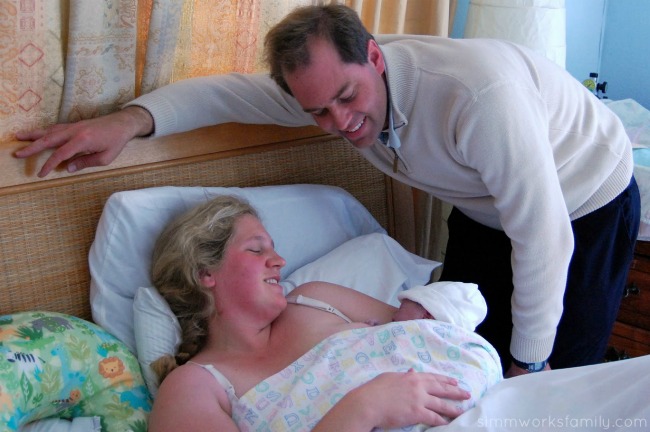
Molly with Mommy shortly after being stitched up

I woke up at 1:45 on Tuesday morning to Ethan crawling into bed with us. I fell back asleep but at 2:30 I woke up again with some back pain. I couldn’t fall back asleep so I went to play on the computer. I started to feel contractions so I started timing them and was surprised to see that they were 3 minutes apart.

After 45 minutes I called the midwife on call to let her know what was going on. I was surprised to have her answer right away and she didn’t even sound tired. I would later find out that another woman was in labor with her first and had arrived at 1am that morning. She told me to continue to time them and when they continued to stay 3-5 minutes apart for a full hour to call back.

They continued so I woke up Joseph and told him I was going to take a shower. Ethan woke up and wouldn’t go back down so he and Joseph started watching Madagascar 2. I called the midwife, Brita, again and mentioned that they weren’t super intense. I also told her about my 8:30 appointment that morning and we both agreed to just have me come in then to see what was going on. She also assured me that she would be at the center so I could come in at any time if things changed.

By then it was 5am so we called Ann, my MIL, to see if we could drop Ethan off at 8am before my appointment and started getting ready for the day. We called Ann back a few minutes later to see if she could come pick Ethan up instead of us dropping him off. I continued having regular contractions and they started to feel a little more intense.

40 weeks pregnant

Ann came by at around 6:30 and Ethan was ready to jump in the car. I guess he knew what was going on to a degree and had no problem heading off with Grandma. Or he knew Papa was at Grandma’s and he wanted to play with him. He kissed us goodbye and was on his way…

By 7:50 we were in the car heading to the birthing center. On the drive over the contractions got more intense and maybe 2-3 minutes apart. But they were definitely bearable. We circled around to find un-metered parking since we didn’t know how long we would be there. I checked in at 8:30 and waited for the midwife. She was still with the woman who was in labor.

She came and got me at about 8:45 and had me pee in a cup. Then she measured the fundal height and checked Molly’s heartbeat. She then checked to see how dilated I was. She exclaimed “Wow!” And I asked if she felt Molly’s head thinking she was just responding to how low she was. She them told me I was 8cm dilated and fully effaced. OMG!

She admitted me at 8:50 and showed me my room. She asked if it were ok to have me in the back room since she had to go from the woman in the front room to me and going up the stairs may be harder. I had no preference and didn’t mind at all. She then asked if I wanted a water birth and I said I would try it. But when she drew the bath and I got in she quickly realized that I was too tall for the tub in the room. She assured me that we could move upstairs if needed and I told her that it wasn’t a problem.

I got out of the tub and started having contractions one after another with maybe 30 seconds of reprieve in between and asked the labor assistant when Brita was going to check me again. She ran to get Brita (she was w/ the other laboring woman) and when Brita checked me I was at 10. I quickly got on the bed to allow them to check the baby’s heartbeat since they couldn’t find it while I was swaying at the bedside trying to get through the intense contractions.

Brita also told me the only thing holding back Molly was my bag of waters so I asked shat would happen when she broke it. She smiled and said that as soon as I started pushing the bag should break on its own.

By this time I really don’t think I knew exactly how close I was to having this baby. I got on my hands and knees and began pushing with the next contraction. Next thing I knew my water broke. The midwife asked if this was how I wanted to push her out and I told her I had no clue. She tried to get a reading on the Baby M’s heartbeat but couldn’t find it in the position I was in so she asked if I could turn around for just a second. I got slightly on my side and put my leg up on her shoulder.

I was ready to push this baby out and push her out now. I started pushing and the midwife asked if I was pushing with a contraction. I told her I had no idea when the contractions were coming, I just needed her out now. She than felt my stomach and would tell me when to push. She and Joseph both told me how strong I was and how close I was to meeting my daughter. The midwife asked if I wanted to see or feel her and I quickly turned her down quickly (I guess I am pretty mean and snappy when I am in pain) and just wanted to focus on pushing.

I felt the midwife’s hands and didn’t understand why Molly wasn’t out yet. Later on I would find out that the midwife just wanted to help prevent any damage with her coming so fast. I finally was at the point where her head was crowning and with the burning ring of fire I felt all I could think about was getting her out. With two pushes after that she was out. As soon as her little body was out, she was on my chest. The midwife looked at the clock and told us she was born at 9:45.

Being placed in mommy's arms 5

I was shocked at how fast it all went! In less than an hour from being admitted I was holding my little girl. The midwife later on mentioned that she thinks my body just went for it after she told me I was 8cm since I had such a huge grin on my face after she told me.

Molly latched on as soon as she cleared out her lungs with some screaming and nursed for a good 30-45 minutes. I had a 2nd degree tear so as I got stitched up Joseph got some skin-to-skin time with Molly. More to come about big brother Ethan meeting his sister for the first time…

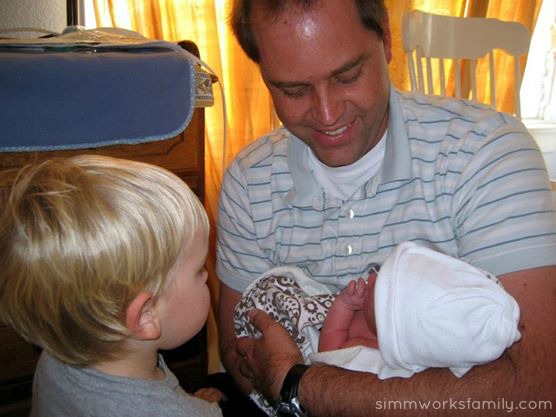
Ethan meeting Molly for the first time

Looking to give birth at a birthing center and live in San Diego? Check out my review of Best Start Birth Center San Diego here.

Welcome Molly Claire

Molly was born on Tuesday December 7th @ 9:45am. She weighed 8lbs and is 21in long. Birth story to come soon!

Published with Blogger-droid v1.6.5

Nursery Ideas {Alice in Wonderland}

One of my favorite stories is Alice in Wonderland. The imagination, the journey, and the creativity behind the story has always intrigued me and I’ve always loved the Disney interpretation as well. So when I found out I was having a girl I knew I wanted to create a simple and classic Alice in Wonderland nursery.

The nursery is NOT finished but here’s what we have so far:


Simple Decor
Our theme is Alice in Wonderland so there are 3 silhouettes of the rabbit, a tea cup and Alice herself. We wanted to keep the colors simple so most of the room is red, black and white with bits of blue and pink thrown in.

This wall is complete but we’ll have the changing pad and a lamp on the dresser and the bow holder will be hung behind the door (bow holder tutorial to come!). 

Repurposing Furniture
My husband stained the crib we had for my son in a darker color (black/brown) to match the dresser we got at Ikea. I think he did an AWESOME job and I’m glad I went with the darker colors as opposed to my original idea of white furniture.

Now re-painting furniture can be a tedious task but when done correctly can turn out beautifully! We used a paint sprayer to spray the crib since there were so many nooks and crannies. And even though it used up a lot more paint than the traditional route, we ended up having a cleaner finish. 

Change It Up With Paint
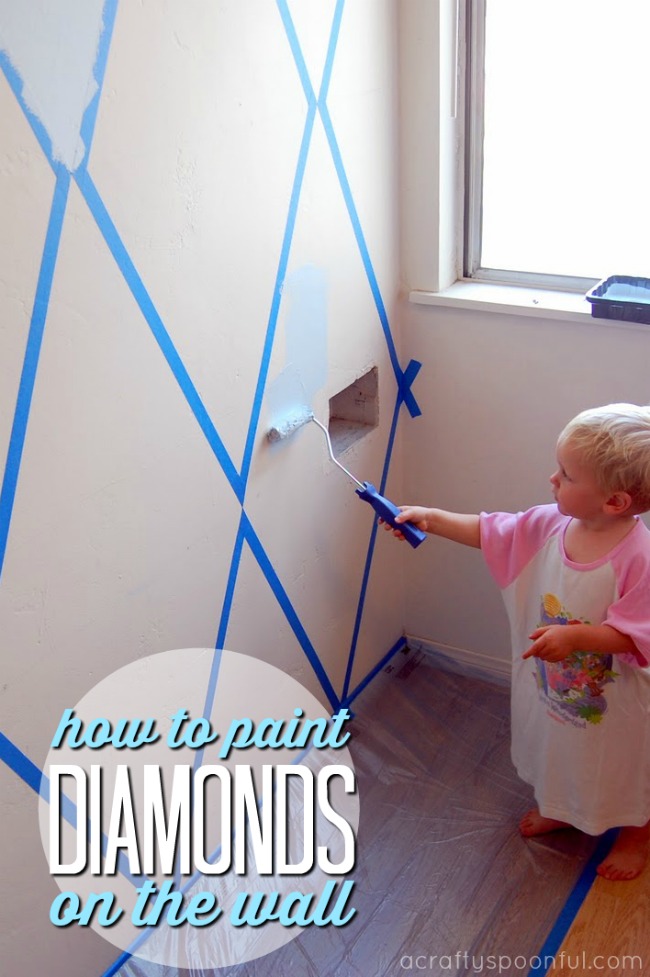
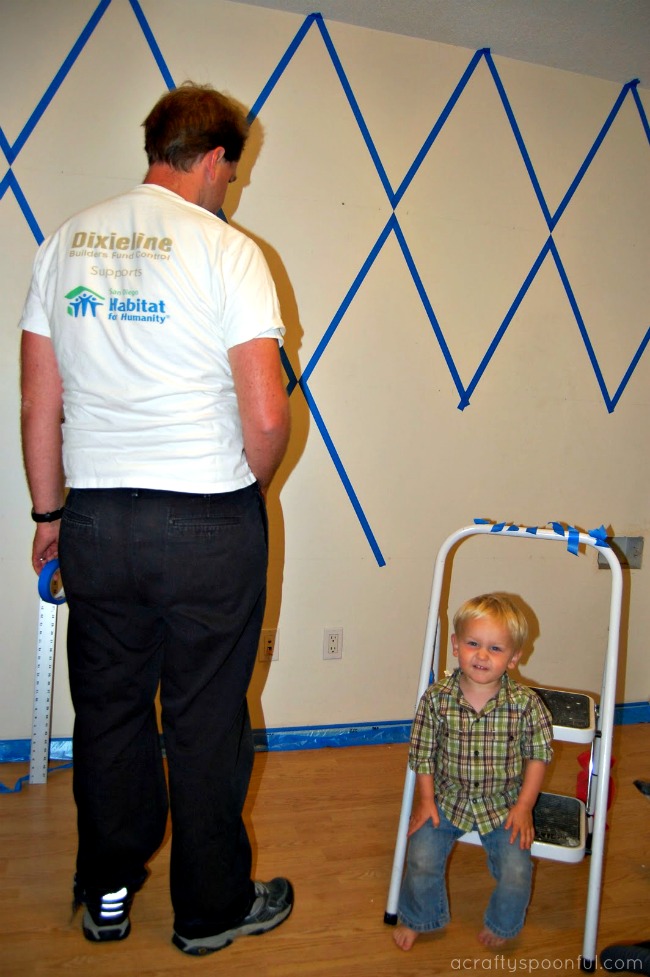
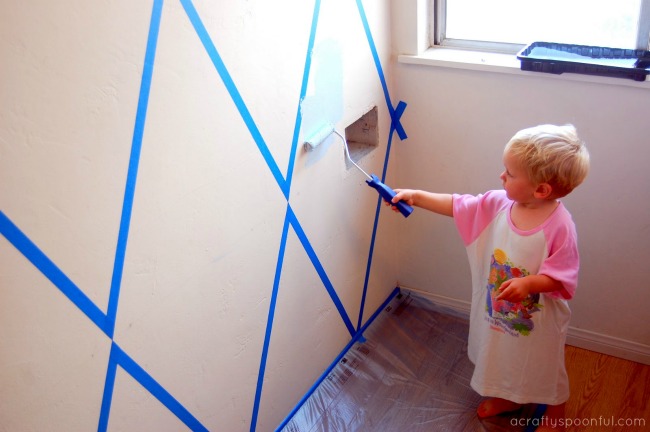
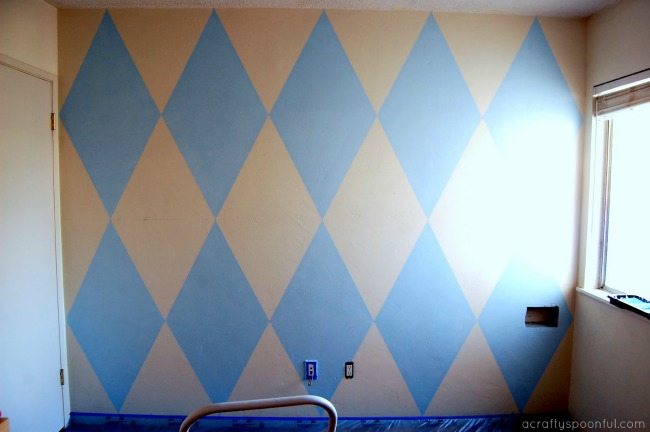
My husband also painstakingly measured out the dimensions and taped off the diamonds so my son and I could paint them light blue (like Alice’s dress). We made sure to use a great painters tape and used a credit card to smooth the edges down to assure that we got clean lines when we removed the paint.

I found a red curtain panel w/ black embroidery at Home Goods on clearance for $5! It fits the window perfectly when open. I’m going to buy a tie back for it soon. We got the curtain rod at Big Lots for $10. Simple and black is hard to find when you want to buy a curtain rod!

Personalized Touches
I received these adorable stuffed animals at my baby shower this weekend (sorry… I forgot my camera so no photos). The Alice doll is from my mother-in-law and is actually a story doll. The cheshire cat and rabbit are attached with velcro. You can also flip Alice’s dress over her head and another character appears.

Since this room was originally our office and we have no place to put our computer, the nursery will also house our desk. I love this simple desk (only $50 at the Salvation Army) because compared to the huge desk/bed structure we had below it’s so small and makes the room so much more open.

Although I have to say if we had the room for it we would have kept the bed/desk combo we used to have since he and his father built it together and he’s had it forever. Luckily the desk will stay in the family as my brother-in-law has taken it in for our nephew to use.

I am going to be putting up some candle sconces above the desk as well as a print from Disneyland that we’ll pick up on Friday when we go up for the last time as a family of 3.

What do you think? What did you use for nursery inspiration?

Nursery Ideas: How to Paint Diamonds on a Wall

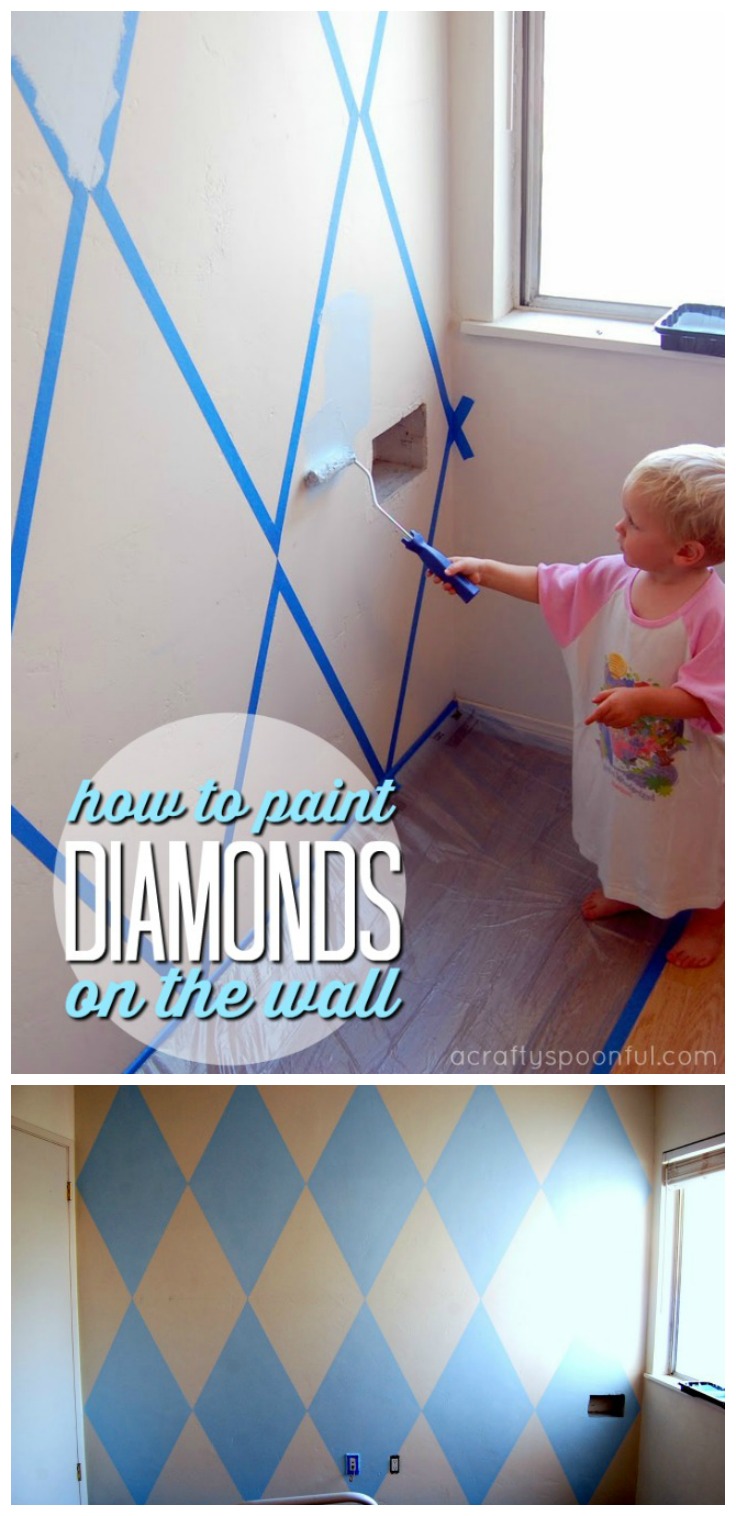
 We’re sharing one of our nursery ideas with this tutorial on how to paint diamonds on a wall. It’s the perfect backdrop for our daughter’s crib and really completes the new nursery.

My husband asked me as we were moving out the large desk/bunk bed what I wanted to do with the wall in our future daughter’s nursery… how I wanted to paint it. I said I just wanted to paint it blue like I told him before. 

He then asked if there was any certain design or style I wanted to do like in my son’s nursery (he has yellow and green stripes on one wall). Then he suggested diamonds.

He quickly realized how much work it would be to paint on diamonds and decided he was going to look for wallpaper instead. We really didn’t have time to special order anything so we took a trip to Lowes, Ikea & Home Depot to see if they had anything in stock. 

Lowes had about 5-6 styles in stock but nothing that screamed our theme so we moved on to Home Depot. Home Depot carries no wallpaper whatsoever. I even called Ace Hardware and they don’t carry any either. But we did find a dresser at Ikea for the nursery so it wasn’t a complete failure of an outing.

So…

I told Joseph that I just wanted something done this weekend and I really, really, liked the diamond idea. So we bought some blue masking tape and were out of Home Depot. And I have to tell you… diamonds were definitely the best choice! I LOVE how the wall turned out. It’s the perfect backdrop for our daughter’s crib. 

How to Paint Diamonds on a Wall

What you’ll need: 

  • painter’s tape
  • box cutter or razor
  • pencil
  • drop cloth
  • paint
  • 12″ roller brush
  • 6″ roller brush
  • paint brush
  • 2 paint colors – 1 neutral, 1 accent

What you do: 

1. Prep your workspace by covering any furniture and wall fittings. Remove faceplates for outlet plugs and light switches and use tape to cover outlets and switches. Tape off the baseboard and put drop cloth down to protect the floor. 

2. Using the 12″ roller brush, paint the wall with your base color. We used a neutral ecru shade. Let dry for 24 hours. 

3. Measure the wall and find the very center. Mark with a pencil.  Measure out the size of the wall from the middle point and find out how many diamonds will fit. This may take a little finagling but is important in making sure the diamonds all look uniform and fit nicely. 

4. Once you’ve measured out the wall, use those measurements to start marking where the tips of each diamond will go. Then use the tape to connect the marks. Make sure that the wall is clean and first coat is completely dry before taping. Use a credit card to make sure there are no bubbles or gaps in the tape on the edges. 

5. Using a pencil, mark where you should paint the accent color so there’s no confusion with what diamond needs to be painted and what stays the neutral color. 

6. Using a 6″ roller brush, brush on the accent color on all of the marked diamonds. Let dry for 2-4 hours, until paint is dry to the touch, then remove tape from the walls. 

7. Let dry completely before adding any artwork to the walls.  

What is your nursery’s theme? Have you had to paint diamonds on a wall? 

Like this post? Read more! 

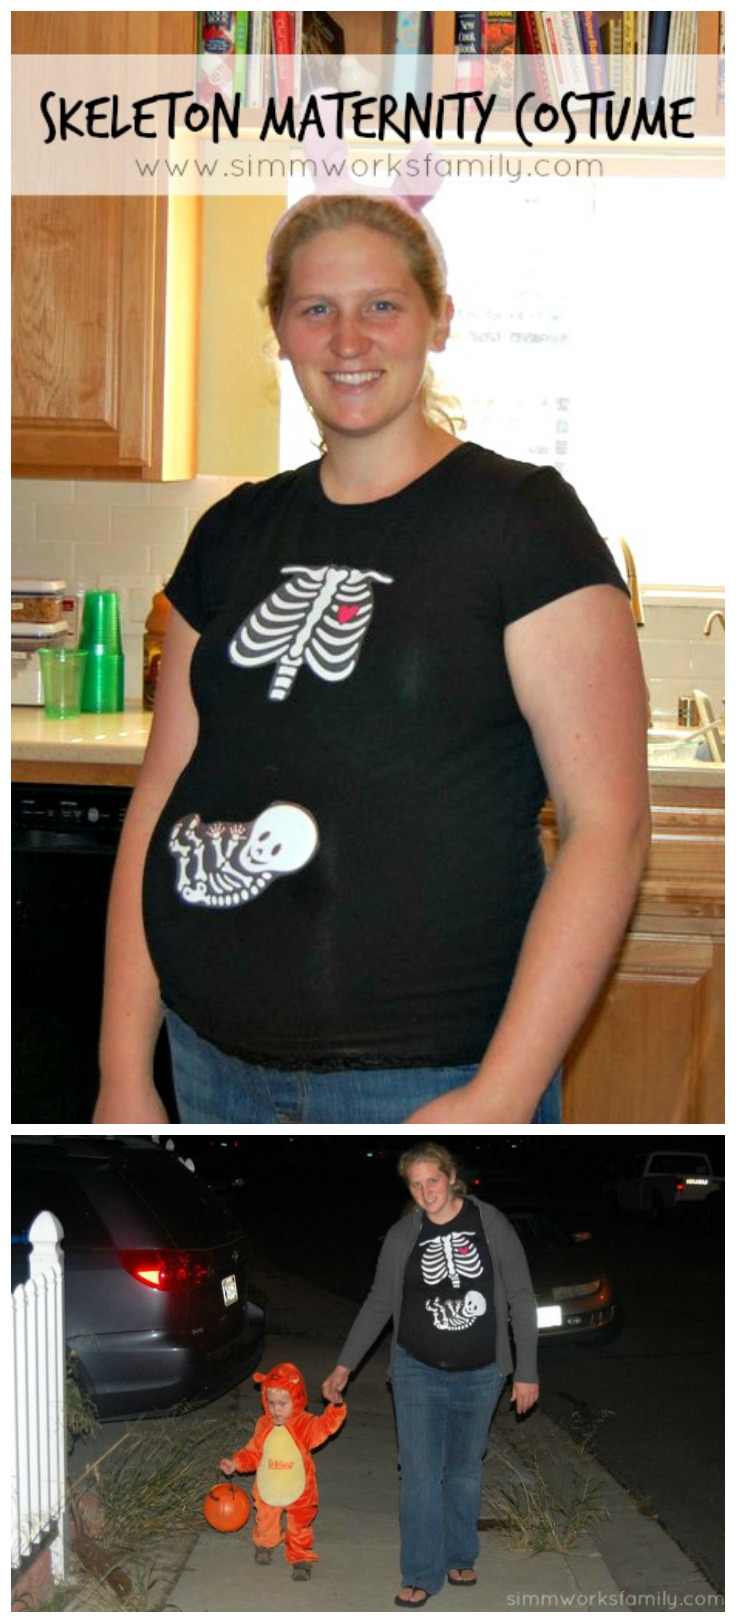
Pin this article for later! 

Click the Pin button on the image below to save for later. 

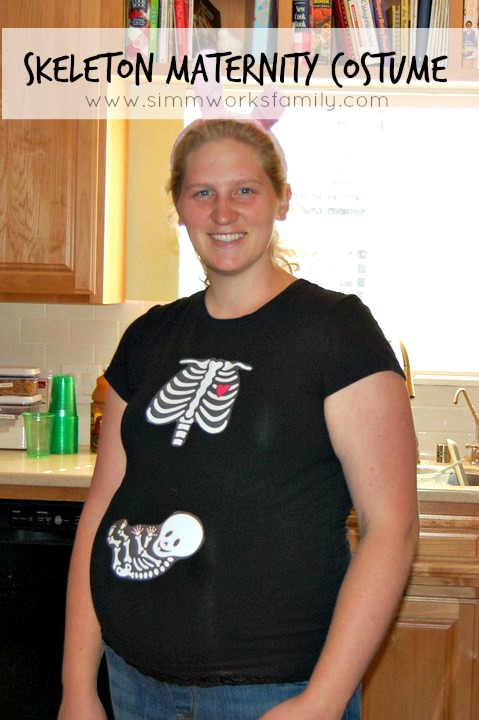
Skeleton Maternity Costume

This skeleton maternity costume takes little time to make and is a comfortable alternative for pregnant mamas around Halloween.

Skeleton Maternity Costume

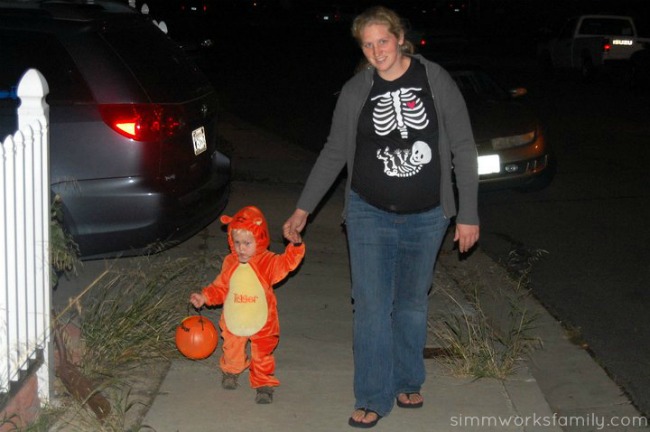
It’s my second pregnancy and my second time creating a fun maternity costume for Halloween. This year I went with a simple DIY shirt to wear out trick or treating with my little one and at the Halloween party we hosted. It was such a fun way to celebrate the holiday while celebrating my pregnancy as well. And everyone I ran into loved the idea! 

I may be weird but I am LOVING this pregnancy. My son has been keeping me on my toes but I’ve been able to take time for myself when needed and enjoy the milestones. With this possibly being the last pregnancy for us, I want to soak it all in! And that includes celebrating holidays and taking lots of photos. Hopefully, you won’t get too sick of the photos. 

Want to make this DIY Skeleton Maternity T-Shirt too? Read on to find out how! This post contains affiliate links. 

Skeleton Maternity Costume with Tigger

DIY Skeleton Maternity T-Shirt

What you’ll need: 

What you do: 

  1. Place image of skeleton baby and rib cage in a word doc making each take up a full page. The baby should be placed horizontally whereas the ribs can be placed vertically. 
  2. Print images out on iron-on t-shirt transfer paper. 
  3. Cut out images close to the edge of the design with scissors. 
  4. Using iron, iron on images to the shirt. Let cool and wear! 

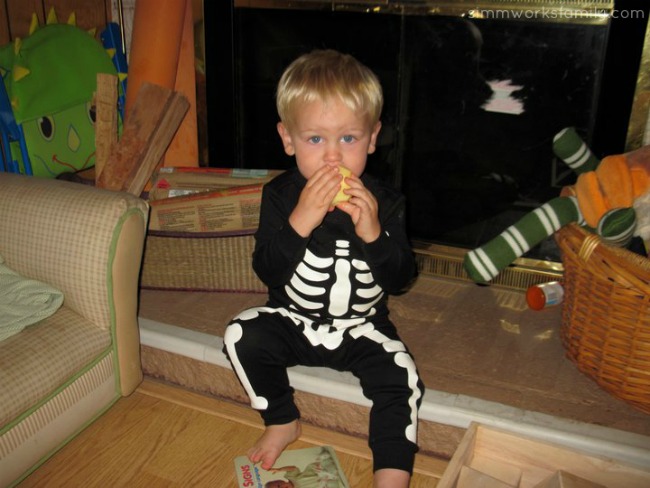
Skeleton Costume Ethan 2010

 What did you dress up for on Halloween? 

Love this idea? Here’s some more: 

Pin this article for later! 

Click the Pin button on the image below to save for later.


© A Crafty Spoonful - All Rights Reserved
It is OK to use one of my photos provided a link back and/or proper credit is given. It is NOT ok to copy and paste a whole post including instructions. Please do not remove watermarks or alter images in any way. Please contact me with any questions at danielle@acraftyspoonful.com

.