This shop featuring how to make a DIY LEGO side table has been compensated by Collective Bias, Inc. and its advertiser. All opinions are mine alone. #MyPledgeCastle #CollectiveBias
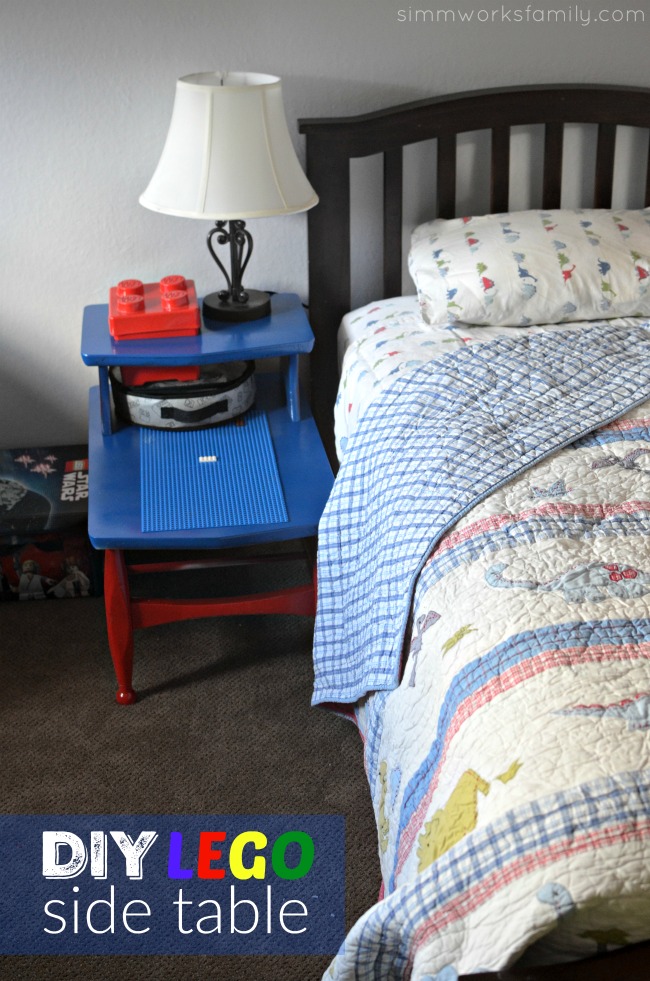
I learned pretty quickly after becoming a boy mom that boys are messy. And as they get older, they make bigger messes. In an effort to organize the messes, I have been wanting to create an activity table like this LEGO side table to take care of the piles of LEGO bricks I always find around his bed.
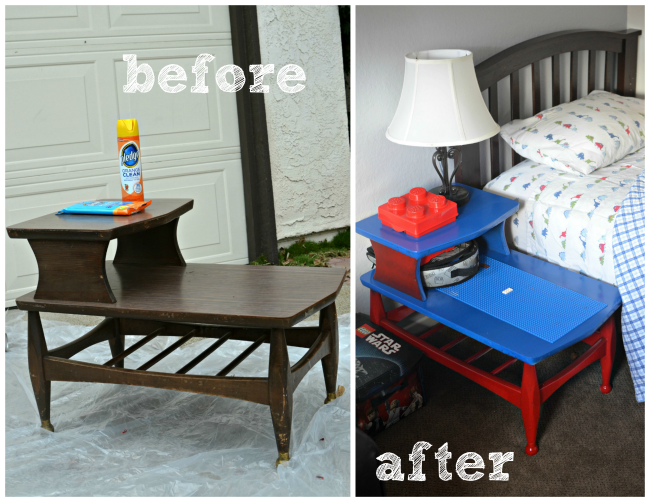
So when we switched him to the room upstairs (our old guest bedroom) the first project I tackled after painting was to turn a side table I found at the thrift store into a DIY LEGO side table.
Not only was it easy to make, it took only a few hours to put together!
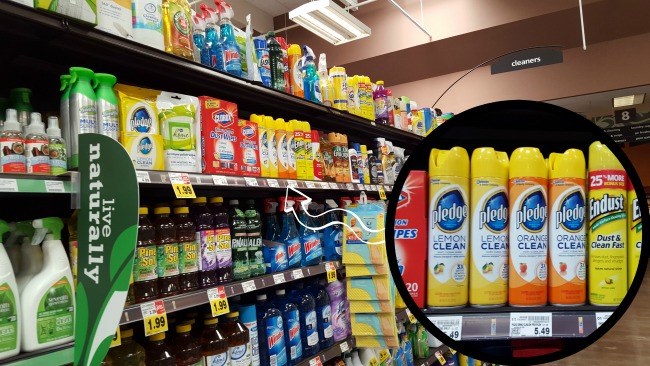
Like the piles of LEGO bricks I find left all over, there’s also always a thin film of dirt trailed wherever my son goes. He treks in so much sand, dirt, and debris from his adventures outside and it ends up on everything. Luckily, with Pledge® Orange Clean Spray I can control the dust and clean up smudges and messes while safely leaving the finishes alone. You can find Pledge® Orange Clean Spray in the cleaning aisle at your local Ralph’s.
When I’m cleaning his room (after he attempts to clean it, of course) I just go at it and wipe down his bed frame, side tables, dresser, and bookshelf. The Pledge® Orange Clean Spray features Allergens Trappers® to remove dust and up to 90% of the allergens found in dust. Not only do I get a clean bedroom, but I can reduce my son’s asthma flare ups too!
DIY Activity Side Table
What you’ll need:
- side table or small end table
- no prep spray paint
- drop cloth
- small box for toy bricks that fits width of table
- measuring tape
- pencil
- painters or masking tape
- drill
- jigsaw
- sandpaper
- spray adhesive
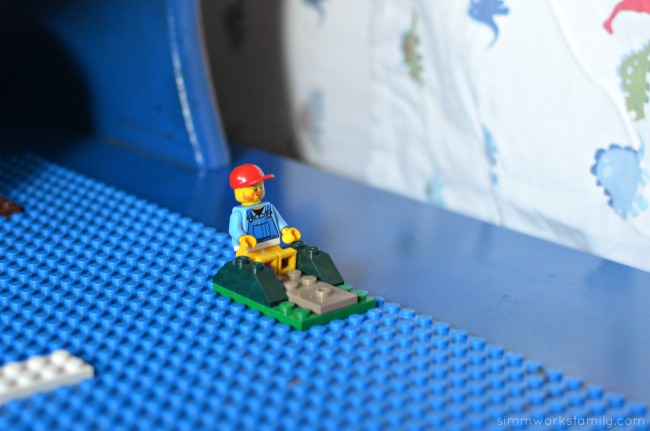
- LEGO baseplate
What you do:
1. Using the no prep spray paint, paint the table in whatever color or pattern you choose. Let dry completely.
2. Measure the spot on the table where you want to place the box. If you’re leaving room for a lamp, etc, make sure to put the box on one side vs. in the center of the table. Trace the box with a pencil.
3. Once you have traced the spot, place masking tape down on the pencil line. The masking tape will help lessen splintering when you’re cutting. Then re-measure the top of the box and measure out where to cut. Note: if your box tapers down like ours did, make sure to account for that.
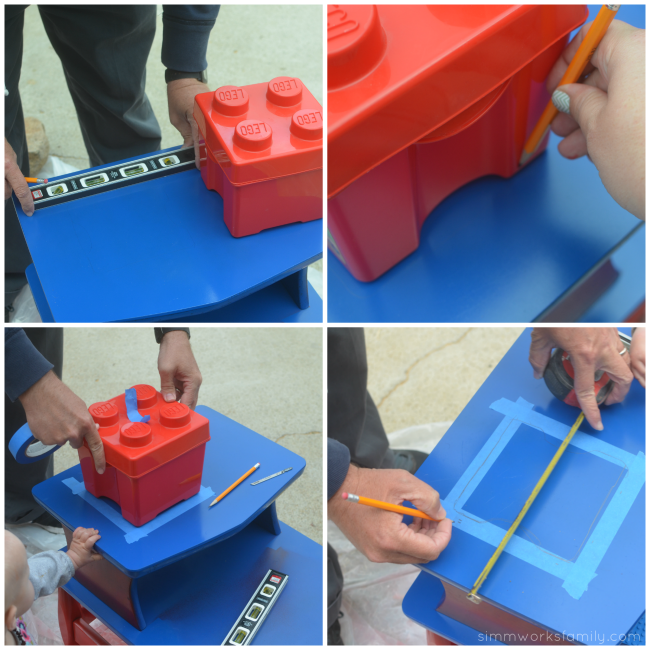
4. Using the drill, drill a hole on two of the opposite corners. This will provide a place to start the jigsaw without making a huge mess of things.
5. Once the two holes are drilled, use the jig saw and cut a straight line to the corner without the hole. Then do the same for the other lines until all 4 sides are cut.
6. Sand the edges of the hole until smooth and then remove the tape. Clean off the table with Pledge® and remove any dirt or debris left over. Spray a little touch up paint in any area that needs to be touched up. When dry, add the box to the hole.
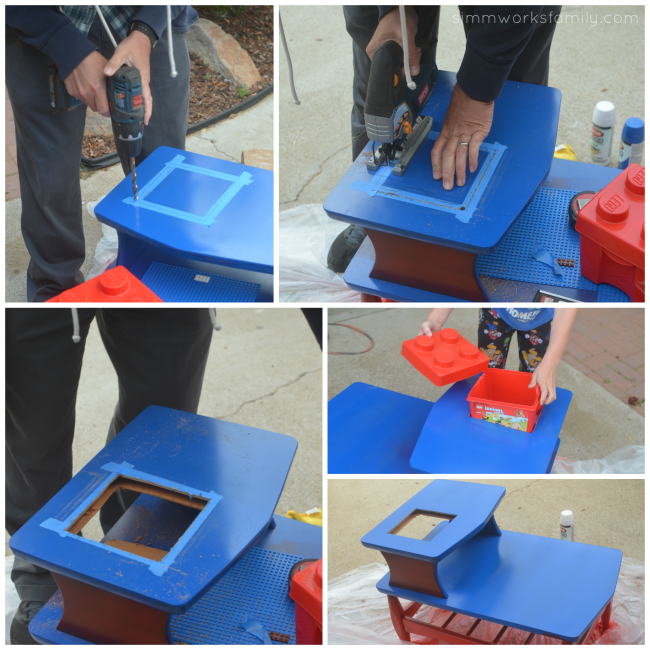
7. Now measure where you want the LEGO baseplate(s) to go. Make a small mark with pencil on either side of the plate so you know where to put it.
8. Using the spray adhesive, spray the back of the LEGO baseplate. Then place back on the table where you marked it and firmly press down. Let dry completely before playing on it.
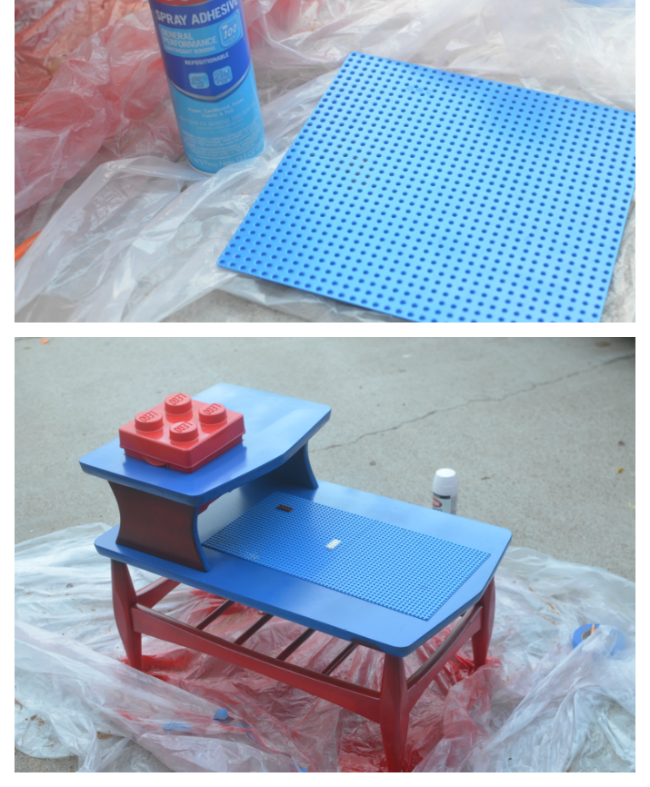
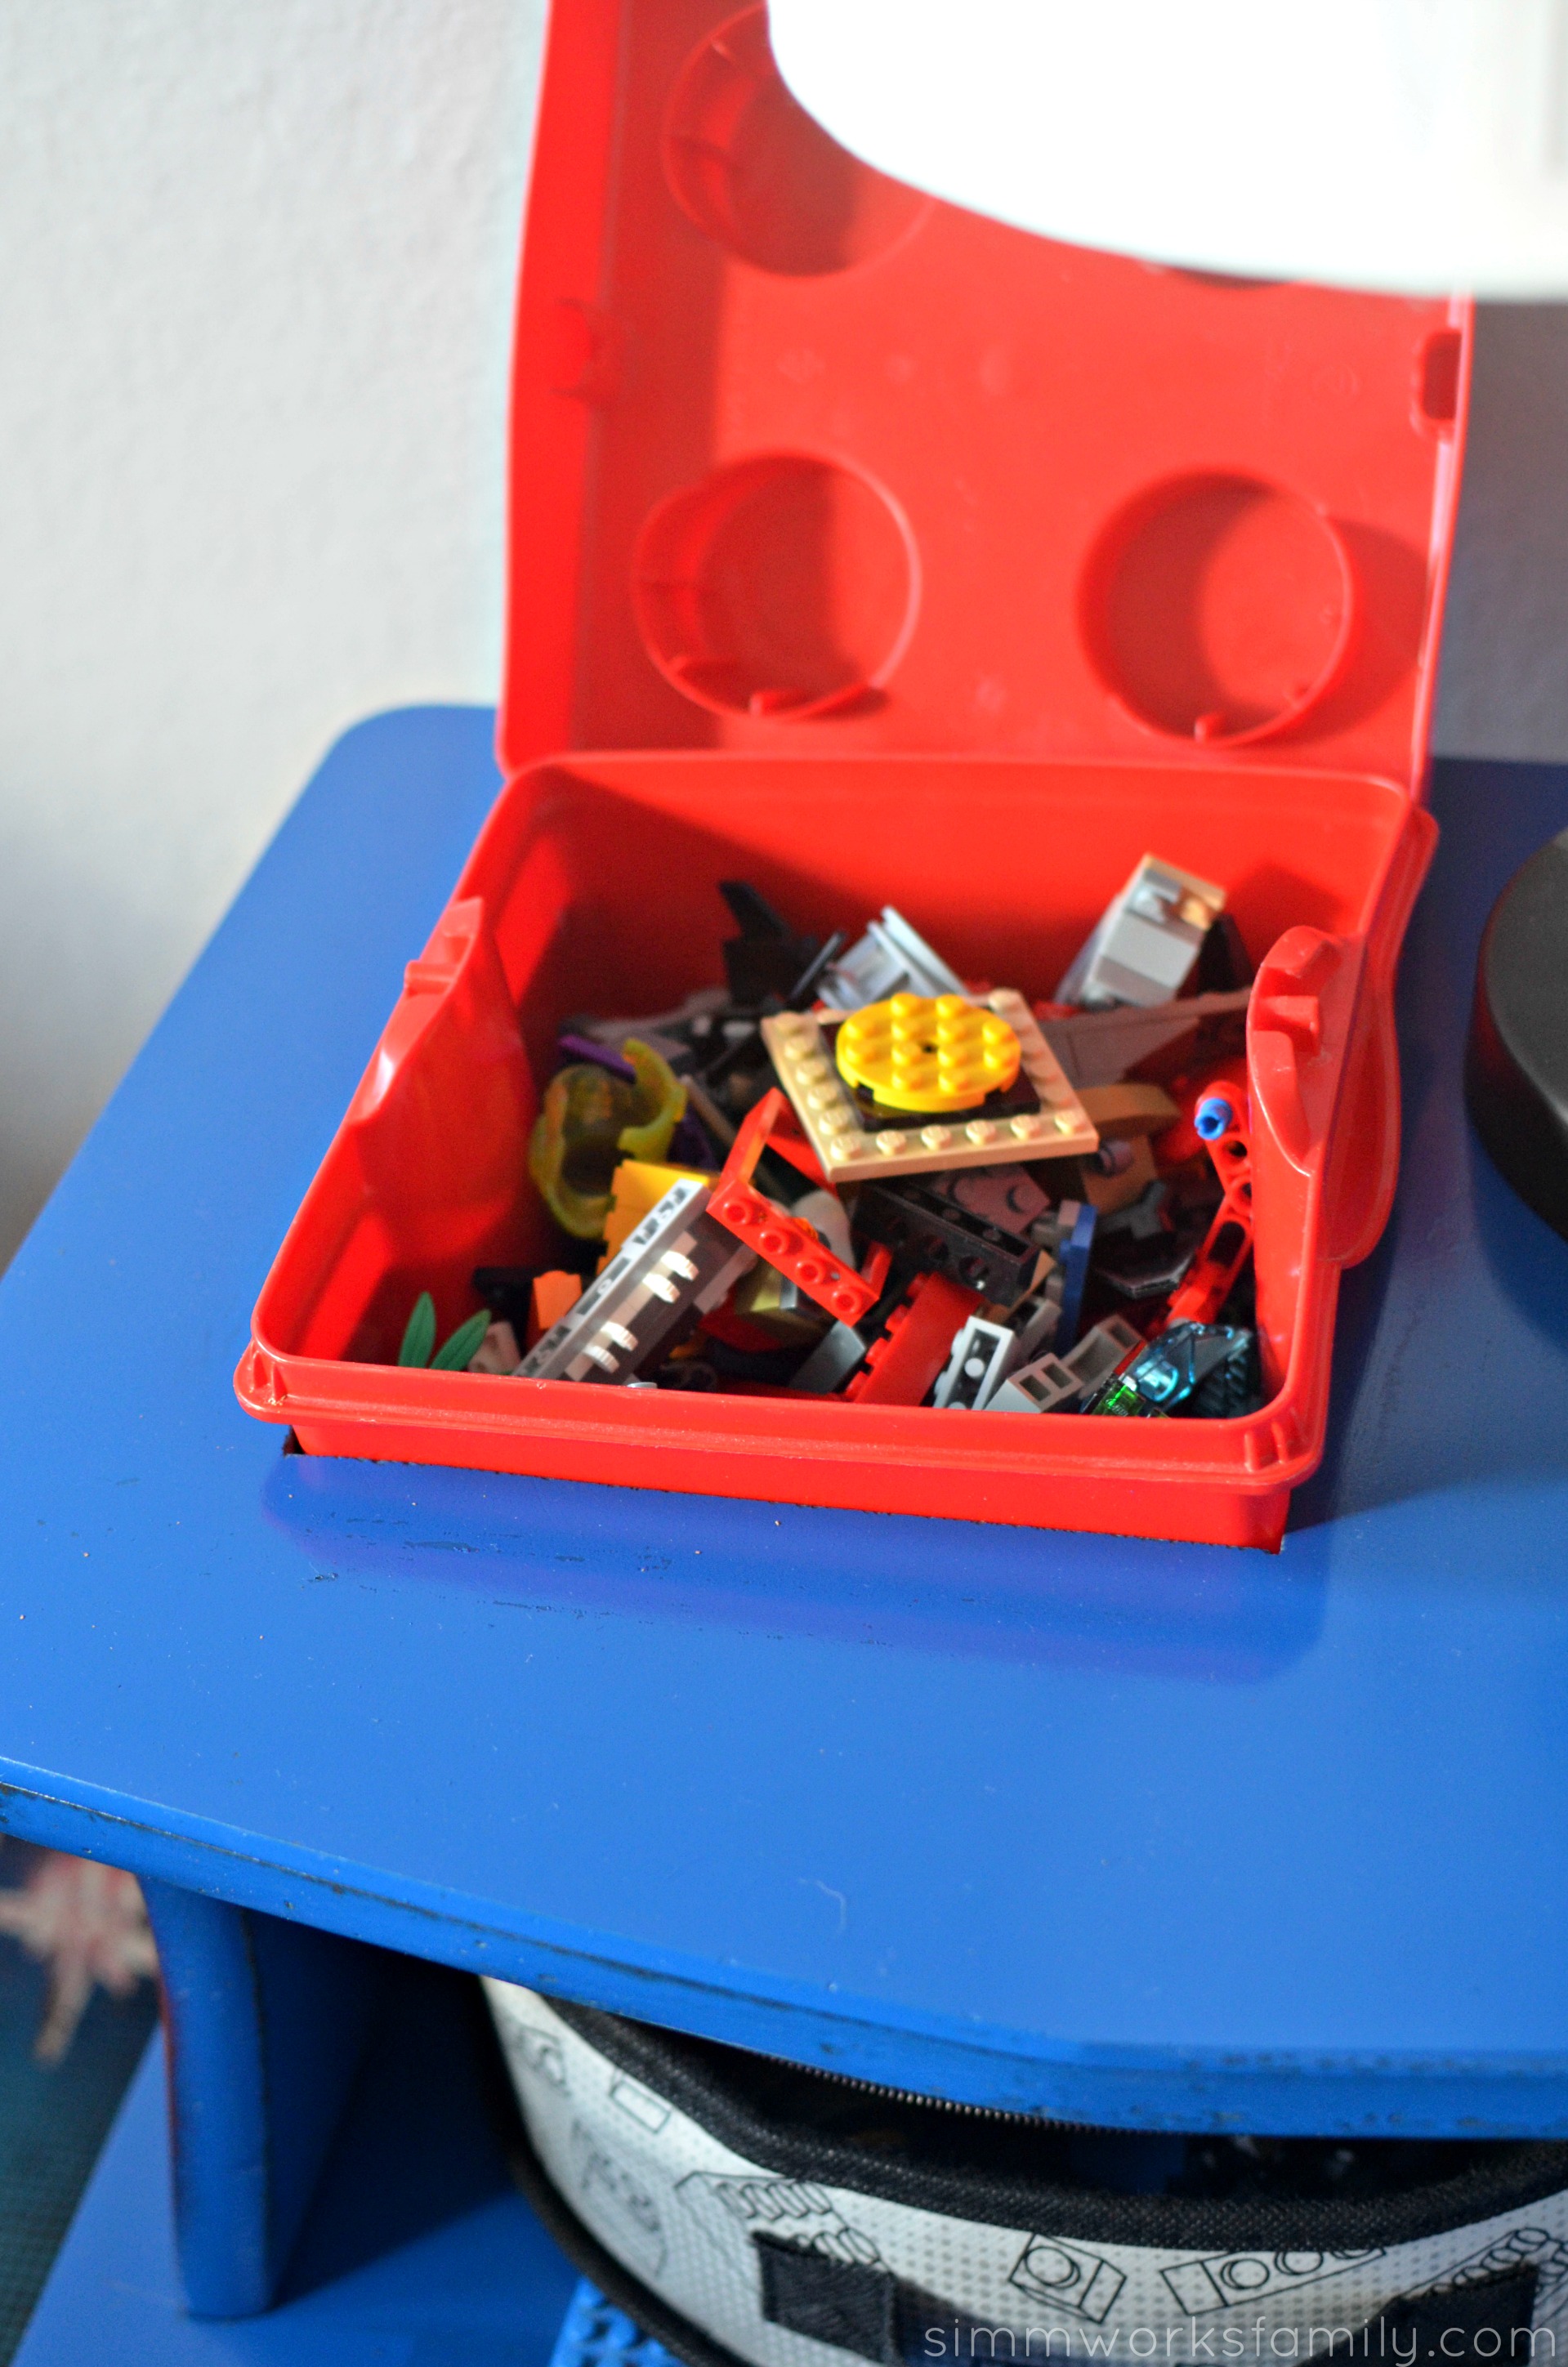
And your DIY LEGO side table is complete! Fill the box up with toy bricks and let your child go at it!
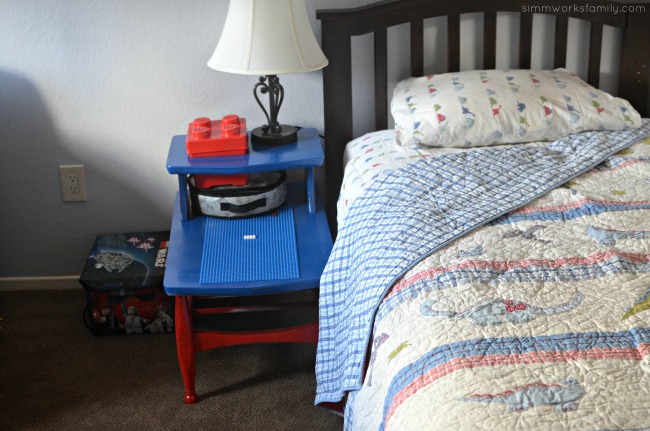
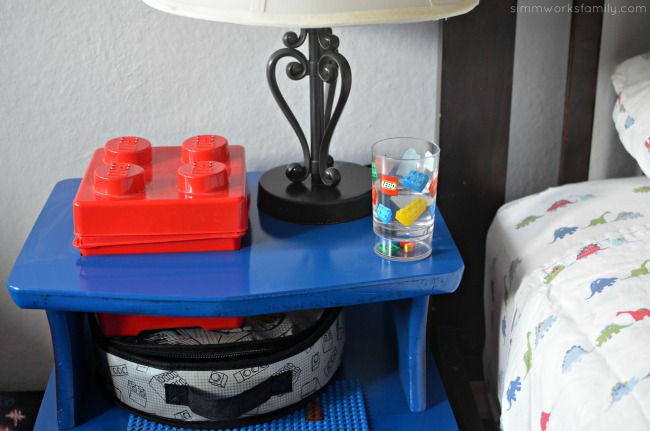
Because this is a side table next to my son’s bed, I wanted to leave room for a lamp and the glass of water he always has to have right before bedtime. There’s even a little more room for a snack or book.
Next up on our DIY room adventure? A minifigure LEGO lamp! Stay tuned…


Speak Your Mind