Upcycled Container Gardens: Housing Your Herbs

Upcycled Container Gardens Housing Your Herbs

Around this house, we try to repurpose and upcycle as many things as we can. If it can’t be composted or turned into something else, we try to donate. So very rarely do we end up with things that go in the trash. This makes for a great assortment of containers to be used in the garden.

When we picked up our chicks I knew we’d need a little home for them until they were big enough to go straight into our coop. At 3 weeks old they’d need to stay warm indoors so I picked up a metal bucket at our local hardware store.

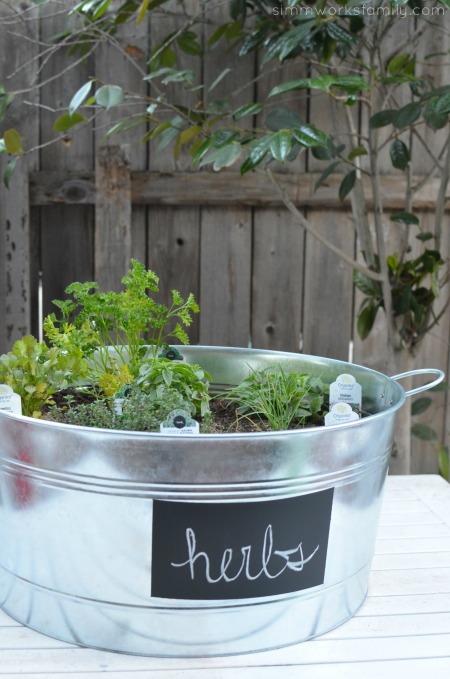
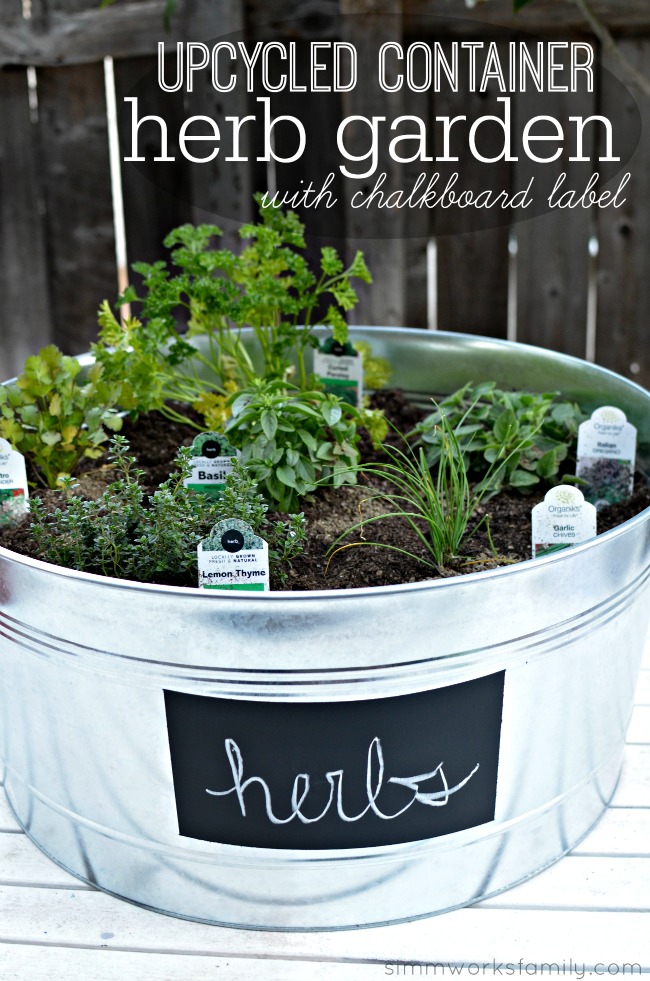
Since I knew I would only be using the bucket for a short period of time I already had it earmarked for a project I’d wanted to do for quite a while… a stand alone herb garden!

Growing Chicks
I’m not sure if you know this but chicks, like children, grow like weeds! Seriously.

I turned around for a second and these cute little baby chicks are almost chickens at 2 months! But we still have 4 more months until they’re actually laying eggs (so I’m told).

Upcycled Container Gardens - growing seedlings

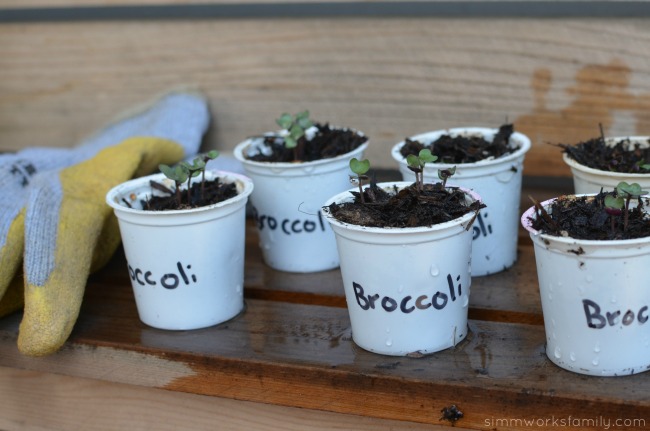
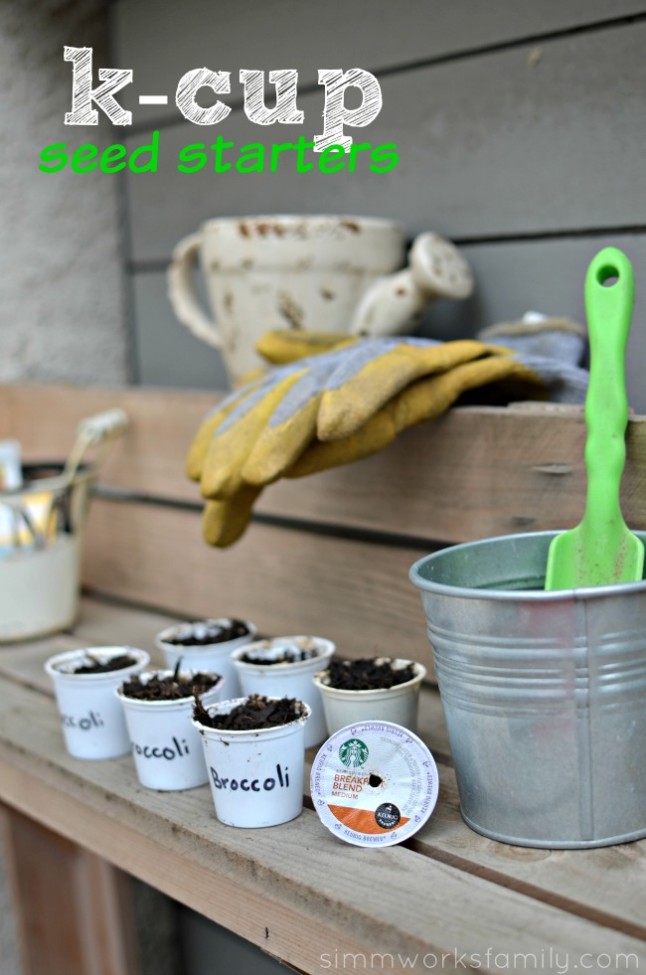
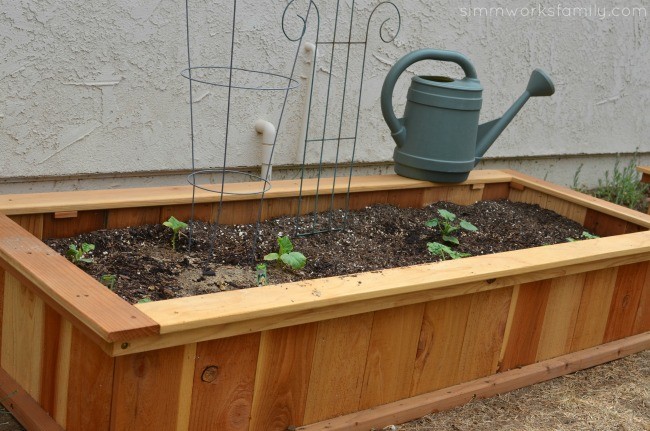
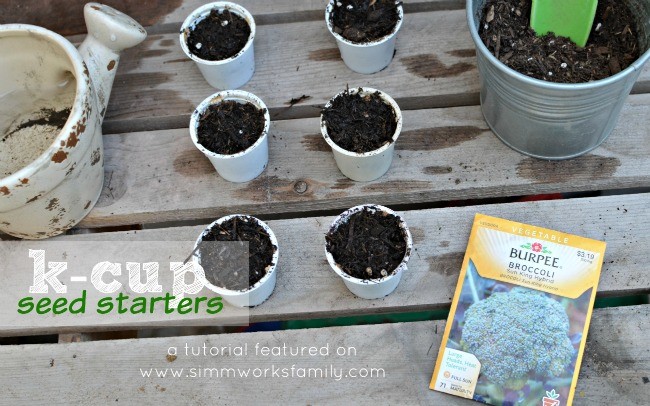
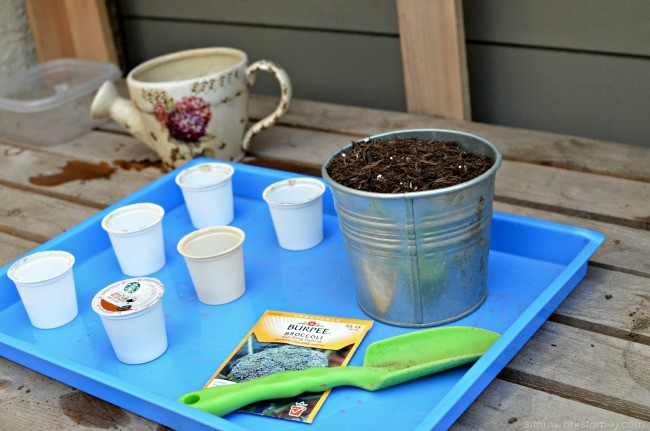
With so many things growing in our raised beds (like the broccoli that’s sprouting from our DIY K-Cup Seed Starters) we didn’t have any more room for the herbs I love to have on hand for cooking.

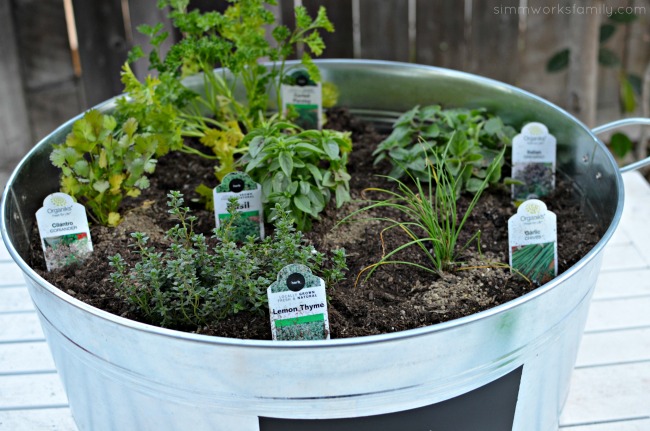
So it just made sense to have a container garden on the patio. What’s a better green work of art than a container garden?

Our next step will be to build a stacked container garden to house the strawberries we’ll be planting soon! How awesome does that sound? It’s as simple as taking this idea and stacking a few smaller containers on top of one another. Then planting in each tier.

Upcycled Container Gardens - cleaning out the container


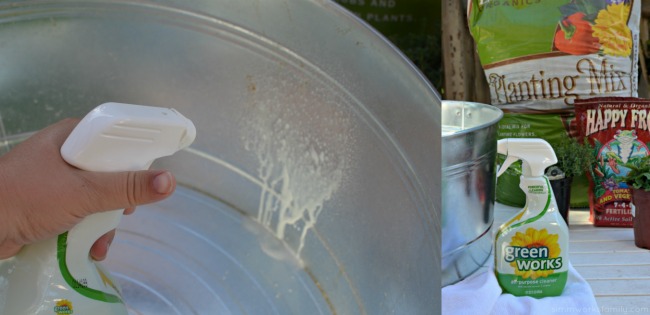
Because our tub housed the chicks, I wanted to make sure that I cleaned the container very well before putting the soil and plants inside.

While some might question why I would clean out the container first – don’t people buy chicken manure? – the chicken poo that may be on the container hasn’t been composted yet. And I don’t want any bacteria that may have been left in the container to contaminate my plants.

But more on composting chicken poo later! Let’s get to this herb garden. First up – the chalkboard label.

Upcycled Container Gardens - DIY Chalkboard Label

 Upcycled Container Garden Chalkboard Label

What you’ll need:

  • 2 paper towels (can also use newspaper)
  • painters tape
  • chalkboard spray paint
  • metal container

What You Do:

1. Wipe down the area you wish to put the chalkboard paint on with an all-purpose cleaner. Then rinse the container out with water and let dry.

2. Grab two paper towels and cut each in half (4 half sheets). Then cut one-half sheet in half again. You’ll have 3 half sheets and 2 quarter sheets.

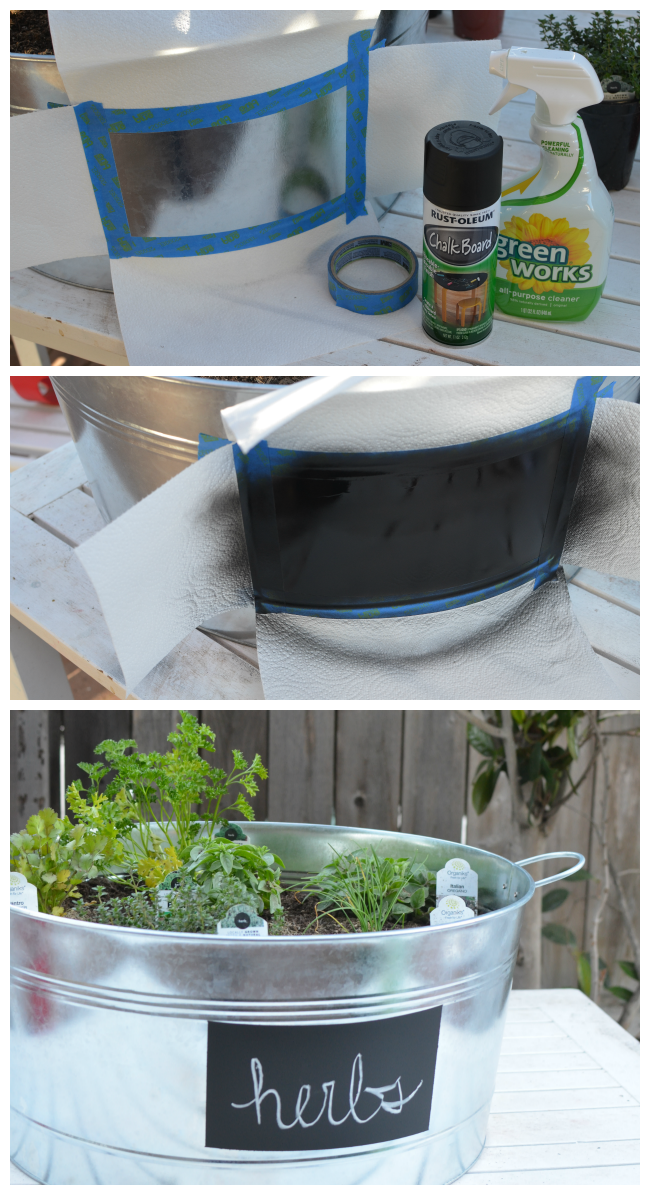
3. Using the painter’s tape and the paper towel pieces, create a square or rectangle space to spray paint the chalk onto.

4. Put extra paper towels under the container to protect the table underneath from paint.

5. Using the chalkboard spray paint, spray on two coats of chalkboard paint onto the container. Wait about 20 minutes in between each coat to allow them to dry.

6. Remove the paper towels and tape to reveal your chalkboard label. Write on it with chalk and display for all to see!

Upcycled Container Gardens - variety of herbs

Tips for Planting Herbs in a Container Garden

  1. Use good soil – find a soil that’s good for growing vegetables or use a good blend of soil and compost
  2. Depending on where you’re putting your container garden, consider the height each herb/plant gets and plant taller herbs in the back
  3. Plant what you know you already use now in the kitchen
  4. Make sure you are also giving your herbs vegetable food (found at any garden center)
  5. Place the container garden in a spot that will receive direct sunlight and make sure to water!

Upcycled Container Gardens with Chalkboard Label

What’s your favorite way to upcycle old containers?

Recycle Reduce Reuse with K-Cup Seed Starters

We’ve come up with a clever solution to a problem we had: K-Cup seed starters! Take those used k-cups and turn them into something useful. 

K-Cup Seed Starters - recycling in the garden

Over the years we’ve become more and more conscious of our environment and the impact we have on it. We cloth diaper, grow our own veggies, compost, and make an overall effort to reduce waste and excess.

Since we’ve upgraded from our Keurig Vue to the Keurig 2.0, the one thing I hate is that I can’t recycle the k-cups I use every day. And since I’m a big coffee drinker, I don’t have any way to reuse the k-cups. Until now! I’ve started getting creative with my k-cups and have come up with a list to reuse them in a useful way.

First up is in the garden. Now our garden has always been my pride and joy. I consider it a work of art that is ever changing. And since we just started up our new garden at the new house, I needed an excuse to show it off.

Green Work of Art in the Garden

How pretty are those little starter plants? Well, they started in our k-cups from seed! Truly a green work of art.

That’s right. K-cups are the perfect way to start seeds for the garden. Not only are they plentiful around here, but they have a built in drainage hole that doesn’t need to be added. How cool is that?

Here’s how you use them!

K-Cup Seed Starters Tutorial

K-Cup Seed Starters

What you’ll need: 

  • k-cup
  • seeds
  • trowel
  • soil (any good vegetable planting soil)
  • water

K-Cup Seed Starters - what you need

What you do: 

1. Remove the foil from the top of the k-cup.

2. Discard the coffee grounds to be used later in the garden or your compost bin.

3. Remove the filter from the k-cup and discard the plastic filter – you can compost the k-cup paper filter if you’d like.

4. Fill with soil about 3/4 of the way up.

5. Add 2-3 seeds and top with more dirt until filled.

6. Water daily and watch sprout!

Once your seedlings are big enough to transfer just pull out gently and move to a bigger pot or straight in your garden bed!

For a full in-depth tutorial, check out our video:


K-Cup Seed Starters - broccoli

How do you recycle, reduce, and reuse around your home?

How to Grow Carrots with Kids {From Garden to Table}

Learn how to grow carrots with kids and see how easy gardening with kids is! All it takes is some patience, sun, water, and love. 

How to Grow Carrots with Kids

One of my kids favorite veggies is carrots. So figuring out how to grow carrots with kids was one of my top priorities when we started gardening.

Lucky for me, growing carrots is one of the easiest things to do. Not too many pests to worry about – unless you have four-legged critters like bunnies, squirrels, and deer – and take anywhere from 60-75 days to grow.

Plus, the kids LOVE watching the tops grow taller and I like how green and pretty it makes the garden bed look. [Read more…]


© A Crafty Spoonful - All Rights Reserved
It is OK to use one of my photos provided a link back and/or proper credit is given. It is NOT ok to copy and paste a whole post including instructions. Please do not remove watermarks or alter images in any way. Please contact me with any questions at danielle@acraftyspoonful.com

.