5 Reasons to Drink Water For Kids

This article is sponsored by Nestlé® Pure Life® Purified Water

Growing up I always heard that if I drink enough water my skin would stay clear. So I drank water like crazy. Vanity will get you everywhere when you’re talking to a teenager, right?

As the mom of two young kids I’m constantly worrying if my children drinking enough water. From their constant requests for juice or milk to the fact that everywhere we go they have the option to choose sugary drinks over water I just hope that I’m doing the best I can when I push water first. Keeping kids hydrated is important.

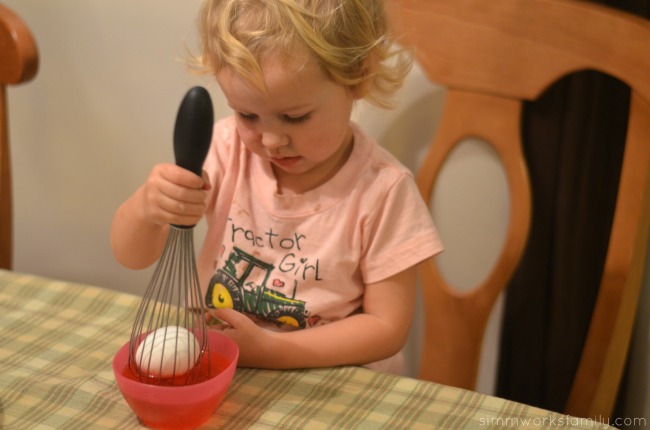
My daughter is awesome at choosing water. She has no problem taking her bottle of water with her everywhere and drinking it when thirsty throughout the day. However my son prefers milk and always chooses it over water. So I’ve begun researching the importance of hydration.

What I’ve found has reaffirmed my belief that water should be their first choice in drink. And I really hope that as they grow up they’ll realize just how great water really is. And not just because it leaves you with fabulous skin.

5 Reasons to Drink Water For Kids

[Read more…]

Tips on How to Make the Perfect Chocolate Chip Cookies

how to make the perfect chocolate chip cookies

Ever make a batch of chocolate chip cookies and wonder what went wrong? Well I’ve chatted with a few friends to find out how to make the perfect chocolate chip cookies and am so excited I did. Because now I know all of the secrets passed down from grandmothers, friends, and neighbors. And you will too!

Some of these tips are so simple you’ll wonder why you didn’t think of it first, and some of them take a little more work. But in the end it’s all worth it for the perfect chocolate chip cookies. [Read more…]

Water Safety Tips For Kids

This post on water safety tips for kids is sponsored by Gymboree.

Water Safety Tips for Kids

With summer in full force and more warm weather ahead of us the one thing on my mind has been water safety for my kids. My children have started to show a love of the water and after getting their snazzy swim suits at Gymboree they wanted to jump in and explore.

But I needed a little time to be prepared for our water adventures and set some ground rules from the get go. By learning a few water safety tips for kids I’ve felt a lot easier about being around the water this summer including when my fabulous friend Carrie of The Fearless Mama invited us over for a playdate that included an underwater camera photo shoot of my kids in their cute outfits.

[Read more…]

5 Must-Have Tools for Traveling

5 must have tools for traveling square

When you have the right tools for traveling a trip can be much easier. By taking the time to research what you might need and finding the perfect products for your trip you can save time, money, and hassle while on the road or in the air.

We recently took a trip to South Dakota to visit friends and found that our trip was made much easier with the help of a few essential tools. Read below to find out exactly how these five must have’s made our lives much easier! [Read more…]

Tips for Keeping Kids Entertained at a Restaurant

This post contains affiliate links. 

Ever have that moment when you wonder why in the heck you thought it was a good idea to take the kids out for dinner? Get to the point where napkins are on the floor, the salt is spilled everywhere, and sugar packets are strewn across the table? Yeah… me too.

So we started to come up with a great ways for keeping kids entertained at a restaurant. While some might sound simple enough, they truly are great at distracting our kids long enough to bridge the gap between ordering our food and being served.

Keeping Kids Entertained at a Restaurant stacking creamers

[Read more…]

31 Days to Organize Your Home: Organizing the Kitchen

31 days to organize your home

Day 1 -3: Organizing the Kitchen

I have to admit… this past week has been hard! Not only have I tackled the kitchen organization I’ve also taken the time to clean as I go so it’s been consuming more time than originally planned. But I managed to successfully organize the kitchen in three days.

As I outlined before, I started with the cupboards, worked my way around the countertops, and organized and cleaned out the fridge and the pantry. Not only did I get rid of things I didn’t need, I also made a pile of things to give away. Items we no longer use but were still functional or didn’t expire for a while.

[Read more…]

Easter Egg Tips and Tricks: How to Make Egg Decorating Easier

These Easter egg tips and tricks will help make egg decorating with the kids easier! 

This Sunday marks the fourth Easter for my son and the second for my daughter. I’m so excited to share this holiday with them and love watching their joy and excitement as we celebrate the resurrection of Christ with our friends and family.

I try my best to remind them that this holiday isn’t just about chocolate and Easter eggs but sometimes as a parent, I just need to give into the fun and let my kids enjoy themselves. They’re pretty good at it and their excitement becomes contagious.

Easter Egg Tips and Tricks

Easter Egg Tips and Tricks 2

Easter Egg Tips and Tricks

I wanted to pass along some tidbits that I found helpful when it comes to dying Easter eggs. Decorating and dying Easter eggs is probably one of my son’s favorite parts of our Easter celebration and we’ve come across a few great ways to make it easier and more fun for everyone. Some of these tips you might have heard already and others might be new!

Easter Egg Tips and Tricks Oven Eggs

1. Bake eggs in the oven

Are you tired of figuring out the “perfect” way to make hard boiled eggs? Do your shells stick? Do your yolks turn gray? Well, I’ve found the solution to all of your problems! Bake ’em.

That’s right. 

Turn the oven to 325, put the eggs in a mini muffin pan and set the timer to 25 minutes. When the time goes off gently transfer the eggs to an ice/water bath with tongs for 10 minutes and then you’re done. Simple, easy, and fun too!

2. Whisk the Eggs

Putting hard-boiled eggs into a whisk makes egg dying a lot easier for small hands. simply grab a whisk from the kitchen, pop the egg through the wire, and let your child dip away! When they are done with the egg just pop it back out and set it down to dry.

3. Use Natural Dyes

There’s no need to buy commercial dyes when partaking in Easter egg fun. By using a few ingredients that you might already have around the house you can create gorgeous natural dyes for your eggs

A few tips on what you can use and how to dye naturally can be found on Martha Stewart.

4. Get Creative

You don’t just need to use dyes to decorate your eggs! Crayons, glitter, and stickers are great alternatives to dyed eggs. And it can be easier for infants and toddlers to get involved.

You can also use a variety of tools to create different designs on your dyed eggs. Wrap a rubber band around the eggs before dipping, or use some electrical tape to create stripes and designs. You can also use a white crayon to draw pictures and write names on your eggs before you dye them.

For more great tips check out this post on Formula Mom.

Easter Egg Tips and Tricks - use whisk to dye eggs

If you have some tips to making Easter egg decorating more fun I’d love to hear them!

Love these ideas? Here are some more: 

Lining a Baking Pan with Foil {Tips and Tricks}

Find out the easy way for lining a baking pan with foil! Plus learn more tips and tricks in the kitchen. 

One tradition we have in our family is a cookie party after the holidays. Every year on the day before the cookie party we make all of the cookies. So I headed over to my husband’s aunt’s house to help out with the cookie baking. Now by cookie baking, I mean cookie baking. Like 8 different types of cookies. Lots. Of. Cookies.

While making the cookies this year we had an oops. We were melting chocolate and it seized. So we had to figure out something to do with it. And I decided to try and make brownies… or so I thought. The “brownies” I made didn’t turn out so well but the tip I learned while making the brownies… priceless!

My husband’s aunt saw me trying to line the pan with foil and quickly showed me this neat trick. Maybe I’m the last one to know about it but I thought I’d share anyway just in case anyone else didn’t know!

Lining a Baking Pan with Foil

  1. Simply turn over the pan and place the foil on the pan. 
  2. Form the foil to the pan.
  3. Take the foil off and turn the pan around. 
  4. Line the pan and make your brownies!


© A Crafty Spoonful - All Rights Reserved
It is OK to use one of my photos provided a link back and/or proper credit is given. It is NOT ok to copy and paste a whole post including instructions. Please do not remove watermarks or alter images in any way. Please contact me with any questions at danielle@acraftyspoonful.com

.