This post is sponsored by BabbleBoxx.com on behalf of Leesa. Are you looking for fun ways to spruce up your girls’ room? Transfering from little girl room to big girl room? We’re sharing simple bedroom decor ideas on a budget and are sharing a fun and easy DIY hair bow holder to store all of your girl’s bows.

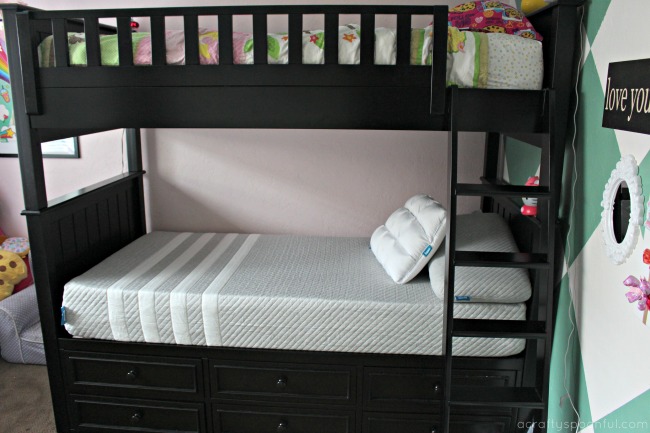
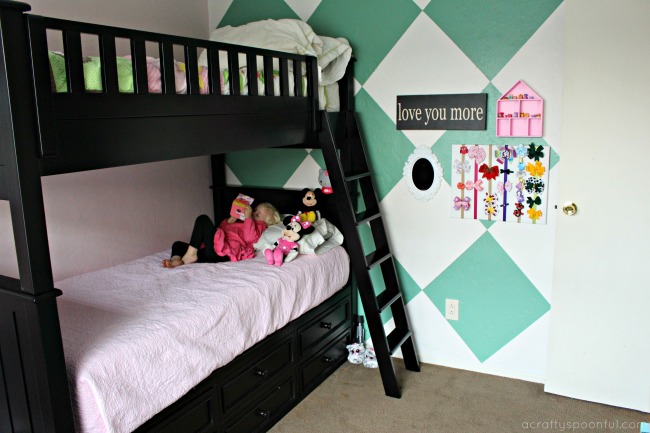
A few weeks ago the girls came to us and asked if they could get a bunk bed so that they could sleep in the same room together. We had just transitioned our youngest from our bed to her own bed at 3 years old and while she loved the idea of being in her own room, she missed the comfort of knowing someone else was sleeping with her in the room. So after much deliberation, we decided to make over our middle child’s room to fit her growing personality (hers was the only room we hadn’t made over since moving to our new home 3+ years ago). And this included a new bunk bed.
We did a bit of research and decided on a twin over twin model with dressers underneath the bottom bunk. Not only would this provide extra support under the bottom bunk but also give us the opportunity to eliminate a large piece of furniture from the room – the dresser! Win-win, right? Now for the important part of a good night’s sleep – the mattresses my girls would sleep on. We consider a mattress an investment not only for our home but our health as well. having the support needed for a good night’s rest is crucial for growing children. So when Leesa reached out to see if we’d like to use their mattresses for our new room, we were more than excited to try them out. Plus, not only are they committed to a good night sleep, they also provide community outreach and give back through two different give-back programs.
Driven by the mission to provide “A Better Place To Sleep for Everybody”, Leesa donates one mattress to a shelter for every ten they sell through their One-ten program (over 22,000 mattresses donated so far!). Leesa also plants one tree for every mattress sold and donates 1% of each employee’s time to volunteer for local causes.
The Best Bed in a Box
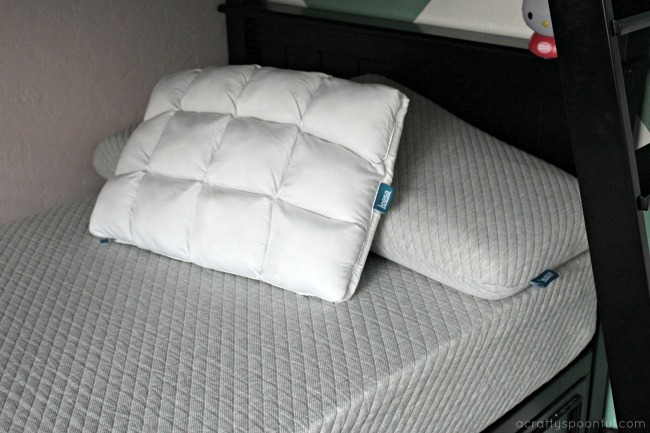
When our mattresses and pillows arrived, my husband was a bit skeptical. How in the world would a full mattress fit in this box? It was fun to find out exactly how the rolled up mattress expanded once put into place and opened. And even more cool to feel the difference in the mattress after an hour of being open vs. a whole day of being opened. Since I lay down with my youngest as she drifts off into sleep on the bottom bunk, I get to experience the comfort of Leesa each night. And with the adjustable and reversible hybrid pillow Leesa sent out, I relax in comfort as the girls fall asleep each night.
The adjustable and reversible hybrid pillow has down-like quilted pockets on one side and a cooling side on the other. It’s adjustable and reversable depending on how our night is going. If I accidentally fall asleep in the bed with my daughter (oops!), and I get too warm, I can flip over the pillow for a more cool slumber. There’s also a pillow insert inside that sits between the quilted pocket and the cool layer that can be removed with a simple zip to change the support level to fit how one sleeps. Plus it’s a good cuddle pillow!
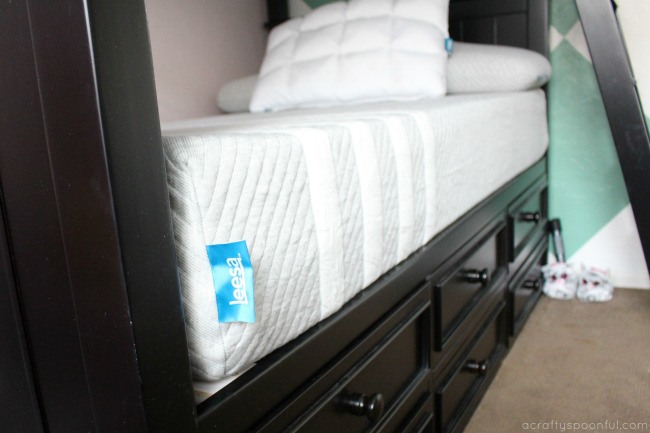
But I can’t focus all of my attention on the awesome pillow I stole from the kids. Let’s get to the mattress! Leesa’s patented Universal Adaptive FeelTM is designed for all types of sleepers and features 3 premium foam layers including a 2-inch AvenaTM foam top layer for cooling and breathability, 2-inch memory foam middle layer for body contouring and pressure relief and 6-inch dense core support foam for durability and structure for sleepers of all sizes. All of this equals the support and comfort one needs for a restful sleep. And the proof is in my Fitbit tracker tracking how much more rest I receive when I accidentally fall asleep in the girls bed vs. going back to my own bed. It may be time to upgrade our own mattress too!
Easy DIY Hair Bow Holder Tutorial
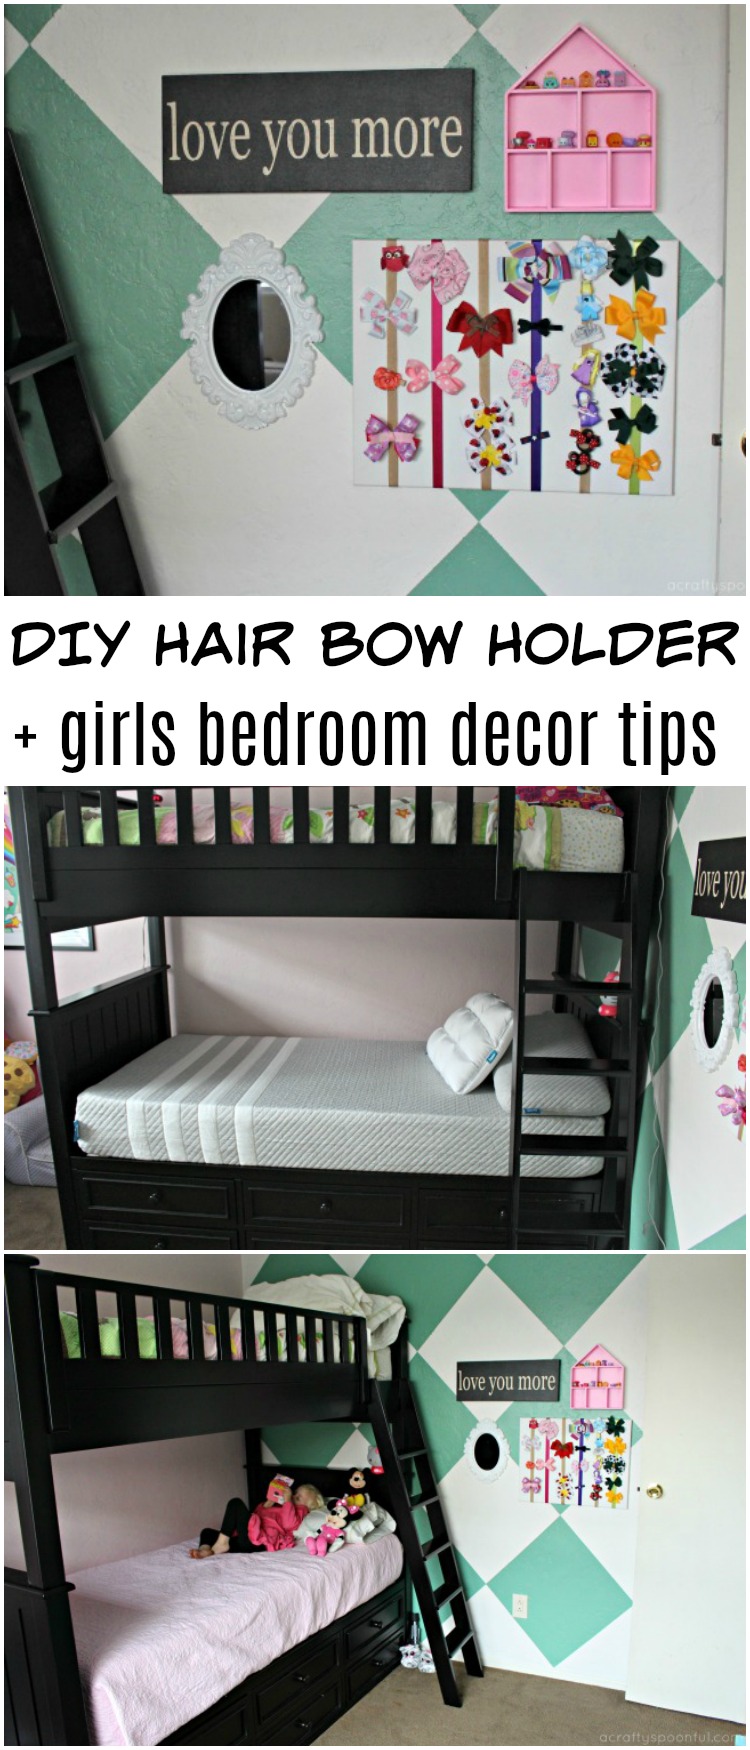
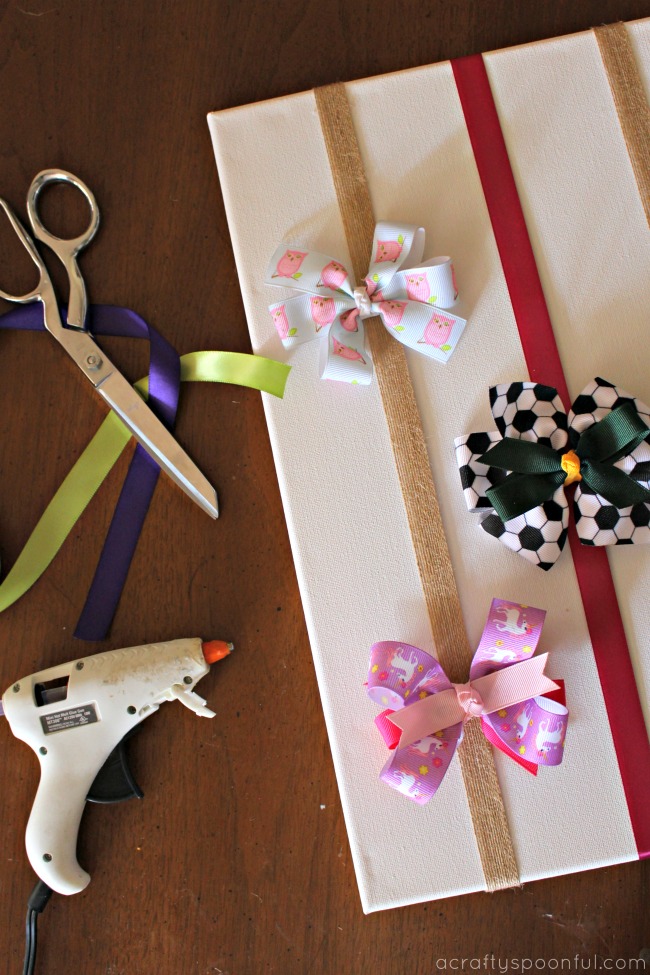
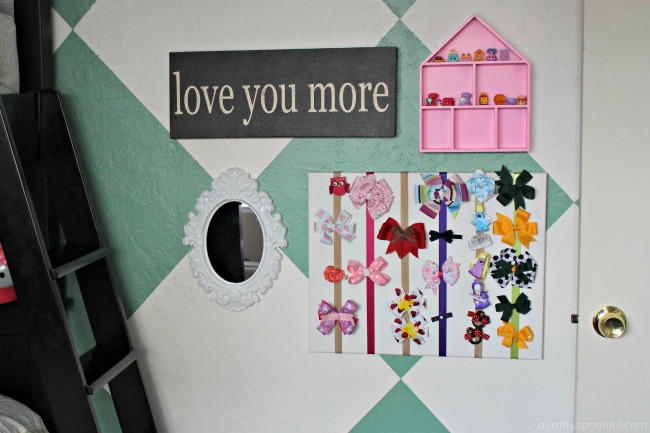
Along with the new bunk bed came a complete overhaul of our daughter’s room. That included new paint on the walls (including a fun diamond design you would have seen featured on my IG stories), and a fun little inspirational wall that included an updated DIY hair bow holder that fit the current room’s personality and my daughters larger bows. We’re sharing how to recreate our DIY hair bow holder in this simple tutorial that takes less than 30 minutes to make! The best part is that I was able to involve my daughter in making this and she did all of the measuring/cutting while I took care of the hot glue.
DIY Hair Bow Holder
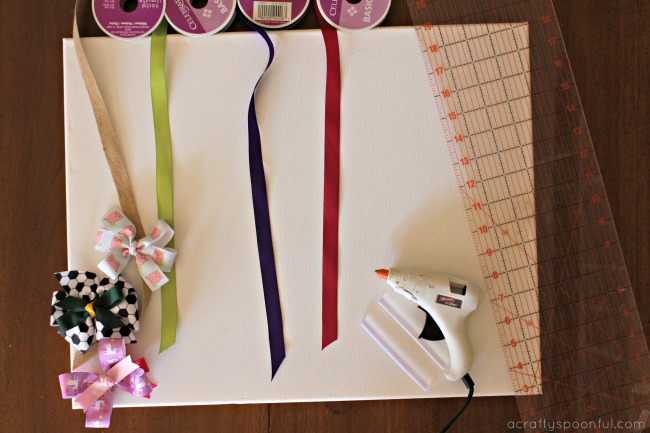
What You’ll Need:
- 16″ x 20″ Blank Artist Canvas with Wooden Frame
- Assorted Ribbon
- Measuring Tape
- Hot Glue Gun
- Pencil
- Bows
What You Do:
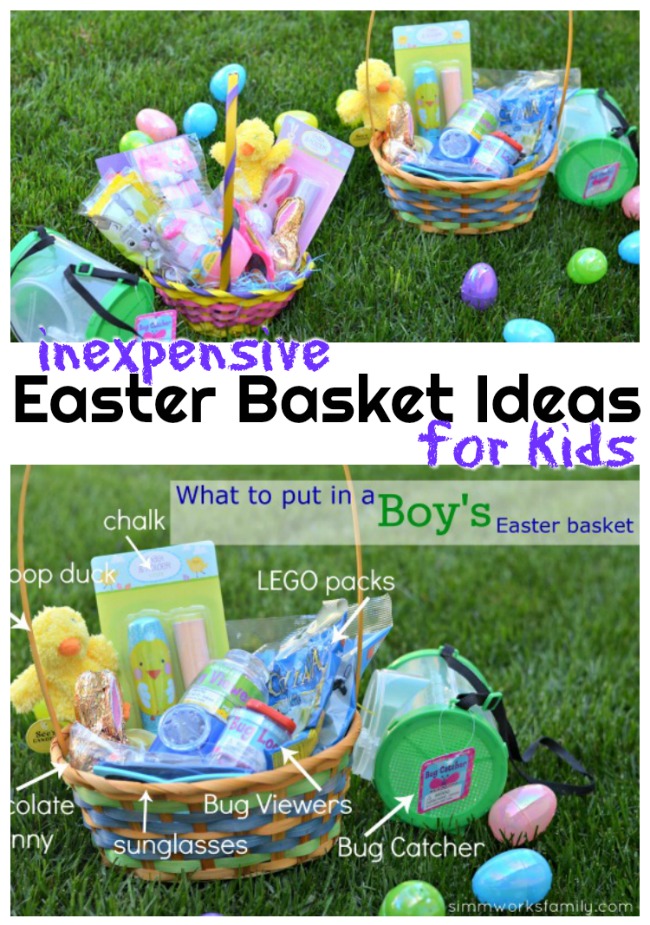
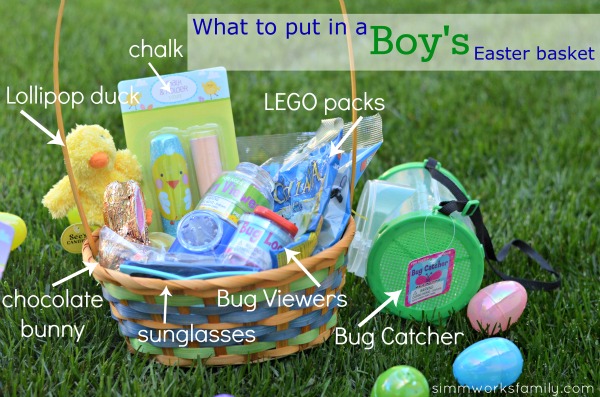
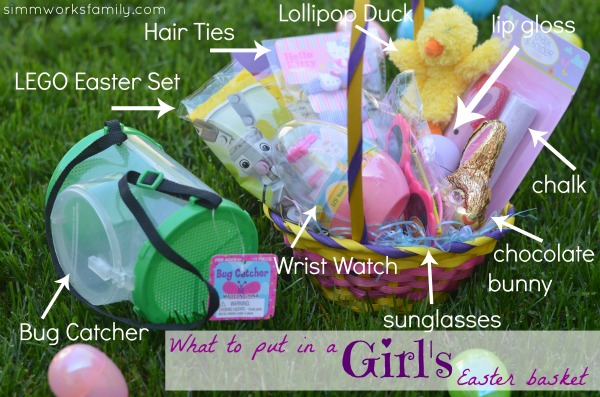
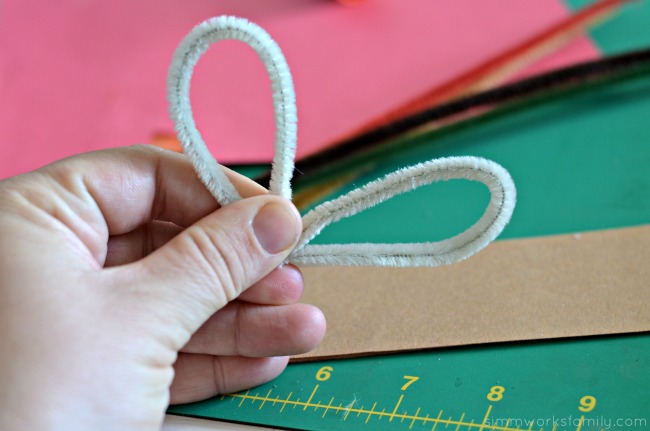
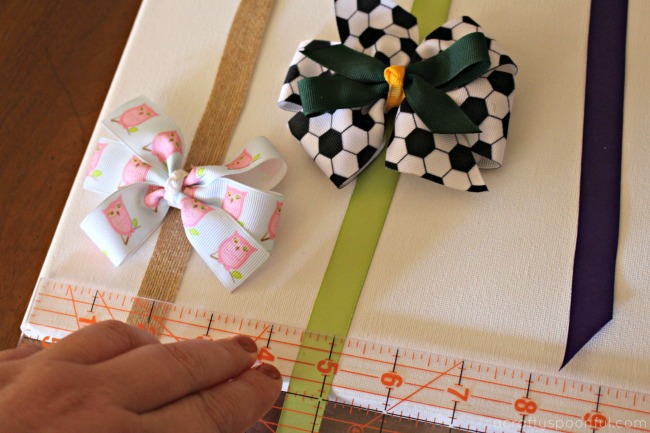
1. Grab the ribbon, a few bows, and a measuring tape to plan out how far apart you want the ribbon from each other. Use the bows as a guide to how much room is needed in between each bow. We measured 2 inches in from each side of the canvas and then 3 inches in between each ribbon strand.
2. Turn the canvas over and mark where each of the ribbons should go on either side of the length of the canvas.
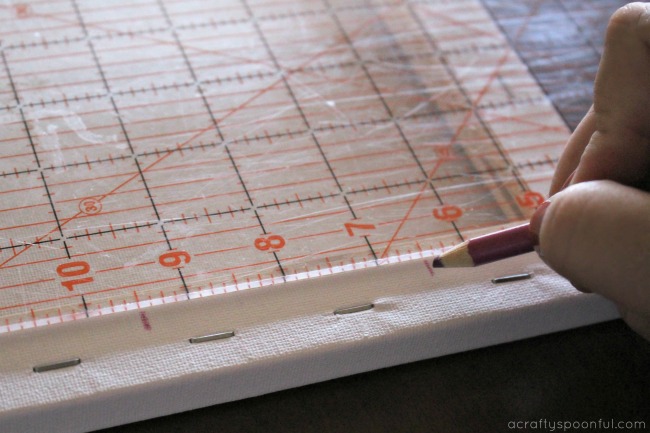
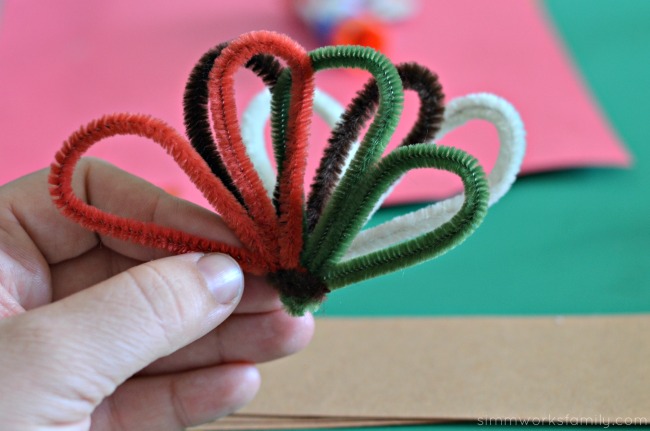
3. Gather the ribbon in the colors you want to use for the project. Cut each color to about 21 inches in length. Make sure that this length wraps around the canvas and back over the frame to be glued into place.
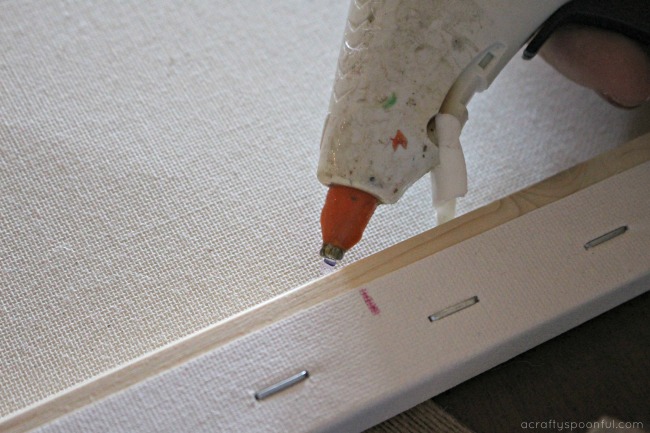
4. Using hot glue, attach the ribbon to the back frame of the canvas and wrap around to the top. Attach the top of the ribbon in the same way making sure that the ribbon isn’t twisted in the front.
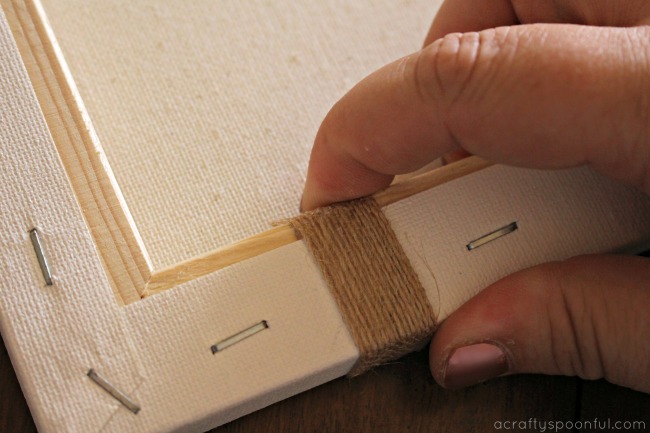
5. Repeat until all of the ribbon is secure and add your bows!
See how easy that was! Now for a few alternative ways you can spice up your DIY hair bow holder:
- Paint the canvas a coordinating color (you can see what our daughter’s old painted bow holder looked like here)
- Wrap the canvas in fabric and secure with hot glue before adding the ribbon
- Add small hooks to the bottom of the canvas frame to hang hair ties and headbands
In addition to adding the DIY hair bow holder, we included a small mirror, an inspirational quote, and a small wooden unit to hold my daughter’s prized possessions: her Shopkins figurines. Having the figurines high up ensures that her little sister can’t reach them. Good thinking, right? Too bad she’s already tried to drag the step stool out to grab one or two. Oh well… I can try! Stay tuned for the full bedroom makeover post! We have more in store for you.
Save on Your Girls Bedroom Decor Ideas with Leesa Sleep
Leesa is available online or at the Leesa Dream Gallery in SoHo NYC and Virginia Beach. And you can now try before you buy at over 80 West Elm stores nationwide. Try the mattress in your own home for 100 nights (risk-free!) with free shipping, always. And don’t forget to use code ACRAFYSPOONFUL for $100 Off your Leesa Mattress purchase. Leesa is available in the US, UK, Canada, and Germany. They’re also continuing to expand their offerings to include: The Leesa Pillow, Blanket, Sheets, Foundation, and Frame.
Looking for more kids bedroom ideas?
Check out these posts you’ll love:
5 Ways To Help Children Get Their Bedroom Organized
Shared Bedroom Ideas for Brother and Sister
Pin this article for later!
Click the Pin button on the image below to save for later.