Easter Egg Tips and Tricks: How to Make Egg Decorating Easier

These Easter egg tips and tricks will help make egg decorating with the kids easier! 

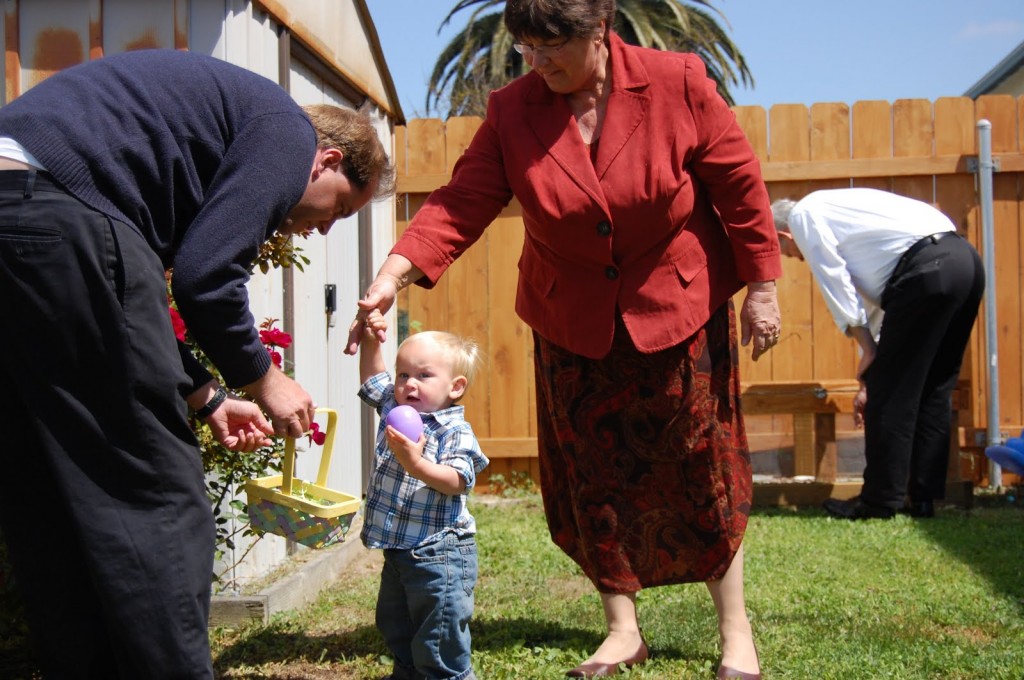
This Sunday marks the fourth Easter for my son and the second for my daughter. I’m so excited to share this holiday with them and love watching their joy and excitement as we celebrate the resurrection of Christ with our friends and family.

I try my best to remind them that this holiday isn’t just about chocolate and Easter eggs but sometimes as a parent, I just need to give into the fun and let my kids enjoy themselves. They’re pretty good at it and their excitement becomes contagious.

Easter Egg Tips and Tricks

Easter Egg Tips and Tricks 2

Easter Egg Tips and Tricks

I wanted to pass along some tidbits that I found helpful when it comes to dying Easter eggs. Decorating and dying Easter eggs is probably one of my son’s favorite parts of our Easter celebration and we’ve come across a few great ways to make it easier and more fun for everyone. Some of these tips you might have heard already and others might be new!

Easter Egg Tips and Tricks Oven Eggs

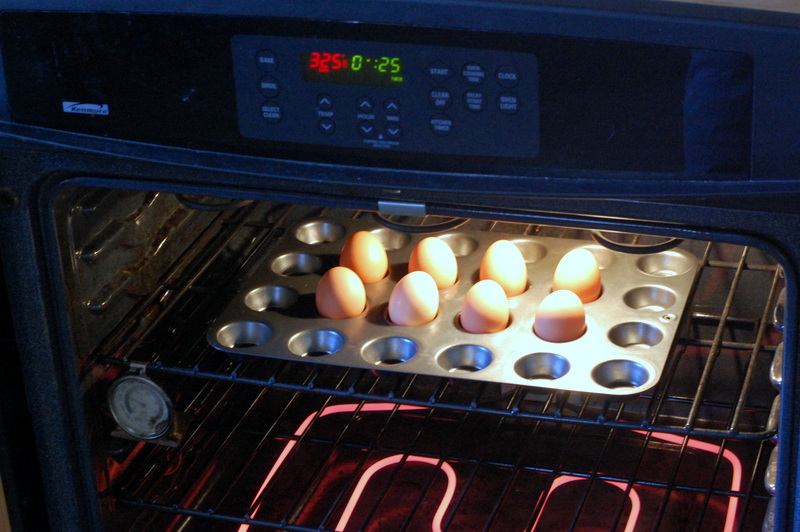
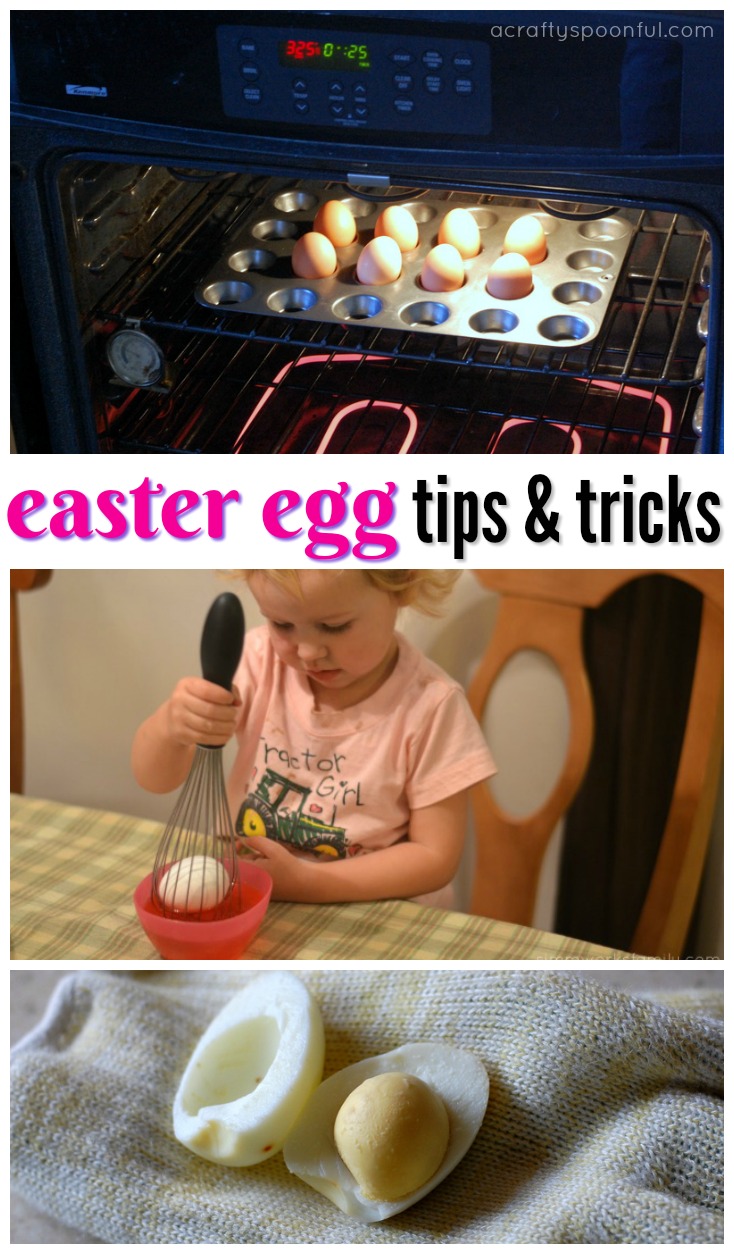
1. Bake eggs in the oven

Are you tired of figuring out the “perfect” way to make hard boiled eggs? Do your shells stick? Do your yolks turn gray? Well, I’ve found the solution to all of your problems! Bake ’em.

That’s right. 

Turn the oven to 325, put the eggs in a mini muffin pan and set the timer to 25 minutes. When the time goes off gently transfer the eggs to an ice/water bath with tongs for 10 minutes and then you’re done. Simple, easy, and fun too!
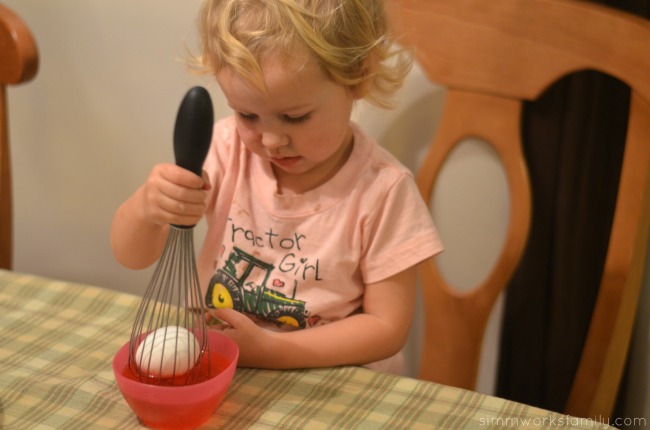
2. Whisk the Eggs

Putting hard-boiled eggs into a whisk makes egg dying a lot easier for small hands. simply grab a whisk from the kitchen, pop the egg through the wire, and let your child dip away! When they are done with the egg just pop it back out and set it down to dry.

3. Use Natural Dyes

There’s no need to buy commercial dyes when partaking in Easter egg fun. By using a few ingredients that you might already have around the house you can create gorgeous natural dyes for your eggs

A few tips on what you can use and how to dye naturally can be found on Martha Stewart.

4. Get Creative

You don’t just need to use dyes to decorate your eggs! Crayons, glitter, and stickers are great alternatives to dyed eggs. And it can be easier for infants and toddlers to get involved.

You can also use a variety of tools to create different designs on your dyed eggs. Wrap a rubber band around the eggs before dipping, or use some electrical tape to create stripes and designs. You can also use a white crayon to draw pictures and write names on your eggs before you dye them.

For more great tips check out this post on Formula Mom.

Easter Egg Tips and Tricks - use whisk to dye eggs

If you have some tips to making Easter egg decorating more fun I’d love to hear them!

Love these ideas? Here are some more: 

Heart Shaped Crayon Valentines {DIY Tutorial}

Crayon Heart Valentines

I first saw the crayon heart valentines on the Family Fun website. I thought they looked adorable but didn’t have a heart mold so I figured I’d just send the regular store-bought valentines instead since I had a few I purchased on clearance a few years back. Then we went to Target and I saw the heart molds in the dollar section of the store and I couldn’t pass up the opportunity. Plus they were all over Pinterest!

So I went to the store, stocked up on a mold and crayons and headed home to do some experimenting. Before I started I did a little research to see what others were saying about the craft. I try not to just jump into a tutorial without reading about it from a few others first. That can lead to disaster (or just make it harder on me since others have found key tips/tricks on making it easier). Once I got the low-down I headed to the kitchen to soak, unwrap, break and bake! And here’s what I did:

Heart Shaped Crayon Valentines {DIY Tutorial}

What you’ll need:

  • 1 box crayons, unwrapped (or left over broken crayons laying around)
  • 1-2 heart molds, choose your size
  • Construction Paper
  • Alphabet stamps OR printer
  • Adhesive dots

What you do: 

1. Place your crayons in a heat proof dish & preheat oven to 250 degrees.

Crayon Heart Valentines 1

2. Heat up some water and pour warm water on crayons (note: do not use boiling water… crayons might melt).

Crayon Heart Valentines 2

3. Let crayons soak for 30 seconds (see what happens when your water’s too hot?). 

Crayon Heart Valentines 4

4. Unwrap crayons (any that didn’t unwrap easily after soaking are set aside and not used).

Crayon Heart Valentines 3

5. Put crayons in a dish and let kids break them up into small, tiny pieces (or put them in a bag and hammer with a kitchen mallet or meat tenderizer until broken up).

Crayon Heart Valentines 5

6. Place heart molds on a rimmed baking sheet and fill with broken crayon pieces.

Crayon Heart Valentines 6

7. Place tray in oven and bake for 15-18 minutes or until crayons are fully melted. Then carefully take out of oven and set aside to harden.

Crayon Heart Valentines 8

8. Once cooled completely pop crayons out of molds and smooth edges by rubbing against a piece of paper.

Please note: The silicone mold may be stained and should only be used for crafts once you melt crayons in them. They are not food safe after used for crafts. 

9. Now’s the fun part! You can decide what you want to do with the crayons once you’ve baked them. I decided to use scrapbooking paper I already had in the house to create a postcard sized Valentine for my son. You can use this printable here for a square valentine with the writing already on the paper or this printable here for a circle valentine (you just have to add your child’s name).

Crayon Heart Valentines

Or you can do what I did and use an alphabet stamp set to customize the sayings you put on each valentine. I simply adhered the crayon to a square piece of scrapbook paper with a glue dot and than layered that onto a larger postcard size piece of scrapbook paper. Then I stamped the sayings I wanted as well as my son’s name to personalize it. You can also have your child decorate the postcard paper by drawing or coloring on it before you stamp out your sayings. You can find more sayings here (as well as more printable options!).

The possibilities and variations really are endless with this craft. And the kids have a great time helping you make them too. Much more personal then a store-bought valentine and twice as cute!

Does your child love to draw?  

Skeleton Maternity Costume

This skeleton maternity costume takes little time to make and is a comfortable alternative for pregnant mamas around Halloween.

Skeleton Maternity Costume

It’s my second pregnancy and my second time creating a fun maternity costume for Halloween. This year I went with a simple DIY shirt to wear out trick or treating with my little one and at the Halloween party we hosted. It was such a fun way to celebrate the holiday while celebrating my pregnancy as well. And everyone I ran into loved the idea! 

I may be weird but I am LOVING this pregnancy. My son has been keeping me on my toes but I’ve been able to take time for myself when needed and enjoy the milestones. With this possibly being the last pregnancy for us, I want to soak it all in! And that includes celebrating holidays and taking lots of photos. Hopefully, you won’t get too sick of the photos. 

Want to make this DIY Skeleton Maternity T-Shirt too? Read on to find out how! This post contains affiliate links. 

Skeleton Maternity Costume with Tigger

DIY Skeleton Maternity T-Shirt

What you’ll need: 

What you do: 

  1. Place image of skeleton baby and rib cage in a word doc making each take up a full page. The baby should be placed horizontally whereas the ribs can be placed vertically. 
  2. Print images out on iron-on t-shirt transfer paper. 
  3. Cut out images close to the edge of the design with scissors. 
  4. Using iron, iron on images to the shirt. Let cool and wear! 

Skeleton Costume Ethan 2010

 What did you dress up for on Halloween? 

Love this idea? Here’s some more: 

Pin this article for later! 

Click the Pin button on the image below to save for later.


Charlie Brown Halloween Costume for Baby

We had a wonderful day today. It all started with pumpkin carving and ended with a wonderful Halloween party at my neighbor’s mother’s house. Little E had a wonderful time with all the kids and I took many pictures!

Everyone loved his costume and we got many compliments for it. Most were shocked to find we made it ourselves but it was so simple I couldn’t see NOT making it!

Since this was Ethan’s first Halloween we didn’t want a costume that would make him too hot or uncomfortable so we stuck with an easy Charlie Brown costume. A t-shirt with a squiggle and shorts, how simple is that!

Charlie Brown Halloween Costume for Baby

How to make a Charlie Brown Halloween Costume for Baby

What you’ll need: 

What you do: 

Ok guys… this can’t get more simple. Cut your black fabric in a zig-zag pattern. Apply No-Sew to the back of the fabric and adhere to shirt. Let dry completely.

Try the shirt on, add the black pants and brown shoes and your Charlie Brown is ready for his big debut! Remember to add Snoopy for an added touch so no one will ask what your little man is for Halloween.

Extra bonus points if baby is still bald… like mine!

charlie brown halloween costume for baby 1

My husband made an iron-on transfer for his shirt that had a picture of Charlie Brown and it said “Wah, Wah, Wah” all over it and underneath Charlie it said “Charlie Brown’s Dad” so everyone would know what the “Wah, Wah, Wah” meant. So cleaver he is!

Image and video hosting by TinyPic

And one more showing Charlie Brown with his Pirate mommy… my neighbor is the lady in front of me with the most adorable panda bear 🙂 He’s 5 months old and we always talk about how E and him are going to be the best of buds when they’re older.

E and his buddy. And shortly after this was taken…

charlie brown halloween costume for baby 4

He didn’t know what he did wrong 🙂

charlie brown halloween costume for baby 5

I hope everyone had a safe and Happy Halloween!

Here’s a Quick Way to Make a Maternity Bun In The Oven Halloween Costume

Bun in the Oven Halloween Costume


I had to share my Halloween costume with everyone. Yes, there is a bun in the oven. Yes, my hair looks really bad and I have no makeup on… hopefully, I can get a better picture to post soon!

Making this costume was super easy. I grabbed a white box I had lying around, printed off a clip art photo of a bun, grabbed some hardware from my work, and printed out the due date as the time on the oven. All in all, it took less than 30 minutes and was perfect for me to wear to work. This would also be great for parties and is super comfortable and not too intrusive. 

Bun In The Oven Halloween Costume

What you’ll need:

What you do:

1. Close up one side of the box and tape shut.

2. Turn the box around and cut off the two smaller panels and one of the longer panels off leaving one long panel.

3. On the closed side, paste the bun image onto the box. Trace with a sharpie to create the oven window. Attach the cabinet door hardware.

4. On the top of the box create oven range coils by using the sharpie.

5. On the long flap add rectangle print out of due date in time form as the clock on the oven. Then add the oven knob.

6. Add the ribbon on either side of the long flap and place over your neck to wear.

Were you ever pregnant on Halloween? What did you dress up as? 

Love this idea and want more? Read on! 


© A Crafty Spoonful - All Rights Reserved
It is OK to use one of my photos provided a link back and/or proper credit is given. It is NOT ok to copy and paste a whole post including instructions. Please do not remove watermarks or alter images in any way. Please contact me with any questions at danielle@acraftyspoonful.com

.