
There’s been a change in the weather over the past few days and our beautiful sun has receded back behind the clouds. The wind has started to pick up and leaves have been swirling around our front yard. It’s the perfect weather for kite flying!
Only problem was we didn’t have a kite.
So after a few different attempts using a few different patterns we made our own kite out of recycled products we had lying around the house. And boy was it fun! While I did most of the construction, my son and daughter did help tape up the kite measured the string. Even without the sun we got to enjoy the outdoors and my kids had a blast running around with their kite.
DIY Recycled Kite
What You’ll Need:
- Plastic bag (trash bag, store bag, etc)
- Thin wooden dowel, cut in 1/2 or other similar item (I used 2 wire hangers)
- Tape, masking or electrical
- String or yarn
- Scissors
- Craft stick

What you do:
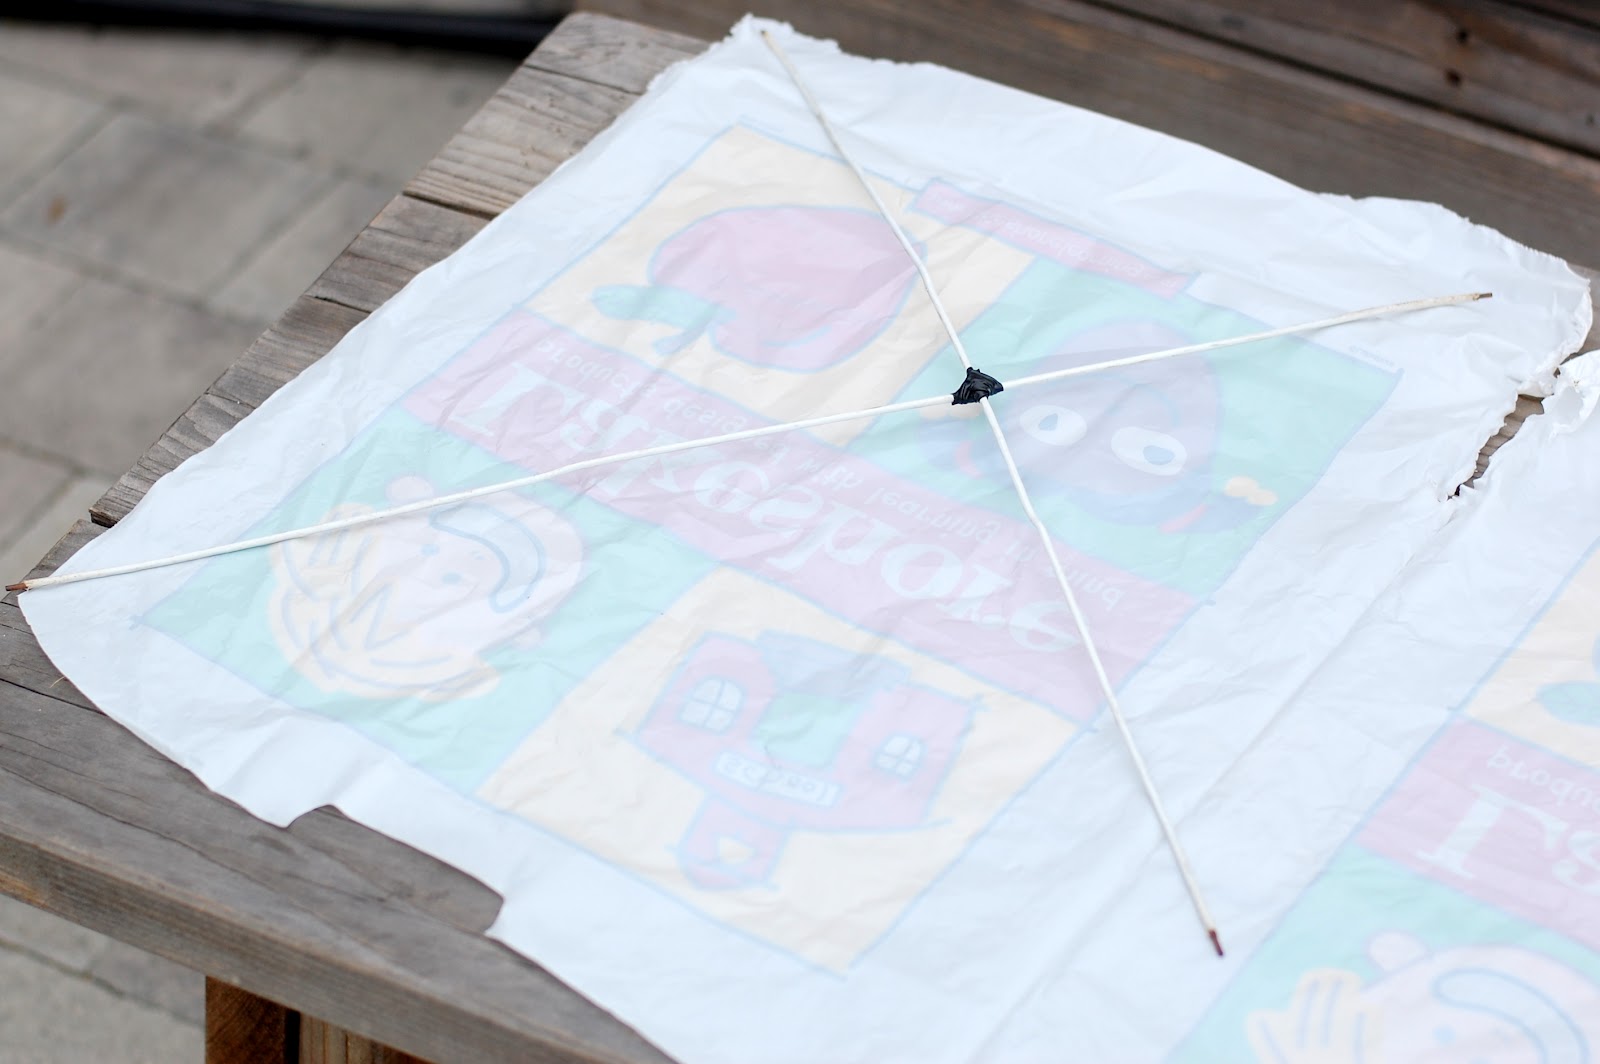
1. Create a lowercase T with the dowels and use tape to secure the two sticks together.

2. Cut bag open along one side and the bottom. Do not cut the other side. Stretch bag open to measure to fit the dowels in a diamond shape.
3. Attach string to the craft stick and wrap a few yards around it.

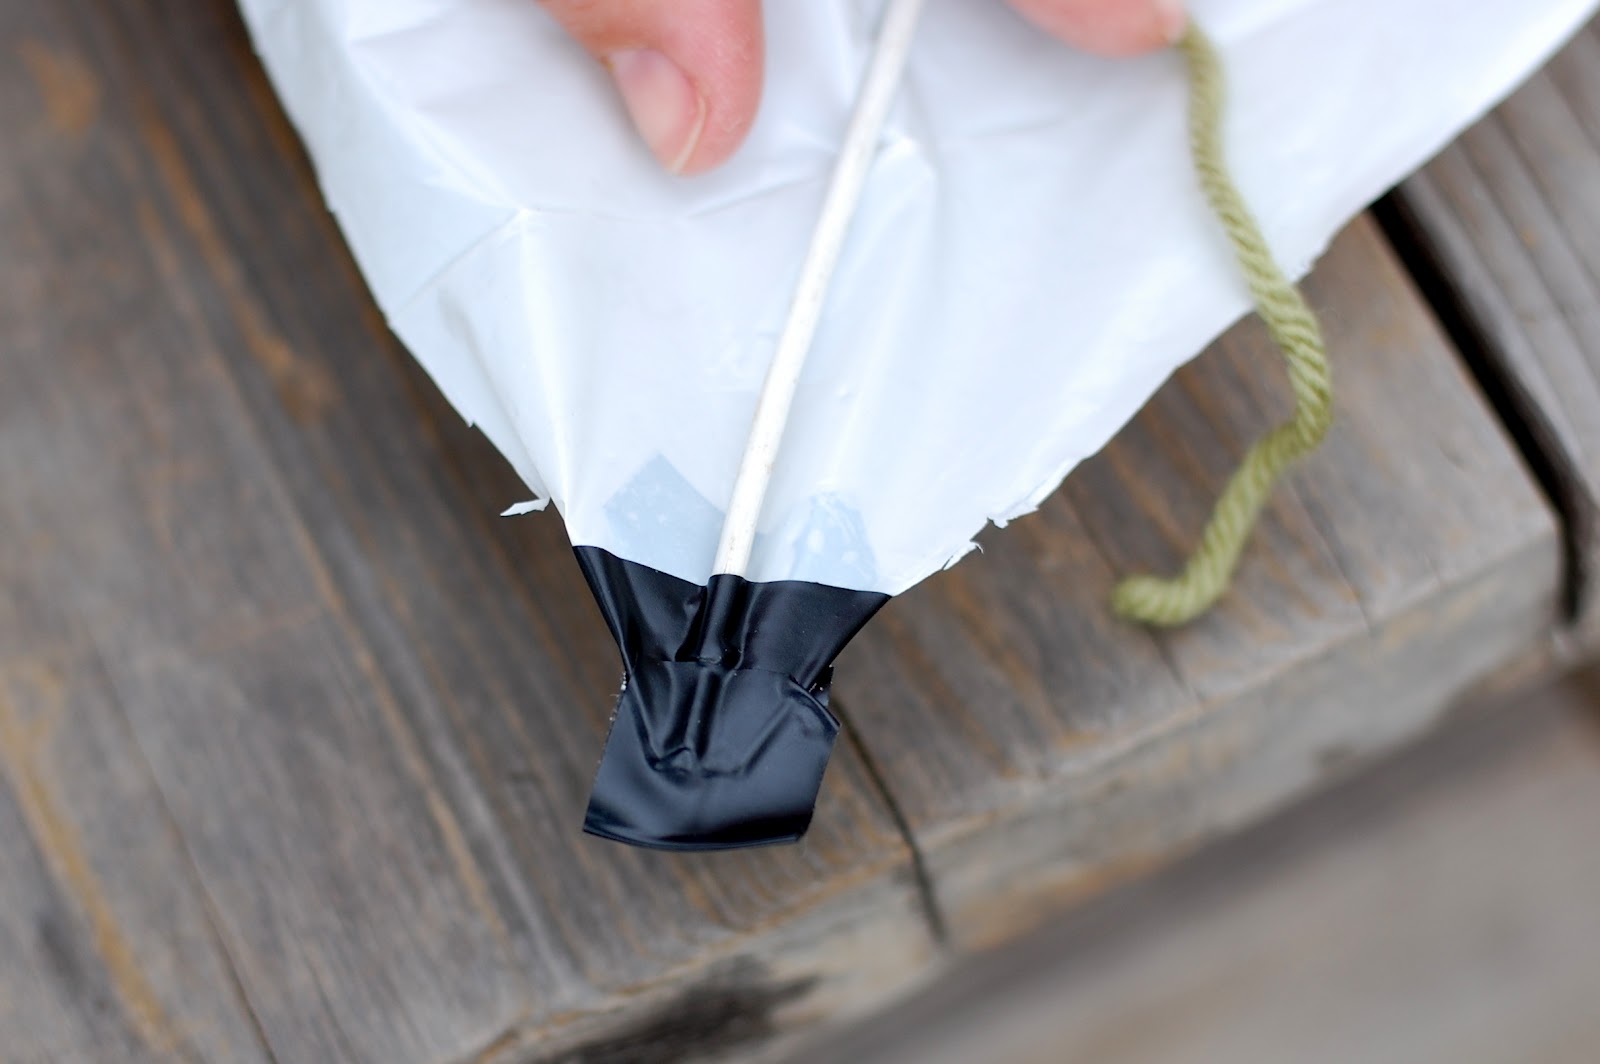
4. Cut out bag and adhere to the dowels by taping each corner.

5. Make two tabs on the right and left side of the kite with tape.
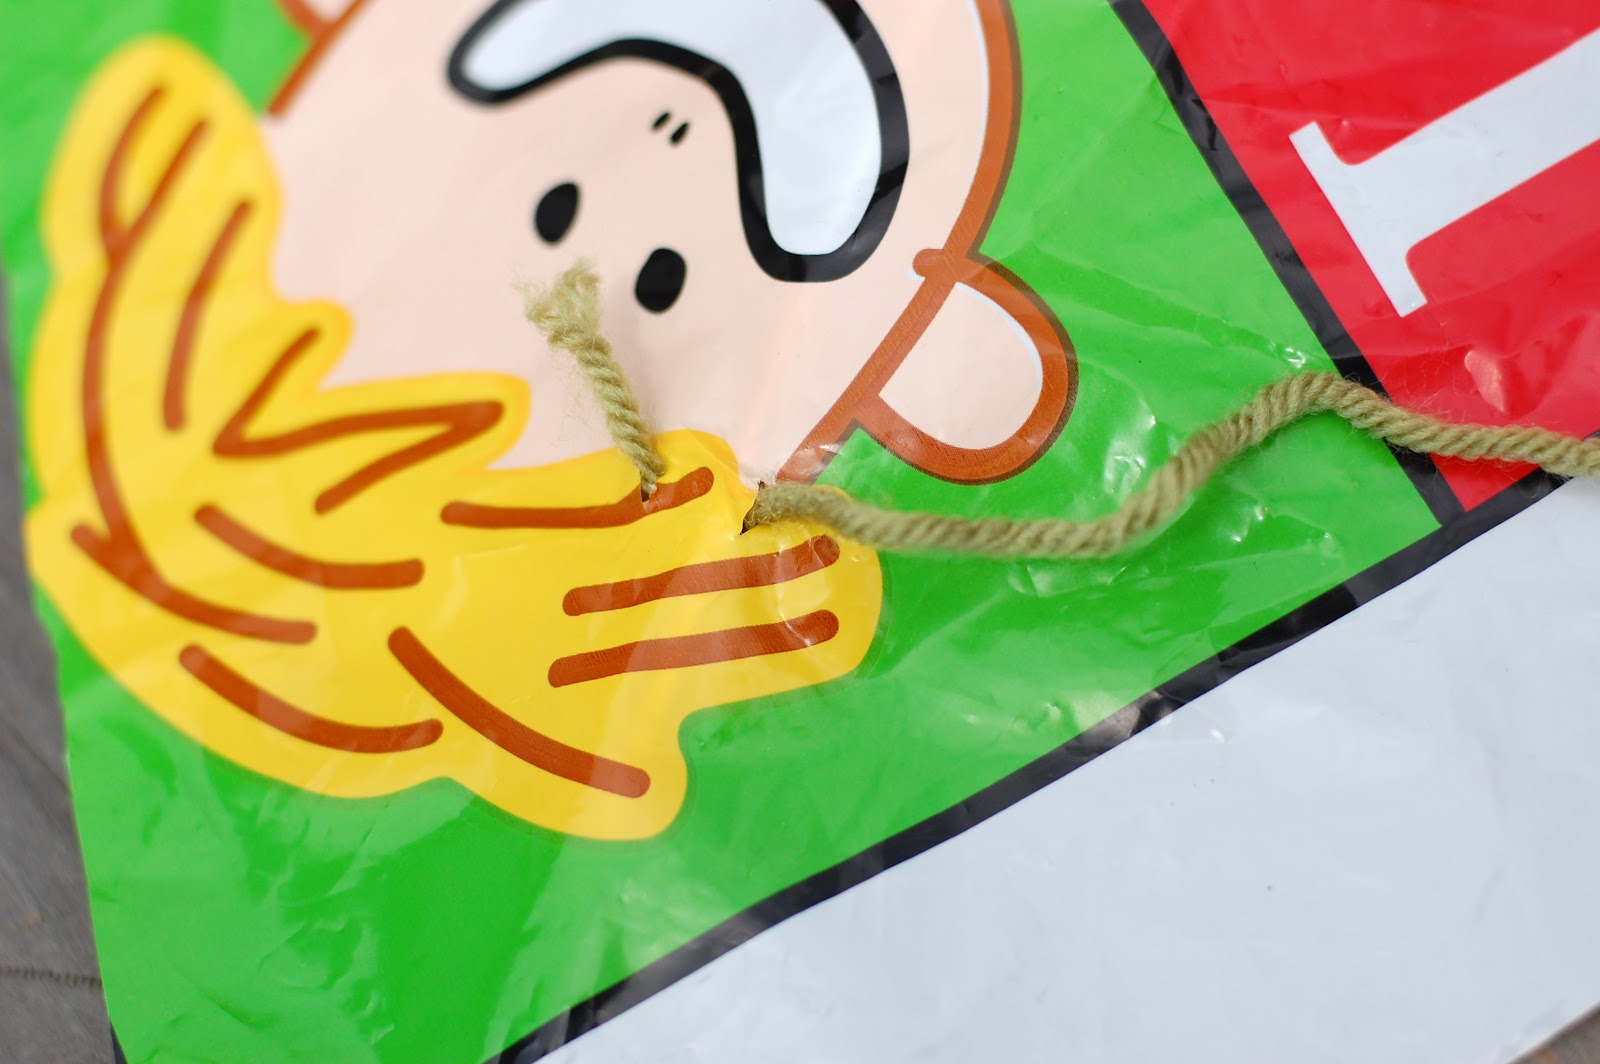
6. Measure out some string or yarn to about 1″ over each side of the kite. Tie string to the tabs you just created and double knot. The string should be tight enough to slightly bend the kite inward.

7. Now this is where it gets a bit tricky. Turn the kite over to the print side (front of kite).
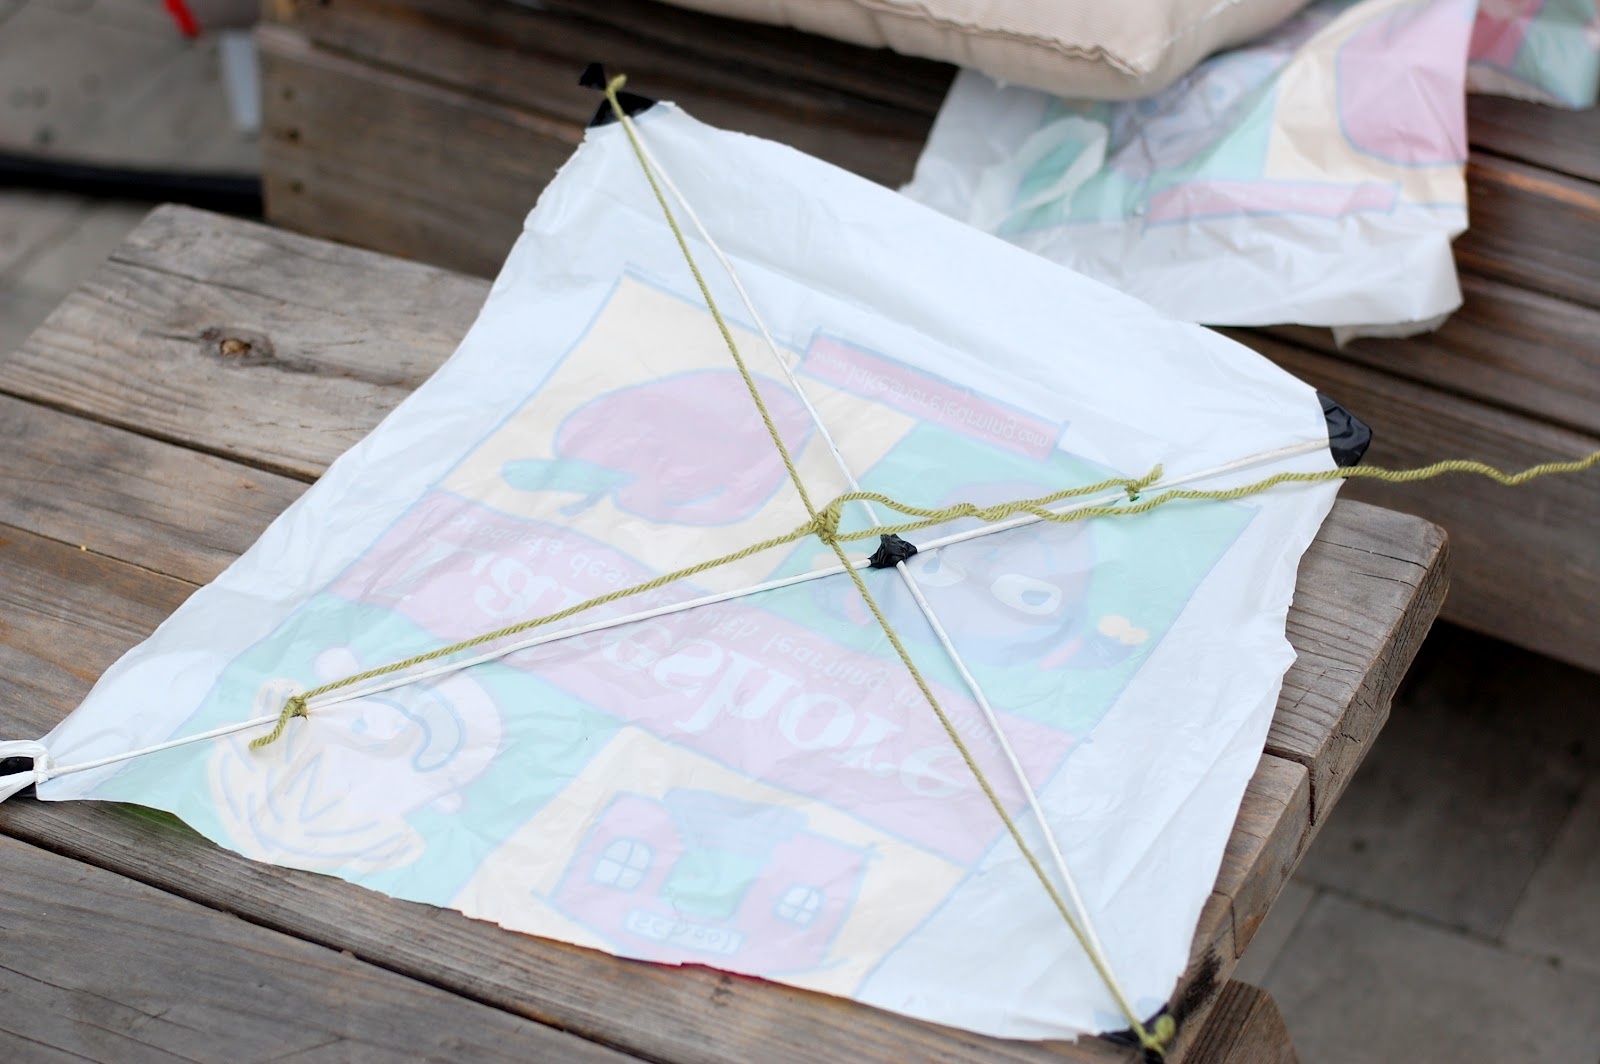
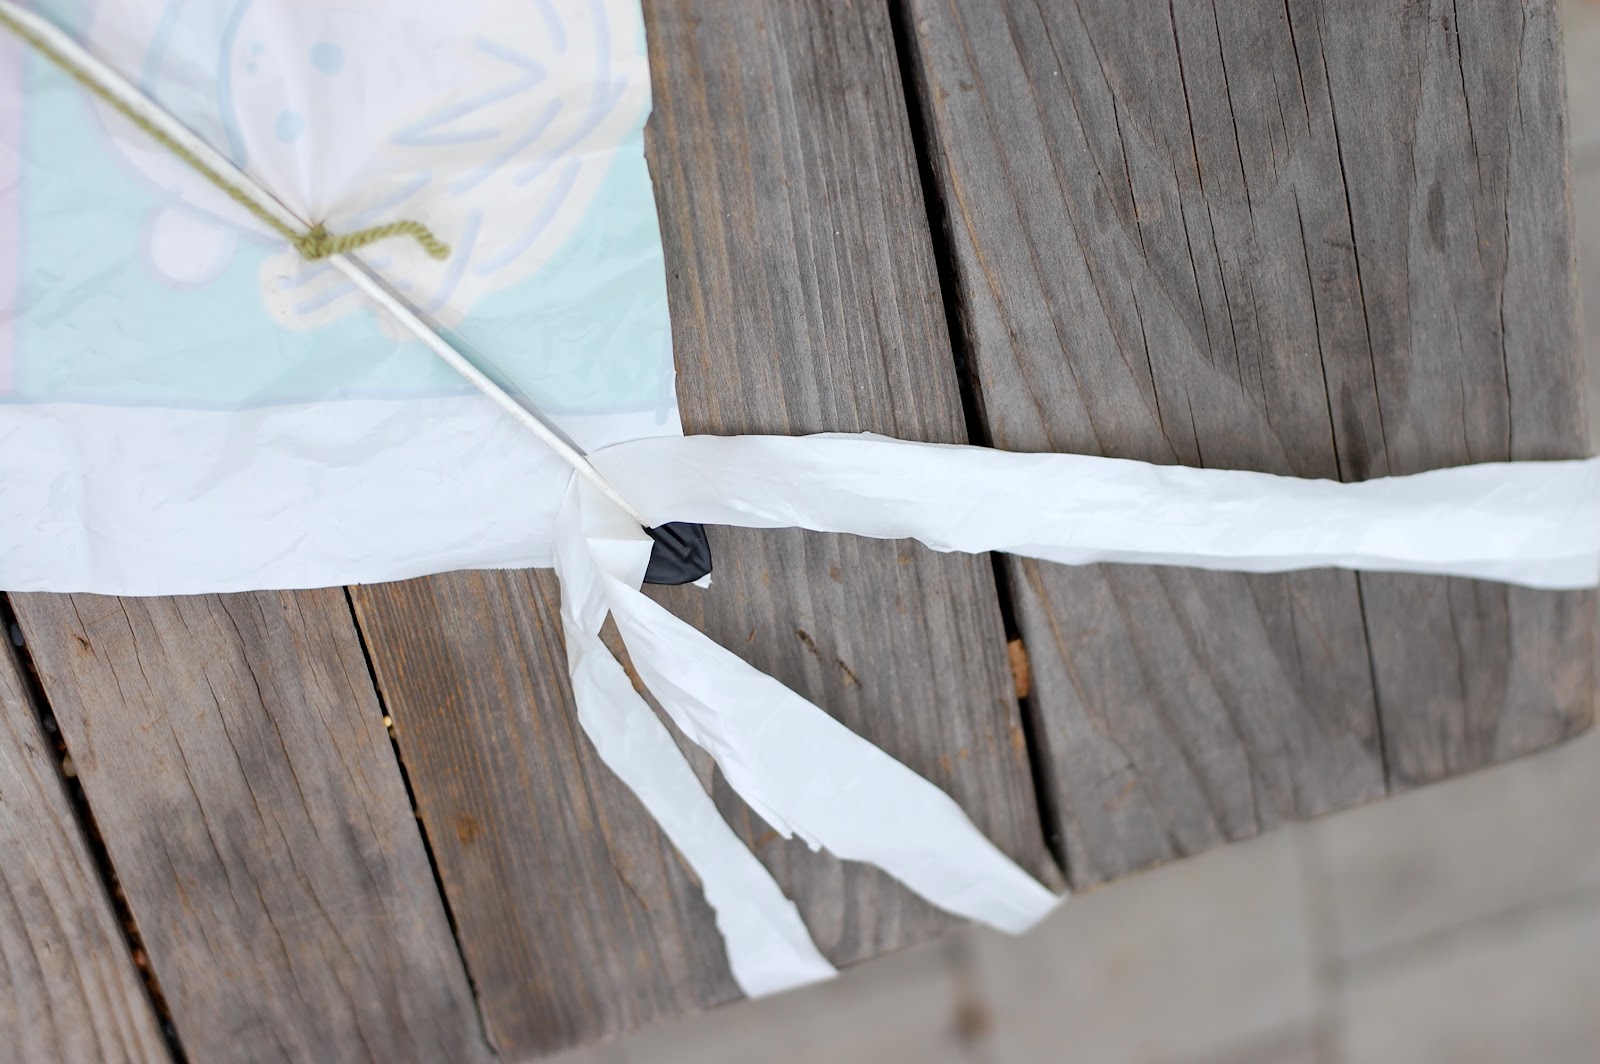
About 3 inches from the top and bottom of the kite make two small holes on either side of the dowel. Use string to secure the dowel to the front of the kite. Run the string down to the bottom of the kite and tie the other side.
8. Tie a piece of string to the dowel below the knot you just created on the backside of the kite. This should create an X on the back of the kite and will be where you attach your lead. Attach the lead to the middle of the X and secure with a slip knot.
9. Cut a few long strips of plastic from the remaining parts of the plastic bag and adhere to the bottom of the kite.
10. Now it’s time to go out and fly!
Help your child out by releasing a bit of string, holding the kite up above your head, and telling them to run in the opposite direction. When you start to feel a pull on the kite let it go and watch it take off!

 Every week Danielle brings great kids crafts to Formula Mom! Danielle is a work-at-home-mom of two beautiful kids and writes over at the Simmworks Family Blog. She loves to blog about her family, healthy living, going green and crafting. Danielle would love for you to come visit! You can reach her on facebook and twitter as well. If you have any questions feel free to email her at [email protected].


… [Trackback]
[…] Here you will find 70383 additional Info to that Topic: acraftyspoonful.com/diy-recycled-kite/ […]