
About a year ago we started our house search by heading out to a few model home tours. We were trying to gauge how much we’d be able to get with our budget but we were also looking for home decor ideas as well once we did move into another home.
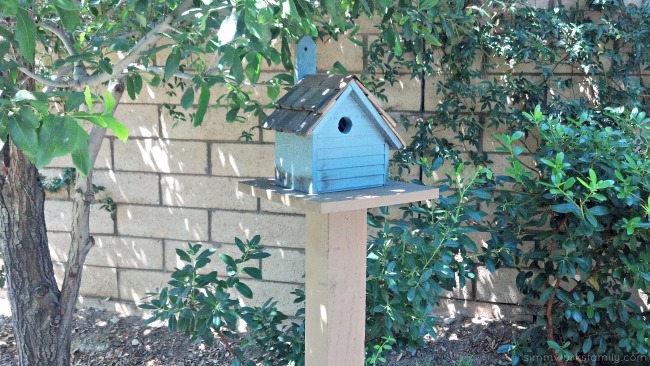
While at one of the model homes we saw some adorable birdhouses on posts that I knew I wanted to replicate once we found our home. So I grabbed a photo, showed to my husband, and he got to work using our new Arrow Fastener staple gun we received for review to finish everything off.
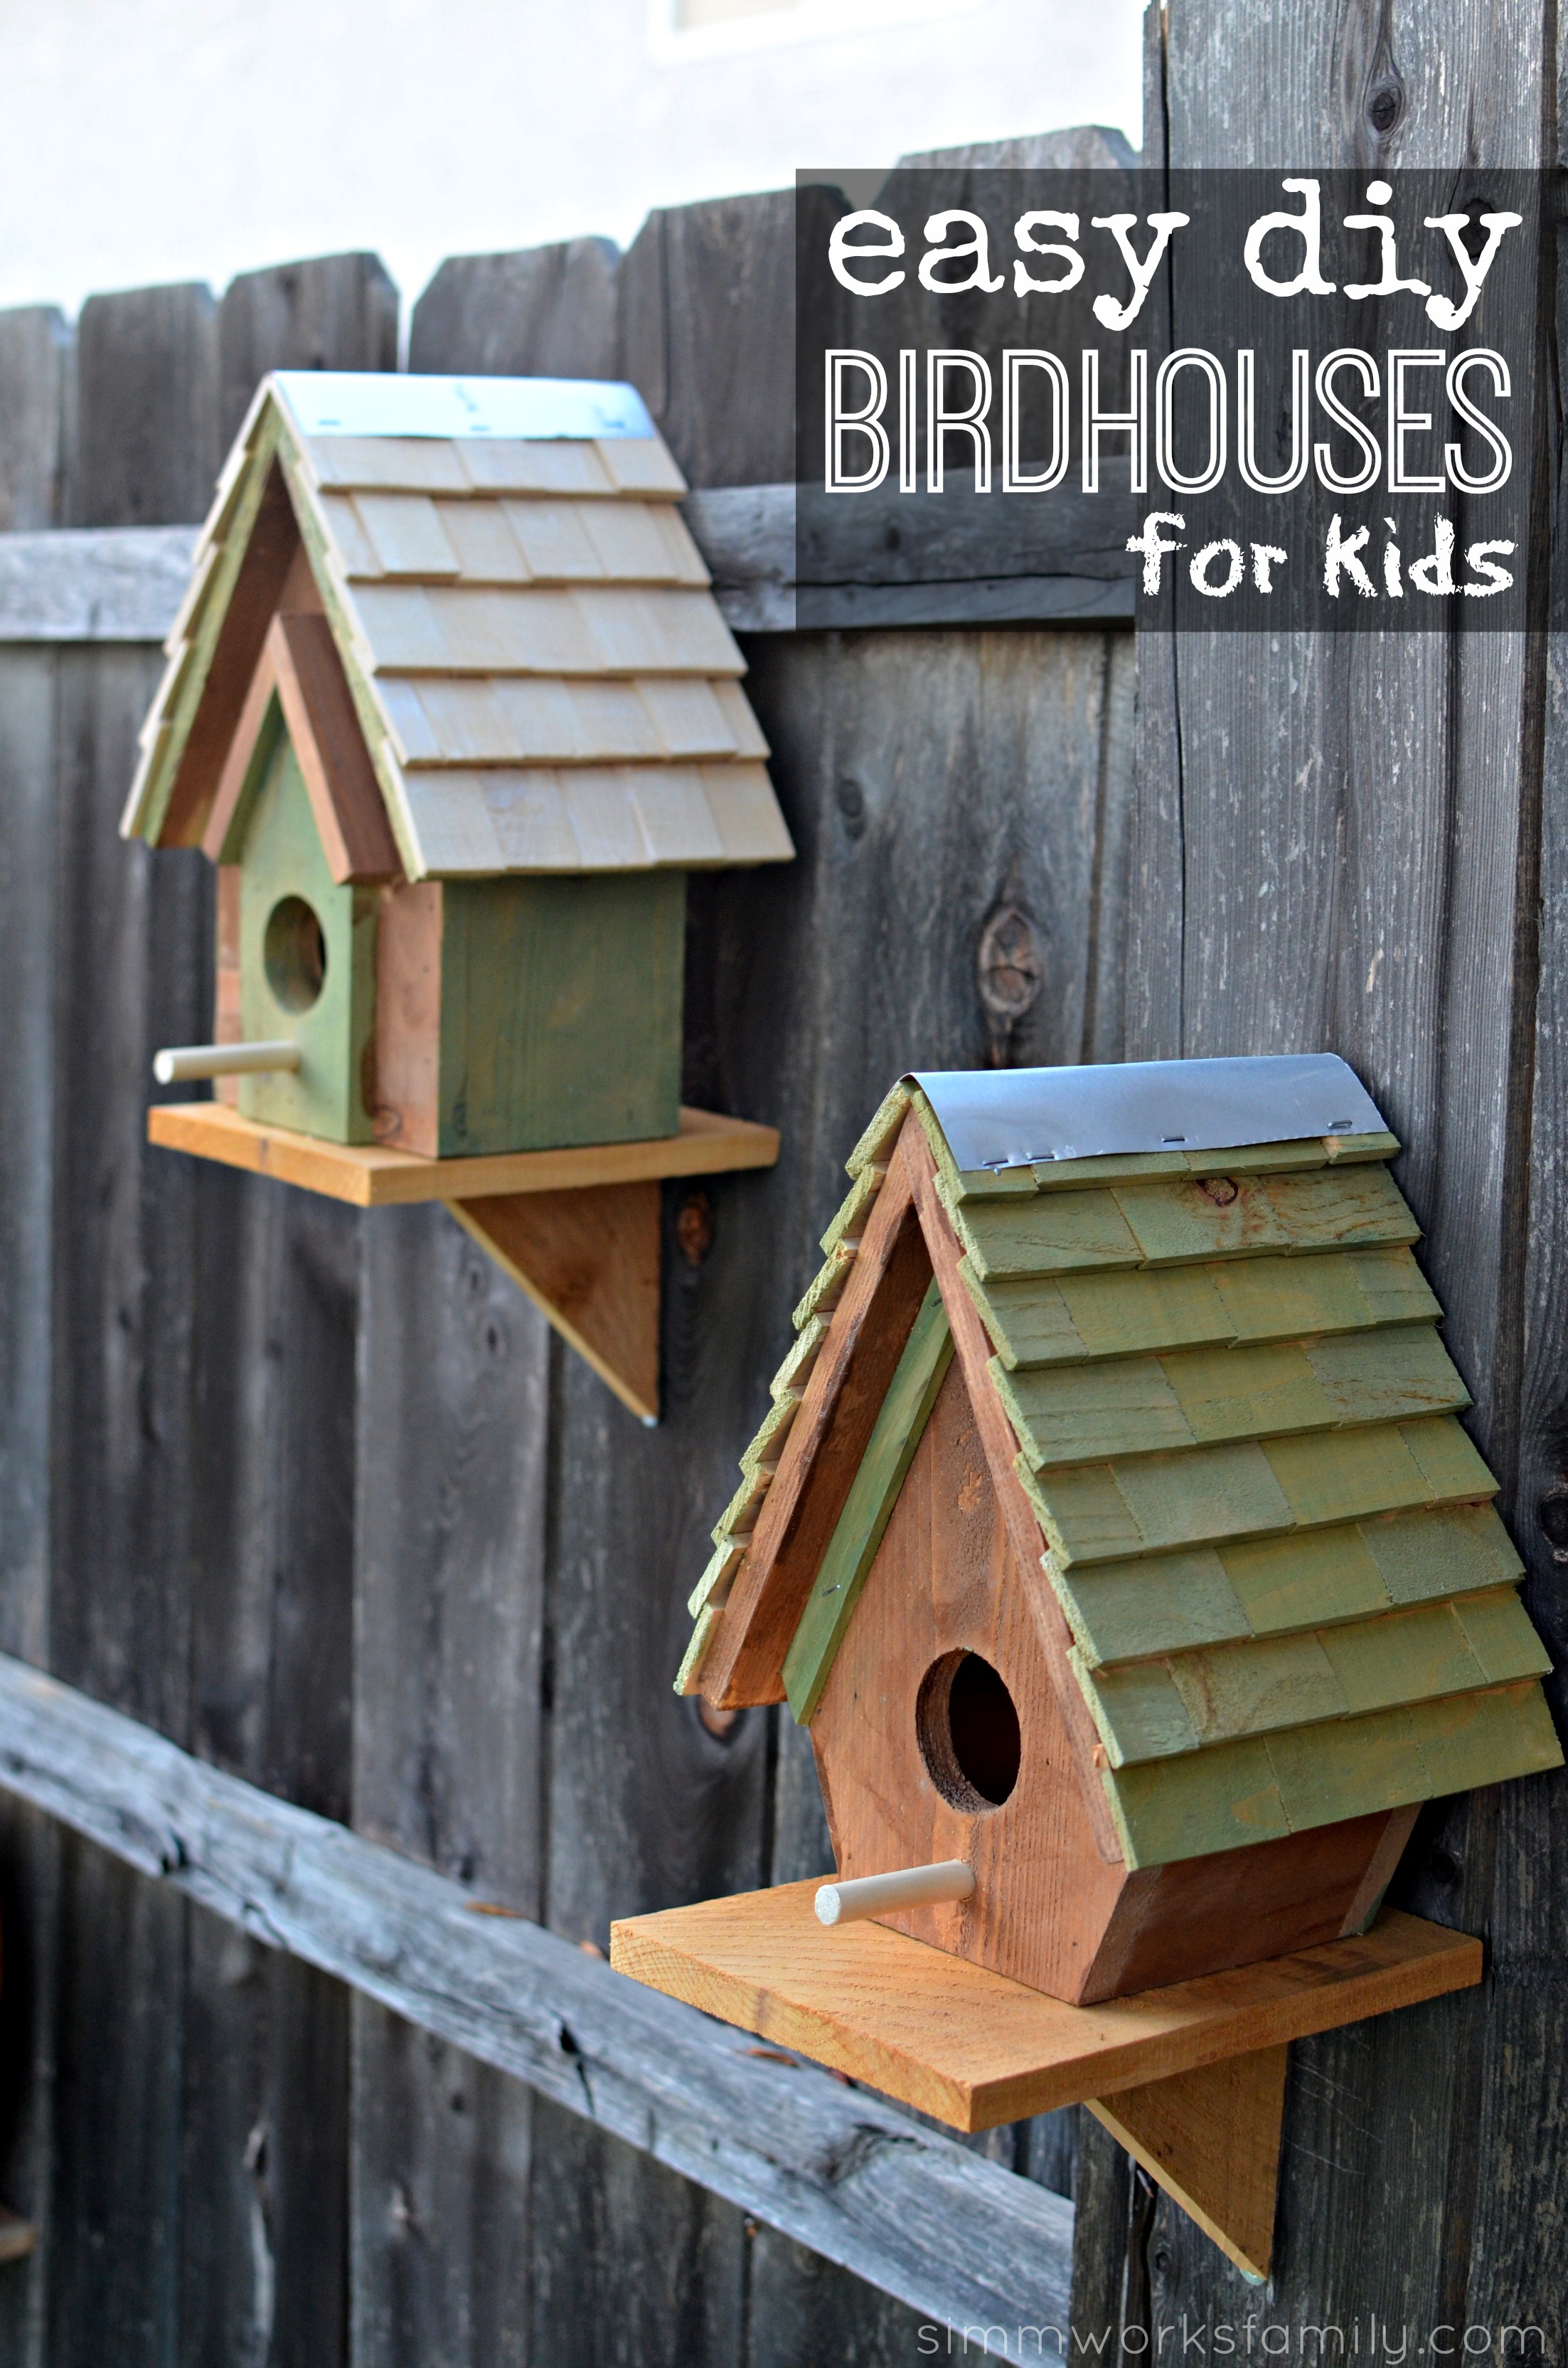
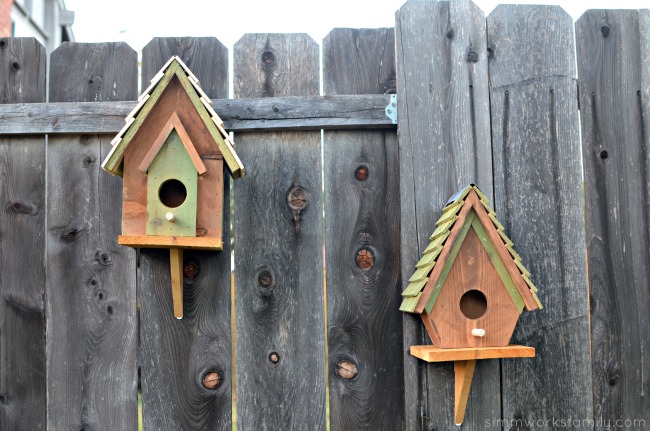
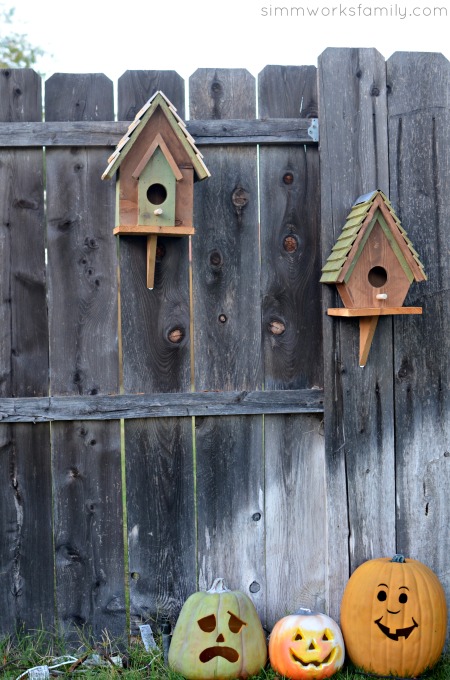
While our birdhouses aren’t on posts, my husband just added some platforms on our fence for our pumpkins for Halloween. After building the birdhouses with the kids (my son loves helping out in any way he can) we perched them on top of a few of the platforms.
This was a great project that we got the kids involved with and we can’t wait to figure out what the next project will be.
Our master plan? To make various birdhouses in different designs to go on the rest of the platforms once Halloween has passed. What do you think?
DIY Birdhouses
What you’ll need:
- 3 boards of 6′ x 8″ cedar fence board (dog eared top is ok)
- 1 – 1/2″ wooden dowel
- 1 roll 10″ aluminum flashing
- Snips for cutting metal
- wood glue
- 1″ or bigger brad nails/or an Arrow electric brad nailer
- table saw (makes it easier for some cuts, but only required for making shingles)
- A couple of packages of wooden shims (for shingles if no table saw)
- jig saw
- 2 1/4″ hole saw and a drill
- Arrow T50 stapler
- T50 9/16″ Arrow staples
- T50 3/8″ Arrow staples
- Behr paint stain samples (in colors of your choice)
- foam brushes
- chip brushes
What you do:
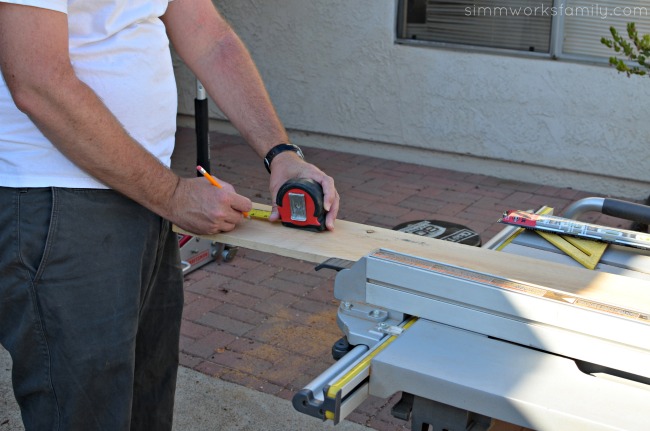
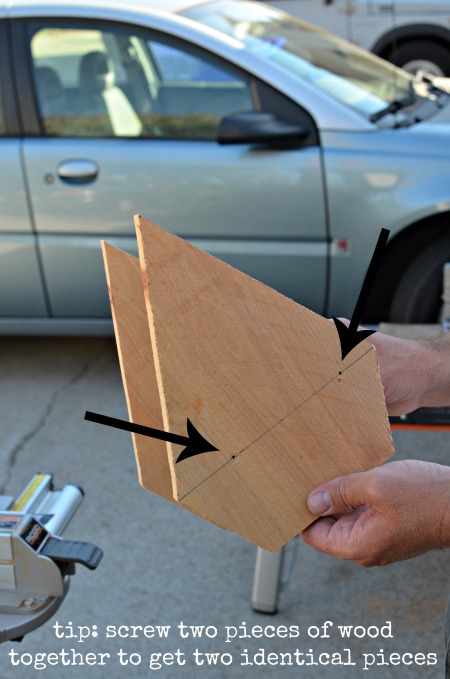
1. FRONT/BACK: Use the provided templates below as a guide. Take one of the fence boards and lay it down flat on a table. Start at the bottom of the board, use a ruler and pencil and sketch out the shape of the front of the bird house on the board.
At the top of the sketch, cut the board straight across so you have a piece that only needs the angles cut out to complete. Take this cut piece and lay it on top of the remaining longer piece.
Clamp or temporarily screw the pieces together so that you can cut out the front and back pieces in one shot. Use the jig saw and follow the lines. You should now have the profile of your bird house cut.
SIDES: Now cut two simple rectangles to form the sides and connect the front and back pieces. The profile of the bird house will determine the height of the side. The width should be about 4″. This width will allow your roof to overhang the sides later.
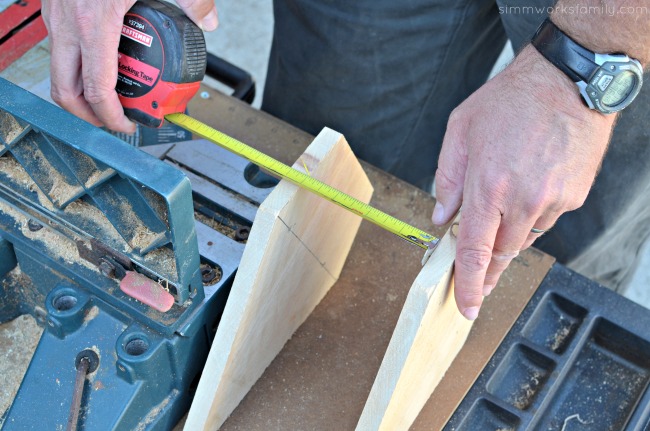
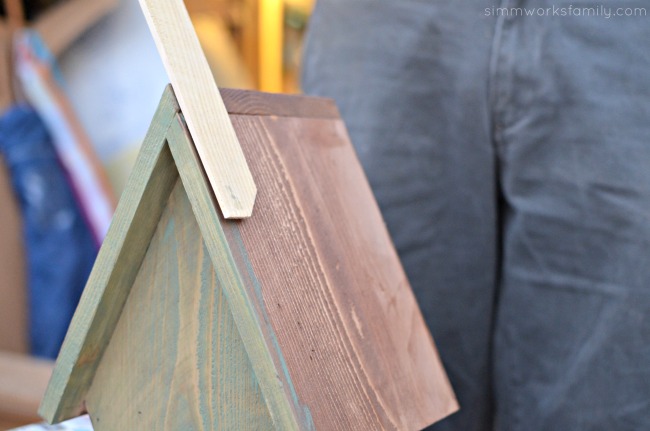
ROOF: Take a fence board and measure 8″ from the end. It generally will look better if you make this cut with an angle on it so you get a nice tight peak. It does not have to be exact. Take your jig saw and set it to about 30 degrees for template 1 and 25 degrees for template 2. Make the cut. Set aside the piece you just cut and return to the left over board. From the cut end with the angle on it, measure 9 1/4″. Return the saw back to 0 degrees and make the cut.
DETAIL: Template 2 has a simple cut out affixed to the front for some extra dimension. Just trace out the design on another piece and cut it out with the jig saw. To make the small roof detail on this piece, use the same technique for making the roof. The width on these pieces is only 1″. Adjust the length to what you feel looks best. Template 1 has some trim applied. It is approximately 1/2″ X 1/4″ wide. A table saw was used to make these, but you could use the jig saw to carefully rip a 1/4″ (x 24″) off the edge of a fence board to end up with 1/4″ x 3/4″ pieces.
SHINGLES: Optionally you can go the extra mile and cut out approximately 60 shingles.
- Option 1- If you don’t have a table saw you might consider using a pack of wooden leveling shims and cutting them down.
- Option 2- Using the table saw rip three pieces the full length of the board to 1 1/2″ wide. Next, take the three pieces you ripped and turn them on their side (the short edge should be down on the table). Adjust the blade so that it is about 1/4″ away from the fence. Run the pieces through so that you are splitting them in half. You then have 6 – 1/4″ x 1 1/2″ strips. Stack then together and start cutting them into 2 1/2″ x 1 1/2″ “tiles.” If you don’t have a table saw you might consider using a pack of wooden leveling shims and cutting them down.
2. Assemble birdhouse pieces with wood glue and brad nailer
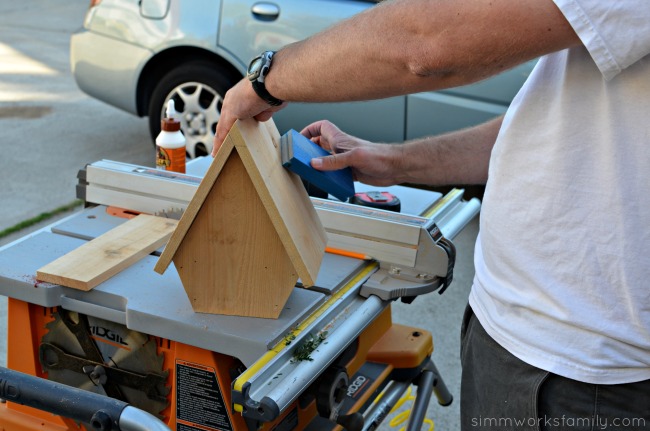
3. Sand birdhouse smooth

4. Using hole saw, drill hole for opening
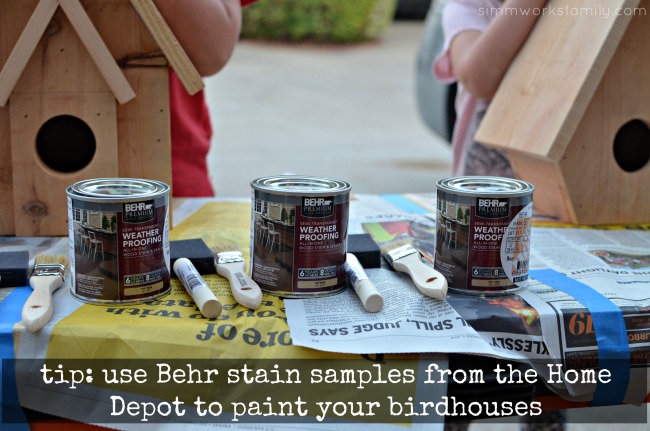
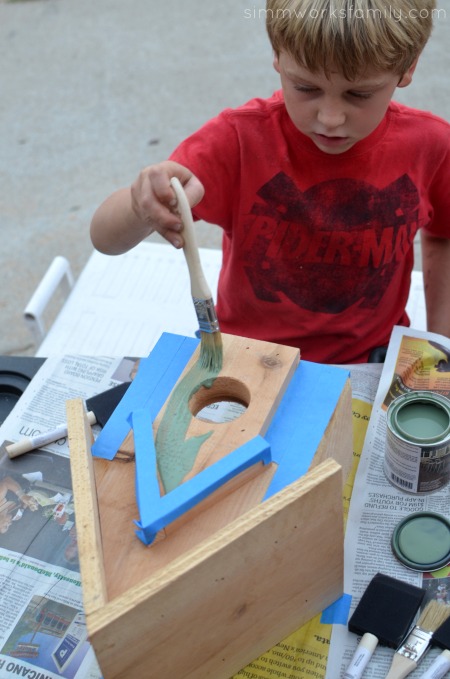
5. Using Behr paint stain samples, let kids stain the houses. Use different stains for the trim to allow it to pop.
TIP: To save a little money and play with multiple colors check out the Behr paint stain samples at the Home Depot (this is the only place we’ve found them so far). You can have them tinted to any Behr paint stain color. And you don’t have to pay $15+ for a quart of stain! We do the same thing with small paint samples for other wood craft projects.
6. Gauge the length of the shingles and trim you want to use and cut to size. (shingles and trim are whatever you prefer – our shingles were 1 1/2″ x 2 1/2″)
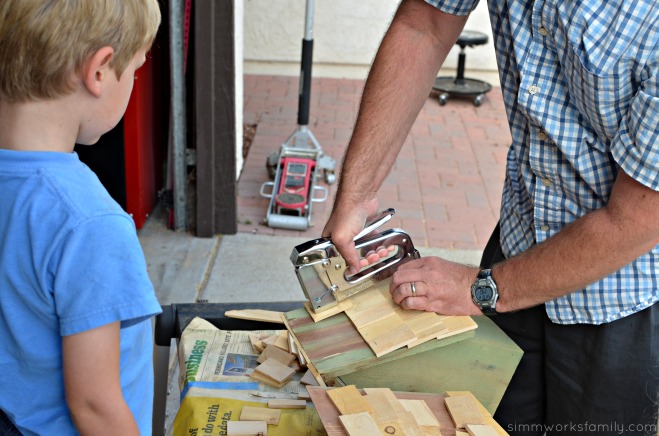
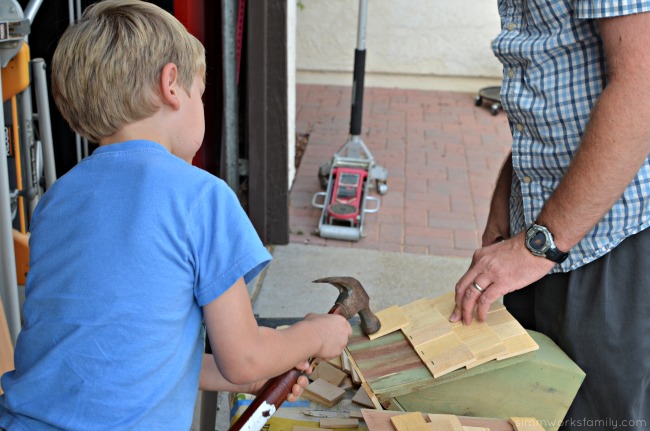
7. Using Arrow Fastener stapler, staple shingles to roof of birdhouse from the bottom up. Use a hammer to assure staples are flush with wood.
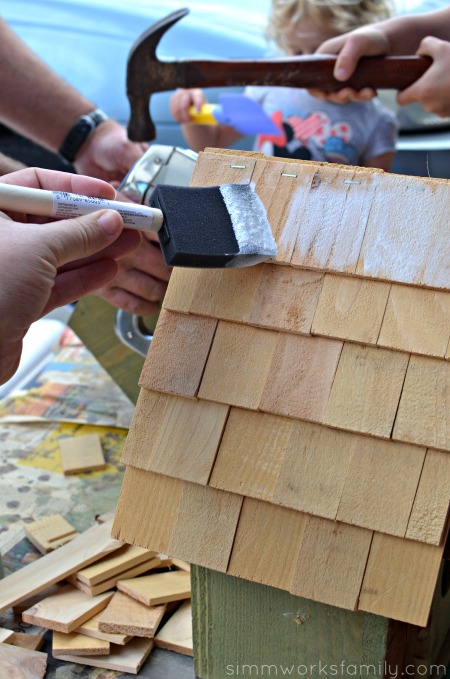
8. Paint shingles in a contrasting color stain.
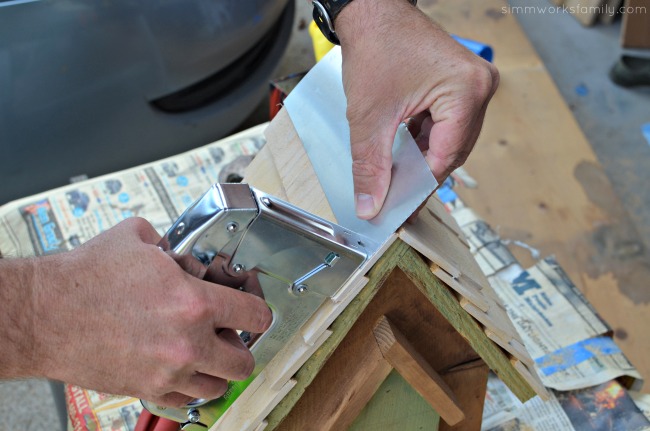

9. Measure and cut aluminum flashing to size to cover peak of houses. Secure with Arrow stapler and hammer into shape.
10. Drill a 1/2″ hole under the large hole for dowel perch. Add wood glue to one end of the dowel and put into hole. Once dry and secure, place birdhouses onto platforms and wait for birds!


