Summer is right around the corner! And what does that mean? School is coming to an end for another year. Why not do something special for your child’s teacher this year and let your child create an awesome gift to give to them on the last day of school?
This pencil holder is not only easy to make but versatile as well. You can easily exchange the craft sticks for pencils, crayons, etc. Whatever you have extras of at home. And the holder doesn’t have to just be for pencils! You can even include a little treat or a gift card for your child’s special teacher.
While we were making this craft together my son worked on his colors, letters, and sorting! So not only was it fun to make, it was educational too! What teacher wouldn’t love to hear that?
DIY Pencil Holders
What you’ll need:
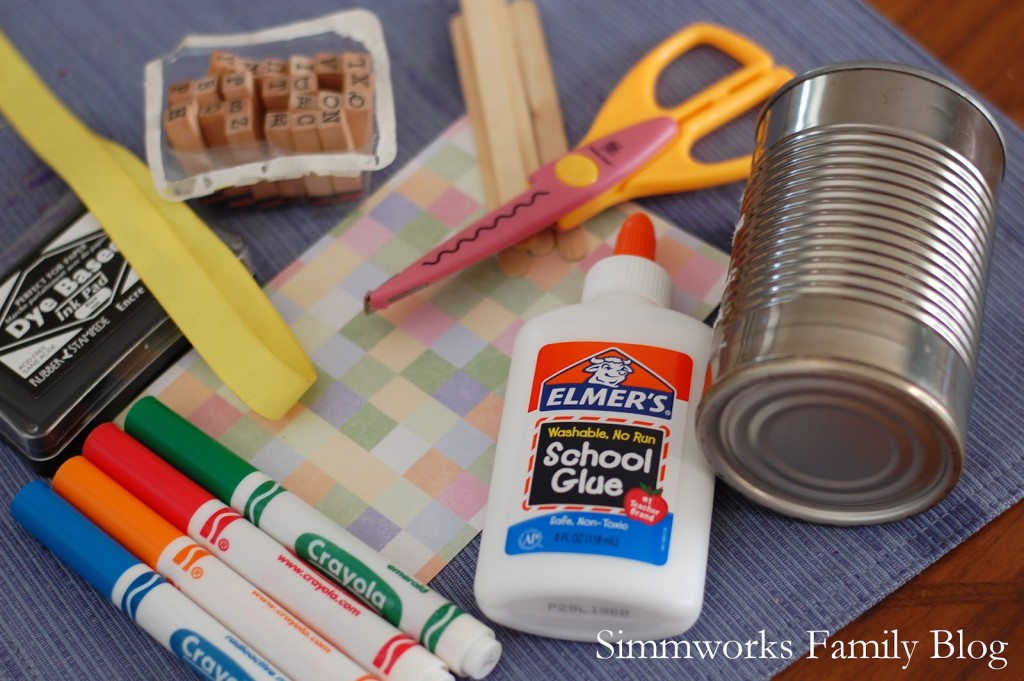
- can, label removed (soup or vegetable works great)
- popsicle or craft sticks
- markers
- glue
- scrap paper
- ribbon
- stamps & ink (optional)
What you do:
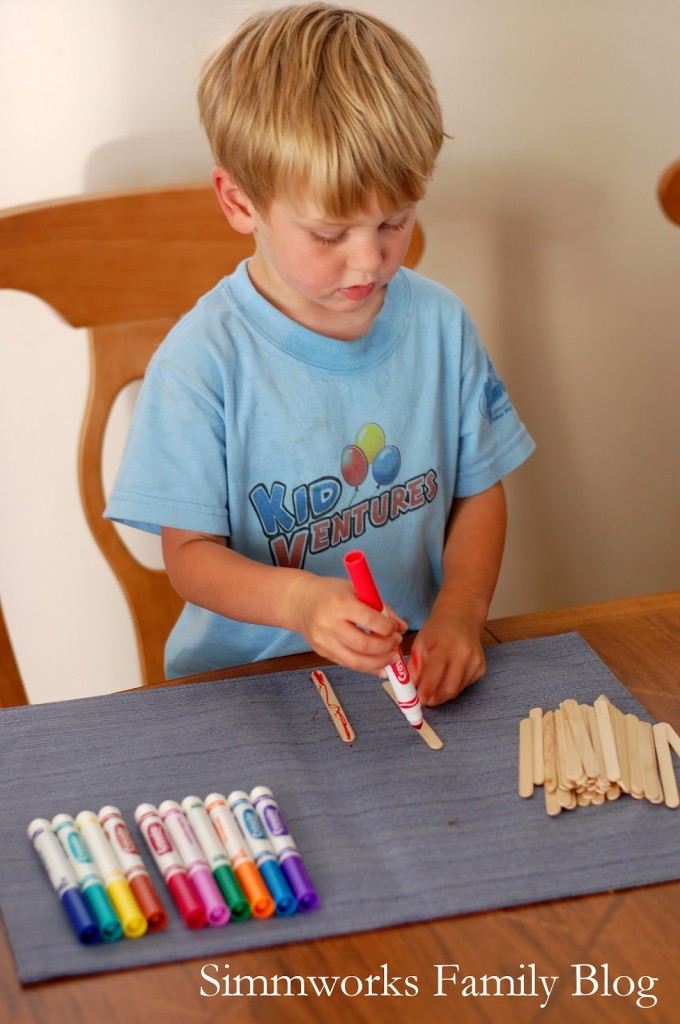
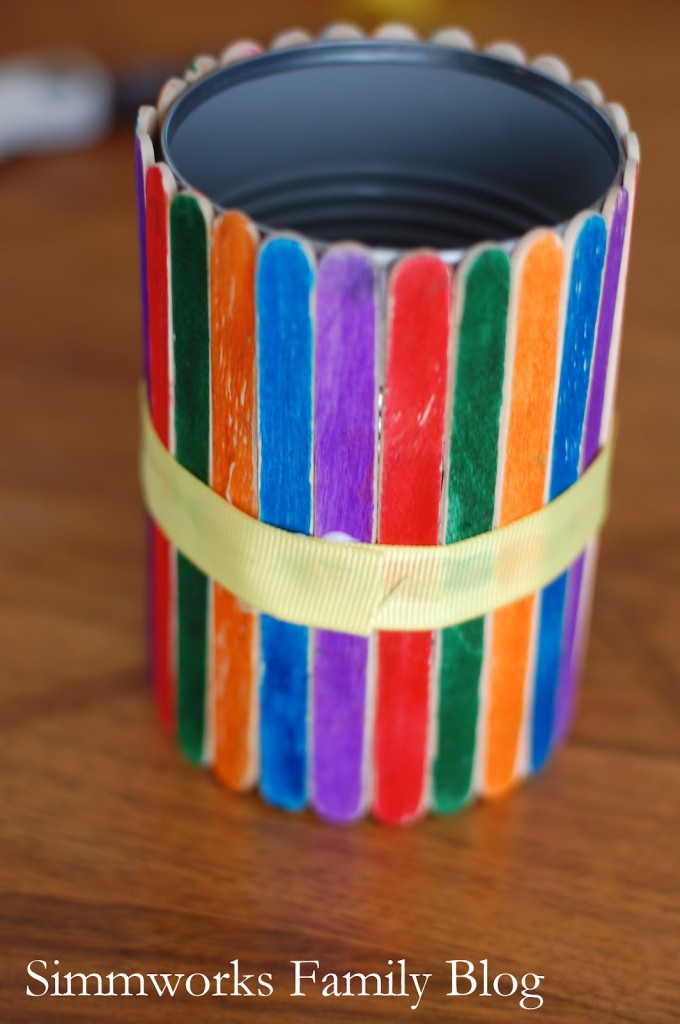
1. Let your child color the craft sticks. This is a great time to work on colors and sorting. Ask them to create a rainbow with the colors.
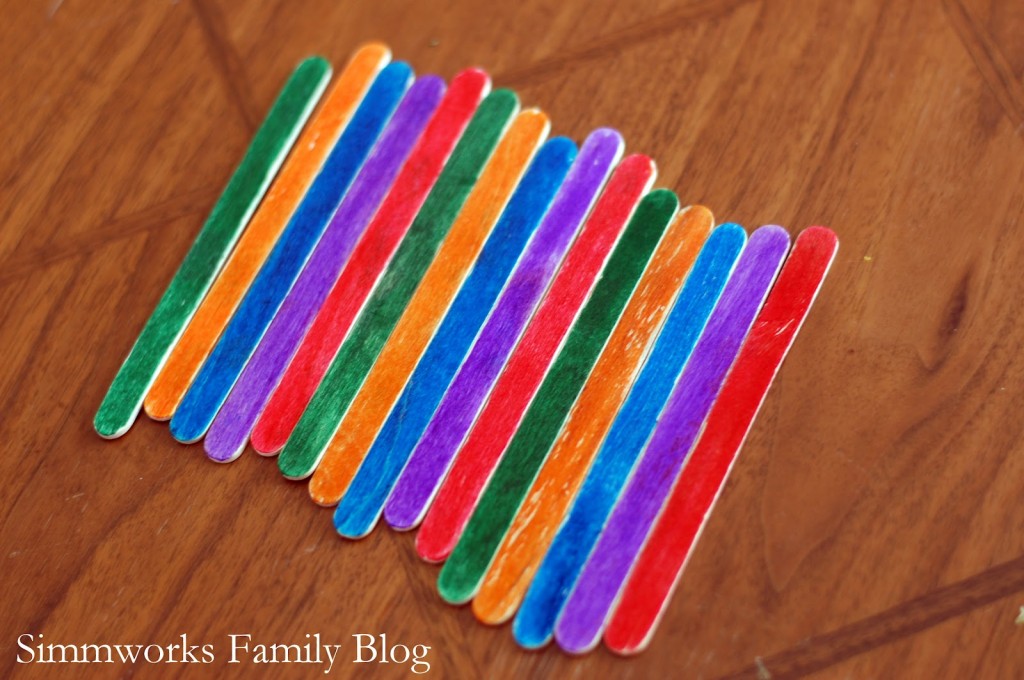
2. Line up sticks in the order you want to place them on the can. You can have your child choose this or ask them to follow a pattern you set out.
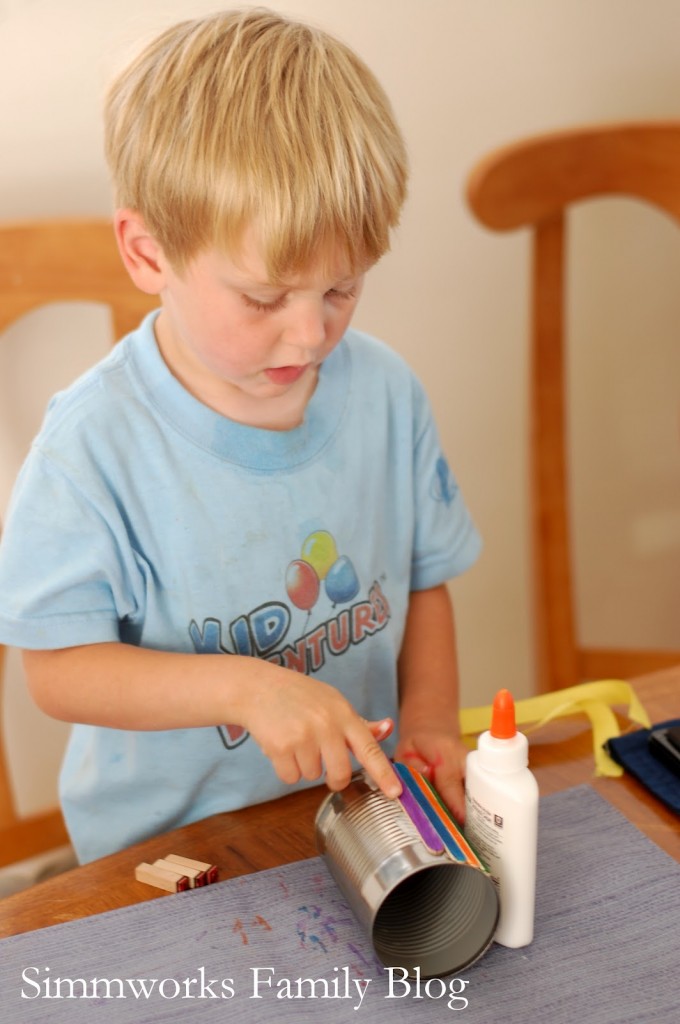
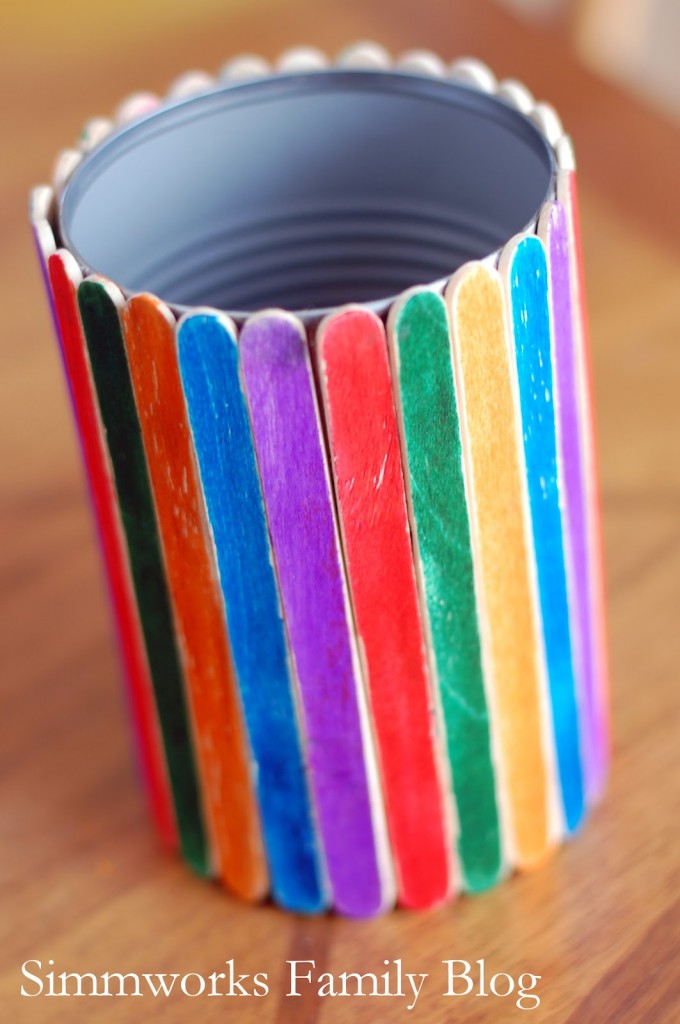
3. Add a thin line of glue to the non-color side of a stick and let your child attach to the can. Make sure to line up the bottom of the stick with the bottom of the can. There should be some overlap at the top.
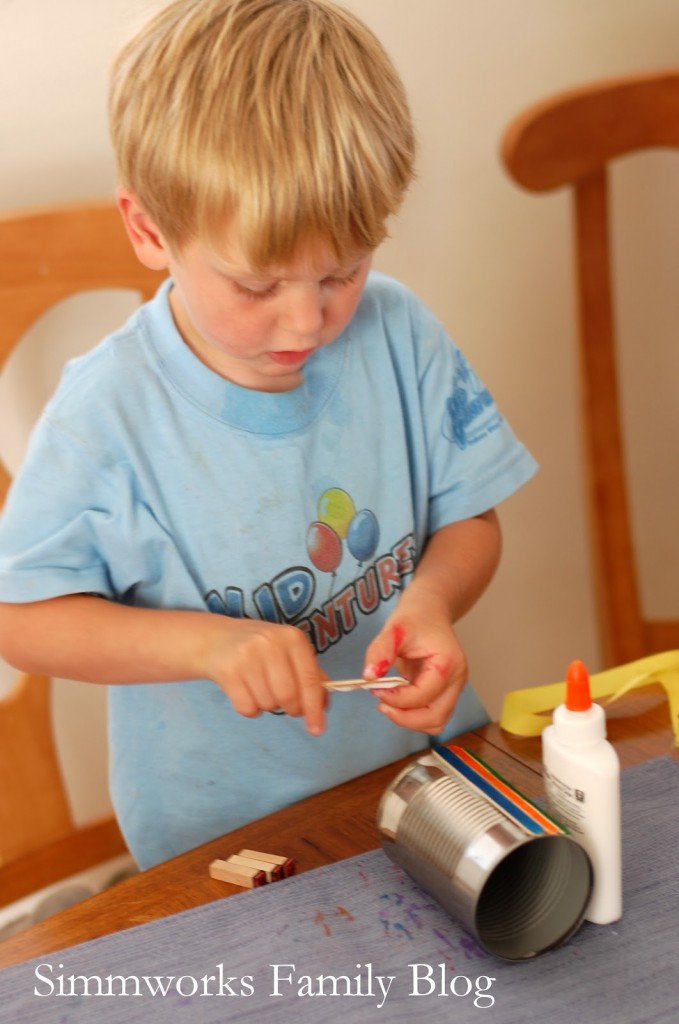
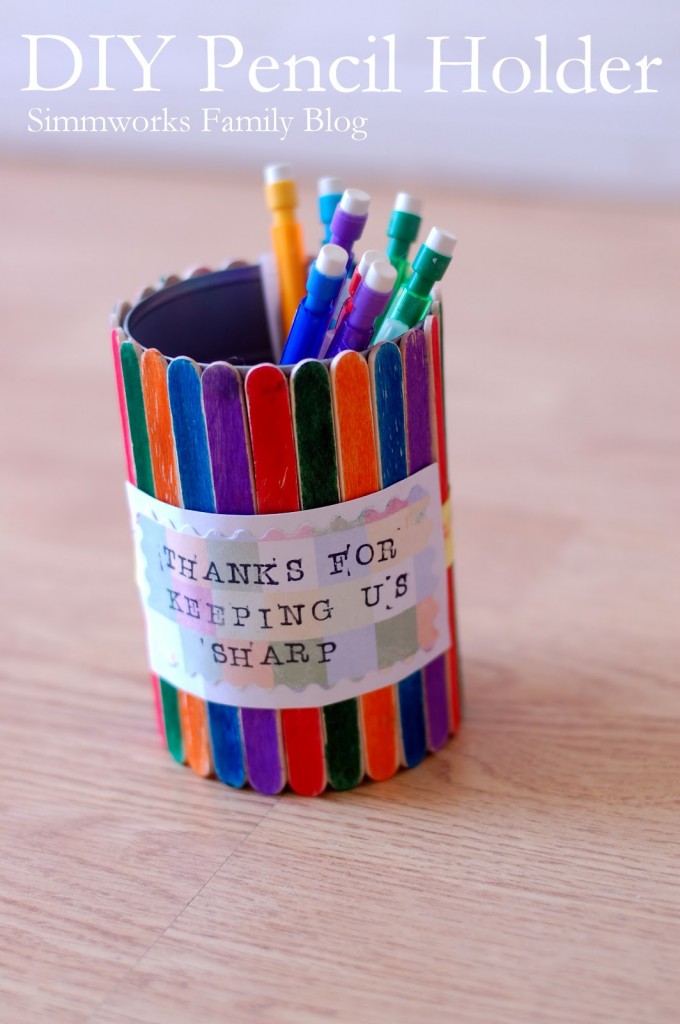
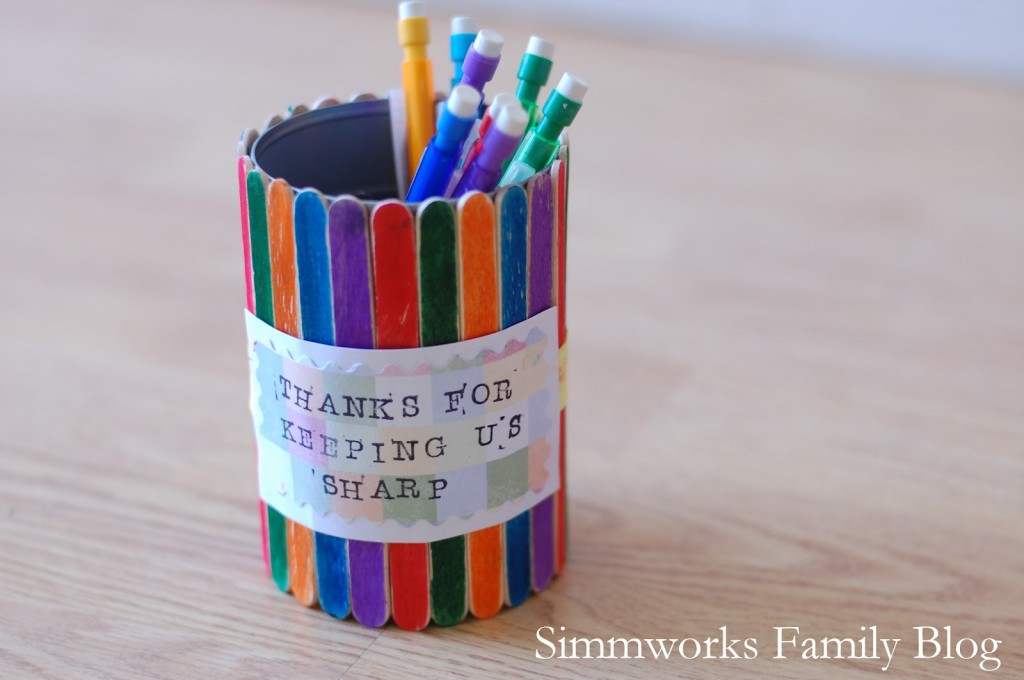
4. Repeat with the other sticks until the can is completely covered. We used 5 sticks in 5 different colors for a total of 25 sticks in all for our soup can.
5. Let the glue dry as you prepare your message or note for your teacher.
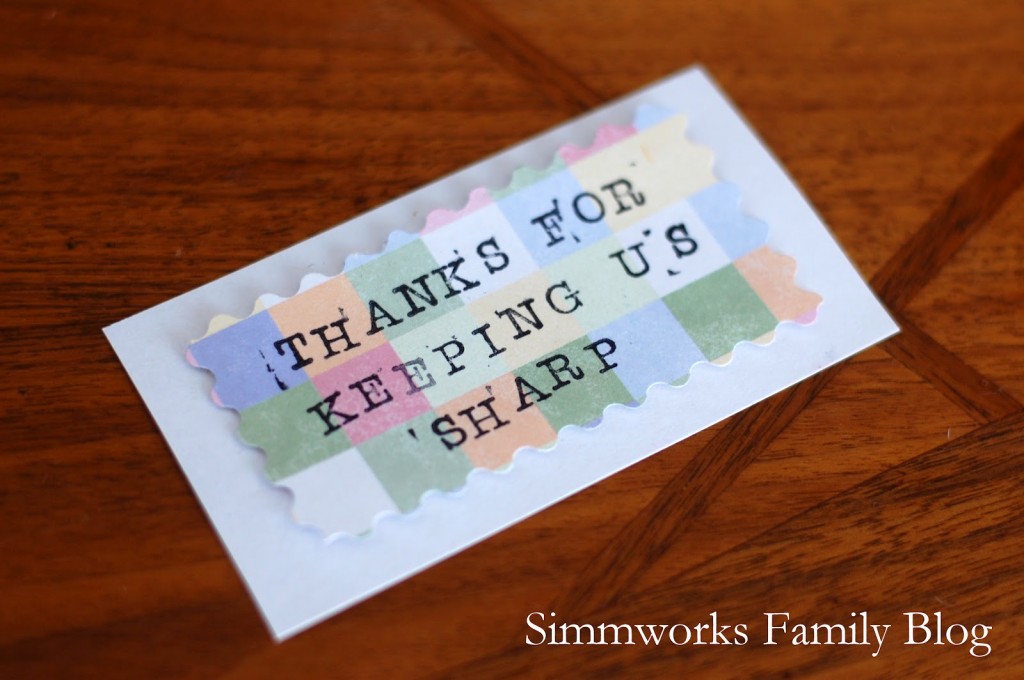
6. Stamp or write out a fun message on some cardstock for your teacher! We used “Thanks for keeping us sharp” as a pun on pencils and learning. You can simply leave a sentimental message or another fun pun you find elsewhere.
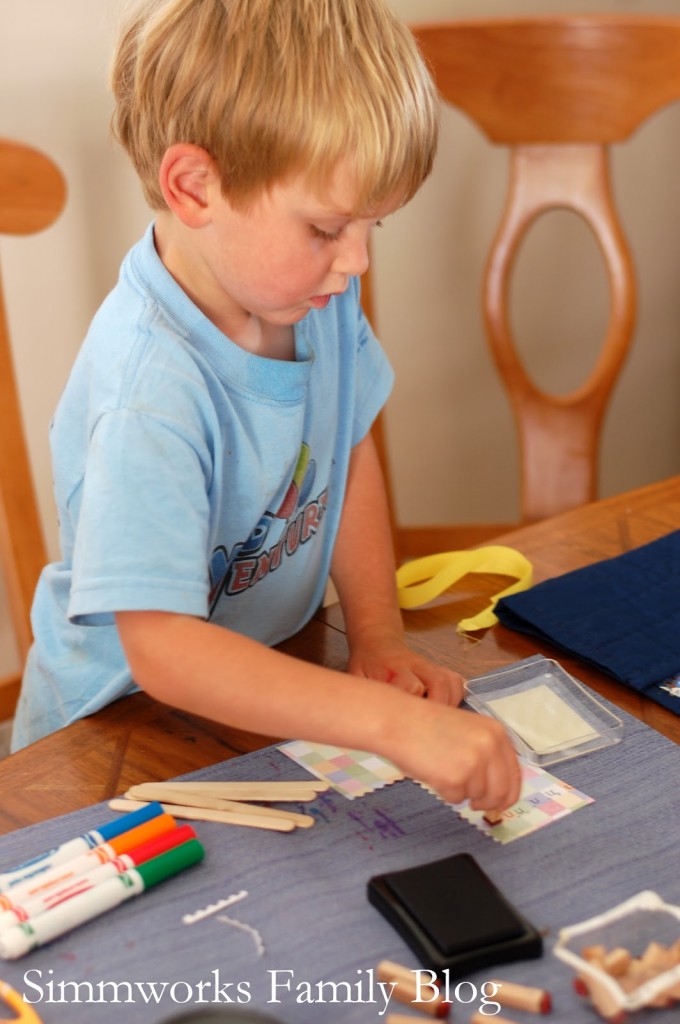
7. Once your message is stamped out, cut it out with scissors. You can use craft scissors with fun edges if you want to give it a different look.
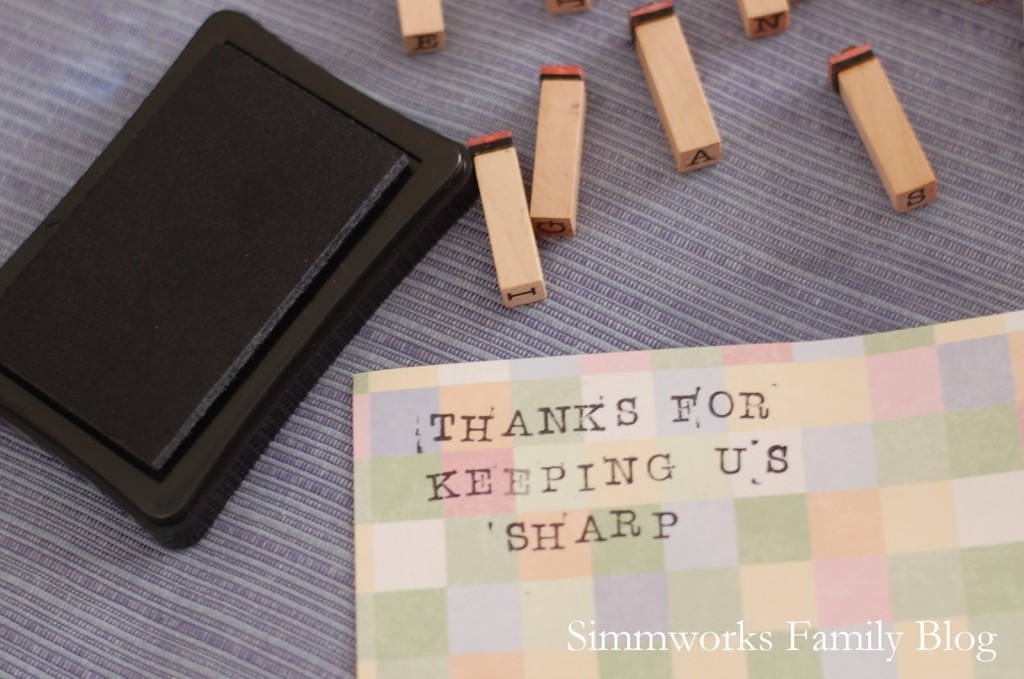
8. Layer your message on top of another piece of cardstock in another color.
9. Take the ribbon and measure out a piece that will wrap around the can.
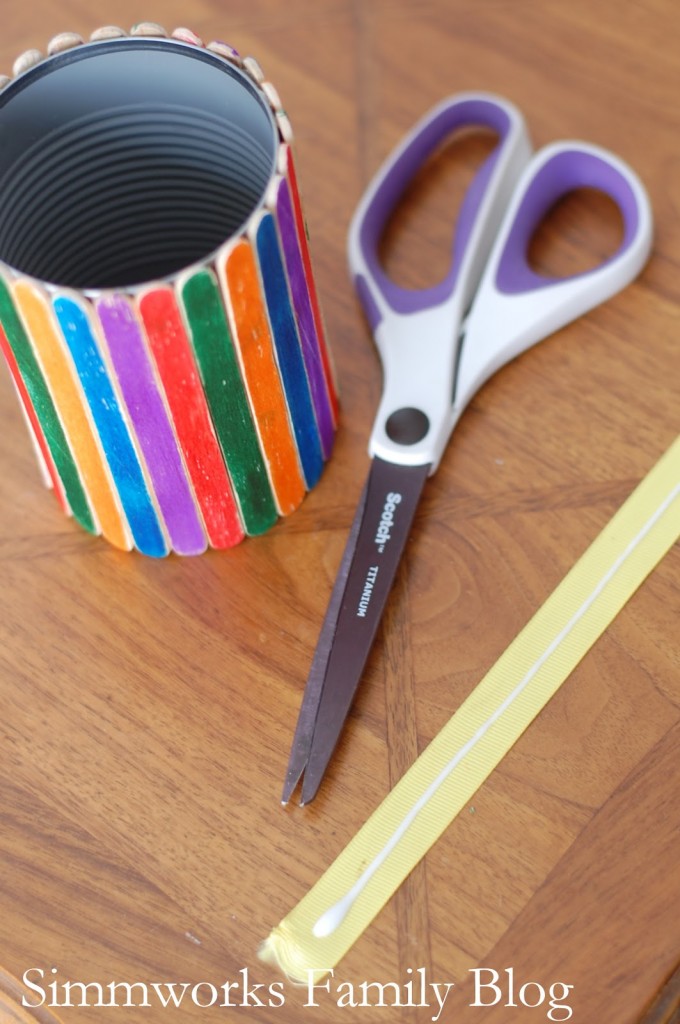
10. Secure ribbon to the middle of the can with a bit of glue.
11. Glue the message onto the can in the middle of the ribbon. Add some rubber bands to keep it together as it dries.

12. Take off the rubber bands and gift your awesome pencil holder to your favorite teacher! Don’t forget to fill it up with some fun goodies.


Your point of view caught my eye and was very interesting. Thanks. I have a question for you.
You always have the cutest ideas! I love this and it’s simple enough that my kids could essentially do on their own! Fabulous!
Fun! My son would love making one of these pencil holders. 🙂
Oh wow. What a really great idea.