How to Make a Pool Noodle Boat + Pirates of the Carribean: Dead Men Tell No Tales on BluRay!

Looking for some fun STEM crafts for your school-aged child? Why not make these fun pool noodle boats and challenge your child to find a design that will float and race! This post contains affiliate links. By clicking on the link, I will receive a small amount of money back if you purchase anything. 

This summer we spent a lot of time outdoors. Whether we were playing, exploring on our own, or making updates around the yard at the house, it just made sense to stay outside as much as possible. And with that, we also wanted to spend time with friends so we made sure we didn’t miss the movie night hosted at our kids school. 

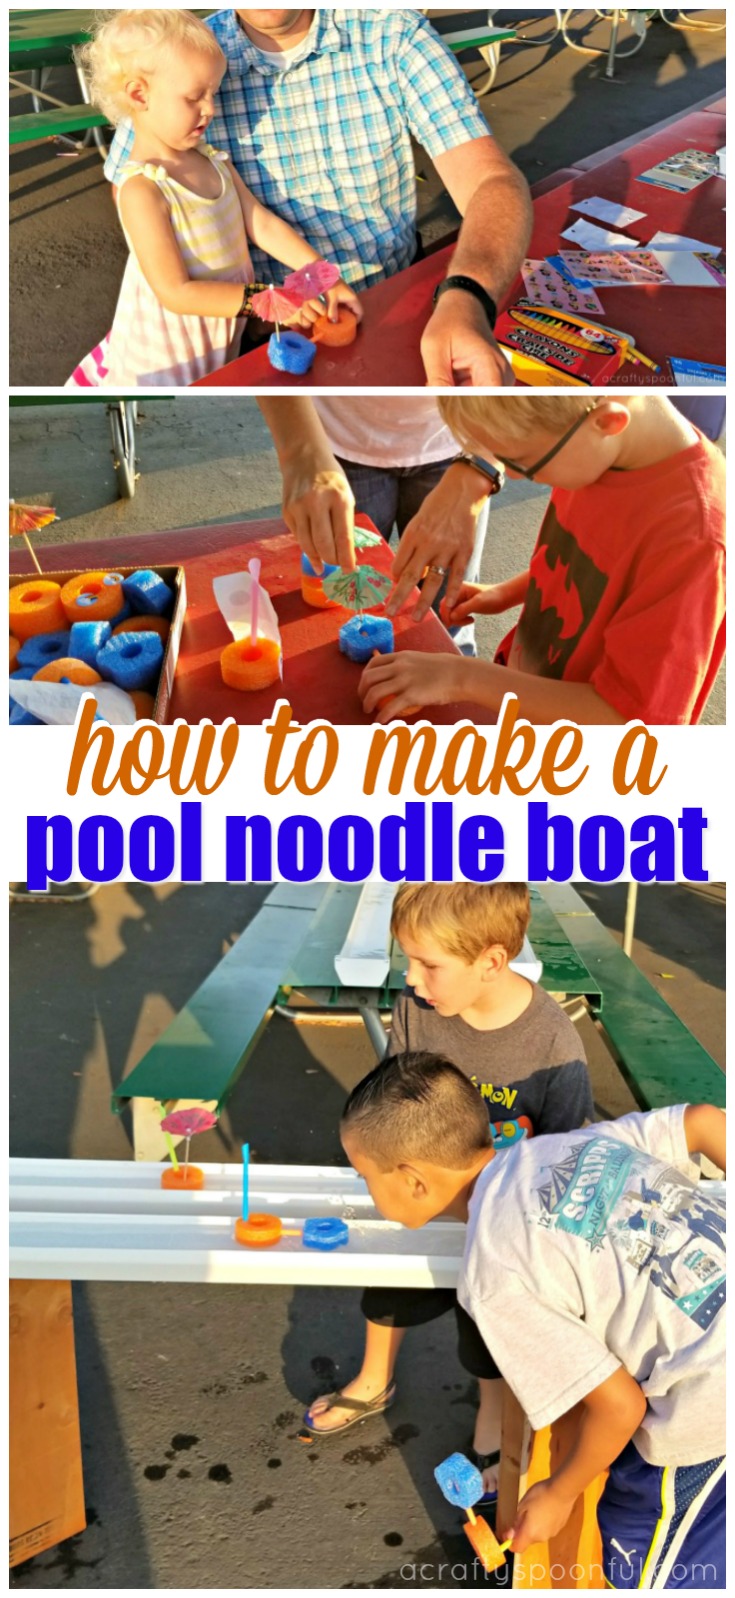
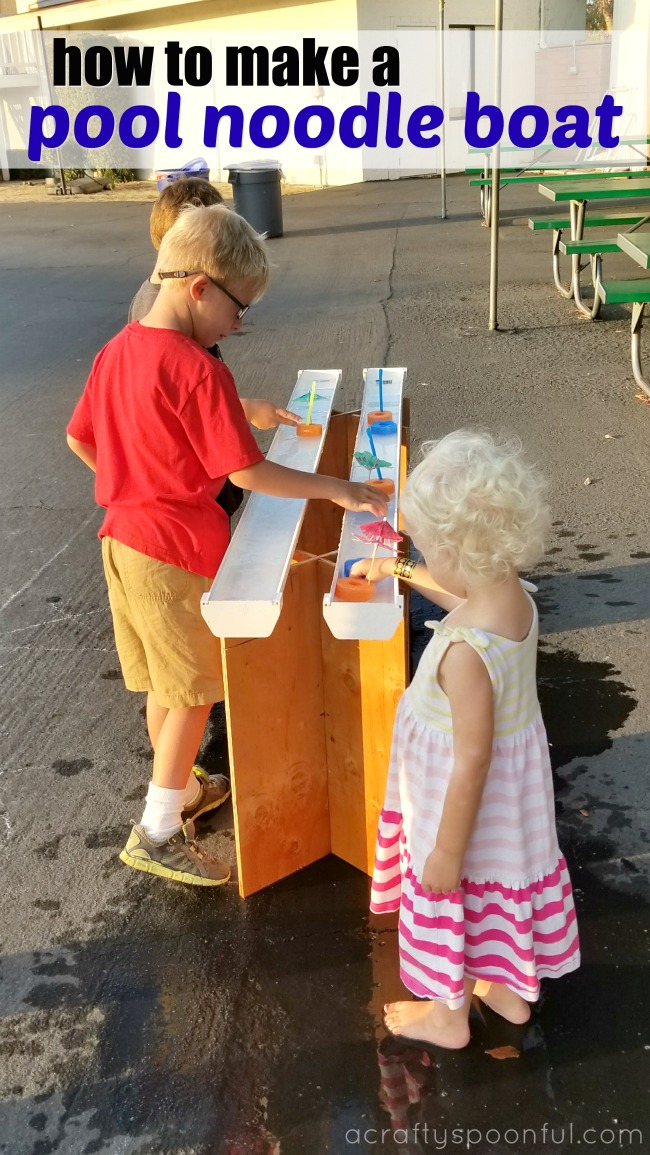
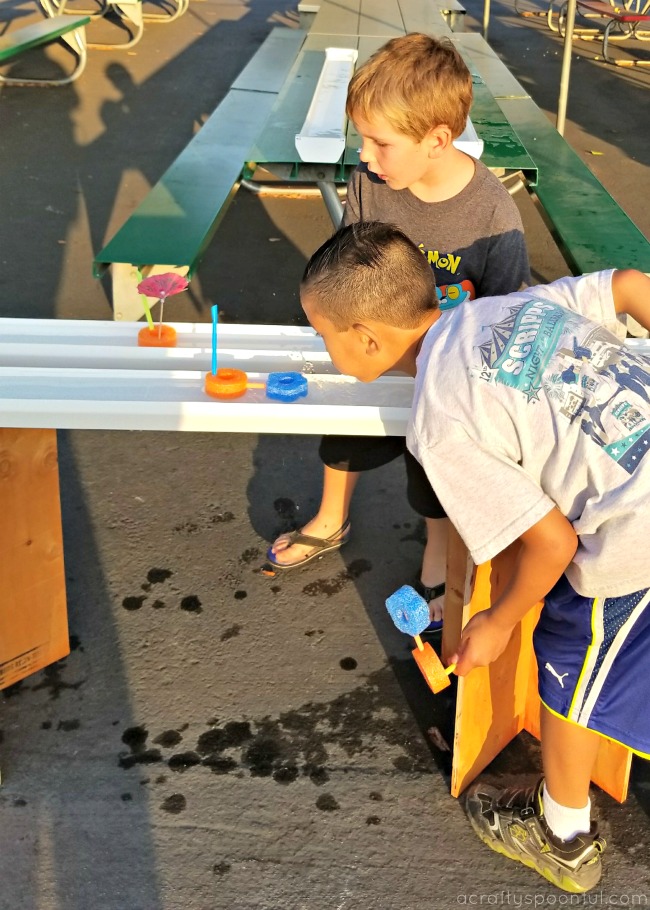
In celebration of the great weather and being outside, we put together a cute pool noodle boat station where kids could come up and design their own boats and race them against their friends. It was a great activity to share before the movie started and kept the kids active as it became dark. 

What we loved was how easy it was for the kids to “get” it and start to create their own designs with little to no help from us. And I loved seeing all of their final designs once they were done decorating them. If you’re looking for a great outdoor STEM activity for the kids to try, grab some pool noodles, straws, and parchment paper and make a pool noodle boat to race! 

How to Make a Pool Noodle Boat

What you’ll need: 

  • pool noodles (we preferred having 2 colors/shapes)
  • straws
  • parchment paper
  • hole punch
  • stickers/markers/crayons to decorate
  • drink umbrellas
  • Rain gutter with end caps

What you do: 

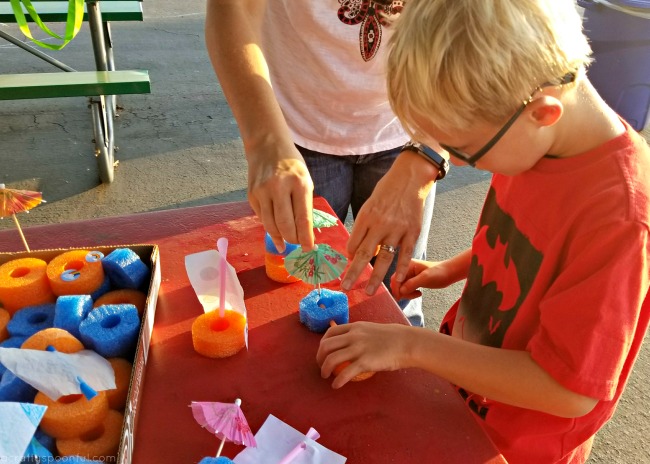
Cut the pool noodles into 1″-1.5″ rounds. Place in a shallow container. 

Taking the parchment paper, cut out sails in trapezoid shape. Punch a hole on the top and bottom that fits a straw. Place sails in container with cut pool noodles. 

Place straws in a cup with drink umbrellas and set next to cut pool noodles and sails. 

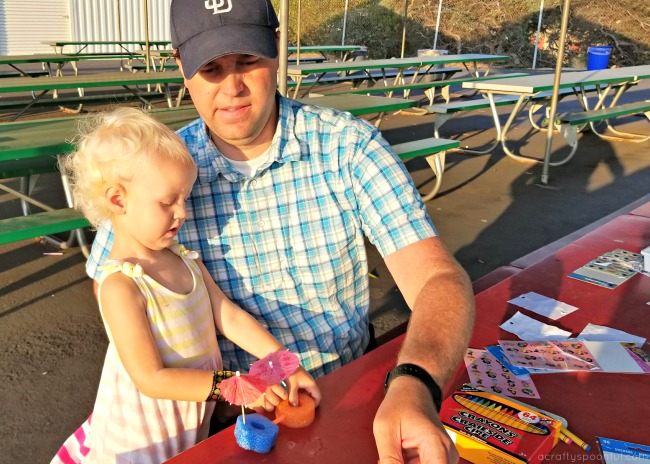
Let kids put together their boats using their own designs and then have them decorate them to make them unique. 

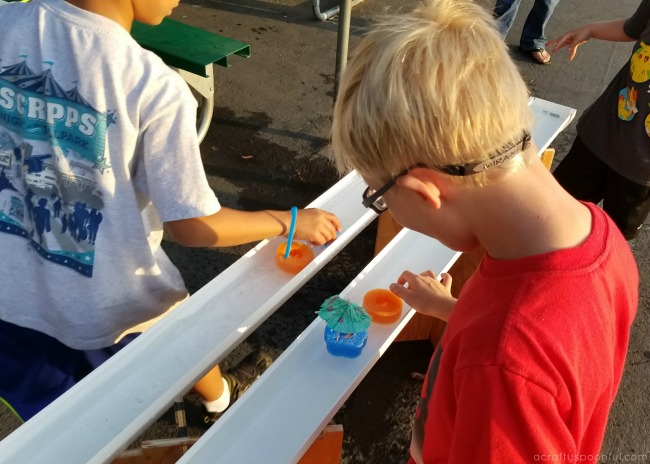
Fill rain gutter (with end caps secure) with water and let the kids race their boats. Try using extra straws to blog into the sails unless you already have a natural wind going. 

Did the boats float? Did they sink? Did they move down the rain gutter with ease? 

Pirates of the Carribean: Dead Men Tell No Tales on BluRay

Did you know that Pirates of the Carribean: Dead Men Tell No Tale is coming out on n 4K Ultra HD™/Blu-ray™ Combo Pack, DVD and On-Demand tomorrow? YUP!! This activity would be a fun way to celebrate this new release. Just set up a movie night with your family or invite friends over for some fun, grab a copy of Pirates of the Carribean, set up an outdoor movie night and enjoy a fun time outdoors! 

What’s your favorite outdoor STEM activities for kids? 

Like this post? Read more! 

Pin this article for later! 

Click the Pin button on the image below to save for later. 

Teaching Kids to Program with the Sphero SPRK+ Robot

There are a lot of robots available today that target grade school children with the intent of getting them excited about programming. Having worked in the past with low-level hardware (motors, switches, LCD Displays, and even thermal printers to name a few) it is really cool to see these kits simplify the pain I had to endure trying to wire up and troubleshoot components. These kits let you focus on the fun stuff right away. It is very gratifying once you get your program figured out and see it all working.

As part of a sponsored partnership with Best Buy, we tested out Sphero SPRK+ robot. The robot is a waterproof ball with no exposed components to damage. We started out by downloading their app onto an Android tablet. While it was downloading we set the robot on its charging cradle. The cradle is cool as it charges without physically plugging anything in (remember it is waterproof). The robot feels pretty solid and tough/durable. It has a clear body so you can see the motors and circuit board.

With the app installed we attempted to connect to the robot. We stumbled here as there are multiple robots that the app supports. Two of the robots listed visually look the same, but do have different names. After trying to connect for a whole day unsuccessfully we finally figured out that we were choosing the wrong robot! 

With that figured out the app and the robot were connected. Our first time in the app was also a bit confusing. After a while we finally kind of figured out how to walk through the program tutorials. Before we figured the tutorials out we tried driving the robot around manually using a joystick like user interface on the app. This was mildly satisfying, but proved hard to control. Because the robot is a ball it is easy to get disoriented. For example when you want to go straight ahead you might not be pushing up on the control as the ball/bot was facing a different direction causing it to go to your right. The kids however loved adjusting its LED light color hue. It has a color picker control that lets you set just about any color you want.

The robot really shines with its programming abilities. We walked through the first tutorial which had us program a path the robot should follow. When creating the program it gave us three ways to write the program: Draw with our finger, drag and drop function blocks, or write with a traditional programming language (Typescript). The drawing method was great for our kindergartner. The drag and drop method was well suited to our second grader. 

Finally, the programming via “text” method was advanced enough for me, but I found the drawing method the most fun and instantly gratifying. We simply used our finger to trace out a route the robot should follow and then hit start. A moment later the robot was following the path of a heart, a spiral, and a triangle from several different program runs.

To facilitate writing programs that would have the robot navigate a maze or around obstacles the robot kit came with a roll of tape (similar to a tape measure) that you can use to calculate distance. You would use this, for example, to tell the robot to roll forward 10 centimeters. A protractor was also included to aim the robot and assist in calculating turns. These tools would come in handy while in the classroom setting where we would ask the kids to think about the procedure or steps the robot should execute to navigate through and obstacle course. This kind of thinking will have them on their way to programming.

The Sphero SPRK+ strikes a good balance of fun and education. We had some fun with paint as the robot rolled through a puddle of green poster paint and proceeded to leave tracks all over the paper. If we had a pool I am sure we would have built the robot some water wings and zipped around. Overall once we figured out the app we really enjoyed using Sphero SPRK+.

Are your kids interested in learning how to program? 

If you are looking for a robot that’s perfect for teaching robotics and programming, Sphero SKRK+ is for you. This is a great STEM-based learning tool that kids 6-12 would love to get their hands on!

You can purchase Sphero SPRK+ at your local Best Buy or online at BestBuy.com

How to Teach Kids To Be SMART Savers + an easy DIY Save Spend Give Piggy Bank

We’re sharing how to teach kids to be SMART savers plus an easy DIY Save Spend Give Piggy Bank for them to make for their earnings.

Do your kids always want to spend everything they get? Or are they more cautious with how they use the money they receive? Whether it’s a weekly allowance, money from birthdays, or money they earn selling lemonade on the corner, kids are never too young to start learning about how to be smart savers. 

With three kids at home, we knew we needed to come up with a simple plan that each of them could understand. From our 2-year-old to our 8-year-old, we use the same system. And it’s broken down into the simplest form for them to grasp. We’ve come up with 3 categories for them and it all has to deal with three simple words: save, spend, give. 

3 Categories of a Budget

Step 1: Save money of your own, 

Step 2: Spend your money wisely by determining what you need versus what you want, 

Step 3: Give your money, time, or things with people who need it.

How to be a SMART Saver

Once you have that broken down, it’s time to start thinking of what or why you want to save. There are 5 steps to putting together a smart savings goal:

1.     Specific: What exactly do you want to accomplish?

2.     Measurable: How will you know you met your goal?

3.     Attainable: Can you really achieve your goal?

4.     Relevant: Why is this goal important to you?

5.     Timely: How much time do you need to accomplish the goal?

Try to talk with your kids about these goals and see if they can come up with their own! 

Get Started! 

Let the kids construct their own Save Spend Give Piggy Banks by gathering 3 containers, decorating them as you prefer, and labeling each one of the following – “Save, Spend, Give.” Put your money in the appropriate bank as you receive it and watch it add up.

We simply grabbed some containers and labels from the dollar store and kept it simple! But you can get as creative as you’d like. To see how we made ours, watch the video below: 

video here

Are your kids learning to manage the money they’re receiving? 

Love this project? Read more! 

Pin this article for later! 

Click the Pin button on the image below to save for later. 

DIY Bouncing Ball

Make DIY bouncing balls with your kids and share the fun of science in the process!

Have you ever wanted to make your own toys? See your creation unfold from idea to reality? My kids absolutely love balls. They always ask to buy more and our front yard is filled with them. So when I saw this tutorial on About.com on how to make polymer balls I had to give it a try.

Result? A pretty fun experiment and toy all in one! And while the ball doesn’t bounce quite as high as the ones you buy from the machine outside of the grocery store it still provides hours of entertainment for children and adults alike. Whether you are looking to teach your kids about a little chemistry or just ready to make a fun toy, this is the perfect craft for a lazy afternoon. 

This post contains affiliate links.


DIY Bouncing Balls

What You’ll Need:

  • borax (found in the laundry section of the store)
  • cornstarch (found in the baking section of the store)
  • white glue (makes an opaque ball) or blue or clear school glue (makes a translucent ball)
  • warm water
  • food coloring (optional)
  • measuring spoons
  • spoon or craft stick to stir the mixture
  • 2 small plastic cups or other containers for mixing
  • marking pen
  • watch with a second hand
  • ruler
  • ziploc bag

[Read more…]


© A Crafty Spoonful - All Rights Reserved
It is OK to use one of my photos provided a link back and/or proper credit is given. It is NOT ok to copy and paste a whole post including instructions. Please do not remove watermarks or alter images in any way. Please contact me with any questions at danielle@acraftyspoonful.com

.