Last Minute DIY Mummy Maternity Costume

Last Minute DIY Mummy Maternity Costume

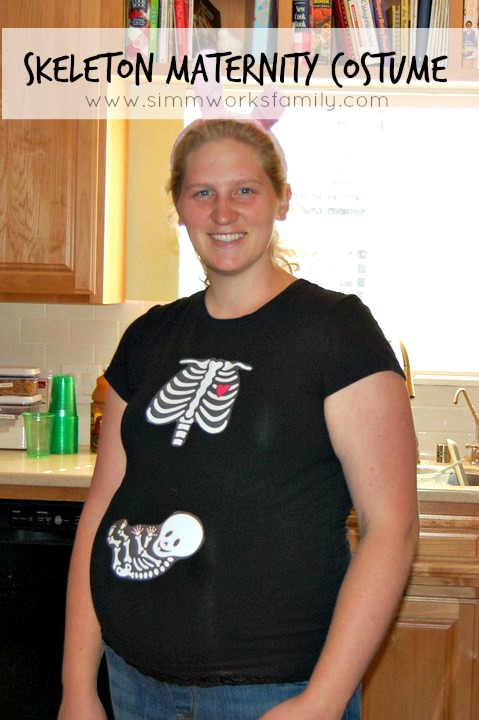
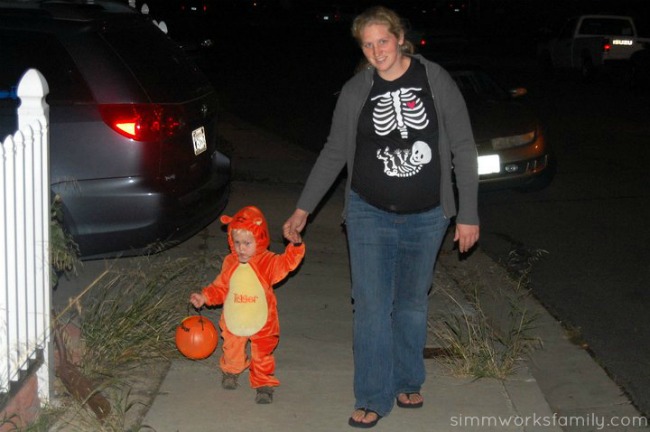
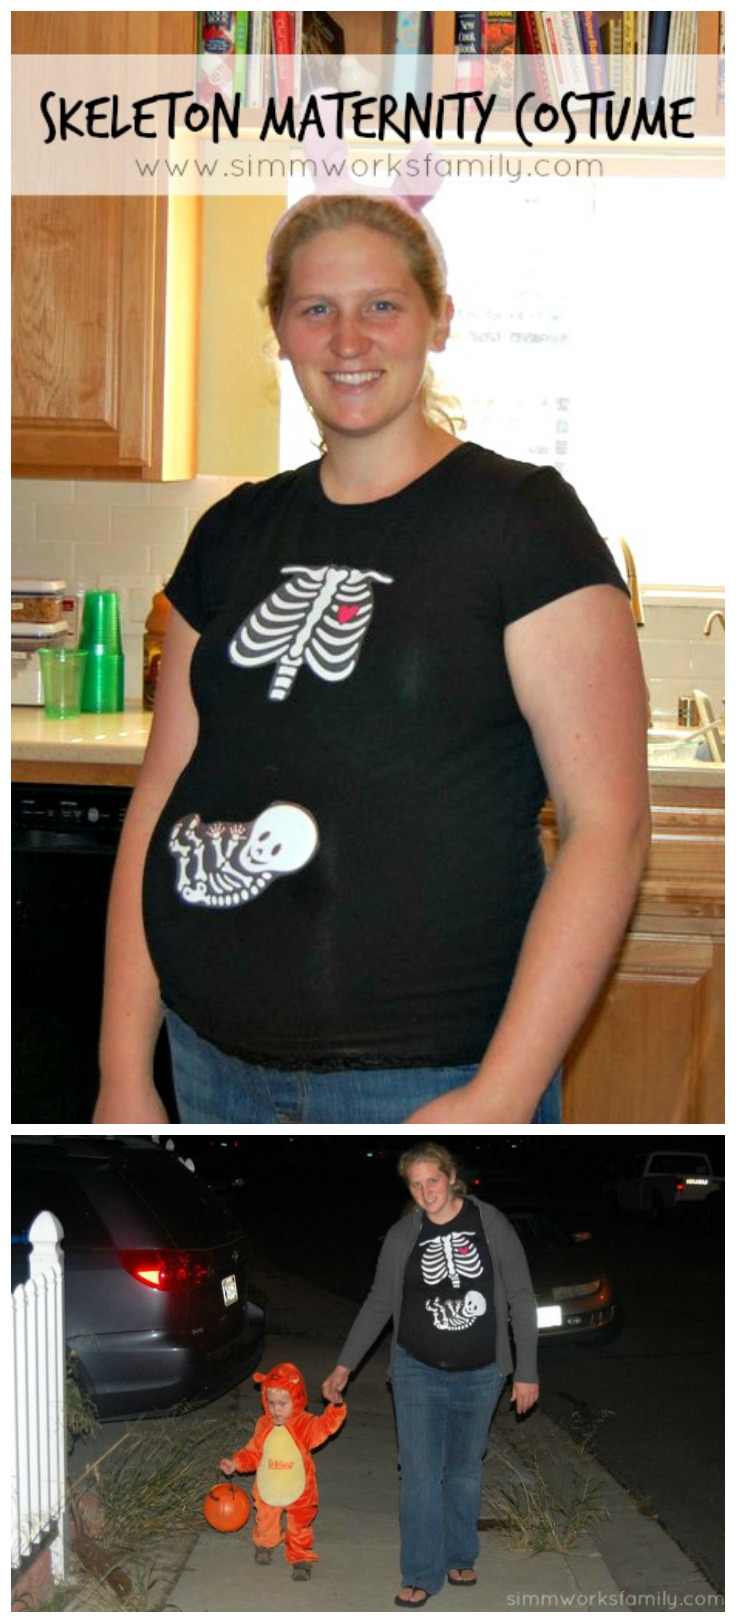
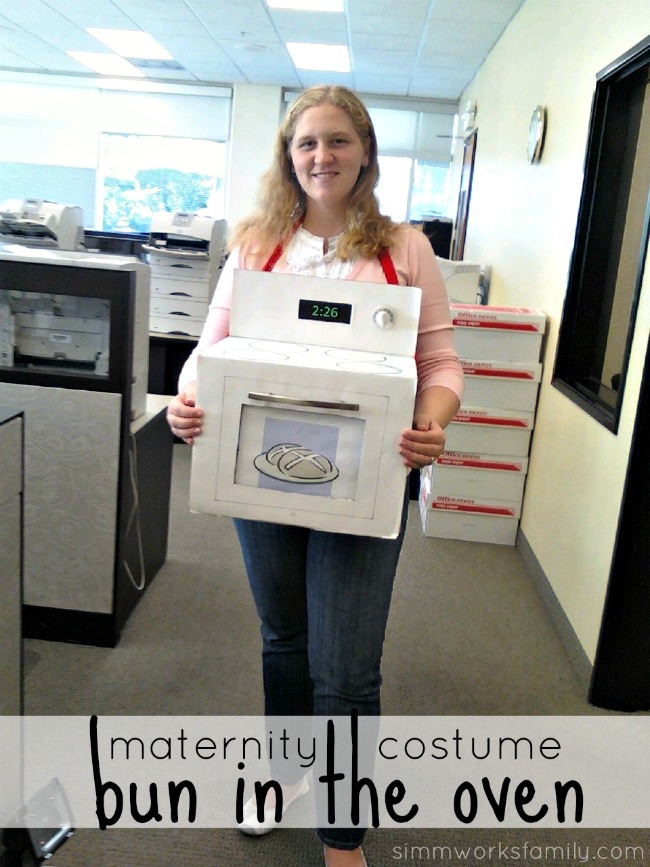
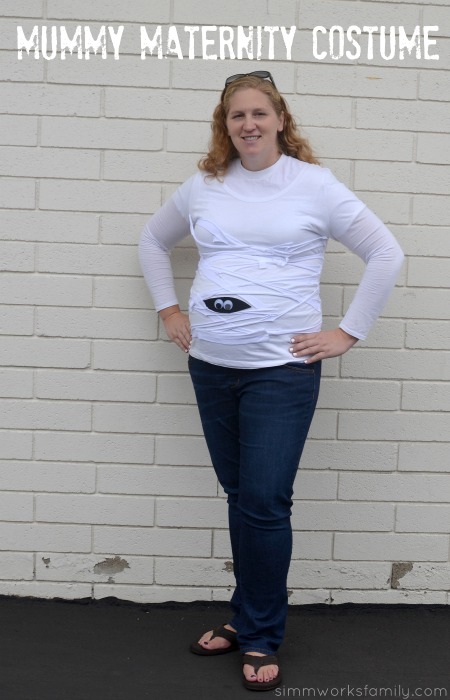
This time last year I was pregnant with my third child. And just like with the first two pregnancies, I wanted to do something fun for Halloween. With my first pregnance I was an oven with a bun inside. Pretty cute if I do say so myself! And with my second pregnancy I made a skeleton shirt with a skeleton baby. This pregnancy I wanted to get a little craftier and came up with this mummy mommy costume. It was the perfect way to celebrate the holiday while still staying comfortable.

Since it’s a shirt, I could pair it with my maternity jeans, leggings, or anything else depending on the weather. So when we headed to Mickey’s Not So Scary Halloween Party I didn’t have any part of my costume getting in the way. And when I helped out at my son’s school Halloween carnival, I was still able to run around and help the kids out at the various booths.

This costume took me all of 30 mintues to throw together but I’m sure with a little more time (and material) I could have really decked it out. Here’s how you put together this mummy mommy costume:

Last Minute DIY Mummy Maternity Costume

What you’ll need:

  • white t-shirt (long or short sleeved)
  • white tights (or an extra white t-shirt)
  • black felt
  • large sized googly eyes
  • fabric marker
  • hot glue gun

What you do: 

1. Cut tights into long strips.

2. Layer strips over the t-shirt in a random pattern. Make sure the edges are at the seam of either side of the shirt.

3. Cut out a piece of black felt in the form of a football a little larger than the width of the googly eyes.

4. Hot glue googly eyes to the middle of the black felt and set aside.

5. Glue strips onto the shirt by adhering the edges to the seam of the shirt. Overlap edges to create a more layered look.

6. Put t-shirt on and grab the black felt googly eyes. Figure out the best position on your belly to put them and mark the center spot with a fabric marker.

7. Take t-shirt off. Glue black felt googly eyes to the spot you marked.

8. Add more strips if needed and glue in place.

That’s it! Simple. Easy. And cute!

What was your go-to maternity Halloween costume?

Skeleton Maternity Costume

This skeleton maternity costume takes little time to make and is a comfortable alternative for pregnant mamas around Halloween.

Skeleton Maternity Costume

It’s my second pregnancy and my second time creating a fun maternity costume for Halloween. This year I went with a simple DIY shirt to wear out trick or treating with my little one and at the Halloween party we hosted. It was such a fun way to celebrate the holiday while celebrating my pregnancy as well. And everyone I ran into loved the idea! 

I may be weird but I am LOVING this pregnancy. My son has been keeping me on my toes but I’ve been able to take time for myself when needed and enjoy the milestones. With this possibly being the last pregnancy for us, I want to soak it all in! And that includes celebrating holidays and taking lots of photos. Hopefully, you won’t get too sick of the photos. 

Want to make this DIY Skeleton Maternity T-Shirt too? Read on to find out how! This post contains affiliate links. 

Skeleton Maternity Costume with Tigger

DIY Skeleton Maternity T-Shirt

What you’ll need: 

What you do: 

  1. Place image of skeleton baby and rib cage in a word doc making each take up a full page. The baby should be placed horizontally whereas the ribs can be placed vertically. 
  2. Print images out on iron-on t-shirt transfer paper. 
  3. Cut out images close to the edge of the design with scissors. 
  4. Using iron, iron on images to the shirt. Let cool and wear! 

Skeleton Costume Ethan 2010

 What did you dress up for on Halloween? 

Love this idea? Here’s some more: 

Pin this article for later! 

Click the Pin button on the image below to save for later.


Here’s a Quick Way to Make a Maternity Bun In The Oven Halloween Costume

Bun in the Oven Halloween Costume


I had to share my Halloween costume with everyone. Yes, there is a bun in the oven. Yes, my hair looks really bad and I have no makeup on… hopefully, I can get a better picture to post soon!

Making this costume was super easy. I grabbed a white box I had lying around, printed off a clip art photo of a bun, grabbed some hardware from my work, and printed out the due date as the time on the oven. All in all, it took less than 30 minutes and was perfect for me to wear to work. This would also be great for parties and is super comfortable and not too intrusive. 

Bun In The Oven Halloween Costume

What you’ll need:

What you do:

1. Close up one side of the box and tape shut.

2. Turn the box around and cut off the two smaller panels and one of the longer panels off leaving one long panel.

3. On the closed side, paste the bun image onto the box. Trace with a sharpie to create the oven window. Attach the cabinet door hardware.

4. On the top of the box create oven range coils by using the sharpie.

5. On the long flap add rectangle print out of due date in time form as the clock on the oven. Then add the oven knob.

6. Add the ribbon on either side of the long flap and place over your neck to wear.

Were you ever pregnant on Halloween? What did you dress up as? 

Love this idea and want more? Read on! 


© A Crafty Spoonful - All Rights Reserved
It is OK to use one of my photos provided a link back and/or proper credit is given. It is NOT ok to copy and paste a whole post including instructions. Please do not remove watermarks or alter images in any way. Please contact me with any questions at danielle@acraftyspoonful.com

.