Free Preschool Pass SeaWorld San Diego

Sea World Preschool pass

Free Preschool Pass SeaWorld San Diego

Yes, that’s right! Sign up for a free preschool pass for SeaWorld San Diego and your preschooler can enjoy Sea World through the end of the year.

SeaWorld San Diego is delighted to offer a 2017 SeaWorld Preschool Fun Card to the first 10,000 registered preschoolers, a $10 Fun Card will be available after that. This FREE Fun Card grants kids ages 5 and younger complimentary admission to SeaWorld San Diego through Dec. 30, 2017*.

Here’s what you do:

  1. Sign your child(ren) up for their free pass by clicking on the link below. Make sure to go through the whole checkout process. Registration ends March 17th, 2017.
  2. Redeem your FREE preschool pass by March 31st, 2017: Simply go to any Sea World ticket window with your printed e-ticket, a valid photo ID, passport, or certified copy of their birth certificate. This is required for verification of age and preschool pass redemption – no exceptions.

To sign up your preschooler for their free Sea World San Diego Preschool Pass head here and fill out the form.

*San Diego and Orange County CA residents only. Valid only at SeaWorld San Diego only for children 5 years old and younger at time of redemption. Unlimited admission through 12/30/2017. Does not include free parking, separately ticketed events or other discounts. Bring Preschool Fun Card Voucher and valid form of ID (a copy of a certified birth certificate or travel passport) to Tickets and Reservations at SeaWorld San Diego. School IDs or children’s security IDs will not be accepted. The SeaWorld Preschool Fun Card offer is not available at the park; advance online registration required.

Offer valid for limited time and subject to change and/or cancellation without notice. Blockout dates apply.
Thanksgiving Turkey Hand Craft

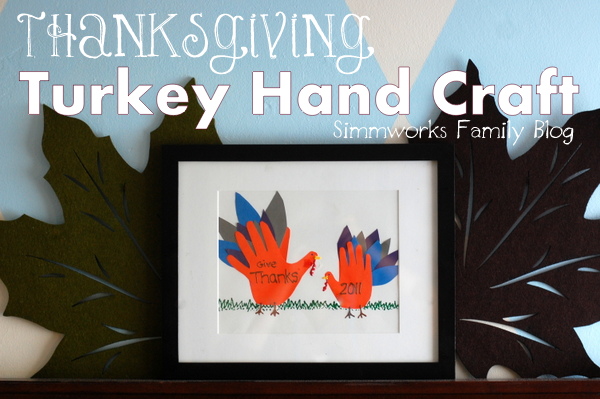
Thanksgiving Turkey Hand Craft

I absolutely love the simple crafts that I can do with the kids to prepare them for the holidays, like this turkey hand craft.

This past week we’ve been working on what we’re thankful for. We’re so thankful for how much we’ve all grown over the past year. My son is thankful that he’s taller and can ride more rides at Disneyland and my daughter must be thankful for the fact that she’s found her voice because she does not want to stop talking!

And I’m thankful for the milestones and memories we’ve made over this past year. In an effort to spruce up our mantel for this month of thanks giving, I’ve returned the turkey hand craft we made last year to remind me of how much my kids have grown this past year.

Here’s how you make it: [Read more…]

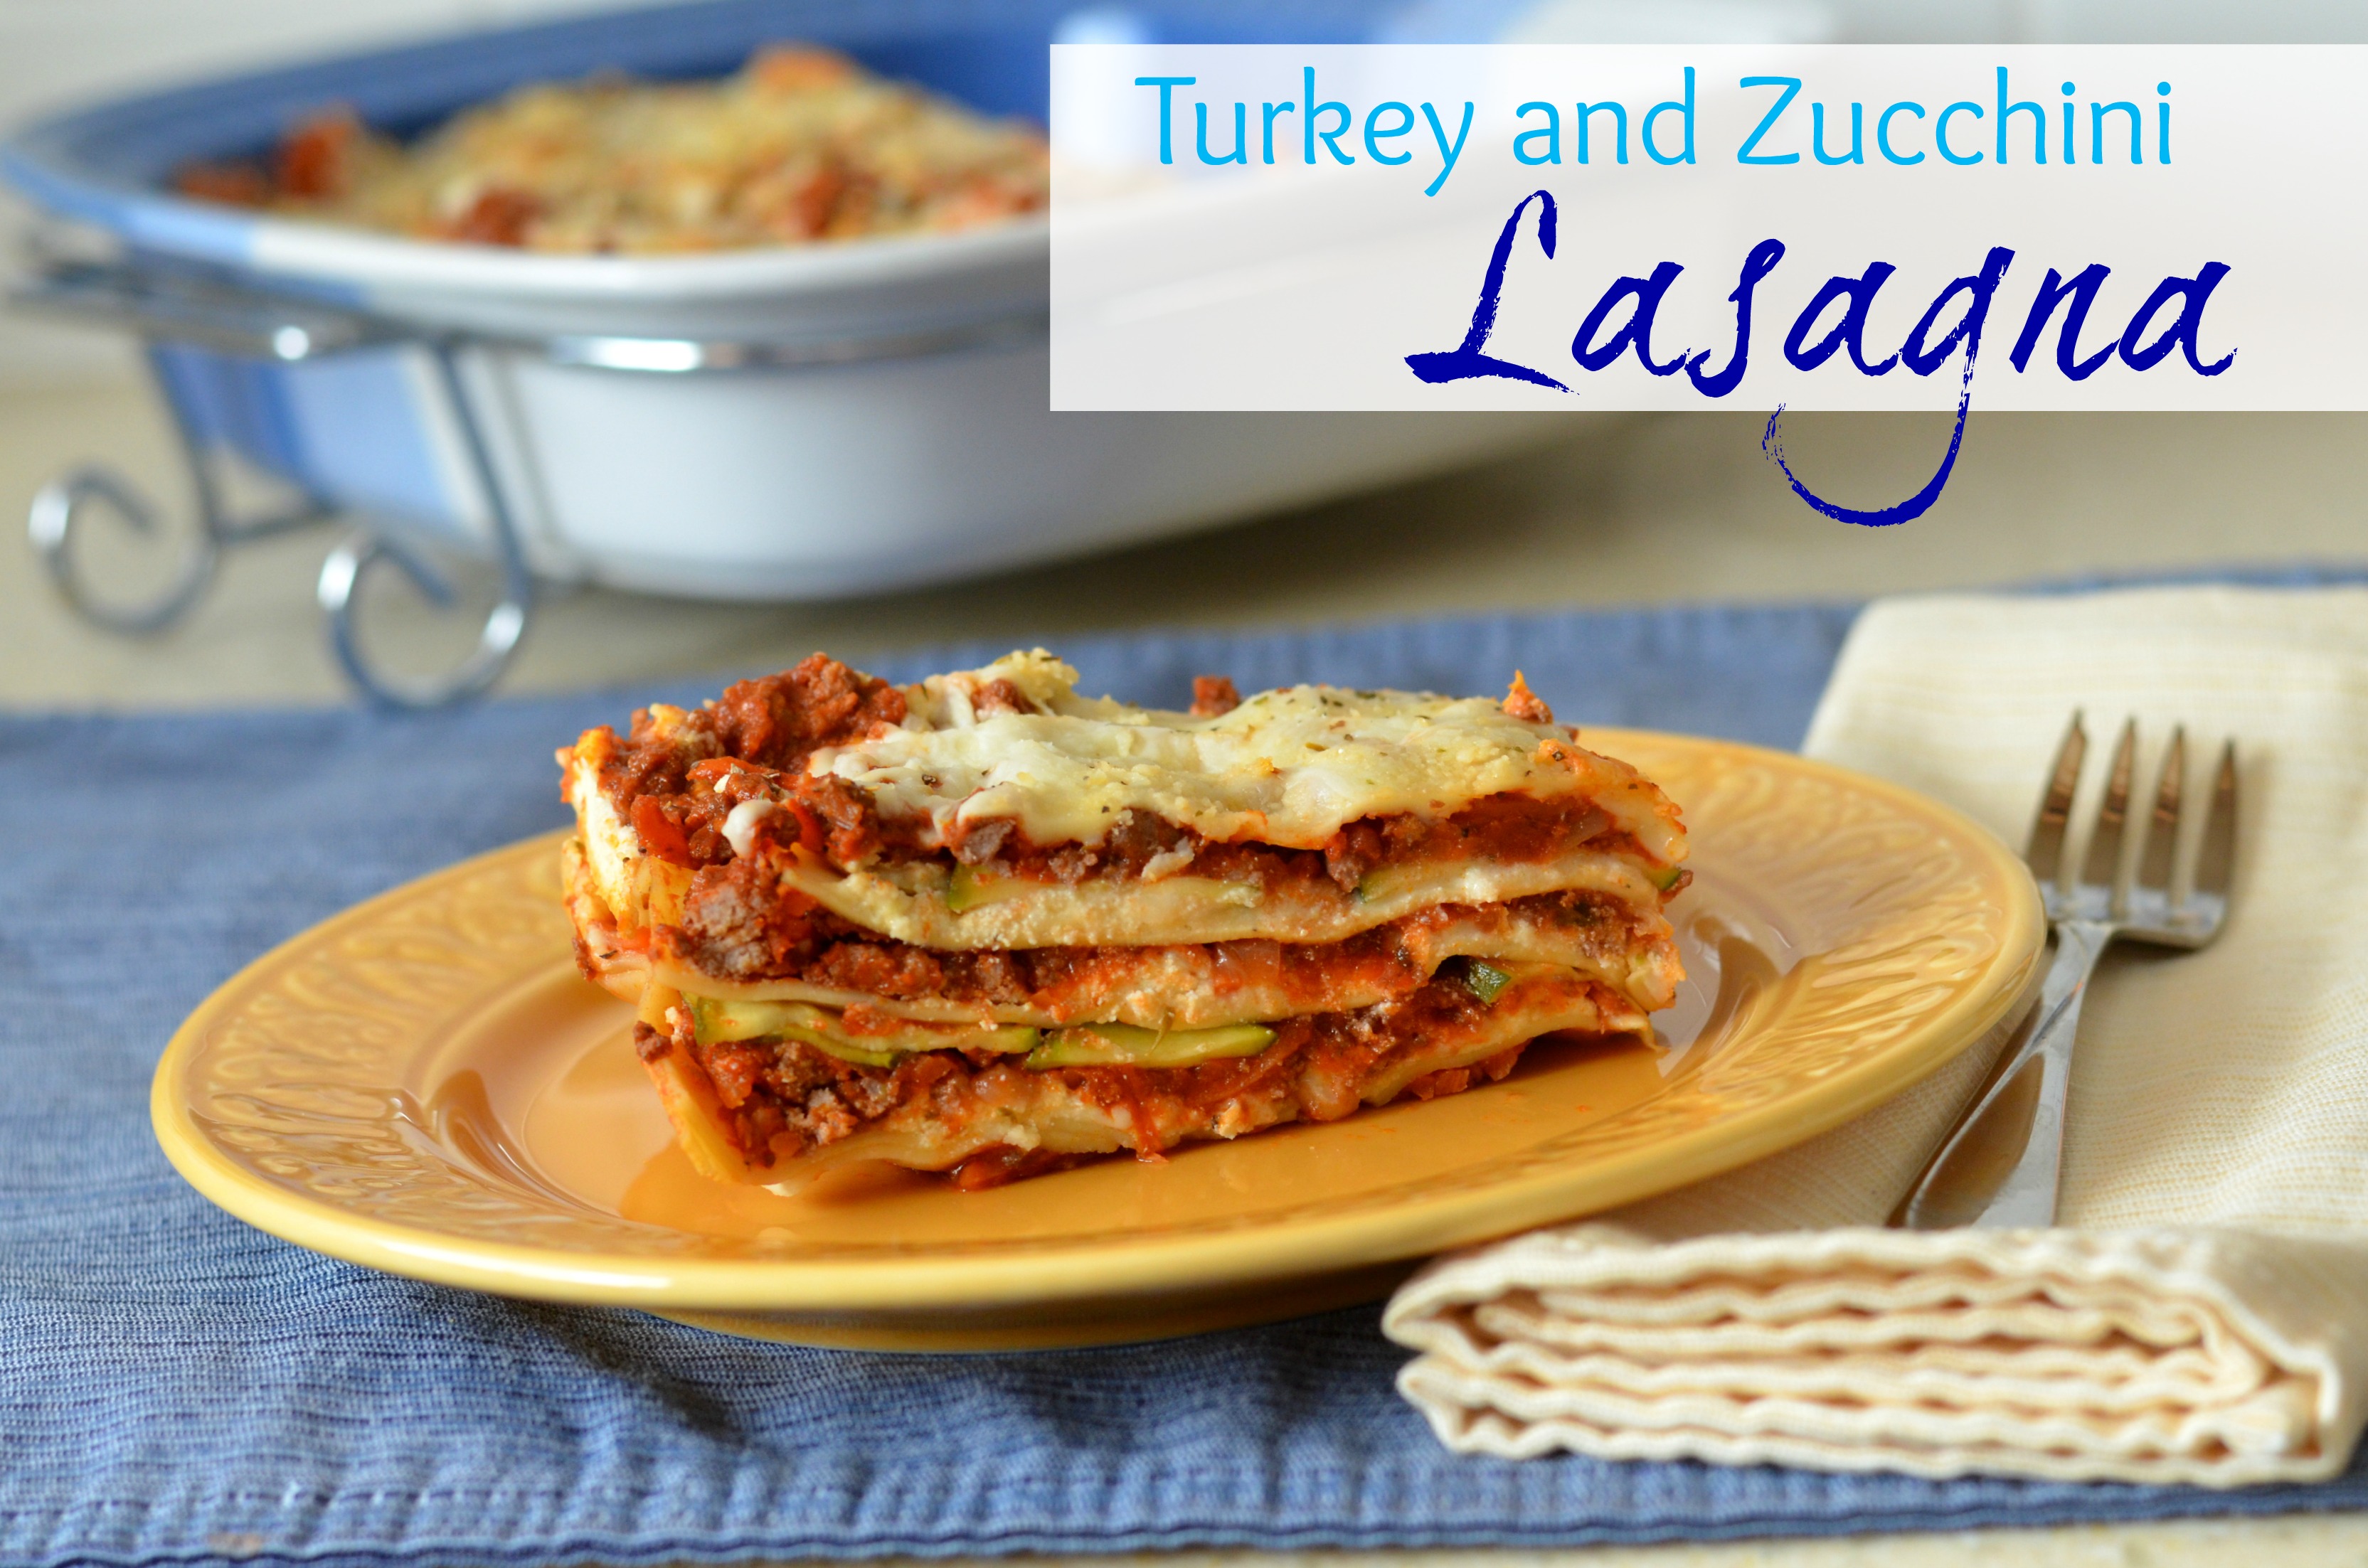
Turkey and Zucchini Lasagna

Turkey and Zucchini Lasagna Turkey and Zucchini Lasagna

One of my favorite dishes to make is lasagna. But because it’s loaded with delicious calories and carbs I tend to make it only 2-3 times a year. But with a few changes I’ve made my favorite dish slightly more forgiving on the calories. This turkey and zucchini lasagna is flavorful, easy to prepare, and worth every extra point I used on it!

My original plan was to use the zucchini as noodles but I didn’t find enough good looking zucchini to do that so that plan will have to wait. And if you try this with my bolognese sauce (recipe to come) I just know you’ll fall in love with this dish.

I think the best part of a lasagna is the re-heating factor. We made enough to serve 6 so we had lunch for the rest of the week! It tasted fabulous heated back up in the oven or the microwave.

[Read more…]

How to Inflate a Balloon: Science Project

My son is absolutely obsessed with science experiences as of late. He is constantly asking how things work and loves to see the outcome of our little projects. He’s definitely turning into a little scientist and I couldn’t be more proud.

With his newfound love of science, I am getting more and more excited for the upcoming Frankenweenie movie. After hearing the amazing experience my friend, Mariah from Formula Mom, had in Hollywood getting a behind-the-scenes look at the movie, I am looking forward to taking my son to see this movie.

In celebration of the scientist behind the movie, we decided to do a little Frankenweenie experiment of our own and learned how a balloon can inflate with the help of science. To find out how we conducted our experiment, and our findings, read on!

How to Inflate A Balloon with Science!

What You’ll Need:

  • Vinegar
  • Baking Soda
  • Plastic Bottle
  • Balloon

What you do: 

1. Fill the plastic bottle with vinegar. About four tablespoons will do but sometimes little scientists like to use more…

2. Next up we need to add a few teaspoons of baking soda into the balloon.

2a. Definitely let your scientist test out the balloon first to make sure there are no holes and that the balloon inflates properly with air.

2b. If you need help getting the baking soda into the balloon, use your fingers to stretch out the opening of the balloon while your scientist pours in the baking soda.

3. Place the opening of the balloon over the top of the water bottle filled with vinegar.

4. Once the balloon is securely on top of the bottle it’s time to pick the balloon up and dump the baking soda in the bottle.

4a. Make sure you get all of the baking soda out and watch what happens in the bottle. See the reaction?

5. Watch the balloon fill up and expand!

This experiment was an absolute blast to do and so simple. My son loved feeling the difference between a balloon he had blown up with air as opposed the the balloon that filled up with the vinegar/baking soda mixture. He let me know that the balloon filled with air seemed softer than the balloon filled with the gas from the vinegar/water.

The gas created is actually carbon dioxide. For older kids this is a great way to teach about chemical reactions and the reason why when both of these mix together they form carbon dioxide. Happy experimenting!

Does your child love to experiment?

DIY Car Tracks

This week we busted out a typical rainy day activity because we needed something to keep us busy but didn’t want to deal with the outside heat. So we decided to create our own DIY car track to play with our race cars.

My kids have a great selection of cars from tv show characters, to rescue trucks, to tractors and trains. But they get kind of bored with playing on their own with their cars. Sure they make believe that there are roads, tracks, and driveways but sometimes it’s much more fun to have a road already built so that your imagination can be used elsewhere.

Here’s how we turn our kids room into a large race track and how you can too!

DIY Car Tracks

What You’ll Need:

  • tape (we used electrical tape but any masking tape or colored tape will do)
  • vehicles with wheels
  • scissors

What you do:

1. Start out by choosing a starting point. Simply start laying down the tape in the shape you want to make for the outer line of the track.

2. Then grab your widest car and measure how far apart each line should be so that every car fits on the track.

3. By following the width (eyeballing is fine) and the outer line, create the inner line to finish up your roadway.

4. Now it’s time to play! Grab your kid(s), your cars, and your imagination and start racing!

4a. And don’t just think that this activity is for the boys! Girls love to race too!


Every week Danielle brings great kids crafts to Formula Mom!

Danielle is a work-at-home-mom of two beautiful kids and writes at the Simmworks Family Blog. She loves to blog about her family, healthy living, going green and crafting. Danielle would love for you to come visit! You can reach her on facebook and twitter as well. If you have any questions feel free to email her at  simmworksfamily@gmail.com

Top 10 Reasons Why You May Need A Double Stroller

DIY Color Bubble Art

This week I’ve found the perfect EASY craft that’s both fun for the kids and makes for some great artwork to hang in the house or playroom. And what kid doesn’t love bubbles?

My kids love bubbles so much that we have to buy them in the gallon size because we go through them so much. And I’m excited to announce that my daughter now says bubble with no prompting, clear as day! How cute is that?

All you need for this project is 5 things. And I’m sure most of these are in your home already! Don’t feel like you have to go out and purchase a canvas for this artwork, simply use a piece of paper, cardboard, or cardstock you have lying around and if you love it enough just frame it later! That way you can keep changing out the artwork as your kids create new masterpieces.

DIY Color Bubble Art

What You’ll Need: 

  • White canvas or cardstock
  • Bubbles
  • Bubble wands
  • Dishes for bubbles
  • Food coloring


What you do: 

1. Take the bubbles and food coloring and mix some colors together. Remember, a few drops go a long way!

2. Get out a variety of wands and tools to help change up the patterns on the artwork. Small and big bubbles alike look equally as cool.

3. If you have a bubble container lying around, fill it with some bubbles and add some food coloring right to the container to create an easy-to-use option for younger kids.

4. Start blowing bubbles towards the canvas!

5. If the bubbles don’t go directly onto the canvas you can always just get closer like my son did and make them blow onto it. Feel free to change up the colors and size of the bubbles by using different wands.

It helps when Mommy and Daddy get involved too. That way the kids can blow the bubbles and pop them!

6. Then enlist an official bubble popper to pop all of the bubbles that are still on the canvas.

7. Allow artwork to dry then hang wherever you see fit!

 
Every week Danielle brings great kids crafts to Formula Mom!

Danielle is a work-at-home-mom of two beautiful kids and writes at the Simmworks Family Blog. She loves to blog about her family, healthy living, going green and crafting. Danielle would love for you to come visit! You can reach her on facebook and twitter as well. If you have any questions feel free to email her at  simmworksfamily@gmail.com

DIY Newspaper Hut

You know how sometimes you go to make a craft with your kids and it ends up being completely different from the vision you had? Yeah, that was this project. We started working on a newspaper house made with the left over Sunday paper. We didn’t have much time until Sister woke up so we quickly got to work rolling up the newspapers.

We taped up a few and were ready to begin building the rest of the structure when… the phone rang. By the time I got off the phone with my husband and returned outside. It was too late. Our craft had turned to mush as my son continued to pour water from his water table all over it.

So we picked back up and made a cool hut instead of a house. And you know what? My son loved it just as much as he did the house. He now has grand ideas for making a tunnel, a hula hoop, and a giraffe all out of rolled up paper. Sounds like fun to me!

DIY Recycled Newspaper Hut

What you’ll need: 

  • 1 Sunday Newspaper
  • Scissors
  • Tape

What you do: 

1. Take two pieces of newspaper and roll them up from one corner to the other to form a long pole.

2. Cut off a piece of tape and secure the loose end of newspaper.

3. Repeat as necessary until you have all the poles you need to build your structure. We used 8 poles for our hut.

4. Lay out the base of your structure.

5. Attach three pieces together forming a right angle with each of the poles, two on the ground and one standing up.

6. Tape the pieces together. Repeat on all sides.

5. Gather the four poles standing straight up in the center and tape together to form a pyramid.

6. Enjoy your structured creation! You can add more newspaper to enclose the hut or leave it open.

7. Build more structures to add to this one and create a super structure!

 
Every week Danielle brings great kids crafts to Formula Mom!
Danielle is a work-at-home-mom of two beautiful kids and writes at the Simmworks Family Blog. She loves to blog about her family, healthy living, going green and crafting. Danielle would love for you to come visit! You can reach her on facebook and twitter as well. If you have any questions feel free to email her at  simmworksfamily@gmail.com

Bread Maker Pizza Dough {Dinner Recipe}

When I purchased my bread machine I thought that all I’d be making was bread. Shortly after getting married I swapped out a Kitchen Aid mixer we received (we already had one) for my Zojirushi and I instantly looked for great recommendations for bread books. That’s when a co-worker of mine mentioned that not only could I make great bread in my machine but I could make basically any type of yeast dough I wanted in it.

I was so overwhelmed with just the making bread part that I filed that info away. Until my husband brought up wanting to make hamburger buns from scratch. Then I really got started…

Now whenever I want some dinner rolls, pizza dough, or even cinnamon rolls, I just grab the bread machine. It truly is an amazing appliance and I’m so glad I got one when I did. On my list of must haves in the kitchen it’s up there with the coffee maker, rice cooker and microplane grater. Seriously… if you love bread and dough you must invest in a bread maker!

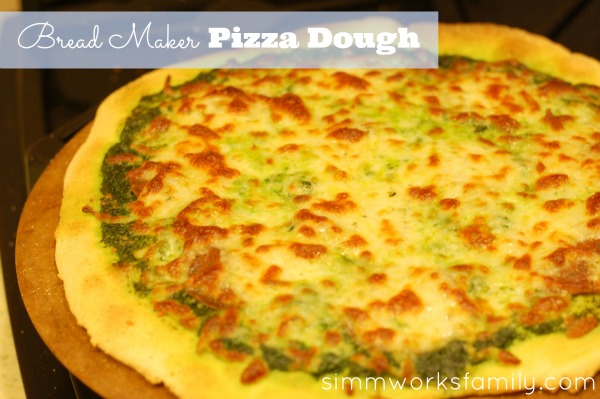
Ok… enough about the appliance and onto this dough. I’ve made a few other dough recipes in the past but none turned out as perfect as this one from Williams Sonoma. I was able to thinly roll the dough out on my countertop and then transfer it to my hot pizza stone without any tears. It was so easy to work.

And the end product spoke for itself. Flavorful, light and airy. 

The crust held all of the toppings onto it without drooping. Now that’s my kind of crust! If you have an itch to make your own dough from scratch then I highly suggest trying this recipe out!

Bread Maker Pizza Dough

Bread Maker Pizza Dough

  • 1 cup warm water (105° to 115°F)
  • 2 Tbs. olive oil
  • 1 tsp. salt
  • 1 1/2 cups unbleached all-purpose flour
  • 1 1/2 cups whole wheat flour
  • 1 Tbs. active dry yeast

In the bread pan of an electric bread machine, combine (in this order) the warm water, olive oil, salt, flour and yeast. Set the machine for Pizza Dough according to the manufacturer’s instructions and process through the cycle.

Transfer the dough to a lightly floured work surface. Punch down the dough and divide in half. Form each half into a ball and cover with a clean kitchen towel. Let the dough rise in a warm place until doubled in size, about 40 minutes. Roll out as directed in the pizza recipe.

Makes two 12-inch rounds.

Disclaimer: This post contains affiliate links. By clicking through to the sponsor’s website your are helping support the Simmworks Family Blog.

DIY Multi Bubble Maker

 
What’s summer without bubbles? I don’t know about you but we keep a huge bottle of bubbles around for fun anytime. It’s proven to be quite useful since most of the time the small bottles of bubbles end up upside down on our sidewalk and lawn. Little hands just haven’t figured out how to steady a bottle in their hand and blow bubbles at the same time.

We’ve become addicted to one bubble maker in particular from a popular clothing store however it can be a bit pricey. So we’ve come up with an inexpensive solution to get the same results… multiple tiny bubbles at one time! 

Not only is this bubble maker super easy to make, it uses items that were in my cupboard already. Double bonus for not having to buy anything. So grab some straws, a few pieces of tape, and your bubbles and start having fun.

DIY Multi Bubble Maker

What you’ll need:

  • a handful of straws
  • tape
  • a shallow dish or container for bubbles
  • bubble solution

What you do: 

1. Grab the straws in your fist and make sure they’re evenly level on both ends.

2. Place tape on one end to secure straws together.

3. Tape the opposite end for further support. Try not to use your husband’s expensive panting tape because your clear tape wasn’t showing up well in pictures.

4. Pour bubble solution into shallow dish and lightly dip bubble maker in.

5. Start blowing bubbles! Try not to put your mouth over the end of the bubble maker, instead brush your lips slightly on the end of the bubble maker and blow.

Bad photo but below is the only one I got of the bubble maker in action since my son refused to play along (you know… just cause I had a camera in my hand). The bubble maker not only makes lots of tiny bubbles but can also make super big bubbles as well if you get lucky!

 
Every week Danielle brings great kids crafts to Formula Mom!
Danielle is a work-at-home-mom of two beautiful kids and writes at the Simmworks Family Blog. She loves to blog about her family, healthy living, going green and crafting. Danielle would love for you to come visit! You can reach her on facebook and twitter as well. If you have any questions feel free to email her at  simmworksfamily@gmail.com


© A Crafty Spoonful - All Rights Reserved
It is OK to use one of my photos provided a link back and/or proper credit is given. It is NOT ok to copy and paste a whole post including instructions. Please do not remove watermarks or alter images in any way. Please contact me with any questions at danielle@acraftyspoonful.com

.