Why I Love Prefolds For Newborns

Why I Love Prefolds For Newborns

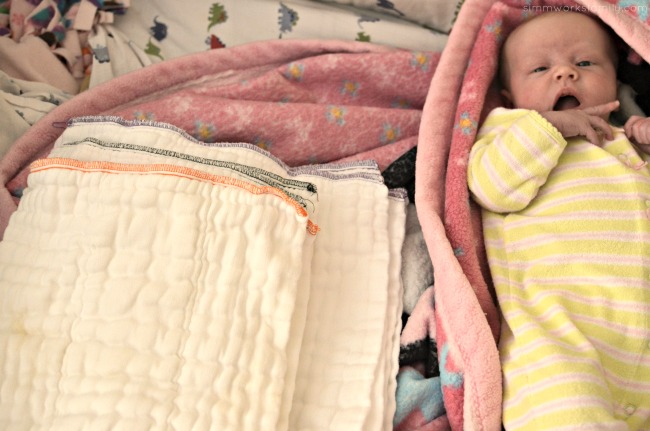
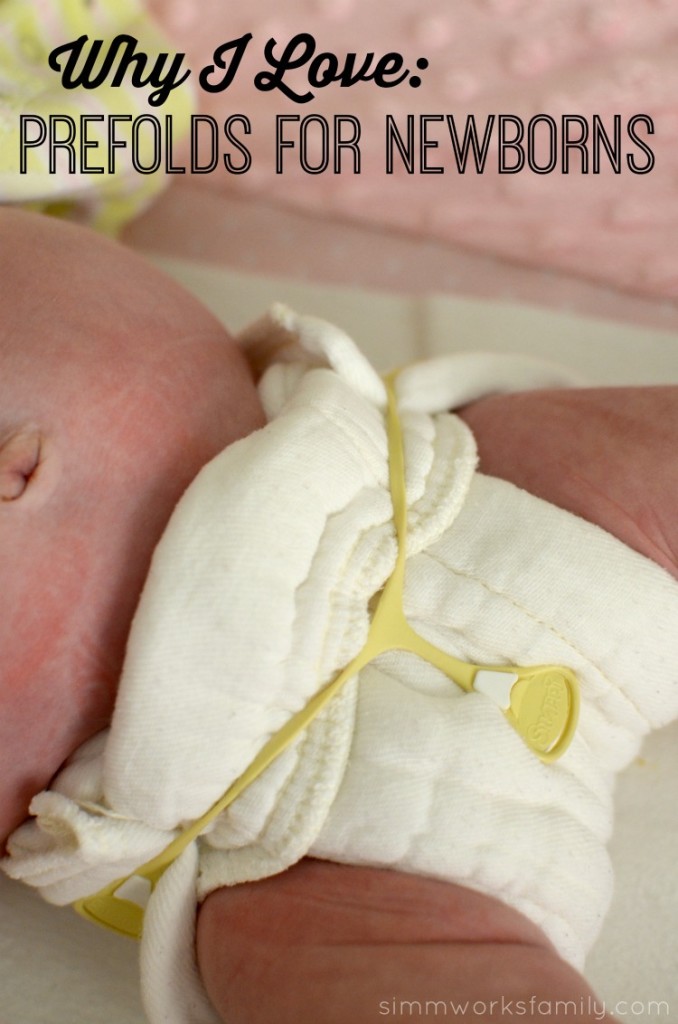
We are back in the land of cloth diapering with our third baby and I’ve come to realize how much I love cloth diapering a newborn with prefolds. Not only is it one of the quickest option for me (no stuffing a pocket diaper or worrying about velcro sticking to another diaper with AIOs, I also find that prefolds tend to be better at containing newborn poo. And my newborn knows how to poo!

With the added layer of a cover, newborn diapering is so awesome with prefolds! I find that I have the least chance of being leaked on if we’ve used a prefold. Now I know that the newborn stage doesn’t last long but while it’s here I’m sure I’ll keep grabbing for the prefolds first when I reach into the diaper stash.  [Read more…]
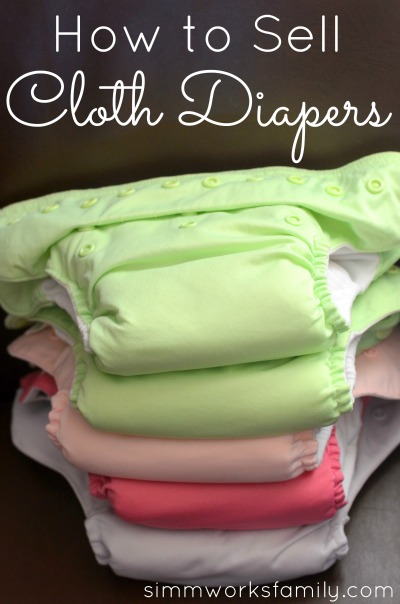
How to Sell Cloth Diapers

How to Sell Cloth Diapers

So you’ve finally decided that you are done with cloth diapering. Your kid(s) are potty trained, you just don’t love cloth diapers like you thought you would, or you have some extra diapers that just didn’t work for you, ore are too small,  and are looking to make room in your stash.

Now how do you sell the cloth diapers you have to make a little more money back?

Since I started cloth diapering 6 years ago, I knew that one of the awesome reasons I cloth diapered was that I’d recoup some of the money I put into the diapers I purchased. Because I could sell my cloth diapers after I used them.

And now the time has come to destash. So I’ve compiled a few great ways to sell cloth diapers. Here are some ways to approach selling your diapers!

How to Sell Cloth Diapers

1. Go local –

Have any friends looking to cloth diaper? Try here first. That way you know that the diapers will get great use and you might be able to help out a friend looking into cloth diapering. Plus you can show them how to use all of the diapers, etc.

And if you don’t have any friends who need cloth diapers, try Craigslist. Take a few photos, post them online and save a bit on the hassle of shipping out the diapers.

Local resale shops also purchase cloth diapers to resell. And while they aren’t the best way to make the most money for your diapers, they are probably the easiest way to sell your diapers quickly.

2. Sell Within Your Community Online –

There are quite a few eco-friendly facebook groups online that allow their community to purchase and sell cloth diapers amongst one another. You simply upload photos of the diapers you have for sale, list the price, and ship to the buyer.

The best way to accept funds is probably paypal since it’s quick, easy, and you can print out a shipping label right on their site!

3. Sell On An Online Forum –

There are a few websites dedicated to helping you sell your cloth diapers. You simply list what you have for sale and can set up everything through the site, including payment and shipping.

A few of my favorites are:

Whatever way you choose to sell your diapers just remember to take great photos, be honest about the condition, and do a little research on the value of the diapers you have for sale.

Have you sold diapers before? What worked for you

Coconut Oatmeal with Tropical Traditions Coconut Oil {Breakfast Recipe}

We’re always trying to find great alternatives to classic favorites in this home. Since my daughter consistantly eats oatmeal for us for breakfast we wanted to continue our luck with the one meal we know she’ll finish. So when I received my Tropical Traditions Coconut Oil I knew exactly what I’d to do try it out… put it in our oatmeal!

When I was done making the first batch of coconut oatmeal I went into the fridge to grab the kids some milk for their sippy cups. I looked over and saw an open package of mini chocolate chips from my husbands latest baking adventure so I grabbed the bag and sprinkled a few chocolate chips over the top of each bowl for an added treat. OMG! This oatmeal tasted exactly like my favorite chocolate chip oatmeal cookie. Delicious!

I cannot wait to start using Tropical Traditions coconut oil in other recipes. Added benefit? We can use it as cloth diaper friendly diaper cream too! Who knew? Plus there are so many other ways to use this stuff. Go here to find more!

Coconut Oatmeal
  • 1 cup milk
  • 1 teaspoon Tropical Traditions coconut oil
  • 1 tablespoon unsweetened coconut flakes
  • 1/2 cup old fashioned oats
  • 1 teaspoon cinnamon
  • 1 tablespoon mini chocolate chips (optional)

Pour milk into a small saucepan and heat on medium.

Stir in coconut oil and coconut flakes. Stir until oil is completely melted. Add in oats. Sprinkle on cinnamon and continue to stir. Cook for 3-5 minutes.

Pour into a bowl and sprinkle with chocolate chips for an added bit of sweetness!

Serves 2 (or 1 adult, 2 kids)

Do you use coconut oil? I’d love to hear how! 

Disclaimer: I received a 32oz jar of Tropical Traditions coconut oil for review purposes only. Regardless, I only recommend products or services I use personally and believe will be good for my readers.

The Basics Beyond Cloth Diapers

So you’ve ordered your cloth diapers. Now what? After choosing what type of cloth diapers you want to use there are a few items that you might find come in handy while cloth diapering. I’ve listed a few below. if you have any to add please feel free to comment below or email me at simmworksfamily (at) gmail.com and I’ll gladly add to the list!

Diaper/Butt Creams
You can’t just use any diaper cream on your child’s tush if you cloth diaper. Most creams can actually ruin your cloth diapers. And no amount of stripping will get your diapers back to their original absorbency. So read labels and choose a cream that will work with your cloth diaper, not against. And if in doubt, use a liner to protect your diaper.

A few commercially available diaper creams may be used with cloth diapers. Always avoid diaper creams with cod liver oil or any other fish oils. Recently many cloth diaper manufacturer’s have developed diaper rash creams that are considered safe for cloth diapers. In many cases, diaper rash creams specifically developed for use with cloth diapers is preferred. I used this list from Pinstripes and Polkadots to choose the cream I currently use and love (CA Baby). The tube lasts a long time and the smell is so relaxing and calming. Plus the product works perfectly for my kids. They also have a wonderful Diaper Area Wash that we’ve had great success with.

If a diaper rash does not go away please consult your physician. It may be a fungal infection that requires a fungicide or other type of medication.

Diaper Liners
As I mentioned above, diaper liners are a great way to protect your diaper from any creams or ointments you may use on your child. They can also help you out by making poop removal easier if you’re using the disposable kind. Some choose not to invest in these but others swear by them.

Here’s some information from Pinstripes and Polkadots about liners:
Liners are used to between the baby treated with a rash cream and the diaper in an effort to protect the diaper from the negative water repelling properties of the diaper rash ointment or cream. People use flushable liners, fleece liners, cloth wipes, and even cut up old t-shirts. If you plan to re-use your liners you will want to wash them thoroughly and separate from your diapers. Likewise, you will also want to wash any wipes used to clean off the ointment or cream with your liners: separate from your diapers. Realize that some flushable liners may not protect a diaper well enough from certain creams.

Laundry Detergent

Just like creams, some detergents are just too harsh on cloth diapers. Not to mention on our clothes as well. And the fragrances and added ingredients can irritate your child’s diaper area. Switching to a cloth diaper friendly detergent for all of your clothes may reduce the chance of a rash or other irritation forming.

In order to choose the perfect detergent you should think about a few things. The most important determinant in the detergent you use is if you have a HE washer or not. The amount of detergent you use as well as the type of detergent can depend on this. To find out more about different detergents and what will work best for you check out The Diaper Jungle. Another great source is Pinstripes and Polkadots (I love this site!) and their HE selection can be found here.

Pins & Snappis
If you are considering using prefolds then you should grab a few sets of pins or some snappis. These great products will give you a tighter fit and can help create a great barrier to keep the poo where it belongs… in the diaper. To tell you the truth, pins kinda scared me. So when I heard about snappis I knew I was going to go this route. But I’ve heard from a few sources that pins can get a tighter fit. This may help when you’re on the verge of going up a diaper size. Your smaller prefolds can be used longer with pins.

Wetbags/Diaper Pail Liners
There are a few size options when it comes to wetbags. And I have a few of each. Some are more for convenience and others are a necessity. I was able to get away with not using a pail liner for quite some time by substituting a large pillow case. But then I found two used liners for sale for $5 each and couldn’t pass them up.

I suggest having at least two wet bags for diaper bag rotation and two diaper pail liners (again, for rotation if one is in the wash). I currently have four wetbags: a small, two medium and one large. I feel that this is the perfect amount for our family. Here’s what I use each for:

  • Small (1-2 diapers) – for quick errands out and about
  • Medium (3-5 diapers) – for day trips 
  • Large (8-10 diapers) – for weekend trips (our go-to for Disneyland overnight visits)

I also use our wet bags for other things. I keep an extra one in the diaper bag if we’re going to the beach or pool so I can throw wet and sandy suits and clothes in one and not have to worry about getting everything else wet and sandy (although the kids do a good job of spreading the sand anyway…). They’re also great to store extra diapers in the car. I keep an “emergency kit” in the car with a change of clothes for each kids and 1-2 extra diapers. I keep it all in a wet bag so they stay fresh and clean.

Washing Wool {Cloth Diapering Tips and Tricks}

Wool covers can be a bit intimidating at first. But once you start using them I’m sure you will start to love this amazing fabric. Not only is it absorbent, it’s breathable as well. I love using wool covers at night to reduce the chance of any irritation or redness on my children’s legs due to PUL covers. I do have to admit that I was quite scared to wash them when I received my first wool soaker in the mail. I was scared that I’d somehow ruin it and I would have spent a lot of money on nothing. But I followed the directions I was given very carefully and have never looked back!

So once you add a piece of wool (or two or five) to your collection, the first thing you’ll need to do is learn how to properly clean it. The best part about cleaning wool is that, at most, you’ll only have to wash it once a week. I actually go every 2-3 weeks with my wool since I switch two covers every other night. But you can definitely tell when it’s time for a washing.

You’ll need a few basic supplies for washing your wool diaper covers:

Sink, pot or bucket: We like to use a large pot for one item, but for more wool items you’ll need to use the sink (or a large 5 gallon bucket).
Water: You will need warmish, but not hot water to clean your wool without shrinking or felting.
Wool soap: Liquid or solid, you choose! We have both liquid wool wash and a wool wash bar.
Towel: We use a bath sized towel. Choose an older one in case any color bleeds out of the wool.

Here’s how to get started:

  • Rinse your wool covers in cool water and gently squeeze out excess water. This will remove any urine salts in the wool that will dry the fibers and retain odor.
  • Fill your sink, pot or bucket with tepid (not hot or boiling) water.

Now for the soapy part

      • If using liquid wool soap, add about a teaspoon to about 1 quart of water. Use approximately 1 tsp and 1 qt of water for each item when washing multilple items together.
      • If using a bar wool soap, lightly lather the bar under the water as you fill the basin.
      • Gently move the water in and around the wool in the sink for 1-2 minutes.
      • Soak your wool diaper cover for 10-15 minutes, without any further agitation. The wool wash will work on its own without your help.
      • Watch your wool in case of bleeding color. If your wool diaper cover is bleeding color you may want to shorten the soaking time.

      And the drying part

      • Drain the water from the sink and gently squeeze some of the water from your wool diaper cover. Be sure to handle it carefully, supporting all of its weight. Don’t let any parts dangle.
      • Refill the sink with cool water and place the wool diaper cover into the clean water to rinse. This will remove soap residue and any grime that didn’t go down the drain.
      • Drain the water again and let the diaper cover drain in the sink after the water is all out, or move the diaper cover to a colander.
      • Gently squeeze the diaper cover to remove additional excess water.
      • Carefully place your wool diaper cover on the towel, roll it up into the towel and press to remove excess water.
      • Lay the wool diaper cover out flat on a screen or another towel, shaping it gently back to its original shape and let it air dry.

          Once your cover is completely dry you can start to use it again. It’s as simple as that! And some say that they’ve had success using their washing machine to wash their wool (not the crochet or knitted stuff!) however I haven’t been brave enough to try yet. Now start shopping… if you’ve already begun cloth diapering then I’m sure you are already addicted to purchasing the diapers. Just wait till you see what wool options are out there! Dangerous. But only for your bank account.

          Source: Zany Zebra Designs, Pinstripes and Polkadots

          Nighttime Cloth Diapering – What Works Best?

          Night time cloth diapering is a bit different than daytime diapering. One big similarity is that there are many options out there and a diapering combination might work well for one baby but might not work at all for the next. Below are a few things to consider when looking for a night time cloth diapering system.

          2.5 months old with a fluff butt

          Absorbency 
          A diaper that allows you to increase the amount of inserts or soakers is something you will want to consider. By being able to control the level of absorbency in your diaper you will have more success in staying dry through the night. Two different types of diapers that I know work well for this are fitteds and pocket diapers. The big difference between the two is that you will need a cover to go over your fitted diaper but won’t need one for the pocket.

          Fit 
          Some moms and dads choose not to cloth diaper at night because when they do find a good night time diaper it ends up being so bulky and large that no pajamas fit over their little one’s tush. More than likely they were using a pocket diaper. Being able to stuff a pocket diaper enough to cover your absorbency needs can lead to big fluff butt. But if you don’t mind a little more junk in the trunk that by all means try your favorite pocket with another insert or two. A fitted diaper may require a cover but it does leave a more trim tush even if you add in a few more soakers.

          To see my son in his nighttime diaper cuteness when he was an itty bitty check out this blog post.

          Inserts/Soakers/Doublers
          First let me start out by defining the three items I mentioned above. Then we’ll get to what material you can choose to use with each.

          Inserts
          Pocket Cloth Diaper Inserts are several layers of absorbent fabric sewn together in a long, trim shape that slip in between the outer waterproof layer & inner stay-dry layer of a pocket cloth diaper. Without the insert, a pocket cloth diaper is not absorbent at all.

          Soakers
          The term soaker is used for two different things. First, this word refers to the middle layer of the diaper. Often this layer is made of a different fabric than the rest of the diaper, one that is more absorbent. The term soaker is also use in reference to wool or polar fleece diaper covers. Unlike other diaper covers, wool and polar fleece are water resistant, rather than waterproof. They do allow some wetness to wick through from the diaper but still manage to keep babies’ clothes dry.

          Doublers
          This term is often used interchangeably with liners perhaps because they do overlap from time to time. Doublers are thick rectangular pads that can be inserted between your baby’s bottom and the diaper to provide extra absorbency. These are great for heavy wetters or for night-time use.

          Material
          The material that your  is made out of will have a lot to do with its absorbency and how many inserts you will actually need. The most common insert material used is microfiber. And while microfiber is very absorbent it can be a bit bulky. Below is a breakdown of the different options for your inserts.

          Microfiber
          A polyester blend fabric that can hold 3-4 times its own weight in liquid. Microfiber is also quick-absorbing & inexpensive, making it a great option for diaper inserts. One microfiber insert is usually enough for a young baby. Around age 6 months, you may find that your child requires 2 microfiber inserts.

          Hemp
          Another popular fabric used to make pocket diaper inserts. Hemp is even more absorbent than microfiber, and is even more trim. Hemp is also a natural fiber that resists mold & bacterial growth naturally. Hemp is a great diaper insert choice for a heavy wetting child.

          Microfiber & Hemp inserts can also be used simultaneously when extra absorbency is needed. Place the microfiber insert on top of the hemp insert and then put both inserts into the pocket diaper. Many parents find this to be the perfect solution for their children because they get the Benefit of quick-absorbing microfiber plus the super absorbency of hemp.

          Prefolds
          Both cotton & hemp prefolds can be used as inserts for pocket diapers as well. Cotton prefolds can usually provide enough absorbency for a regular to moderately heavy wetting child. Hemp prefolds are necessary for super heavy wetters and toddlers during long periods between changes such as nap time and over night.

          You know you have to go up a size when…

          Breathability
          The breathability of your night time cloth diaper has more to do with your diaper cover if you are using a fitted diaper. There are a few options for cloth diaper covers out there. And I’m familiar with two. Covers made out of PUL and wool covers. And the cover that breathes the best? Wool. Hands down. But some people prefer a PUL cover because if you have a nighttime pooper the PUL will keep it in and wool wont. Plus some people are a little intimidated by washing wool. You can’t just throw wool covers into a washing machine or dryer. I’ll be covering that in an upcoming post!

          My favorite nighttime diapering solution: 
          For my son – the heavy wetter
          A bububebe fitted diaper with all 3 soakers snapped in
          An Artsy Fartsy Foo Foo hemp insert
          A Sustainable Babyish wool soaker (or longies in the winter)

          For my daughter – not so heavy wetter
          A bububebe fitted diaper with 2 soakers snapped in
          A Sustainable Babyish wool soaker (or longies in the winter)

          Don’t have the money to invest in these items? Buy them used on a variety of forums including Spots Corner, Swap Spot and Diaper Swappers. And don’t forget your local Craigslist! You might find local cloth diaperers that might want to swap and trade with you.

          Do you have an awesome nighttime solution? What is your tried and true combination?

          Sources: The Diaper Pin, Cutie Tooties

          How to Strip Cloth Diapers

          Due to a few inquires from others on my Washing Cloth Diapers post I thought it might be beneficial to also go over how to strip your cloth diapers as well. You see, as you wash and use your cloth diapers a build up can sometimes occur. Usually that build up is due to the detergent you use. There isn’t anything wrong with your detergent, it’s just something that naturally happens over time.

          In order to get rid of that build up and increase the absorbency of your diaper (as well as reduce the chance of irritation for your baby) it’s best to strip your diapers from time to time. I usually strip my diapers once a month but I know other mamas who do it every few washes. Basically when you start to notice that your diapers either a. are getting a little smelly or b. aren’t as absorbent you want to strip them.

          There are two different products I’ve seen out there that cloth diapering mamas use:

          Bac-Out
          Bac-Out is a product made by Bi-O-Kleen and it’s an amazing neutralizer. It eliminates the most difficult, organic stains, odors and waste the way nature intended. Bac-Out is a very unique blend of natural living enzyme cultures and botanical extracts, with more strains of cultures for more effective performance than commercial brands.

           Dawn
          Yes, it’s true. You can use Original Dawn to strip your cloth diapers. But remember to buy the original blue Dawn, not the scented or foaming Dawn. You can also use this product to strip other things like your clothes and towels. If Dawn can cut through oil on a baby duck then it can take care of your diapers! There are also a few other uses for Dawn too highlighted on a few blogs. Check out Blissfully Domestic or Wise Bread for more suggestions.

          Now to get to stripping… no, not that kind of stripping. Diaper stripping. Stripping your diapers is super easy. Just follow these steps and you’ll have clean and absorbent diapers in no time!

          How to Strip Cloth Diapers

          1. Wash With Hot Water
          To strip your diapers you will need the hottest water possible. If your washer machine does not have hot, hot water you may consider boiling a large pot of hot water and adding it to the wash to make the water hotter. Once you have the hot water add a squirt or two of Dawn, or Bac-Out, to the water (I literally just take the whole bottle, put it upside down and squirt the product into the water). Once the Dawn dissipates into the water add your diapers.

          2. Rinse, Rinse, Rinse
          Once your diapers have gone through the wash cycle it may take a few rinse cycles to get rid of the soapy bubbles. I rinse my diapers in cold water 2-3 times or until there are no more soapy bubbles. Don’t confuse soapy bubbles with bubbles caused by agitation. Soapy bubbles will linger whereas agitation bubbles will disappear pretty quickly.

          3. Air Dry
          I like to air dry my diapers after I’ve stripped them. I feel as if I’m freshening them up by stripping them so why not freshen them up some more with some clean air. And the sunshine only adds to the cleaning process (plus it bleaches out any lingering stains). Pop the dried diapers in the dryer and dry on low for 10-15 minutes to fluff them up and you’re ready to go!

          And if stripping your diapers doesn’t take care of the stink or absorbency problem please do not hesitate to contact the diaper manufacturer. They will more than likely be willing to help you out in finding a solution. You might have a yeast problem and yeast sucks. But don’t give up hope! Pinstripes and Polkadots has a few suggestions for yeast problems and prevention. Some other great resources and suggestions on alternative methods to strip your diapers can be found on Zany Zebra Designs and Lite Green Living.

          Washing Cloth Diapers {How To}

          I’ve highlighted my love for cloth diapers (CDs) on this blog before but since having my daughter I haven’t talked much about our cloth diapering experience with her. Honestly it’s because it’s been going very well. We haven’t run into one issue with the diapers we bought for her. Mainly, I think, because we are using all of the diapers we grew to love with our son. I still have the Happy Heiny and Bum Genius love but more than likely I’m grabbing for a prefold and Thirsties cover in the closet then a pocket or all-in-one diaper.

          One question I have received a few times is how I clean them. Most assume I use a service. And they’re surprised to hear that I take care of the washing (poop and all) myself. It’s actually quite easy! So I figured I’d break it down for those who were curious and/or interested in cloth diapering. Just remember that this is how I wash my diapers. Always consult the manufacturers instructions for their recommendations before jumping in. We’ll start with the basics and go from there.

          Stuff You’ll Need:

          • CD friendly detergent (check out this website for comparisons)
          • Vinegar
          • Original (blue) Dawn or Bac-Out (to strip your diapers if needed)
          • Dryer Balls
          • Clothes line with clothes pins

          What You Do
          Washing cloth diapers is pretty simple. After the initial prep wash, which we’ll go over, you can wash all of your cloth diapers together in the same load. The only thing you won’t be able to throw in the wash are your wool covers. That will be another post! Before washing make sure that when baby has a poopy diaper you clean it out by either spraying, scraping or plopping the waste in the toilet before putting your diaper in your wet bag.

          Prep Wash
          When you first get your cloth diapers you will need to do a bit of prep washing to maximize the absorbency of the diaper (so it holds more pee). With this initial prep wash you will need to separate natural fibers like hemp from your synthetic fibers. The natural fibers release oils during this initial wash that you don’t want coating your other diapers.

          Most diapers only need that first initial prep wash. But if you are buying prefolds brand new it can take anywhere from 3-5 wash and dry’s to fully get the absorbency needed. An easy way to test your diapers to see if they’re pee-ready is to put a few drops of water on them. If the diapers immediately absorb the water with no problem then they’re ready to go. If the water beads up then the diapers need another go through or two.

          To prep your diapers just do the following:

          • separate natural and synthetic fibers
          • wash diapers in cold water with a small amount of detergent (usually 2 tablespoons)
          • dry the diapers on low heat until fully dry or line dry diapers
          • repeat 2-4 times until diapers absorb water (prefolds will quilt up)

          Washing Diapers
          When you have about 24-30 dirtied diapers in your diaper pail or bag it’s time to do some wash! Don’t be scared. Diaper laundry will come as natural to you as washing your clothes. There are just a few simple steps you will need to add to the routine.

          1. Set your water level to the highest it goes
          Do NOT lower the water level to the level your diapers reach in the wash. It’s important to fully submerge the diapers and give the diapers some room to move around to get all the ickies out.

          2. Rinse your diapers first with cold water
          Include a small amount of detergent with this rinse to freshen things up. The rinse will remove any excess poo that may still be on your diapers and will also wash the diapers out a bit so that when they are being washed they’ll get cleaner.

          3. Wash your diapers with hot water, rinse again with cold
          There’s no need to use the sterilize cycle if you have it but please feel free to do so. I prefer just using the hot wash/cold rinse. Add in the recommended amount of detergent. This usually ends up being roughly 1/2 the amount you would use with your regular clothes.

          After the wash is complete add some vinegar (about 1/4 cup) to the laundry for the rinse. This will reduce the need for dryer sheets or fabric softener. It’s also a great alternative for your regular laundry too. You can also purchase a downy ball and throw the downy ball (filled 1/2 way with vinegar) to the wash so you don’t have to listen to when the second rinse occurs.

          4. Dry your diapers on low heat or on the clothes line
          Some prefer to dry their diapers on medium or high heat but in order to save a little energy I dry on low. I also add dryer balls to the dryer to beat out any static that may be lingering. Try not to use fabric softener or dryer sheets in the washer and dryer you use for your cloth diapers. These products leave a film on your clothes and your washer and dryer. The build up of this film will reduce the absorbency of your diapers.

          When the weather is nice I like to dry my diapers on low for 10 minutes and then pull them out and line dry them until fully dry. I then pop them back in the dryer with some dryer balls for another 10-15 minutes with the dryer balls to fluff them up. Best thing about line drying in the sun? The natural bleaching the sun does to the diapers. Natures miracles. Then you simply just take the diapers out of the dryer, stack together or stuff and stare in awe at your stash. Oh, wait. Maybe I’m the only one that does that. I may have a sick obsession with how much I love the fluff.

          So basically it’s cold rinse, hot wash, cold rinse, dry and you’re done!

          Need help stripping your diapers? Check out my Stripping Diapers post for more information.

          *** This giveaway is now closed ***

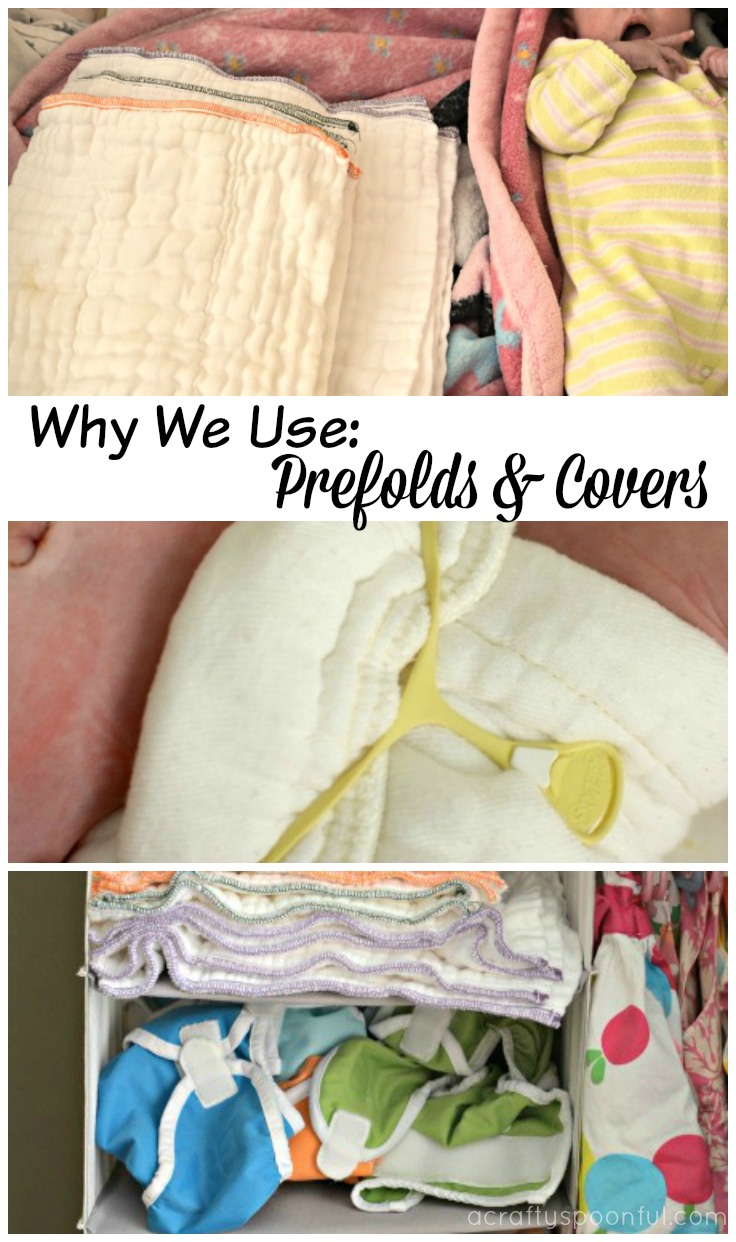
          Why We Use Prefolds and Covers

          I love cloth diapering. I love that there are no nasty chemicals touching my baby’s butt. I also love that he’s only had two instances of redness in the diaper area (not even a real rash). One of the best things about cloth diapering is you decide how much (or how little) you want to spend! The cheapest way to cloth diaper is by using prefolds and covers.

          This post contains affiliate links.

          Why Prefolds? Sizes and Types

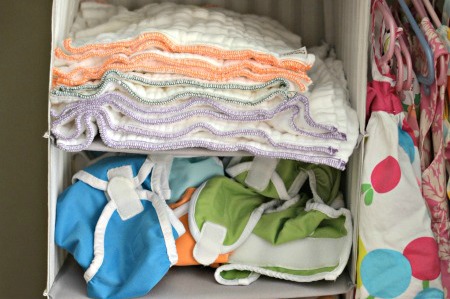
          I have only used Green Mountain Diaper (GMD) prefolds. There are two types of prefolds, Indian and Chinese. I have no idea what the difference is but GMD was recommended and we fell in love with their absorbency and durability after using them. There are multiple sizes. Most likely you can skip sizes and go to the next size up instead of buying every size. We went from Orange Edged (newborn) to Yellow Edged to Brown Edged. Most suggest either doing the Orange & Red combo OR the Yellow & Brown combo so I did it a bit different but I loved having the newborn size. We now use them as inserts for our pocket diapers.

          Why Prefolds? Types of Folds

          There are a few folds for a prefold. The most known are the angel wing fold, the jelly roll fold and the newspaper fold. For the longest time we would only use the angel wing fold but every time he pooed we’d have to get a new cover because the prefold leaked. So now we use the jelly roll fold exclusively (tutorial to follow in next post). 

          I use a Snappi to pin the diaper in place because frankly… diaper pins scare me. It’s not that I don’t think I can do it but I think of the pain I’d cause E if I screwed up. Just can’t do it… so I am sticking with the Snappi for now. I may change later on.

          Why Prefolds? Covers

          The great thing about prefolds is that it has a cover to keep everything IN. Our favorite diaper covers are the Thirsties brand covers. I don’t think we’ve ever had a blowout that went out of the Thirsties diaper covers we use. I’m sure that there could be some chance that it’d happen if the baby was positioned a certain way and had a large explosion but it’s very rare. 

          Another great thing about the Thirsties covers (and this goes along with prefolds in general) is that they aren’t as expensive as other cloth diapering options. And they hold up VERY well. We use our covers daily and they still look as good as they did when I first bought them.

          The prefold is the workhorse of the diaper family. You can do just about anything to it and can’t screw it up. I’ve sometimes accidentally let one slip into the regular wash with my clothes (it was clean… just being used as a burp rag instead of a diaper) and it was still as absorbant as my others. And one final thing about prefolds… even my mother-in-law and husband know how to fold a prefold successfully. So if you’re thinking… oh, I couldn’t do that, think again! You can!

          Why do you love prefolds? 

          Want to know more about cloth diapering? Read on! 

          Pin this article for later! 

          Click the Pin button on the image below to save for later. 

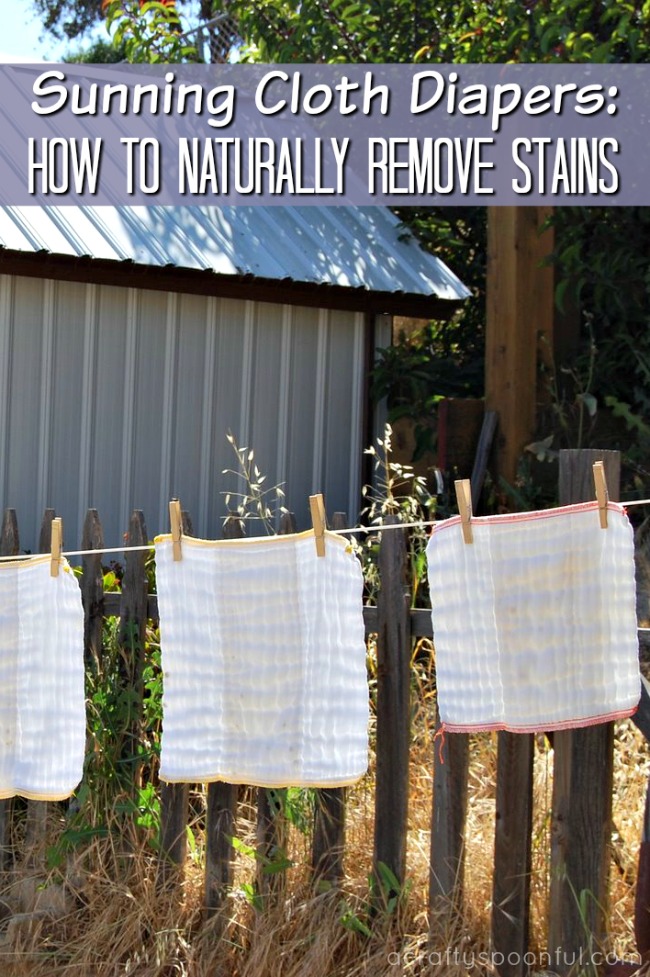
          The Secret to Remove Stains From Cloth Diapers: Sunning Diapers

          Did you know that the sunning diapers can actually work like bleach and get stains out? We share how below!


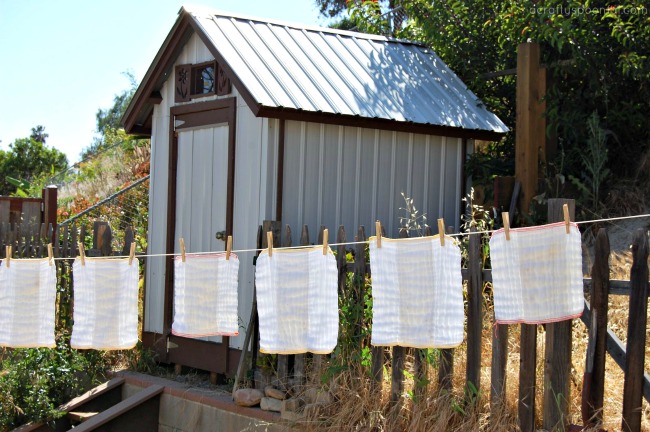
          Did you know that the sun can actually work like bleach and get stains out? We had no clue! I had to try it out because I did not believe it. I mean, I understood how it could work because every summer I get great highlights just by going outdoors so there must be some truth to it.

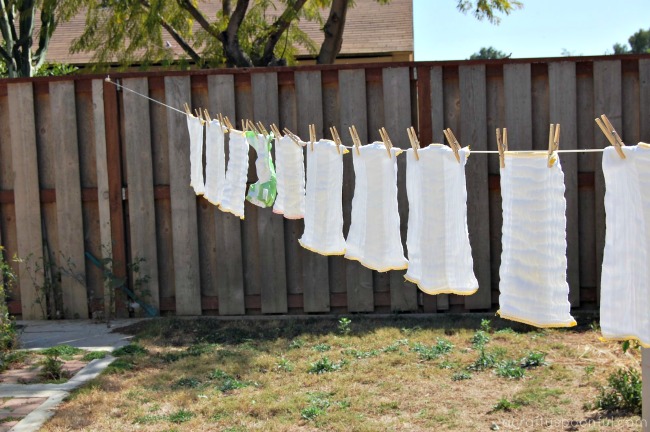
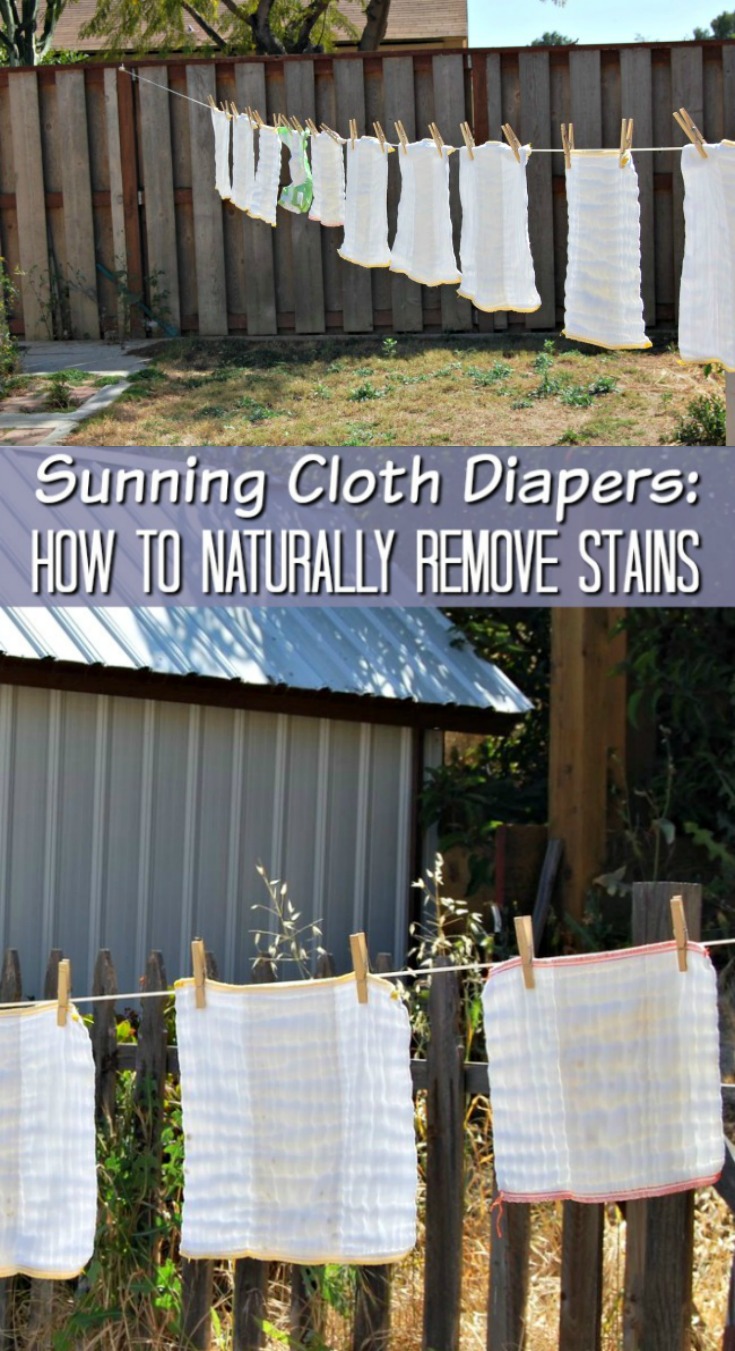
          So I had my husband set up a clothesline in the back yard. Oh, The clothesline isn’t for our clothes… it’s for the cloth diapers 🙂 Baby poo stains like no other. And when diapers are white there are a lot of stains. And then you dry them in the sun and they magically disappear!

          Where does the stain go?

          How to Remove Stains From Cloth Diapers

          1. Wash your cloth diapers like you normally would. 
          2. When still wet from the wash, take them out to your clothesline in direct sunlight and pin onto the clothesline. 
          3. Let dry completely in the sun and watch the stains fade away!
          4. If you still have some staining on your diapers, dampen a bit and let dry again. 
          5. Pop the diapers in the dryer for 2-5 minutes to soften them up a bit before putting away. 

          This also works on white clothing that baby spits up on as well! Or if you have an antique gown or outfit you want to remove the yellowing from. Such magic! 

          While this won’t work for all stains, it does work for the ones baby creates (until they start eating food and playing in the dirt). 

          What great laundry tricks do you use? 

          Love what you’ve read? Read more! 

          Pin this article for later! 

          Click the Pin button on the image below to save for later. 


          © A Crafty Spoonful - All Rights Reserved
          It is OK to use one of my photos provided a link back and/or proper credit is given. It is NOT ok to copy and paste a whole post including instructions. Please do not remove watermarks or alter images in any way. Please contact me with any questions at danielle@acraftyspoonful.com

          .