I participated in an Ambassador Program on behalf of Influence Central for SoCozy. I received Target gift cards to facilitate my review and thank me for my participation.
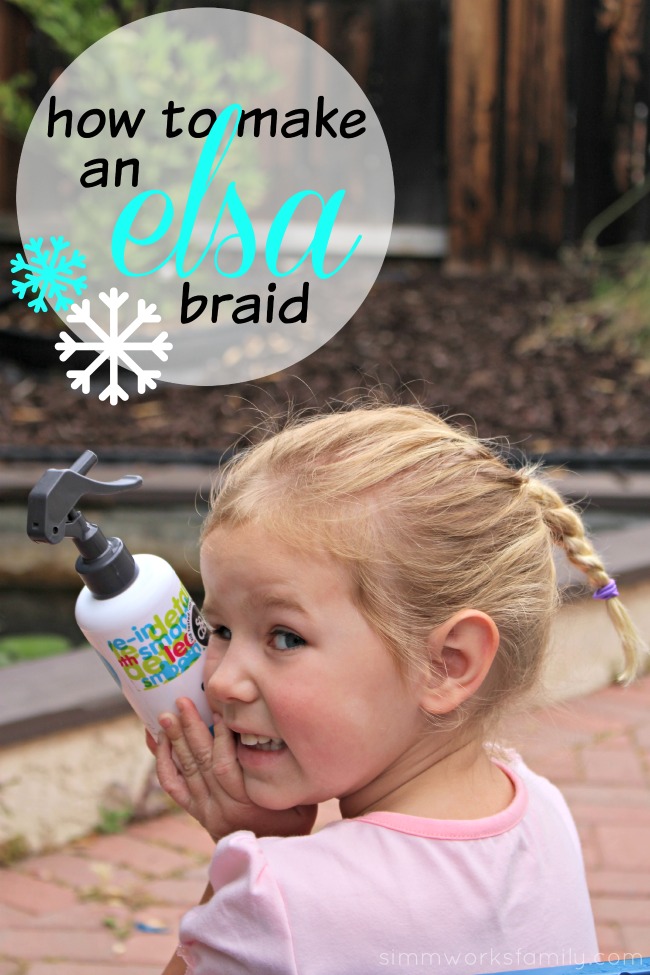
Now let me be completely honest up front, if you were looking for a super fancy french braid like tutorial, then look somewhere else. Because today I’m going to show you how to make an Elsa braid. But if you’re anyone other than my daughter you may simply see a pony tail with a braid in it. That’s because this is exactly what her Elsa braid is.
I’ve french braided her hair and tried to call it an Elsa braid, I’ve even done a fishnet braid in her hair and tried to call it an Elsa braid. But this girl. She doesn’t believe me. And this, right here, is what she deems as an Elsa braid.
So we go with it. And I save about 15 minutes in the morning arguing about brushing her hair. Because she’ll let me brush her hair if we put it in an Elsa braid. AND if we use her SoCozy detangler.
How to Make An Elsa Braid
What you need:
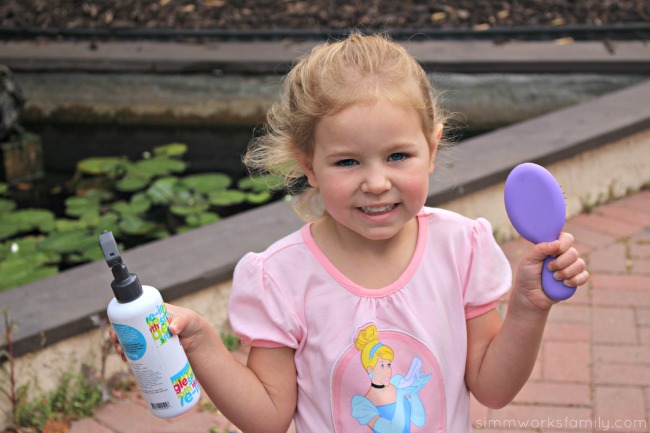
- brush
- detangler
- 2 small pony tail holders
- a head of hair
What you’ll do:
- Spray hair with SoCozy detangler.
- Brush all of the tangles and knots out of the hair.
- Put the hair into a pony tail by gathering up all of the hair to the middle of the child’s head with a brush. Spray additional detangler if needed for stray or frizzy hairs.
- Secure with a pony tail holder.
- Section pony tail into 3 sections.
- Take one section into the left thumb and forefinger, on into the right thumb and forefinger, and let the middle fall into where your fingers meet.
- Bring the left hand side over in between the middle section and the right section. Then bring the right hand side over in between the middle section and the left section.
- Repeat until all of the hair is used up and braided.
- Secure with the second pony tail holder.
Watch this video tutorial for an easy visual on how to make this hairstyle:
She’d scream, cry, and complain that I was pulling. I was hurting her. She was going to call Daddy. And then it all stopped and mornings became magical again (cue the Cinderella blue birds).
Because now we can sit by her wishing well (aka the koi pond) like Snow White, while she wears her Cinderella dress, and smells her Briar Roses – no, seriously… they’re “Sleeping Beauty Roses” to her – and I make her an Elsa braid before we head off to preschool. 5 minutes. Easy peasy!

Looking for something a little less basic? Check out this SoCozy tutorial on how to make a Braided Tiara for your princess:
These SoCozy products truly are magical. We’ve had great luck with our SoCozy Cinch 3 in 1 Shampoo + Conditioner + Body Wash in addition to the detangler we use daily. Not only does our daughter use it during bathtime but our son uses it in the shower as well.
And with how lazy this boy is in the shower, we need a 3 in 1 product that tackles everything at once so we can douse him, scrub him, rinse him, and dry him without him realizing it! Before we bought this product, he’d just go in, rinse with water, and tell us he was clean.
We’ve had to go back to Target and get more because he is actually using it. And in the end he smells Mango-go fresh and everyone around him is thankful.


