15 Patriotic Decor Ideas


Patriotic Decor Ideas for Summer

Memorial Day is approaching. This holiday is usually the day most consider the unofficial start of Summer. And for us that means decorating for the Summer holidays to not only remember our troops but to remember our country and show our patriotic pride.

I love changing up my mantel and home decor depending on the holiday or season and Summer is the perfect season to decorate with American flags and red, white, and blue decor.

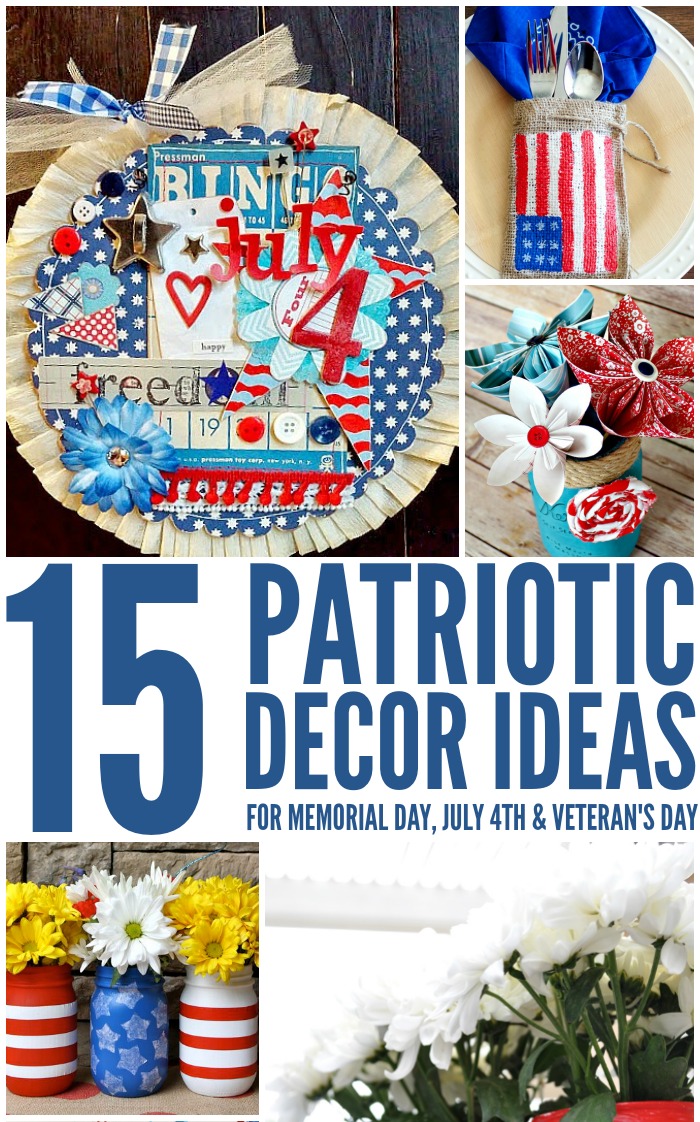
Here are a few patriotic decor ideas to spruce up your home for the summer holidays!

1. Painted Burlap Patriotic Place Settings | Source: A Night Owl

2. Patriotic Wand Centerpiece | Source: The Country Chic Cottage

3. Patriotic Hanging | Source: DIY Beautify

4. Patriotic Paper Flowers Tutorial | Source: View From the Fridge

5. Quickie Memorial Day Garland | Source: Happiness is Homemade

6. Patriotic Mason Jars | Source: Yesterday on Tuesday

7. Patriotic Upcycled Can Flower Pots | Source: Club Chica Circle

8. Pledge Printable | Source: Seven Thirty Three

9. Patriotic Initial Wreath | Source: We Three Smiths

10. Rustic Americana Scrap Fabric Banner | Source: Catch My Party

11. Easy Red, White and Blue Party Decor | Source: She Wears Many Hats

12. Pringles Can Firecrackers | Source: I Gotta Create

13. Patriotic Luminaries | Source: My Blessed Life

14. Vintage-Inspired Patriotic Printables | Source: Live Laugh Rowe

15. Patriotic Clothespin Wreath Tutorial | Source: Everything Etsy

How To Make Subway Art on PicMonkey

affiliate link disclaimer

PickMonkeySubwayArt

When I started to put the final touches on my home office and craft area I knew I wanted to add some personalization to the space to really make it mine. I scoured over Etsy and other designers to find the perfect wall art but nothing screamed me. So I decided to put my creative skills to the test.

What I came up with was how to make subway art on PicMonkey! Not only did I get to personalize the words to what I wanted my space to reflect, it cost me nothing. Well… besides the monthly fee I’m already paying for the premium services.

Below is a step-by-step tutorial on how to make subway art on PicMonkey so you can create your own artwork to hang up!

How to Make Subway Art on PicMonkey

When you head over to PicMonkey click on Create a Collage. We’re going to create our template first before adding our words.

PicMonkeyClickOnCreateACollageCraftRoomSubwayArt

1. Delete all but one cell from your collage.

PicMonkeyClickOnRemoveCellCraftRoomSubwayArt

2. On the left hand side click on textures (diamond grid icon). Choose a texture.

PicMonkeyChooseATextureCraftRoomSubwayArt

3. Drag the texture to the cell.

PicMonkeyTextureCraftRoomSubwayArt

4. Resize the cell to match the resolution and size you want to print your photo. For an 8×10 photo it’s suggested to use a 2400×3000 pixel ratio.

PicMonkeyResizeTemplateCraftRoomSubwayArt

5. Save your re-sized template. This will be the base of your subway art.

PicMonkeySaveCraftRoomSubwayArt

PicMonkeySaveAsCraftRoomSubwayArt

6. Now that your template is saved, go to Edit a Photo and open it up.

PicMonkeyEditAPhotoCraftRoomSubwayArt

7. Using the words you want to display on your subway art, start adding different words and fonts to your page.

PicMonkeyOpenPictureCraftRoomSubwayArt

8. Play around with different sizes and colors to get the look and feel you’re going for. Remember that you can also turn words vertically if you prefer.

PicMonkeyEditingCraftRoomSubwayArt

9. Once you’ve added all of the words and have them aligned the way you want, make sure there’s a nice 1/2 inch boarder around the wording to make room for framing.

PicMonkeyCraftRoomSubwayArt

10. Print out your subway art, frame it and enjoy!

Have you created subway art before? What was your focus or keywords?

Looking to play more with PicMonkey? Here are some fun projects to try out:

How to Make a DIY First Day of School Sign Using PicMonkey #BackToSchool

DIY First Day Of School Sign

how to make a recipe card with picmonkey pinterest

How To Make A Recipe Card With PicMonkey

How to Make Valentines with PicMonkey

How to Make Valentine’s with PicMonkey

Disclaimer: This post is contains affiliate links

DIY Popcorn Garland with @JollyTimePops

Jolly Time Popcorn Garland

 Getting Creative on a Budget: How to Make DIY Popcorn Garland

Getting crafty and creating items to decorate your home can be pretty daunting. And sometimes it gets rather expensive! But this DIY popcorn garland is neither daunting or expensive. So pop up your kernels on the stove and lets get to it!

[Read more…]

DIY Football Field Table Runner

DIY Football Table Runner

As I mentioned before, it’s football season! And that means one thing… my husband will not respond to a thing I say on Sundays unless we’re coming out of church or it’s during a commercial. So I do what I do best when I have no one to talk to… I craft! And this weekend I made this awesome football field table runner for our dining room table.

Not only is this a festive and fun piece for the house, it can also be brought to the game to spice up a boring folding table or a truck bed. Why not make tailgating fun with a little crafty decor, right?

This table runner is quick, easy, and the best part is there’s no sewing involved! So grab your glue, get some felt, and lets make a table runner! Then grab the scraps and make the football coasters to go along with it.

[Read more…]

How to Make Football Coasters

Football Coasters


Everyone in America knows that football season is upon us. Why not make watching the game a little more enjoyable with these fun DIY football coasters? With a little bit of felt, corkboard, and glue you can create these awesome coasters that are perfect for protecting your tables and properly holding your beer as you watch the game.

What’s even more awesome about these coasters is the fact that they take less than 10 minutes to make. No… seriously. All you do is cut, glue, and use!

We used these coasters for our tailgating party this weekend to go along with the football field table runner I made. Both paired perfectly together and made our game-time meal more enjoyable. These would also be perfect to pack up and take to the game for a proper tailgating party.

[Read more…]

5 Alternatives to Carving Pumpkins {Fun Kids Crafts}

Having small children can sometimes make pumpkin carving a bit difficult. So this year we went with something a little different and let the kids make a few varieties of pumpkins. Grab some glue, your potato head pieces, and even the paint and see what your kids do to create their Fall masterpieces!

If you’re in the same boat and are looking for great alternatives to carving pumpkins this year, here are our suggestions.  [Read more…]

Smarties Are The Perfect Halloween Sweet Treat

One of my favorite parts of my childhood Halloween experience was racing home from trick or treating to sort out all of the Halloween candy I received. I was obsessed with finding my favorites (Smarties were at the top of the list along with chocolate). And one of my favorite parts of Halloween now are the decorations we put up each year. I absolutely love how festive and creative we get each year.

My husband is quite the Halloween decor enthusiast. Each year he purchases foam pumpkins from the store and creates a new face. And in an effort to keep up with him, I try to get creative as well in the decor inside our home.

Smarties Halloween candies #IAmASmartie

Gluten-Free and Allergen Free

This year I headed to Target to pick up some decorating supplies and candy to pass out. Since there are so many allergies and special diets these days, we went simple. Smarties all around! And I planned on decorating with Smarties as well.

Smarties are not only gluten-free, but they also contain no peanuts and are fat free! They’re the worry-free, one-size-fits-all candy this holiday and are the perfect choice for passing out. I was able to pick up a large bag of Smarties and another bag of Smarties and Dum-Dums mixed together. My daugther was absolutely elated to put these bags into the cart to take home.

Fun for All Ages

I always make sure to pick up some goodies for smaller children who aren’t able to eat candy so I grabbed a pack of Play-Doh as well. Once I had everything I needed to pass out to the kids, I grabbed some decorations to make our home festive.

Since we also needed a bucket for my daughter (she was a bit too young last year for a bucket), we picked up a classic pumpkin bucket to match her brother’s. My son’s bucket is personalized so I grabbed some scrapbooking alphabet stickers to personalize hers as well. It makes a simple bucket their own and I love the ease of it.

You can check out the rest of my shopping experience in my Smarties Google+ Album.

Fun and Festive Wreath

In an effort to tie in the fun of one of my favorite candies with the decor in my home, I decided to turn a Target $1 Spot foam wreath into a festive piece for my front door. Along with the pumpkins and spider webs in our front yard, our trick-or-treaters would also see this gorgeous wreath and know exactly what they’d be getting in their buckets.

To create my wreath I simply glued Smarties in their wrappers onto the wreath. By gluing them seam side down, the wreath can stay in tact for many years. Because the Smarties left gaps as I glued the first layer I decided to add a second layer. And even though it added a bit of weight to the wreath I absolutely loved the look it gave to the finished piece. I simply tied dome wire ribbon to the top and hung it on my door.

To find out how to make this wreath step by step, check out my Smarties Wreath DIY Tutorial here.

Sweet Treats

After creating our wreath, we wanted to celebrate by using our Smarties in a different way.With our Parish Festival coming up we were already planning on making some delicious goodies to sell in the Bake Shop to raise money for the church. We made some delicious Smarties Sugar Cookies that were absolutely delicious.

Instead of using the Smarties whole in our cookies I decided to crush them into a flour and use them in a family sugar cookie recipe. not only did they give great flavor to the sugar cookies, they were the perfect treat for Halloweentime. We packaged them in with a few whole Smarties in with the package to share our Smarties love.

You can check out my Smarties Sugar Cookies recipe here

If you’re looking for a great treat to pass out to the goblins and ghouls who come to your door this Halloween, pick up a large bag of Smarties and you’ll be set! And if you want to get a bit creative… see what you can make with Smarties this Halloween.

Make sure to head over to visit Smarties on Facebook and follow Smarties on Twitter to indulge in their sweet goodness.

What would you do with Smarties candy?

Disclaimer: I am a member of the Collective Bias™ Social Fabric® Community. This shop has been compensated as part of a social shopper insights study for Collective Bias™ and Smarties. All opinions are my own. #CBias #SocialFabric


© A Crafty Spoonful - All Rights Reserved
It is OK to use one of my photos provided a link back and/or proper credit is given. It is NOT ok to copy and paste a whole post including instructions. Please do not remove watermarks or alter images in any way. Please contact me with any questions at danielle@acraftyspoonful.com

.