Moana has been and continues to be both of my daughter’s favorite movie. Each of them is glued to the screen as the story unravels every time they watch it. Three thousand years ago, the greatest sailors in the world voyaged across the vast Pacific, discovering the many islands of Oceania. But then, for a millennium, their voyages stopped – and no one knows why.
The story of Moana goes through the history of her people and the reason why they never leave their island. As Moana takes off on a new adventure, we come to learn more about this missing pieces of her story and watch as she creates a story of her own.
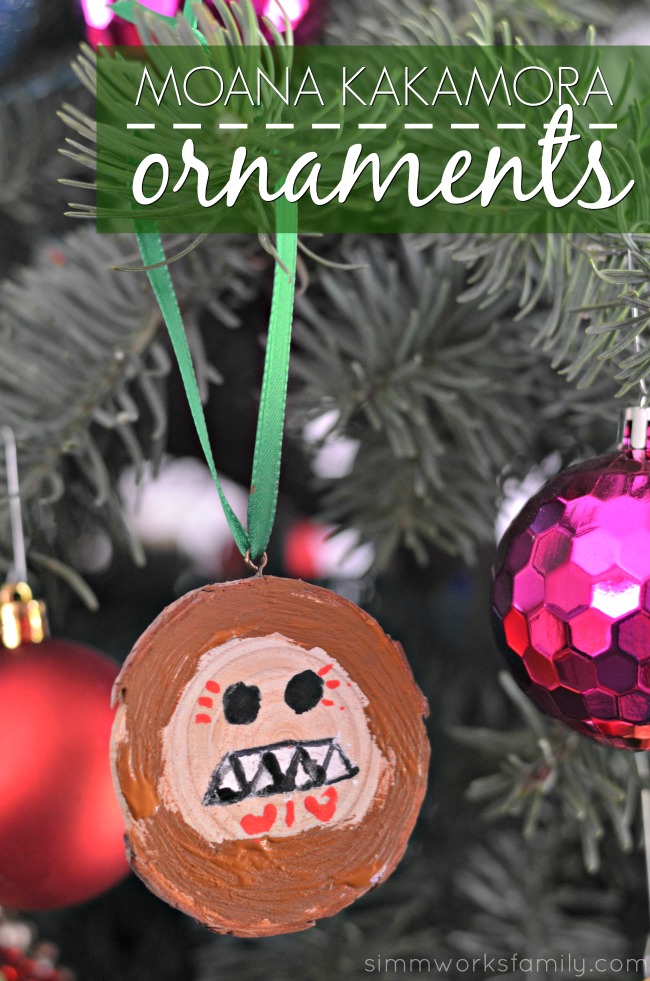
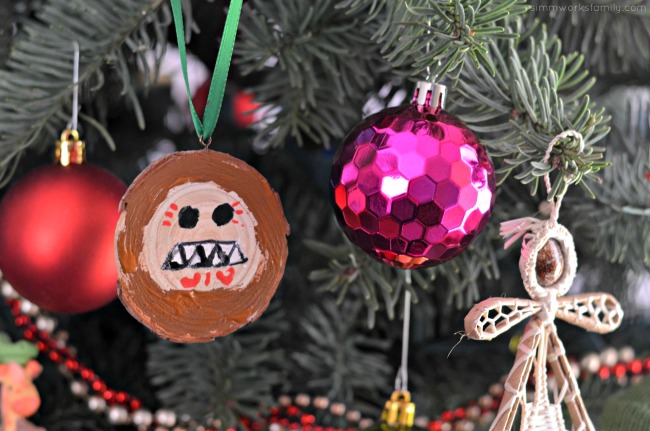
Throughout her adventures, my daughter’s favorite part in the movie is when Moana and Maui encounter the Kakamora. Seemingly sweet and gentle creatures in the beginning, Moana quickly learns of their fierce, warrior-like side. We’re recreating the Kakamora in these fun Kakamora Christmas ornaments for the holiday season.
Don’t want to make these yourself? Purchase one here in our Etsy store!
How to Make Moana Kakamora Coconut Ornaments
What you’ll need:
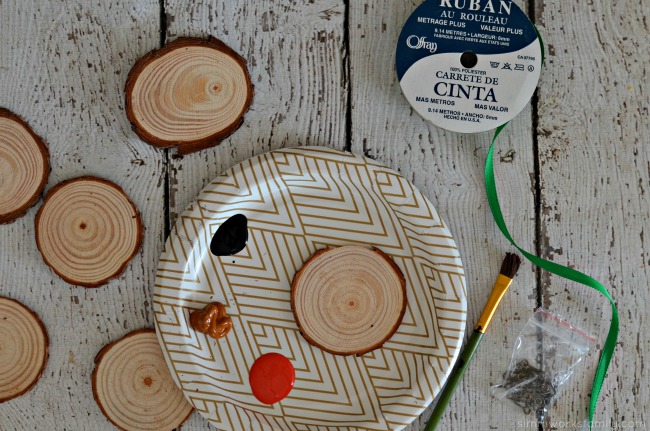
- 2″ unfinished natural wood slices
- brown, black, red and white craft paint
- paint brush
- small eye screws
- ribbon or twine
What you do:
1. Paint a circle around the edge of the wood slice with brown paint leaving the middle wood exposed.
2. Using the black paint, make two circles for eyes.
3. With the white paint, make a mouth full of teeth. Outline in black if you’d like.
4. Add the final touches to the face by adding some designs with red paint.
5. Screw eye screw on top of the ornament and string with ribbon.
Let dry and hang on the tree to enjoy during the holiday season!
* This post was originally published on Nov 21, 2016