When to Wean {Breastfeeding}

As my daughter gets closer and closer to 18 months of age I keep thinking about when we will wean from breastfeeding. From a young age we knew that she would be a difficult one to wean. I was even told by one of her pediatricians that she would more than likely nurse until she was three if we let her.

And you know what? That sounds fine to me!

Some days it can be hard. She wants to soothe and relax by nursing while I’m trying to do housework or take care of my son. She still nurses 5+ times a day although never longer than 5 minutes at a time unless its naptime or bedtime. So while it takes me away from the task at hand, it’s quick and then she’s ready for the next thing on her list.

I recently read a post over on Naptime is My Time on weaning your baby.  The post was part of a series from The Mommy Mindset where a handful of bloggers share their experience. I was relieved to hear that a few other mommies were in the same boat. Their kids just aren’t showing any signs of readiness even at 18+ months.

With my son I felt almost relieved when he finally decided he was ready to wean at 19 months. I was going into my third trimester with my daughter’s pregnancy and I honestly don’t think I was even producing much milk still. Plus he loved sippy cups (and took a bottle when he was younger!) which made a difference.

He happily stayed with family for a few days out of the week while I worked part time away from the home and was used to using his sippy for comfort instead of nursing. But since I’ve been home with my daughter she hasn’t had much experience with having to take her milk from a sippy. I have been told, however, that she happily took her milk when we recently out for a date night that didn’t end until well past bedtime.

I’m hoping that by following her cues and going with what feels right for both of us we’ll figure out a great time to wean. And while nursing can sometimes take a toll on me (my body tends to hold onto weight when I am nursing) I cherish this time I have with my babies. It’s definitely worth it in the end!

Bread Maker Pizza Dough {Dinner Recipe}

When I purchased my bread machine I thought that all I’d be making was bread. Shortly after getting married I swapped out a Kitchen Aid mixer we received (we already had one) for my Zojirushi and I instantly looked for great recommendations for bread books. That’s when a co-worker of mine mentioned that not only could I make great bread in my machine but I could make basically any type of yeast dough I wanted in it.

I was so overwhelmed with just the making bread part that I filed that info away. Until my husband brought up wanting to make hamburger buns from scratch. Then I really got started…

Now whenever I want some dinner rolls, pizza dough, or even cinnamon rolls, I just grab the bread machine. It truly is an amazing appliance and I’m so glad I got one when I did. On my list of must haves in the kitchen it’s up there with the coffee maker, rice cooker and microplane grater. Seriously… if you love bread and dough you must invest in a bread maker!

Ok… enough about the appliance and onto this dough. I’ve made a few other dough recipes in the past but none turned out as perfect as this one from Williams Sonoma. I was able to thinly roll the dough out on my countertop and then transfer it to my hot pizza stone without any tears. It was so easy to work.

And the end product spoke for itself. Flavorful, light and airy. 

The crust held all of the toppings onto it without drooping. Now that’s my kind of crust! If you have an itch to make your own dough from scratch then I highly suggest trying this recipe out!

Bread Maker Pizza Dough

Bread Maker Pizza Dough

  • 1 cup warm water (105° to 115°F)
  • 2 Tbs. olive oil
  • 1 tsp. salt
  • 1 1/2 cups unbleached all-purpose flour
  • 1 1/2 cups whole wheat flour
  • 1 Tbs. active dry yeast

In the bread pan of an electric bread machine, combine (in this order) the warm water, olive oil, salt, flour and yeast. Set the machine for Pizza Dough according to the manufacturer’s instructions and process through the cycle.

Transfer the dough to a lightly floured work surface. Punch down the dough and divide in half. Form each half into a ball and cover with a clean kitchen towel. Let the dough rise in a warm place until doubled in size, about 40 minutes. Roll out as directed in the pizza recipe.

Makes two 12-inch rounds.

Disclaimer: This post contains affiliate links. By clicking through to the sponsor’s website your are helping support the Simmworks Family Blog.

DIY Multi Bubble Maker

 
What’s summer without bubbles? I don’t know about you but we keep a huge bottle of bubbles around for fun anytime. It’s proven to be quite useful since most of the time the small bottles of bubbles end up upside down on our sidewalk and lawn. Little hands just haven’t figured out how to steady a bottle in their hand and blow bubbles at the same time.

We’ve become addicted to one bubble maker in particular from a popular clothing store however it can be a bit pricey. So we’ve come up with an inexpensive solution to get the same results… multiple tiny bubbles at one time! 

Not only is this bubble maker super easy to make, it uses items that were in my cupboard already. Double bonus for not having to buy anything. So grab some straws, a few pieces of tape, and your bubbles and start having fun.

DIY Multi Bubble Maker

What you’ll need:

  • a handful of straws
  • tape
  • a shallow dish or container for bubbles
  • bubble solution

What you do: 

1. Grab the straws in your fist and make sure they’re evenly level on both ends.

2. Place tape on one end to secure straws together.

3. Tape the opposite end for further support. Try not to use your husband’s expensive panting tape because your clear tape wasn’t showing up well in pictures.

4. Pour bubble solution into shallow dish and lightly dip bubble maker in.

5. Start blowing bubbles! Try not to put your mouth over the end of the bubble maker, instead brush your lips slightly on the end of the bubble maker and blow.

Bad photo but below is the only one I got of the bubble maker in action since my son refused to play along (you know… just cause I had a camera in my hand). The bubble maker not only makes lots of tiny bubbles but can also make super big bubbles as well if you get lucky!

 
Every week Danielle brings great kids crafts to Formula Mom!
Danielle is a work-at-home-mom of two beautiful kids and writes at the Simmworks Family Blog. She loves to blog about her family, healthy living, going green and crafting. Danielle would love for you to come visit! You can reach her on facebook and twitter as well. If you have any questions feel free to email her at  simmworksfamily@gmail.com

Coconut Oatmeal with Tropical Traditions Coconut Oil {Breakfast Recipe}

We’re always trying to find great alternatives to classic favorites in this home. Since my daughter consistantly eats oatmeal for us for breakfast we wanted to continue our luck with the one meal we know she’ll finish. So when I received my Tropical Traditions Coconut Oil I knew exactly what I’d to do try it out… put it in our oatmeal!

When I was done making the first batch of coconut oatmeal I went into the fridge to grab the kids some milk for their sippy cups. I looked over and saw an open package of mini chocolate chips from my husbands latest baking adventure so I grabbed the bag and sprinkled a few chocolate chips over the top of each bowl for an added treat. OMG! This oatmeal tasted exactly like my favorite chocolate chip oatmeal cookie. Delicious!

I cannot wait to start using Tropical Traditions coconut oil in other recipes. Added benefit? We can use it as cloth diaper friendly diaper cream too! Who knew? Plus there are so many other ways to use this stuff. Go here to find more!

Coconut Oatmeal
  • 1 cup milk
  • 1 teaspoon Tropical Traditions coconut oil
  • 1 tablespoon unsweetened coconut flakes
  • 1/2 cup old fashioned oats
  • 1 teaspoon cinnamon
  • 1 tablespoon mini chocolate chips (optional)

Pour milk into a small saucepan and heat on medium.

Stir in coconut oil and coconut flakes. Stir until oil is completely melted. Add in oats. Sprinkle on cinnamon and continue to stir. Cook for 3-5 minutes.

Pour into a bowl and sprinkle with chocolate chips for an added bit of sweetness!

Serves 2 (or 1 adult, 2 kids)

Do you use coconut oil? I’d love to hear how! 

Disclaimer: I received a 32oz jar of Tropical Traditions coconut oil for review purposes only. Regardless, I only recommend products or services I use personally and believe will be good for my readers.

Growing Up Is Hard To Do

My beautiful baby girl no longer gives open mouth kisses. She puckers up.

And forget holding my hand when she steps down from our front porch… she can do it all by herself with no help. 

I knew that watching the kids grow would be hard, especially with no plans of a third child in the works. I’ve been trying to let each moment, each milestone soak in as much as possible. Being home with the kids during the week has helped give me the opportunity to watch how much they grown and change each day.

I watch how much these little ones change and am in awe of how quickly they adjust to these new skills and techniques. I definitely don’t react as fast!

I feel as if I need time to process it all. Make my mind realize how quickly things are changing and try and be “in the moment” as much as possible while I watch them grow and become these amazing little people.

In just a few months my oldest will be going to preschool and while it’s just a few days a week (and right around the corner from our home) I don’t know what I’m going to do without my little buddy during the day. I’m sure we will stay plenty busy, but after being with him day in and day out for this past year I know it’ll feel a bit weird to not have him with us on our daily adventures.

Just this morning my daughter and I dropped him off with his great aunt and m ydaughter was beside herself with sadness because she couldn’t go too. I just know the reaction will be similar as she watches her brother go off to school.

Donuts might have worked as a great distraction this morning but they can’t be a daily thing.

And what will I do when both are in school? I’m sure I’ll be able to find volunteer work, continue working at home part time, and keeping myself busy with activities, etc but the thought of them growing so quickly and heading off to school so soon is such  a weird thing to think about.

Maybe we should think of having another… Nah! That’s be crazy.

DIY Paper Bag Puppet

One of my kids’ favorite toys to chose for imaginary play are their puppets. We have a few stuffed animal puppets and a few wooden puppets that they play with on a regular basis. My son makes his sister take whichever puppet he isn’t interested in and has her play whatever part he doesn’t want. And she plays her part with no complaining because she loves to play with her brother.

So when I asked my son if he wanted to make his own puppet and he turned me down, my daughter quickly jumped in and started to make her own. She helped cut out the stripes, glued down all of the parts, and even added a few stripes of her own with her favorite black marker.

Paper Bag Animal Puppet

What You’ll Need: 

  • paper bag
  • construction paper
  • glue
  • scissors
  • plastic eyes
  • black washable marker
  • pipe cleaners (optional)

What you do: 

1. Cut out the shapes for your animal. We made a tiger/cat so we cut out stripes and three triangles for the ears and nose. 

2. Glue on stripes

3. Place dots for eyes and place eyes on top portion of paper bag.

4. Add ears, nose, and whiskers. Use pipe cleaners for whiskers if you prefer a more three dimensional puppet.

5. Let your child put their finishing touches on the puppet (in our case, more stripes) and start playing!

There are many different types of puppets you can make and many other tools you can use to enhance your puppets. We love to use yarn for hair (or manes), glitter for sparkle, and buttons for eyes and noses when we don’t have googly eyes.

Characters in books are the favorites for puppet ideas. We’ve done full productions of Goldilocks and the Three Bears in the front yard as well as our own version of a few Mother Goose tales. The ideas are endless! Just grab your favorite book or create your favorite animal and get crafting.

 
Every week Danielle brings great kids crafts to Formula Mom!
Danielle is a work-at-home-mom of two beautiful kids and writes at the Simmworks Family Blog. She loves to blog about her family, healthy living, going green and crafting. Danielle would love for you to come visit! You can reach her on facebook and twitter as well. If you have any questions feel free to email her at  simmworksfamily@gmail.com

Where to Pick Strawberries in San Diego {San Diego Family Fun}

Where to Pick Strawberries in San Diego

The one activity I’ve been dying to do with my family is go strawberry picking. I’ve said year after year that we were going to do it and then just didn’t follow through. So for Mother’s Day my husband asked if I wanted to take the kids up to the strawberry fields to go strawberry picking. And I quickly said yes!

We made our way up the 5 freeway towards Carlsbad and just stopped at the first U-Pick Strawberries sign we found. We didn’t do much research beforehand that I know of other than to find out how much it was so we had enough cash on hand.

When we got there we parked, paid for our small bucket. Then after a quick run down of the rules we made our way to the strawberry plants to get picking.

Where to Pick Strawberries in San Diego Carlsbad Strawberry Co picking strawberries

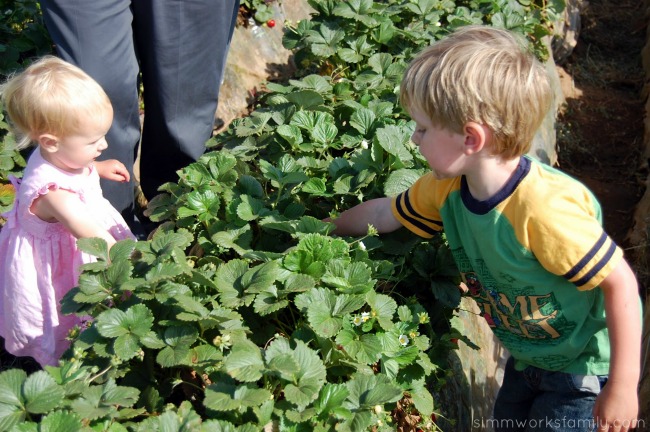
The kids quickly jumped on board and started picking and eating like crazy. Until my husband noticed the moldy strawberries next to the ones the kids just ate and picked. So we became the pointers for the kids and showed them which ones to pick.

Where to Pick Strawberries in San Diego eating strawberries

My son was quite excited about the whole “eat as many as you’d like” and quickly had a ring of red around his lips and on his fingers. I highly recommend bringing baby wipes with you as you pick the strawberries!

Where to Pick Strawberries in San Diego eating strawberries at Carlsbad Strawberry Co

After traipsing up and down just about every row, the kids were too exhausted to walk back to the car alone. So my husband scooped them up and carried them. He quickly learned why the owners recommend wearing old shoes after putting the kids down at the car… his shirt and pants were not only covered in strawberries but caked with muddy dirt as well. The sign of any great adventure!

So if you are interested in picking some strawberries this season I highly suggest that you check out where your local U-Pick strawberry farms are. They’re great fun for kids and adults alike! Next year we’ll definitely be checking out the other strawberry fields around town.

Where to Pick Strawberries in San Diego strawberry fields

Where to Pick Strawberries in San Diego

Carlsbad Strawberry Co. – Camarosa Strawberries
Located on Hwy 5 at Cannon Road in Carlsbad
Open 7 days a week, 9 am to 5 pm

PO Box 479,
Carlsbad, CA, 92018-0479
760-519-4154
m1h2ouse@yahoo.com.

U-Pick Fields open April 17th through June, perhaps as late as July 4th weekend.
Prices: $8.70 for a 1 quart bucket, $17.00 for a 3 quart tub (think fried chicken tub size), Cash only

Temecula Valley Strawberry Farms
Click here for current open hours, days, dates, and directions.
Open Friday-Sunday 10am-6pm

5452 5th Street,
Fallbrook, CA 92028
951-212-4899
kfietz3@gmail.com

U-Pick Fields open March 15 pm to August 30.
Price: $4 per pound, Cash, Check, Debit cards, Visa/MasterCard accepted

Heritage Farms
Call for picking hours

21345 San Pasqual Road,
Escondido, CA.
(760) 746-8822

Have you gone strawberry picking with your family? What do you make with the strawberries you pick?

Sausage & Kale Soup

Sausage and Kale Soup

In an effort to go green and become a bit more eco-friendly we’ve started an organic garden at home. We’ve also been very diligent about choosing a new and unique veggie to take home from the farmer’s market in an effort to teach our kids about eating healthy. One of the vegetables we picked up this week was kale. I’ve heard amazing things about it’s super green, vitamin rich goodness but honestly have never cooked with it before.

So I attempted to make kale chips as a healthy alternative to potato chips for my family. I had heard rave reviews from a few of my friends and just had to try them. What a mistake that was! Burnt to a crisp or so bitter I couldn’t swallow. I threw out the whole batch and was dreading watching the other bunch of kale we had picked.

Until I remembered a friend mentioning using kale in her soups. And then I thought of the sausage and potato soup they serve at the Olive Garden. The light in my head went on and I knew what dinner was going to be! Not only did I get some veggies into our meal, the kids enjoyed it! This soup is simple, easy, and comes together quick. The perfect way to relax in the cool, crisp spring air after enjoying the farmer’s market.

Sausage & Kale Soup

  • 2 sausage links
  • 1 tablespoon olive oil
  • 1 onion, diced
  • 4 carrots, coined
  • 1 tablespoon flour
  • 1 can navy beans, rinsed
  • 4 cups chicken stock
  • 2 cups water
  • 4 cups of kale, stems removed, torn into small pieces
  • salt & pepper to taste

Saute the sausage in a large pot or dutch oven. Once slightly browned, remove from pan and set aside.

Add olive oil to the pan. Once heated, add onions and carrots to the pot and saute until translucent and tender. Sprinkle flour over the veggies and saute for a minute longer.

Pour chicken stock and water into the pot and add sausage back in. Add the beans and let simmer for 20 minutes, or until all of the flavors are incorporated. Add kale and season with salt and pepper to taste and cook for another 5 minutes.

Serve with some fresh-baked bread or your favorite salad for a wonderful and tasty meal in under 30 minutes.

Citrus Beef with Broccoli {Dinner Recipe}

My husband’s known to pick up random cuts of beef from the store because he sees them in the clearance bin. He’s great at spotting the great deals as soon as we walk into the store and sometimes I have to get a bit creative when it comes to cooking up what he brings home. Especially when it’s something that is going to expire tomorrow.

So when he grabbed some chuck steak the other night at Target I decided to get creative with what I made out of it and combined two of my favorite asian flavors, orange chicken and beef with broccoli. I mixed the citrus glaze of the orange chicken with beef and broccoli and was pleasantly surprised with the results.

If you want more of an orange flavor, use orange marmalade in place of the lemon curd. I had lemon curd in the cupboard for some reason so I just used that. I didn’t use a lot so it wasn’t overly sweet in the dish.

 
Citrus Beef with Broccoli

  • 2 cups brown rice
  • 1 1/4 pounds beef chuck steak
  • 1/4 cup canola oil
  • 1/4 cup cornstarch
  • 1/4 cup lemon curd (or orange marmalade)
  • 1 tablespoon chopped garlic
  • 2 tablespoons white vinegar
  • 1 tablespoon peeled and chopped ginger
  • 2 tablespoons soy sauce
  • 1/2 cup freshly squeezed  orange juice
  • 1 head broccoli, cut into florets, stems sliced into 1/4-inch rounds
Cook the brown rice according to package directions.

 Thinly slice the chuck steak, about 1/4-inch thick, across the grain. Cut the slices into 3-inch long strips.

Heat the oil in a wok or large skillet over high heat. Toss the beef in the cornstarch and shake off excess. Fry the beef in 2 batches in the hot oil, turning once, until crispy and golden, about 2 minutes on each side. Remove the beef from the pan and set aside on paper towel lined plate. Carefully drain the oil from the wok or skillet.

In a medium bowl add the lemon curd, garlic, vinegar, ginger, soy sauce and orange juice and whisk until well combined. Add to the wok, over high heat, and cook for 2 minutes. Stir in the broccoli. Cook the broccoli until slightly tender and the sauce is thick, about 3 to 5 minutes. Stir in the beef, then transfer to a serving platter.

Serve immediately with the rice.

Serves 4

DIY Recycled Kite

There’s been a change in the weather over the past few days and our beautiful sun has receded back behind the clouds. The wind has started to pick up and leaves have been swirling around our front yard. It’s the perfect weather for kite flying!

Only problem was we didn’t have a kite.

So after a few different attempts using a few different patterns we made our own kite out of recycled products we had lying around the house. And boy was it fun! While I did most of the construction, my son and daughter did help tape up the kite measured the string. Even without the sun we got to enjoy the outdoors and my kids had a blast running around with their kite.

DIY Recycled Kite

What You’ll Need: 

  • Plastic bag (trash bag, store bag, etc)
  • Thin wooden dowel, cut in 1/2 or other similar item (I used 2 wire hangers)
  • Tape, masking or electrical
  • String or yarn
  • Scissors
  • Craft stick

What you do:

1. Create a lowercase T with the dowels and use tape to secure the two sticks together.

2. Cut bag open along one side and the bottom. Do not cut the other side. Stretch bag open to measure to fit the dowels in a diamond shape.

3. Attach string to the craft stick and wrap a few yards around it.

4. Cut out bag and adhere to the dowels by taping each corner.

5. Make two tabs on the right and left side of the kite with tape.

6.  Measure out some string or yarn to about 1″ over each side of the kite. Tie string to the tabs you just created and double knot. The string should be tight enough to slightly bend the kite inward.

7. Now this is where it gets a bit tricky. Turn the kite over to the print side (front of kite).

About 3 inches from the top and bottom of the kite make two small holes on either side of the dowel. Use string to secure the dowel to the front of the kite. Run the string down to the bottom of the kite and tie the other side. 

8. Tie a piece of string to the dowel below the knot you just created on the backside of the kite. This should create an X on the back of the kite and will be where you attach your lead. Attach the lead to the middle of the X and secure with a slip knot.
 

9. Cut a few long strips of plastic from the remaining parts of the plastic bag and adhere to the bottom of the kite.

10. Now it’s time to go out and fly!

Help your child out by releasing a bit of string, holding the kite up above your head, and telling them to run in the opposite direction. When you start to feel a pull on the kite let it go and watch it take off!

Every week Danielle brings great kids crafts to Formula Mom! Danielle is a work-at-home-mom of two beautiful kids and writes over at the Simmworks Family Blog. She loves to blog about her family, healthy living, going green and crafting. Danielle would love for you to come visit! You can reach her on facebook and twitter as well. If you have any questions feel free to email her at  simmworksfamily@gmail.com.


© A Crafty Spoonful - All Rights Reserved
It is OK to use one of my photos provided a link back and/or proper credit is given. It is NOT ok to copy and paste a whole post including instructions. Please do not remove watermarks or alter images in any way. Please contact me with any questions at danielle@acraftyspoonful.com

.