Preschool and Potty Training

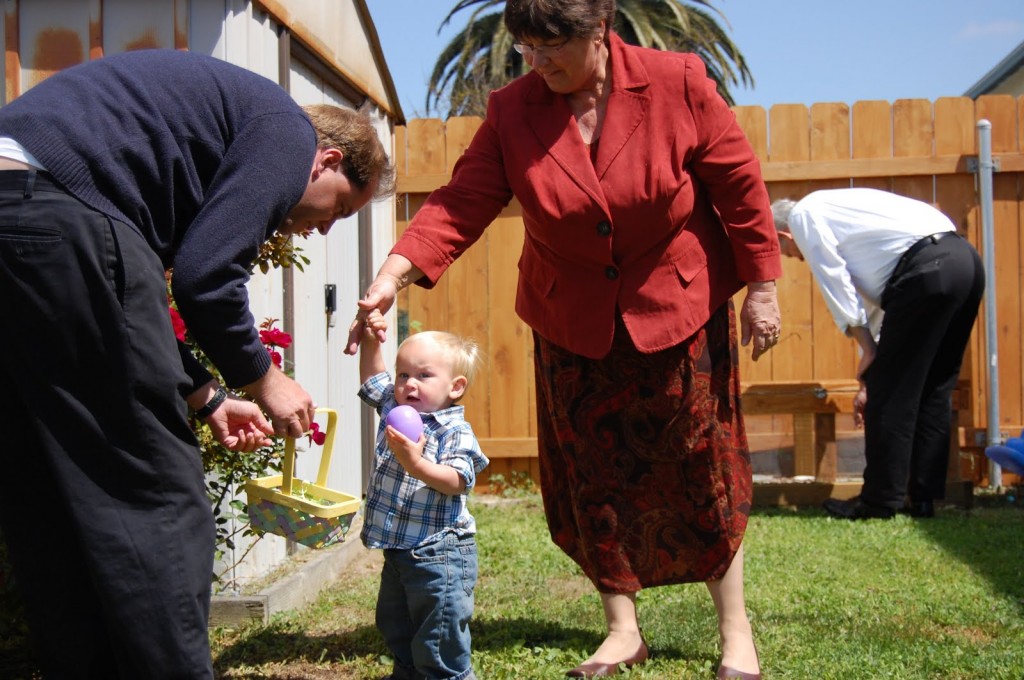
Ever since my son turned 3 I’ve had a hard time figuring out what to label him as. He’s not quite a toddler but isn’t in preschool. Yet. He starts in the fall but is more than ready right now. He’s social, loves to read and learn, and is obsessed with the idea of going to school “like a big boy.”

But since he has to be potty trained before he can go, we’re doing what we can at home to pique his interest. Since we’ve gone over this hump before I’m dreading starting again even more. But I know that if I just jump in as soon as he starts showing more interest then he’ll pick it up right away. He understands the concepts; he just doesn’t want to lose the control.

But once he’s potty trained what’s next? Preschool, growing up, lots of change.

This past weekend we went to an inflatable slide/jumpy place called Inflatable World. My son had been begging us to take him and invite his cousin to join us for weeks and finally I gave in. Most of the slides seemed a bit too big for him so he stuck with smaller jumpy areas that he seemed more comfortable with. But then he decided he wanted to go branch out and try a slide out.

With a little help from his aunt he got up the wall and after a bit more encouragement and maybe a little shove he went down the slide. Once he was down he was all smiles. But he did make it clear that he did NOT want to go on the slide again. He tried. That’s all that mattered.

I don’t see myself as the bawling mother waving good bye to her baby on the first day of preschool. But maybe I will surprise myself and be overcome with emotions. I mean this happy, energetic, amazing boy was once a teeny newborn in my arms not able to do anything for himself.

Now I have to put my faith in complete strangers to help raise him and teach him. Its like I’m the one with the control issues now.

Its not that I’m afraid or apprehensive about leaving him at preschool either. I am looking forward to a few days a week with only one child. For some reason I have fantasies of days filled with cleaning and working without constantly being interrupted. And naptimes. Naptimes that don’t abruptly stop when one or the other child wakes up or has to be put down.

I know, I know… total fantasies.

Preschool is right around the corner. Potty training is inevitable. And eventually both of my children will be taught by people other than myself and my family. It’ll be hard to get used to but it’s something that’s coming up quite soon.

Apple Carrot Walnut Muffins {Breakfast Recipe}

These Apple Carrot Walnut Muffins are the perfect quick and easy breakfast recipe to let the kids help make!

Apple Carrot Walnut Muffins

I hosted a playgroup playdate at my house yesterday morning and didn’t really have much planned in the form of snacks. I had the usual toddler fair of goldfish, snap pea crisps, and pretzels but nothing of substance for the mamas. So I asked Ethan what he wanted. And like your typical kid, he asked for cupcakes. So I made the next best thing.

I grabbed one of my recipe books and started flipping. And fell upon a recipe that I had all of the ingredients for (sans a few substitutions). And the results were pretty darn yummy. I’ll definitely be making these muffins for future get-togethers.

Apple Carrot Walnut Muffins 2

Apple Carrot Walnut Muffins

12 servings | 3 WW+ Points*

  • 1 cup all-purpose flour
  • 1/3 cup brown sugar
  • 1 teaspoon baking powder
  • 1/4 teaspoon baking soda
  • 1/4 teaspoon table salt
  • 1 egg
  • 1 cup greek fat-free yogurt
  • 2 teaspoons vanilla extract
  • 1/4 cup butter
  • 1 small apple (, shredded)
  • 1/2 cup shredded carrots
  • 1/2 cup pecans (, chopped)
  • 1 teaspoon cinnamon
  • 1/2 teaspoon nutmeg
  • 1 tablespoon sugar
  • 1 teaspoon ground cinnamon
  1. Preheat oven to 400 degrees. Grease a muffin tin or prep with cupcake liners.
  2. In a large bowl whisk flours, sugar, baking powder, baking soda, spices, and salt together until well mixed. In a separate large bowl whisk the egg. Add yogurt, vanilla, and butter. Stir until combined.
  3. Add liquid ingredients to dry ingredients and mix just until incorporated together. Do not over mix. Batter will be thick and dough-like. Fold in apples, carrots, and nuts.
  4. Use an ice cream scoop or spoon to fill muffin tins 2/3rds of the way full. Mix 1 tablespoon sugar with 1 teaspoon cinnamon. Top each muffin with sugar blend. Bake for 15-18 minutes or until golden brown.

*by omitting the nuts you can reduce this recipe to 2 WW+ points each

What is your all time favorite muffin flavor? 

Love this recipe? Check out these great ones too! 

Pin this article for later! 

Click the Pin button on the image below to save for later. 

Curry Tuna Melt {Lunch Recipe}

Every Friday during Lent I scramble for a great alternative to our usual meat filled lunches. Usually I have a salad with grilled chicken and I make the kids a sandwich, leftovers, etc. But in an effort to stick with meatless meals I turn to fish to make sure my kids are getting the protein they need.

I’ve recently been really lucky with my garden and have a great supply of celery, green onions, and cilantro. So I’ve tried to find various ways to use them up. I started to think of what cuisines uses these different ingredients and how and immediately I thought of Indian food. So I grabbed some curry powder, picked some veggies from the garden, and started mixing.

What I ended up with was a delicious dish that is sure to make any boring lunch into a great one. The kids even enjoyed it and split one amongst themselves. They were even more excited about the fact that we used the veggies from our garden to make the sandwich.

Curry Tuna Melt

[Read more…]

Easter Egg Tips and Tricks: How to Make Egg Decorating Easier

These Easter egg tips and tricks will help make egg decorating with the kids easier! 

This Sunday marks the fourth Easter for my son and the second for my daughter. I’m so excited to share this holiday with them and love watching their joy and excitement as we celebrate the resurrection of Christ with our friends and family.

I try my best to remind them that this holiday isn’t just about chocolate and Easter eggs but sometimes as a parent, I just need to give into the fun and let my kids enjoy themselves. They’re pretty good at it and their excitement becomes contagious.

Easter Egg Tips and Tricks

Easter Egg Tips and Tricks 2

Easter Egg Tips and Tricks

I wanted to pass along some tidbits that I found helpful when it comes to dying Easter eggs. Decorating and dying Easter eggs is probably one of my son’s favorite parts of our Easter celebration and we’ve come across a few great ways to make it easier and more fun for everyone. Some of these tips you might have heard already and others might be new!

Easter Egg Tips and Tricks Oven Eggs

1. Bake eggs in the oven

Are you tired of figuring out the “perfect” way to make hard boiled eggs? Do your shells stick? Do your yolks turn gray? Well, I’ve found the solution to all of your problems! Bake ’em.

That’s right. 

Turn the oven to 325, put the eggs in a mini muffin pan and set the timer to 25 minutes. When the time goes off gently transfer the eggs to an ice/water bath with tongs for 10 minutes and then you’re done. Simple, easy, and fun too!

2. Whisk the Eggs

Putting hard-boiled eggs into a whisk makes egg dying a lot easier for small hands. simply grab a whisk from the kitchen, pop the egg through the wire, and let your child dip away! When they are done with the egg just pop it back out and set it down to dry.

3. Use Natural Dyes

There’s no need to buy commercial dyes when partaking in Easter egg fun. By using a few ingredients that you might already have around the house you can create gorgeous natural dyes for your eggs

A few tips on what you can use and how to dye naturally can be found on Martha Stewart.

4. Get Creative

You don’t just need to use dyes to decorate your eggs! Crayons, glitter, and stickers are great alternatives to dyed eggs. And it can be easier for infants and toddlers to get involved.

You can also use a variety of tools to create different designs on your dyed eggs. Wrap a rubber band around the eggs before dipping, or use some electrical tape to create stripes and designs. You can also use a white crayon to draw pictures and write names on your eggs before you dye them.

For more great tips check out this post on Formula Mom.

Easter Egg Tips and Tricks - use whisk to dye eggs

If you have some tips to making Easter egg decorating more fun I’d love to hear them!

Love these ideas? Here are some more: 

Wise Words from Ina May {Remember Your Natural Instincts}

 This past Sunday I had the pleasure to attend the Your Natural Baby Fair here in San Diego. Imagine a room filled with women and men passionate about natural childbirth and child-rearing. It was amazing. I was inundated with information and excited to take home what I learned. 

One of the best parts about the fair was listening to Ina May Gaskin, author of Ina May’s Guide to Childbirth and her latest book Birth Matters: A Midwife’s Manifesta. Ina May played a large role in my decision to persue natural childbirth for both of my babies. And even though I received pitocin and an epidural with my son I still felt empowered and informed about what was going on throughout the entire pregnancy and birth.

I have to thank my best friend, Miranda, for introducing me to the ideas behind natural childbirth and med-free labors. She is a doula and helped me through the delivery of my first. She’s also inspired me to become a doula myself. And while I haven’t started training yet I now have the local resources (and a new mentor!) to move forward with this goal.

After listening to Ina May I’m even more excited about this next journey in my life. One thing that Ina May said struck me. Her advice to new mothers and fathers to calm their newborn is, “If your newborn is in distress and crying just lick their head to calm them.” Simple as that. A little licking and you’re set! And before you say something about this being totally gross… that baby just came from the most sterile environment available.

Natural Instincts of Humans

You see, Ina May is all about following your natural instincts. Almost to the sense that you go primal. She told us of the story of a mom who had just gone through a c-section. Her baby was in hysterics and as the mother tried to get the baby to latch for the first time she became stressed as well.

Daddy came to the rescue though. He grabbed the baby and did what came naturally. He brought the baby’s soft little head up to his and nuzzled and licked the baby. After a few moments the baby calmed. Enough to latch perfectly to the mother. Ina May was very moved by the event and after hearing her re-tell the story so was I.

Sphincter Law

Ina May also mentioned something she calls the Sphincter Law. Basically, this law means that women go into labor and give birth more easily when the following criteria are met:

  • Privacy and intimacy are created
  • Time limits are removed
  • Demands are not made to ‘urinate now!’, ‘push!’, or ‘poop!’
  • Praise is given by another person in the proximity of the sphincter’s owner. This other person might be the mother of toddler or a midwife assisting a woman giving birth
  • Create an environment where the person is able to laugh, allowing the sphincter to open naturally
  • When a person’s sphincter is in the process of opening, it may suddenly close if that person becomes frightened, upset, embarrassed, or self-conscious. This is because high levels of adrenaline in the bloodstream do not favor (sometimes they actually prevent) the opening of the sphincters
  • The state of relaxation of the mouth and jaw is directly correlated to the ability of the cervix, the vagina, and the anus to open to full capacity. A relaxed and open mouth favors a more open vagina and cervix.

If medical professionals learn better how the sphincter works, we will more than likely see a decrease in caesarian sections. To read more about the Sphincter Law, check out Ina May’s article on the subject. And if you’re a pregnant woman, see if your OB or midwife are familiar with it as well. Just having this knowledge at hand is a powerful tool.

Natural Instincts of Animals

After speaking about our primal instincts and listening to Sphincter Law, Ina May also mentioned two videos we should check out on YouTube. The first was a video of a mother elephant resuscitating her newborn after it was born not breathing. What she did after following her own instincts is just amazing to watch.

She also suggested that we watch the birth of a chimp at the Attica zoo where the birthing mother’s mom (the baby’s grandma) acted as her doula. The grandmother proudly assisted her daughter and provided the moral support she needed to get through the birth.

These two videos are amazing examples of how uneducated wild animals with no medical degrees turned to their own natural instincts to take care of their young. And it only inspires me more to promote natural childbirth and the importance of knowing what our bodies are built for.

I cannot wait to learn more about natural childbirth as I start my journey to becoming a doula!

Have you read any of Ina May’s work? Are you interested in natural childbirth? 

Gardening with City Farmers Nursery

When I started thinking of planting our garden the first place I went to for information and advice was City Farmers Nursery. We’re lucky enough to live right around the corner from this awesome place so heading over a few times to get ideas, come up with a plan, and then eventually to purchase soil and plants was easy and fun.

The first time we heard about City Farmers Nursery was at our annual neighborhood block party. Farmer Bill came over and talked to the neighborhood about the native plants we could put in our yards to help create a landscape that was both drought resistant and beautiful. The next year he talked about a tree program from the city that was offering trees to residents to put in their yards. Most of those trees are now well established in the streets around our home.

Once we finally had a plan about what we wanted to do with our yard and where we wanted to place our raised bed we set it up and headed over to the nursery to pick out what plants we wanted to grow. We dropped off a soil sample and were told that Farmer Bill would call us once he’d analyzed the soil.

We got a call back the next day and had a plan! Bill set us up with the soil, additives, and food we needed and even helped us with choosing which plants (and how many) to purchase for our garden. It was time to get to work!

We set up our raised bed a few months before we actually were ready to start our garden and the kids quickly took advantage of the new dirt patch. So my son was quite sad to see his trucks and digging area go away. But as soon as I told him we were going to the nursery to purchase the plants he was all over helping us. He loves City Farmers Nursery as much as we do. But for different reasons.

At the nursery they not only have just about every plant imaginable. They also have animals too. A horse, chickens, a turkey, rabbits, koi, turtles and much more. The kids love going and just exploring the animals, plants, and trails on the nursery property. How can you not love going to a place like that?

We picked up different varieties of lettuce, mixed greens, swiss chard, broccoli, cauliflower, onions, celery, cilantro, and strawberries. Once we got the soil and additives mixed into the dirt we already had in our raised bed we got to planting. I let my son dig while I placed the plants into the bed.

Once everything was planted we watered, weeded, and fed the veggies and fruit until after a few weeks we started to notice that our garden was going crazy with growth! A few things didn’t make it or didn’t quite turn out as we thought they would but for the most part we now have a healthy, thriving garden! And the kids love going out to pick out their lettuce, broccoli, and celery when we eat it for lunch.

I can’t wait until we get to choose out a new veggie or two to plant in a few weeks when we harvest our lettuce and swiss chard. Hopefully we’ll have enough room for a zucchini plant! I can just taste the freshly baked zucchini bread coming out of the oven already.

I know exactly where we’ll be going to buy our seeds, dirt, and plants when we’re ready for our next project. And I have some pretty big plans for our back yard.

Do you have a garden? What are you planting?

Tuna Noodle Casserole {Dinner Recipe}

I’ve been pretty bad about keeping the cupboards stocked lately. I started to get lazy when it came to dinner planning and have been making sandwiches or eating what’s in the freezer to make up for it. So when Lent came around I was not prepared for a non-meat dish for dinner. But I didn’t have to worry… we always have the ingredients on hand for tuna noodle casserole. It’s a family favorite.

Only we were out of cream of mushroom AND cream of celery condensed soup.

So I went in search for an alternative. It was about time. I mean… really… I, er, we don’t need all of that extra sodium and additives. Plus I’m sure I read somewhere about canned stuff being bad. Or was that just for veggies?

Anyway… I only had 30 minutes until everyone under the roof starved and was already starting to get complaints about hunger pains so I searched the web until I found a recipe that sounded tasty and didn’t include canned soup.

This recipe is a winner! And I love how versatile I can be with the veggies. Next time I’m going to try some spinach. Delicious, nutritious, and the kids liked it. Added bonus.

tuna noodle casserole

[Read more…]

DIY Easter Bunny Basket {Guest Post}

Easter is right around the corner. To get the kids excited about this holiday I thought it’d be great to start doing Easter crafts. And the first thing that popped to mind was this bunny basket I saw on About.com.

My son loved putting it together with me and even decided to do one on his own after I helped him with this one. He loved being able to use the stapler and the scissors. And he surprised me by how well he did with the pen while drawing on whiskers. He’s getting quite skilled!


DIY Easter Bunny Basket

What you’ll need:

  • paper plates
  • googly eyes
  • glue dots
  • 2 cotton balls
  • 1 piece white construction paper (for ears)
  • 1″ strip of construction paper (for handle)
  • Black & pink marker
  • scissors
  • stapler

What you do:

1. Fold the white construction paper in half. Cut out two bunny ears and set aside.

2. Fold the paper plate in half.

3. Staple up each side of the paper plate 4 times.

4. Use glue dot to add googly eyes to either side of the paper plate. Add a nose to the bunny with the pink marker.

5. Add handle to the top of the paper plate with a staple.

6. Use pink pen to color the inside of the ears. Attach ears to the paper plate with glue dots.

7. Add whiskers to the bunny with the black marker on each side.

8. Place 2 glue dots at the opposite end of the bunny and add a cotton ball for a tail. Repeat on the other side.

9. Stuff with your favorite Easter goodies and have fun!

Every week Danielle brings great kids crafts to Formula Mom! Danielle is a work-at-home-mom of two beautiful kids and writes over at the Simmworks Family Blog. She loves to blog about her family, healthy living, going green and crafting. Danielle would love for you to come visit! You can reach her on facebook and twitter as well. If you have any questions feel free to email her at simmworksfamily@gmail.com

Green Monster Smoothies {Breakfast Recipe}

Green Monster Smoothie

One of my favorite new ways to get greens into my kids is by blending them up into smoothie form. And this smoothie started it all. Now this is just your basic Green Monster. There are so many different variations of this smoothie and my kids and I love to experiment with what we put in it when we make it.

For some awesome ways to shake up the original recipe check out my friend CB’s Green Monster journey over on her blog See Cupcake Run. Just search for “green monster” since I’m not sure how to link to one of her categories.

Green Monster Smoothie

  • 1 cup milk
  • 1 ripe, frozen banana, peeled
  • 3 handfuls organic spinach
  • 1 tablespoon ground flax
  • 1 tablespoon peanut butter (or PB2)
  • 4-5 ice cubes

Add 1 cup of milk to the blender.

Now add in the chia or flax (if using) and nut butter.

Next, add in the spinach followed by the banana on top.

Blend until smooth.

Add in your ice cubes and blend some more.

Serves 2 | 4 WW pp+ with PB2 (not including banana)

Meatballs and Polenta {Dinner Recipe}

When I’m in need of a comfort meal the first dish that comes to mind is my Meatballs & Polenta. I’ve been making this dish for almost a year now after seeing it on my friend CB’s blog, Two Pink Hippos, and trying it out with a few changes. Now I make it at least once a month and love how versatile it is.

Plus I can never get over how easy it is to make polenta!

When I’m rushing to put dinner together 4 times out of 5 I always forget to start the grain or starch. So I’ve been saved quite a few times by quick cooking dried polenta. And the frozen brown rice from Trader Joe’s.

This is one of those meals that you can make ahead, freeze, and pull out when you want them too. So it’s the perfect dish to make for expecting mamas, friends in need, and any other meal in between. Plus you can turn left over meatballs into a meatball sandwich for the next day’s lunch. Mmmm…

Meatballs & Polenta

[Read more…]


© A Crafty Spoonful - All Rights Reserved
It is OK to use one of my photos provided a link back and/or proper credit is given. It is NOT ok to copy and paste a whole post including instructions. Please do not remove watermarks or alter images in any way. Please contact me with any questions at danielle@acraftyspoonful.com

.