Boozy Smoothies By The Pool

This shop featuring boozy smoothies has been compensated by Collective Bias, Inc. and its advertiser. All opinions are mine alone. #Arbormist #StartSummer #CollectiveBias The following content is intended for readers who are 21 or older.

Boozy Smoothies

When I plan a mom’s night in I like to keep things simple: drinks, food, and fun. And if I can combine two of those things into one, like food and drink, everyone is happy!

I recently headed over to a friends house for some much needed girl time and brought a boozy smoothie bar with me to whip up some delicious cocktails we could indulge in by the pool.

With a few simple ingredients, a blender, and some plastic wine gasses I found at the dollar store we had delicious drinks that served as both snack and boozy treat. How awesome is that?

Boozy Smoothies with fruit

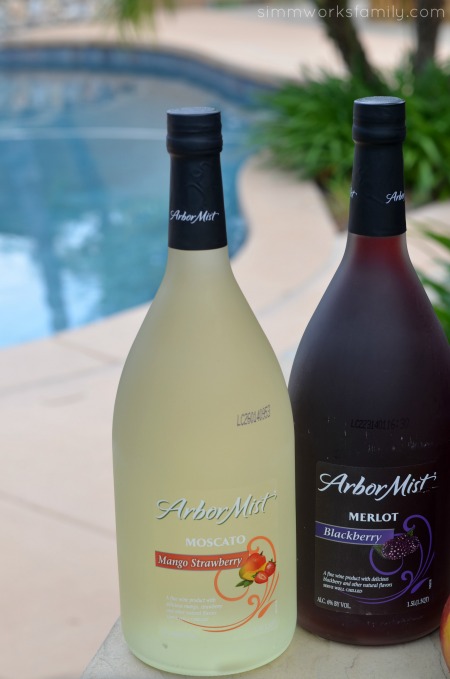
Boozy Smoothies By The Pool with Arbor Mist

I love to keep entertaining simple. Especially when it’s on-the-go entertaining at someone else’s house. But simplicity means that I can entertain elsewhere and am not limited to just my back yard.

This summer I forsee many afternoons hanging by the pool and relaxing with a boozy smoothie in one hand while I chat with my friends and enjoy the warmth of summer.

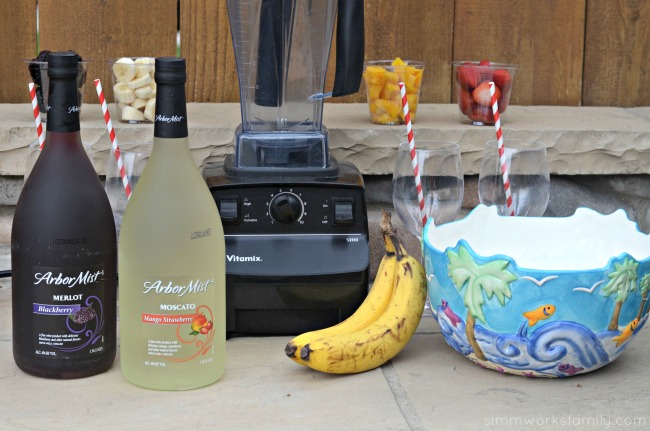
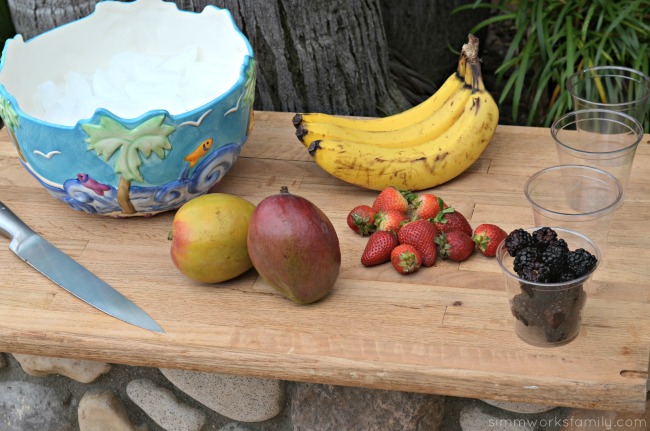
Boozy Smoothies ingredients

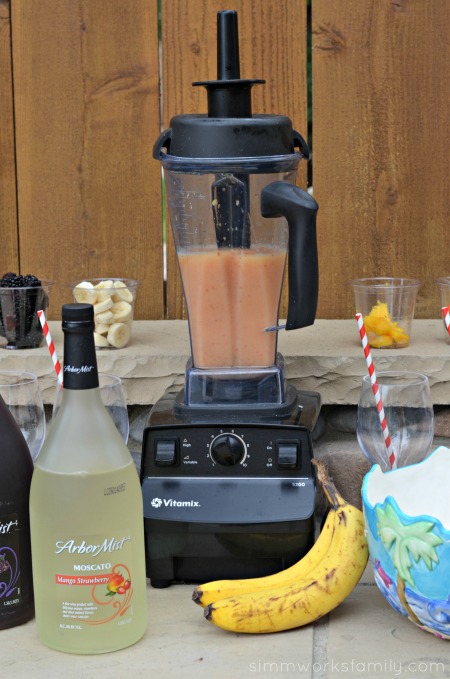
Boozy Smoothies blended up

Boozy Smoothies

  • 1 cup Arbor Mist (any flavor)
  • 1 cup fruit (I chose mango, strawberries, blackberries, and bananas)
  • 1 cup ice
  1. Add equal parts Arbor Mist, fruit, and ice into the blender.
  2. Blend until all incorporated.
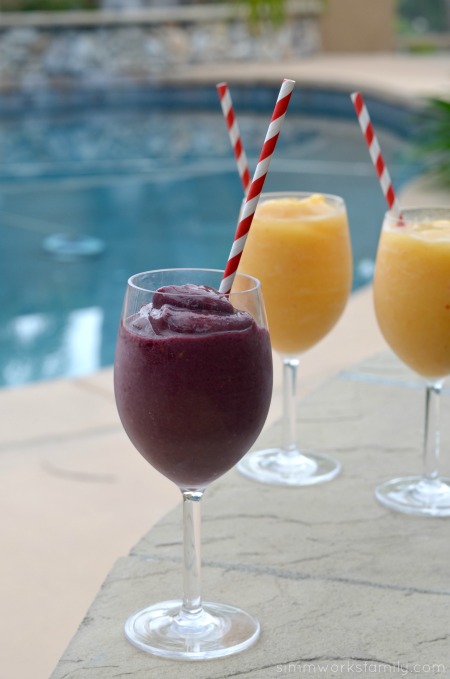
  3. Serve in a classy plastic wine glass and sip by the pool!
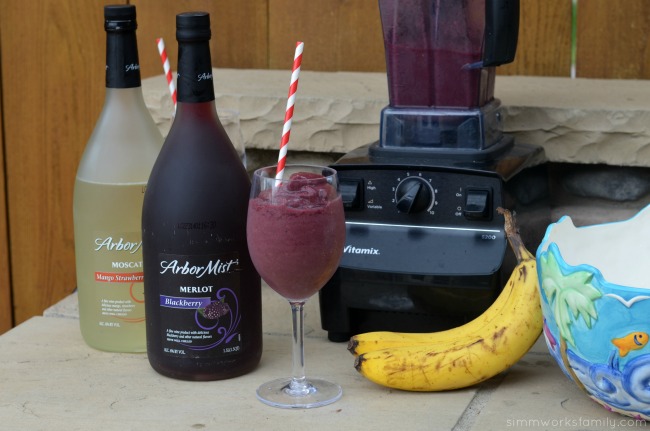

Boozy Smoothies with Blackberry Arbor Mist

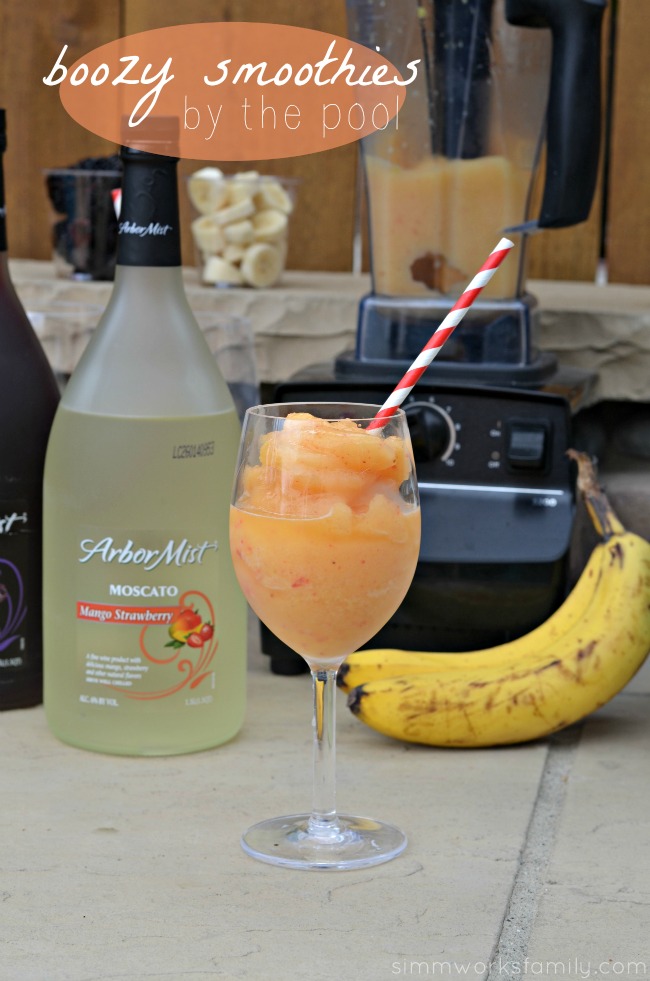
Boozy Smoothies By The Pool

Visit the Simple Entertaining Social Hub for more great entertaining ideas! And if you’re looking for more fun, enter the Arbor Mist Summer Sweepstakes where 1 lucky winner will win a brand new water sport vehicle and 100 others will win Arbor Mist beach themed prizes!
What’s your favorite way to stay cool by the pool?

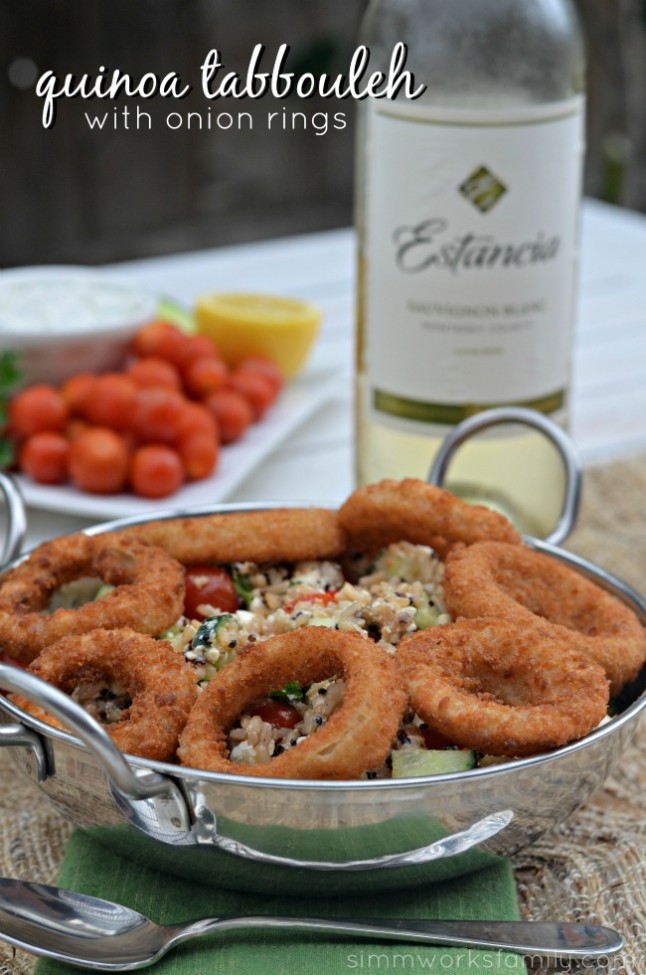
Quinoa Tabbouleh with Onion Rings

This shop featuring a Quinoa Tabbouleh with Onion Rings recipe and mediterranean dinner ideas has been compensated by Collective Bias, Inc. and its advertiser. All opinions are mine alone. #SpringIntoFlavor #CollectiveBias

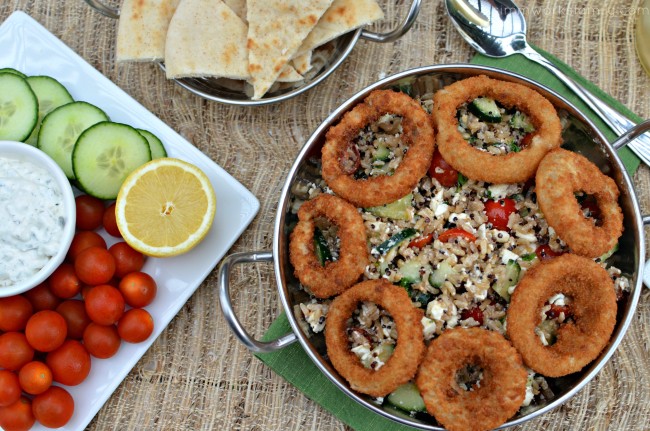
Quinoa Tabbouleh with Onion Rings

One thing I absolutely love about summertime are the fresh flavors of summer. Everything seems to get lighter while still staying just as tasty. And I love including some light fare when hosting friends over for dinner or lunch. Especially when most of the meal is make ahead!

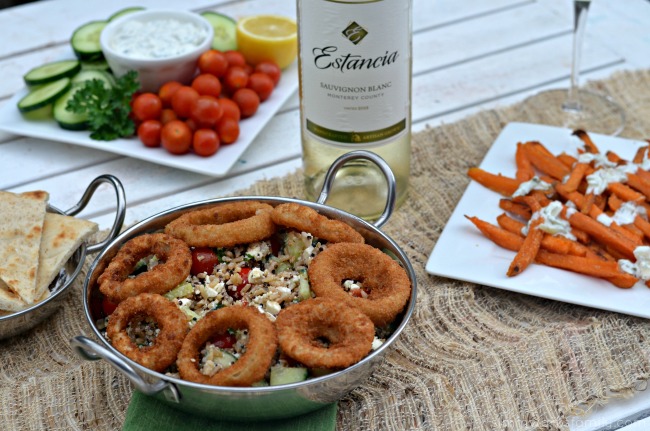
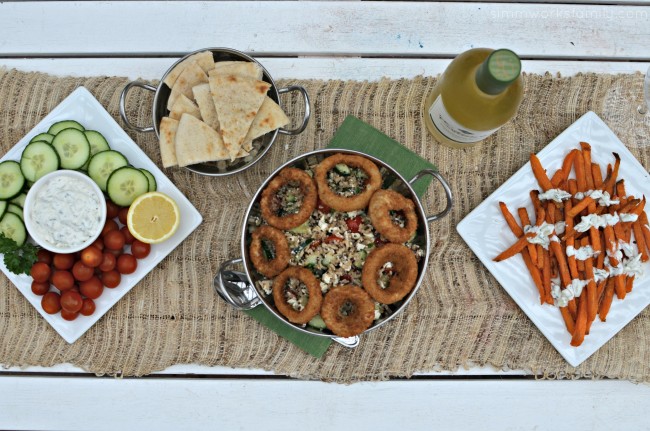
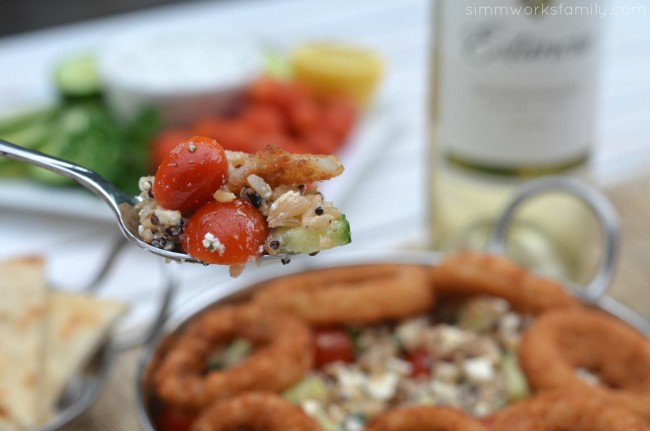
I recently hosted a small group of friends over for a light dinner and went with a mediteranean themed menu including a quinoa tabbouleh with onion rings, delicious sweet potato fries drizzled with homemade tzatziki sauce, and some veggies and pita bread with tzatziki dip. Paired with a great wine, this was a fabulous meal to kick of summer.

Quinoa Tabbouleh with Onion Rings and veggies

All I needed to do was prep a little ahead of time by pairing a quinoa brown rice blend I had left over from dinner the night before and making the tzatziki sauce that morning, I was able to throw this all together in about 10 minutes after the sweet potato fries and onion rings baked.

By prepping 1/2 of my meal ahead of time, I’m able to enjoy my guests and throw things together right before we eat. That means more quality time with my friends and less time in the kitchen.

Quinoa Tabbouleh with Onion Rings and sweet potato fries

Quinoa Tabbouleh with Onion Rings

  • 1 cup grape tomatoes (halved)
  • 1 cup english cucumbers (sliced and quartered)
  • 8 ounces feta cheese (crumbled)
  • 1/4 cup fresh parsley (finely chopped)
  • 1/8 cup olive oil
  • 1 cup cooked quinoa and brown rice blend (cooled)
  • juice of 1/2 a lemon
  • salt and pepper to taste
  • 5-6 onion rings (baked and chopped)
  1. In a large bowl, mix together tomatoes, cucumbers, cheese, and parsley. Drizzle with olive oil and combine.
  2. Add quinoa mix to the bowl and squeeze 1/2 a lemon over the mixture. Salt and pepper to taste and stir once more.
  3. Add chopped onino rings and lightly toss. Serve with whole onion rings on the top and enjoy!

Quinoa Tabbouleh with Onion Rings mediterranean spread

By using high quality ingredients like Alexia onion rings and sweet potato fries and pairing them with fresh, in-season produce, a delicious meal can be created with little effort. And you won’t be missing out on flavor.

Every single bite of this tabbouleh is filled with fresh flavor and the perfect texture. Normally a tabbouleh is not made with onion rings but the crunch of these baked rings of deliciousness is an amazing addition.

Quinoa Tabbouleh with Onion Rings bite

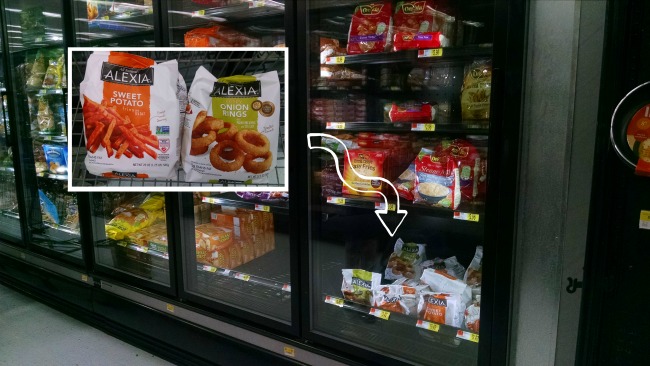
You can find Alexia products in the freezer section of your local Walmart. I was able to find a handful of varieties all together right next to one another in the frozen potato aisle.

I absolutely love that Alexia products are made with all natural ingredients and love to keep these on hand for quick meals with the family or when friends come over. Next time I’m picking up a bag of the new Alexia Rosemary fries to try out with my tzatziki sauce!

Alexia Onion Rings and Sweet Potato Fries at Walmart

How do you keep meals light during the summer months?

85 Ways to Use Yogurt

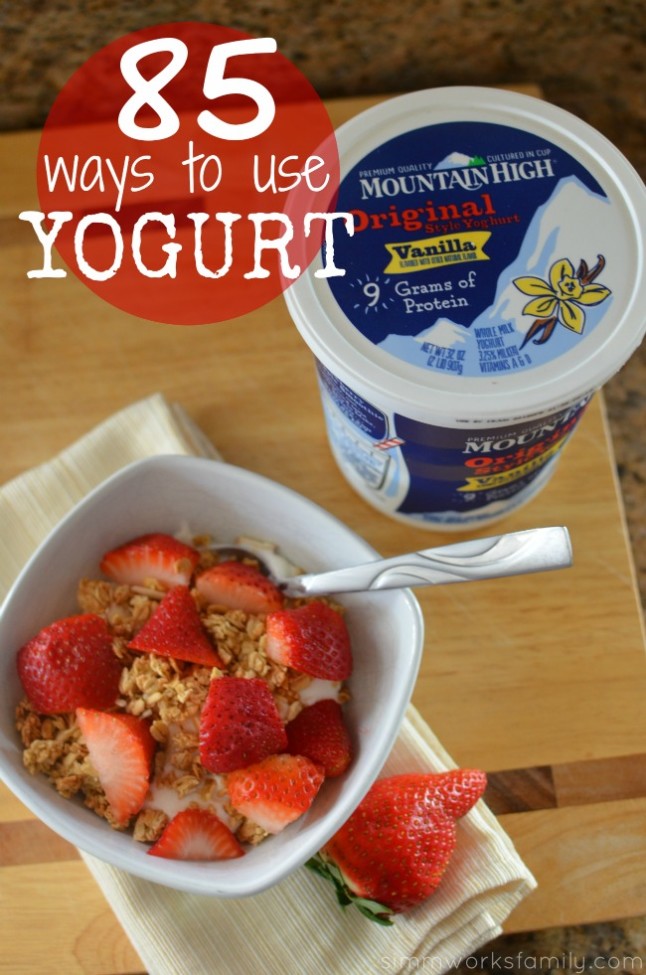
Are you a yogurt fan? We’re sharing 85 ways to use yogurt in your everyday recipes!
85 Ways to Use Yogurt

There’s one thing I can always count on to make me happy. Whether it’s morning, noon, or night. And that’s a delicious bowl of yogurt. It’s the one thing I reach for in the fridge when I need a snack or when I’m cooking up a meal or dessert.

I started turning to yogurt more and more as a staple in my home after going through Weight Watchers after having my oldest child. It is such a great substitute for other ingredients in recipes and is full of flavor. Plus… less calories!
And in it’s simplest form, with a sprinkle of granola and some sliced berries, it can make any day better. Plus, when you’re done eating the yogurt inside, you can make something fun out of the container!

Have some yogurt in the fridge like I do? Here are 101 ways to use yogurt!

85 Ways to Use Yogurt

Breakfast

1. In strawberry muffins

2. Sprinkled with homemade granola

3. In a breakfast cereal parfait

4. In brown sugar maple muffins

5. To make a strawberry shortcake parfait a little healthier

6. In banana blueberry muffins

7. Spruced up as pumpkin pie yogurt

8. In greek yogurt blueberry muffins

9. In apple carrot walnut muffins

10. In chocolate chip donuts

Weight Watchers Simple Start anytime snack

11. In a healthy blueberry parfait

12. In overnight oats

13. In a Pomegranate Parfait with Blueberries

14. In cinnamon streussel yogurt muffins

15. In baby bran muffins

16. In banana chocolate chip whole wheat pancakes

17. In these flavorful Pomegranate Pancakes

18. In a blackberry shortcake parfait

19. In these Red Currant and Rosemary Olive Oil Scones

20. In these Whole Wheat Cranberry Sauce Scones

21. Or these Whole Wheat Mango & Ginger Scones

22. And these Whole Wheat Orange Scones with Chia Seeds

23. Or change it up with these Whole Wheat Pomegranate Scones

24. And around Halloween, bake up these Whole Wheat Pumpkin Scones

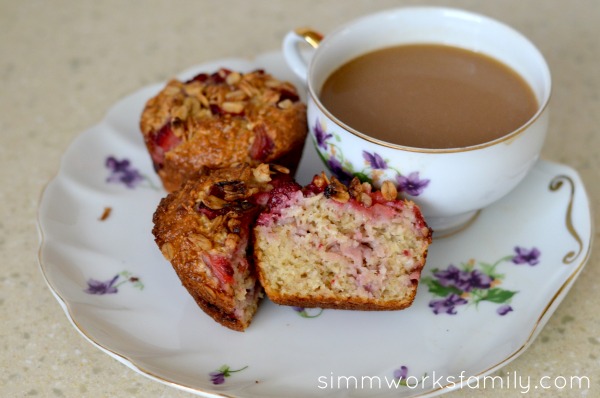
Strawberry Muffins with Greek Yogurt and coffee


Lunch

25. To spruce up tropical chicken sliders

26. In a greek chicken wrap

27. In greek style gourmet burgers


Dinner

28. To lighten up Pomegranate and Lamb Moussaka with Cardamon

29. In a marinade for Chicken Skewers with Dipping Sauce

30. In a chicken tikka masala recipe

31. In the slow cooker with this butter chicken recipe

32. In a Boneless Chicken Breast Kabob (Joojeh Kabob)

33. With these Filet Mignon Kabobs (Kabob-eh Barg)

34. In this Yogurt Marinated Leg of Lamb


Side Dishes

35. Grilled Baby Artichokes with Balsamic Yogurt

36. In carrot raisin salad

37. Mixed with mint on top of a beet salad


Snacks

38. In vanilla chai banana bread

39. In an apple blossom parfait

40. In apple cobbler yogurt bites

41. In cranberry orange muffins

42. With a cup of coffee and this Nut Crusted Whole Wheat Pumpkin Bread

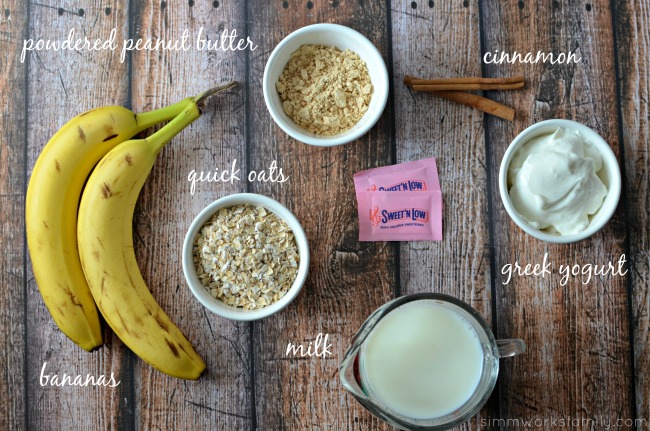
Peanut Butter Banana Oatmeal Smoothie ingredients

Drinks

43. With a straw in a PB Banana Oatmeal Smoothie

44. In an orange creamsicle smoothie

45. Spiced up in a pumpkin pie smoothie

46. In a strawberry smoothie

47. In this Mango-Rum Smoothie

48. With avocados in a blueberry smoothie

49. In a cookies n cream smoothie

50. With papayas in a papaya smoothie

51. In Doogh (Persian Yogurt and Mint Drink)

52. In an Orange Cream Smoothie

53. After a workout in this Mango Protein Shake

54. In a Pomegranate Smoothie


Dessert

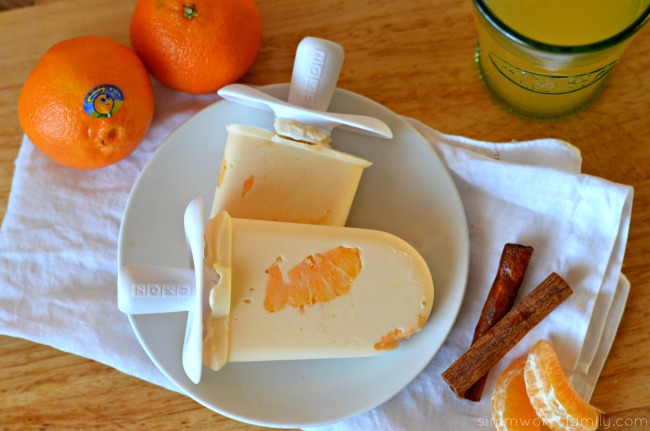
55. In mandarin orange cream pops

56. For a delicious addition to a Banana Smash Cake

57. In chocolate chip muffins perfect for dessert

58. In a Plum Yogurt Cake

59. To cool down in frozen greek yogurt pops

60. In an Orange Upside Down Cake

61. In churro cupcakes

62. In these root beer float pops

63. In chocolate covered strawberry frozen yogurt

64. In pumpkin spice yogurt

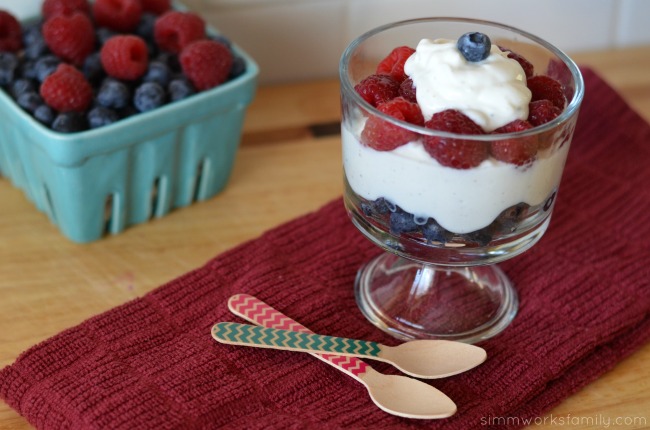
65. In a berry triffle

Mandarin Orange Cream Pops aerial

66. In strawberry frozen yogurt

67. In these Strawberry-Rhubarb Creamsicles

68. In a pomegranate sundae yogurt parfait

69. Frozen in pina colada popsicles

70. In berry cake with coconut rum

71. To moisten Carrot Cake with Walnuts & Raisins

72. With a glass of wine and this Grape Upside Down Cake

73. In a vibrant Lemon Basil Cake

74. In this Red, White & Blue Jello

75. In these mini Saffron & Raisin Pound Cakes

76. In this White Rose Cake


Dips and Appetizers

77. In a herbed yogurt cheese dip

78. In a refreshing homemade tzatziki dip

79. In Borani-e Esfenaj (Yogurt and Spinach)

80. In this Hatch Chile Dip

81. In Borani-e Bademjoon (Persian Yogurt and Eggplant)

82. With this Mast-o Khiar (Persian Yogurt with Cucumbers)

83. In chocolate caramel apple dip

84. With apples in this PB Yogurt Dip

85. In peanut butter cinnamon yogurt dip

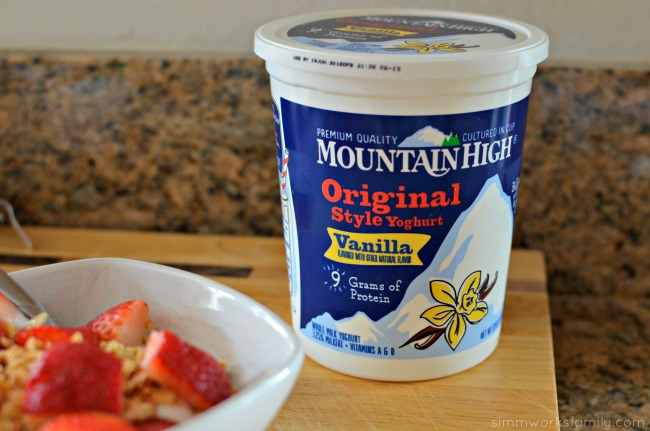
Mountain High Yoghurt

What’s your favorite way to incorporate yogurt into your day?

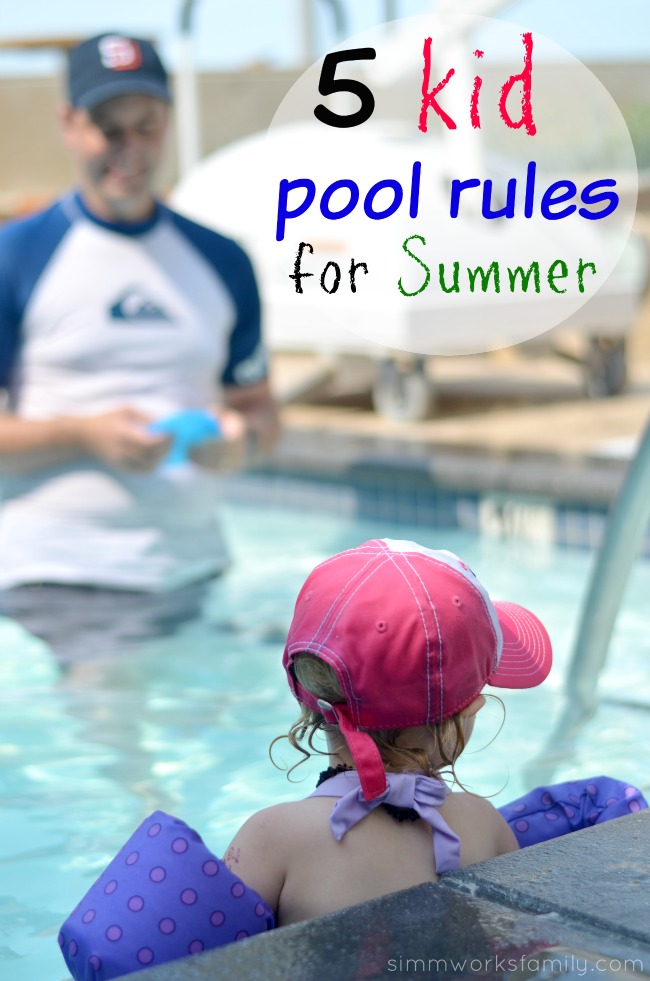
5 Kid Pool Rules For Summer

This is a sponsored post written by me on behalf of Stearns Puddle Jumpers®. All opinions are 100% mine.

5 Kid Pool Rules For Summer

The temperature is remaining warm, Memorial Day is around the corner and the kids are almost out of school. For tens of thousands of children, their eyes switch from the books to the pool.

We love going to the pool during the summer but when we do there are some clear, simple rules that our children must follow in order to swim and play at the pool. And if one of the rules is broken, we simply pack up and head back home.

Pool safety, and sun safety, is very important. So we’ve come up with 5 Kid Pool Rules to keep our kids safe during the summer months. We even keep a copy of it with our pre-packed pool bag. Makes things simple and our kids know what to expect!

5 Kid Pool Rules For Summer

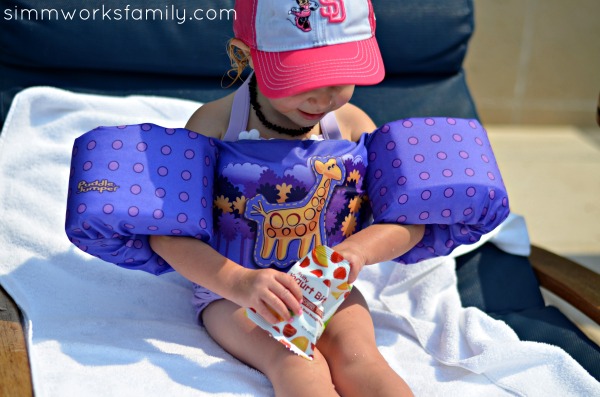
Healthy Snack Time with Sprout Organic Foods at the pool

1. Sunscreen. Before anything!

I don’t know about you but I am a stickler for sunscreen application. Like clockwork we apply and re-apply. I even set a timer to remind myself. There’s been too many times in my life that I’ve gotten burned and have had to deal with the pain afterwards. To save my kids from that, we remember to keep up with our sunscreen.

What I love doing is before we even get our swim clothes on, we put on sunscreen. Then when we get dressed and head out the door we don’t have to stop and apply when we get to the pool. Need a distraction? Give them a snack while you apply!
Healthy Snack Time with Sprout Organic Foods playing at the pool

2. Cover up.

Whether it’s a rash guard, a hat, or staying under a cover, when it’s sunny outside, I keep the kids, and myself, covered up. We get enough sun daily here in San Diego to give us a golden hue to our skin. We don’t need to be lobster red!

The best way to get my kids to cover up is to have them pick out their rash guard and a hat to match. We also don’t give them the opportunity to not wear a rash guard while swimming or playing in the waves so they really don’t know any different.

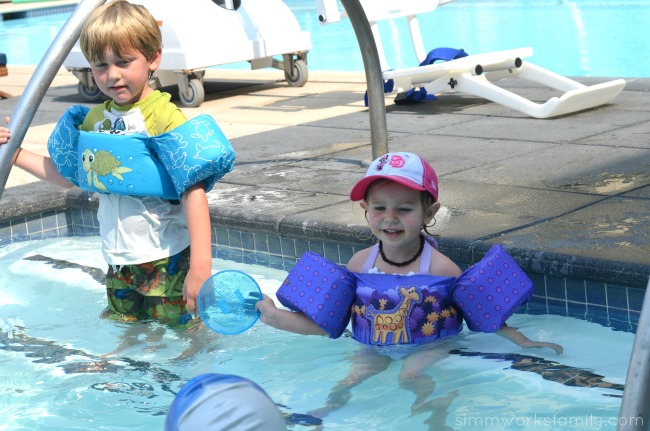
5 Kid Pool Rules For Summer - floaties on

3. Flotation devices on!

My go-to item for in the pool safety is our tried and true Puddle Jumpers. For kids 30-50 lbs, there’s no other way to go. It’s comfortable for the kids and gives them a sense of security if they’re just learning to swim or haven’t quite mastered swimming in deeper water.

Plus, it’s Coast Guard approved so most public pools and water parks will allow you to use them over their generic life vests. That means you get to use a safe flotation device that your kid is comfortable with!

Our Puddle Jumpers are also put on as soon as we get to the pool and aren’t taken off until we leave. This is also something that the kids cannot argue with. If they take off their Puddle Jumper, we’re heading home.

Need one for your kid? Visit StearnsFlotation.com to purchase one today.

5 Kid Pool Rules For Summer - listening ears

4. Listening ears at all times.

To keep the kids safe, we make sure that they keep an ear on us at all times. What does that mean? Not going farther then about 10-15 feet from us so they can hear us if we need to speak with them.  Since it’s a rule, they are pretty good about following it and not going out of range. By staying within hearing range, they’re also visible as well.

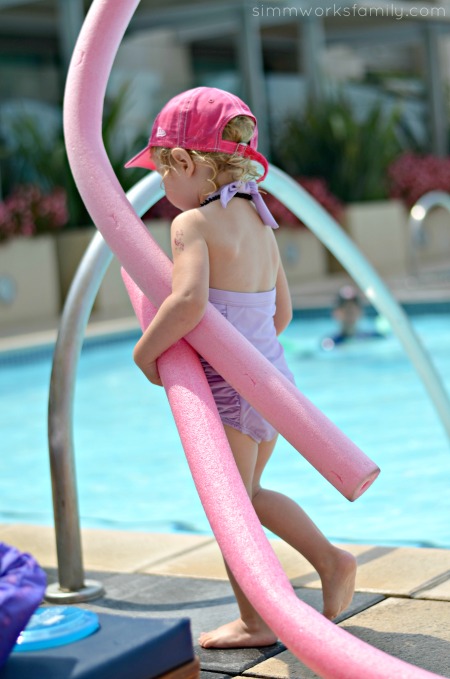
5 Kid Pool Rules For Summer - no running

5. No running. Ever. Period.

I know it’s basic. But my kids, and most others, just get excited when they’re having fun in the water or sand. They want to race off to their next adventure but running by a pool is very dangerous.

We’ve had a few slips here and there so our kids are aware of the fact that they can get hurt if they run by a pool. And we have to warn them about the danger of not only falling, but falling and hitting their head near water. Very scary.

When our kids are safe, and they’re clear on the rules, pool time is so much more fun! We’re clear on our expectations and in return we usually end up with very happy, very tired kids after a fun day at the pool.

How do you keep your kids safe during the summer?

Visit Sponsors Site

Creating a Comfortable Learning Environment + 10 Classroom Hacks for Teachers

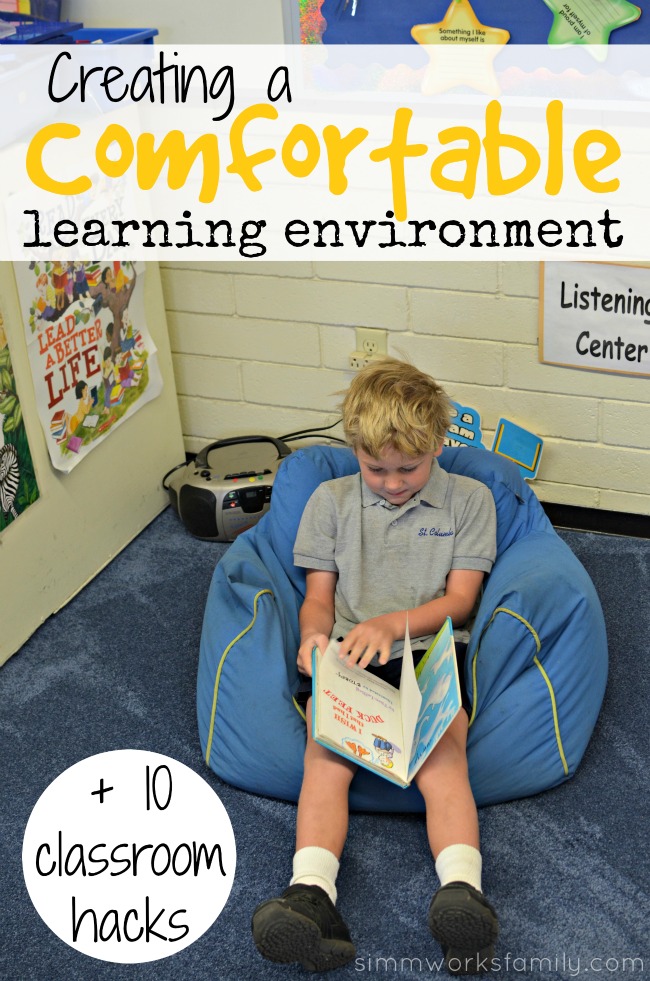
This post featuring classroom hacks for teachers is made possible thanks to Mohawk, who has graciously donated a bound Mohawk carpet to my son’s kindergarten teacher so she could create a comfortable learning environment for the kids. 

Creating a Comfortable Learning Environment + 10 Classroom Hacks for Teachers

One of the keys to a great learning environment for kids is creating an inviting and comfortable setting. My son’s kindergarten teacher has done just that with her classroom and it allows the kids to feel at home when they’re away at school. From the warm colorful walls to the cozy nooks found in the different centers she has scattered through the classroom, the kids never have to worry about being uncomfortable.

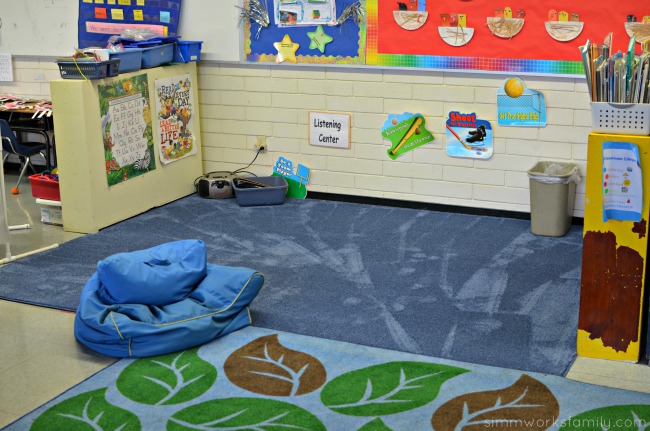
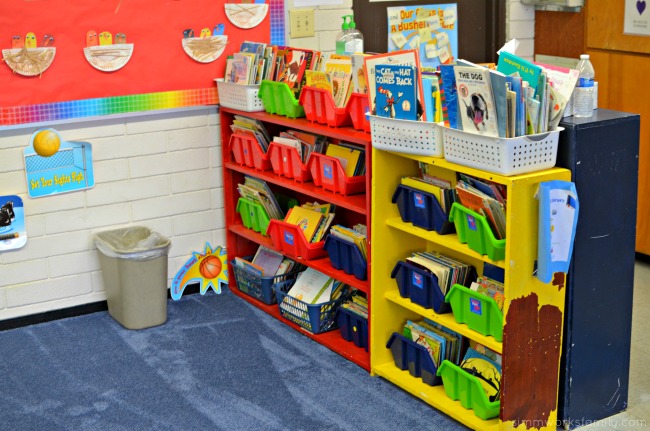
Two of the learning centers she has set up next to one another is the listening center and the literacy center. A cozy section of the classroom dedicated to books and reading. The carpet she had in this area of the classroom was looking a little sad and wasn’t as comfortable as it once was for the kids. With the help of Mohawk we’ve spruced up this area and now the kids are greeted with a plush, comfortable area to read and learn.

Creating a Comfortable Learning Environment with Mohawk bound carpet

Mohawk’s new SmartStrand Forever Clean is the toughest, easiest to clean carpet on the planet! How, you ask? It has Nanoloc spill protection for quick and easy spill cleanup (a new nanotechnology to protect the fiber) and is the ONLY carpet with built-in stain and soil resistance that NEVER wears or washes off. 

Since classrooms are filled with kids for a majority of the day, being able to clean the classroom easily is important. Most stains on the Mohawk SmartStrand Forever Clean carpet comes clean with water or a little mild detergent. No harsh cleaners needed – which is perfect for a classroom or playroom setting! And an added bonus is that it’s environmentally friendly because it’s made in part from renewable resources. 
  
Creating a Comfortable Learning Environment - literacy center
Another awesome thing about Mohawk is that any SmartStrand carpet can be cut and bound in the size you want! Visit your local Mohawk retailer to shop styles and colors and choose a carpet that’s perfect for your classroom.
Now for some great classroom hacks for the end of the school year!

10 Classroom Hacks for Teachers

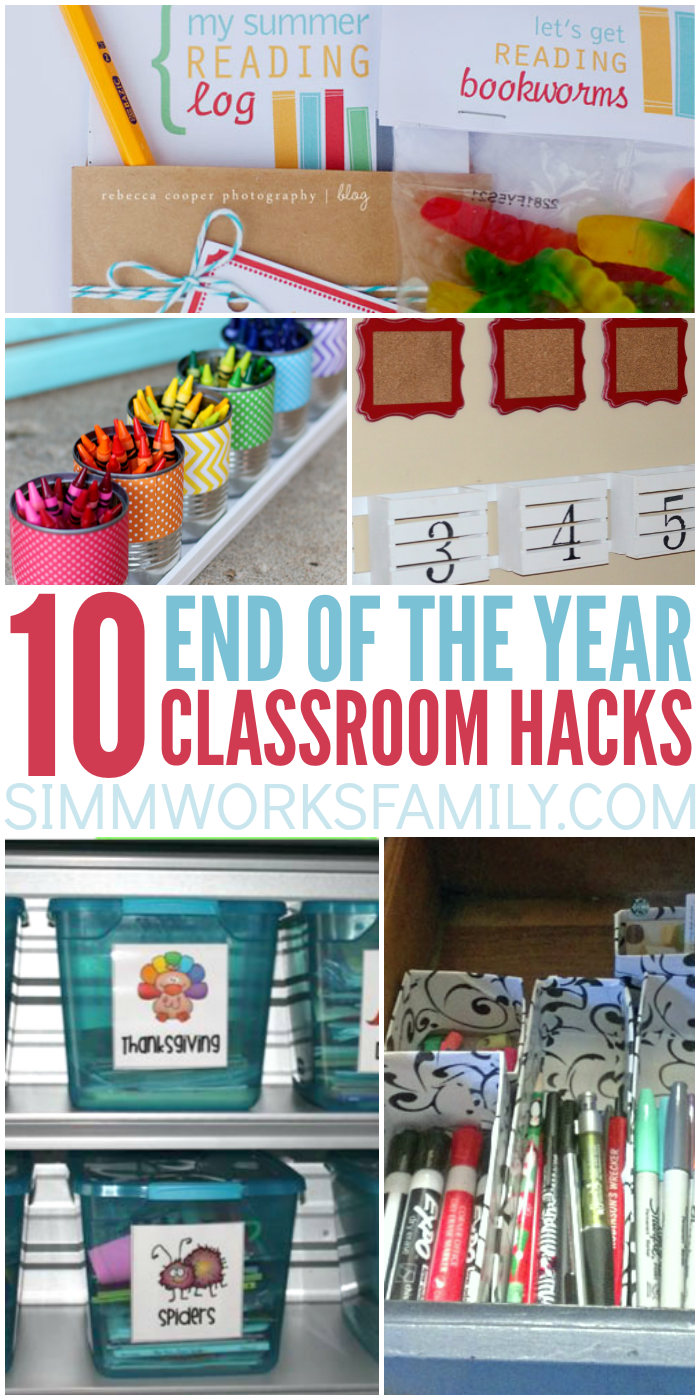
10 End ­of­ Year Classroom Hacks for Teachers

1. Create a ”Closing the Classroom” checklist. As you finish up the school year, check off each item to ensure you’re on track. Scholastic has a great list, but you’ll want to personalize it for your unique situation.

2. Before you pack up your classroom materials at the end of the year (especially if you’re moving to a new room, school, etc.), purge your belongings. If it pains you to throw things away, set up giveaway stations for other teachers to peruse before you break out the trashbags. This will allow you to begin the new year without clutter from the previous years.

3. Let the students clean their desks and work stations with sanitizing wipes. It’ll help them work off some nervous energy during those last few days.

4. Create a summer reading log to encourage your students to read during the summer. Love the book worm treat bag with gummy worms, too!

5. By the end of the year, your canisters for pencils, crayons and markers have seen better days. Revamp your canisters with some pretty scrapbook paper, ribbons or other embellishments.

6. Get a jump start on your organizational bins. You’ll need weekly, monthly and themed unit bins prepped and ready to go for next year.

7. Be prepared when you have parent volunteers to help. We love these volunteer bins with papers to copy, books to be leveled, etc.

8. Organize the markers, pens, pencils and other office supplies in your desk drawer using revamped cereal boxes. Cut them off, and use contact paper or scrapbook paper to make them pretty.

9. Do you feel irritated whenever you have to look for another parent communication form because someone lost theirs? You won’t have that problem next year! Create a parent communication station with clearly labeled forms. The students can grab what they need whenever they need it.

10. Parents and teachers alike can use this command center idea for papers that need to go home or back to the school, library books, communication and more.

How are you preparing your classroom for summer?

Find more great ideas and reasons to use Mohawk Flooring on FacebookTwitterPinterest and Google+.

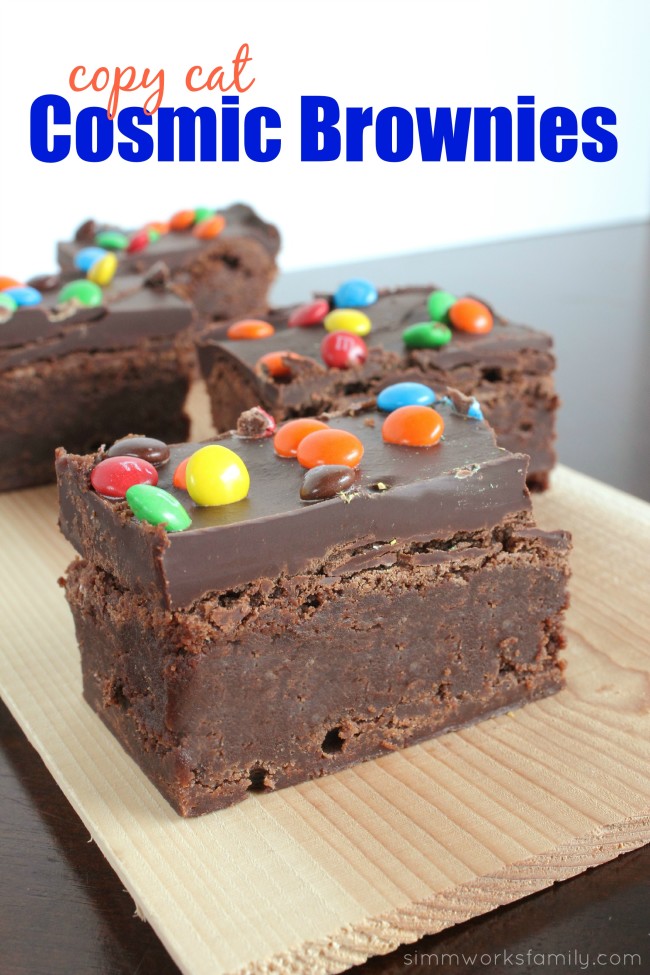
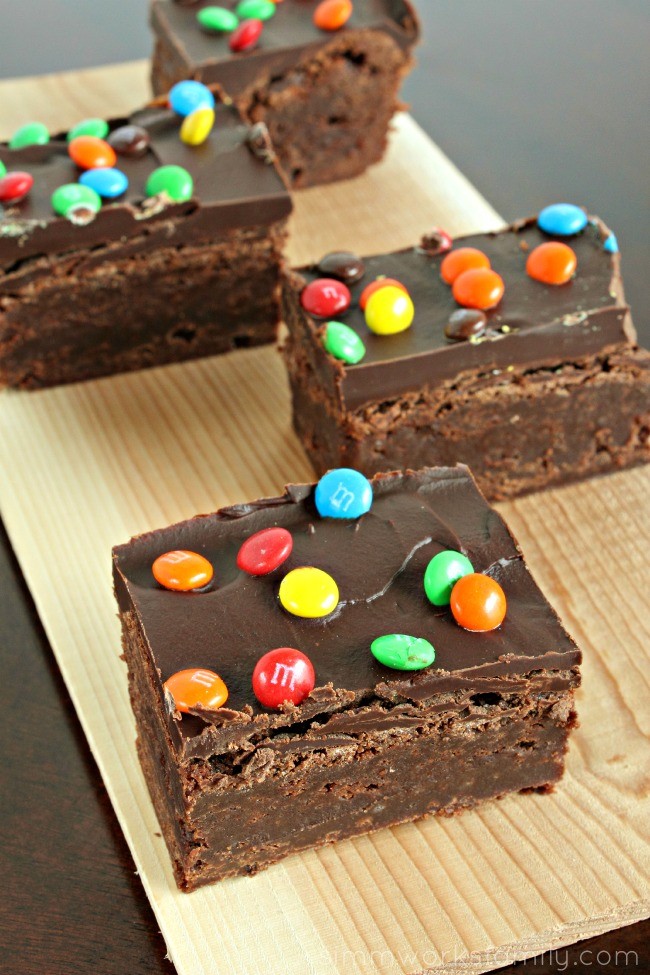
Copy Cat Cosmic Brownies

Copy Cat Cosmic Brownies

I don’t know what it is about having a baby that makes me crave sweets but one of my biggest hurdles while nursing is saying no to too many sweets. However I still allow myself some decadent indulgence from time to time. As long as I make it from scratch.

Sure it sounds like more work, but I promise you, making these brownies from scratch is so worth it! Get ready to enjoy a small square of these brownies and be satisfied for the whole week.

Copy Cat Cosmic Brownies - delicious and decadent

Copy Cat Cosmic Brownies

  • 1 ½ Sticks Butter (softened)
  • 1 Cup Sugar
  • 1 Cup Brown Sugar
  • 2 Eggs
  • ¾ Cup Heavy Cream
  • 2 teas. Vanilla Extract
  • ¾ Cup Cocoa Powder
  • 1 Cup Flour
  • 8 oz . Semisweet Chocolate
  • ¼ – ½ Cup Mini M&Ms
  1. Preheat oven to 350˚.
  2. In a mixing bowl cream together the Butter, Sugar and Brown sugar.
  3. Add in the Eggs, ¼ Cup Heavy cream and Vanilla, stir until combined.
  4. Add in the Cocoa powder and stir until combined.
  5. Add the flour 1/3 at a time stirring between each addition.
  6. Put the batter in an 8×8 or 9×9 inch pan lined with lightly greased parchment paper and bake at 350˚
  7. until a tooth pick comes out clean, 45-55 minutes. Remove and let cool.
  8. In a microwaveable bowl combine the Chocolate and ½ Cup Heavy cream. Microwave on high for 30
  9. second intervals stirring after each until the Chocolate is melted and smooth. Pour over the brownie in
  10. the pan and smooth to the edges.
  11. Sprinkle with M&Ms and refrigerate until set.
  12. Remove from the pan and cut into desired sizes.
  13. Store in an airtight container in the refrigerator.

What’s your favorite add-in to a brownie recipe?

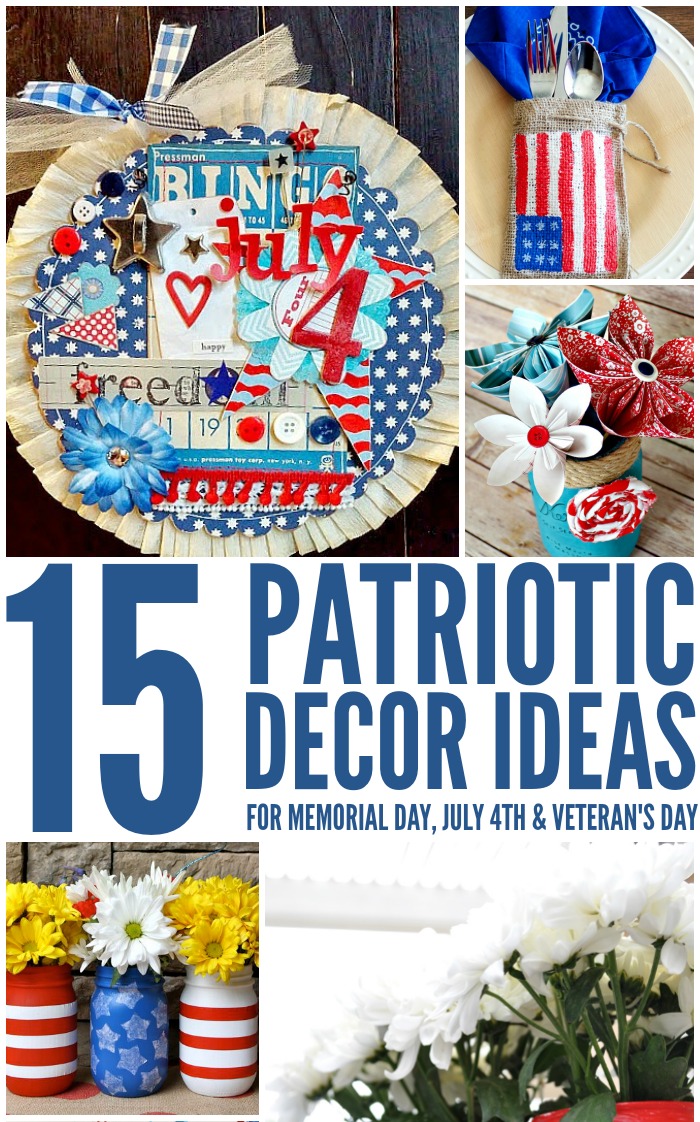
15 Patriotic Decor Ideas


Patriotic Decor Ideas for Summer

Memorial Day is approaching. This holiday is usually the day most consider the unofficial start of Summer. And for us that means decorating for the Summer holidays to not only remember our troops but to remember our country and show our patriotic pride.

I love changing up my mantel and home decor depending on the holiday or season and Summer is the perfect season to decorate with American flags and red, white, and blue decor.

Here are a few patriotic decor ideas to spruce up your home for the summer holidays!

1. Painted Burlap Patriotic Place Settings | Source: A Night Owl

2. Patriotic Wand Centerpiece | Source: The Country Chic Cottage

3. Patriotic Hanging | Source: DIY Beautify

4. Patriotic Paper Flowers Tutorial | Source: View From the Fridge

5. Quickie Memorial Day Garland | Source: Happiness is Homemade

6. Patriotic Mason Jars | Source: Yesterday on Tuesday

7. Patriotic Upcycled Can Flower Pots | Source: Club Chica Circle

8. Pledge Printable | Source: Seven Thirty Three

9. Patriotic Initial Wreath | Source: We Three Smiths

10. Rustic Americana Scrap Fabric Banner | Source: Catch My Party

11. Easy Red, White and Blue Party Decor | Source: She Wears Many Hats

12. Pringles Can Firecrackers | Source: I Gotta Create

13. Patriotic Luminaries | Source: My Blessed Life

14. Vintage-Inspired Patriotic Printables | Source: Live Laugh Rowe

15. Patriotic Clothespin Wreath Tutorial | Source: Everything Etsy

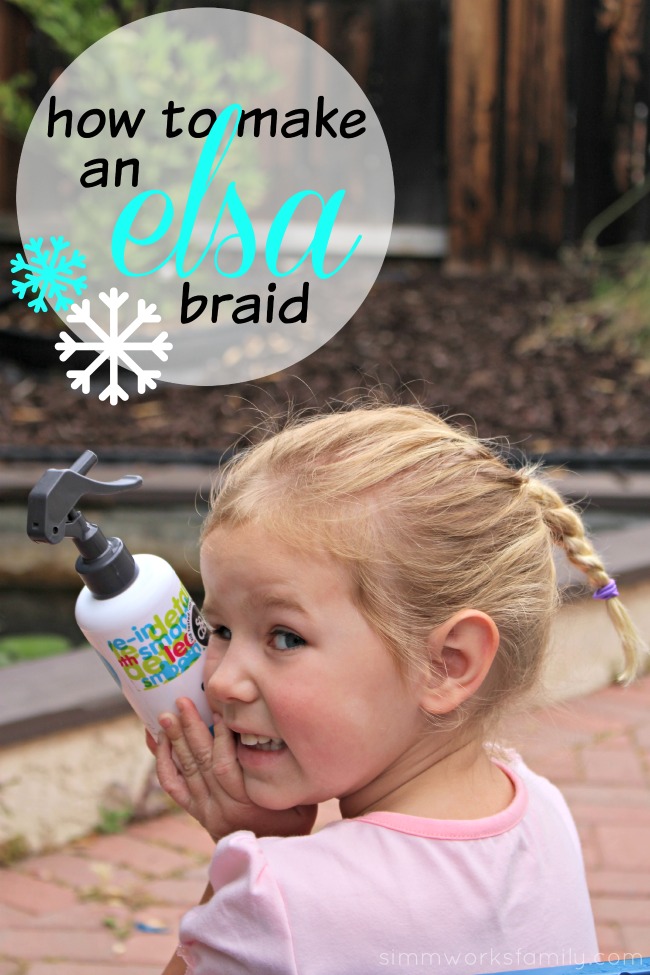
How to Make An Elsa Braid: A Simple Hair Tutorial

I participated in an Ambassador Program on behalf of Influence Central for SoCozy. I received Target gift cards to facilitate my review and thank me for my participation.

How to Make An Elsa Braid - A Simple DIY Tutorial

Now let me be completely honest up front, if you were looking for a super fancy french braid like tutorial, then look somewhere else. Because today I’m going to show you how to make an Elsa braid. But if you’re anyone other than my daughter you may simply see a pony tail with a braid in it. That’s because this is exactly what her Elsa braid is.

I’ve french braided her hair and tried to call it an Elsa braid, I’ve even done a fishnet braid in her hair and tried to call it an Elsa braid. But this girl. She doesn’t believe me. And this, right here, is what she deems as an Elsa braid.

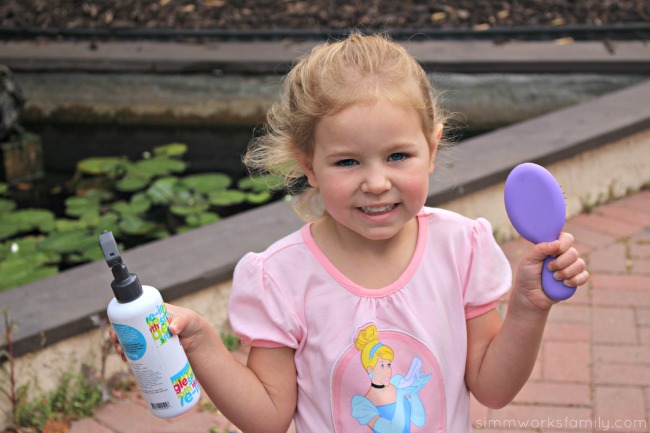
So we go with it. And I save about 15 minutes in the morning arguing about brushing her hair. Because she’ll let me brush her hair if we put it in an Elsa braid. AND if we use her SoCozy detangler.

How to Make An Elsa Braid - the life of a princessHow to Make An Elsa Braid - SoCozy detangler

How to Make An Elsa Braid

What you need: 

  • brush
  • detangler
  • 2 small pony tail holders
  • a head of hair

What you’ll do: 

  1. Spray hair with SoCozy detangler.
  2. Brush all of the tangles and knots out of the hair.
  3. Put the hair into a pony tail by gathering up all of the hair to the middle of the child’s head with a brush. Spray additional detangler if needed for stray or frizzy hairs.
  4. Secure with a pony tail holder.
  5. Section pony tail into 3 sections.
  6. Take one section into the left thumb and forefinger, on into the right thumb and forefinger, and let the middle fall into where your fingers meet.
  7. Bring the left hand side over in between the middle section and the right section. Then bring the right hand side over in between the middle section and the left section.
  8. Repeat until all of the hair is used up and braided.
  9. Secure with the second pony tail holder.

Watch this video tutorial for an easy visual on how to make this hairstyle: 

Before we started using the SoCozy detangler and putting my daughter’s hair in an Elsa braid, I would have to wrangle her every.single.morning to get her to stay still so I could brush her hair.

She’d scream, cry, and complain that I was pulling. I was hurting her. She was going to call Daddy. And then it all stopped and mornings became magical again (cue the Cinderella blue birds). 

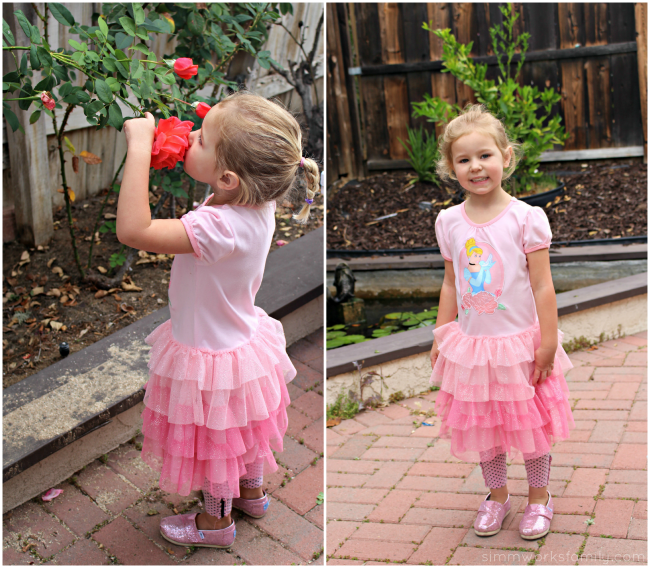
Because now we can sit by her wishing well (aka the koi pond) like Snow White, while she wears her Cinderella dress, and smells her Briar Roses – no, seriously… they’re “Sleeping Beauty Roses” to her – and I make her an Elsa braid before we head off to preschool. 5 minutes. Easy peasy!

How to Make An Elsa Braid - quick and simple hair design

Looking for something a little less basic? Check out this SoCozy tutorial on how to make a Braided Tiara for your princess:


These SoCozy products truly are magical. We’ve had great luck with our SoCozy Cinch 3 in 1 Shampoo + Conditioner + Body Wash in addition to the detangler we use daily. Not only does our daughter use it during bathtime but our son uses it in the shower as well.

And with how lazy this boy is in the shower, we need a 3 in 1 product that tackles everything at once so we can douse him, scrub him, rinse him, and dry him without him realizing it! Before we bought this product, he’d just go in, rinse with water, and tell us he was clean.

We’ve had to go back to Target and get more because he is actually using it. And in the end he smells Mango-go fresh and everyone around him is thankful. 

What’s your go-to hairstyle for your little one?

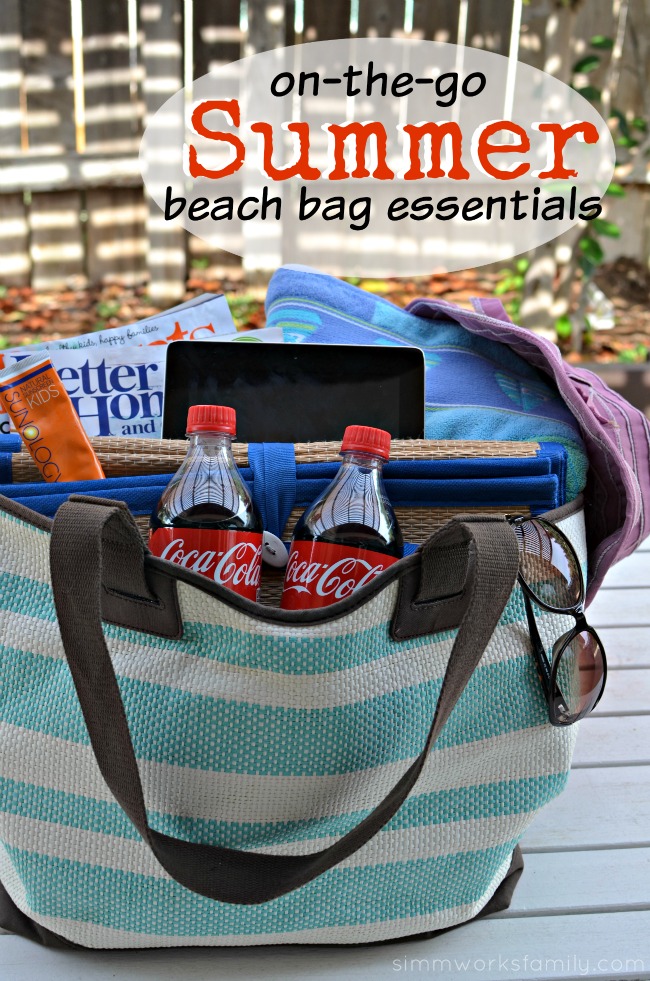
On-The-Go Summer Beach Bag Essentials

This shop featuring summer beach bag essentials has been compensated by Collective Bias, Inc. and its advertiser. All opinions are mine alone. #CokeHappyHour #CollectiveBias

On-The-Go Summer Beach Bag Essentials

The best thing about living in San Diego AND working from home is that if it’s a nice day I can choose where I work. Most times during the summer I love heading out in the afternoon and spending some time at the beach with friends (and sometimes our dogs).

My kids like to call this happy hour. They don’t truly understand what the traditional happy hour is yet but our version is pretty awesome.

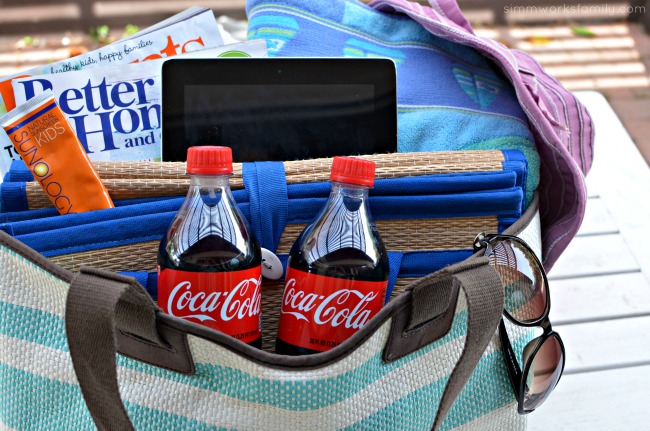
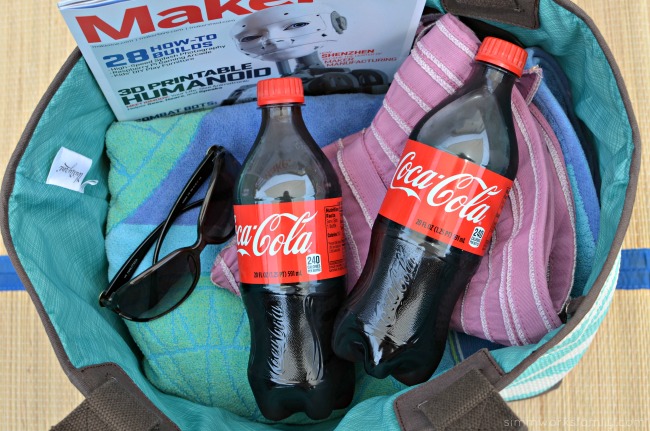
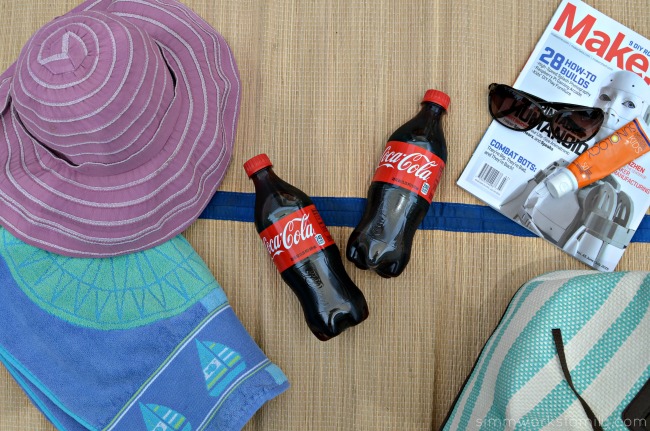
I keep a packed beach bag in the trunk of our car for just these occasions. I’ll share exactly what I keep in this bag and how you can make a bag filled with beach essentials too. Since every beach trip requires refreshments, I like to stop by Walgreens to pick up a few bottles of Coke to enjoy at the beach when we get there.

STAINMASTER PetProtect running at the beach

We also love surprising out of town guests with a summer essentials bag too when they come visit. It’s the perfect way to welcome them into our city and allows them the opportunity to take advantage of our beautiful beaches.

I also love stuffing in a few coupons for places around town including the zoo, local restaurants, and other attractions.

On-The-Go Summer Beach Bag Essentials - share a Coke

On-The-Go Summer Beach Bag Essentials

What you’ll need: 

  • large bag (something you won’t mind getting dirty)
  • towel for everyone
  • straw beach mat
  • magazines
  • tablet or laptop (to work)
  • sun glasses
  • hat
  • sunscreen
  • snacks
  • Coke

On-The-Go Summer Beach Bag Essentials - unpack at the beach

What you do: 

  1. Pack the towels, beach mat, magazines, hat, and sunscreen in the large bag to stay in the trunk.
  2. When you’re ready to head out to the beach, grab the tablet or laptop and your sun glasses and add them to your bag. Grab the the kids (and/or the dog) and head out for some fun.
  3. Stop by Walgreens to pick up some snacks and grab a few cold Cokes to share with friends. Take advantage of Coke Happy Hour at Walgreens while you’re there (more about that below).
  4. Head off to the beach!


On-The-Go Summer Beach Bag Essentials - easy to grab and go

Every Wednesday through Friday from 4:00 to 7:00pm, Buy 1 Coca-Cola 20 oz. bottle and Get 1 Free 20 oz. bottle to share! You can load the coupon instantly on the Walgreens app or click here for more information.

From May through July you get 3,000 Balance Rewards points when you buy participating Coca-Cola products when you purchase $10 of participating Coca-Cola products.

Coke at Walgreens

Who will you share a Coke with during happy hour

Using Disposables At Night

This post featuring why our family chose to use disposables at night is sponsored by Huggies.

Using Disposables At Night - why we made the decision

 After having my third child I thought things would go just like the other two. We’d continue to do all of the things that we did with the other two this time around. But every child truly is different and we’ve had to tweek some things here and there to create a new normal for our family of 5.

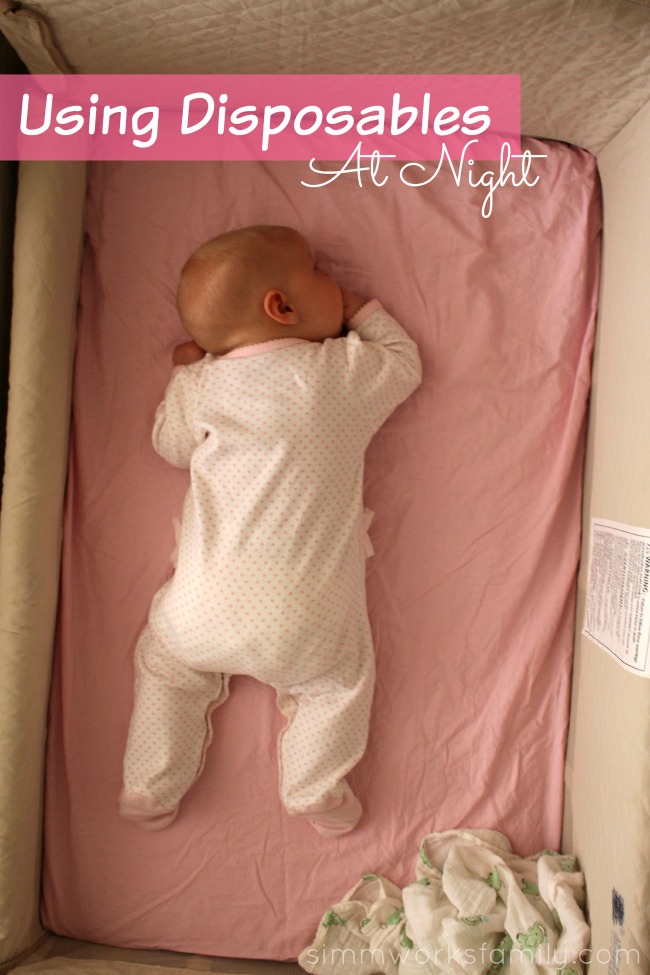
One of those tweeks is that we’ve chosen to use disposable diapers at night. Little Miss was just too much of a heavy wetter and I hated waking up soaked every night. She’d start out dry in her co-sleeper and then would end up soaked on me in the morning. No bueno.

cloth during day disposables at night baby girl

My old night time diapering solution just wasn’t cuting it and I needed a change.

After using disposable diapers on our trip to Seattle for SoFabU On The Road, my mind was made up. I was going to use disposables at night. (Need tips on staying in a hotel with an infant? Check out this post here!)

Since I am not very familiar with disposable diapers it was a bit of a learning curve to figure out what would work best with our baby. And after a few trial and errors we’ve found the perfect solution.

Fun Fact: I totally tried to put the diaper on backwards the first few times I used a disposable during my trip to Seattle. Oy! And? I had no clue how to tell if she was wet. My mom had to show me.

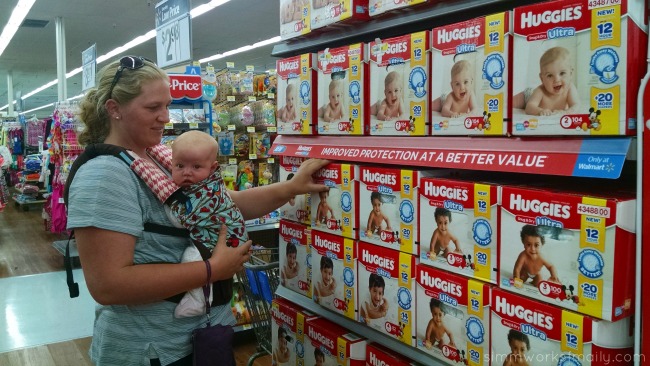
Huggies® Snug & Dry Ultra diapers at Walmart

We picked up a box of new Huggies® Snug & Dry Ultra Diapers, available exclusively at Walmart, because we heard that they lock away wetness better than other brands and provide up to 12 hours of long-lasting leakage protection. 

Since this little one likes her beauty rest (and co-sleeping makes it possible to quickly nurse to appease her appetite) keeping baby dry all night long gives me the confidence that I’m making a smart choice for my family.

cloth during day disposables at night with Huggies

5 Things To Know When Making The Switch

  1. Put the tab side down first. Don’t try and diaper your baby backwards like I did (unless they’re older and try to remove their diaper at night). 
  2. When checking to see if the diaper is wet, feel the front with your thumb and pointer finger. If it’s squishy, it’s wet. 
  3. Don’t worry about sizing up in PJs. Slimmer bum = wearing their true size in sleepers. 
  4. Size up! Especially if your baby is on the cusp of going to the next size, always size up. 
  5. Don’t try to stock up. Since you’re only using them at night, you only need 1-2 diapers a day (depending on how heavy of a wetter you have).

These might sound like “duh” things to think about but from a mama who’s only cloth diapered, I was truly clueless when making the switch.

Cloth during day disposables at night - no leaks

Instead of adding layers upon layers into my fitted cloth diapers that I used with the other two, I now just grab for a Huggies® Snug & Dry Ultra diaper as we go through our night time routine and I know that I won’t be frustrated when I wake up. 

A happy mama equals a happy baby! 

cloth during day disposables at night - Huggies stay dry

Share a Huggies #UltraHug and Win A Grant For Your Community

Give your baby an Ultra hug every time you diaper them in Huggies® Snug & Dry Ultra Diapers, and make someone else’s day better by sharing an #UltraHug. 

Share a selfie of you and baby on Twitter or Instagram and nominate a community project in need such as a local park, playground, or rec-center. Tag the post with #UltraHug and you may receive a $2,000 grant from Huggies for your community’s project!

You can post between now and June 25 to enter. Beginning July 6, Huggies will feature 20 of the nominated projects HERE. The top 10 will receive community project grants.

Did you do the same thing with all of your kids or did you change things up?


© A Crafty Spoonful - All Rights Reserved
It is OK to use one of my photos provided a link back and/or proper credit is given. It is NOT ok to copy and paste a whole post including instructions. Please do not remove watermarks or alter images in any way. Please contact me with any questions at danielle@acraftyspoonful.com

.