How to Make a DIY First Day of School Sign Using PicMonkey

affiliate link disclaimer

How to Make a DIY First Day of School Sign Using PicMonkey #BackToSchool

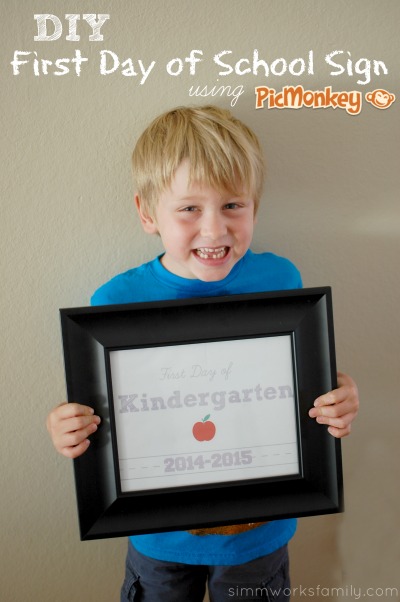
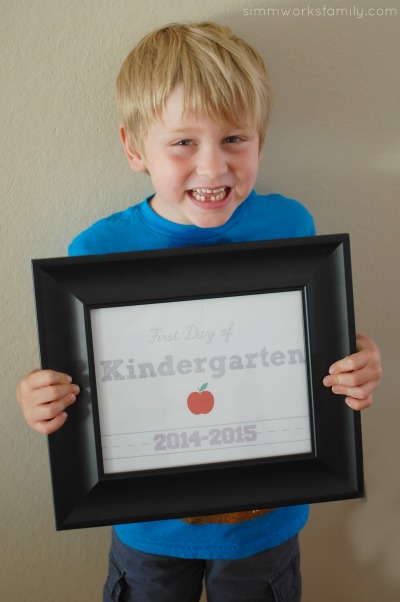
My oldest will be heading to kindergarten in just two short weeks. And while I’m definitely ready for this next step in his adventure, I want to make sure to capture as many memories as I can.

So after seeing a lot of printables floating around, I decided that instead of finding something someone else made, I’d make my own DIY first day of school sign.

With the help of PicMonkey it was not only easy to do, but it came together very quickly! And it cost nothing for me to make. I simply used a picture frame we hadn’t hung yet and handed it over to him to take a few photos.

And you can make one too! Here’s how:

How to Make a DIY First Day of School Sign Using PicMonkey

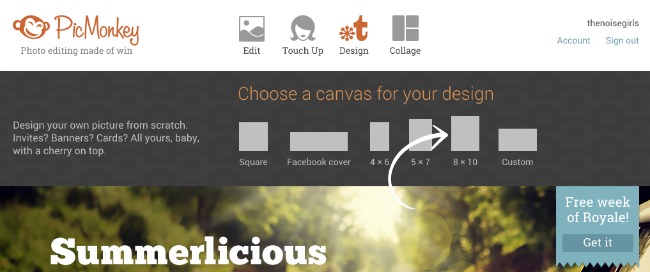
Step 1: Choose a Size under Design –

Since I planned on framing my sign, I chose an 8×10 canvas. If you have specific dimensions you want to use you can specify them by selecting the custom option (or use one of the other canvas templates available).

DIY First Day of School Sign Using PicMonkey step 1

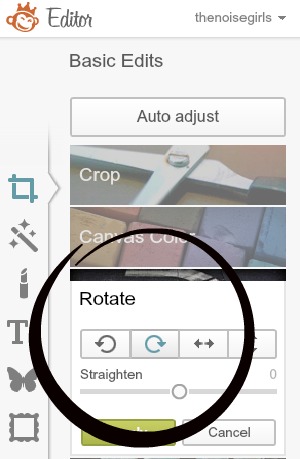
Step 2: Rotate if you prefer Landscape orientation

DIY First Day of School Sign Using PicMonkey step 2

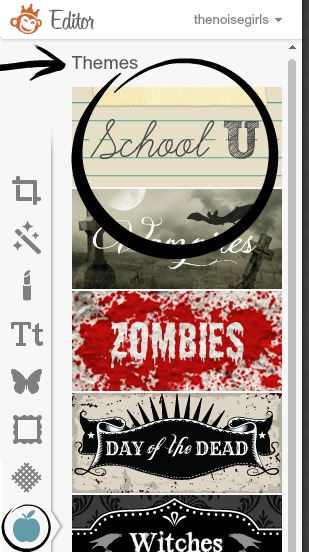
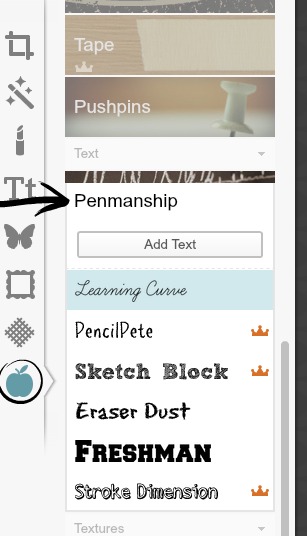
Step 3: Click on Themes (apple icon) and Select School U –

You can really use any of the fonts, overlays, etc but I found everything I wanted under the School U theme making it easier to edit and add all from one location.
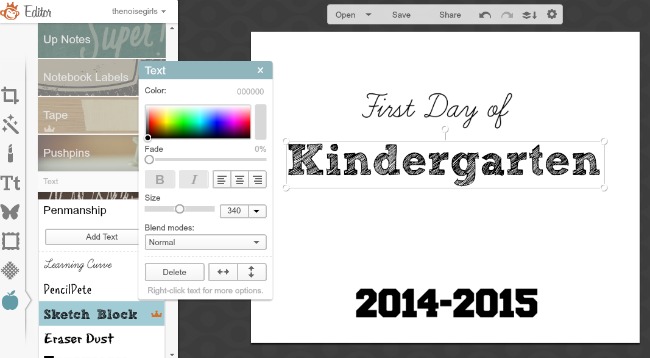
DIY First Day of School Sign Using PicMonkey step 3

Step 4: Add Text –

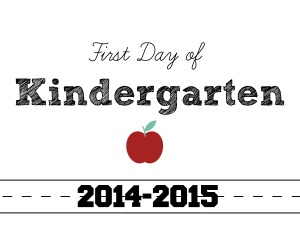
Using the School U Penmanship you can write in your child’s grade, the school year, and if you prefer, your child’s name. Feel free to change up the fonts, colors, and sizes to your liking. Here I used Learning Curve for the “First Day of”, Sketch Block for “Kindergarten” and Freshman for the school year.

DIY First Day of School Sign Using PicMonkey step 4

DIY First Day of School Sign Using PicMonkey step 5

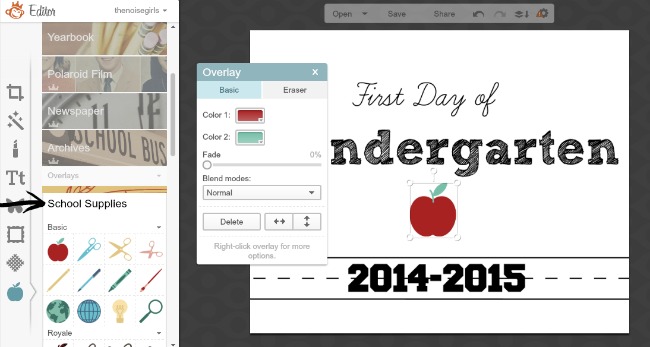
 Step 5: Add Overlays –

Still, in the School U Theme, click on any of the Overlays options and select what overlays you want to use to add more to your printable. After playing around a bit I added an apple found under School Supplies and a line of ruled paper found under Dashed & Lined.

DIY First Day of School Sign Using PicMonkey step 7

DIY First Day of School Sign Using PicMonkey step 8

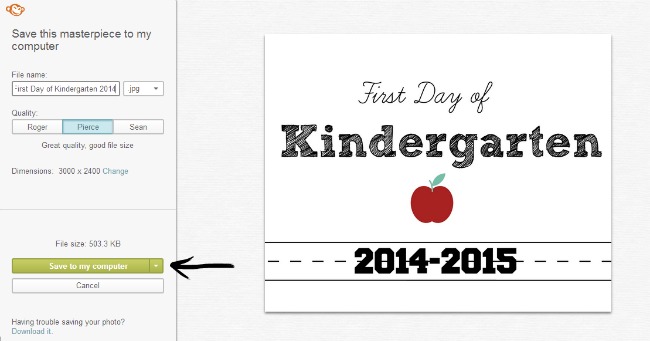
Step 7: Save, Print, & Frame!

If you’ve chosen the 8×10 size there’s no need to change the size of the document but if you’re looking for a lower resolution/size file feel free to make the size of your printable smaller. You can also change the file format and save as either a .jpg or .png. When you’ve named your printable go ahead and save to your computer.

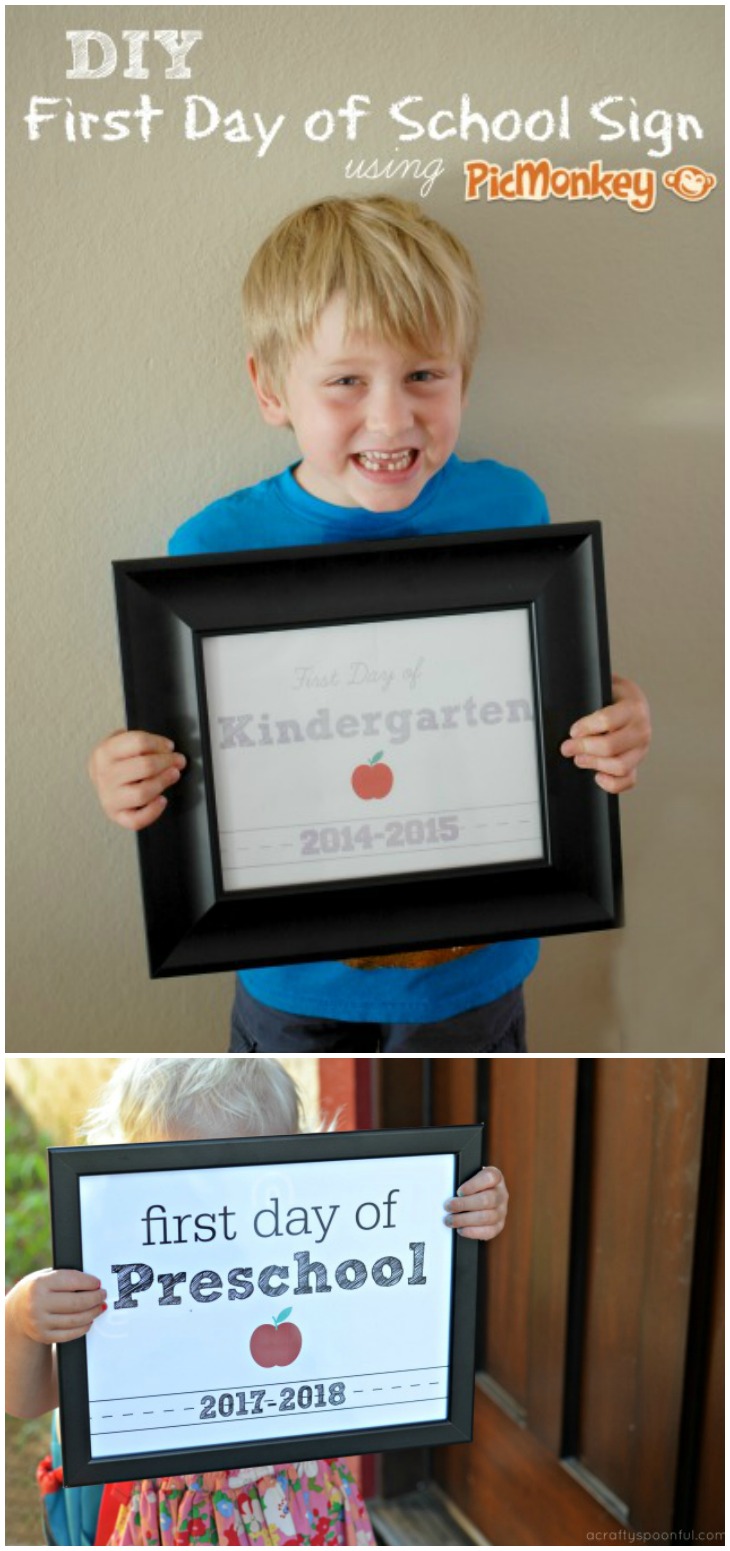
When printing out make sure that your printer isn’t automatically printing a full page photo and stretching your image. You want it to print out at an 8×10 size to fill an 8×10 picture frame (unless using a different size). Once printed, frame and snap away! Just be aware when using a glass frame that glare may be an issue when taking photos.

DIY First Day of School Sign Using PicMonkey step 9

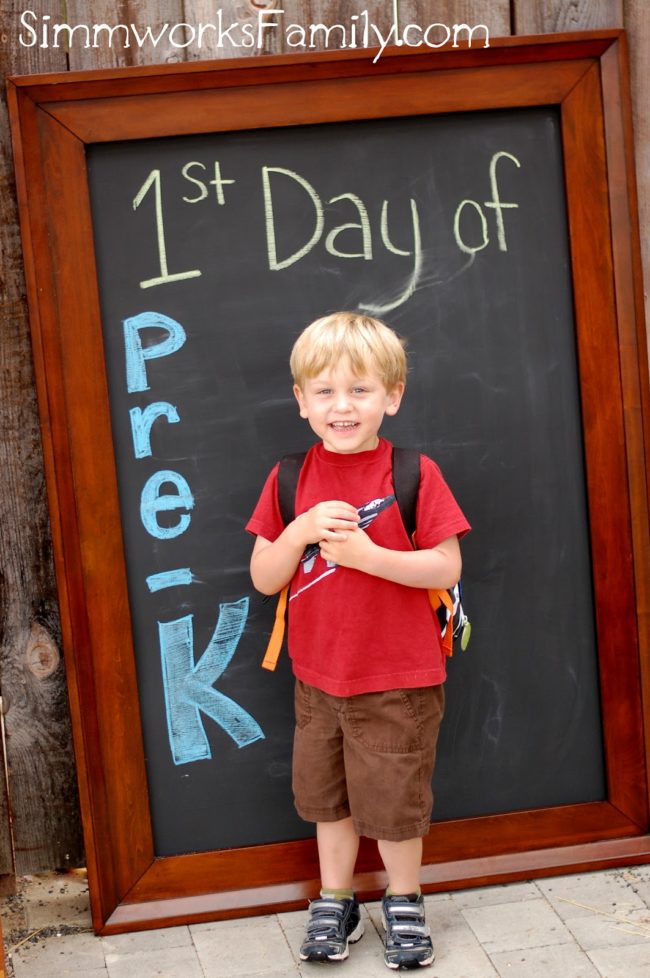
How cute is this little guy?? Definitely growing up way too fast!

DIY First Day of School Sign Using PicMonkey step 10

 What grade is your child going into?

Don’t want to deal with the hassle of making your own and have a kindergartner? Use my printables for free!

First Day of Kindergarten 2014 - printable

First Day of Preschool – Date

First Day of Preschool – No Date

First Day of Kindergarten – Date

First Day of Kindergarten – No Date

First Day of 1st Grade – Date

First day of 1st Grade – No date

First Day of 2nd Grade – Date

First day of 2nd Grade – No date

First Day of 3rd Grade – Date

First day of 3rd Grade – No date

First Day of 4th Grade – Date

First day of 4th Grade – No date

First Day of 5th Grade – Date

First day of 5th Grade – No date

First Day of 6th Grade – Date

First day of 6th Grade – No date

First Day of 7th Grade – Date

First day of 7th Grade – No date

First Day of 8th Grade – Date

First day of 8th Grade – No date

This post was originally published on August 15th, 2014

Like this post? Read more!

Pin this article for later! 

Click the Pin button on the image below to save for later.  

Make Creative Back to School Memories That Last

The first day of school can be brimming with anticipation and excitement. Both for our kids and ourselves. With a new school year here, we want to capture as many back to school memories as possible. Especially when we can highlight these milestones through photos and traditions.

back to school memories

There are a few ways to create and preserve the memories of the first day of school.

Here are a few of our favorites:


Special First Day of School Breakfast 
Fix a special breakfast of your child’s favorite pancakes or some delicious french toast.  Try making a batch of delicious homemade cinnamon rolls lfrom the Frugal Greenish Mama or a delicious blueberry coffee cake. Or let them decide what they want to have the night before. No matter what, don’t send them off without a full tummy.

While they’re chowing down, leave a note or two for your child in their backpack or jacket pocket to let them know that they’re awesome and you’re thinking of them on their first day.


Back to School Photo Shoot

Before you leave for school snap a few photos. You can be creative and use a chalkboard to write what grade your child is going to.

I’ve turned my large chalkboard (tutorial can be found here) into a first day of school tradition. Every year I can take a photo of my children on the first day of school, and then a photo on the last day of school to store these perfect memories forever.

Or simply print out a piece of paper with the grade and date on it. There are a few great templates out there to download including this one we use every year – we’ve even included a PicMonkey tutorial in case you would like to make your own)

Make sure to have a repeat photo session on the last day of school as well so that you can look back on how much your child has grown over the school year.

First Day of School Questionnaire

Ask your child a series of the same questions every year when they get home from their first day. Add a photo and look back on the answers with your children at the end of the school year.

Some questions to ask: 

  • When I grow up I want to be a ______________.
  • My favorite color is ______________.
  • My teacher’s name is ______________.
  • I learned about ______________ on my first day.
  • My favorite part about my first day was ______________.
  • My friends are ______________.
  • I’m looking forward to doing ______________ tomorrow.

After the First Day of School Treat

When you pick the kids up from school on their first day, make it special by taking them to the local ice cream parlor or fro-yo shop for a special treat.

You can talk about their first day, fill out your questionnaire, and talk about what the rest of the year (or maybe just the week) has in store for them. Be involved, be excited for them, and make sure they know you’re there to share in the excitement of the new year.

How do you celebrate the first day of school?

This post was originally published on August 29th, 2012

Like this post? Read more! 

Pin this article for later! 

Click the Pin button on the image below to save for later.  


How To Turn a Mirror into a Chalkboard {DIY Tutorial}

My baby boy started preschool yesterday.

I still can’t believe he’s old enough! But he’s 3 1/2 and ready to go. He was practically shoving us out the door so he could get to school.

He excitedly grabbed his backpack (filled with a change of clothes and LOTS of dinos) and headed out. But not before I grabbed a few snapshots of him to mark the special day.

The chalkboard I used is something I made. Yup! And it cost me $7 + a can of chalkboard paint. And no, I didn’t use all of the chalkboard paint. There is plenty left for lots more projects. Wanna know how I did it? Here’s how!

How to Turn a Mirror into a Chalkboard

1. Head over to your local furniture store. Check their clearance section to see if they have any cracked mirrors. The one above had a HUGE crack down the center of the mirror and was clearanced at $7. You can’t find frames that inexpensive!

2. Carefully remove the glass by taping the mirror and lightly tapping on the glass with a hammer. Use gloves to remove the glass from the frame.

3. Once the glass is removed, tape the sides of the frame so no paint gets on the wood.

4. Paint a thin coat of chalkboard paint onto the backing of the mirror (ours had a nice piece of chipboard behind the glass)

5. Let dry for 2 hours, or as recommended on the paint can, and reapply another thin coat.

6. Allow paint to dry overnight or until completely cured. Then start coloring!

Thats it! This was such a simple craft that I enjoyed doing. And the possibilities are endless. Peruse yard and estate sales for older mirrors, check out the flea market and thrift shops, etc. Then change up the color of the frames with some spray paint, remove the glass, and start making chalkboards!


© A Crafty Spoonful - All Rights Reserved
It is OK to use one of my photos provided a link back and/or proper credit is given. It is NOT ok to copy and paste a whole post including instructions. Please do not remove watermarks or alter images in any way. Please contact me with any questions at danielle@acraftyspoonful.com

.