Upcycled Container Gardens: Housing Your Herbs

Upcycled Container Gardens Housing Your Herbs

Around this house, we try to repurpose and upcycle as many things as we can. If it can’t be composted or turned into something else, we try to donate. So very rarely do we end up with things that go in the trash. This makes for a great assortment of containers to be used in the garden.

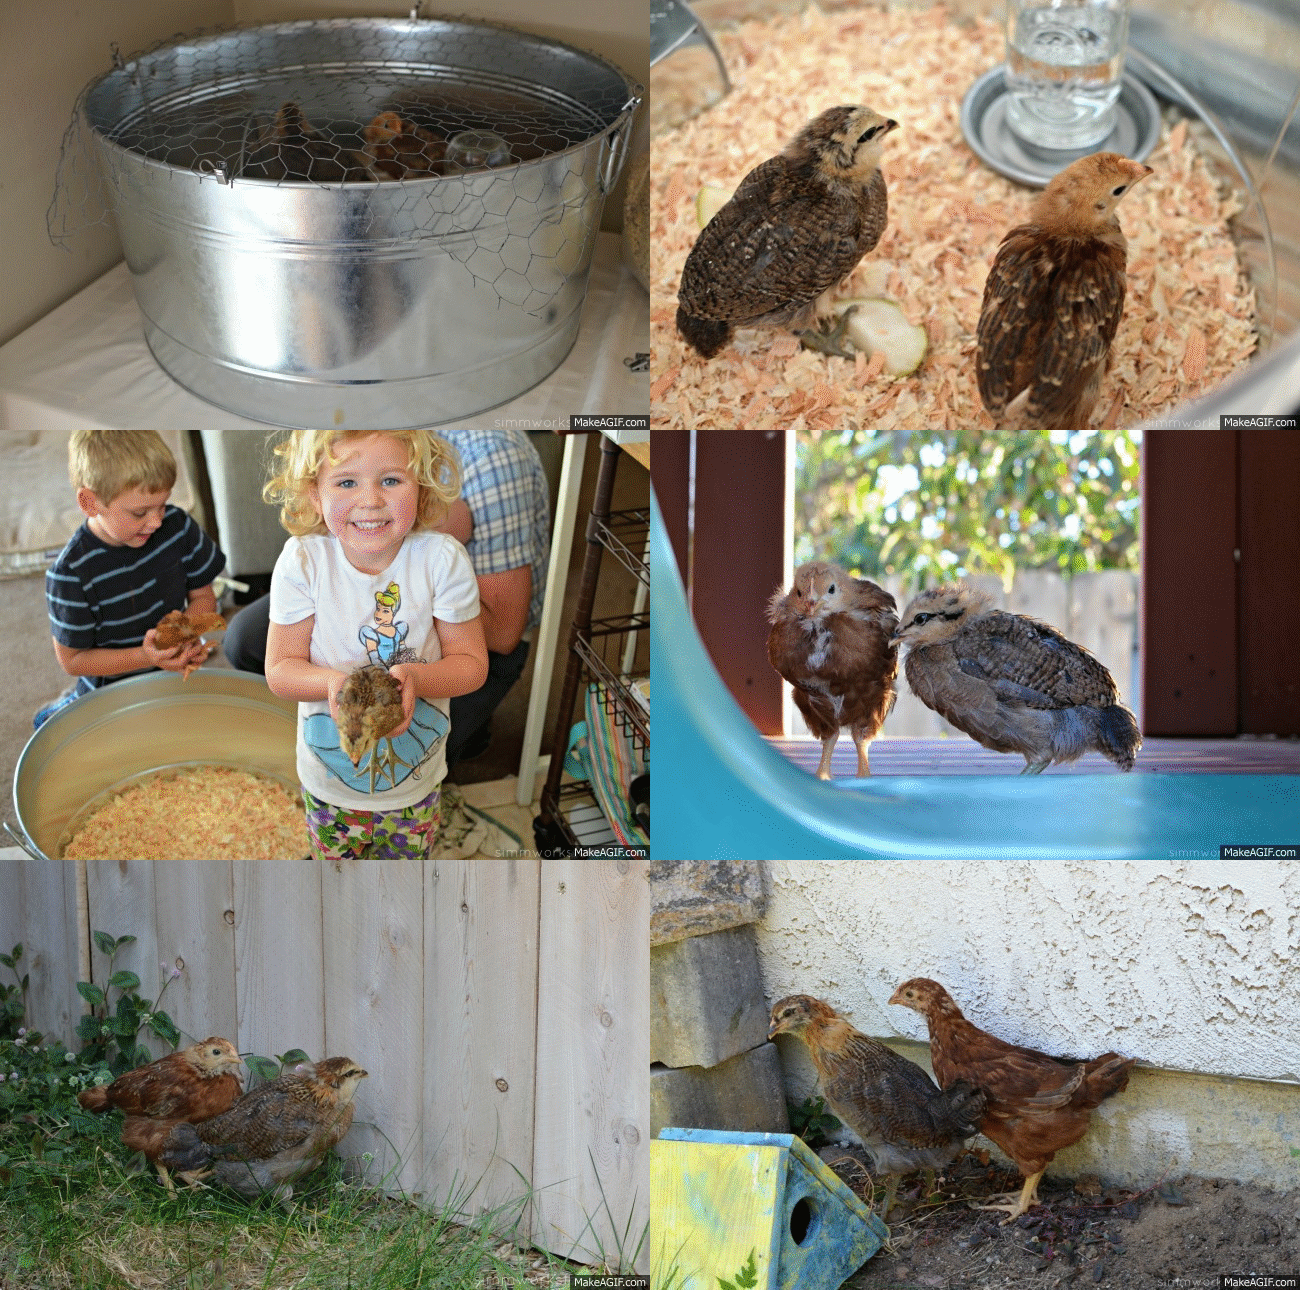
When we picked up our chicks I knew we’d need a little home for them until they were big enough to go straight into our coop. At 3 weeks old they’d need to stay warm indoors so I picked up a metal bucket at our local hardware store.

Since I knew I would only be using the bucket for a short period of time I already had it earmarked for a project I’d wanted to do for quite a while… a stand alone herb garden!
Growing Chicks
I’m not sure if you know this but chicks, like children, grow like weeds! Seriously.

I turned around for a second and these cute little baby chicks are almost chickens at 2 months! But we still have 4 more months until they’re actually laying eggs (so I’m told).
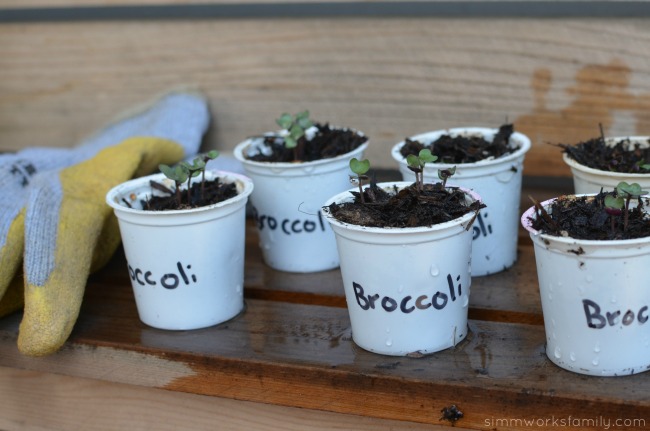
Upcycled Container Gardens - growing seedlings

With so many things growing in our raised beds (like the broccoli that’s sprouting from our DIY K-Cup Seed Starters) we didn’t have any more room for the herbs I love to have on hand for cooking.

So it just made sense to have a container garden on the patio. What’s a better green work of art than a container garden?

Our next step will be to build a stacked container garden to house the strawberries we’ll be planting soon! How awesome does that sound? It’s as simple as taking this idea and stacking a few smaller containers on top of one another. Then planting in each tier.

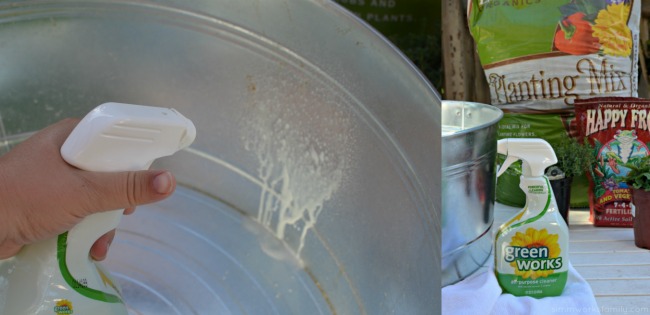
Upcycled Container Gardens - cleaning out the container


Because our tub housed the chicks, I wanted to make sure that I cleaned the container very well before putting the soil and plants inside.

While some might question why I would clean out the container first – don’t people buy chicken manure? – the chicken poo that may be on the container hasn’t been composted yet. And I don’t want any bacteria that may have been left in the container to contaminate my plants.

But more on composting chicken poo later! Let’s get to this herb garden. First up – the chalkboard label.

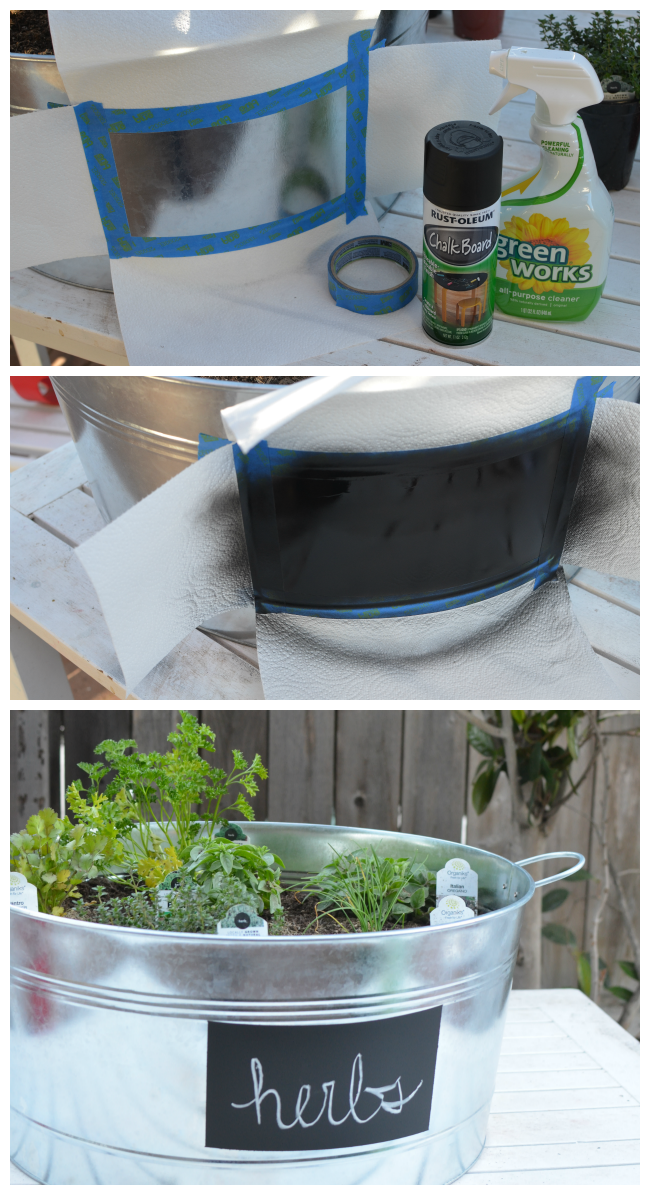
Upcycled Container Gardens - DIY Chalkboard Label

 Upcycled Container Garden Chalkboard Label

What you’ll need:

  • 2 paper towels (can also use newspaper)
  • painters tape
  • chalkboard spray paint
  • metal container

What You Do:

1. Wipe down the area you wish to put the chalkboard paint on with an all-purpose cleaner. Then rinse the container out with water and let dry.

2. Grab two paper towels and cut each in half (4 half sheets). Then cut one-half sheet in half again. You’ll have 3 half sheets and 2 quarter sheets.

3. Using the painter’s tape and the paper towel pieces, create a square or rectangle space to spray paint the chalk onto.

4. Put extra paper towels under the container to protect the table underneath from paint.

5. Using the chalkboard spray paint, spray on two coats of chalkboard paint onto the container. Wait about 20 minutes in between each coat to allow them to dry.

6. Remove the paper towels and tape to reveal your chalkboard label. Write on it with chalk and display for all to see!

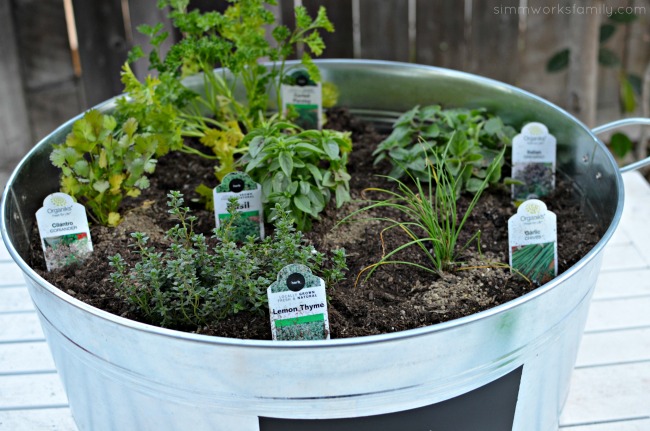
Upcycled Container Gardens - variety of herbs

Tips for Planting Herbs in a Container Garden

  1. Use good soil – find a soil that’s good for growing vegetables or use a good blend of soil and compost
  2. Depending on where you’re putting your container garden, consider the height each herb/plant gets and plant taller herbs in the back
  3. Plant what you know you already use now in the kitchen
  4. Make sure you are also giving your herbs vegetable food (found at any garden center)
  5. Place the container garden in a spot that will receive direct sunlight and make sure to water!
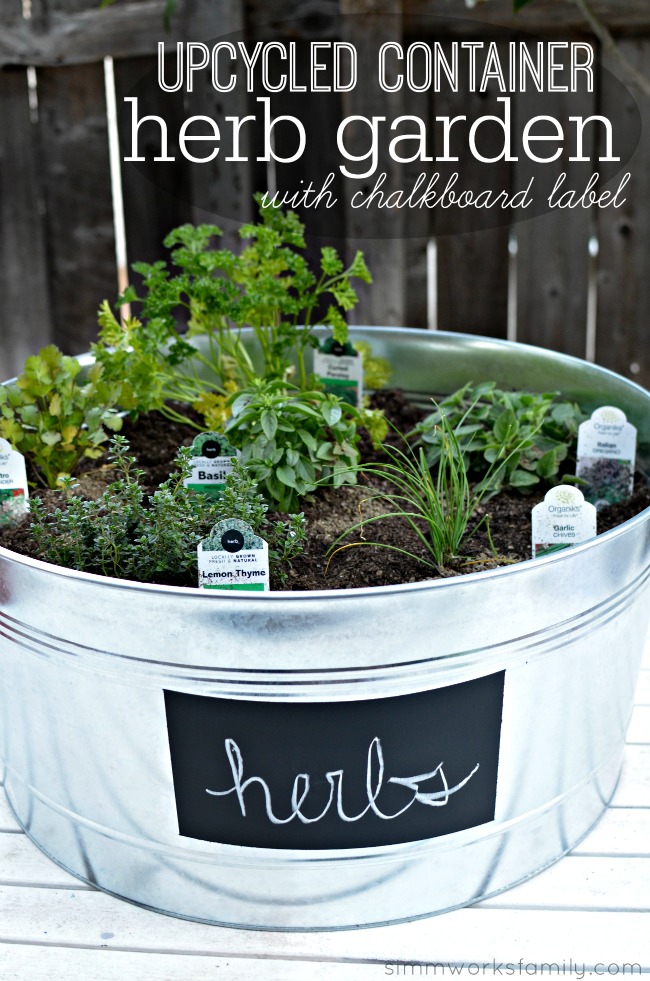
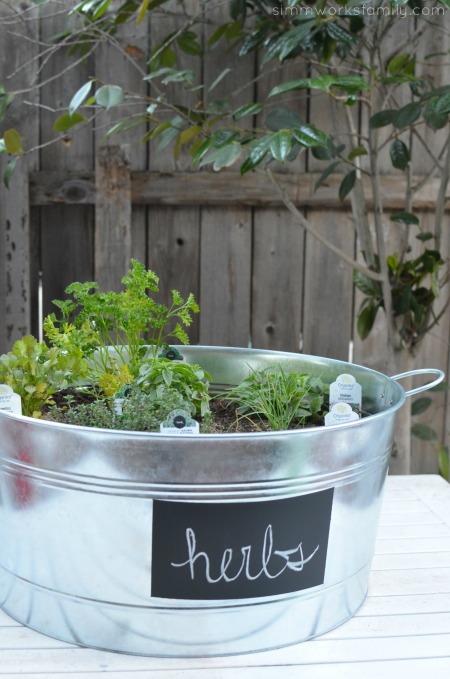
Upcycled Container Gardens with Chalkboard Label

What’s your favorite way to upcycle old containers?

Medicine Cabinet Must-Haves

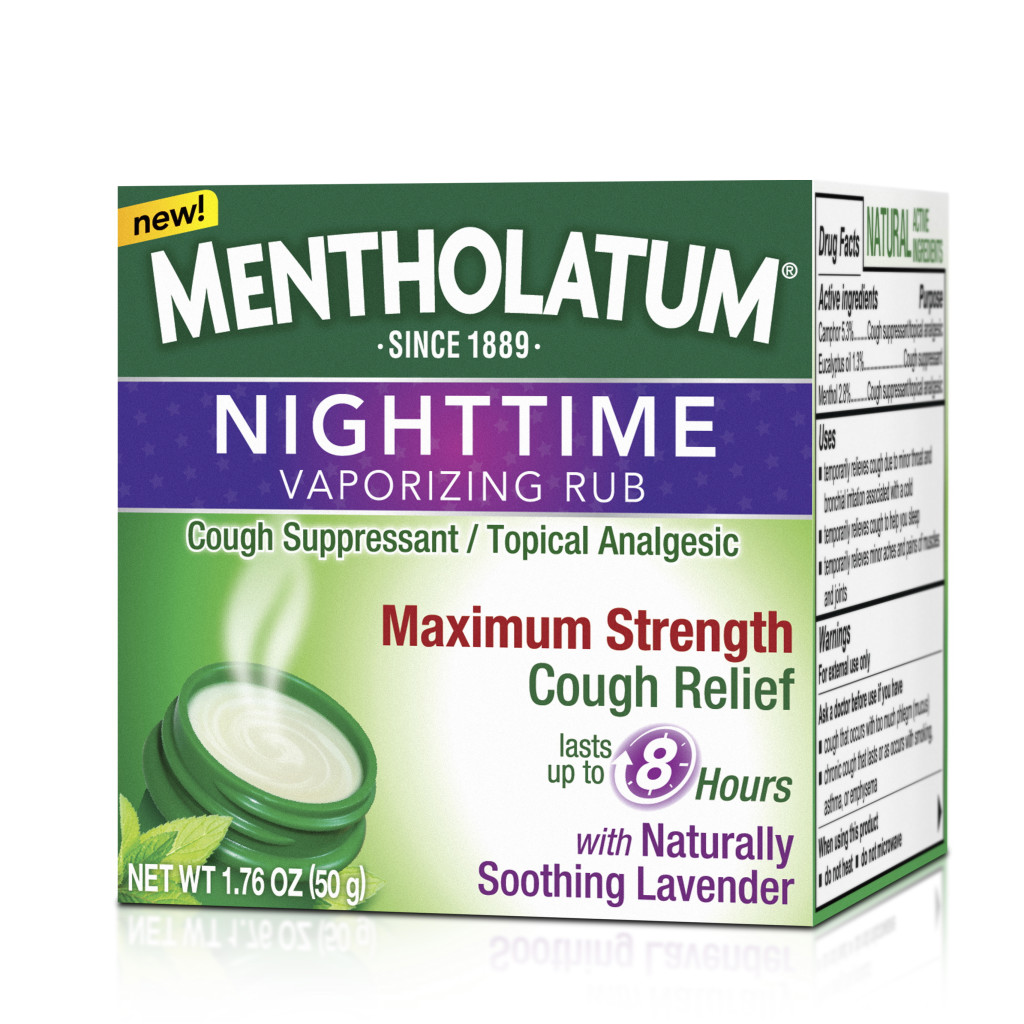
This post and giveaway are brought to you by Mentholatum® Nighttime Vaporizing Rub

What’s in your medicine cabinet? Most people stock commonly used items right up front: thermometer, lotions, bandages and ibuprofen. And, toward the back you may find a jar of chest rub that’s been around for years. Now there’s a reason to give chest rub a spot in the front row.

The Mentholatum Company talked to consumers to find out exactly why chest rub wasn’t a go-to cold relief product. Dissatisfaction with the fragrance was a major complaint. Users wanted a product that would bring relief for coughing and chest and muscle aches, but with the added benefit of a pleasant smell. New Mentholatum® Nighttime Vaporizing Rub was formulated with the soothing scent of lavender to address these concerns.

People have been claiming the therapeutic benefits of lavender for thousands of years, and herbalists value it for its calming and soothing properties. Its name comes from the Latin word lavare, meaning “to wash,” but its uses go far beyond the act of cleaning. Today you’ll find lavender as an ingredient or fragrance in many popular products.

Mentholatum_Nighttime_Vaporizing_Rub_Box [Read more…]

White Party Cake with Strawberries Recipe + Baking Tips

Tracking Pixel

This is a sponsored post written by me on behalf of PAM Cooking Spray.

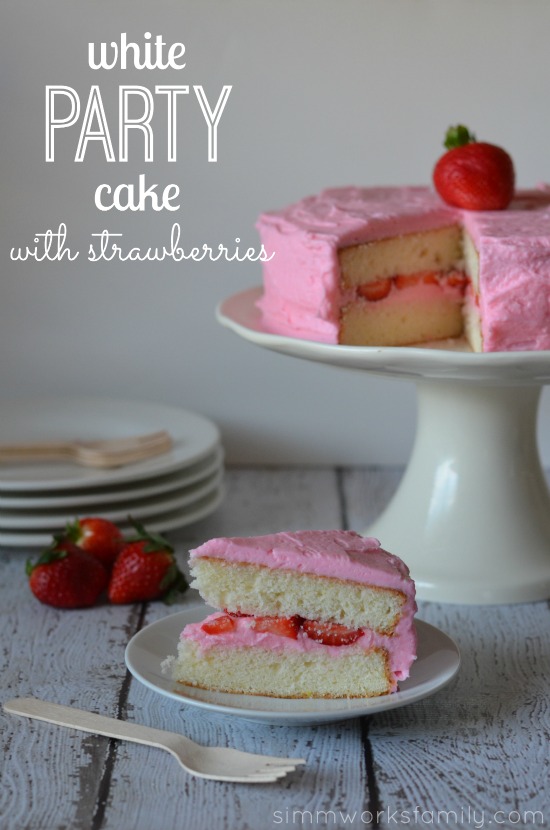
white party cake with strawberries

My baby is turning 3 tomorrow. 3 years old! How did that happen? In celebration of her birthday we baked together and made her a delicious white party cake with pink strawberry frosting. It’s a trial run for the cake I’m making for her party on Sunday and I think it’s a winner!

Every year I bake my kids a cake or cupcakes for their birthday party. We end up having both cake and cupcakes but I try and make one of them. And without fail I’m baking the night before the party and always have to re-do everything because my cakes stuck to the pan. Well not this year. I busted out my secret weapon: Baking PAM Cooking Spray. Not only is it the perfect non-stick spray, it also has flour in it so my baked goods come out perfectly every time.

The kids are slightly disappointed because they don’t get to eat up all of the cake crumbles from the broken cakes that I’ve just about ruined. But I’m happy because a cake that slides right out of the pan means less work and stress for me!

[Read more…]

Washing Cloth Diapers {How To}

I’ve highlighted my love for cloth diapers (CDs) on this blog before but since having my daughter I haven’t talked much about our cloth diapering experience with her. Honestly it’s because it’s been going very well. We haven’t run into one issue with the diapers we bought for her. Mainly, I think, because we are using all of the diapers we grew to love with our son. I still have the Happy Heiny and Bum Genius love but more than likely I’m grabbing for a prefold and Thirsties cover in the closet then a pocket or all-in-one diaper.

One question I have received a few times is how I clean them. Most assume I use a service. And they’re surprised to hear that I take care of the washing (poop and all) myself. It’s actually quite easy! So I figured I’d break it down for those who were curious and/or interested in cloth diapering. Just remember that this is how I wash my diapers. Always consult the manufacturers instructions for their recommendations before jumping in. We’ll start with the basics and go from there.

Stuff You’ll Need:

  • CD friendly detergent (check out this website for comparisons)
  • Vinegar
  • Original (blue) Dawn or Bac-Out (to strip your diapers if needed)
  • Dryer Balls
  • Clothes line with clothes pins

What You Do
Washing cloth diapers is pretty simple. After the initial prep wash, which we’ll go over, you can wash all of your cloth diapers together in the same load. The only thing you won’t be able to throw in the wash are your wool covers. That will be another post! Before washing make sure that when baby has a poopy diaper you clean it out by either spraying, scraping or plopping the waste in the toilet before putting your diaper in your wet bag.

Prep Wash
When you first get your cloth diapers you will need to do a bit of prep washing to maximize the absorbency of the diaper (so it holds more pee). With this initial prep wash you will need to separate natural fibers like hemp from your synthetic fibers. The natural fibers release oils during this initial wash that you don’t want coating your other diapers.

Most diapers only need that first initial prep wash. But if you are buying prefolds brand new it can take anywhere from 3-5 wash and dry’s to fully get the absorbency needed. An easy way to test your diapers to see if they’re pee-ready is to put a few drops of water on them. If the diapers immediately absorb the water with no problem then they’re ready to go. If the water beads up then the diapers need another go through or two.

To prep your diapers just do the following:

  • separate natural and synthetic fibers
  • wash diapers in cold water with a small amount of detergent (usually 2 tablespoons)
  • dry the diapers on low heat until fully dry or line dry diapers
  • repeat 2-4 times until diapers absorb water (prefolds will quilt up)

Washing Diapers
When you have about 24-30 dirtied diapers in your diaper pail or bag it’s time to do some wash! Don’t be scared. Diaper laundry will come as natural to you as washing your clothes. There are just a few simple steps you will need to add to the routine.

1. Set your water level to the highest it goes
Do NOT lower the water level to the level your diapers reach in the wash. It’s important to fully submerge the diapers and give the diapers some room to move around to get all the ickies out.

2. Rinse your diapers first with cold water
Include a small amount of detergent with this rinse to freshen things up. The rinse will remove any excess poo that may still be on your diapers and will also wash the diapers out a bit so that when they are being washed they’ll get cleaner.

3. Wash your diapers with hot water, rinse again with cold
There’s no need to use the sterilize cycle if you have it but please feel free to do so. I prefer just using the hot wash/cold rinse. Add in the recommended amount of detergent. This usually ends up being roughly 1/2 the amount you would use with your regular clothes.

After the wash is complete add some vinegar (about 1/4 cup) to the laundry for the rinse. This will reduce the need for dryer sheets or fabric softener. It’s also a great alternative for your regular laundry too. You can also purchase a downy ball and throw the downy ball (filled 1/2 way with vinegar) to the wash so you don’t have to listen to when the second rinse occurs.

4. Dry your diapers on low heat or on the clothes line
Some prefer to dry their diapers on medium or high heat but in order to save a little energy I dry on low. I also add dryer balls to the dryer to beat out any static that may be lingering. Try not to use fabric softener or dryer sheets in the washer and dryer you use for your cloth diapers. These products leave a film on your clothes and your washer and dryer. The build up of this film will reduce the absorbency of your diapers.

When the weather is nice I like to dry my diapers on low for 10 minutes and then pull them out and line dry them until fully dry. I then pop them back in the dryer with some dryer balls for another 10-15 minutes with the dryer balls to fluff them up. Best thing about line drying in the sun? The natural bleaching the sun does to the diapers. Natures miracles. Then you simply just take the diapers out of the dryer, stack together or stuff and stare in awe at your stash. Oh, wait. Maybe I’m the only one that does that. I may have a sick obsession with how much I love the fluff.

So basically it’s cold rinse, hot wash, cold rinse, dry and you’re done!

Need help stripping your diapers? Check out my Stripping Diapers post for more information.

*** This giveaway is now closed ***


© A Crafty Spoonful - All Rights Reserved
It is OK to use one of my photos provided a link back and/or proper credit is given. It is NOT ok to copy and paste a whole post including instructions. Please do not remove watermarks or alter images in any way. Please contact me with any questions at danielle@acraftyspoonful.com

.