Getting Crafty in the Garden: Painting Rocks for Garden Markers

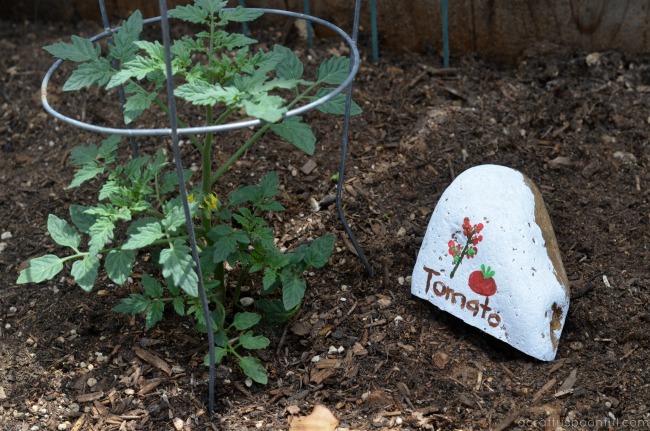
Kids helping in the garden this Spring? Why not use these painted rocks for garden markers! This craft is super easy to make and you can just use supplies you have around the house.
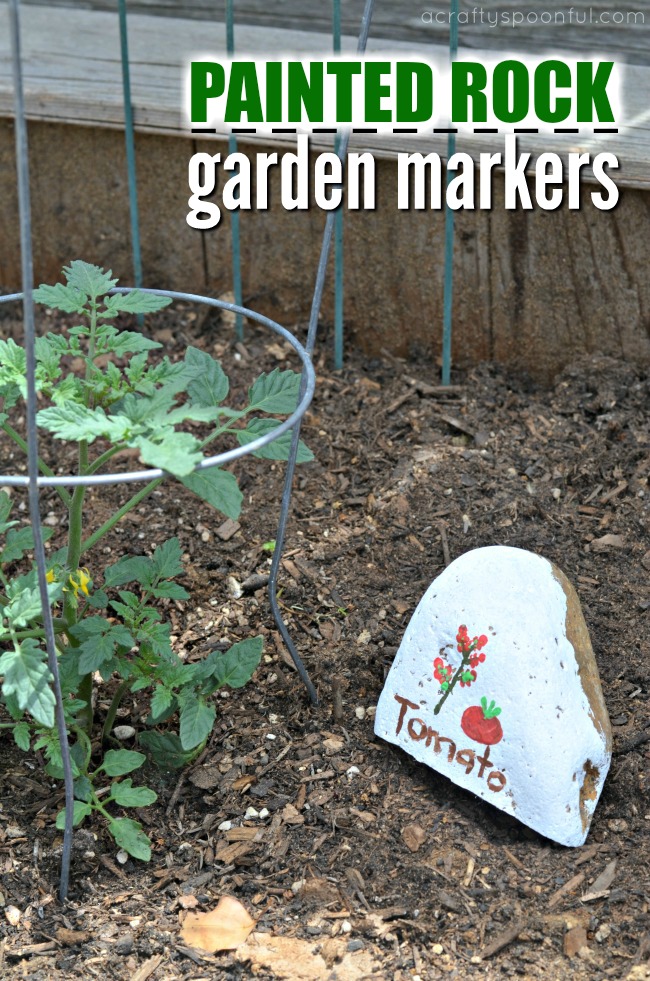
 

One thing I love about this time of year is all of the green and new growth sprouting about everywhere! And that means that our garden goes from sad and lackluster to full of life within a few short weeks. With that new life comes a bit of confusion for the kids with what plant is growing what type of fruit, herb, or vegetable. So we had a little fun and used painted rocks for garden markers to distinguish each plant from one another. 

Now there’s no real huge planning that goes into these painted rock garden markers. We simply used a base color that would make our illustrations stand out, and I let the kids paint each of the plants that we were growing. They had fun choosing the colors and making different types of veggies and herbs on their rocks. 

I think the most fun was when they tried to trace my penciled in names with paint to make each name stand out a bit more. The concentration my littlest had in her eyes (and brow) was quite humorous. 

If you’re planning out your spring garden, or are already growing, these are a great addition to share with kids and guests alike what you’re growing this season. Here’s how to make these painted rocks for garden markers: 
Painted Rocks for Garden Markers

What you’ll need: 

  • good sized rocks
  • paint in a variety of colors based on what you’re growing
  • a variety of brush types, cotton balls, and/or cotton swabs
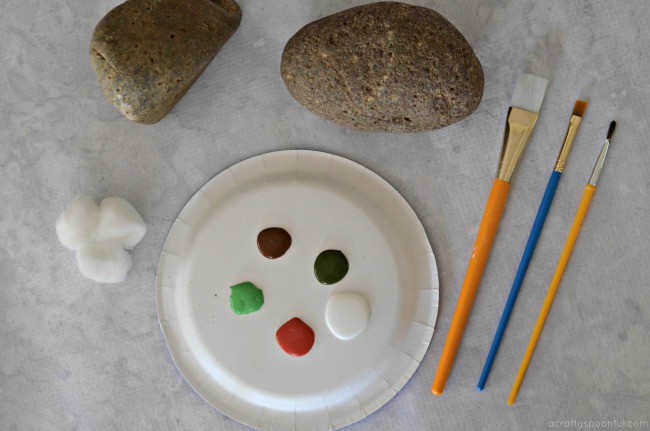
What you do: 

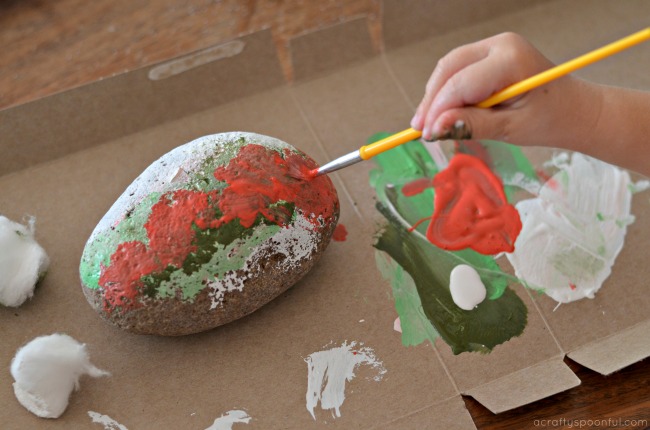
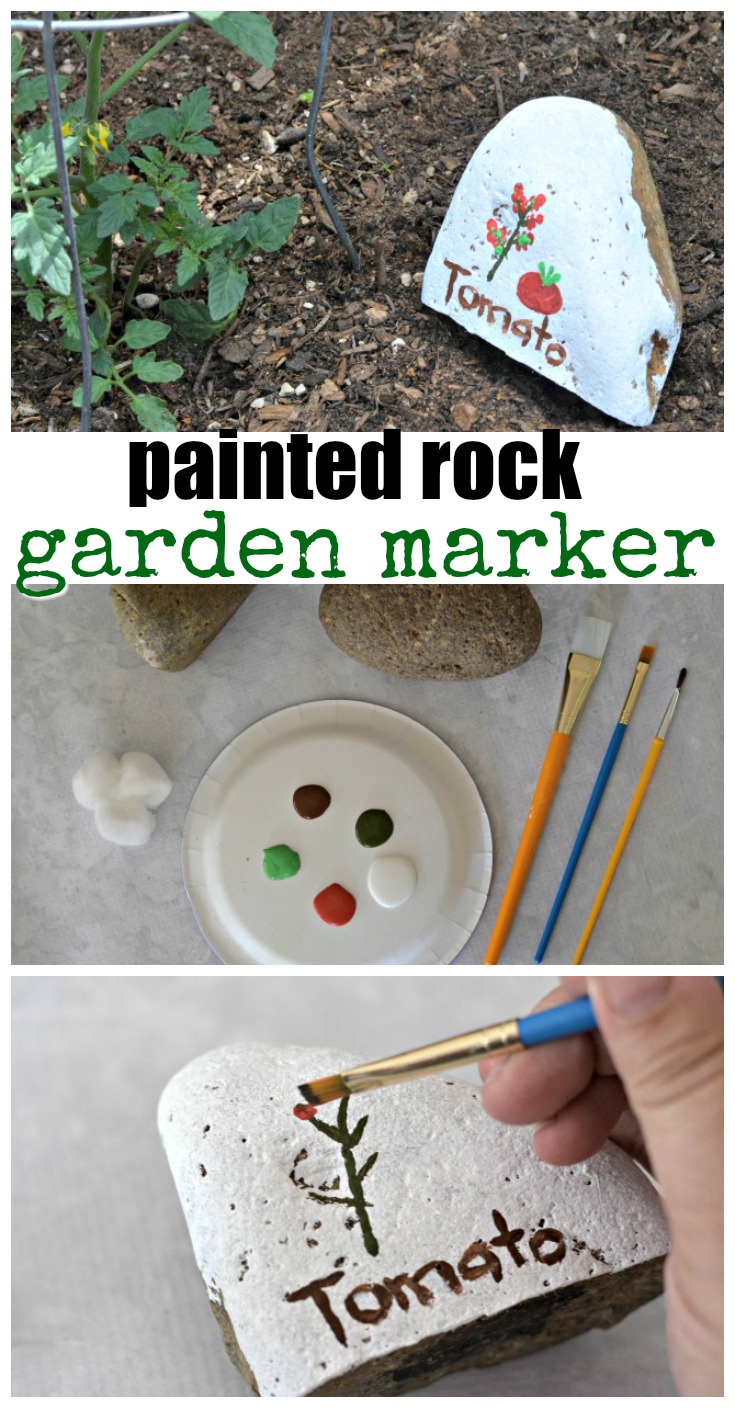
1. Using either a brush or cotton ball, layer the base color on the rock so that the illustrations you paint will stand out. We used a white base but any light color will due. 
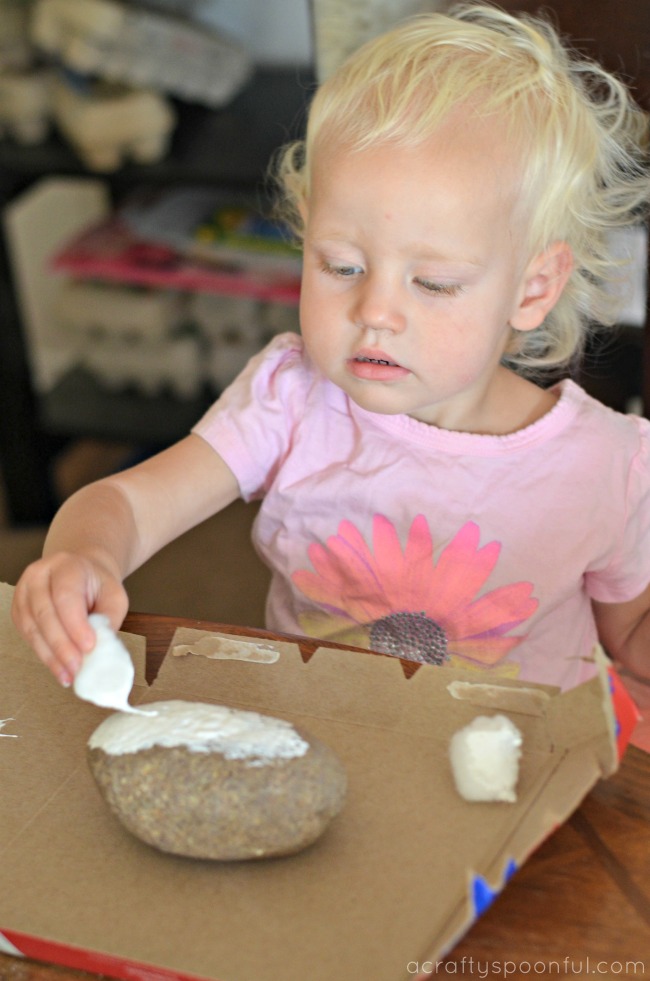
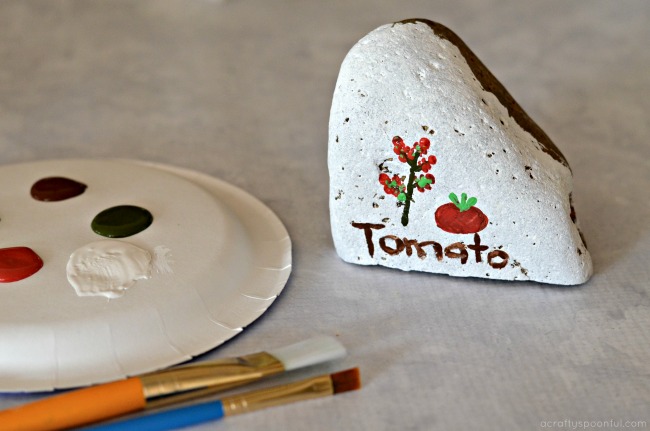
2. Once the base coat is dry, now it’s time to paint the objects you’re growing. As you can obviously see from the rock above, my daughter was painting strawberries. Remember, it’s ok if the artwork is a bit… abstract… in the next step we’ll make things a bit clear. 
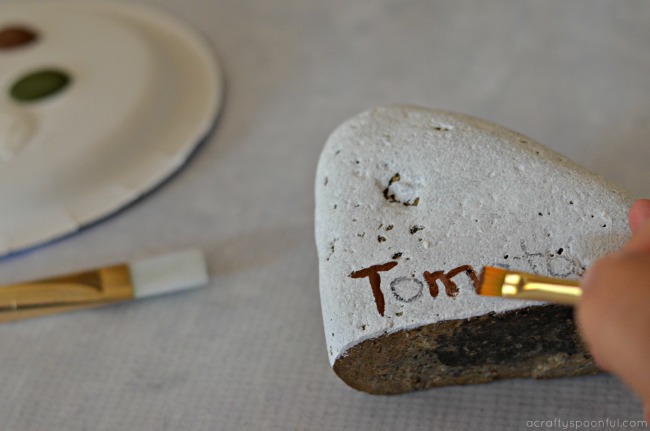
3. With a pencil, write out the names of each of the plants onto the rock. Then let your child trace the written names with their paint brush to make the name of the plant stand out. 
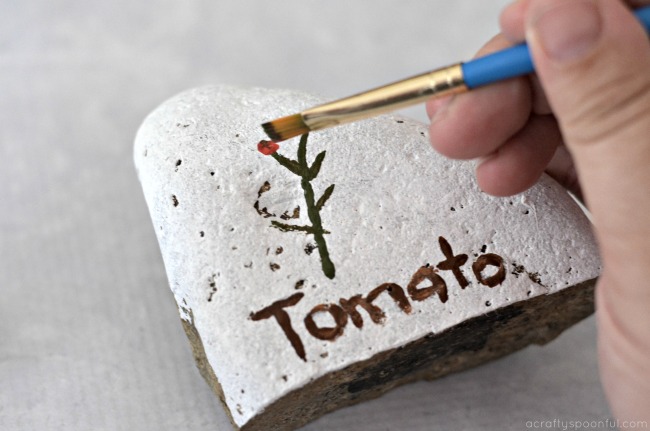
4. Once your painted rock is completely dry, set it outside next to your plant and enjoy! 
With Spring upon us, we’ve planted a variety of different seeds and plants in our garden. Here’s what my preschooler helped plant: 

  • Cherry Tomatoes
  • Bell Peppers
  • Radishes (from seed)
  • Carrots (from seed)
  • Cucumber (from seed)
  • Snap Peas (from seed)
  • Mint
  • Sage
  • Basil
  • Parsley
  • Thyme

And the big kids help by watering, weeding, and keeping an eye on the bugs that are in our garden beds

Looking to get your kids more involved in the garden? You’ll love these tips! 

DIY Indoor Herb Garden Ideas

Using Ladybugs in the Garden

Tips for Gardening with Kids

Kid Friendly Ideas to Get Your Kids In The Garden

Pin this article for later! 

Click the Pin button on the image below to save for later. 
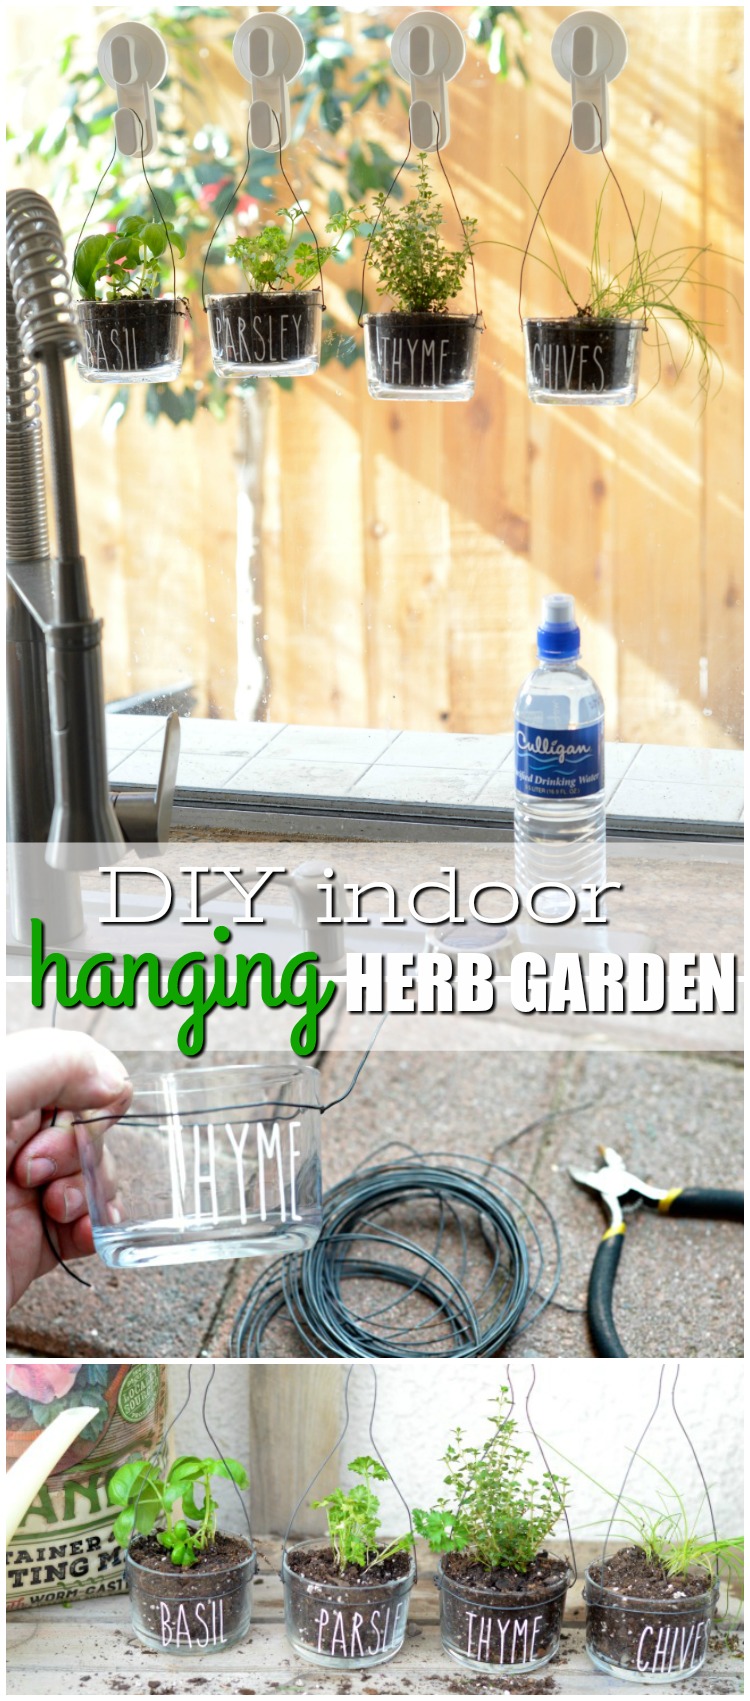
DIY Indoor Herb Garden Ideas: Easy to Make Indoor Hanging Herb Garden

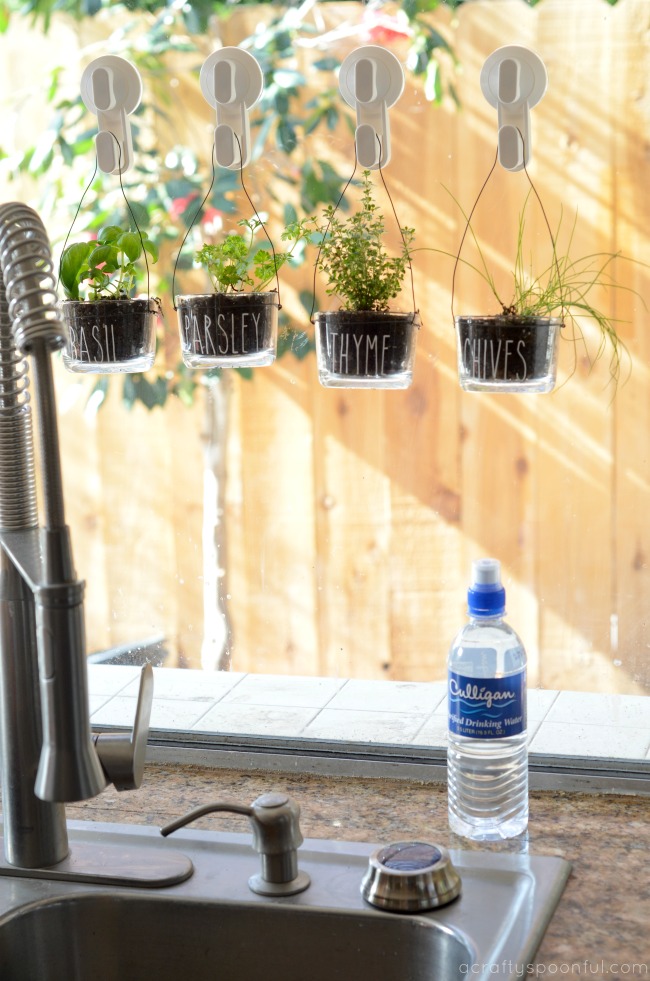
This DIY Indoor Hanging Herb Garden is the perfect way to bring the garden indoors! Plus you’ll have fresh herbs for whatever you’re whipping up for dinner. This post was sponsored by Culligan Water as part of an Integrated Program for Influence Central and all opinions expressed in my post are my own.

Water is the one thing that makes the world go round. And filtered water is something we can’t live without. As a busy mom of 3, I am constantly filling up water bottles at our fridge or turning on the tap to make dinner. And all of that water usage had me thinking… are we drinking the best water we could be drinking? The answer was no. And I’ll tell you why… while we had an under the sink water filter, it wasn’t pulling out everything it could be to ensure that our water was safe to drink. 

We live in Southern California. We’re known for our droughts and lack of water. So any water we do have is usually brought in from another source. Our source? The Colorado River. Since our water comes from so far away, it has quite a journey to reach us. and that means there’s more chance of contaminants leaching into our water supply. Being able to ensure that we get those contaminants out of our drinking water was goal #1 for me. The second goal? How our water affected not only drinking but other water usages like showering, our garden, and our pets. 

Luckily we were asked to check out Culligan’s Water Filtration System. We just had the ClearLink PRO installed in our home.

Stay tuned for a follow-up post sharing how Culligan has positively impacted our daily usage of water. As of now, while we’re still testing the system, we thought it’d be fun to share how we can bring the garden indoors and add a bit greener to the meals we’re making with the help of a DIY indoor hanging herb garden. Here’s how!

Changing How We See Water

We knew our home needed a few updates to our water filtration system. We previously used an under-the-sink filter for our tap water as well as another filter in our fridge for the water that came out of the fridge door. But one in-home consultation with a Culligan expert showed that even these filters we had in place weren’t taking out everything we wanted to keep out. With water playing such a crucial role in our daily life – being used in the food we make, the water we (and our pets) drink, and what we use to water our own edible garden – a few changes to our water filtration system was a must. 

Culligan’s goal is to provide water that its customers can trust and offer the best possible customer service experience out there. With over 80 years of water quality and service industry experience, they strive to help individuals identify their water issues right in their home – whether that be hard water, water filtration or taste of their water. After our in-home consultation, our new Culligan Water Filtration System was installed. And with the push of a button right by our sink, fresh and filtered water comes right out of our faucet. The system is so easy to use that even the kids can get their own filtered water from the sink. We also had a filtered water line run to our fridge as well. 

Now that our system is in place, we’ve been enjoying the perks of filtered water. We’ll be sharing our full journey from start to stop in our next post featuring Culligan so stay tuned. Now for our tutorial on this easy to make DIY Indoor Hanging Herb Garden! 

Easy to Make Indoor Hanging Herb Garden

What you’ll need: 

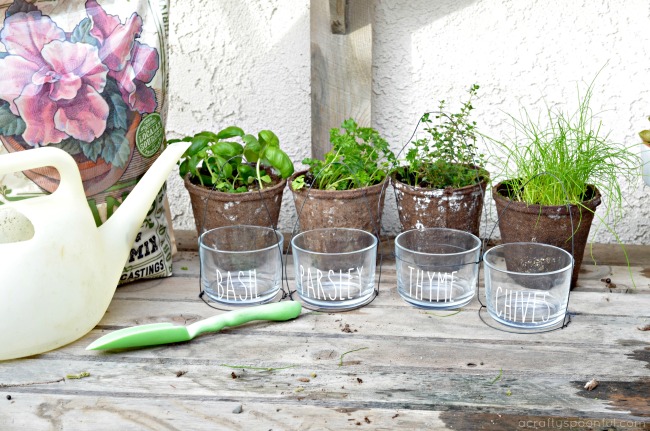
  • Glass containers
  • Wire
  • Wire cutters
  • Window hooks
  • Labels
  • Small rocks
  • Soil
  • 4″ herbs OR seeds
  • Water

What you do: 

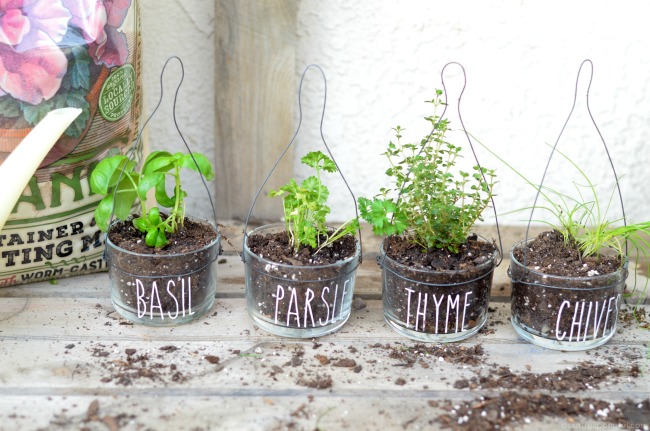
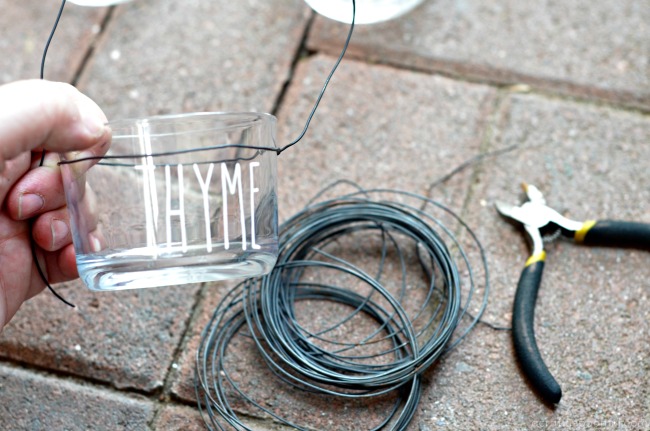
1. Wrap the wire around your container to form a circle. Connect the wire to itself tightly so that your container is secure in the wire. Don’t cut the wire just yet.

2. Make an arch with the wire over the glass container. 

3. Once you have the arch length you want, cut the wire leaving about 1 inch to attach it to the other side. 

4. Once you’ve secured the arch to the other side of the wire circle, make sure the wire is still securely around the glass container and can be lifted safely without the container falling out. 

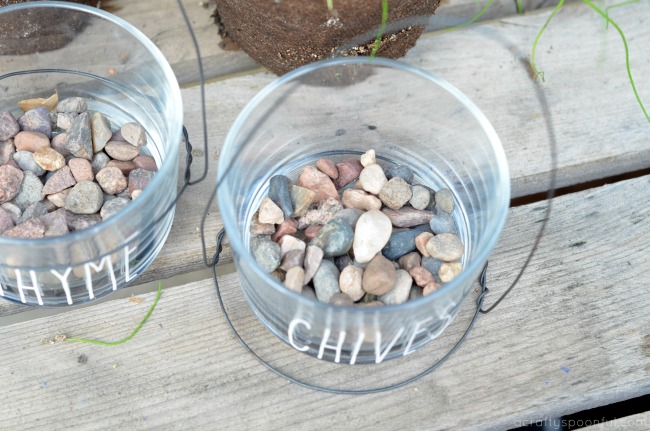
5. Fill the bottom of the containers with about 1/2 an inch of small rock to provide drainage. 

6. Top the rocks with soil up to about 1 inch from the top of the container and dig a well for the herbs. Add some filtered water to the bottom of the dirt well.  

7. Add the herbs to the container on top of the water and make sure the roots are buried/covered. 

8. Sprinkle a bit of vegetable food on the surface of the dirt by the herbs and then water again with filtered water. 

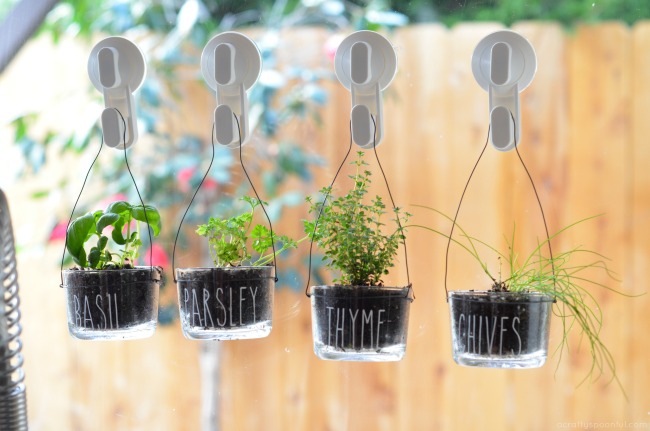
9. Place the window hooks in the window where you want the containers to hang. Find a place that will get sunlight during the day. 

10. Hang the herbs up in the window and watch them grow! Snip off what you need for meals in the kitchen as you cook. 

Water plays an important part in our everyday lives. Being able to have the kids go to the sink and fill up their water bottles, or fill up a watering can, and know that the water they’re drinking and using is water we can trust means a lot to our family. And now we can say that every day is a “Good Water Day” with Culligan! Stay tuned for our next post where we go in-depth into our experience with Culligan Water

How are you making healthy touches in the kitchen? 

Love this idea? Check out these other garden-related posts! 

Pin this article for later! 

Click the Pin button on the image below to save for later. 
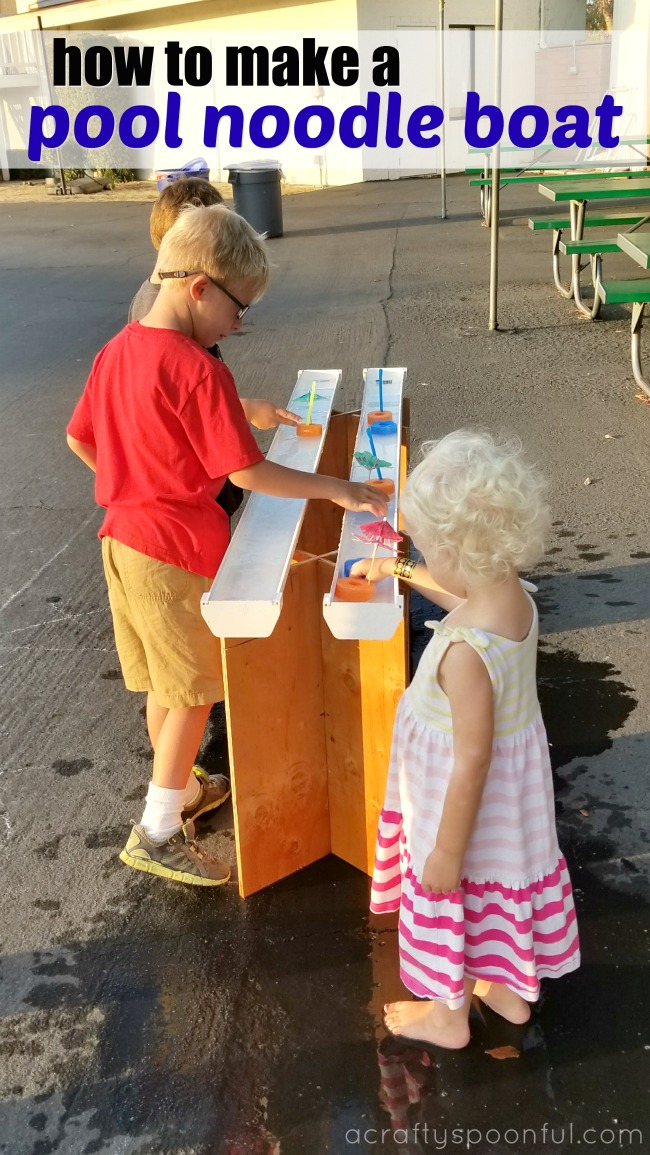
How to Make a Pool Noodle Boat + Pirates of the Carribean: Dead Men Tell No Tales on BluRay!

Looking for some fun STEM crafts for your school-aged child? Why not make these fun pool noodle boats and challenge your child to find a design that will float and race! This post contains affiliate links. By clicking on the link, I will receive a small amount of money back if you purchase anything. 

This summer we spent a lot of time outdoors. Whether we were playing, exploring on our own, or making updates around the yard at the house, it just made sense to stay outside as much as possible. And with that, we also wanted to spend time with friends so we made sure we didn’t miss the movie night hosted at our kids school. 

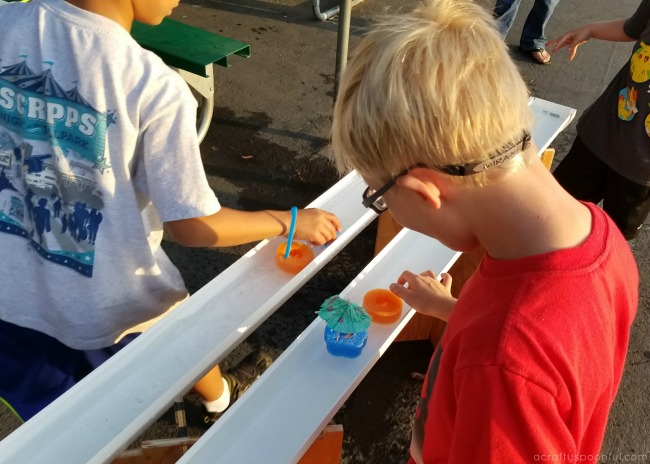
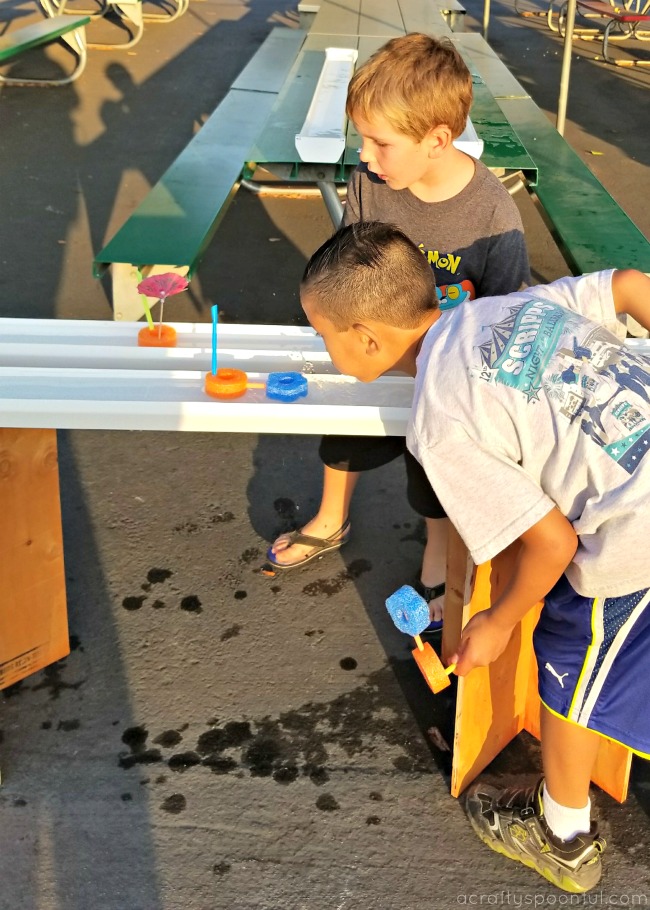
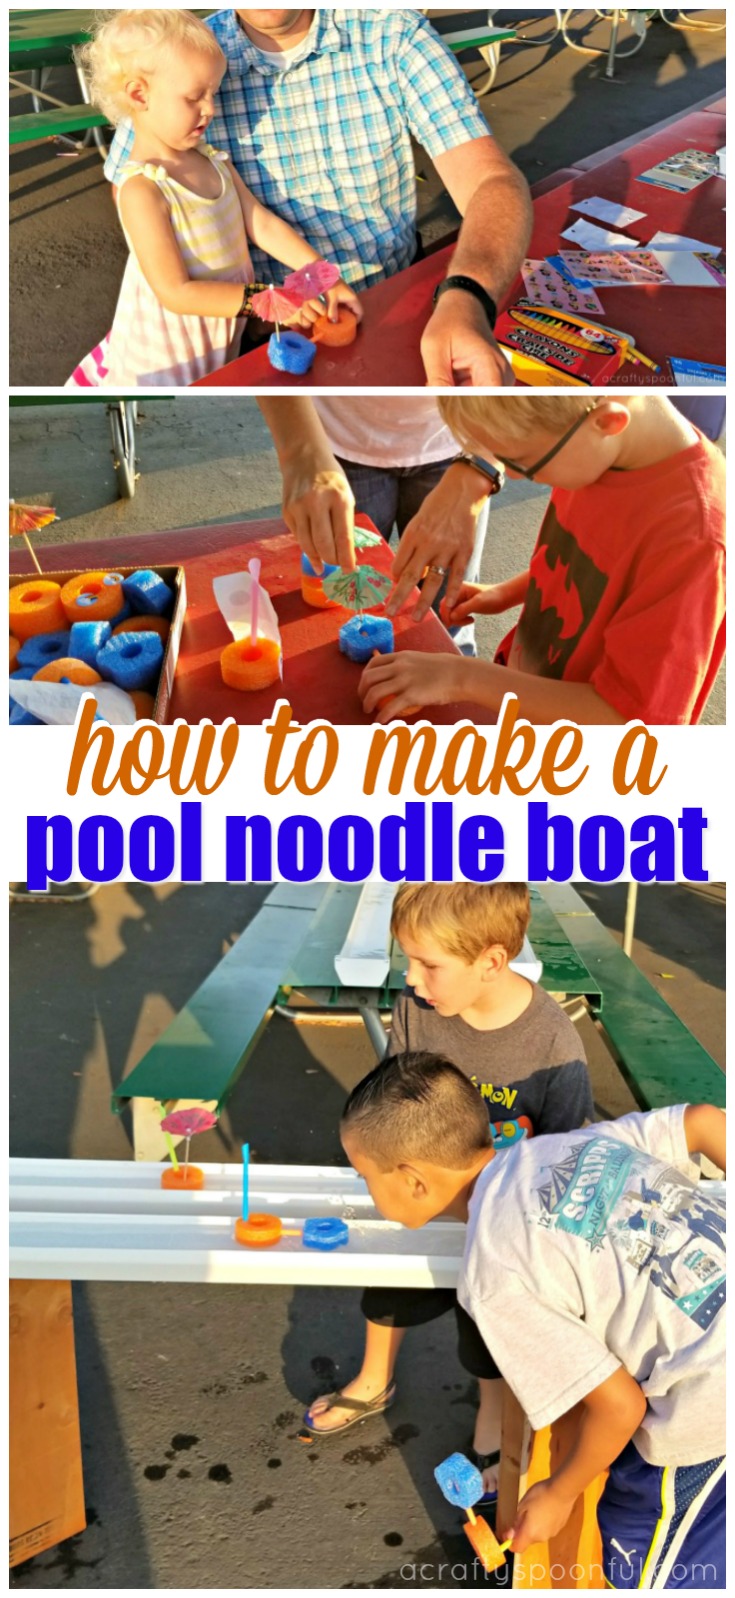
In celebration of the great weather and being outside, we put together a cute pool noodle boat station where kids could come up and design their own boats and race them against their friends. It was a great activity to share before the movie started and kept the kids active as it became dark. 

What we loved was how easy it was for the kids to “get” it and start to create their own designs with little to no help from us. And I loved seeing all of their final designs once they were done decorating them. If you’re looking for a great outdoor STEM activity for the kids to try, grab some pool noodles, straws, and parchment paper and make a pool noodle boat to race! 

How to Make a Pool Noodle Boat

What you’ll need: 

  • pool noodles (we preferred having 2 colors/shapes)
  • straws
  • parchment paper
  • hole punch
  • stickers/markers/crayons to decorate
  • drink umbrellas
  • Rain gutter with end caps

What you do: 

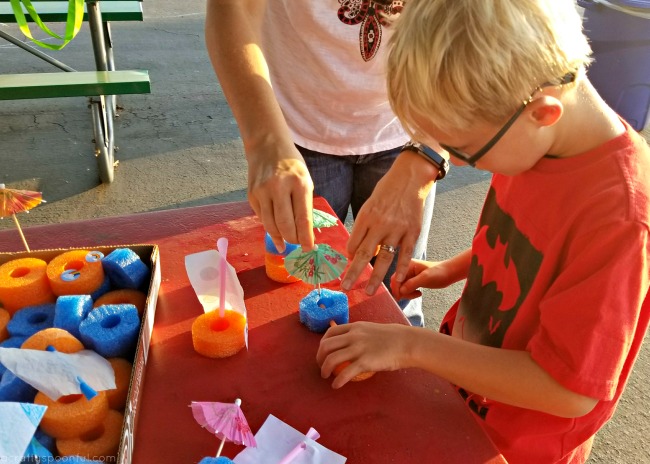
Cut the pool noodles into 1″-1.5″ rounds. Place in a shallow container. 

Taking the parchment paper, cut out sails in trapezoid shape. Punch a hole on the top and bottom that fits a straw. Place sails in container with cut pool noodles. 

Place straws in a cup with drink umbrellas and set next to cut pool noodles and sails. 

Let kids put together their boats using their own designs and then have them decorate them to make them unique. 

Fill rain gutter (with end caps secure) with water and let the kids race their boats. Try using extra straws to blog into the sails unless you already have a natural wind going. 

Did the boats float? Did they sink? Did they move down the rain gutter with ease? 

Pirates of the Carribean: Dead Men Tell No Tales on BluRay

Did you know that Pirates of the Carribean: Dead Men Tell No Tale is coming out on n 4K Ultra HD™/Blu-ray™ Combo Pack, DVD and On-Demand tomorrow? YUP!! This activity would be a fun way to celebrate this new release. Just set up a movie night with your family or invite friends over for some fun, grab a copy of Pirates of the Carribean, set up an outdoor movie night and enjoy a fun time outdoors! 

What’s your favorite outdoor STEM activities for kids? 

Like this post? Read more! 

Pin this article for later! 

Click the Pin button on the image below to save for later. 
Smurfette’s Secret Succulent Fairy Garden

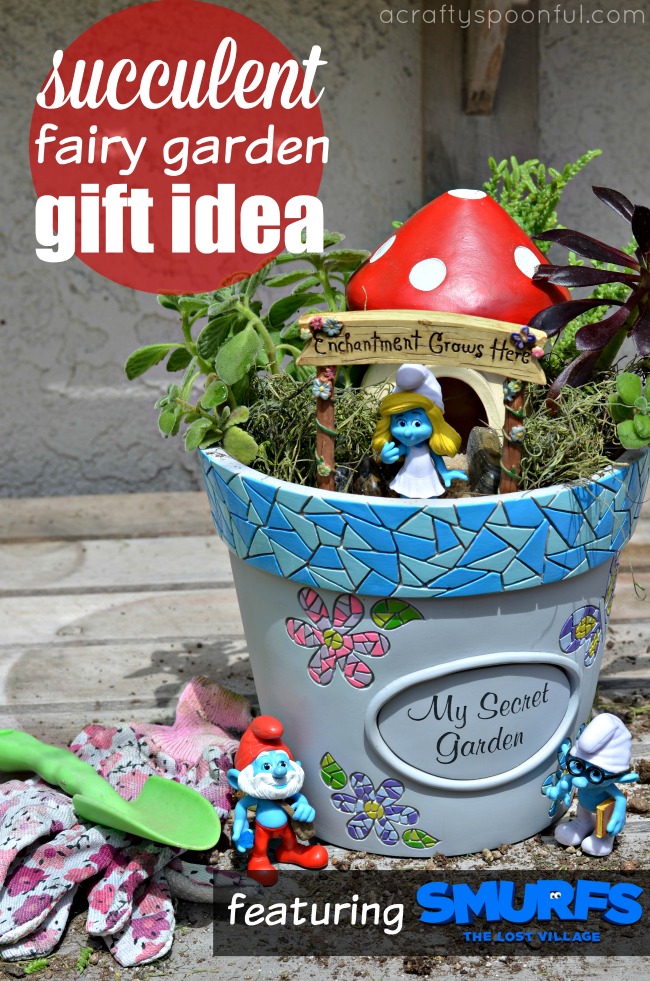
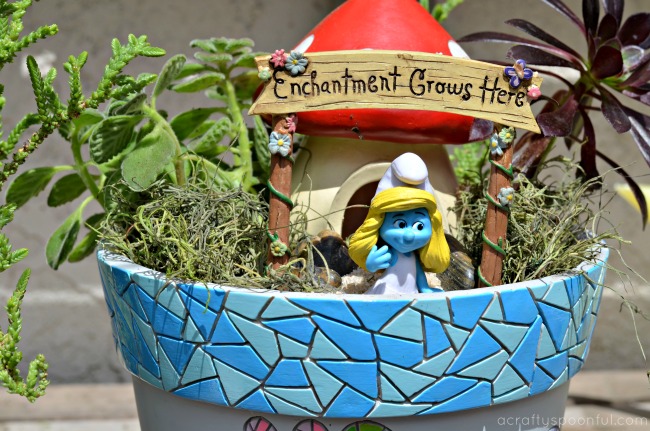
This secret succulent fairy garden would make a perfect gift for Mother’s Day or any other special occasion. Plus, it’s super easy to put together when you have the right tools!

A few weeks ago we were invited to a screening of Smurfs The Lost Village and boy did my kids love it! The movie took us through the story of Smurfette’s creation and her struggle with finding her unique talent. Since she was made out of clay and different from the other Smurfs, she grew sad and frustrated with her lack of being able to master one skill. 

As the story unfolds, she and a few Smurf friends head off on an adventure that brings her to realize who she really is and the power she holds inside. 

Well… my kids were quite inspired by the movie because as soon as we got home they wanted to create their own Smurf village in the back yard! The fun plants that came alive and the various creatures found along Smurfette’s journey were all they could talk about. 

So I pitched a fairy garden but instead of fairies, we used Smurfs! And how perfect did it turn out? Plus? It was so easy for the kids to make! 

Watch the video at the end of this post for more details! 

[Read more…]

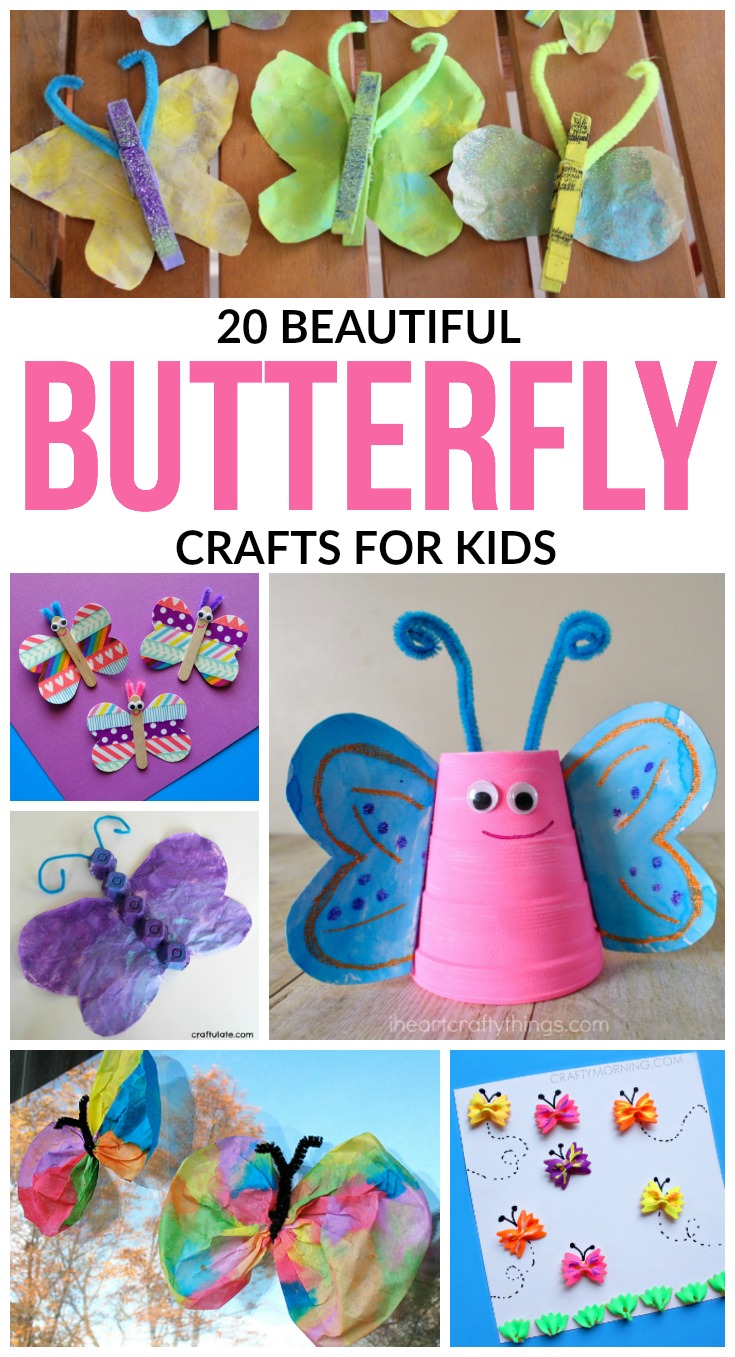
20 Beautiful Butterfly Crafts for Kids

In celebration of spring, we’ve put together a list of 20 butterfly crafts for kids that will be perfect for celebrating spring with the littles! Try one or try them all and add some springtime fun to your day with the kids.

Springtime is my favorite time of the year! I get back into gardening, enjoying the birds in the back yards making nests and eating from our bird feeders, and the gorgeous butterflies flying around our yard. 

Spring also begins on my birthday most years so it holds a special place in my heart. There’s something about getting outside and soaking in the sunshine after a few weeks of rain. And one of my favorite things to do is to go outside with a blanket and lay down in the grass with the kids as we look up and watch nature around us. 

The kids are always amazed at how much they can see once they sit still and silence themselves for a few moments. I ask each of them to try and find one new thing they didn’t notice when we first came outside and I love hearing what they discover. Yesterday Ethan discovered that the bird who nests at our house every year has finally returned. So we can expect some babies soon!! Molly is on the hunt for caterpillars so we can see if we can watch them turn to chrysalises.

If you want some hands-on inspiration for your butterfly crafts, try creating a butterfly garden in the yard so you can attract butterflies in your yard for the kids to check out. 

Butterfly Crafts for Kids

1. Coffee Filter Butterfly | Crafts by Amanda
2. Oil Pastel Butterflies | My Bored Toddler
3. Toilet Paper Roll Butterfly Craft | Life Over C’s
4. DIY Butterfly Magnets | Mom Endeavors
5. Bright & Beautiful Butterfly Craft | Mom on Timeout
6. Butterfly Finger Puppets | Twig & Toadstool
7. DIY Butterfly Window Clings | Gym Craft Laundry
8. Washi Tape Butterflies | Artsy Momma
9. Tissue Paper Butterflies | J-Man & Miller Bug
10. Bow Tie Noodle Butterfly | Craft Morning
11. Paint Splat Butterflies | Glued to my Crafts
12. Colorful Butterfly Symmetry Painting | Artsy Momma
13. Fluttering Butterfly Wand | The Simple Parent
14. Paper Doily Butterflies | Crafts by Amanda
15. Sun Catcher Butterflies | Parenting Chaos
16. Butterfly Ribbon Dancer Craft | Simple at Home
17. Handprint Butterfly Craft | Glued to my Crafts
18. Egg Carton Butterfly | Craftulate
19. Foam Cup Butterfly Craft | I Heart Crafty Things
20. Watercolor Butterfly Craft | About a Mom

Do your kids love butterflies? 

Love these ideas? Here are a few more! 

Pin this article for later! 

Click the Pin button on the image below to save for later. 
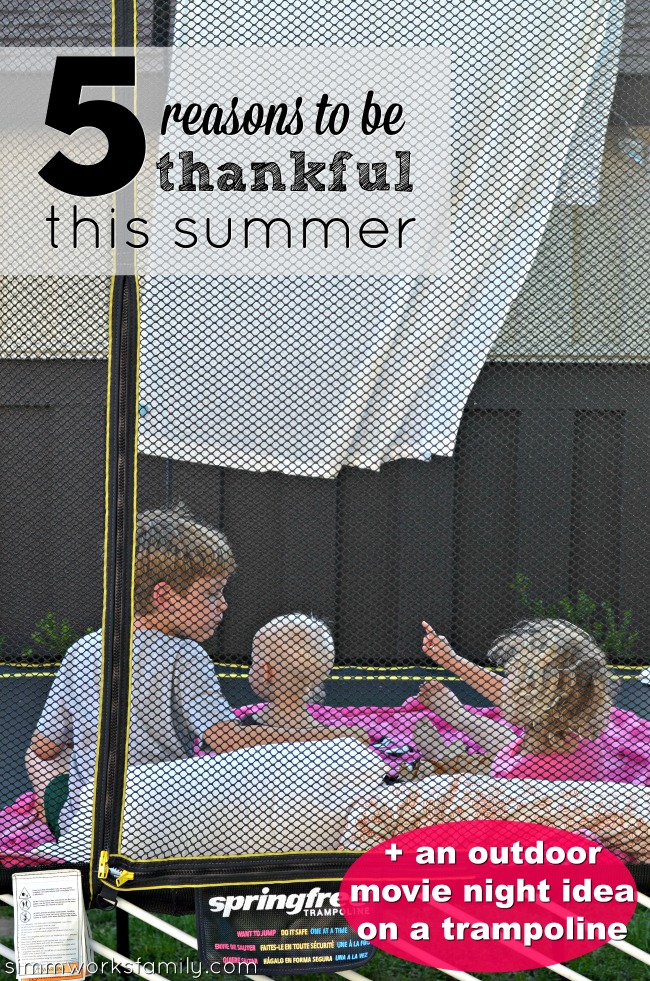
5 Reasons To Be Thankful For Summer + an outdoor movie night idea on a trampoline

We’re thankful for summer and sharing a great way to get outdoors with an outdoor movie night idea brought to you thanks to our partnership with Hershey’s via MomTrends.  

5 Reasons To Be Thankful For Summer + an outdoor movie night idea on a trampoline

Summertime always comes and immediately the one thing that runs through my head as a work from home mom is: how in the world am I going to take care of the kids all day AND get work done?

But this summer I’m approaching things differently. I’m not resenting the fact that our school cancelled their summer program right after all of the local museum classes filled up, or the fact that I don’t have a backup child care set in place because I didn’t think about it in February when apparently everyone else did. I’m going to make the best of our summers together and really strive to be thankful for summer.

At the end of the day, summer is the only real time I have to fully enjoy my kids until they move out of the house. That means 10 summers left with my oldest, 12 with my middle, and 17 with my youngest. Those are going to go by FAST!

5 Reasons To Be Thankful For Summer + an outdoor movie night idea on a trampoline with siblings

5 Reasons To Be Thankful For Summer

1. More Time With The Kids – 

While having the kids home all summer will be hard to balance my work/life workload, having more time with the kids is always a good thing and something to be thankful for. Even though I still have to work, I can take an afternoon or morning off each week to really spend one on one time with the kids. Plus we have some help from family so they can have fun adventures with Grandma, their great aunts, or their cousins throughout the summer too. 

2. Later Bedtime – 

Because we don’t have to wake up early, I can choose to spend more time with the kids at night (watching movies outside!) or catch up on work after bed time. The kids love having the freedom of no bedtime and actually get to bed by 9pm when this happens so they’re not up too late. And everyone is in a better mood when we go to bed and get up when our bodies tell us to. 

3. No Alarm Clock – 

Ok, confession: I don’t use an alarm clock. But I do have to wake up at 6:30am every day during the school year to make sure the kids get out the door and to school on time. Because we don’t have to actually get up and go somewhere (if we choose not to), we can sleep in. AND? We can have pajama days. Lots and lots of pajama days! 

4. Warm Weather – 

I love that we get to enjoy all summer together when the weather is nice. Sure there’s a few weeks where it’s unbearably hot. But living here in San Diego means that we can take full advantage of the beaches, pools, and other outdoor (and some indoor) areas to keep cool. I fully plan on taking advantage of our location this year and have quite a few beach days planned for us. Even if that means I have to get my keyboard a little sandy while I work and they play. 

5.  Fun Adventures – 

With the warmer weather and lack of an actual place we have to be, we can have fun adventures this summer (and every summer) that we wouldn’t have had the freedom to do during the school year. As I mentioned previously, we’ll take full advantage of our location. But I’m also planning at least one road trip and a few staycations to enjoy ourselves this year. I’m also hoping to schedule at least one activity outside the home a week. That way I’m not too stressed about too many activities but we still get to do fun things. 

So far here are some of my ideas for summer fun adventures: hikes, beach/pool days, zoo trip, free days at museums, movies in the middle of the day, trip to the water park, trip to the mountains, gardening club, city clean up days, trip to the aquarium

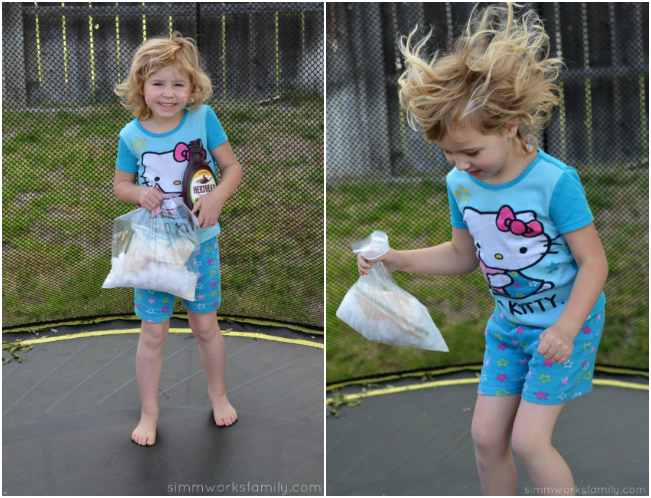
5 Reasons To Be Thankful For Summer + an outdoor movie night idea on a trampoline and making homemade ice cream5 Reasons To Be Thankful For Summer + an outdoor movie night idea on a trampoline with homemade popcorn

One of our fun adventures this summer will be getting outdoors and enjoying movie night on our trampoline. And it’s SUPER simple! 

Outdoor Movie Night On A Trampoline

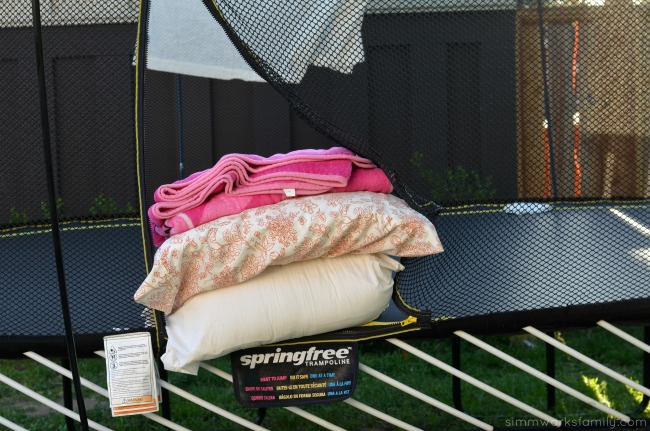
  1. Grab a white sheet plus a pile of blankets and pillows.
  2. Hang the white sheet over one side of the net on your trampoline and clamp down with clamps (I just use the clamps I use for my photo backdrops here).
  3. Set out the blankets and pillows so everyone is comfy. 
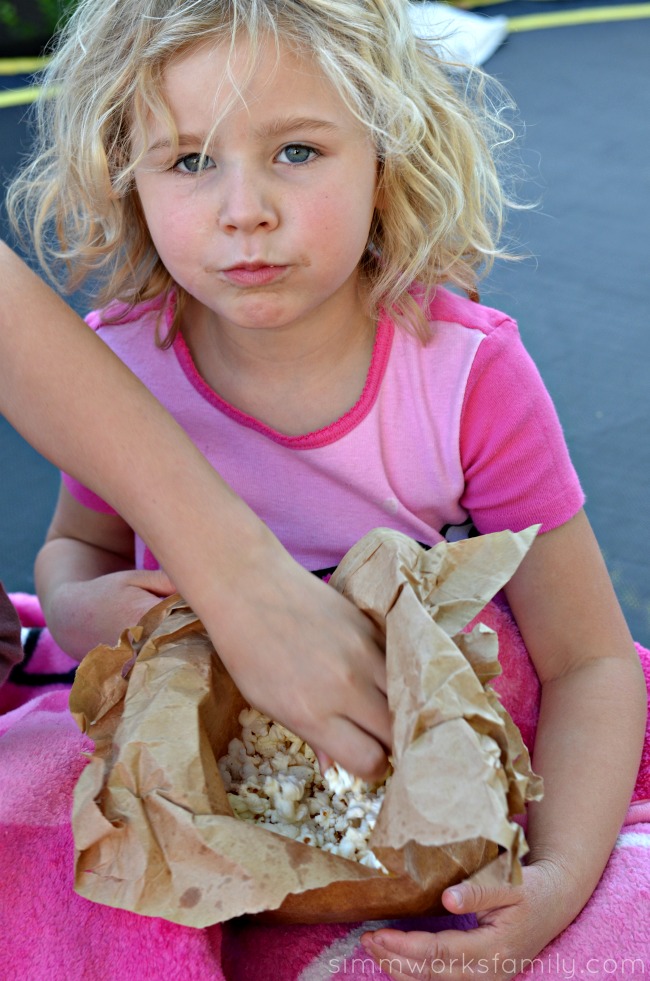
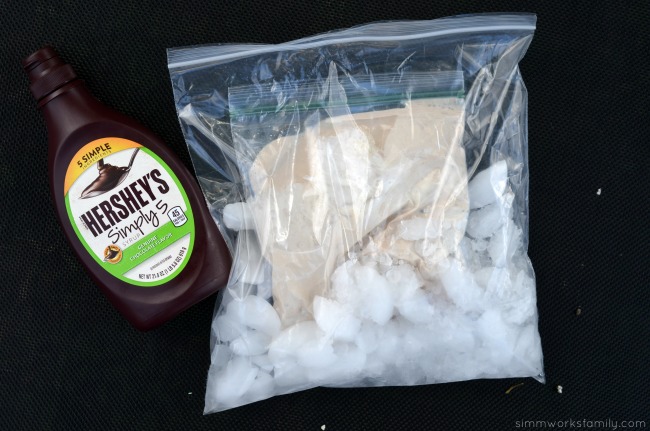
  4. Make some fun snacks with the kids like this delicious homemade chocolate ice cream in a bag with Hershey’s Simply 5 Syrup or popcorn in a bag.
  5. Grab a projector and start playing the movie! 


5 Reasons To Be Thankful For Summer + an outdoor movie night idea on a trampoline with blankets and pillows

What #Simply5 words describe a sweet memory that’s made your day special? 

Sometimes, even the process of enjoying the little things in life – like movie night – becomes complicated. It shouldn’t require a year-long commitment or tons of planning.

In honor of the sweet and simple ingredients in Hershey’s Simply 5 Syrup and the sweet and simple memories that it inspires, we want people to share the sweetness in everyday moments. Take a moment to “stop and smell the chocolate” and share your #Simply5 – a five word recount of what makes your day sweet.

Post your #Simply5 on social media by sharing a five word recap of what makes your day special! 

5 Reasons To Be Thankful For Summer + an outdoor movie night idea on a trampoline with Hershey's Simply 5

Hershey’s Simply 5 Syrup is a sweet and simple take on original Hershey’s Syrup, now made with five simple ingredients. You can find more recipes and fun things to do with Hershey’s by visiting them on Facebook or following along on Twitter.

Disclaimer: Compensation was provided by Hershey’s via MomTrends.  The opinions expressed herein are those of the author and are not indicative of the opinions of Hershey’s or Momtrends.

Finding Teachable Moments With Our Kids

This conversation featuring 10 places to find teachable moments is brought to you by Vroom

Finding Teachable Moments With Our Kids

Over the past few years I’ve come to realize how important it is to turn average, everyday moments into teachable moments with our kids. Not only are they the most relaxed when we’re just doing our own thing and going through our day, they’re also more apt to ask questions and really take in what you’re telling them when you share something with them in the moment.

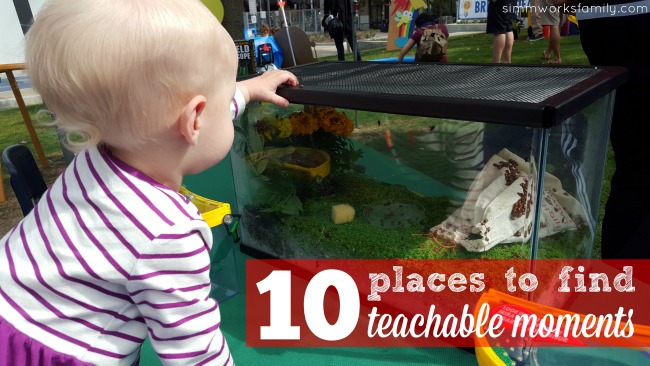
In an effort to take advantage of these moments, I’ve listed our top 10 places to find teachable moments below.

10 Places To Find Teachable Moments

Finding Teachable Moments in the Car

1. In The Car

The one place that I find ourselves the most disconnected from tablets and computers and phones is the car. For one… no wifi! And we’re in the car at least twice a day to and from school for drop off and pick up. While we don’t necessarily talk the whole time we’re in the car, we are together in a confined space with no where else to go until we get to our destination.

I’ve found that this is the great time to not only ask about their day, but to open up about topics we might not have thought about. And what’s most crazy is that those topics don’t just pop up… they’re provoked by the one thing that is on in the car: the radio. Whether it’s a song that comes on, or something the announcer says, my kids and I have had great talks about everything from racism to politics to math after a topic was sparked by what we hear on the radio.

2. On A Walk

We love taking family walks. It’s important for us to get outdoors with the kids so we try and make time for walks as a family. Whether we’re heading out to the park or up the road to grab an ice cream cone after dinner, it’s a great time to bring things up. We also love talking about what’s going on in our neighborhood and what we see around us.

3. After School

I don’t know if this is the same for everyone but my son never gives me any information about what’s going on at school or what’s coming up. My daughter, on the other hand, gets in the car after school ready to share about her day. But when I do want to know what’s going on with him I don’t just ask what he did at school. I find ways around the obvious question and ask him other things that might lead to a conversation about his day. I found some really great conversation starters here.

4. During Dinner Time

Dinner time in our home is family time. And it doesn’t just start when we sit at the table to eat. By getting the kids involved in making dinner with me, I can teach them little things in the kitchen that they can continue to learn as they get older. Whether its dumping in the ingredients into a bowl like my 15 month old, chopping up veggies like the older kids, or unloading the dishwasher like my husband, everyone has something to do when we get dinner ready. This gives us the opportunity to spend time with one another while we teach each other new things. You can find more tips for creating a family table at meal time here.

5. On A Trip

When we leave home for trips, whether it’s for vacation or a simple get away for the day, we try to take any opportunity we can to teach our children about something. If we’re heading to Boston to visit family, we make sure to schedule a few historical stops along the way, or if we’re going to the San Diego Zoo, we try and get the kids involved in learning more about the animals we see. By just exploring the world around them, they soak in everything.

6. In The Bathroom

So if you’re a parent you know that you can’t do anything alone anymore. And that includes going to the bathroom. While it may not be the most enjoyable thing, I’ve found that my kids curiosity in the bathroom has helped open our channels of communication about things we might not have discussed until a later age. I’m pretty open about the birds and the bees with my kids. While I do make sure to keep it at an age appropriate level, most of the talks I’ve had with my son and daughter have started in the bathroom.

Finding Teachable Moments in the back yard

7. In The Back Yard

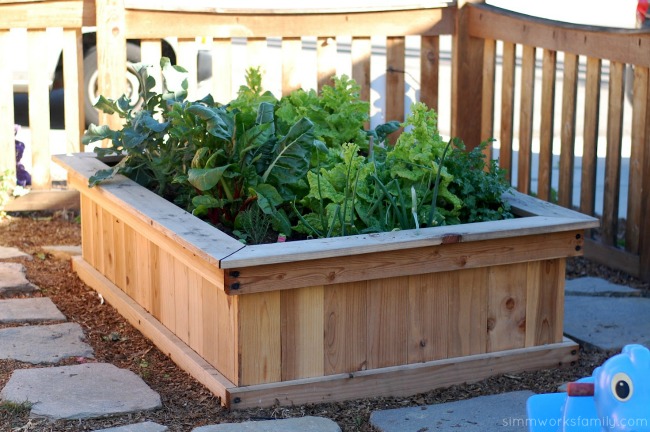
Our back yard is our oasis. Whether we’re gardening together, playing together, or taking care of our many animals, having an active back yard has allowed us the opportunity to continue to teach our children about how to grow their own food and how to take care of another being. By just making things available to them, like a few planters to plant whatever veggies or flowers they want to plant, I’ve come to realize how independent they become and how much they’ve learned by just observing us.

8. In The Classroom

Now this might sound like a no-brainer but it’s not on the list for why you think. If you work outside of the home it may be hard to do, but volunteering in your child’s classroom can really open the doors of communication and help in teaching them at home.

I’ve found that by observing my son in class and seeing how he learns things there has helped how I approach teaching him certain things at home. Homework time is also a great time to check in with them and see how they’re doing.  By being active and in communication with his teacher, I’ve been able to see what his strengths are academically and what he needs help with.

9. At A Friend’s House

Growing up I learned so much about the differences between each family after heading to a friend’s house for a playdate or sleep over. The family dynamics are so different between one household and another and by going to friends houses to see their family dynamic, we’ve been able to teach our kids that being different is great. We also make sure they feel comfortable in asking questions they have about those differences.

10. With Family Members

One thing I absolutely love about living close to family are the different life lessons their grandparents and aunts and uncles can teach them. Whether it’s just hanging out at Grandma’s house or going on an adventure with their Great aunts or uncles, being able to learn different ways from different people has allowed our kids to get a bigger perspective on the world around them.

Finding Teachable Moments with Family Members

In an effort to inspire every caregiver to think more about teachable moments, the Bezos foundation has started a fun campaign called the Vroom initiative. Vroom was developed based on the premise that every child is born with enormous potential, and every parent can help them realize that potential. The Vroom Superhero campaign demonstrates the heroic role that every parent and caregiver plays in the lives of children, and reinforces the message that anyone can be a Vroom Superhero to a child.

You can find a little more about the campaign in the video below:

Vroom was designed to give parents and caregivers simple tools that turn everyday activities, like mealtime and bath time, into brain building moments. We want to empower parents and caregivers like Camellia to interact with their children during their daily routines, engaging them in activities that require no additional time or resources but have outsize long-term benefits.

Become a superhero and join Vroom today!

How do you make teachable moments fun?

Keeping Pests Away: Using Ladybugs In The Garden

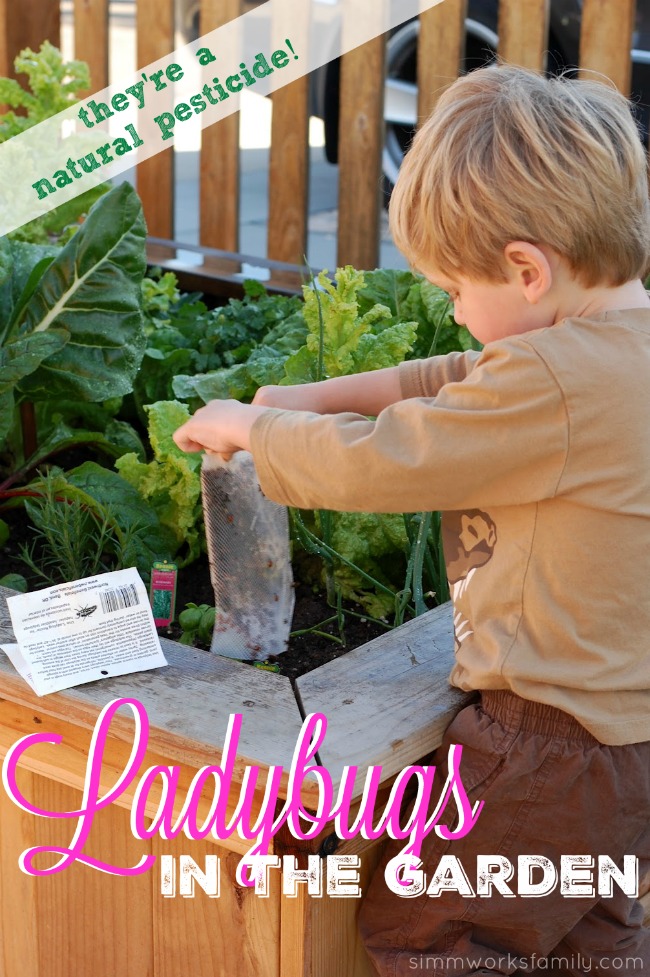
Keeping Pests Away Using Ladybugs In The Garden Is A Natural Pesticide

One thing I decided from the beginning when we started our garden was that I didn’t want to use any chemical pesticides. I’ve been very diligent about not using chemicals in the home so why would I use them in the garden? Especially on plants we grow to eat. So when I started to see little aphids I quickly went in search of a solution. And happily found out that ladybugs were the answer! How awesome is that?

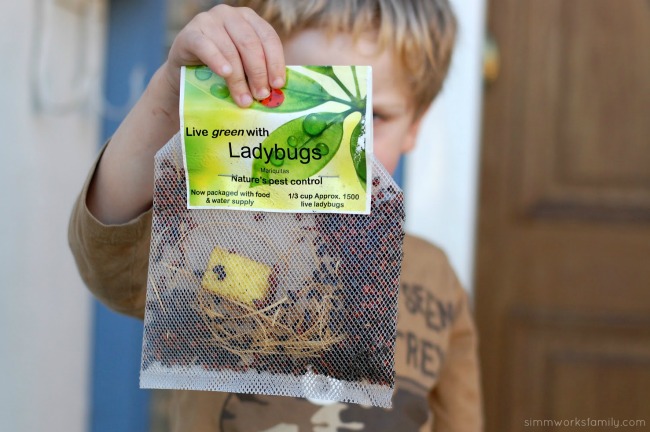
My lettuce, celery, broccoli, and various other veggies and fruit (gotta remember those strawberries!) needed some protection so we headed out to find us some ladybugs. And we found ours at Armstrong Garden Centers over Ladybug weekend a few years back. And we keep going every year to enjoy the ladybugs. What’s Ladybug Weekend? It’s when one free packet of ladybugs harvested from colonies in California’s foothills will be handed out to Armstrong Garden Centers customers at check-out with purchase while supplies last

 And this year it will take place on Saturday, April 23 and Sunday, April 24 at all 32 Armstrong Garden Centers locations. Armstrong Garden Centers anticipates giving away two million of these “good bugs” to encourage healthy lawns and gardens. How cool is that? 

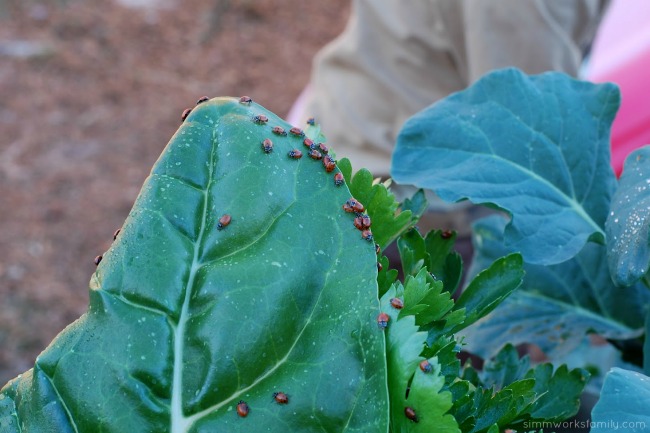
Known for their unique red and black colors, ladybugs will stay in your garden as long as there is something to eat. It is okay if the insects leave because it means that your garden is clean and the ladybugs have moved on to help your neighbor’s yard.

Keeping Pests Away Using Ladybugs In The Garden

To celebrate ladybug weekend, the following free classes will be available at all Armstrong Garden Centers stores:

  • Saturday, April 23 at 9:00 a.m. – Ladybugs and Other Good Bugs – Many insects are excellent garden helpers. Learn which plants are best for attracting these beneficial insects along with how they can help your garden flourish.
  • Sunday, April 24 at 10:00 a.m. – Organic Gardening – Learn everything you need to know from building soil health to problem-solving using organic products and techniques.

Keeping Pests Away Using Ladybugs In Our Garden

Why Ladybugs?

Ladybugs are great at keeping pests out of your garden. A few pests they take care of are:

  • Whitefly
  • Scales
  • Mites
  • Mealybugs
  • Broccoli Worm
  • Tomato Hornworm
  • Bollworm
  • Cabbage Moth

If you have signs of any of these pests you might want to consider picking up some ladybugs at your local gardening store to release in your garden. To find out more about using ladybugs to keep pests at bay check out this awesome website all about ladybugs, Everything Ladybug!

Here are a few tips on releasing the ladybugs into the garden:

Keeping Pests Away Using Ladybugs In The Garden - in a bag

1. Wet the garden bed. Ladybugs love moisture. If you want them to stay in your garden and not move onto the next you really don’t want to skip this step.

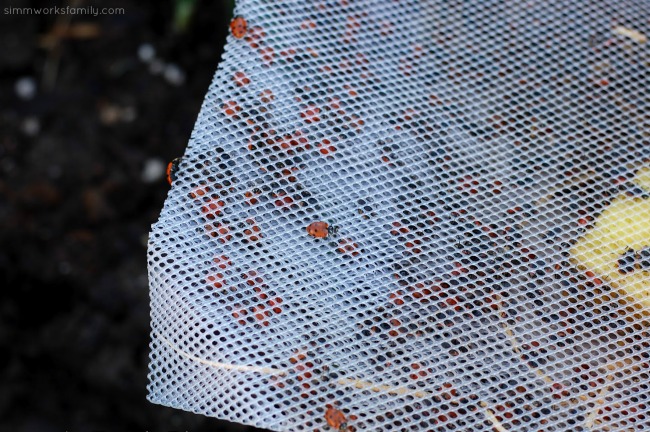
2. Open up the container and let the ladybugs start to crawl up and out.

Keeping Pests Away Using Ladybugs In The Garden and strawberries

3. Let your three year old shake the container over all parts of the garden. You don’t want all of the ladybugs in one area. (The three year old isn’t necessary but makes a fun adventure!)

4. Watch as the ladybugs wake up and start moving. The ladybugs might take a few minutes to perk up but soon they’ll start crawling all over and exploring your garden. A good amount of the ladybugs will leave to other gardens but a surprising amount stay.

Watch the little guys for a bit at your child’s level. You’ll be amazed at the sheer joy your little ones find in this activity!

Keeping Pests Away Using Ladybugs In The Garden crawling around

5. Continue to mist the garden with the lady bugs twice a day. Just enough to make sure that the dirt and plants are moist and the ladybugs have water to drink.

You can also mist the garden with a 1:1 ratio of sugar based soda to water. This will make the ladybug’s wings sticky and will allow them to explore your garden instead of flying away. This solution works for about a week and then wears off.
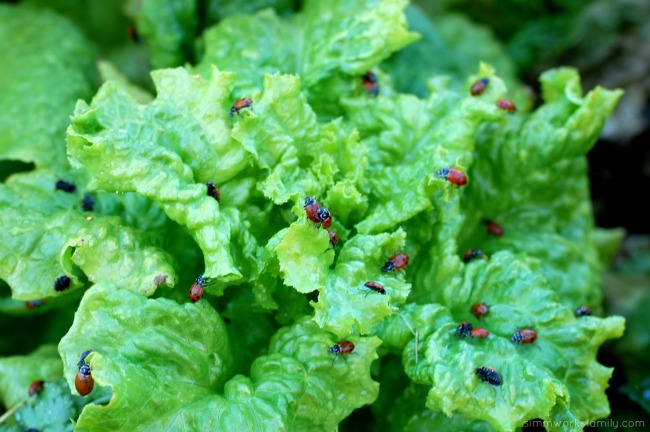
Keeping Pests Away Using Ladybugs In The Garden spreading out

Have you released ladybugs in your garden before?

* The photos in this post are a flashback to our March 2012 ladybug adventure 🙂

Water Conservation Tips: What Can You Do?

Tracking Pixel

In California right now we’re in a serious drought. That means water conservation is at an all time high. With these few simple water conservation tips, sponsored by Scotts® EveryDrop™, we can reduce water usage and maximize other options. 

Water Conservation Tips What Can You Do

I’ve lived in San Diego all of my life. And for as long as I can remember, we’ve always been in a drought. Water conservation is just something we do. I remember learning about 2 minute showers at 6th Grade Camp. And actually trying to recreate them at home. And we’ve never had a lush green lawn during the summer and fall months unless there was a good rain storm. Brown lawns with a hint of green is just normal.

Adjusting to this way of life may be easy for our family, but for others it can be a hard adjustment. So I’ve compiled a list of everything we’re doing at our home to reduce our water usage and reuse the water that we do use. Keep in mind that we are a family of 5 with multiple pets (including a large pond outside with fish and a turtle). Every water used in this house is considered precious.

Water Conservation Tips: What Can You Do?

rain barrel rebate program san diego

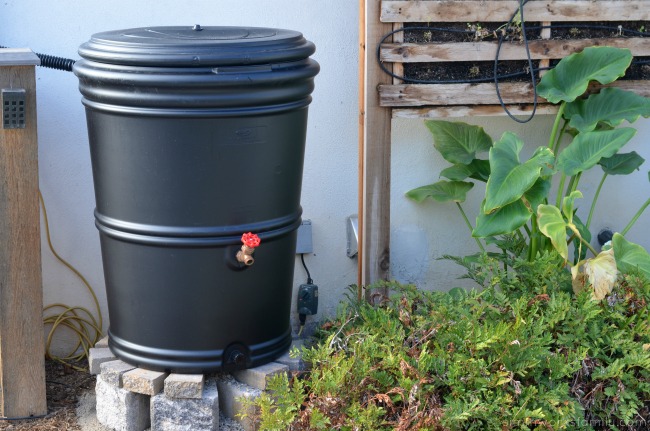
1. Rain Barrels

After the City of San Diego offered rebates for rain barrels, my husband went out and picked up two for our old house. After the first big rain storm both were filled to the brim with water we could use for our lawn, plants, and vegetable garden. Talk about a savings in water. We were stoked! Each rainfall would easily fill our rain barrels and we found that we’d need even MORE room to store all of the rain. So we considered upgrading. Until we decided to move to a new home.
So whe we moved to our new house and found out that the rebate was per residence, and not per family, we jumped at getting a few more rain barrels for the new home as well. And we went up in size. The rain barrels we first got were 2 70 gallon barrels. This time we’re upgrading to 3. Since we have a larger house, we have a larger roof and more water collecting potential. By utilizing the rain we collect to water our plants and edibles, we are saving on using water from our sprinkler system. But first we have to put up rain gutters…

Adding Desert Plants to Your Garden xeriscaping

2. Greywater Reuse

In addition to using the water from our rain barrels, we’re also going to be taking advantage of using the greywater from our washer in the garage to keep our lawns green. With kids, we know we want to have a green space for them to play. And while most of our landscaping is drought resistant plants or edibles (more on those later), having a patch of lawn IS doable in a drought area by utilizing all of the water we have available.

I’ll be posting about our greywater collection system and what we use to collect the water and how we use it to water our grass. We’ll steer clear of using it to water the garden due to the soap residue from our eco-friendly laundry soap.

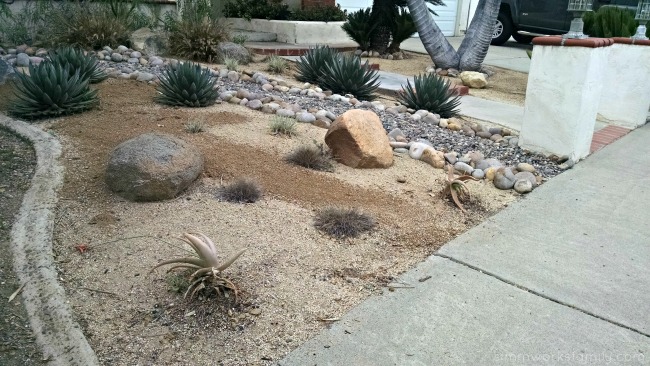
3. Desert Scaping | Drought Resistant Plants

Even though we want to have a patch of green lawn for our kids, the rest of our landscape – except the edibles – are drought resistant plants. I was able to get some great ideas on what plants to use in our design on one of my many visits to City Farmer’s Nursery. I highly suggest heading to a local nursery to talk to them about your options.

I love that I can still have a beautiful landscape while saving on our use of water. Plus I’d rather be using the water we do use on our edibles or the lawn so choosing plants native to Southern California was important. And there are quite a lot of plants that are native to this area to use in our yards. The added bonus? Because they’re so used to this climate, they take less care. Most of the plants, once they have been established, can survive by just waiting for the little rainfall that comes and some pruning a few times a year.
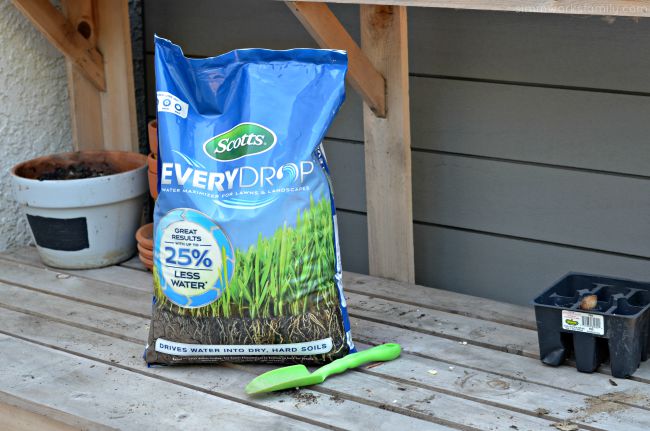
Water Conservation Tips What Can You Do - Scotts EveryDrop Water Maximizer

4. Water Maximizer
When we do water our lawn, we want to make sure that each drop of water we put in it is used efficiently. Especially because we’re limited to watering only two days a week and 5 minutes per station based on the new Mandatory Water Use Restrictions in the City of San Diego.

By using Scotts® EveryDrop™ in our yard we can do just that. EveryDrop™ is a unique blend of wetting agents designed to help move water into the soil, consistently and evenly. This helps to reduce wasteful runoff and pooling. Whether relying on rain, sprinklers or hoses from our greywater, EveryDrop™ helps to make the most of available water. 

Well-fed lawns and plants are more efficient at using available water so make sure to feed your plants and edibles with fertilizer to maximize their potential.

5. Plant Edibles Instead

While other plants may look better, planting edibles instead means that your using that rainwater you are collecting to feed your family, not just water some random plants in your yard to keep them green and looking pretty. By planting edibles in your yard, you can create a beautiful landscape while providing a food source. Plus, gardening with kids can make their backyard (or front yard!) into a learning experience that’s fun!

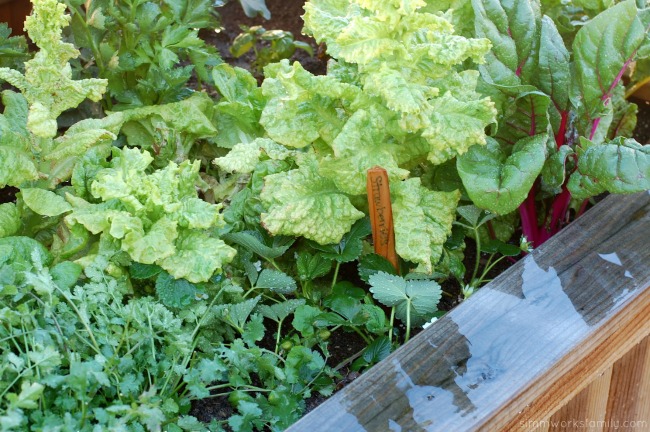
You’d be surprised at how pretty some edibles are. I have two planters out front filled with various lettuces because they’re so pretty. And you’d be surprised at just how pretty an artichoke is when it turns into a flower and goes to seed. Gorgeous!

Green Work of Art in the Garden

How do you conserve water?

Disclaimer: This is a sponsored post written by me on behalf of Scotts® EveryDrop™.

Recycle Reduce Reuse with K-Cup Seed Starters

We’ve come up with a clever solution to a problem we had: K-Cup seed starters! Take those used k-cups and turn them into something useful. 

K-Cup Seed Starters - recycling in the garden

Over the years we’ve become more and more conscious of our environment and the impact we have on it. We cloth diaper, grow our own veggies, compost, and make an overall effort to reduce waste and excess.

Since we’ve upgraded from our Keurig Vue to the Keurig 2.0, the one thing I hate is that I can’t recycle the k-cups I use every day. And since I’m a big coffee drinker, I don’t have any way to reuse the k-cups. Until now! I’ve started getting creative with my k-cups and have come up with a list to reuse them in a useful way.

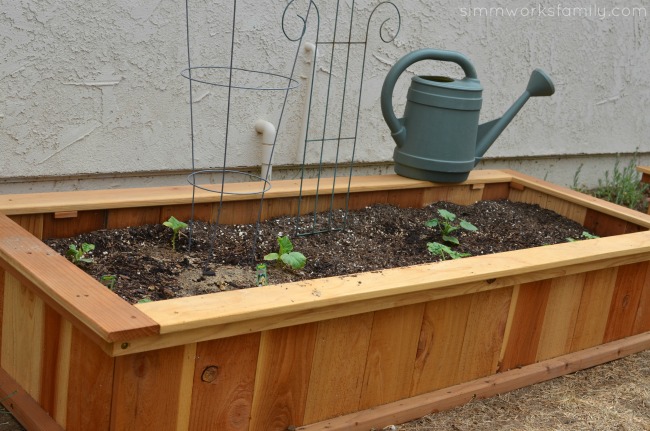
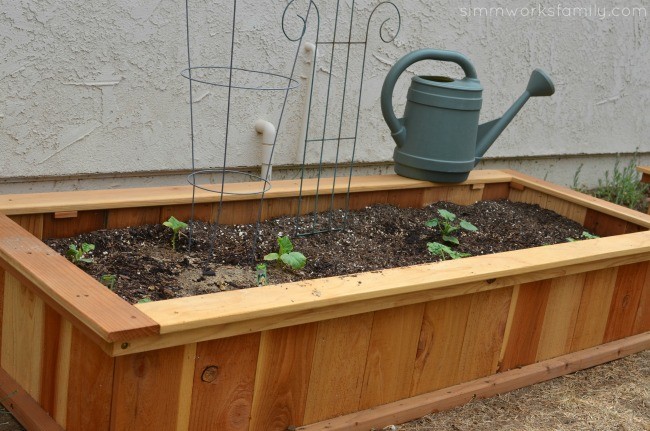
First up is in the garden. Now our garden has always been my pride and joy. I consider it a work of art that is ever changing. And since we just started up our new garden at the new house, I needed an excuse to show it off.

Green Work of Art in the Garden

How pretty are those little starter plants? Well, they started in our k-cups from seed! Truly a green work of art.

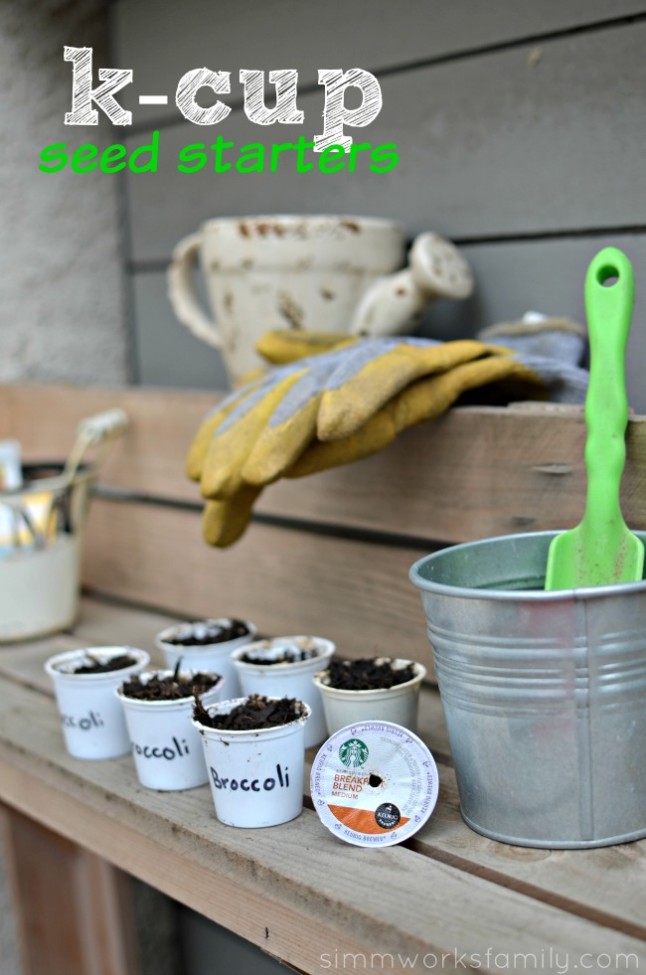
That’s right. K-cups are the perfect way to start seeds for the garden. Not only are they plentiful around here, but they have a built in drainage hole that doesn’t need to be added. How cool is that?

Here’s how you use them!

K-Cup Seed Starters Tutorial

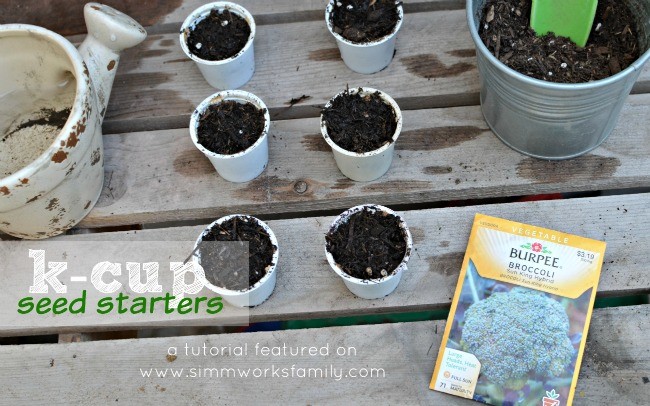
K-Cup Seed Starters

What you’ll need: 

  • k-cup
  • seeds
  • trowel
  • soil (any good vegetable planting soil)
  • water

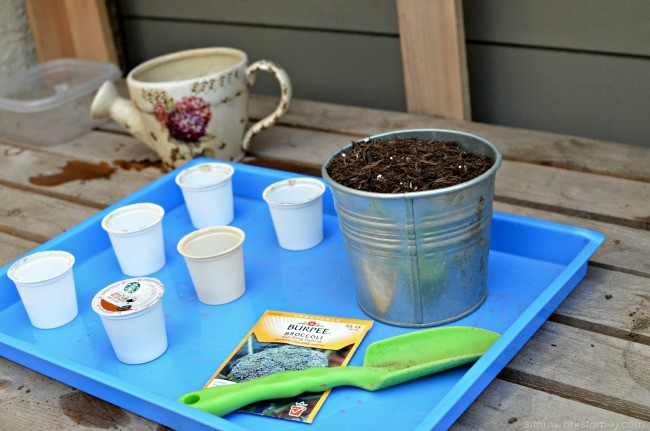
K-Cup Seed Starters - what you need

What you do: 

1. Remove the foil from the top of the k-cup.

2. Discard the coffee grounds to be used later in the garden or your compost bin.

3. Remove the filter from the k-cup and discard the plastic filter – you can compost the k-cup paper filter if you’d like.

4. Fill with soil about 3/4 of the way up.

5. Add 2-3 seeds and top with more dirt until filled.

6. Water daily and watch sprout!

Once your seedlings are big enough to transfer just pull out gently and move to a bigger pot or straight in your garden bed!

For a full in-depth tutorial, check out our video:


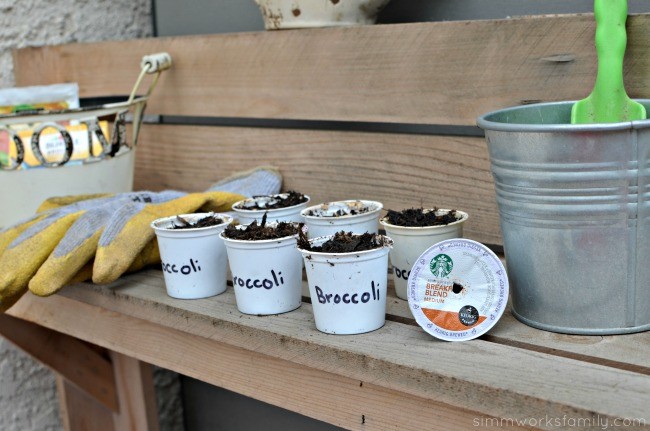
K-Cup Seed Starters - broccoli

How do you recycle, reduce, and reuse around your home?


© A Crafty Spoonful - All Rights Reserved
It is OK to use one of my photos provided a link back and/or proper credit is given. It is NOT ok to copy and paste a whole post including instructions. Please do not remove watermarks or alter images in any way. Please contact me with any questions at danielle@acraftyspoonful.com

.