Dream Dinners Makes Mom’s Life Easier

When I find things that make my life easier, I want to climb onto the roof and shout it out to everyone. So when I was invited to try out Dream Dinners in Encinitas and see what it was all about, I couldn’t say no. And not only did I find an awesome place to enjoy some me time, I was able to check a few things off my list in a short amount of time.

Dream Dinners - Making Moms Lives Easier

I’m a huge believer of using the tools and resources out there to make our lives easier. I also believe that everyone should know their strengths and weaknesses. And when you have a weakness, you should try and find a way to create strength. I love cooking. I love to eat what I make and enjoy seeing my family around the dinner table enjoying a meal that I made.

However with an increase in work hours and a crazier family schedule, I’ve found that the one thing I don’t have is time to prep meals. That includes finding time to grocery shop (although I do love me some Amazon Prime Now and Amazon Fresh!). But even when I do get groceries delivered to our door, I still have to prep it and come up with a dinner plan. But even with the best of intentions I find myself running around 10 minutes before my husband comes home trying to find some 15 minute wonder to make and serve to the family. Or I call the husband and ask him to pick something up.

That’s when Dream Dinners stepped in and opened my eyes to how easy meal time prep could be with a little preplanning. And a little letting go. Just like I gave in and hired a maid service when I realized I am horrible at keeping up with the house cleaning, I also realize that I need help in the kitchen too for those nights that a conference call runs late, I’m still working on a project, or I have a meeting at my son’s school. And having a meal prepped and ready to go in the fridge, with little to no prep work on my end is making my life a whole lot easier.
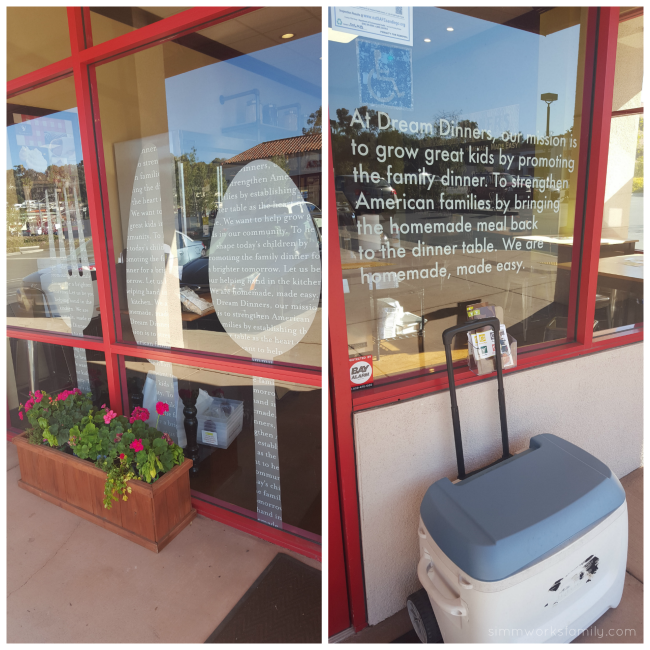
Dream Dinners storefront

Why Dream Dinners?

Founded in 2002, Dream Dinners enables guests to choose from seasonal, rotating monthly menus and prepare the dinners in-store without the hassle of planning, shopping and chopping. They lay out the ingredients in an easy-to-follow format so you can assemble a month’s worth of meals in about an hour.

You can get a feel for the DreamDinners experience in this video:  https://www.youtube.com/watch?v=E-4Cu9epiAA.

Dream Dinners - instructions to follow

How Dream Dinners Works

Interested in how Dream Dinners works? Here’s a run down of exactly what I did from the time I walked into the door to when I left with my bag of meals:

  1. As soon as I came in, I dropped off my purse and headed to grab an apron and wash my hands.
  2. Then I grabbed my list of meals that I’d be preparing that day and got to work.
  3. I went to the station for my first meal and looked over the instructions.
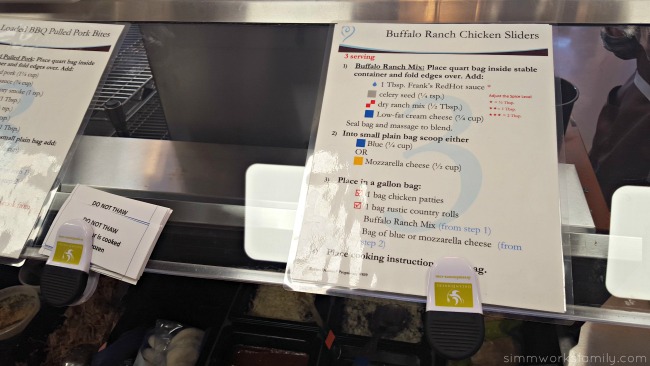
  4. I simply went down the instructions list and added ingredients into the small bags provided to create each “layer” of the meal or recipe. All of the tools I needed were right at the station ready to use including measuring cups and spoons as well as all of the ingredients I’d need.
  5. When I had all of the components together,  I added everything to a larger bag and popped in a recipe card so I’d know what to do once I got home.
  6. After each meal was in it’s bag, I placed it in the fridge to stay cool while I finished the rest of my meals.
  7. I repeated this process until all of my meals were done, washing my hands in between each meal prep.
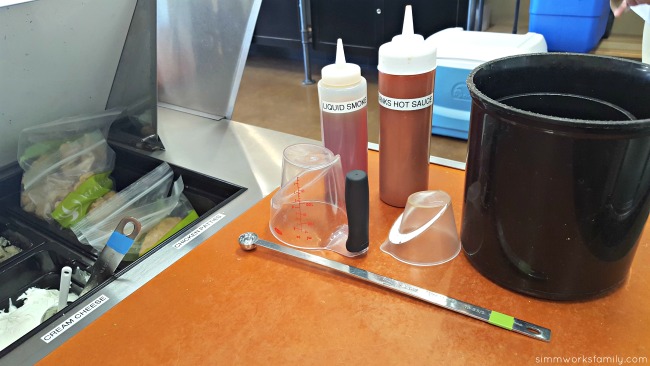
Dream Dinners - tools to use

When you first walk into Dream Dinners, the helpers there take you through the process. You aren’t just left alone to figure it out, you have a helper there along the way for any questions you might have.

Since I’m eating a different meal plan than my family, I could simply omit ingredients I wouldn’t eat or substitute another ingredient. I could also note on the bag if I needed to add anything at home. For example, they have low fat versions of certain things like cream cheese. So I noted what bags I needed to add full fat cream cheese to since we don’t usually eat the low fat versions.

And not only is it easy to customize your meals, you also get to choose what meals you prepare from a huge list of meals that are on a rotating basis each month. So one month’s menu will never be the same as the previous month. That means I get to try out a lot of fun options with my family. And each time I go to Dream Dinners, I can get a taste for one of the latest menu items for the next month after I’m done!
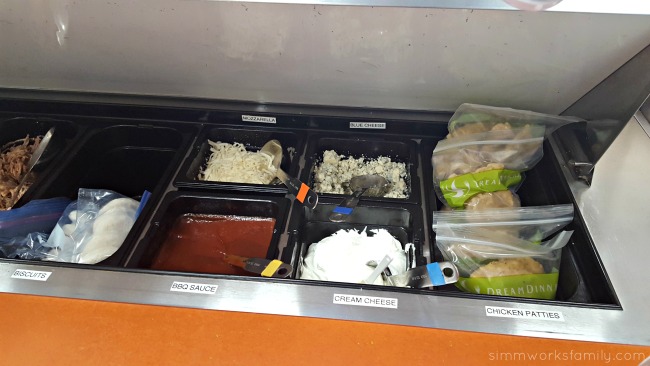
Dream Dinners - ingredients to use

When I got my meals home, I took the three I knew I’d make in the next 5 days and put them in the fridge. All of the others went into the freezer for another week. It’s recommended to pull the meal you want to enjoy from the freezer and into the fridge the night before so it has time to thaw out. But there is also thawing options available in case you forget like I have.

And while sides don’t come with the meals, Dream Dinners has a huge fridge with sides and dessert options you can add to your meals. Or you can choose to add your own sides. For the French Taragon Chicken with Redskin Potato Wedges meal, I added fresh asparagus and just roasted it when I roasted the potatoes. So easy to throw in when everything else was cooking.

Dream Dinners 1

Dream Dinners is a great option for those parents who might not have the time every night to completely prepare and cook a homemade meal for their families. I love that I now have a (cheaper) option at my fingertips for homemade dinners to take the place of calling my husband and asking him to bring home fast food.

And? I love that I can head out to Dream Dinners for a few hours to meal prep. I don’t have to make a mess in my kitchen AND I get a little me time on the weekends. Win-win!
Have you tried Dream Dinners? What’s your favorite Dream Dinners meal?

Keeping Pests Away: Using Ladybugs In The Garden

Keeping Pests Away Using Ladybugs In The Garden Is A Natural Pesticide

One thing I decided from the beginning when we started our garden was that I didn’t want to use any chemical pesticides. I’ve been very diligent about not using chemicals in the home so why would I use them in the garden? Especially on plants we grow to eat. So when I started to see little aphids I quickly went in search of a solution. And happily found out that ladybugs were the answer! How awesome is that?

My lettuce, celery, broccoli, and various other veggies and fruit (gotta remember those strawberries!) needed some protection so we headed out to find us some ladybugs. And we found ours at Armstrong Garden Centers over Ladybug weekend a few years back. And we keep going every year to enjoy the ladybugs. What’s Ladybug Weekend? It’s when one free packet of ladybugs harvested from colonies in California’s foothills will be handed out to Armstrong Garden Centers customers at check-out with purchase while supplies last

 And this year it will take place on Saturday, April 23 and Sunday, April 24 at all 32 Armstrong Garden Centers locations. Armstrong Garden Centers anticipates giving away two million of these “good bugs” to encourage healthy lawns and gardens. How cool is that? 

Known for their unique red and black colors, ladybugs will stay in your garden as long as there is something to eat. It is okay if the insects leave because it means that your garden is clean and the ladybugs have moved on to help your neighbor’s yard.

Keeping Pests Away Using Ladybugs In The Garden

To celebrate ladybug weekend, the following free classes will be available at all Armstrong Garden Centers stores:

  • Saturday, April 23 at 9:00 a.m. – Ladybugs and Other Good Bugs – Many insects are excellent garden helpers. Learn which plants are best for attracting these beneficial insects along with how they can help your garden flourish.
  • Sunday, April 24 at 10:00 a.m. – Organic Gardening – Learn everything you need to know from building soil health to problem-solving using organic products and techniques.

Keeping Pests Away Using Ladybugs In Our Garden

Why Ladybugs?

Ladybugs are great at keeping pests out of your garden. A few pests they take care of are:

  • Whitefly
  • Scales
  • Mites
  • Mealybugs
  • Broccoli Worm
  • Tomato Hornworm
  • Bollworm
  • Cabbage Moth

If you have signs of any of these pests you might want to consider picking up some ladybugs at your local gardening store to release in your garden. To find out more about using ladybugs to keep pests at bay check out this awesome website all about ladybugs, Everything Ladybug!

Here are a few tips on releasing the ladybugs into the garden:

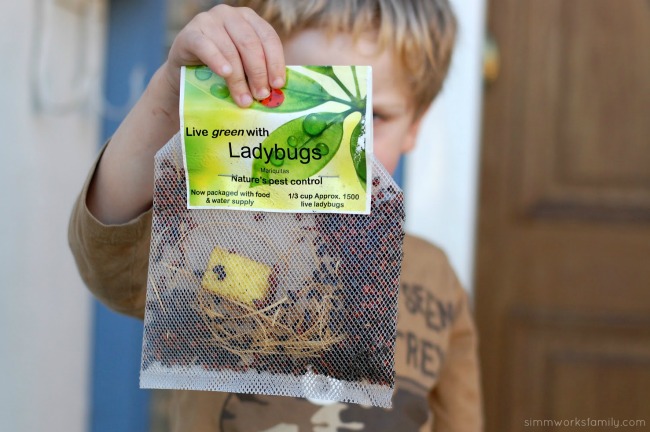
Keeping Pests Away Using Ladybugs In The Garden - in a bag

1. Wet the garden bed. Ladybugs love moisture. If you want them to stay in your garden and not move onto the next you really don’t want to skip this step.

2. Open up the container and let the ladybugs start to crawl up and out.

Keeping Pests Away Using Ladybugs In The Garden and strawberries

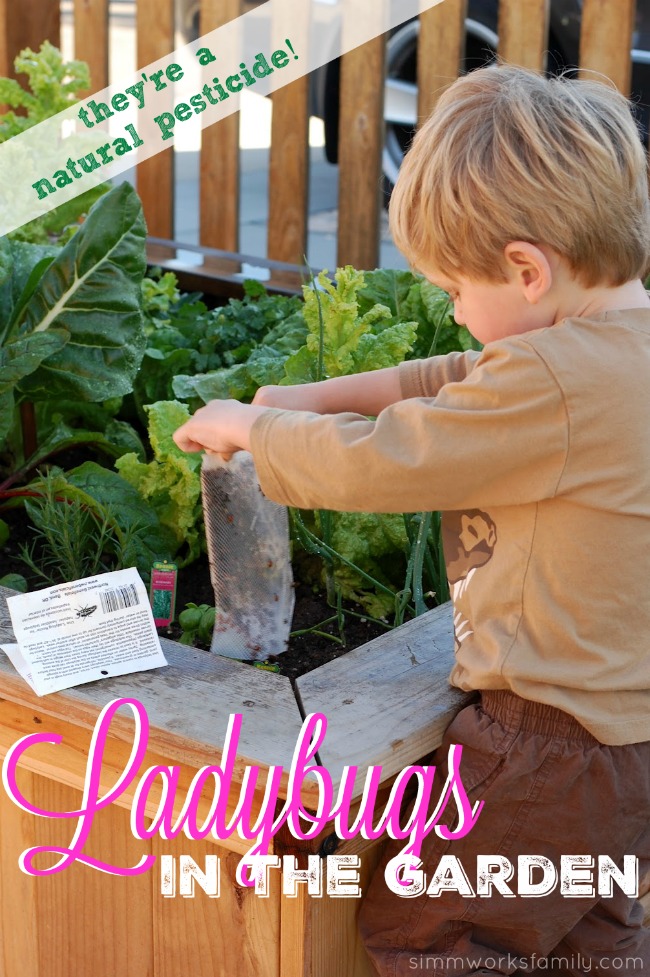
3. Let your three year old shake the container over all parts of the garden. You don’t want all of the ladybugs in one area. (The three year old isn’t necessary but makes a fun adventure!)

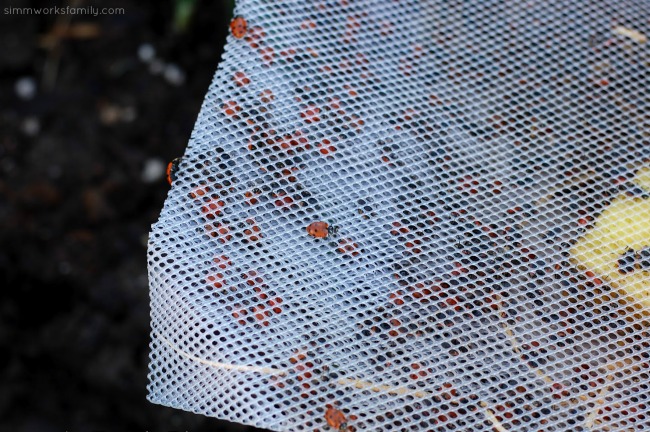
4. Watch as the ladybugs wake up and start moving. The ladybugs might take a few minutes to perk up but soon they’ll start crawling all over and exploring your garden. A good amount of the ladybugs will leave to other gardens but a surprising amount stay.

Watch the little guys for a bit at your child’s level. You’ll be amazed at the sheer joy your little ones find in this activity!

Keeping Pests Away Using Ladybugs In The Garden crawling around

5. Continue to mist the garden with the lady bugs twice a day. Just enough to make sure that the dirt and plants are moist and the ladybugs have water to drink.

You can also mist the garden with a 1:1 ratio of sugar based soda to water. This will make the ladybug’s wings sticky and will allow them to explore your garden instead of flying away. This solution works for about a week and then wears off.

Keeping Pests Away Using Ladybugs In The Garden spreading out

Have you released ladybugs in your garden before?

* The photos in this post are a flashback to our March 2012 ladybug adventure 🙂

Tips On Making Healthy Living A Priority For Moms

This is a sponsored post written by me on behalf of American Heart Association. All opinions are 100% mine.

Tips On Making Healthy Living A Priority For Moms

Like most moms, my number one priority is my children. Our day to day lives, as well as the decision we make for our future, revolve around them. So when it comes to our health, I also want to make sure I remember to not only take care of the kids but myself as well. By making a few changes to our daily routine I’ve been able to focus on my health without drastically changing how I’m living or taking too much time on one thing. Because we all know if it takes too much time, it isn’t going to happen.

We want to experience more of life’s precious moments. But to do that, we must be healthy in heart and mind. As the American Heart Association reminds us, the heart is where life’s moments are felt most, and the mind is where we relive them again and again. Making healthy living a priority for moms is easy when you have the right tools! By making these changes we can impact better heart and brain health. You have the power to affect real change!

Tips On Making Healthy Living A Priority For Moms - go on adventures

Tips On Making Healthy Living A Priority For Moms

Make Simple Changes 

Healthy living doesn’t mean changing your whole way of living. It means changing a few small things to make a big impact. Here are a few changes you can implement in your daily lives that have big impacts:

  1. Eat more fruits and veggies – Consider joining a CSA or a food delivery program that delivers fresh produce right to your door! We love Farm Fresh to You’s veggie/fruit deliveries.
  2. Eat less sodium – Read labels and see where sodium is hiding. Then reduce the amount you’re eating!
  3. Drink less sugary sweetened beverages – Do you drink soda? Cut down your consumption or switch it for flavored water!
  4. Increase your physical activity – just add a 30-minute walk in a day! Then increase from there.
  5. Check and control blood pressure – regular check ups with your doctor are important for overall health.

Tips On Making Healthy Living A Priority For Moms - spend time with kids

Find a Work-Life Balance

Sometimes the stress in our lives is made when we try and do too much or take on too many tasks. Finding that work/life balance can help ease stress and reduce health problems. Here are some basic changes to make:

  1. Set office hours and stick to them! If you work outside of the home, this may be easy, but if you work from home like me, office hours are a must. This also applies to SAHMs. You can create a schedule around kids activities, focusing on the home, etc so you are using your time more efficiently.
  2. But also, schedule some family/home hours as well. Between school pick-up and bedtime are the times during the week that I focus on the kids and after 10 a.m. on the weekends is family time. I try not to work on holidays as well so I make it clear that I’m not available on those days.
  3. “Me time” is important as well. I make sure to get out once a month and focus on myself. Whether that’s mom’s night out, getting a pedicure, or getting my hair cut, even as little as one hour is enough for me to recharge. You could even consider creating a Moms group where you get together once a month at each other’s houses just to get some mom time in.

AHA

Implement Change One Step At A Time

Don’t rush into these changes all at once. While one or two changes may be ok right now, making too many changes may lead to defeat. Consider adding 1-2 new changes into your routine a week and work from there. By the time you realize it, you may have already implemented some great changes in your life and are already becoming a healthier you.

Remember, these changes are not only for you but for your whole family! Make it fun and challenge the other family members in your home to participate as well! Take a walk at night as a family to tackle increasing physical activity AND spending family time together. Or consider a screen time ban after dinner so you create family time.

Tips On Making Healthy Living A Priority For Moms - mental health days

The American Heart Association (AHA) has resources for healthy living, like recipes, healthy tips and tricks for moms, and information and resources on heart and brain health. They’re working to improve the health of communities by affecting laws through advocacy initiatives. As an organization, the AHA is funding life-saving research and science advances to help people live healthier, longer lives. You can find more resources by visiting Life Is Why.

Looking for more support? The Moms Unite Facebook Group is also a great place for fellow moms to get together in an effort to encourage one another and share tips for leading a healthy life. Check out what they have on Pinterest too!

Everyone has a reason to live a healthier, longer life. What’s yours?

Visit Sponsors Site

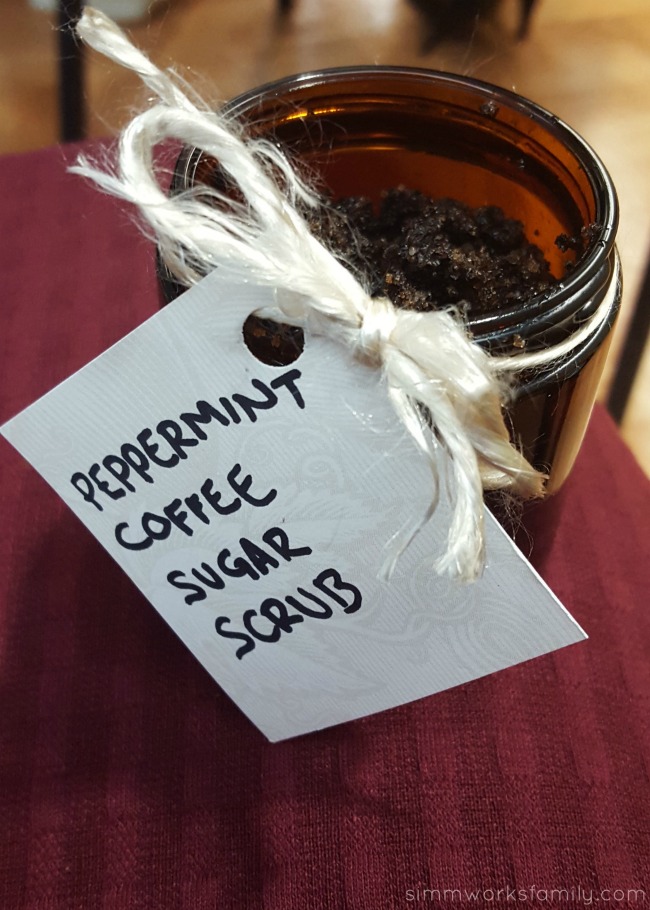
Sleep Tips for Kids + A Peppermint Coffee Sugar Scrub Recipe

affiliate link disclaimer
Sleep Tips for Kids plus a Peppermint Coffee Sugar Scrub recipe

Last week I was invited to host and attend a seminar hosted by Radys Children’s Health Network and Children’s Primary Care Medical Group. Cleverly titled, “Good Night, Sleep Tight” the conversations of the night covered the topic of sleep. We were greeted by two local physicians who both chat a lot about sleep with their parents. Dr. Adrienne Lostetter is a pediatrician and member of the Children’s Primary Care Medical Group. And Dr. Rakesh Bhattacharjee is a pediatric pulminologist and director of the Sleep Center at Rady Children’s Hospital – San Diego.

Both tackled the topic of sleep as Dr. Lostetter covered typical sleep cycles and how to help our kids get to sleep. Dr. Bhattacharjee helped us understand the issues that arise when there are sleep problems (more on that topic later!). Then we had a little fun when Jimbo’s… Naturally! shared some fun sugar scrub recipes with us. Including an adapted version of my Vanilla Mint scrub that the attendees could make and take home with them! I share the peppermint coffee sugar scrub they demonstrated for us below!

Now I know that each kid is different, as is each kid’s sleep patterns. And each family is different too. While below is the advice of Dr. Lostetter, I do want to note that we have co-slept with all three of our kids. I feel that having them near me is the safest when they’re infants and my older two have since transitioned to their own beds in their own rooms easily and without issue. But more on that later!

Sleep Tips for Kids

Sleep Tips for Kids

from Dr. Adrienne Lostetter of Children’s Primary Care Medical Group

Infants & Toddlers

Infant sleep cycles may vary until about 6 months of age. Newborns can sleep about 16-17 hours per day but might only sleep in 1 or 2 hour chunks of time. As babies get older, they need less sleep. However, all babies are different – even each of your own kids are different!

The best sleeping surface is a firm mattress without all of those cute bumper pads and comforters. SIDS is a real concern at this age so make sure they are “back to sleep” in a safe crib.

Toddlers need plenty of sleep as well. About 11-12 hours of sleep a day, including naps, will help them grow up healthy. Like teens, children who don’t get enough sleep are more likely to be overweight or obese. They also tend to have tired cues and reading these can help prevent bedtime battles.

Preschoolers

Preschoolers need 10-12 hours of sleep a night. Somewhere between ages 3-5, your child will likely stop nap time. This transition can be hard. To make it easier on both parents and kids, move their bedtime earlier slowly over time so they get plenty of sleep. Make sure to establish bedtime routines – kids thrive on routines.

Teens

For adolescents, 8.5-9.5 hours of sleep a night is recommended. Keeping a similar weekday and weekend schedule leads to less fatigue.

Teens who get enough sleep have a reduced risk of being overweight or suffering depression. They are less likely to be involved in automobile accidents and have better grades/higher standardized test scores. Most importantly, they will have an overall better quality of life.

You can find more tips on developing better sleep routines for kids here and a few bedtime tips here.

Peppermint Coffee Sugar Scrub

Peppermint Coffee Sugar Scrub

Combine all ingredients & mix well. Store in an air-tight container and enjoy in your next bath or shower. Should last 7 days in the shower.

Once you finally get your kids in bed, what’s the first thing you do?

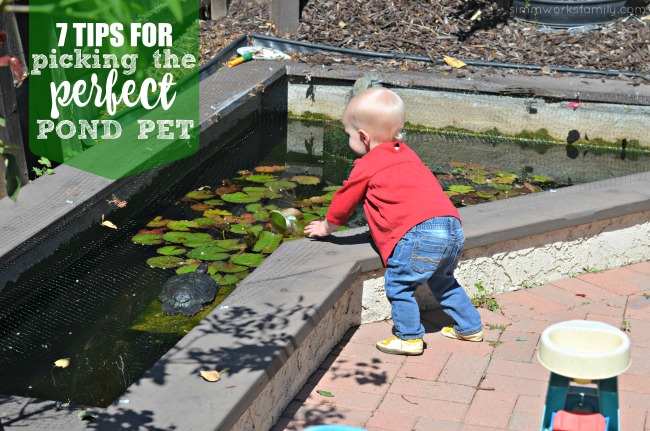
7 Tips for Picking the Perfect Pond Pet

7 Tips for Picking The Perfect Pond Pet

Are you ready to add a little life to your backyard pond? Adding a pond pet can be the perfect addition, as it adds character, color, and most definitely life to the space. I can’t tell you how much enjoyment we get out of watching our animals in the pond. It’s especially entertaining when the turtle decides to play “tag” with the fish. Oh yes, hours of fun!

When we first moved into our home, we were stoked to be inheriting a large, old koi and a red eared slider turtle with the pond in the back yard. But after a few months of just the two animals in the pond, we thought it’d be fun to add some more. So we did some research and found a few shubunkin goldfish to add to the mix.

There’s been a lot of change over the past two years in our pond and we now have 10 shubunkin goldfish and our red eared slider, Franklin. The original three shubunkin were eaten by a juvenile red tailed hawk and we’ve since put a net over the pond. But somehow between adding them to the pond and them disappearing we were left with 13 baby fish swimming around.  10 have survived to be the size you see in the photos below.

You can find enjoyment in being able to provide a peaceful refuge to a pond pet, as they are sure to enjoy being there just as much as you enjoy having them. But how do you pick the perfect pond pet? If you aren’t sure where to begin, take a look below at 7 tips for picking the perfect pond pet!

Picking the Perfect Pond Pet - know breeding habits

7 Tips for Picking the Perfect Pond Pet

1. Know what sort of space you are working with.

Frogs and turtles will be able to come up for much needed oxygen, but your fish won’t. If you are considering koi or goldfish, you want to be sure there is at least 8-10 square feet of pond per large fish.

This will ensure they get the space and oxygen they need to grow properly. If you are working on limited space, opt for one or two goldfish or amphibians that can come and go as they need.

The number of fish in our pond is higher than we’d like so we’ll be looking to re-home about 1/2 of them so that the other 1/2 can live with enough room to freely move around.

2. Be realistic about maintenance.

Adding fish to your pond means regular feeding (sometimes more than once a day) as well as regular filter maintenance. Amphibians as you know can typically find insects on their own, but the occasional sprinkling of crickets may be needed. If you are short on time, fish that need daily feeding may not be feasible and you should opt for amphibians.

We’ve found that we clean the pond and pond filter once a month and feed frequently (1-2 times in the day) during the summer, and less frequently in the winter.

3. Know your climate.

Most fish and amphibians can survive a harsh winter if proper preparations are made with the pond. If you have the time to do this yearly, go for it! If you live in an area where extreme heat or frost is an issue, you might be setting up these pets for failure. Instead, add bird feeders around the pond to attract birds who can fly south/north as needed to survive.

Luckily we live in Southern California and have no need to bring in our red eared slider during the winter months. But many turtle lovers set up a tank in their homes for the winter months with no issues. So don’t completely shy away from amphibians or turtles if you think you’ll be able to take them inside in the winter.

4. Talk to your local pet shop.

Don’t pick out pond pets blindly. Be sure to talk to a local pet shop or business that specializes in ponds so they can make suggestions for you. They are sure to offer helpful advice and product suggestions so you can have a successful experience.

We have had such a great amount of luck at Aquatic Warehouse in Kearny Mesa. They help us every time we have a problem and were able to recommend an awesome pond pump and filter for the size of our pond.

5. Consider kids into the decision.

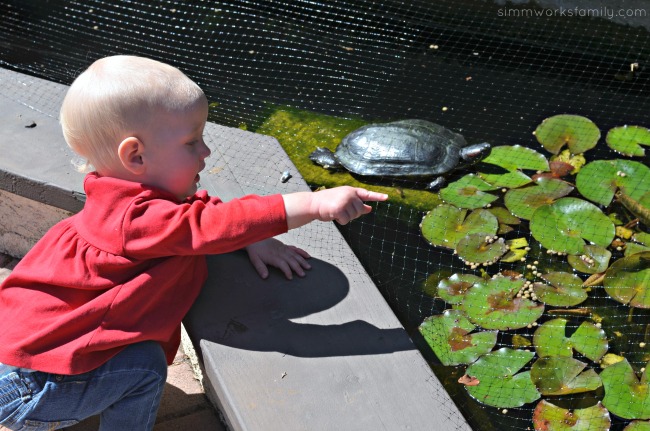
Do you have small children who can pose harm to the pond pets? Or perhaps be intrigued by them and get too close to the pond? Be sure your children know how to be respectful of the pond pets and know how to care for them properly. You also want to avoid pond pets if children don’t know pond safety precautions, as their curiosity can result in harm.

We are currently working on wrapping a seating bench around the pond to help in deterring our kids from leaning over and reaching into the pond. We should have that complete by the time our youngest is old enough to open our sliding glass door leading to the back yard.

6. Know breeding habits.

So you think you want a few snails or frogs in your pond? Think just a few fish won’t be a big deal? Be warned that pond pets can and will breed and before you know it you can be up to your ears with new pets! Know how to deal with fish/amphibian eggs so you don’t quickly become overrun.

As I mentioned before, after our shubunkin passed and we thought we only had the one koi and one turtle, we ended up finding baby fish in our pond! At first we assumed the shubunkin laid the eggs and left them, but now as the fish get older, some look like koi and some look like shubunkin! You never know if the animals you’re adding to the mix are already pregnant and will be making babies in the pond.
7. Consider your reasons for wanting a pond pet.

Do you want to add a little life? Frogs are great for that, but be warned they can be quite noisy at night! Turtles are fantastic, but may wander into the grass and will need to be watched out for when mowing. Our turtle stays in the pond at all times right now but we are planning on creating an area for him to climb out and sun bathe in. It will be gated off so that the dog and chickens can’t get in and hurt him.

Each pond pet comes with unique needs you should be prepared for. If you want one solely for decoration, you might want to think again. Remember these are living creatures that need care and are for more than decoration. If you keep this in mind and are ok with it, a pond pet is sure to appreciate the space you provide!

Picking the Perfect Pond Pet - consider kids in the decision

A pond pet can be a lot of fun, a learning experience, and add greatly to your backyard pond. Keep these tips in mind when choosing the perfect pond pet, and you are sure to enjoy success.

Do you have a pond? Or are you considering creating one?

How to Make Reading Fun: Learning to Love Reading Early On


How to Make Reading Fun Learning to Love Reading Early On

Igniting a love for reading in children is important, and the earlier you do so the better! Children who learn to love reading at a young age master sight words quickly, develop larger vocabularies, and tend to read above grade level later in life. And the early years of development between 0-5 years of age are crucial for setting a foundation for a lifelong love of reading and learning. 

I remember the love I had for reading. How I could get lost in a book and transform my world around me into the place I was reading about. It was an amazing way to escape real life and immerse myself into an adventure. The magic that comes from reading a book continued with me and still to this day I can become absolutely consumed with the book I am reading. That passion and love of reading is something I’ve always wanted to pass on to my children. And as my oldest begins his reading journey, I hope to share that love with him. 

If you want to inspire a love for reading in your own child, take a look below at 5 helpful tips on how to make reading fun, and ignite a love for reading early on. These tips can help you inspire their own love for reading and make them readers for life!

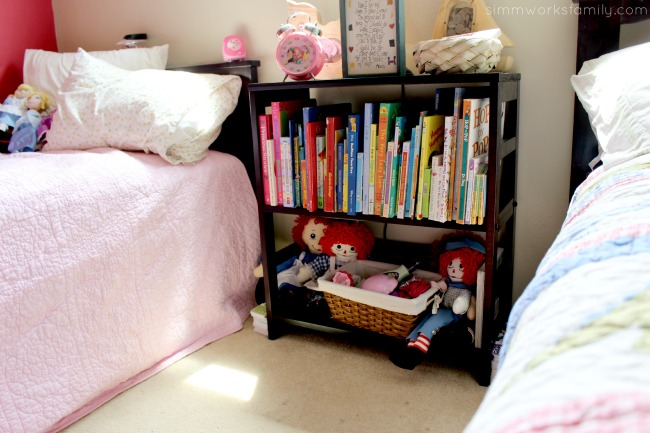
 Shared Bedroom Ideas for Brother and Sister - bookshelf

Tips on How to Make Reading Fun

1. Model reading.

Can you recall your own parents being readers? Let your children see you enjoy reading. Keep your own books on hand and next to your bed or on the coffee table. Let them see you enjoying your books, and you can even tell them what your favorite parts where about the book. If you aren’t into novels, even modeling reading the newspaper or magazines is a great start! If they see you reading for pleasure, they are more likely to do the same. You can even do a book club together, and meet over snacks to talk about the book!

2. Let them choose their own texts.

When you explore the library together, let them gravitate towards texts that interest them. Even if the book is above their reading level, let them have practice handling it and exploring it. If they seem to enjoy magazines, short stories, or even online reads, let them lead in navigating. While it is wise to choose skill appropriate texts, giving them some freedom helps keep the experience a more positive one and gives you an idea of what interests them.

3. Find words all around you.

We are surrounded by words, and it is fun and important to point this out to children. Show them words on cereal boxes, billboards, candy wrappers, and anywhere else you may seem them. Invite them to point out words they recognize, and help them with words they don’t or they are curious about. Go on a word hunt and see all of the places in the house you can find words to read. To make your environment really rich in text, make flash cards using the sight words you want to work on. Hang these up all over the house so your child can practice and identify the word as they walk by.

4. Read nightly, and read enthusiastically.

Do you have fond memories of being read to at night? Set aside time each night before bed for at least one book. You can read it, or they can along with you. Don’t let this appear to be a chore but something you enjoy doing. Do the best you can to show enthusiasm, using the voices and any hand motions or props that may make the story better. Make it a wonderful and enjoyable experience that you look forward to each night.

5. Make reading interactive.

Give children sticky notes that they can use in their books to mark pages they enjoy, have questions about, or want to remember to show you. You can also use highlighting tape to highlight words they know or don’t know as they read, or to mark the page number they left off on. You can give them puppets or stuffed animals to read to or act out the stories with, or let them draw about what they read when done. This makes the reading experience interactive, fun, and continues the learning process.

Kids Reading Nook Idea - Access to Books

Reading is such an amazing part of life, and one that you don’t want your child to miss out or get behind on so starting young is important! By talking, reading, & singing with our children, we help them learn and grow in the world around them. The importance of recent brain science in child development cannot be overstated. More than 80% of a child’s brain is developed by age 3, so it’s no wonder that the first three years of a child’s life are referred to as the “Golden Years” for brain development and strengthening. Give these tips a try and see how you can help them find a love for reading that is sure to stay with them throughout their lives.

First 5 California as a great, free resource for information. From activities to use with your children, to PDFs of books and videos that help parents learn how to teach their children in a variety of ways. Plus, there are so many articles to download and use for later.

How do you inspire your children to Talk.Read.Sing.®?

Strawberry Vanilla Overnight Oats

This is a sponsored post written by me on behalf of The a2 Milk Company™. All opinions are 100% mine.

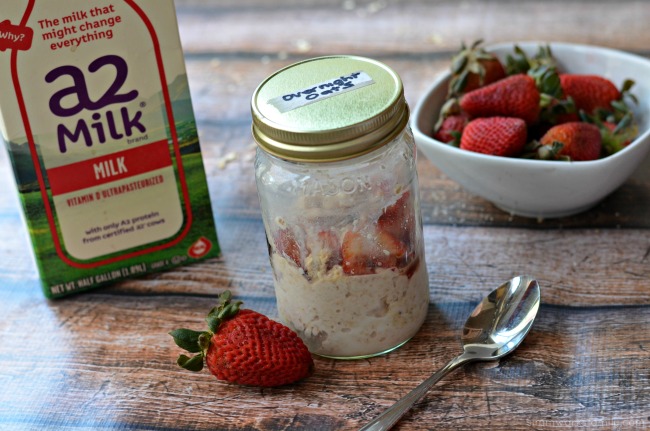
Strawberry Vanilla Overnight Oats - a quick and easy breakfast for busy mornings

As a busy mom of three, I need quick and easy breakfast ideas for those mornings that just don’t go a smoothly as I plan. So at the beginning of the week, I take a look at our schedule and figure out what days might be the hardest to squeeze in making breakfast. Whether it’s a day I’m also making lunches, or a day we have to leave earlier than normal, I want to be prepared and do what I can ahead of time to make our mornings easy.

On those days that I need to plan ahead for breakfast, I’ve started to make these delicious overnight oats the night before. Not only are they simple and easy to make, but they are so versatile! Plus, with a2 Milk® I don’t have to worry about tummy trouble after eating them!

The kids love the taste and I love the simplicity! Plus, there’s minimal ingredients and almost no mess (unless I give the baby some without watching her). And when I put them in mason jars, the kids can bring them with us in the car if they didn’t finish breakfast at home. Easy peasy!

Strawberry Vanilla Overnight Oats with A2 Milk

Strawberry Vanilla Overnight Oats

  • 1/2 cup quick oats
  • 1/2 cup a2 Milk®
  • 1/2 cup strawberries
  • 1 teaspoon vanilla
  • 1 tablespoon sugar

Wash the strawberries and dice them up. Add them to a small bowl. Pour vanilla and sugar over the strawberries and stir until well coated. Let macerate in the fridge.

While the strawberries are working their magic, grab a mason jar, the oats, and a2 Milk®. Pour 1/2 cup of oats in the bottom of the mason jar. Top with milk. Then grab the strawberries and pour 1/2 into the jar. Save the other 1/2 in the fridge.

Screw on the mason jar lid and store the jar in the fridge overnight. In the morning, remove lid and stir up with a spoon.

Microwave for 30 seconds if you’d like to remove the chill from the oats. Top with the remaining strawberries and enjoy!

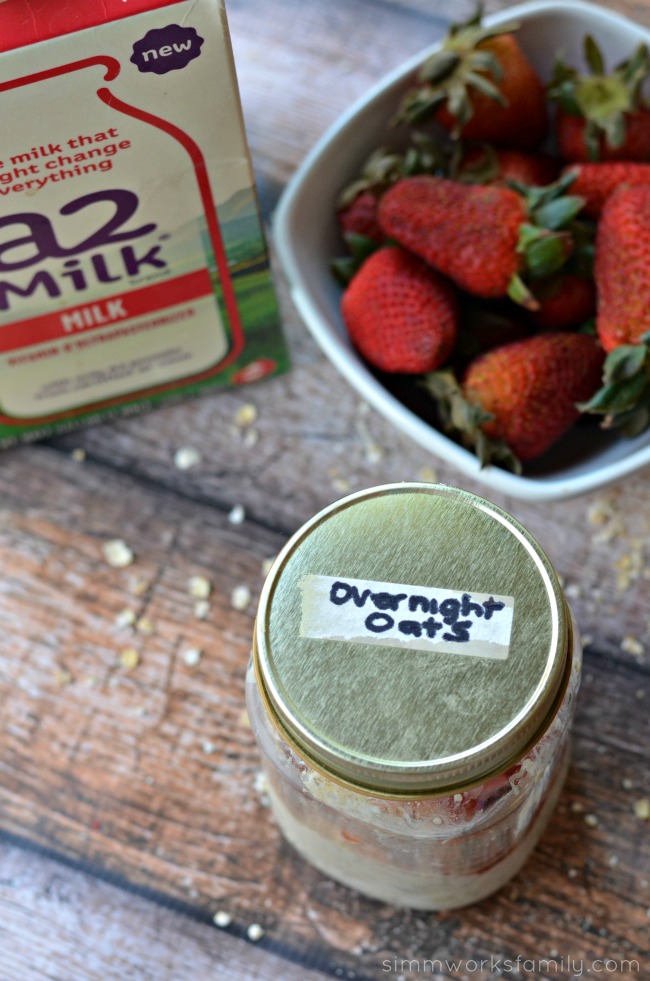
 Strawberry Vanilla Overnight Oats in a mason jar

Over the past few weeks we’ve incorporated a2 Milk® into our everyday lives and I have to say that I really enjoy it. And the kids haven’t noticed a difference at all. Since we started introducing our 13 month old to cow’s milk, she’s only ever tried a2 Milk®. Since all other forms of mammal’s milk (i.e. goat, sheep, human) only contain the A2-type proteins, she’s used to only getting the A2 protein. I’m hoping this continues to make her transition to cow’s milk easier.

You can find more about a2 Milk® and my recipe for No Cook Chocolate Avocado Pudding here. And for more awesome recipes and news on a2 Milk®, check them out on Twitter, Facebook and Pinterest

Find a store near you that carries a2 Milk® by using this Product Locator. Save now with this a2 Milk® $1 Off Coupon

What’s your favorite easy, make-ahead breakfast? 

Visit Sponsors Site

The Perfect Baking Basket for Mom

This shop featuring the perfect baking basket for mom has been compensated by Collective Bias, Inc. and its advertiser. All opinions are mine alone. #BlissfulMoments #CollectiveBias

The Perfect Baking Basket for Mom

Life has been crazy here. I feel as if I’m running in every direction and have no idea where I’m supposed to go. I’m in the middle of planning my kids school Gala and am in charge of all of the gift baskets and donations for the event. And it’s next Saturday. Months and months of planning and now we’re in the final days before the event. Even with all of the planning, there is still a lot to do. 

With all of the running around I’ve been doing, I’ve found myself forgetting to sit back and take a moment for myself. I haven’t been enjoying naps with Norah, or me time at night after the kids go to bed, because every extra moment is spent on Gala prep. So when the time came to start assembling all of the baskets we have for our event, I decided to combine me-time with basket assembly.

The Perfect Baking Basket for Mom with Betty Crocker Sweet Rewards

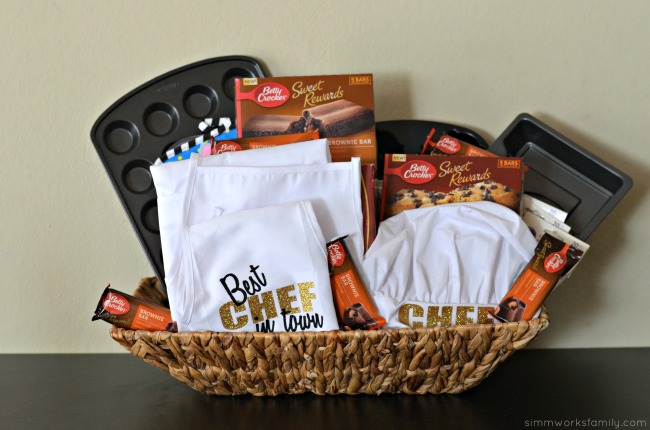
With some delicious indulgent treats in hand, my favorite music on, and the kids at the park with their dad, I jumped in to making baskets and getting my creativity on. Nothing makes me happier than crafting and creating. It’s the perfect me-time. And these NEW Betty Crocker™ Sweet Rewards Chocolate Chip Cookie Bars and Brownie Bars were the perfect treat to enjoy.

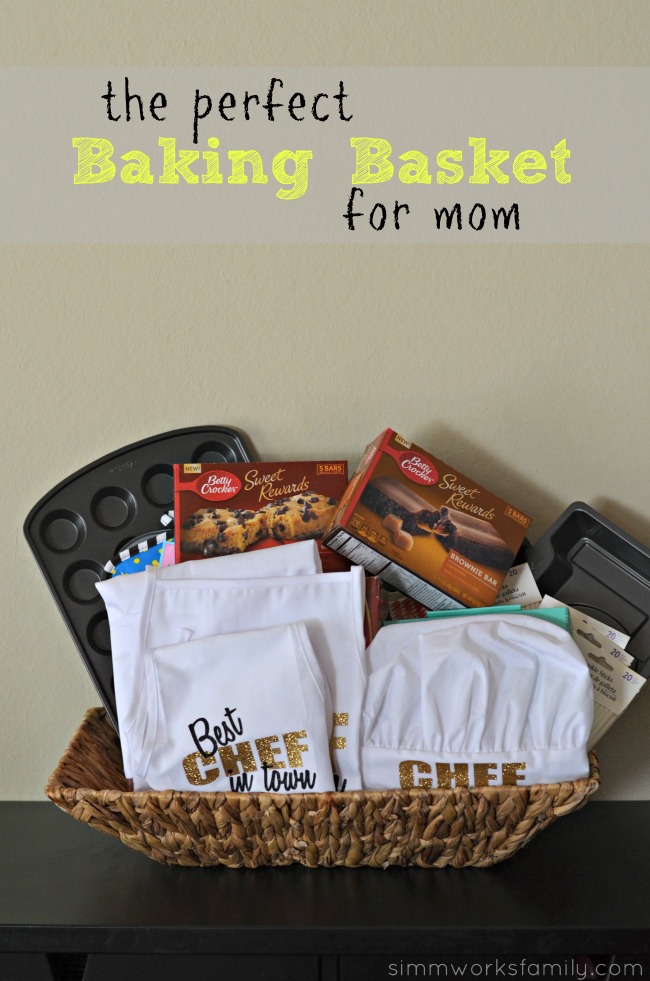
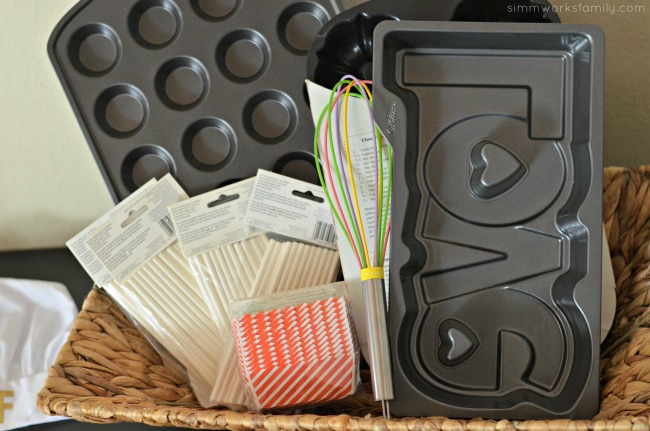
One of my favorite baskets to put together would have to be this awesome baking basket for mom. Complete with baking pans, aprons, and a few extra boxes of Betty Crocker™ Sweet Rewards Chocolate Chip Cookie Bars and Brownie Bars, I’m sure any mom would be stoked to get it! Here are a few tips on making your own perfect baking basket for mom.

The Perfect Baking Basket for Mom

1. Add a personalized touch

I have a Cricut machine and a Silhouette machine. But I hardly find time to actually use them. So with the time I had while the kids were out of the house, I made some vinyl cut outs to add to a chef’s hat and apron set I had. Now mom will have an apron for herself and an apron for her little one to match!

The Perfect Baking Basket for Mom with personalized touches

2. Find a nostalgic piece or two

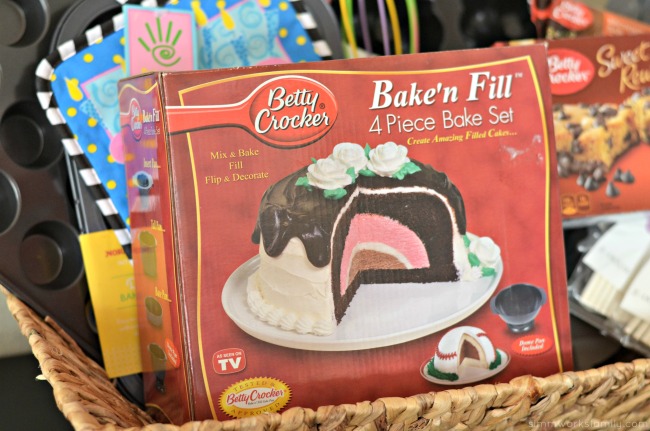
I don’t know about you but my mom always had one or two “fun” pans that we could make ice cream cakes or checkers cakes with. So when I saw this Betty Crocker Bake’n Fill bake set I had to grab it for this basket. Consider finding something out-of-the-box to add to your basket and make it fun! It may not be a cool bake set but maybe a gift certificate to a baking class around town.
The Perfect Baking Basket for Mom with Betty Crocker

3. Fill the basket with accessories

Once you’ve picked out your big items – like various sized pans – it’s time to find some fun little items! Consider a spatula or whisk, some paper liners, or these cool cookie sticks!

The Perfect Baking Basket for Mom Fun Extras

4. Presentation is key

Make sure you choose the right basket for your items. You don’t want a basket that’s too small or two big. And if you need help fitting things in the basket, grab some filler – cardboard makes a great prop for items and paper “grass” left over from Easter can pretty up any empty space that’s visible. And if you’d like, wrap everything up in cellophane and add a big bow!

The Perfect Baking Basket for Mom - an easy mother's day gift

If you’re having trouble finding items for your basket, try and think of things that you use daily in your kitchen and the use they bring to you. Then consider a few extras you’d love to have and pop those in as well. And if you get hungry trying to assemble your basket, don’t forget to pick up a few boxes of Betty Crocker™ Sweet Rewards bars. These delicious soft baked bars are amazing at home or on-the-go. Pick some up at your local Walmart! I found mine in the Cereal aisle.

Betty Crocker Sweet Rewards at Walmart

Here are a few other great ideas for baskets for mom: 

Pampering Gift Basket

Coffee Lover’s Gift Basket

Wine Gift Basket

Cooking Gift Basket

How do you enjoy me-time?

Teaching My Daughter To Find Her Dreams + a DIY Vertical Toy Storage Tutorial

This shop featuring a tutorial on DIY Vertical Toy Storage has been compensated by Collective Bias, Inc. and its advertiser. All opinions are mine alone. #InspireBigDreams #DreamBigPrincess #CollectiveBias

DIY Vertical Toy Storage Tutorial

My daughter. She is so strong. She’s always known what she wanted since she was a small child. I’m sure many of my family members remembered how she’d refuse a bottle because she knew she only wanted to nurse. She’d make my husband drive her all the way to my work to nurse her at lunch time. And then would wait until I got home to eat again. She still, to this day, knows exactly what she wants. And for the most part she knows how to get it.

From finishing fun projects she’s set out to start, to learning new things and going on fun exploratory journeys to do so. She is so brave. And so generous. And just the kindest girl I know. Sometimes I look at her and wonder how I got so lucky to have a daughter like her. She’s a lot like some of her favorite Disney Princesses. Inquisitive like Ariel, adventurous like Rapunzel, and smart like Tiana.

The other day she came to me asking if she could help kids who might not have as much as her. We had talked about how blessed we are as a family a few nights prior and how much we have after one of the kids had a meltdown after not getting a toy at a store. We went over how not everyone was blessed enough to have a huge birthday party every year, or is able to go to theme parks with their family, or even get new toys at Christmas and on birthdays. So my sweet girl asked how she could help make sure other kids got the gifts and toys they deserved. How could I not help her with this?

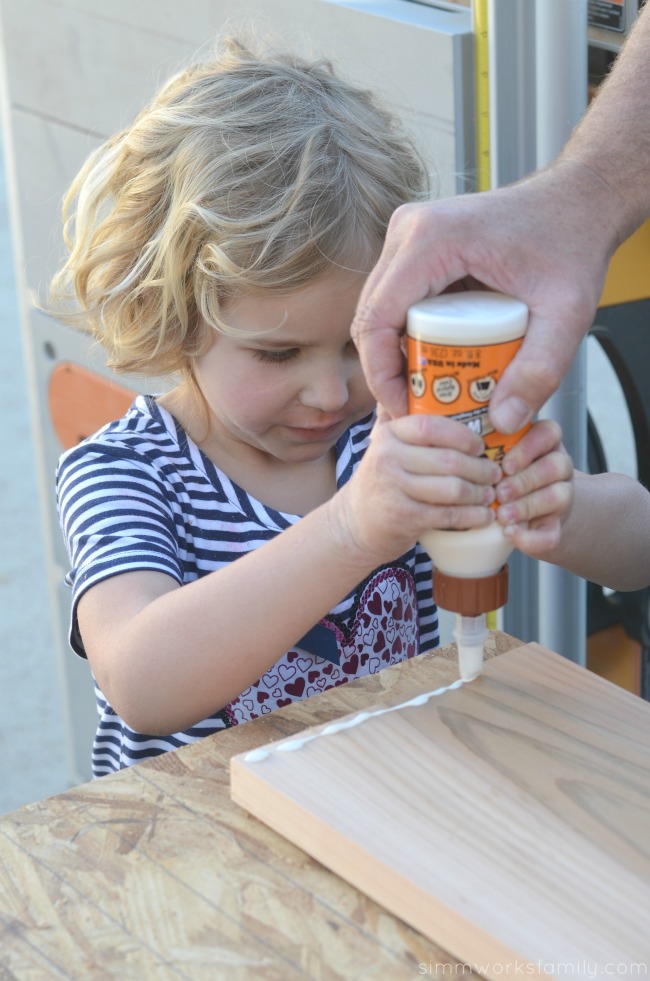
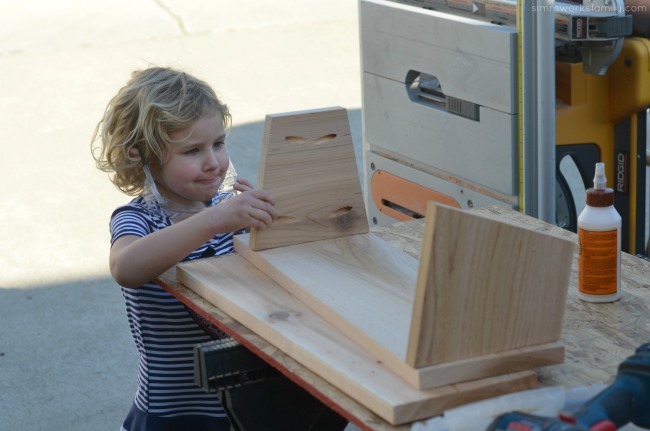
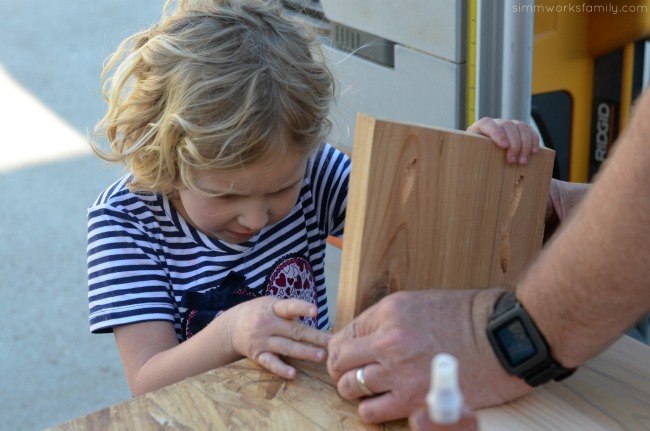
Building a DIY Vertical Toy Storage needs precise measurementsDIY Vertical Toy Storage - glue pieces before screwing together

So we set out to make a list of all of the places we could ask for donations. We also thought about how we could also chip in a bit to purchase new toys. And we came up with a game plan. Any time we head over to Toys ‘R Us to window shop or pick out a gift, we’re going to grab one extra. Guess what Molly’s doing to help? She’s saving up her dollars to use on the extras we purchase. Yup! She thought of that all by herself too. That kid. She makes me proud. 

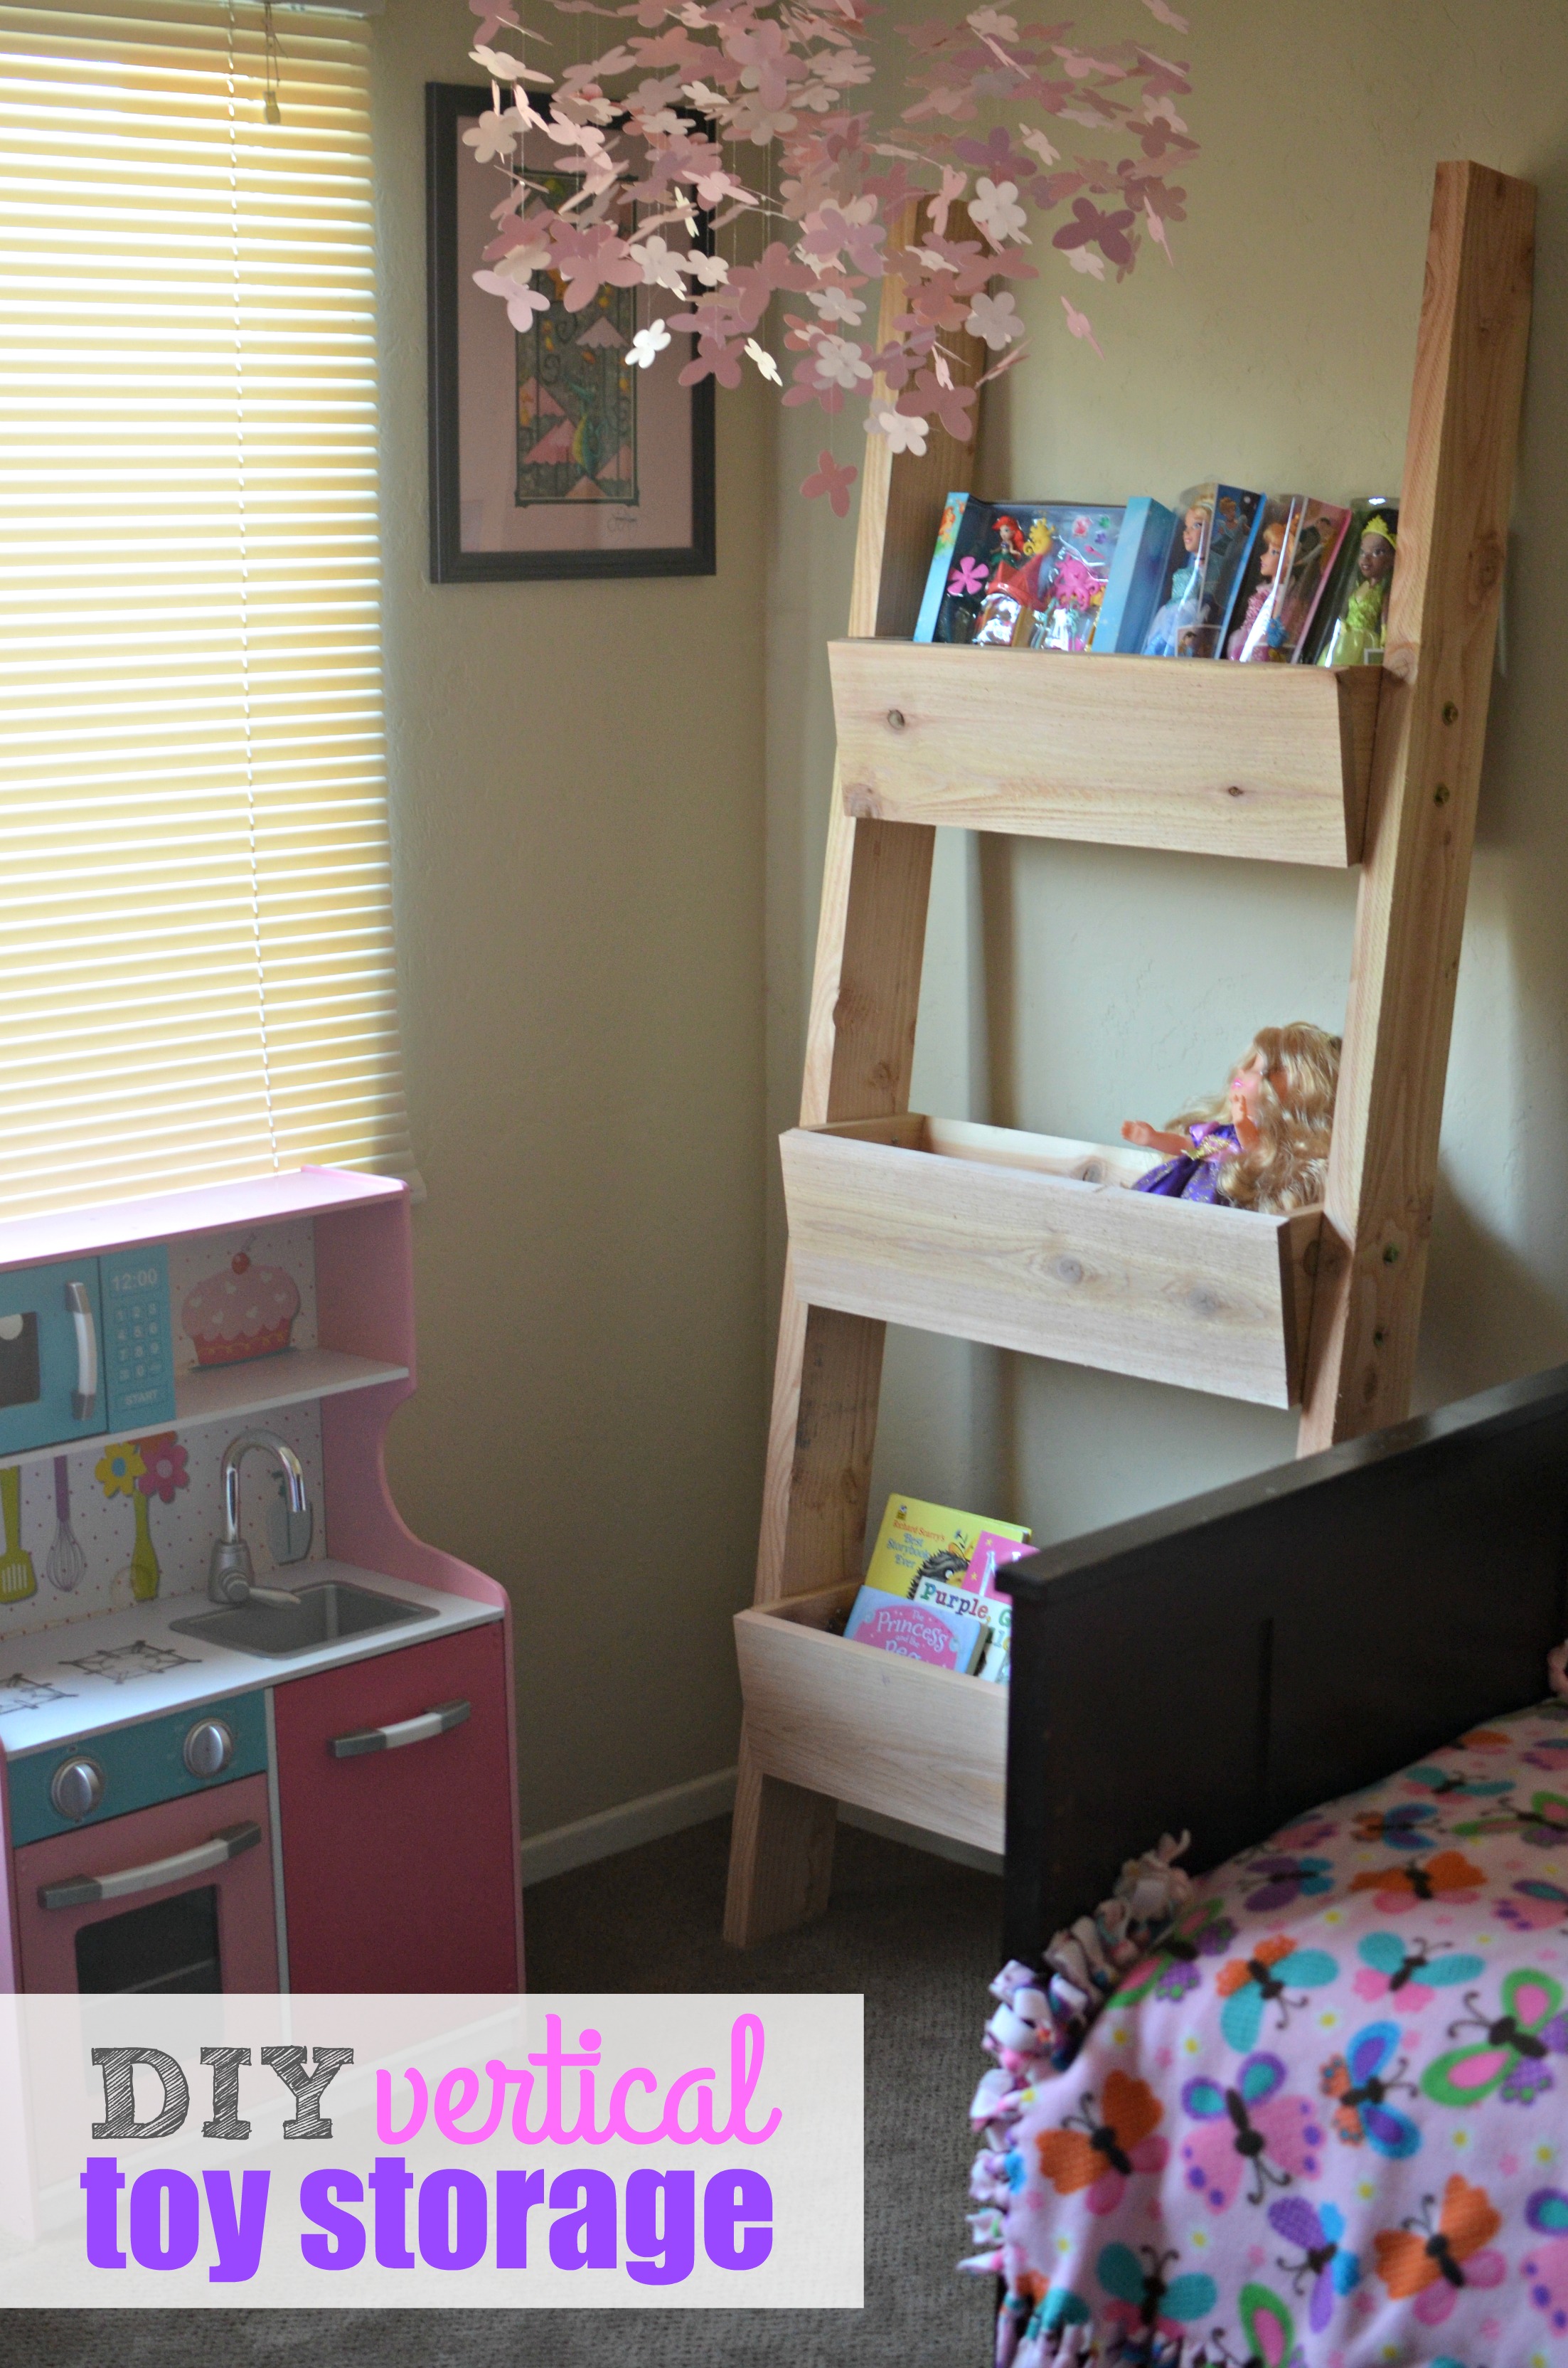
And then she asked if we could make a toy chest for her room so she could put all of the extra toys we collect somewhere as we collect them. Since I’m not one to squash her ideas and dreams, we set fourth to make a great DIY vertical toy storage with her help, of course.  Why not build up her dreams literally and figuratively? 

DIY Vertical Toy Storage - measure twice cut onceDIY Vertical Toy Storage takes focus to build

With the help of a few princesses, some tiny field mice, a dad’s guiding hand, and a mother’s encouragement our project came together quite nicely. I think it’s absolutely amazing that both of our older kids love helping my husband and me with our projects. Whether it’s sanding, glueing, hammering, and even using a drill, they’re up for the challenge. It doesn’t hurt to have a super handy husband who can make just about anything. So when I drew out my vision he was 100% on board with creating a plan. 

Now her new dolls have a home, and we have designated to top box for new toys we’ve collected to donate. At the end of every quarter we’ll collect up our toys and find a local charity in need to donate them to. 

The best part about all of this? Now my youngest will have her own person to look up to and learn from. And I know her sister is going to teach her every thing she knows about following her dreams. Sure she’s only 1, but it’s never too early to encourage them to be strong and think for themselves even if it is a bit difficult at times. I’m up for the challenge! 

DIY Vertical Toy Storage Tutorial top tiers

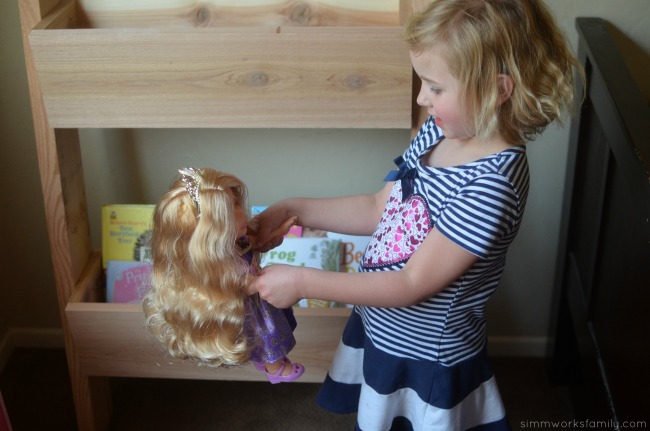
DIY Vertical Toy Storage Tutorial and twirling with princessesDIY Vertical Toy Storage disney princess royal shimmer dolls

DIY Vertical Toy Storage

What you need:

  • 2 2’x6’x8′ doug fir boards
  • 3 1’x8’x8′ western red cedar boards
  • wood glue
  • miter saw
  • 3/8ths inch drill bit + drill
  • pocket screw jig
  • 12 1 1/2″ pocket screws
  • 12 2 1/2″ 5/16ths bolts
  • 12 5/16ths T nuts
  • 12 5/16ths washers

What you do:

Build 3 Boxes

  1. For the first box, cut one 1 x 8 x 8′ board into the following:
    – 2 – 24″ sections (front and back of boxes),
    – 1 – 22 1/2″ section (bottom),
    – 2 – 7 1/2″ section (sides)
  2. Screw and glue the pieces together. 
  3. Repeat again to make 3 boxes total

Build Side Box Supports

  1. Cut 2 x 6 x 8″ boards to 74″ long. These will become the side supports of your vertical storage.
  2. Lean one of the sides against a wall. Put a straight edge on ground against 2 x 6. Trace angle on 2×6. We used a 50 degree angle. Cut along line you have drawn. Transfer angle to other 2 X 6 and cut to match.
  3. Now put straight edge against wall and trace line on 2 X 6. Cut along line. Repeat for other 2 X 6. Both pieces should be identical.

Attach Boxes

  1. Lay one of the 2 x 6’s flat on the ground. Position one of the boxes in the lowest spot (bottom of box should be about 8-12 inches up from bottom of the board). Make sure to adjust box so that it’s level once it is resting on the wall. Next, lay out the second box. Finally position the third.
  2. When happy with the spacing, use screws to attach box to 2 x 6 side. Now put other 2 x 6 side flat on the ground. Flip partially assembled side to rest on 2 x 6. Attach with screws once lined up.
  3. Reinforce with bolts once unit is assembled with screws.

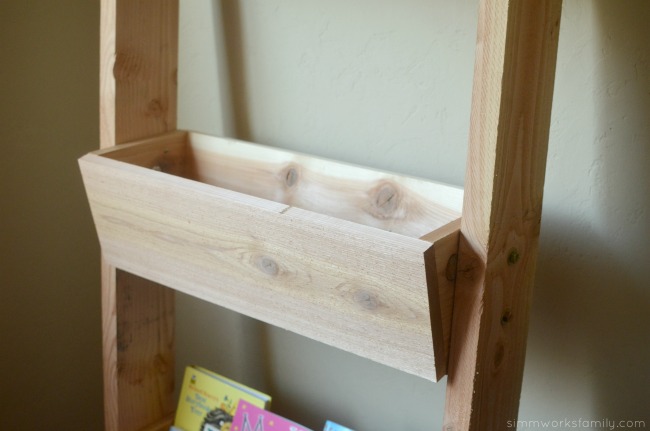
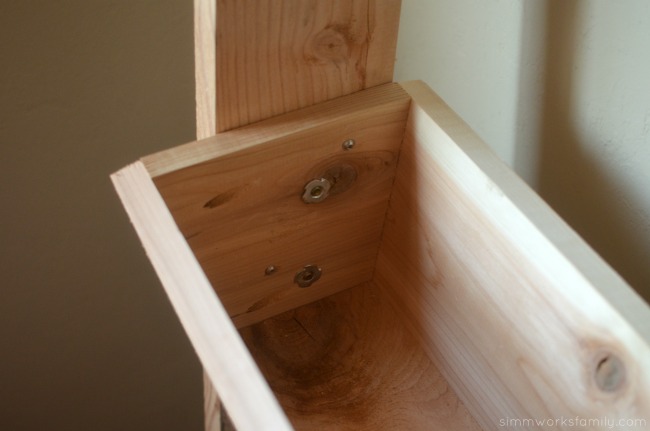
DIY Vertical Toy Storage close up of boxes DIY Vertical Toy Storage inside of box

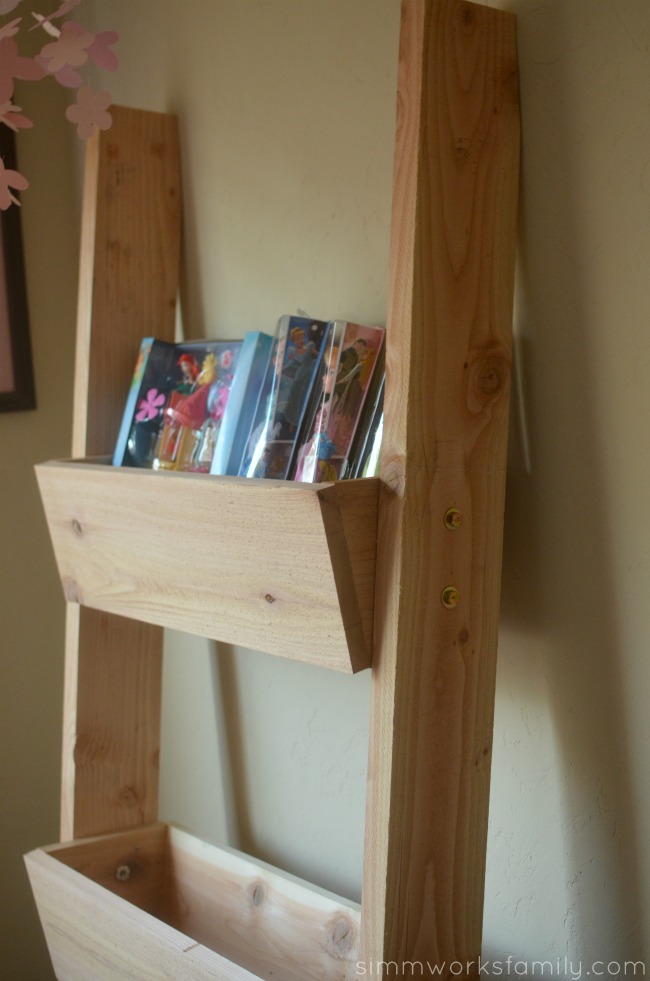
DIY Vertical Toy Storage also good for books

If your daughter is interested in following her dreams and ideas, check out this great video from Disney on how she can be a champion too. You can find the full line of Disney Princesses at Toys ‘R Us including my daughter’s favorite Disney Princess Royal Shimmer Dolls and Little Kingdom Ariel’s Sea Castle. They’re easy to find when you look for the dedicated Disney Princesses aisle in store. 

Dream Big Princess Display at Toys R Us

How do you support your daughter’s dreams?

San Diego Festival of Science & Engineering Expo Day

This post featuring the San Diego Festival of Science and Engineering’s Expo day is sponsored.

SDFSE 2016 Social Media Image EXPO Day TagExcite your mind at the San Diego Festival of Science & Engineering March 5-13.
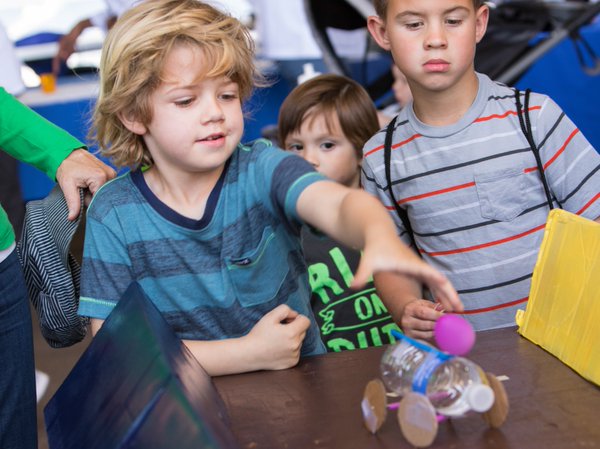

The San Diego Festival of Science & Engineering’s EXPO Day is Saturday, March 5 from 10 a.m. to 5 p.m. and kicks off a celebratory week of learning interaction and behind-the-scenes opportunities for kids in kindergarten through 12th grade and their families to ignite the love for all things STEM.

Join us at PETCO Park for a FREE day of fun for the entire family. Visit with more than 130 local businesses, corporations and organizations providing interactive, hands-on science, technology, engineering and math (STEM) exhibits and activities to budding K-12 science lovers, but everyone is welcome. EXPO DAY is free and open to the public.

Now in its eighth year, festival organizers are expanding their festival event schedule to appeal to adults ages 21 and up, to continue their passion for STEM education. Also new in 2016 is the “STEM in Your Backyard” series, which consists of mini versions of EXPO Day in diverse communities across San Diego, including Vista, Barrio Logan, Chula Vista, City Heights and Downtown San Diego’s East Village. This new series will invite local families of all backgrounds to experience the festival and STEM exhibits in diverse neighborhoods across San Diego County.

SDFSE 2016 Twitter Image 1

A program of the BIOCOM Institute and presented by Illumina, the San Diego Festival of Science & Engineering is partnering up again with the Reuben H. Fleet Science Center to encourage and get kids excited about science and related fields to inspire them to become tomorrow’s STEM innovators. The festival also helps continue our region’s reputation of being a leader in the science industry. The San Diego Festival of Science & Engineering truly shows how science and engineering is right in our “backyard.”

The San Diego Festival of Science & Engineering website has a complete list of Festival Week events. Many of the activities are free and can accommodate school groups, scout troops, and other individuals, students and families.

Go to lovestemsd.org for complete details.

SDFSE-EXPO-Day-IMG_0002-Photo by Melissa Jacobs

Is your child interested in STEM subjects?


© A Crafty Spoonful - All Rights Reserved
It is OK to use one of my photos provided a link back and/or proper credit is given. It is NOT ok to copy and paste a whole post including instructions. Please do not remove watermarks or alter images in any way. Please contact me with any questions at danielle@acraftyspoonful.com

.