Keeping Pests Away: Using Ladybugs In The Garden

Keeping Pests Away Using Ladybugs In The Garden Is A Natural Pesticide

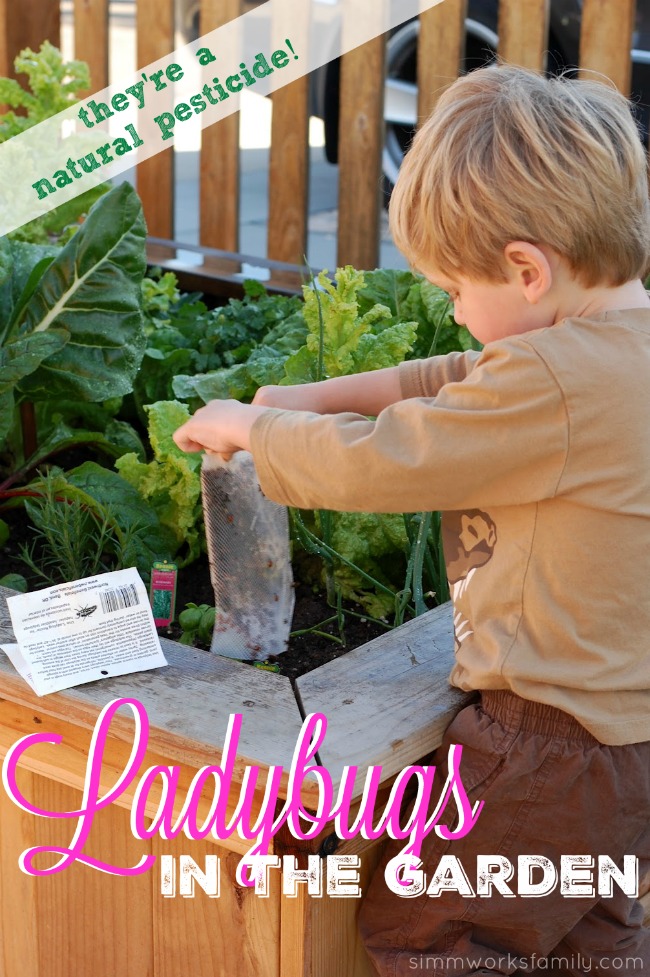
One thing I decided from the beginning when we started our garden was that I didn’t want to use any chemical pesticides. I’ve been very diligent about not using chemicals in the home so why would I use them in the garden? Especially on plants we grow to eat. So when I started to see little aphids I quickly went in search of a solution. And happily found out that ladybugs were the answer! How awesome is that?

My lettuce, celery, broccoli, and various other veggies and fruit (gotta remember those strawberries!) needed some protection so we headed out to find us some ladybugs. And we found ours at Armstrong Garden Centers over Ladybug weekend a few years back. And we keep going every year to enjoy the ladybugs. What’s Ladybug Weekend? It’s when one free packet of ladybugs harvested from colonies in California’s foothills will be handed out to Armstrong Garden Centers customers at check-out with purchase while supplies last

 And this year it will take place on Saturday, April 23 and Sunday, April 24 at all 32 Armstrong Garden Centers locations. Armstrong Garden Centers anticipates giving away two million of these “good bugs” to encourage healthy lawns and gardens. How cool is that? 

Known for their unique red and black colors, ladybugs will stay in your garden as long as there is something to eat. It is okay if the insects leave because it means that your garden is clean and the ladybugs have moved on to help your neighbor’s yard.
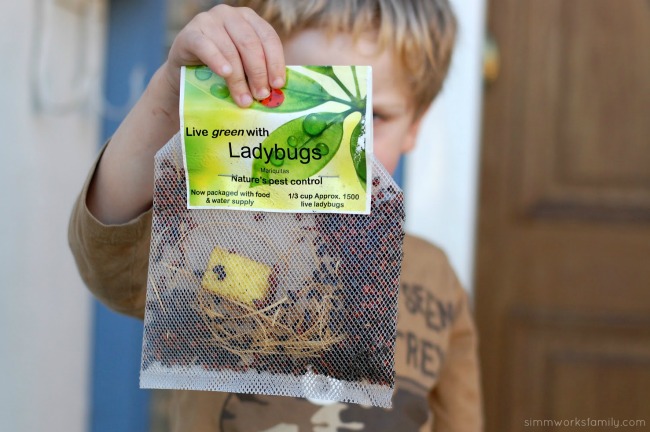
Keeping Pests Away Using Ladybugs In The Garden

To celebrate ladybug weekend, the following free classes will be available at all Armstrong Garden Centers stores:

  • Saturday, April 23 at 9:00 a.m. – Ladybugs and Other Good Bugs – Many insects are excellent garden helpers. Learn which plants are best for attracting these beneficial insects along with how they can help your garden flourish.
  • Sunday, April 24 at 10:00 a.m. – Organic Gardening – Learn everything you need to know from building soil health to problem-solving using organic products and techniques.
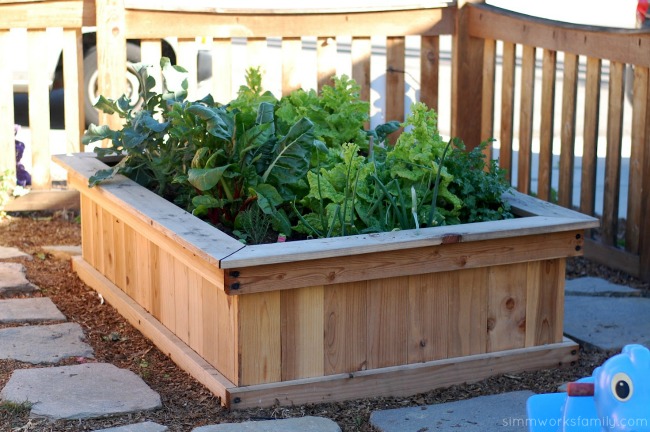
Keeping Pests Away Using Ladybugs In Our Garden

Why Ladybugs?

Ladybugs are great at keeping pests out of your garden. A few pests they take care of are:

  • Whitefly
  • Scales
  • Mites
  • Mealybugs
  • Broccoli Worm
  • Tomato Hornworm
  • Bollworm
  • Cabbage Moth

If you have signs of any of these pests you might want to consider picking up some ladybugs at your local gardening store to release in your garden. To find out more about using ladybugs to keep pests at bay check out this awesome website all about ladybugs, Everything Ladybug!

Here are a few tips on releasing the ladybugs into the garden:
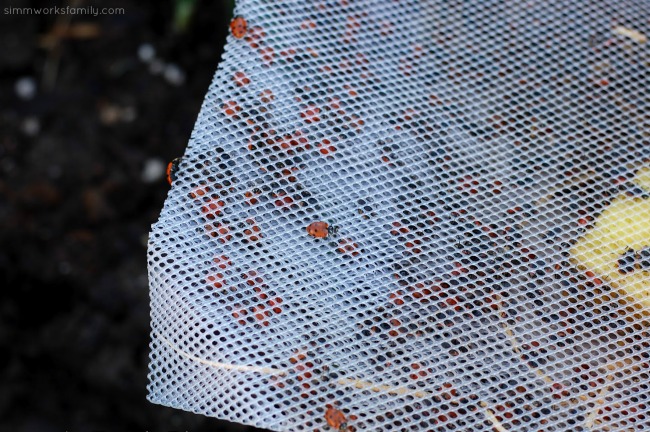
Keeping Pests Away Using Ladybugs In The Garden - in a bag

1. Wet the garden bed. Ladybugs love moisture. If you want them to stay in your garden and not move onto the next you really don’t want to skip this step.

2. Open up the container and let the ladybugs start to crawl up and out.
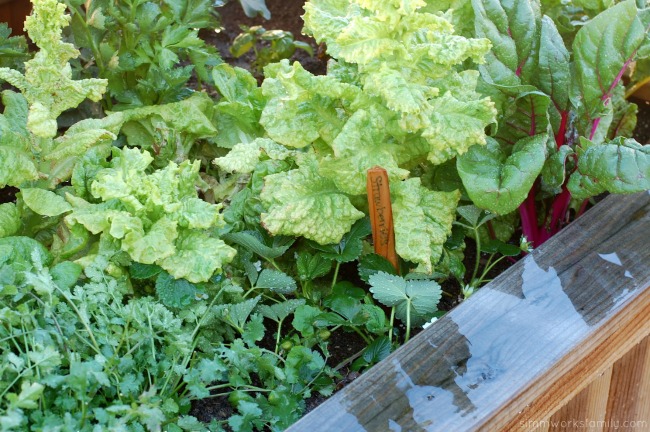
Keeping Pests Away Using Ladybugs In The Garden and strawberries

3. Let your three year old shake the container over all parts of the garden. You don’t want all of the ladybugs in one area. (The three year old isn’t necessary but makes a fun adventure!)

4. Watch as the ladybugs wake up and start moving. The ladybugs might take a few minutes to perk up but soon they’ll start crawling all over and exploring your garden. A good amount of the ladybugs will leave to other gardens but a surprising amount stay.

Watch the little guys for a bit at your child’s level. You’ll be amazed at the sheer joy your little ones find in this activity!
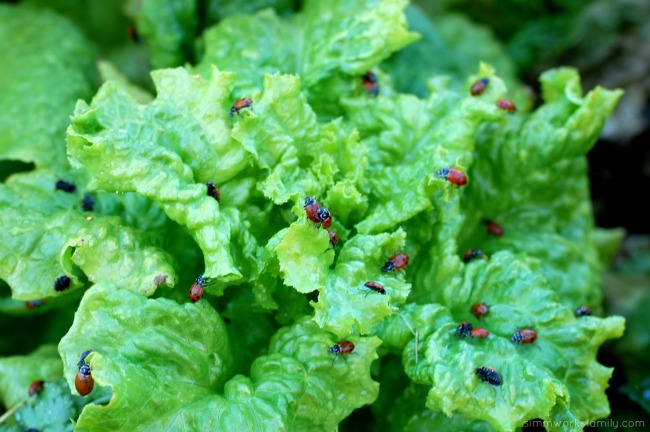
Keeping Pests Away Using Ladybugs In The Garden crawling around

5. Continue to mist the garden with the lady bugs twice a day. Just enough to make sure that the dirt and plants are moist and the ladybugs have water to drink.

You can also mist the garden with a 1:1 ratio of sugar based soda to water. This will make the ladybug’s wings sticky and will allow them to explore your garden instead of flying away. This solution works for about a week and then wears off.
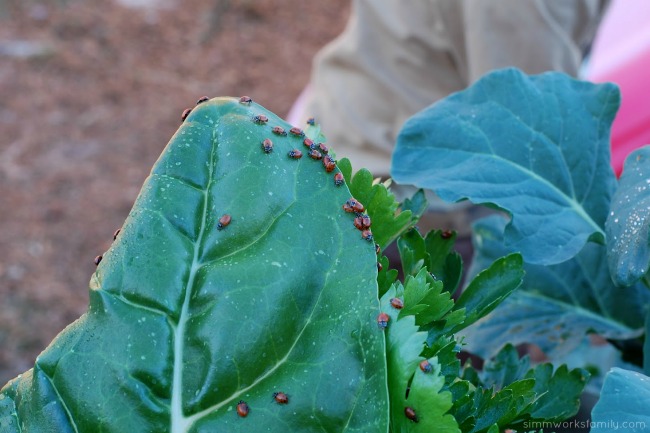
Keeping Pests Away Using Ladybugs In The Garden spreading out

Have you released ladybugs in your garden before?

* The photos in this post are a flashback to our March 2012 ladybug adventure 🙂
Teaching My Daughter To Find Her Dreams + a DIY Vertical Toy Storage Tutorial

This shop featuring a tutorial on DIY Vertical Toy Storage has been compensated by Collective Bias, Inc. and its advertiser. All opinions are mine alone. #InspireBigDreams #DreamBigPrincess #CollectiveBias

DIY Vertical Toy Storage Tutorial

My daughter. She is so strong. She’s always known what she wanted since she was a small child. I’m sure many of my family members remembered how she’d refuse a bottle because she knew she only wanted to nurse. She’d make my husband drive her all the way to my work to nurse her at lunch time. And then would wait until I got home to eat again. She still, to this day, knows exactly what she wants. And for the most part she knows how to get it.

From finishing fun projects she’s set out to start, to learning new things and going on fun exploratory journeys to do so. She is so brave. And so generous. And just the kindest girl I know. Sometimes I look at her and wonder how I got so lucky to have a daughter like her. She’s a lot like some of her favorite Disney Princesses. Inquisitive like Ariel, adventurous like Rapunzel, and smart like Tiana.

The other day she came to me asking if she could help kids who might not have as much as her. We had talked about how blessed we are as a family a few nights prior and how much we have after one of the kids had a meltdown after not getting a toy at a store. We went over how not everyone was blessed enough to have a huge birthday party every year, or is able to go to theme parks with their family, or even get new toys at Christmas and on birthdays. So my sweet girl asked how she could help make sure other kids got the gifts and toys they deserved. How could I not help her with this?

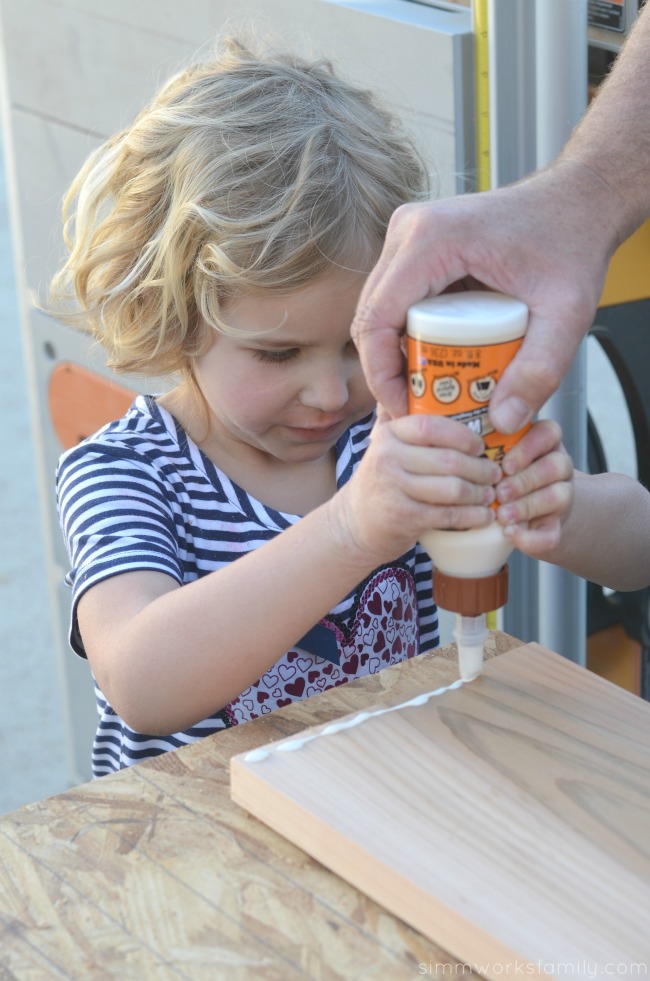
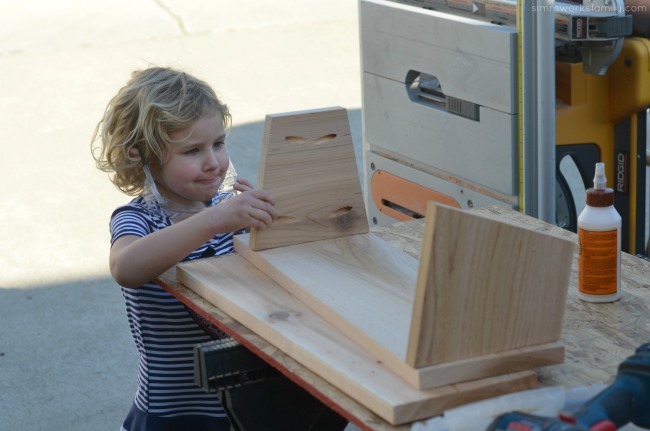
Building a DIY Vertical Toy Storage needs precise measurementsDIY Vertical Toy Storage - glue pieces before screwing together

So we set out to make a list of all of the places we could ask for donations. We also thought about how we could also chip in a bit to purchase new toys. And we came up with a game plan. Any time we head over to Toys ‘R Us to window shop or pick out a gift, we’re going to grab one extra. Guess what Molly’s doing to help? She’s saving up her dollars to use on the extras we purchase. Yup! She thought of that all by herself too. That kid. She makes me proud. 

And then she asked if we could make a toy chest for her room so she could put all of the extra toys we collect somewhere as we collect them. Since I’m not one to squash her ideas and dreams, we set fourth to make a great DIY vertical toy storage with her help, of course.  Why not build up her dreams literally and figuratively? 

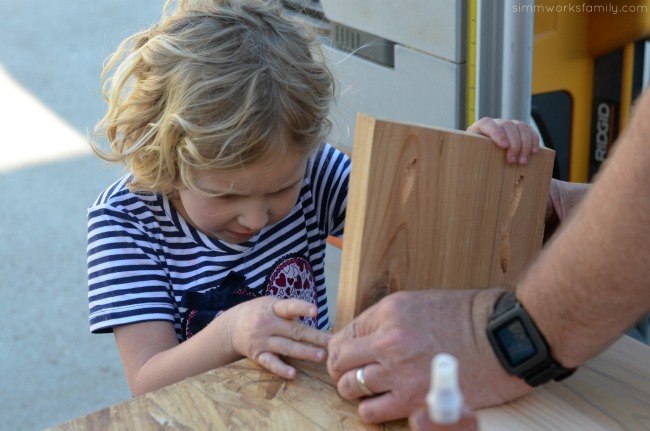
DIY Vertical Toy Storage - measure twice cut onceDIY Vertical Toy Storage takes focus to build

With the help of a few princesses, some tiny field mice, a dad’s guiding hand, and a mother’s encouragement our project came together quite nicely. I think it’s absolutely amazing that both of our older kids love helping my husband and me with our projects. Whether it’s sanding, glueing, hammering, and even using a drill, they’re up for the challenge. It doesn’t hurt to have a super handy husband who can make just about anything. So when I drew out my vision he was 100% on board with creating a plan. 

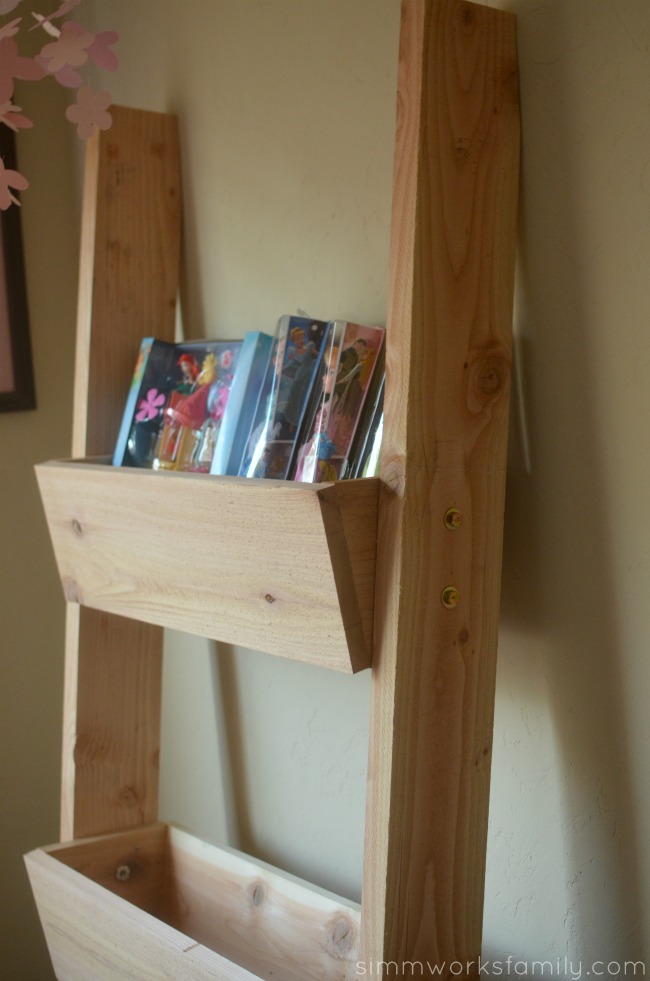
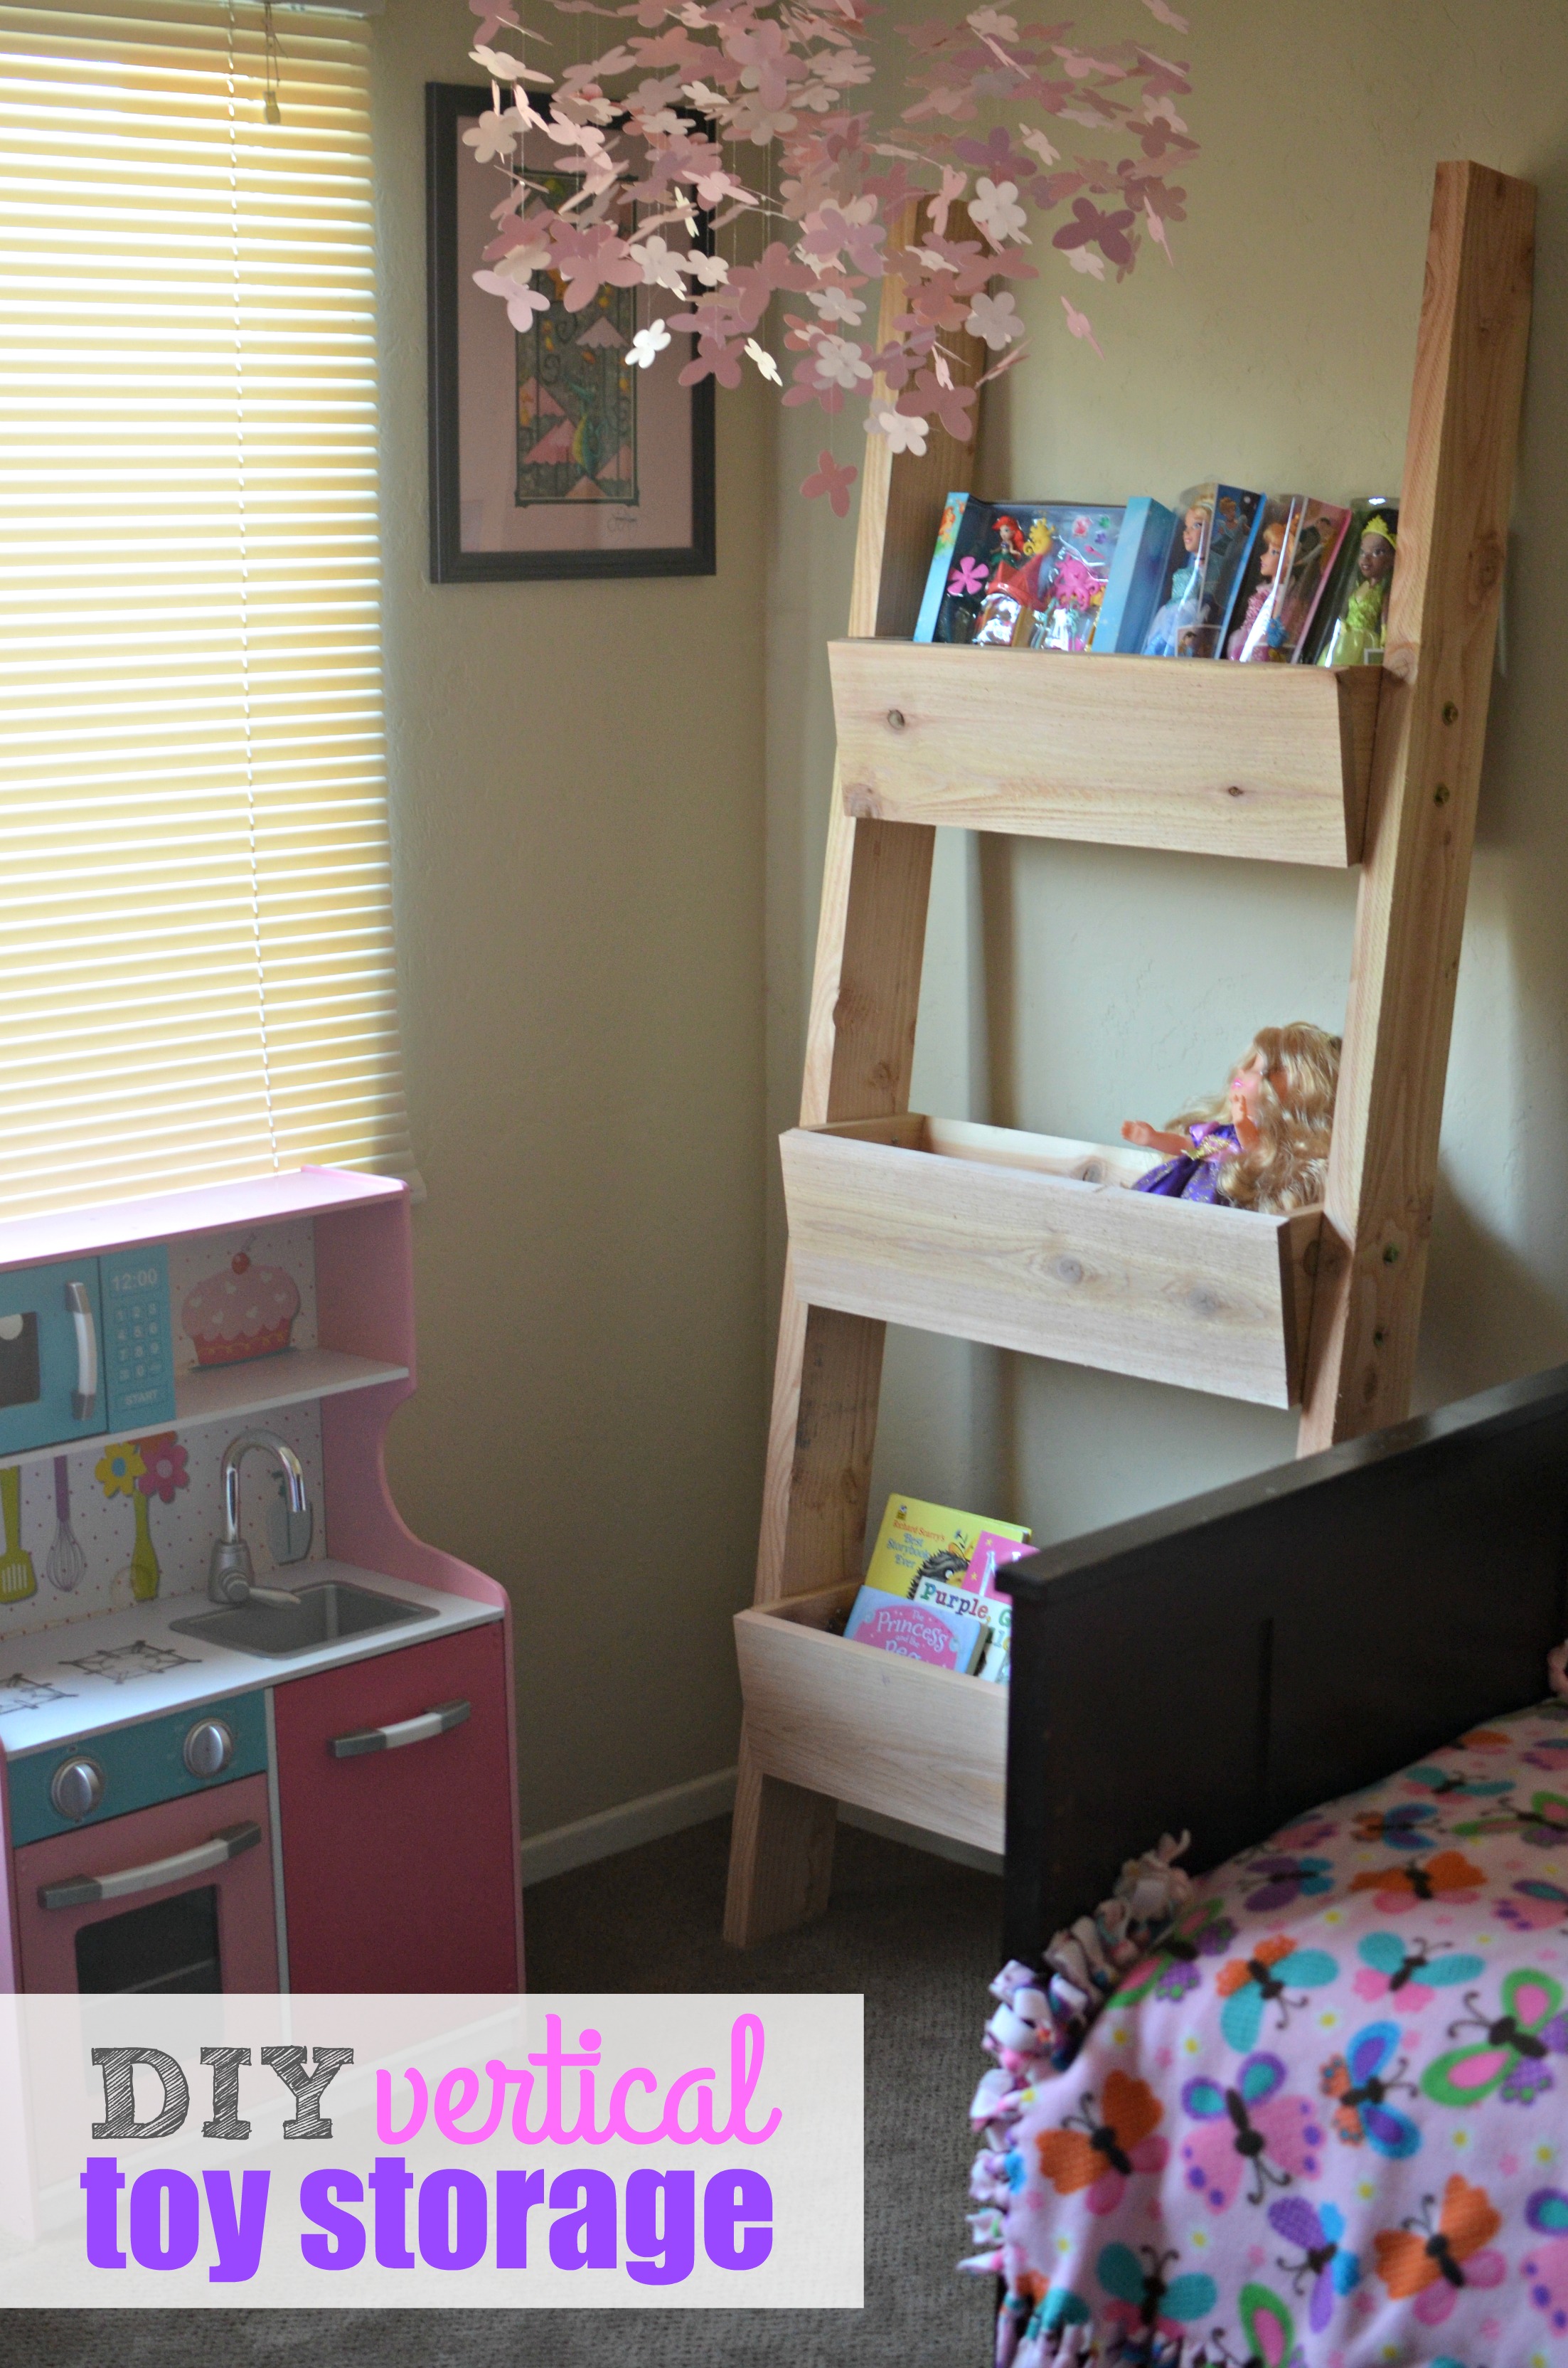
Now her new dolls have a home, and we have designated to top box for new toys we’ve collected to donate. At the end of every quarter we’ll collect up our toys and find a local charity in need to donate them to. 

The best part about all of this? Now my youngest will have her own person to look up to and learn from. And I know her sister is going to teach her every thing she knows about following her dreams. Sure she’s only 1, but it’s never too early to encourage them to be strong and think for themselves even if it is a bit difficult at times. I’m up for the challenge! 

DIY Vertical Toy Storage Tutorial top tiers

DIY Vertical Toy Storage Tutorial and twirling with princessesDIY Vertical Toy Storage disney princess royal shimmer dolls

DIY Vertical Toy Storage

What you need:

  • 2 2’x6’x8′ doug fir boards
  • 3 1’x8’x8′ western red cedar boards
  • wood glue
  • miter saw
  • 3/8ths inch drill bit + drill
  • pocket screw jig
  • 12 1 1/2″ pocket screws
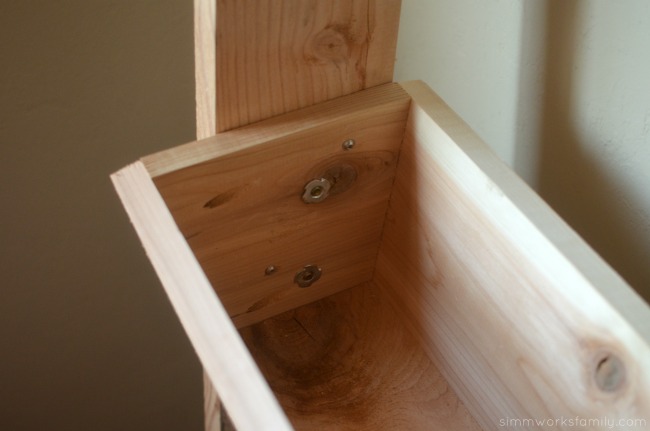
  • 12 2 1/2″ 5/16ths bolts
  • 12 5/16ths T nuts
  • 12 5/16ths washers

What you do:

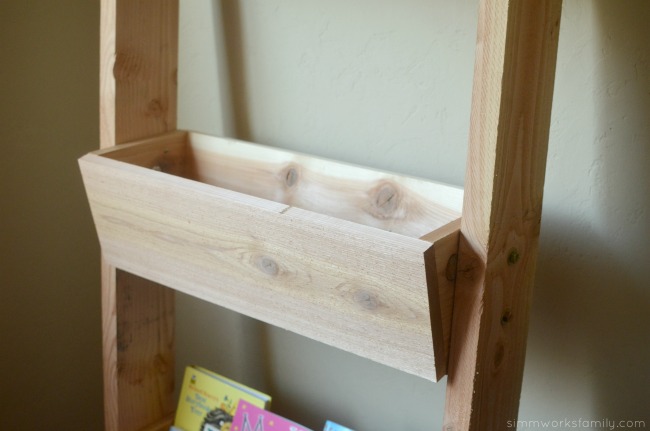
Build 3 Boxes

  1. For the first box, cut one 1 x 8 x 8′ board into the following:
    – 2 – 24″ sections (front and back of boxes),
    – 1 – 22 1/2″ section (bottom),
    – 2 – 7 1/2″ section (sides)
  2. Screw and glue the pieces together. 
  3. Repeat again to make 3 boxes total

Build Side Box Supports

  1. Cut 2 x 6 x 8″ boards to 74″ long. These will become the side supports of your vertical storage.
  2. Lean one of the sides against a wall. Put a straight edge on ground against 2 x 6. Trace angle on 2×6. We used a 50 degree angle. Cut along line you have drawn. Transfer angle to other 2 X 6 and cut to match.
  3. Now put straight edge against wall and trace line on 2 X 6. Cut along line. Repeat for other 2 X 6. Both pieces should be identical.

Attach Boxes

  1. Lay one of the 2 x 6’s flat on the ground. Position one of the boxes in the lowest spot (bottom of box should be about 8-12 inches up from bottom of the board). Make sure to adjust box so that it’s level once it is resting on the wall. Next, lay out the second box. Finally position the third.
  2. When happy with the spacing, use screws to attach box to 2 x 6 side. Now put other 2 x 6 side flat on the ground. Flip partially assembled side to rest on 2 x 6. Attach with screws once lined up.
  3. Reinforce with bolts once unit is assembled with screws.

DIY Vertical Toy Storage close up of boxes DIY Vertical Toy Storage inside of box

DIY Vertical Toy Storage also good for books

If your daughter is interested in following her dreams and ideas, check out this great video from Disney on how she can be a champion too. You can find the full line of Disney Princesses at Toys ‘R Us including my daughter’s favorite Disney Princess Royal Shimmer Dolls and Little Kingdom Ariel’s Sea Castle. They’re easy to find when you look for the dedicated Disney Princesses aisle in store. 

Dream Big Princess Display at Toys R Us

How do you support your daughter’s dreams?

How To Make A Glass Vase Out Of A Coke Bottle

This shop featuring how to make a glass vase out of a Coke bottle has been compensated by Collective Bias, Inc. and its advertiser. All opinions are mine alone. #MyFavoriteIsAllMine #CollectiveBias

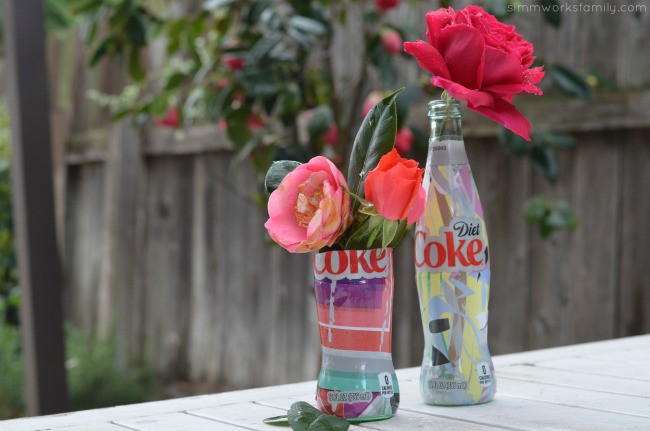
How To Make A Glass Vase Out Of A Coke Bottle - the perfect way to display garden roses

Last year I attended a Mom’s Night Out event at an awesome local store that repurposed glass bottles into various pieces. One thing that stood out to me were the various drinking glasses that they made from upcycled glass bottles. Another thing that stood out was the steep price tag. So after a bit of digging around I came across a few different tutorials on how to make my own drinking glasses from glass bottles and while I haven’t perfected it yet, I have created an awesome glass vase out of a coke bottle.

On a recent trip to Vons, I found these gorgeous Diet Coke It’s Mine bottles while shopping for an event I’m hosting at my home. These new, uniquely packaged bottles showcase Diet Coke in a creative way and no two glass bottles are the same! After perusing the designs on display, I chose a few that complimented each other. Their colors reminded me of the blooming flowers we have in our back yard and the hints of spring all around us.

Diet Coke It's Mine bottles at Vons

Selfie Your Way To Primetime TV’s Biggest Award Show

In addition to being awesome, these bottles could get you into Primetime TV’s biggest awards show!

You could win 1 of 10 VIP prize packages for 2 to Los Angeles to see Primetime TV’s Biggest Awards show coming up in September! (packages include: hotel, travel gift card, pre-party reception, exclusive gift bag and tickets to the awards show.)

Snap a selfie with your favorite Diet Coke It’s Mine branded bottle/can on Twitter OR Instagram with the hashtag #ItsAllMineSweepstakes for a chance to win. You may register between February 3rd, 2016 and April 26th, 2016.  Winners will be selected around April 27, 2016.

Make sure to follow these rules: 

  • Twitter: Your account settings must be set to “unprotected” and/or “public” in order for your Tweets to be viewable to enter into the sweepstakes.
  • Instagram: In order for your entry to be valid, your Instagram profile must be public.

How To Make A Glass Vase Out Of A Coke Bottle with roses

Once back home it was time to start testing out my new project. And after a few failed attempts, I finally created a beautiful glass vase to display the flowers we have in the back yard. I’m hoping my next attempt might even yield the drinking glasses I was hoping to create. Once I do master the skill of creating drinking glasses, I’ll be creating a gift basket for our school’s Gala along with other Coca Cola goodies (and my favorite Diet Coke It’s Mine bottles).

How To Make A Glass Vase Out Of A Coke Bottle with Diet Coke

How To Make A Glass Vase Out Of A Coke Bottle

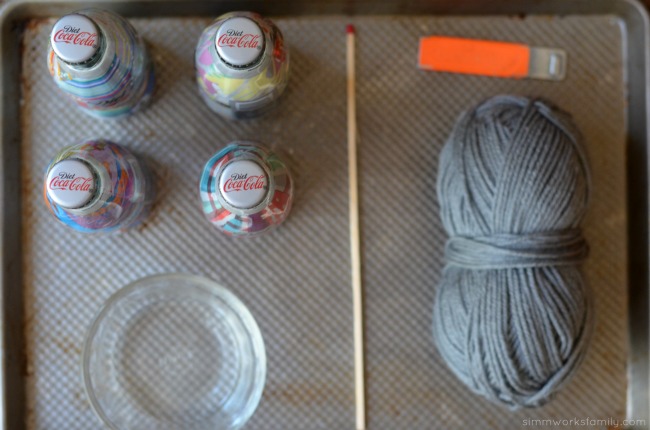
What you’ll need: 

  • Diet Coke bottle
  • Yarn
  • Acetone
  • match or lighter
  • scissors/straight edge razor
  • ice bath
  • sand paper
  • adhesive roller

How To Make A Glass Vase Out Of A Coke Bottle materials
What you do: 

1. Grab a Diet Coke It’s Mine bottle and enjoy the deliciousness inside. Once you’re done with your beverage, remove the plastic decorative packaging with scissors or a straight edge razor.

2. Wrap the yarn around the bottle 5 times in the spot you want the glass top to be. Tie a knot and cut off the edges.

3. Remove the yarn from the bottle keeping it together in the same shape and soak in acetone for about 20-30 seconds until well soaked.

4. Place the yarn back on the bottle and make sure it lines up where you want it to be.

5. With an ice bath close by*, light the yarn on fire and turn the bottle slowly while the yarn burns until the flame is gone.

6. Submerge the glass into the ice bath.

7. If the glass doesn’t break after the first attempt, repeat 1-2 more times until it does making sure the yarn soaks well and the ice bath is super cold.

8. Once the top breaks off, use a sheet of sand paper to sand down the rough edges around the glass. Be aware that it may take a few attempts/bottles to get the method down right.

9. Once the top of the vase is sanded, grab the beautiful It’s Mine Diet Coke bottle and wrap it around the vase. Cut it down to the size of the vase and use adhesive to adhere back onto the bottle.

10. Add flowers and enjoy!

* I suggest using a separate container for your ice bath and not your sink due to the chance of broken glass.


How To Make A Glass Vase Out Of A Coke Bottle using the new Its Mine Diet Coke bottles

For more information on the sweepstakes and to discover your entry visit http://cbi.as/2edqu.

Find the video tutorial here:

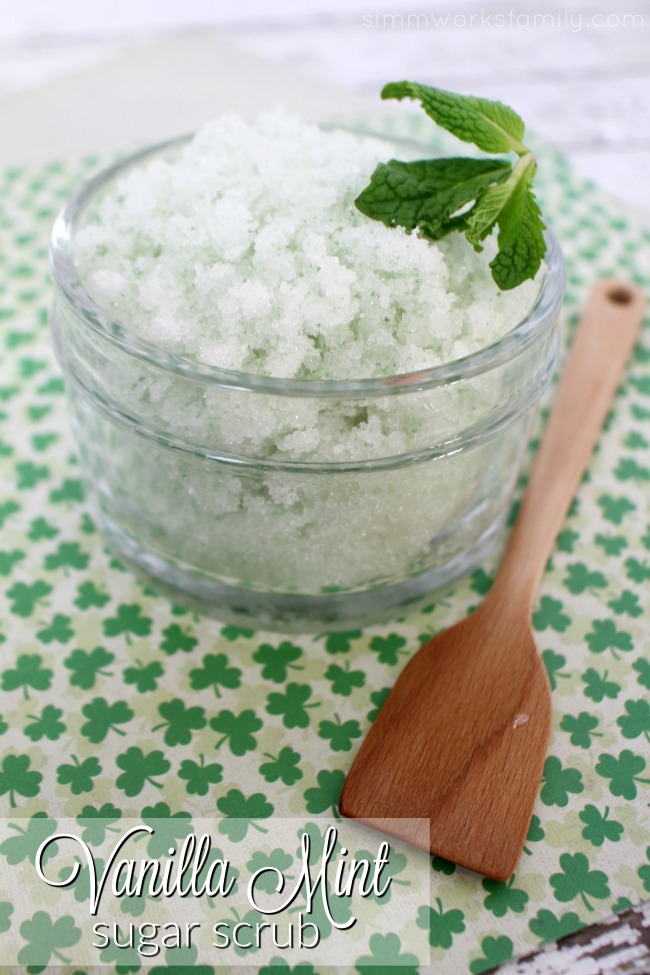
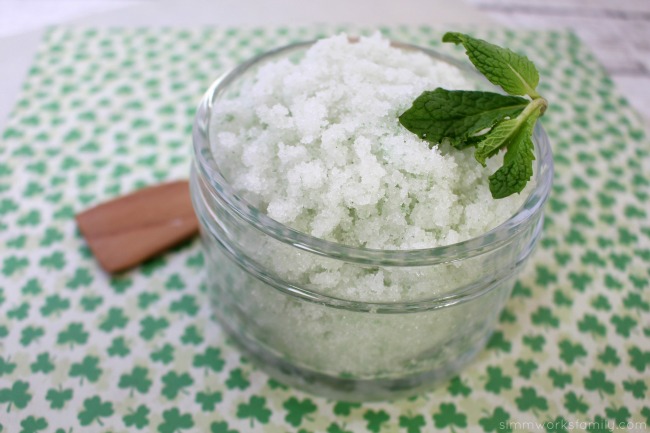
Vanilla Mint Sugar Scrub

Vanilla Mint Sugar Scrub

One thing I miss about our old house is the soaking tub we installed in the guest bathroom shortly after our son was born. I knew I wanted a great tub for bathtime and a deeper one would hold in all of the water for splashing. Plus I love to take baths so it’d be a great way for me to relax as well.

Our current bathrooms have shallow bathtubs that don’t allow much room for soaking. So I have to do all of my relaxing in the shower. Luckily I’ve made a few sugar scrubs to help make the shower just as relaxing as my old soaks in the tub. This vanilla mint sugar scrub would also be a great gift for St. Patrick’s Day. Or you could make  a salt scrub and pair the two together for Valentine’s Day.

Vanilla Mint Sugar Scrub - a great way to relax

Vanilla Mint Sugar Scrub

In a medium mixing bowl, add the sugar and sea salt.
Add the remaining ingredients and mix with a fork until well incorporated.
Transfer to an airtight container.
Enjoy in the shower or while soaking in the tub. You can store this Vanilla Mint Sugar Scrub up to 6 months but more than likely, it will be used before then…the smell is so soothing and calming!

How do you relax at the end of the day?

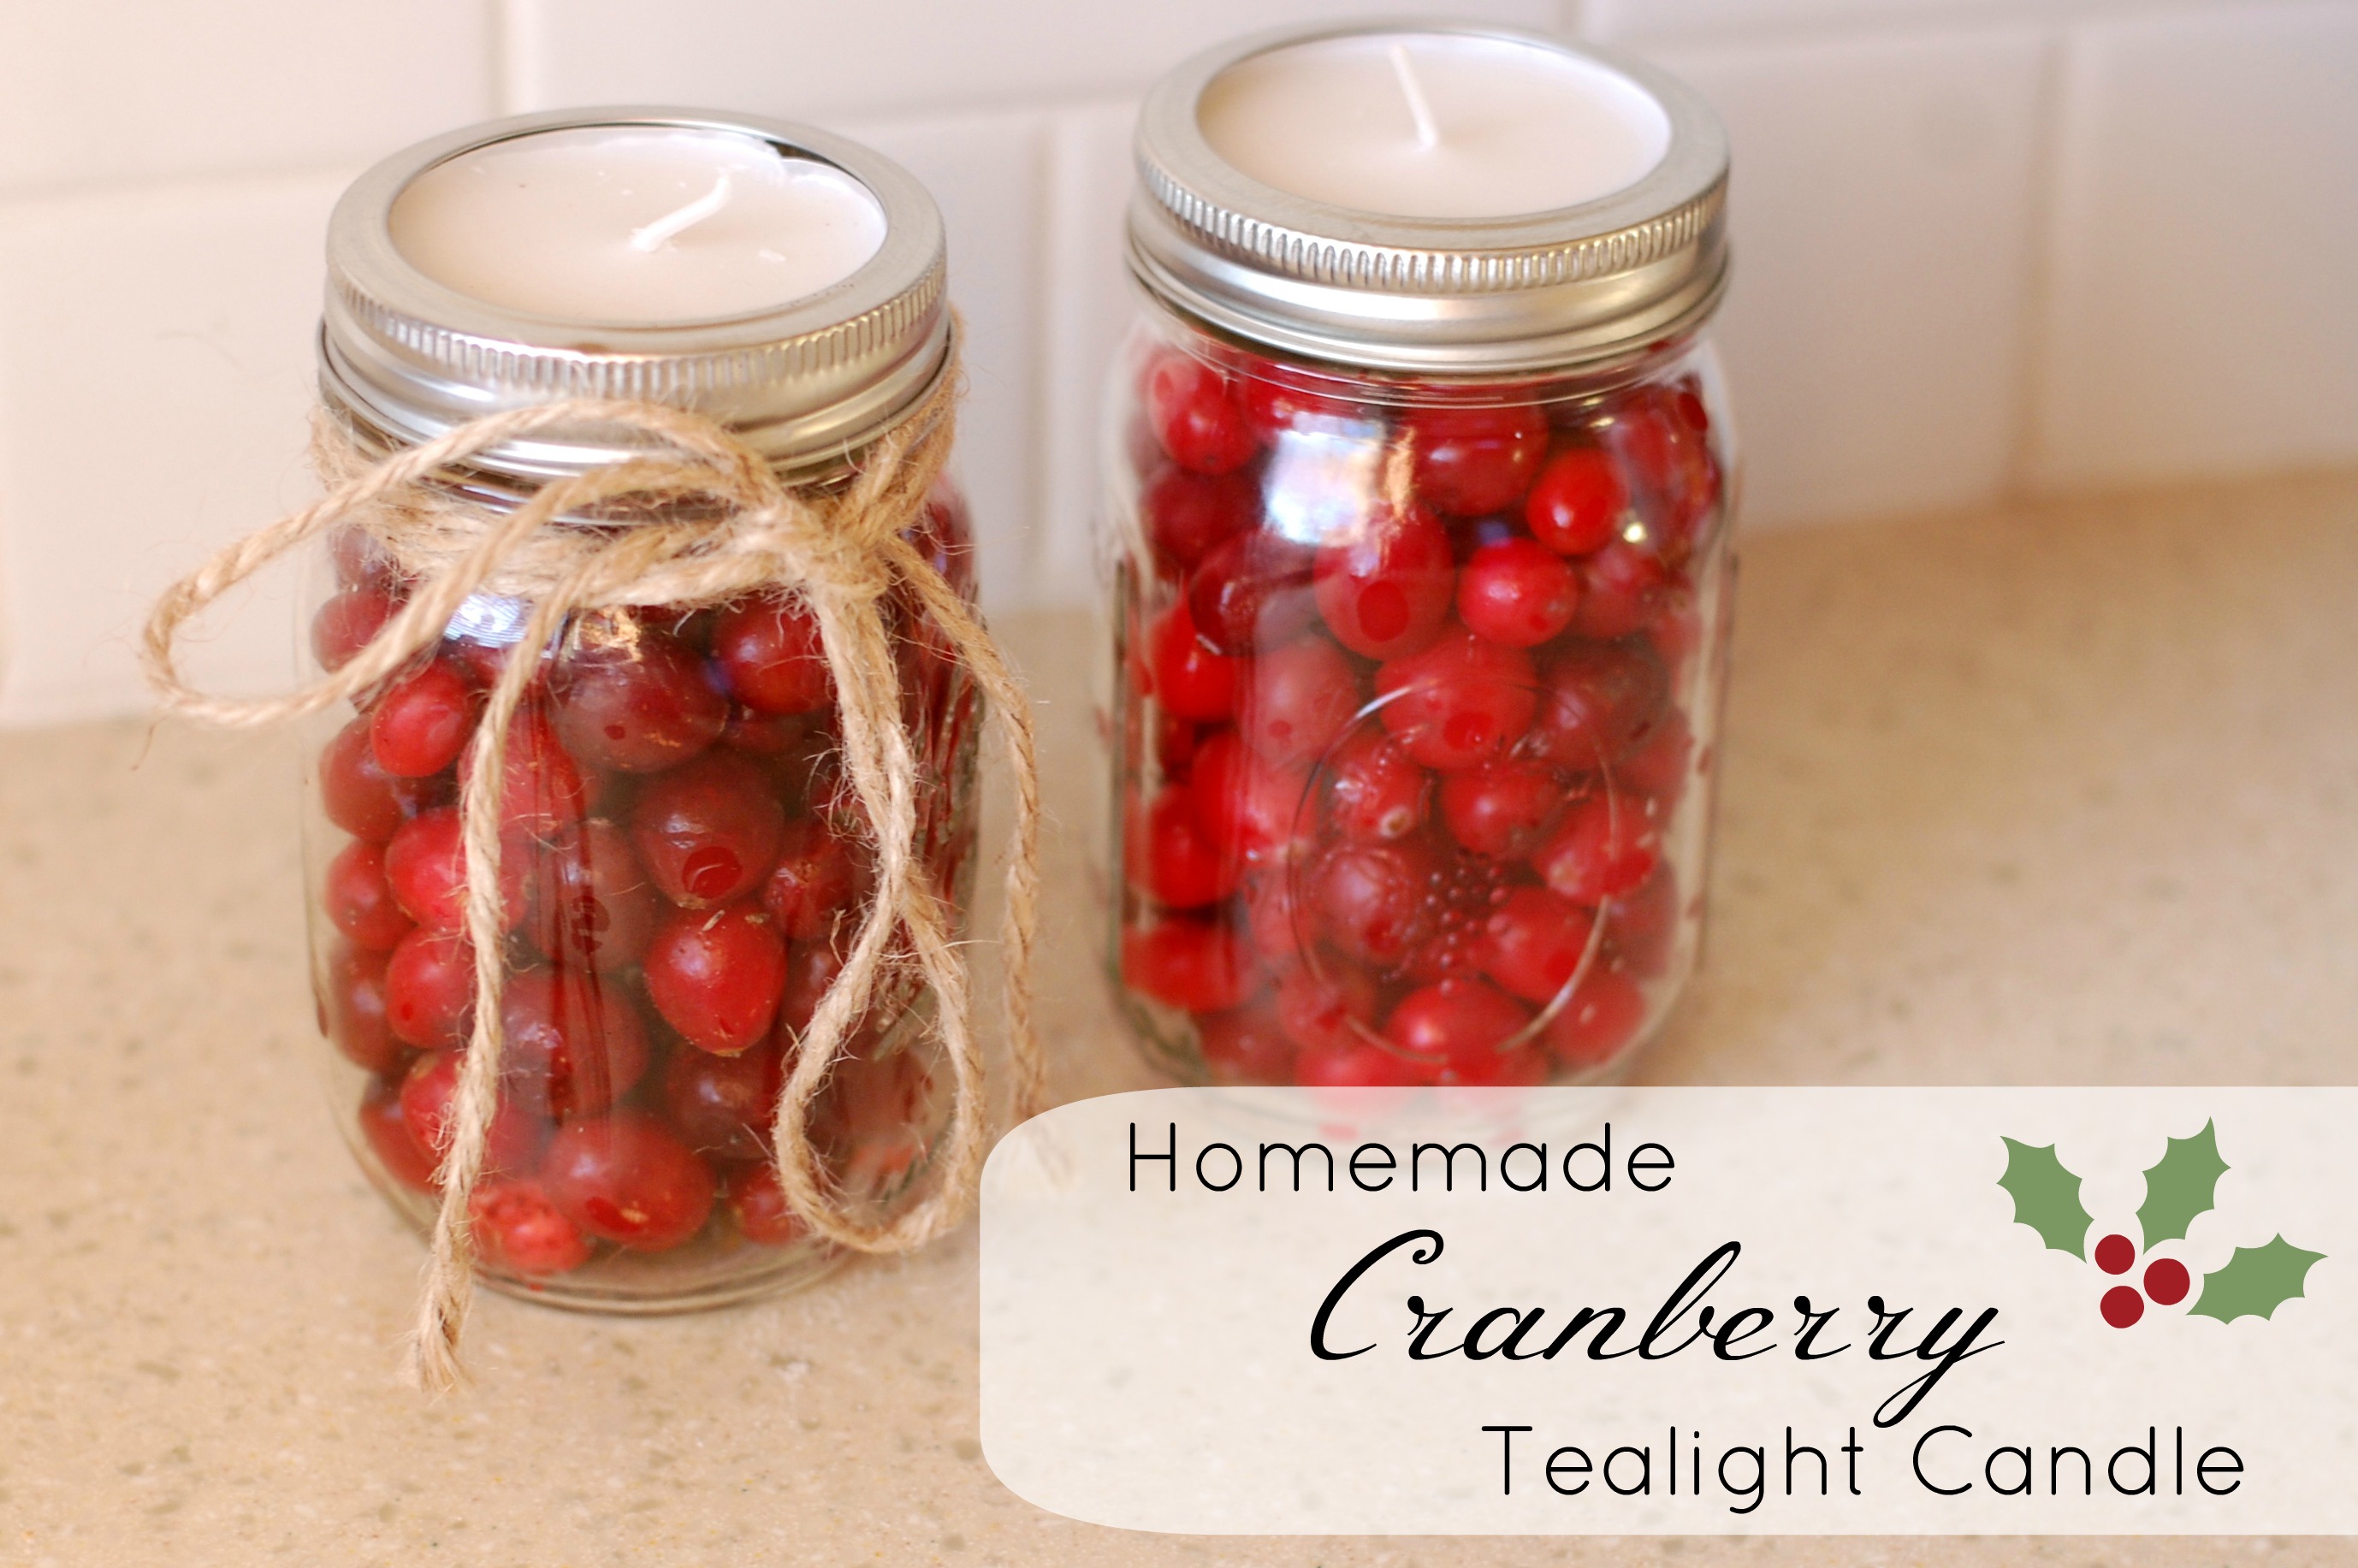
Homemade Cranberry Tealight Candles

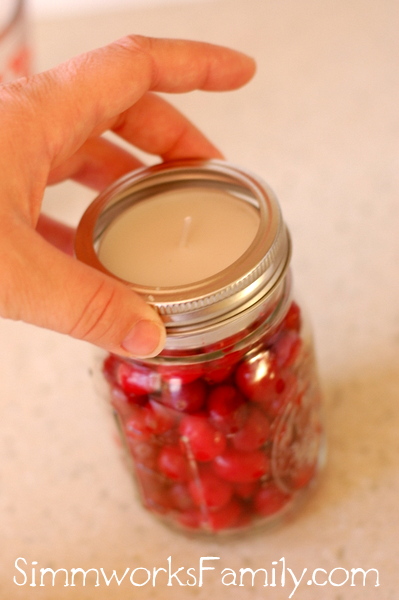
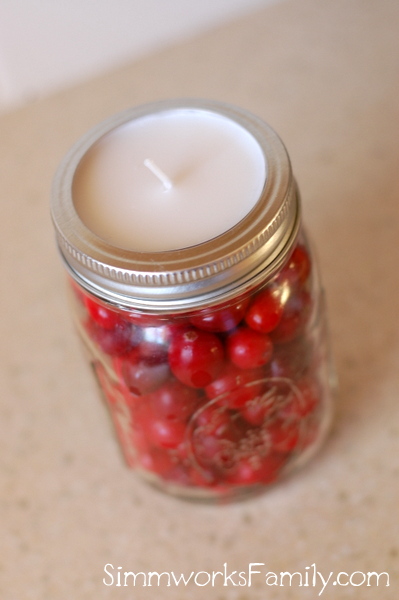
Homemade Cranberry Tealight Candle

During the holidays I’m always looking for easy DIY ways to decorate the house. I also love any decoration that could be turned into a makeshift gift. After a little trip to Ikea I found these awesome larger tealight candles that are perfect for making my own candles for different seasons.

This homemade cranberry tealight candle takes a mason jar, some cranberries, and a tealight and makes it into so much more! If you have a few of these supplies lying around why not try your hand at making your own decorative candle for the holidays. Add a bit of twine and you have the perfect centerpiece or mantle display.

How to Make a Homemade Cranberry Tealight Candle

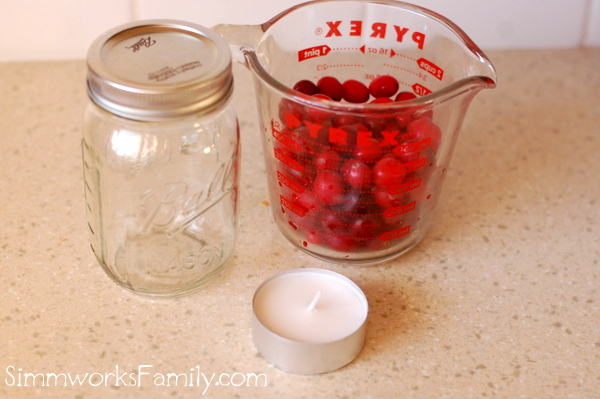
What you’ll need:

  • regular mouth pint sized mason jars
  • bag of cranberries
  • Ikea GLIMMA candles
  • twine (optional)

Homemade Cranberry Tealight Candles supplies

What you do:

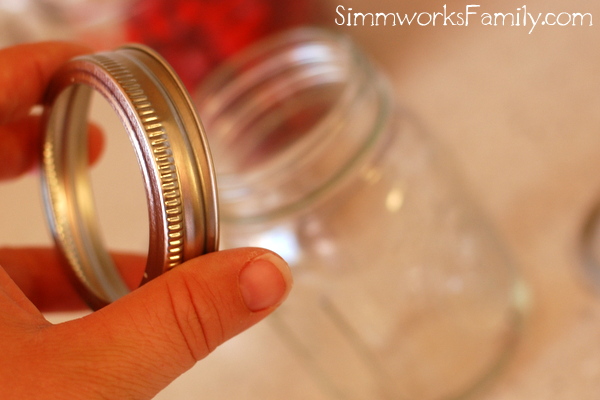
1. Take lid off mason jar and discard flat disc.

Homemade Cranberry Tealight Candles take off lid

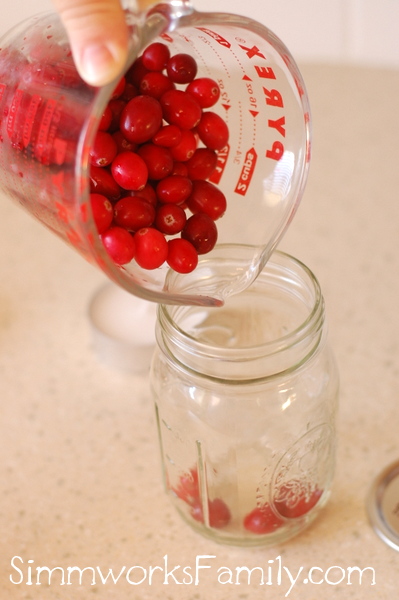
2. Pour in cranberries.

Homemade Cranberry Tealight Candles  pour in cranberries

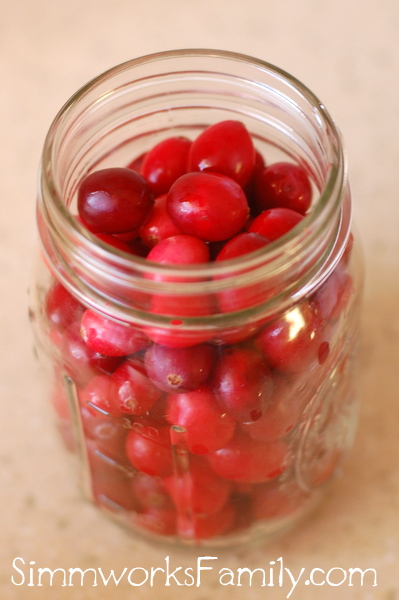
3. Stop at the fill line right below the neck of the jar.

Homemade Cranberry Tealight Candles fill to below lid line

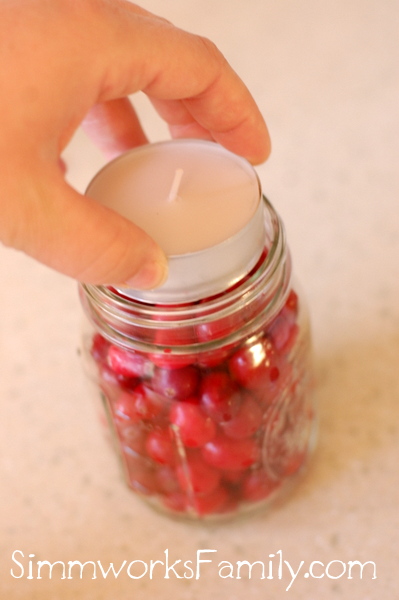
4. Place the candle on top of the berries. Make sure it’s flush with the top of the jar.

Homemade Cranberry Tealight Candles add tealight

5. Screw on the lid.

Homemade Cranberry Tealight Candles screw on cap

6. Embellish with twine, or ribbon, and enjoy your candle!

Homemade Cranberry Tealight Candles finished

How do you create a festive atmosphere around the holidays?

This giveaway is now closed!

thisorthatbutton

How To Make Salt Dough Ornaments

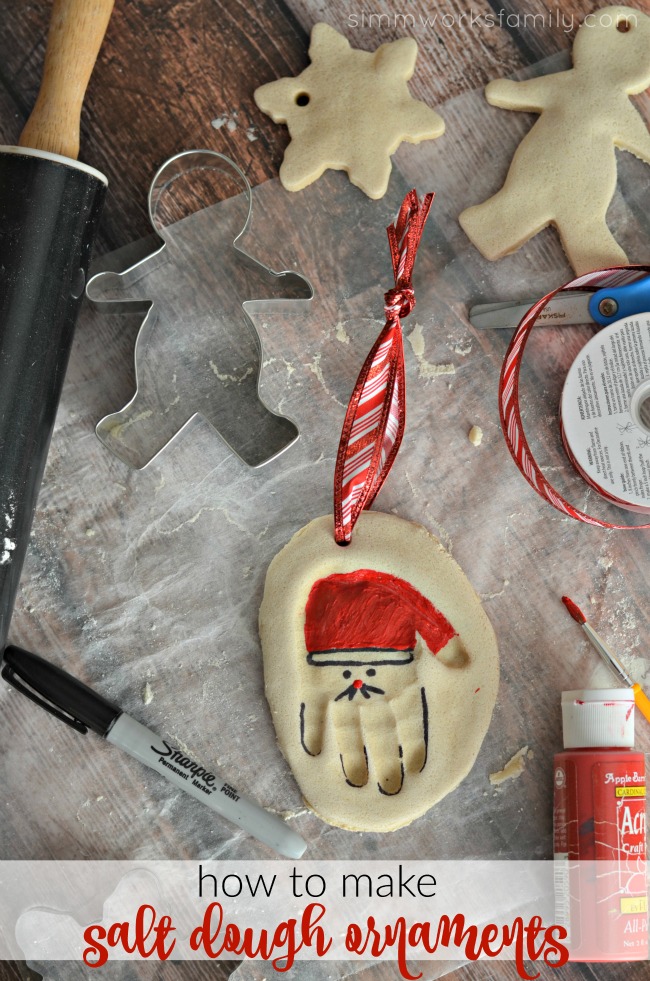
How To Make Salt Dough Ornaments - a simple craft for kids of any age
E year my son’s school has each class decorate and create ornaments for the kids to gift to their parents. Last year we had fun making reindeer thumbprint ornaments along with a few other great ornament designs. And this year we’re going to be making salt dough ornaments with the first graders. There are so many great ideas and techniques to incorporate when making salt dough ornaments with kids. You can get as creative as you like by simply incorporating different mediums when decorating your ornaments.

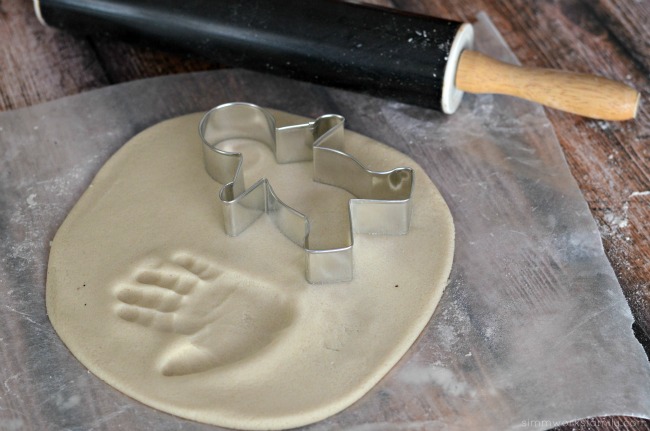
Since this year is my youngest’s first Christmas, I decided to make an example for the kids by using her hand print and turning it into Santa. My other daughter wants to use her footprint to make a reindeer but I’ll be sticking with hands for the first graders. I’ll also be using cookie cutters for the kids who don’t want to do hand prints and I’ll have them add two thumbprints to create hearts in the middle of their cut out. They’ll get to color and decorate their ornaments after I bake them up.

How To Make Salt Dough Ornaments - decorate ornament after baking

How To Make Salt Dough Ornaments

What you’ll need:

  • 1 cup flour
  • 1/2 cup salt
  • 1/2 cup water (more or less depending on dough)

What you do: 

Preheat your oven to 250 degrees.

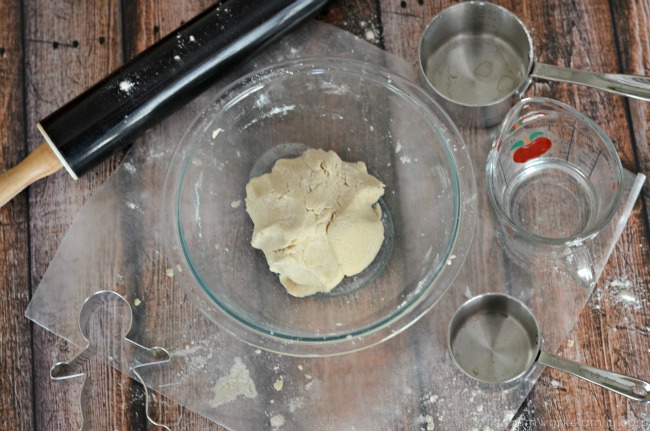
Grab a medium bowl and mix flour and salt until well incorporated.

Slowly add in water. Start with 1/4 cup and mix in, then add in a bit more until the dough forms and is lightly tacky but not sticky.

How To Make Salt Dough Ornaments - combine ingredients into dough

Grab a piece of parchment paper and lightly flour. Turn dough onto floured surface and knead a little more until the dough is smooth.

Roll dough out with rolling pin to 1/4 inch thickness.

Grab a kid and put a hand print in the dough and/or use some cookie cutters to cut out some designs.

How To Make Salt Dough Ornaments - make a handrpint

If you’re using a hand print, make sure to cut a circle around the hand print leaving room for a hole at the top.

Remove excess dough and set aside. Place parchment paper with ornaments on a cookie sheet. Using a plastic straw, poke a hole at the top of each ornament (for Santa, make sure you put the hole at the palm/bottom  of the hand). Now grab a kid and let them blow on the straw until the little ball of dough that was just punched out pops onto the counter.

How To Make Salt Dough Ornaments - make hole with straw before baking

Bake ornaments for 2-3 hours or until hardened. Let cool completely before decorating.

How To Make Salt Dough Ornaments - decorate ornament after baking

What is your favorite part about the holidays?

stockingstufferhopbutton

*** This giveaway is closed ***

Congrats Janet!

Handmade Holidays: Toy Animal Necklaces

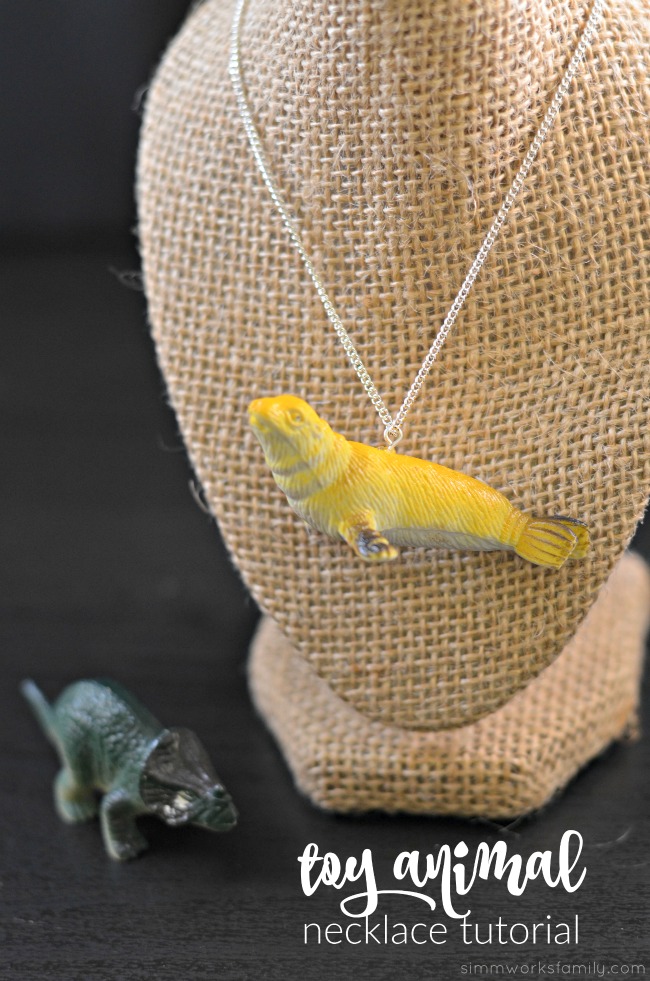
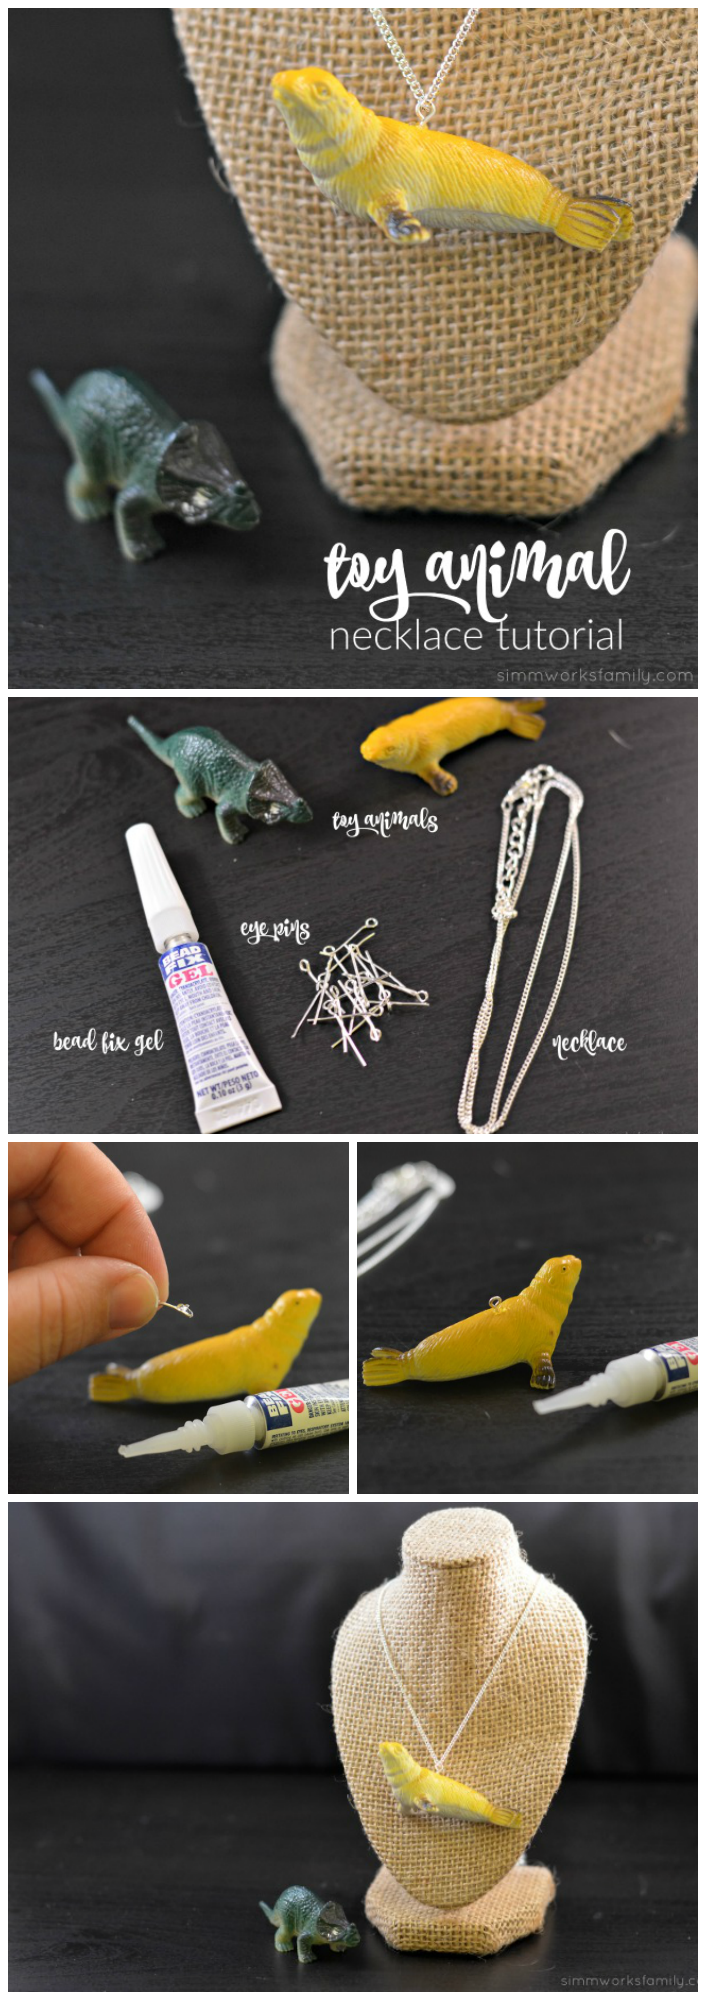
Toy Animal Necklace Tutorial

My kids have a LOT of toys. And as the holidays are coming up (as is my daughter’s 5th birthday) I’m trying to see how I can repurpose old toys as gifts to give to them as well as other relatives and friends.

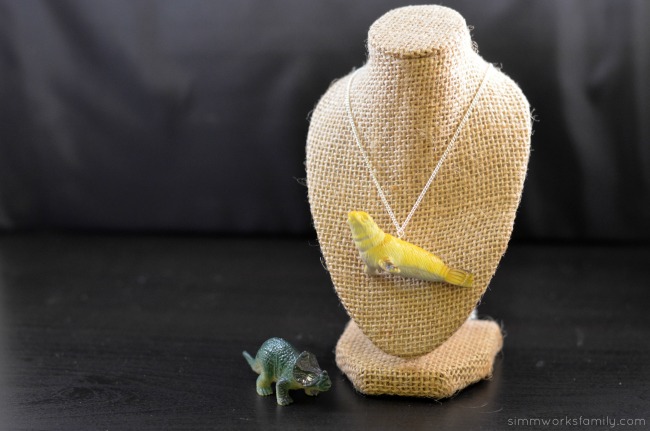
My daughter is obsessed with my jewerly. She loves trying it on, playing with it, and picking out what pieces I should wear when I go out. So I decided to gift her with a few pieces of her own. Including a handmade toy animal necklace I made just for her.

These toy animal necklaces are super easy to make and take about 10 minutes to actually put together. How’s that for a simple DIY gift?

Toy Animal Necklaces - a quick and easy DIY gift to upcycle old toys

Toy Animal Necklaces

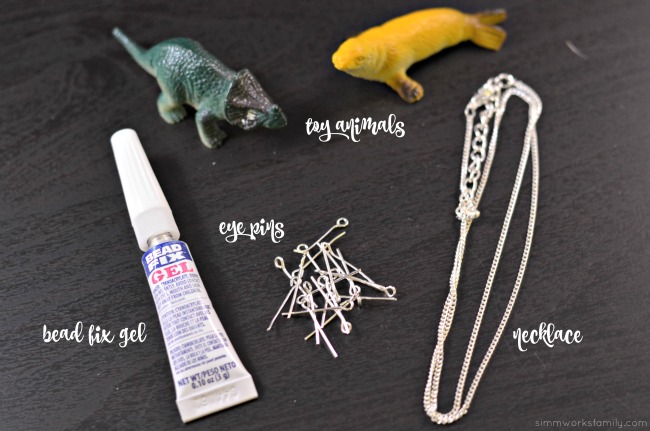
What you need:

Toy Animal Necklaces - supplies

What you do:

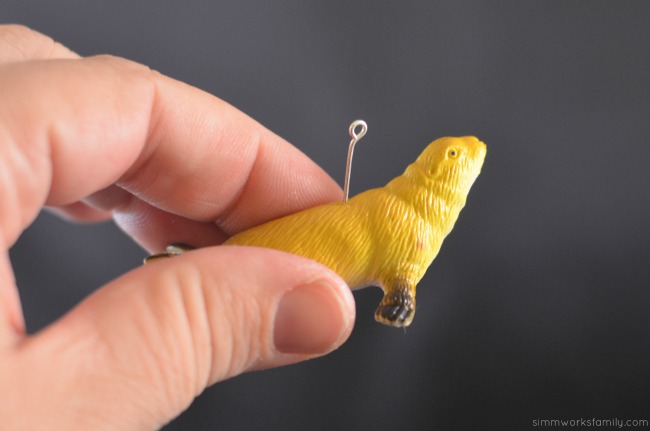
1. Take an eye pin and poke a hole into your toy. If you are having difficulty getting it in, or if the pin is bending, you may need to use a small drill to drill a hole. Or you can simply get a small nail and create a small hole to get the pin going.

Please note: I had to cut my pin in half to allow it to fit inside the body of the toy. 

Toy Animal Necklaces - stick pin in toy

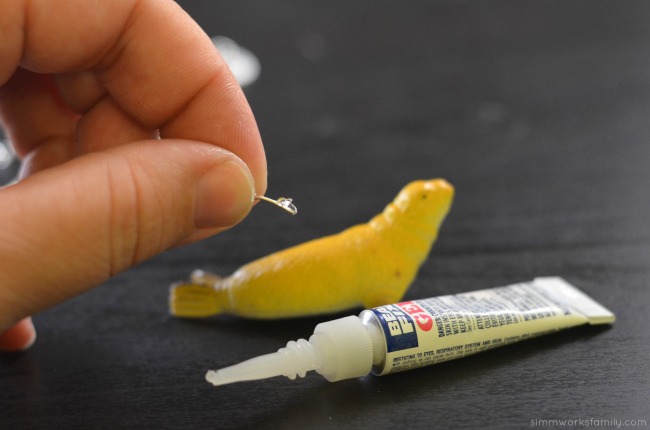
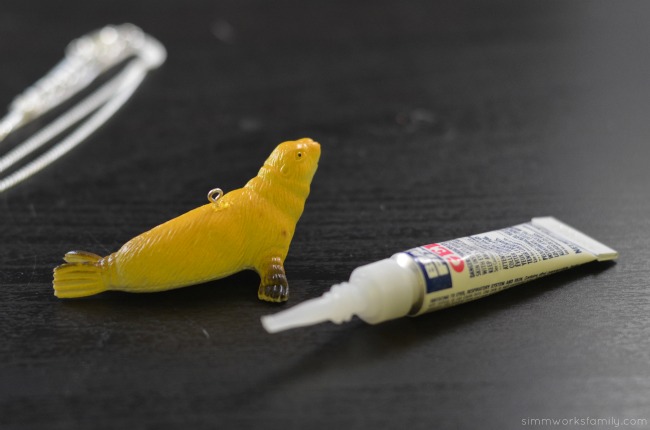
2.  Add a small amount of glue onto the pointed end of the eye pin. Place eye pin in the toy and make sure it’s secured with glue. Let set. 

Toy Animal Necklaces - glue eye pin to animalToy Animal Necklaces - glued on

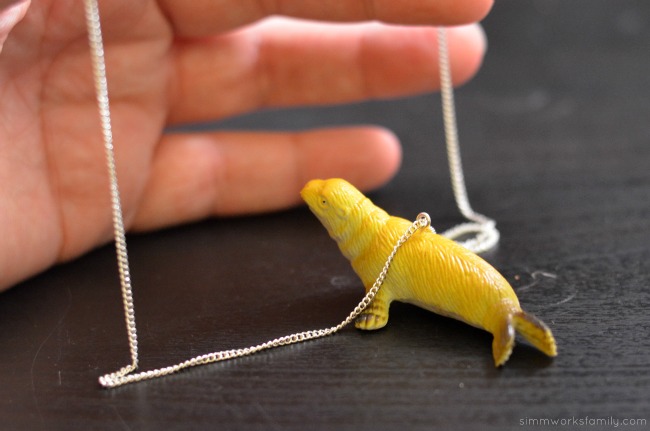
3. Grab the necklace. If the top circle of the eye pin is too small for one end of your necklace to go through, you may need to remove the link of the chain attaching the chain to the clasp. Once you can fit the necklace chain through the round eye of the eye pin, re-secure chain to necklace and clasp. 

Toy Animal Necklaces - necklace threaded through

That’s it! How easy is this project? For the next batch I’m going to spray paint the animals before I put them on the chains. And I’m going to try and dig around and find smaller animals! 

HANDMADE HOLIDAYS hop - HORIZONTAL

I’m part of the 5th Annual Handmade Holidays. You can find some other great gift ideas, crafts, and more by visiting the awesome blogs linked up.

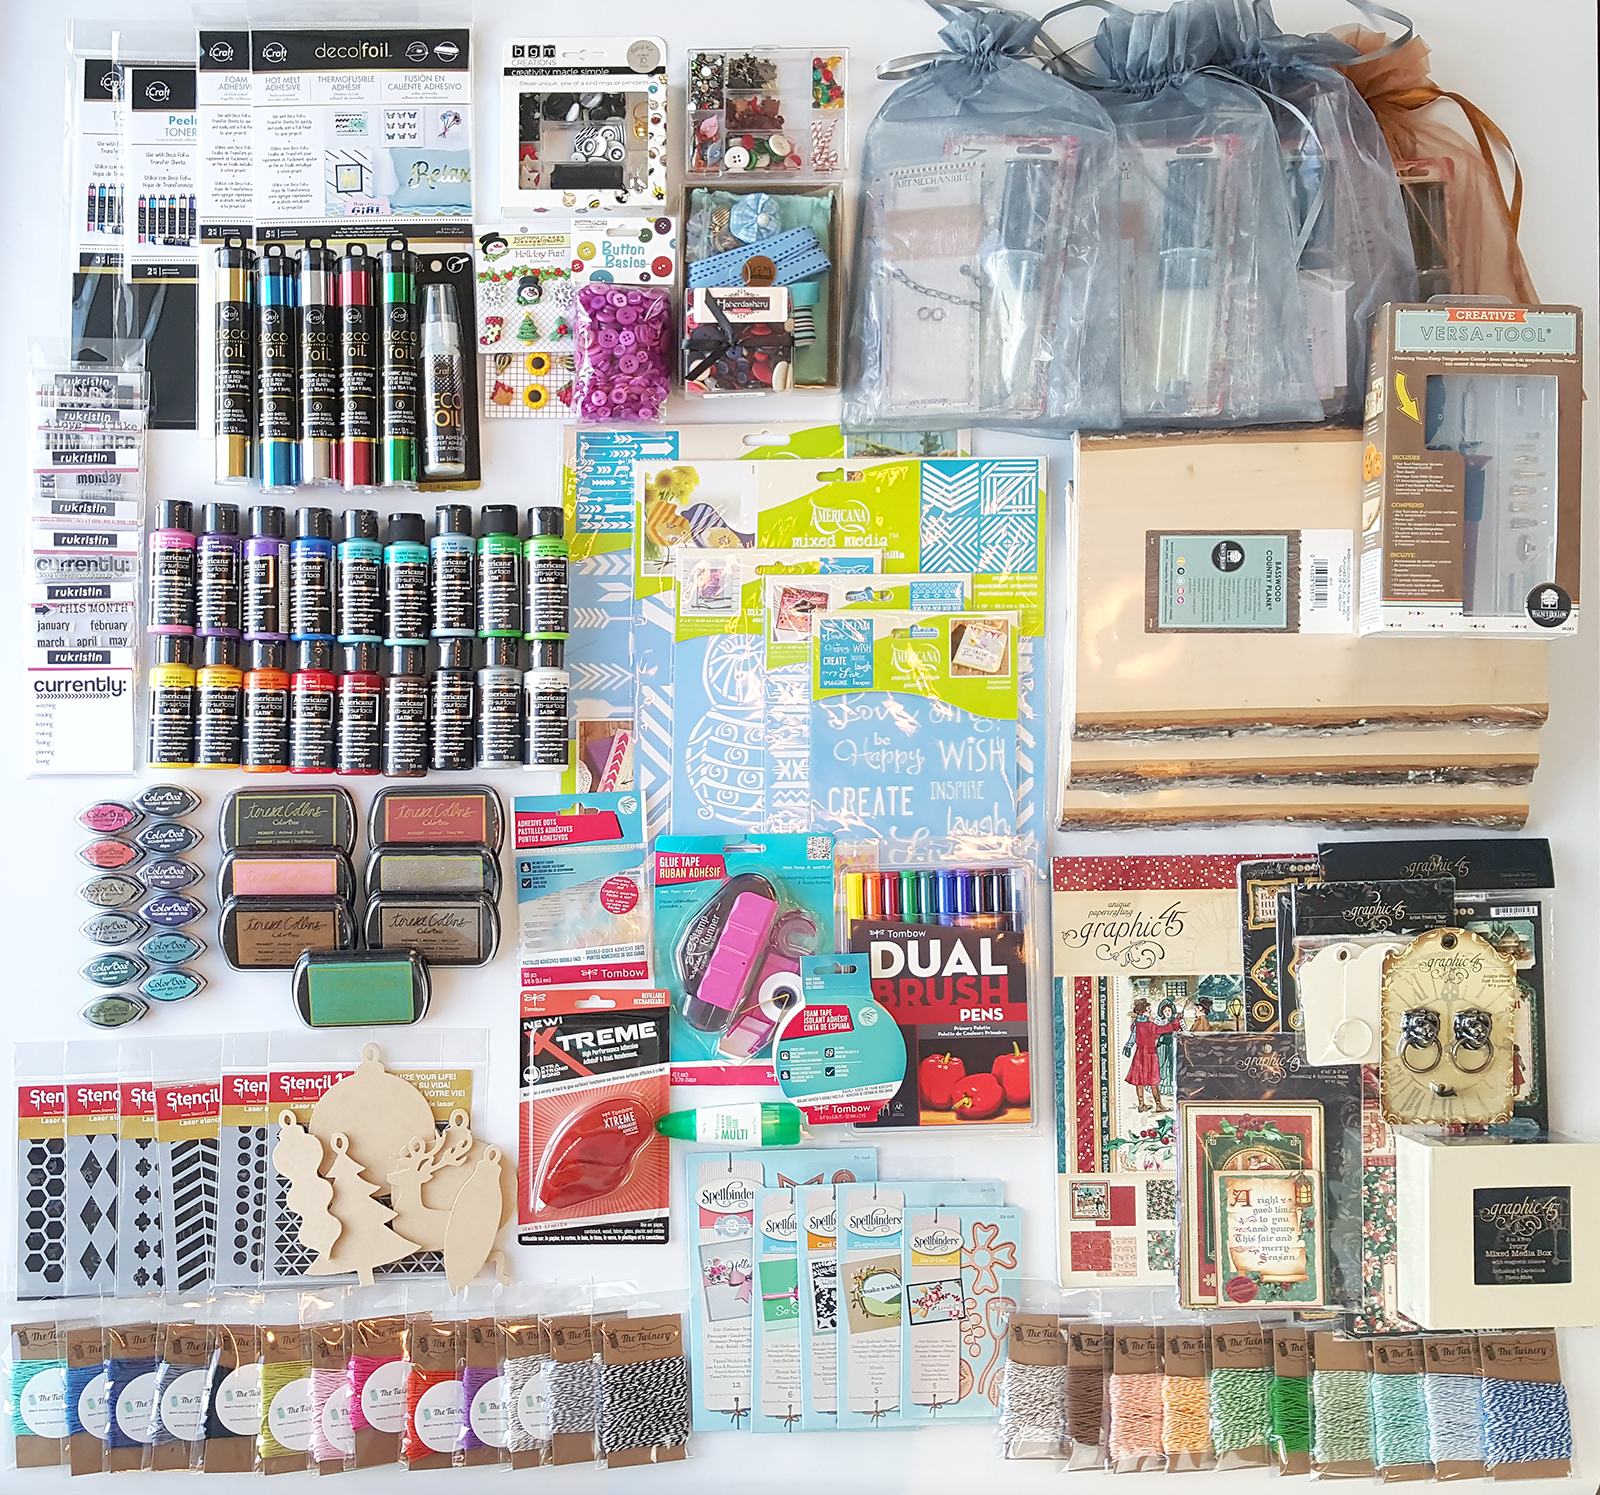
We are having a giveaway of over $600 in craft supplies to help you make this holiday handmade. Enter to win using the widget below:

Handmade-Holidays-2015-Prize-Pack-1600-wide

a Rafflecopter giveaway

Toy Animal Necklaces - an easy DIY upcycled necklace

How to Create a Smart Home: DIY Home Energy Efficiency Tips

The reviewer has been compensated in the form of a Best Buy Gift Card and/or received the product/service at a reduced price or for free. This post contains affiliate links.
home energy efficiency tips

One bill I hate to see every month is our electric bill. Not only can the amount fluctuate from month to month but I feel as if now that I’m working from home I am the sole cause of the increases to our bill. But after doing my research I feel confident in applying these home energy efficiency tips in our home to help lower our electric bill.

And this couldn’t be a better time to start thinking about energy efficiency in our homes. Especially since our cost of electricity is expected to rise greatly come Winter.

If you’re concerned about high electric bills and want to do something to make your home more energy efficient (as well as save on your monthly bill!) consider making a few simple DIY changes around the home to help conserve your electrical usage.

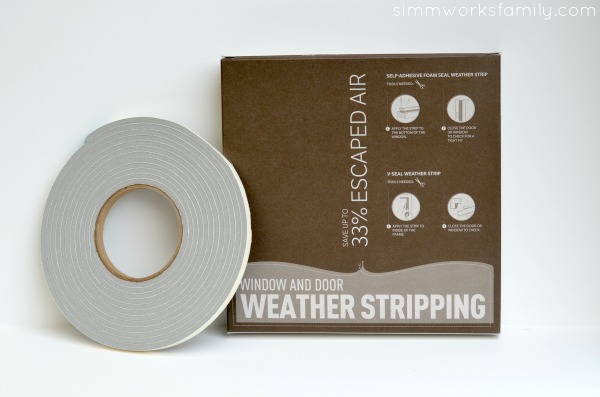
home energy efficiency tips weather stripping

Home Energy Efficiency Tips

1. Close up the air gaps!

Talk a walk around your house and inspect the outer perimeter of your home to find where air can get in. Using weather stripping around doors and windows, eliminate air from getting in and out.

2. Replace your light bulbs

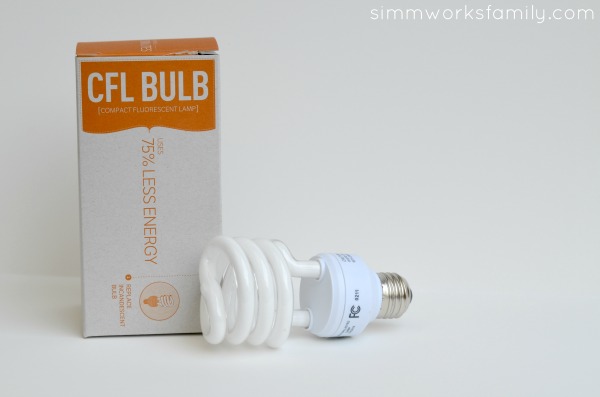
By replacing your light bulbs to CFLs or LEDs you can save up to 75% in lighting cost. An added bonus? They last longer too!

home energy efficiency tips cfl bulbs

3. Look at your HVAC system

Your HVAC system consists of the heating/cooling equipment, the thermostat, the pipes, the filters, and the duct work found in a central forced air system. Inspect your HVAC system to make sure it’s been properly maintained. If you aren’t sure when the last time it was checked is consider contacting a certified HVAC contractor to do an inspection.

If you don’t already have a programmable thermostat I suggest picking up a Home Nest Smart Thermostat. This is the new 3rd generation version, which is thinner, sleeker in design, and allows for a bigger, crisper display than the prior 2nd generation version.

Not only can you set where the temperature should stay throughout the day and night but you can save money by having your system run only when you want it to. We like to keep our air off until it reaches 78 in the house in the summer. We normally keep the house between 75 and 78 degrees when we’re home. And the heater doesn’t kick on until it’s 65 degrees in the house. But usually the temperature is between 65-70 depending on who’s home. With the Nest there is no need to set preferences – within a week, the Nest learning thermostat starts programming itself. It learns your habits and adjusts automatically, regulating your home’s temperature based on your schedule – which can save you energy and money.


Programmable Nest Thermometer

When used with the new Netgear exclusive router (on store shelves 11/4) you’ll be able to increase or decrease the temperature whenever you need to, even if you’re upstairs! This is a brand new router that was exclusively developed between Netgear, an industry leader in the networking world, and Best Buy, to help provide consumers with an easy, all-in-one solution to support their home’s connected devices.

Best Buy makes it easy with this new high performance Wi-Fi router, which includes a Wi-Fi extender and Geek Squad Set Up and Support via phone & web, for one full year. The Geek Squad service via phone & web allows customers to call or get help 24/7 whenever they want, vs. the need to schedule an appointment. Plus they’re always so friendly and helpful when you do connect with them!

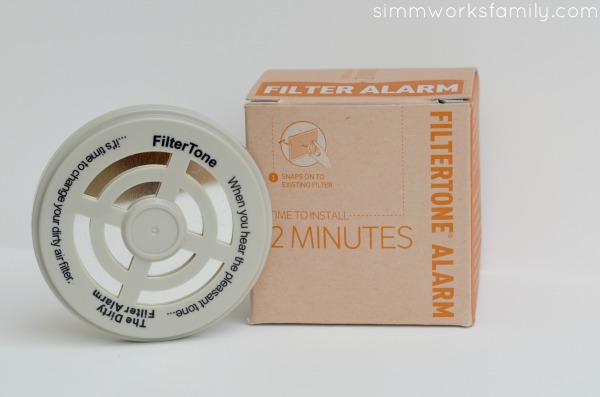
home energy efficiency tips filtertone alarm

4. Check your appliances

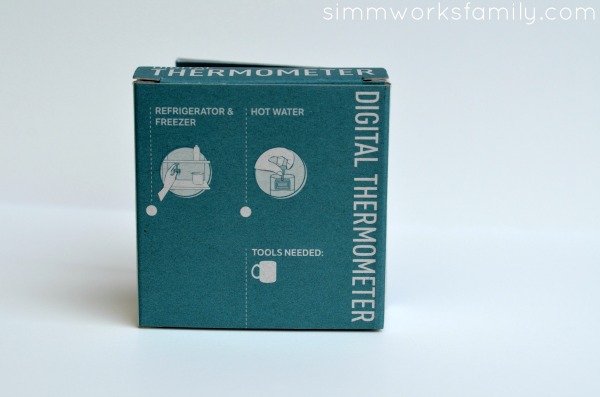
Appliances make up about 17% of the average home’s energy usage. Refrigerators, clothes washers and dryers are at the top of that list. Make sure that your fridge temperature is set between 38-40 degrees F and your freezer is set to 0 degrees F. Use a digital thermometer to check the temperature.

If you have appliances older than 10 years you should consider investing in a newer, more energy efficient model.

5. Test your hot water

Heating water for bathing, washing clothes, and dishes accounts for as much as 15-30% of your household energy use. And the temperature setting of the hot water heater determines the energy used to heat your water. Make sure to check your hot water temperature with a digital thermometer. The temperature should be between 120 and 130 degrees F.

Don’t forget the insulation! Hot water heaters also need to be insulated. If the shell of the heater feels warm to the touch then it should be wrapped in an insulating blanket.

If your hot water heater is 15 years old it might be time to replace it. Look for replacement tanks that have an energy factor of over .62 for gas and .93 for electric. Gas-heated tankless water heaters save about 320% on your yearly energy usage.

home energy efficiency tips digital thermometer

6. Turn off your lights and computer

By simply turning off your lights when not in use, or installing timers to turn them off for you, you can save a lot on your utility bill!

Consider solar lights for the outside of your home or in your garden. Not only will they not be using electricity but you can still feel safe knowing the lights are on outside. We love our solar powered motion censored light out in our front and back yards.

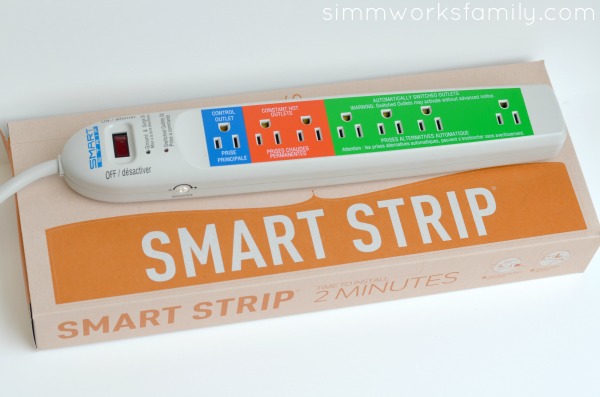
Take a walk around the house and make note of the equipment that is plugged in but not being used. Consider unplugging these devices or investing in a smart strip. Smart strips are easy and convenient to use and will shut off the power to devices that are plugged into it but not in use. You can reduce your energy output by 21$ with just one smart strip installed!

home energy efficiency tips smart strip

Incentives from your local utility, plus federal tax credits and other options, can save you thousands of dollars on your Energy Upgrade. It takes a little bit of research and some work but you, too, can reap the rewards of having an energy efficient home and feel good about saving money and conserving energy.

If you decide to do a whole house energy upgrade it’s best to start with a professional home audit. Your local utility company can provide you with a list of auditors and may even cover all or some of the cost!

How do you save on your utility bill?

Last Minute DIY Octopus Costume

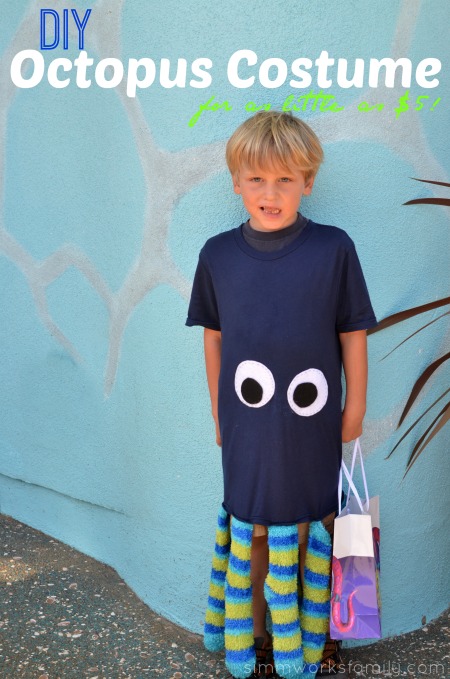
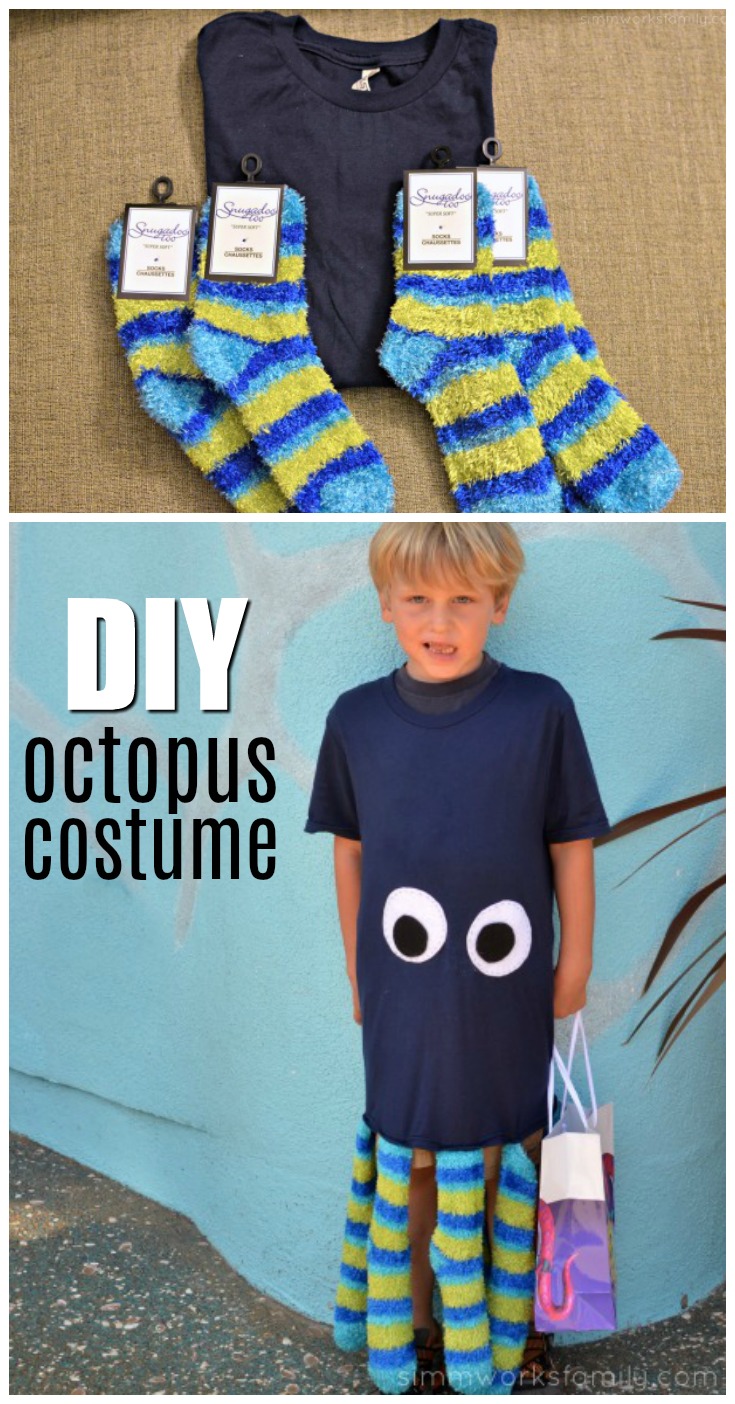
This easy DIY octopus costume is made with fun finds at our local dollar store. Total cost of the project? $5!! And it came together in less than 30 minutes. 

DIY Octopus Costume - a quick and easy costume you can make for as little as $5 with the help of Dollar Tree

Two weeks ago my family and I were invited to take a peek at Sea World San Diego’s Halloween Spooktacular. Since the invite suggested having our kids dress up in their favorite sea-inspired costumes I knew I would have to get creative.

So the night before the event – yeah, I know… last minute – we headed out in search of supplies for a cool sea costume for my son and daughter. After snagging an Ariel costume at another store for my daughter we headed over to Dollar Tree to see if anything caught our eye.

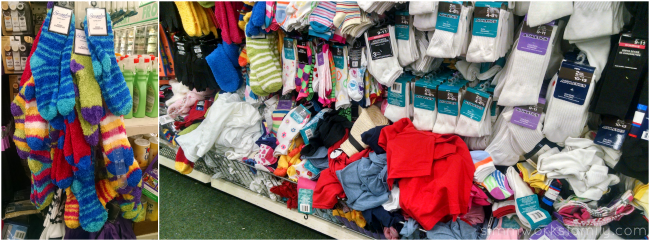
While there we saw many fun things to use in our costume in the toy aisle, we eventually settled on a simple and easy DIY octopus costume made out of a Dollar Tree shirt and Dollar Tree fuzzy socks. We walked out of the store only paying $5! How awesome is that?

Here’s how we did it:

DIY Octopus Costume at Sea World

DIY Octopus Costume

What you need:

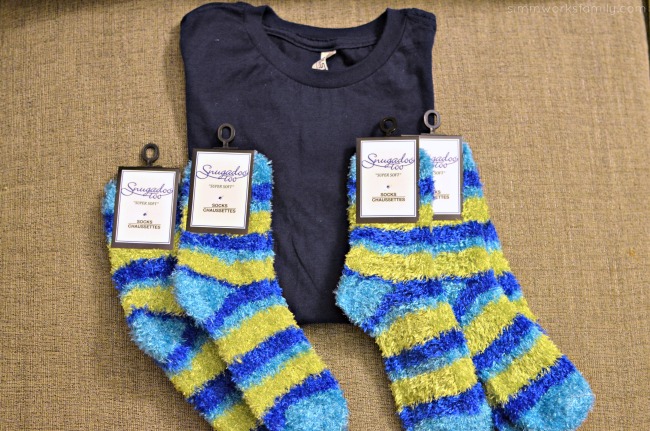
  • 1 Dollar Tree shirt (any color)
  • 4 pair Dollar Tree fuzzy socks (any color/pattern)
  • Black and White felt for eyeballs
  • wash cloths or microfiber shop towels
  • needle & thread

DIY Octopus Costume Dollar Tree suppliesDIY Octopus Costume suppliesWhat you do: 

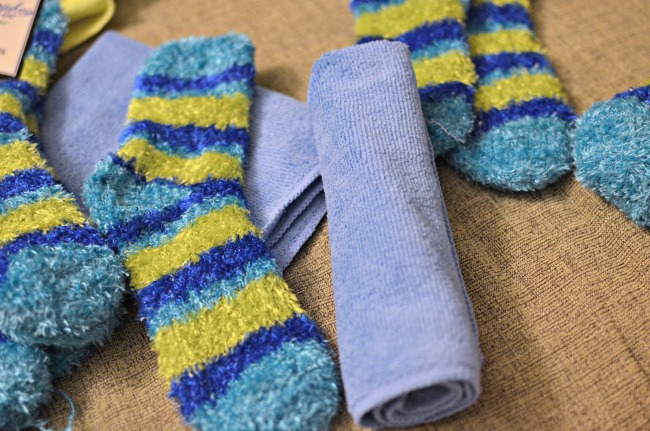
1. Grab the socks and stuff one washcloth/towel into each sock.

DIY Octopus Costume stuff socks with towels

2. Cut out felt eye balls and sew pupil onto whites. Then sew the eyes onto the shirt 1/2 way down (you can put the shirt on your child and see where the eyes would best fit).

DIY Octopus Costume cut out felt eyes and sew onto shirt

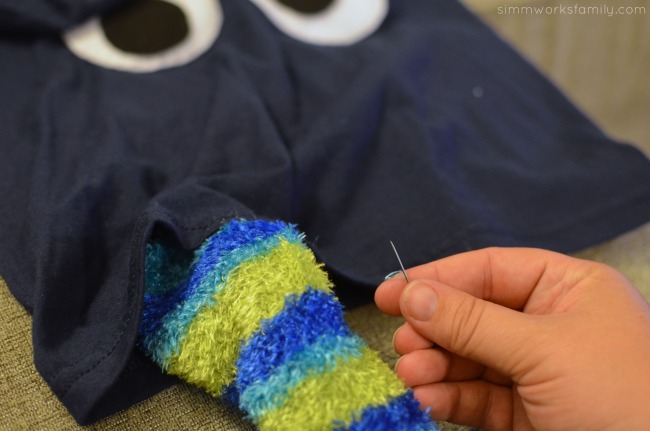
3. Sew stuffed legs onto the bottom hem of the shirt. Make sure to reinforce your stitches by going over them twice so the legs don’t fly off after a night of fun trick or treating!

DIY Octopus Costume sew legs onto bottom of shirt

That’s it! Now your octopus costume is complete! How easy was that? And it takes under an hour to make. If you have sewing skills and prefer to use a sewing machine it’d be even faster!

Too bad my sewing machine is hidden beneath boxes still in the garage… maybe next year!

If your little one would prefer a hat to complete the costume or would like to be a squid instead, consider picking up a beanie hat at Dollar Tree or sewing a felt squid hat in the same color as the shirt.

DIY Octopus Costume

What will your little one be dressed up as for Halloween?

Love this idea? Here’s some more: 

Pin this article for later! 

Click the Pin button on the image below to save for later.

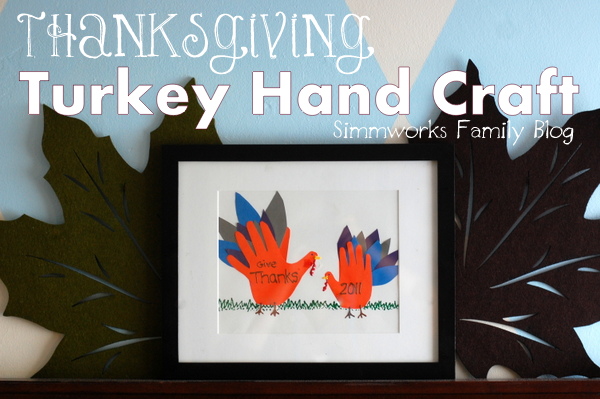
Thanksgiving Turkey Hand Craft

Thanksgiving Turkey Hand Craft

I absolutely love the simple crafts that I can do with the kids to prepare them for the holidays, like this turkey hand craft.

This past week we’ve been working on what we’re thankful for. We’re so thankful for how much we’ve all grown over the past year. My son is thankful that he’s taller and can ride more rides at Disneyland and my daughter must be thankful for the fact that she’s found her voice because she does not want to stop talking!

And I’m thankful for the milestones and memories we’ve made over this past year. In an effort to spruce up our mantel for this month of thanks giving, I’ve returned the turkey hand craft we made last year to remind me of how much my kids have grown this past year.

Here’s how you make it: [Read more…]


© A Crafty Spoonful - All Rights Reserved
It is OK to use one of my photos provided a link back and/or proper credit is given. It is NOT ok to copy and paste a whole post including instructions. Please do not remove watermarks or alter images in any way. Please contact me with any questions at danielle@acraftyspoonful.com

.