8 Fantastic Ways to Use Baby Oil

I have been compensated by Johnson’s® Baby for this post; however, I am sharing my own thoughts. All opinions are my own.

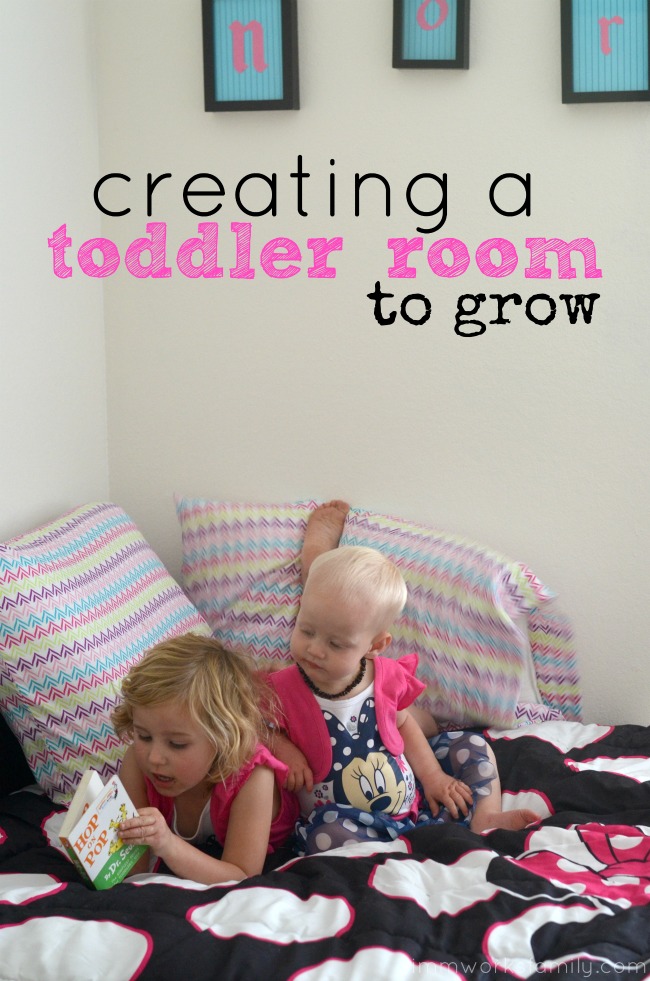
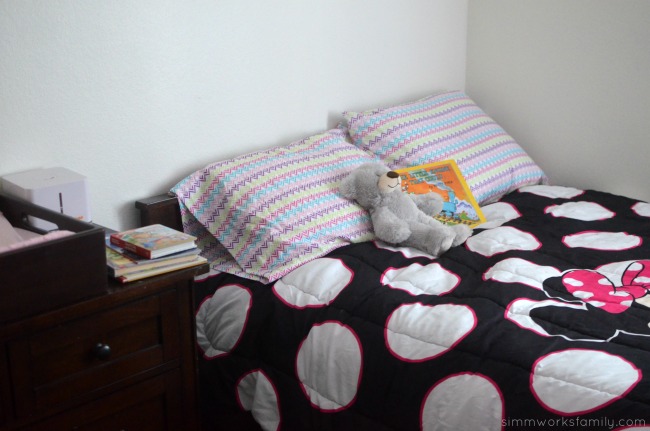
What do you do with the products you’ve come to love as you raise your babies but they aren’t babies any longer? My youngest just turned two and we are finally happy with the size of our family. Since she transferred into toddlerhood I decided to clean out her closet and pair down the baby stuff we still have in the home. And what did I find? We still had Johnson’s® Baby baby oil, baby lotion, and baby wash (full sizes!) in the way back.

Now we  already had bottles in the bath tub so these weren’t just forgotten about. We just got so many from family and friends at the shower, that we had enough left over. Luckily I know that baby oil is for more than just babies! And it’s a great item to have on hand even for adults. We keep it in stock at all times in our cabinet!

Baby oil is actually just mineral oil with perfume added to it, and mineral oil has a lot of potential uses! So if you’ve got a bottle of Johnson’s® Baby baby oil sitting in your cabinet, check out these 8 Fantastic Ways to Use Baby Oil!

8 Fantastic Ways to Use Baby Oil

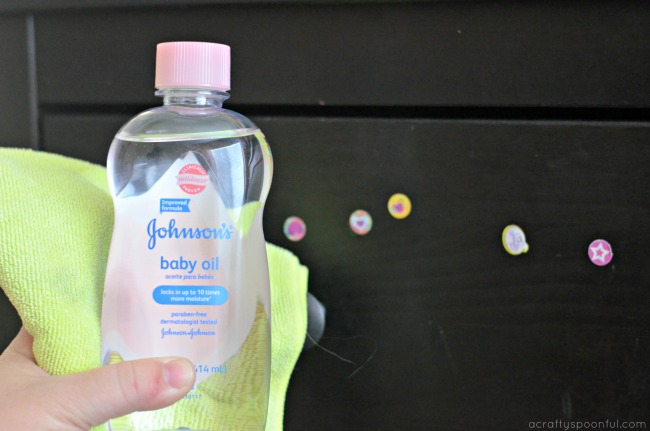
1. Easy Adhesive Removal

If you want to peel labels off of things faster, try one of the many ways to use baby oil- as an adhesive remover! Just rub the baby oil onto the label or sticker, let it sit for 5 minutes to soak in, then rub at it was a cloth. The label should come right off! Do you kids like surprising you by putting stickers on their furniture or on the windows in the car? This also works to remove adhesive that’s left behind after peeling a sticker off, and can help loosen up Band-Aids!

2. Body Insulator

One of the more surprising ways to use baby oil is as a way to insulate yourself against the cold! If you rub baby oil onto your skin your pores will close and you’ll become better insulated against the weather. However, since it does temporarily close up your pores, you may want to avoid putting it on your face if you suffer from acne.

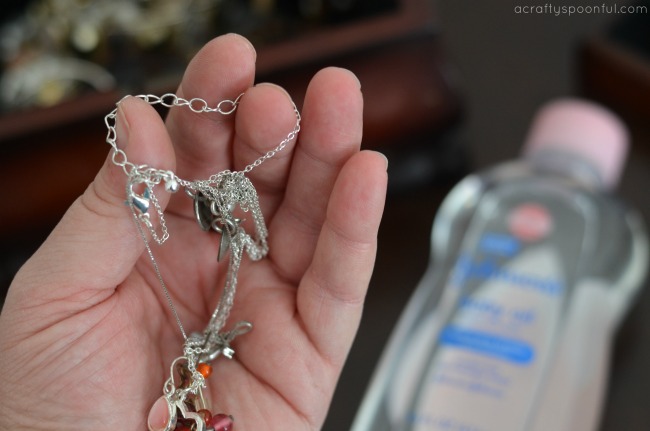
3. Necklace Chain Loosener

Have you ever had a necklace where the chain got tangled and caught on itself? To undo this, you can use baby oil! Just put a drop or two of the oil onto the area that’s stuck, then work to undo the tangle using something pointy, like a sewing pin. My girls have found my jewelry box and may or may not have tangled up a few pieces together. With some baby oil, I can help loosen everything up and am wearing my favorite necklace come date night!

4. Remove Paint from Skin

If you happen to get paint on yourself, you don’t need to rub yourself down with paint thinner! Instead, use baby oil! Rub the baby oil onto the paint on your skin until you feel that the paint is loosening up, then wash with soap and water. Repeat until all the paint is gone.

5. Polish Anything

One of the best ways to use baby oil is as a polish! And baby oil can polish pretty much anything! It can polish leather, wood, faucets, car hubcaps, chrome, and other such hard surfaces. It also can help protect surfaces from water, as it has some waterproofing properties. Make sure to test it out in a small area first before going to town just in case!

6. Shredder Lubricant

If you own a document shredder, then you may have been given some free shredder lubricant pages with your purchase. It’s important to keep the blades on your shredder lubricated to keep the shredder working at 100% and prevent jams. But rather than continually buying more and more lubricant pages, all you really need is baby oil with which you can make your own shredder lubricant pages! To make them, lay a few pages of paper down in a large dish or on a baking sheet and coat them with baby oil. Let that soak in for a few minutes, then shred them in your shredder!

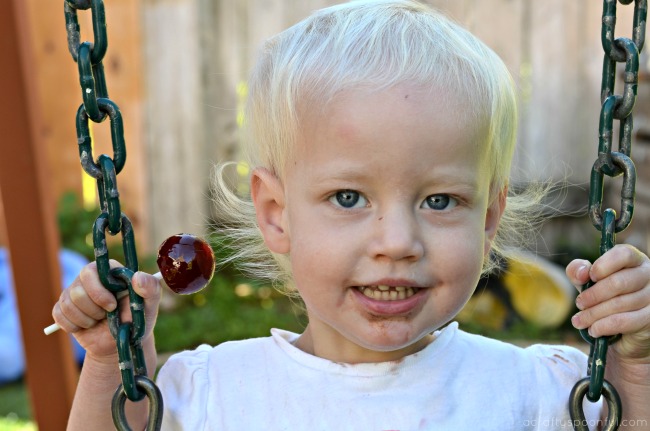
7. Remove Sticky Stuff from Hair

Kids are surprisingly good at getting sticky things like gum (or lollipops) in their hair. To get the sticky stuff out, massage some baby oil onto the stuff, and use your fingers or a comb to gently pull it out. This works because the baby oil moisturizes and lubricates the sticky substance, helping it to let go of the hair and slide right out.

8. Shaving Cream Substitute

It’s okay to run out of shaving cream if you have some baby oil in the closet! That’s because one of the ways to use baby oil is as a shaving cream/gel substitute! Just rub it into your skin before you go to shave, and the razor will be able to move across your skin without any problems. If you put some more baby oil on after shaving, you’ll find that it also helps soothe your skin post-shave!

Do you use baby oil?

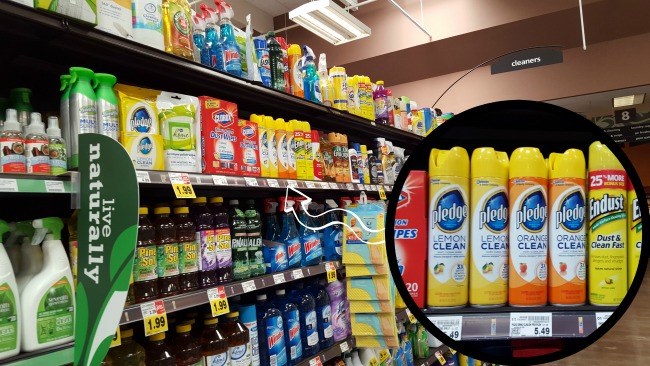
If you aren’t stocked up on Johnson’s® Baby Baby Oil, grab a bottle or two on your next trip to Walmart. You can find it in the baby products aisle right next to the baby wash and body lotion! Or do what I do and order it online at Walmart.com and have it shipped right to your door. So convenient and perfect for busy moms.

Adverse Claims Disclaimer: If someone is reporting an adverse event or a product quality complaint, please tell them to call the Johnson & Johnson (J&J) North America Consumer Care Center at 800-361-8068 during normal business hours of operation: Monday through Friday, 8 a.m. to 8 p.m. ET. After normal business hours, they can report adverse events or product quality complaints through www.jnj.com Contact Us page.

10 Tips To Teach Children The Basics of Organization

These 10 tips to teach children the basics of organization can help get your kids to start picking up after themselves and stop leaving messes all over the house. 

10-tips-to-teach-children-the-basics-of-organization

Teaching your child how to organize can be comparable to brushing your teeth while eating Oreos. As much as parents like to do things themselves, there comes a point where children must learn to do things on their own. And now is about the time that my kids need to start picking up after themselves and learning how to keep their areas organized. 

After two weeks home with the kids and little messes made in every.single.room of the house over the holiday break,  I was done. And at one point I’m pretty sure I grabbed a big black trash bag and threatened to pick up everything I see on the ground and give it away. Mama was over it. And the kids picked up on that. 

Our house is set up so that our children can let their inner creativity shine. BUT at 6 and 7 years old I think they’re old enough to start learning how to start organizing their things. Putting stuff away once they are done using them so that they’re not in every corner of our home. Or so that they don’t end up in a pile on their bed or bedroom floor. 

Starting with the basics is one way to help your child learn how to organize. And that’s exactly where we’re starting. 

10-tips-to-teach-children-the-basics-of-organization-before-and-after

10 Tips To Teach Children The Basics of Organization

#1. Simplicity

Teach your child that organization doesn’t need to be complicated. Organization should be used as a tool to make everything simpler.

#2. It Takes Time

One thing a child should know about organization is that it takes time. Even the most basic forms of organization will take some time.

#3. Limits

Your child should know that to be successful in organization there has to be limits put on things. You can’t collect every single paper you bring home from preschool.

#4. Donations

It’s amazing how much one person can collect overtime. Teaching your child the basics about donations will help them learn about organization. They should know that when a person has extra of something, it’s okay to donate to someone else less fortunate.

#5. Bring one in Take one Out

One rule a child should know about organization is the value of doing it “as you go.” If you buy something new and bring it home, then the rule is that something else has to leave. Learning to let go of items can be a hard lesson.

#6. Everything Has a Home

I think one of the most valuable lessons a child can learn in organizing is that everything has a home. You don’t need to leave everything out on the floor, simply put it away. When everything has a home the basics of organization seem pretty simple.

#7. Teamwork

Teach your child that it’s okay to ask for help when they need it. Sometimes organizing can be incredibly overwhelming. Teaching your child to ask for help is a tip they’ll need to carry with them for a long time.

#8. Know Their Limits

A child should be taught the basics of organization, but there is no need to be incredibly pushy about it. There should be a happy medium between proper organization and overzealous organization. 

Your child doesn’t need to spend every waking moment organizing their room. Have your child set a 15 minute timer for their organizing time. When that time is over, they get to take a break.

#9. Prioritize

Organizing can be overwhelming because sometimes there’s too much to do and not enough time. Teach your child how to prioritize one task over another. For example—The floor needs cleaned up before you can sweep.

#10. Get Creative

There are no rules to organizing. One family’s idea of organizing is different than another. Teach your child the basics behind organizing and they should be good to go. Also teach them that getting creative with the resources is a smart move. For example—You don’t need to go out and buy organizing items, you can use what you have at home. Use a milk crate for a toy box and etc. 

10-tips-to-teach-children-the-basics-of-organization-folding-clothes

Try to refrain from getting frustrated or yelling when you’re teaching your child about organizing. Children should grow up to love this sort of exercise, not grow to hate it.

How do you get your kids involved in the organization process? 

Birthday Party Tips: The Lazy Mom’s Guide to Hosting A Party

This shop featuring the lazy mom’s guide to hosting a party has been compensated by Collective Bias, Inc. and its advertiser. All opinions are mine alone. #WipeAwayHolidayMess #CollectiveBias

the-lazy-moms-guide-to-hosting-a-birthday-party

My gorgeous little girl is turning 6 on Wednesday. Yup. 6. I remember when she was first born. She came so fast. Like she was ready to be here after waiting 5 days after her due date. Always on her time. And always like a whirlwind. 

She insisted on a Shopkins themed party and I had to deliver. I mean come on, you only turn 6 once, right. In the 6 years of throwing parties for her, I’ve come to learn a thing or two about throwing together a party. And each year has gotten simpler and simpler with a few easy tricks I’ve learned. 

Throwing a birthday party doesn’t have to be complicated. Or expensive for that matter. it just takes some creativity and a little bit of prep. And if cleaning isn’t your thing, I have some tips for that too! 

the-lazy-moms-guide-to-hosting-a-birthday-party-party-decor

The Lazy Mom’s Guide to Hosting A Birthday Party

1. Pick a theme

Now I normally leave themes up to the kids, but then I work on coming up with a basic color scheme to go along with that theme. In an effort to keep costs down, I only select a few character or themed items and coordinate those with solid color decor. I try to stock up on solid color plates and napkins, etc when I see them on sale so I don’t have to spend too much right before the party. 

2. Do any prep work ahead of time

About a week out I like to do the simple things I may not find the time to do on the day of the party or the day before. I fill goodie bags, make sure I have the pinata ready to go, and do a quick cleaning of the main areas of the house. I also print out any printables I’ve made or found and assemble anything that needs to be assembled (like when I make my own happy birthday signs). 

the-lazy-moms-guide-to-hosting-a-birthday-party-cupcakes

3. Only commit to making 1-2 food items

My biggest time saver and stress reliever is to only make 1-2 of the food items I serve at the kids parties. This year it was hot dogs and pasta with two different sauces (alfredo and marinara). We purchased the pizza, fruit, veggie tray, and cupcakes from the grocery store. And I added a little flair to the store bought cupcakes by purchasing some character rings and cupcake decorations online. Way cheaper than custom cupcakes or cakes! 

4. Set up the night before

So that everything is ready to go, I always try to set up everything the night before. I lay out platters, make little notes about where I want things to go, and come up with a day-of game plan so I don’t forget anything. That way there’s less stress on me the day of. I also make sure my husband is in charge of picking up all of the food on the day of so I’m home to do any last minute tidying and to greet any early guests. 

the-lazy-moms-guide-to-hosting-a-birthday-party-scotch-brite

5. Don’t clean up during – or right after – the party

My biggest suggestion when hosting a party is to not worry about clean up. Especially when there are guests still at your home. We set out trash cans outside and inside so that guests know where things go (including recycling). And sometimes guests are so inclined to help pick up here and there. Let them! But don’t you dare pick up that piece of trash! This is your time to enjoy the fun your child is having with their friends. 

When the party has ended, I simply put away any food items that are still left out. And that’s all I do. I leave the mess for the morning. Because by then I’m exhausted and why work more when it’ll all be there in the morning? The next morning I conquer and divide. I have one kid with a bag to pick up trash and the other with a bag to pick up recyclables. 

Then I go around clearing any plates or dishes that may not have been put away. Next up is the dishes. Now you may be worried that because you didn’t clean up the night before, you might have some leftovers stuck to the dishes. That’s nothing a handy dandy Scotch-Brite® Scrubbing Dish Cloth can’t handle. The scrubbing dots on the one side of the dish cloth allow you to take on tough messes in the sink and across a variety of surfaces. Squeaky clean! 

Then I unleash the best tools of all! Our dogs. We let them search around and find anything we may have missed. And it works like a charm! 

the-lazy-moms-guide-to-hosting-a-birthday-party-cleaning-up

So the next time you’re hosting a party remember to keep it simple! Choose a theme, but use solid color accents, do some prep work ahead of time, only make 1-2 items for the party and purchase the rest, and come up with a day of game plan (including NOT cleaning). Looking for some help in the kitchen? Just grab some Scotch-Brite Scrubbing Dish Cloths to help you out! 

What are your tips for making party planning easier? 

scotch-brite-at-ralphs

Head over to your local Ralphs to score an In-Store Clip Strip Offer for $1.00 off a 1-pack of Scotch-Brite Scrubbing Dish Cloths starting on 12/4! We found our Scotch-Brite Scrubbing Dish Cloths in the cleaning aisle. 

birthday-party-tips-the-lazy-moms-gude-to-hosting-a-party

When Babies Turn Into Toddlers: Creating a Toddler Room To Grow

This post brought to you by Disney Junior. The content and opinions expressed below are that of mine alone.

When Babies Turn Into Toddlers Creating a Toddler Room To Grow

Babies turn into toddlers quite quickly. One minute they’re crawling on the ground and cooing and laughing and the next minute they’re running down the hall pointing at an object and saying (kind of) words. Their little brains are working so hard and so fast that if you don’t keep a look out for the changes, it may happen without you even knowing it!

Luckily we’ve been through this a few times before and it’s come to my attention over the past few weeks that my 15 month old has officially changed from a baby into a toddler. It almost feels like overnight. She’s still very much a baby but through her actions and reactions to our everyday adventures she is starting to act a whole lot more like me and her sister. She’s definitely our little MinnieMe.

When Babies Turn Into Toddlers Playing with Siblings

From wanting to help us bake and cook, to demanding that we read her a favorite book before bed as we cuddle on her new full size bed with cute new Minnie Mouse bedding, to insisting she wear the same thing as her older sister like her new adorable Minnie Mouse Toddler Girl 2-Fer Dress, or use the same Disney Minnie Mouse Bows and Dots Beach Towel after bath time, our little toddler loves to try and keep up with us no matter what we’re doing.

I cannot believe how much or how fast she is changing. And I don’t know if I can keep up! I feel like she went from not caring one bit about walking to going non-stop in her own direction. She definitely takes after us and I know she’ll be just as energetic and opinionated as her sister. 

When Babies Turn Into Toddlers - bedtime routines

So the time has come for us to give our baby turned toddler her own space. We’ve fixed up a new room for her brother upstairs and have begun creating a room just for her. Inspired by her baby shower and her first birthday, we’ve used elements from Minnie Mouse to create a fun, playful atmosphere for her to learn and grow in. 

This Mother’s Day reminded me of how quickly these kids change and how much we need to preserve our memories with them. So as I transform her room for her, I want to share what we change and what we add to encourage her journey into toddlerhood. 

Tips on creating a toddler room to grow: 

  1. Purchase a twin or full size bed. Toddler beds are not comfortable… let me tell you! And when we transitioned the kids into their own beds, it was much easier to give them a full size bed then a small bed. And we didn’t have to buy another bed when they outgrew the toddler bed! 
  2. Get a full size dresser and add a changing table box with pad to the top of it instead of using a separate changing table. Again… one less piece of furniture to buy! 
  3. Utilize photos or memorabilia from your child’s baby shower, birthdays, etc to decorate the room. We were able to repurpose her name sign from her baby shower as wall art.

Here’s a sneak peek at her almost finished toddler room:

When Babies Turn Into Toddlers Creating a Toddler Room To Grow with Disney Baby

When Babies Turn Into Toddlers Creating a Toddler Room To Grow #MinnieMe

When Babies Turn Into Toddlers Creating a Toddler Room To Grow changing table

Looking to create a fun toddler room of your own?

Check out these adorable Disney Junior Minnie Mouse items and grab a few things that would work for your explorative toddler! Not quite ready for a full size bed? Check out this Disney Minnie Mouse Bow Power 4-piece Toddler Bedding Set! So cute.

Watching my two little “MinnieMe’s” grow has been one of the greatest joys in my life. This time together with them goes quickly and I’m definitely soaking up every minute of it!

Visit Sponsors Site

DIY LEGO Side Table

 This shop featuring how to make a DIY LEGO side table has been compensated by Collective Bias, Inc. and its advertiser. All opinions are mine alone. #MyPledgeCastle #CollectiveBias 

DIY Lego Side Table - the perfect addition for a LEGO loving boy room

I learned pretty quickly after becoming a boy mom that boys are messy. And as they get older, they make bigger messes. In an effort to organize the messes, I have been wanting to create an activity table like this LEGO side table to take care of the piles of LEGO bricks I always find around his bed.

So when we switched him to the room upstairs (our old guest bedroom) the first project I tackled after painting was to turn a side table I found at the thrift store into a DIY LEGO side table.

Not only was it easy to make, it took only a few hours to put together!

Pledge at Ralphs

Like the piles of LEGO bricks I find left all over, there’s also always a thin film of dirt trailed wherever my son goes. He treks in so much sand, dirt, and debris from his adventures outside and it ends up on everything. Luckily, with Pledge® Orange Clean Spray I can control the dust and clean up smudges and messes while safely leaving the finishes alone. You can find Pledge® Orange Clean Spray in the cleaning aisle at your local Ralph’s.

When I’m cleaning his room (after he attempts to clean it, of course) I just go at it and wipe down his bed frame, side tables, dresser, and bookshelf. The Pledge® Orange Clean Spray features Allergens Trappers® to remove dust and up to 90% of the allergens found in dust. Not only do I get a clean bedroom, but I can reduce my son’s asthma flare ups too!

DIY Lego Side Table before and after

DIY Activity Side Table

What you’ll need:

  • side table or small end table
  • no prep spray paint
  • drop cloth
  • small box for toy bricks that fits width of table
  • measuring tape
  • pencil
  • painters or masking tape
  • drill
  • jigsaw
  • sandpaper
  • spray adhesive
  • LEGO baseplate

What you do:

1. Using the no prep spray paint, paint the table in whatever color or pattern you choose. Let dry completely.

2. Measure the spot on the table where you want to place the box. If you’re leaving room for a lamp, etc, make sure to put the box on one side vs. in the center of the table. Trace the box with a pencil.

3. Once you have traced the spot, place masking tape down on the pencil line. The masking tape will help lessen splintering when you’re cutting. Then re-measure the top of the box and measure out where to cut. Note: if your box tapers down like ours did, make sure to account for that.

DIY Lego Side Table - measure twice, cut once

4. Using the drill, drill a hole on two of the opposite corners. This will provide a place to start the jigsaw without making a huge mess of things.

5. Once the two holes are drilled, use the jig saw and cut a straight line to the corner without the hole. Then do the same for the other lines until all 4 sides are cut.

6. Sand the edges of the hole until smooth and then remove the tape. Clean off the table with Pledge® and remove any dirt or debris left over. Spray a little touch up paint in any area that needs to be touched up. When dry, add the box to the hole.

DIY Lego Side Table - cut out hole for box

7. Now measure where you want the LEGO baseplate(s) to go. Make a small mark with pencil on either side of the plate so you know where to put it.

8. Using the spray adhesive, spray the back of the LEGO baseplate. Then place back on the table where you marked it and firmly press down. Let dry completely before playing on it.

DIY Lego Side Table - use spray adhesive to secure square lego pad

And your DIY LEGO side table is complete! Fill the box up with toy bricks and let your child go at it!

DIY Lego Side Table - turn a thrift store find into an awesome tableDIY Lego Side Table - built in LEGO boxDIY Lego Side Table - with room for lamp and water glass

Because this is a side table next to my son’s bed, I wanted to leave room for a lamp and the glass of water he always has to have right before bedtime. There’s even a little more room for a snack or book.

Next up on our DIY room adventure? A minifigure LEGO lamp! Stay tuned…

DIY Lego Side Table - a fun way to play with LEGO bricks

How do you organize your child’s small toys?

Keeping Pests Away: Using Ladybugs In The Garden

Keeping Pests Away Using Ladybugs In The Garden Is A Natural Pesticide

One thing I decided from the beginning when we started our garden was that I didn’t want to use any chemical pesticides. I’ve been very diligent about not using chemicals in the home so why would I use them in the garden? Especially on plants we grow to eat. So when I started to see little aphids I quickly went in search of a solution. And happily found out that ladybugs were the answer! How awesome is that?

My lettuce, celery, broccoli, and various other veggies and fruit (gotta remember those strawberries!) needed some protection so we headed out to find us some ladybugs. And we found ours at Armstrong Garden Centers over Ladybug weekend a few years back. And we keep going every year to enjoy the ladybugs. What’s Ladybug Weekend? It’s when one free packet of ladybugs harvested from colonies in California’s foothills will be handed out to Armstrong Garden Centers customers at check-out with purchase while supplies last

 And this year it will take place on Saturday, April 23 and Sunday, April 24 at all 32 Armstrong Garden Centers locations. Armstrong Garden Centers anticipates giving away two million of these “good bugs” to encourage healthy lawns and gardens. How cool is that? 

Known for their unique red and black colors, ladybugs will stay in your garden as long as there is something to eat. It is okay if the insects leave because it means that your garden is clean and the ladybugs have moved on to help your neighbor’s yard.

Keeping Pests Away Using Ladybugs In The Garden

To celebrate ladybug weekend, the following free classes will be available at all Armstrong Garden Centers stores:

  • Saturday, April 23 at 9:00 a.m. – Ladybugs and Other Good Bugs – Many insects are excellent garden helpers. Learn which plants are best for attracting these beneficial insects along with how they can help your garden flourish.
  • Sunday, April 24 at 10:00 a.m. – Organic Gardening – Learn everything you need to know from building soil health to problem-solving using organic products and techniques.

Keeping Pests Away Using Ladybugs In Our Garden

Why Ladybugs?

Ladybugs are great at keeping pests out of your garden. A few pests they take care of are:

  • Whitefly
  • Scales
  • Mites
  • Mealybugs
  • Broccoli Worm
  • Tomato Hornworm
  • Bollworm
  • Cabbage Moth

If you have signs of any of these pests you might want to consider picking up some ladybugs at your local gardening store to release in your garden. To find out more about using ladybugs to keep pests at bay check out this awesome website all about ladybugs, Everything Ladybug!

Here are a few tips on releasing the ladybugs into the garden:

Keeping Pests Away Using Ladybugs In The Garden - in a bag

1. Wet the garden bed. Ladybugs love moisture. If you want them to stay in your garden and not move onto the next you really don’t want to skip this step.

2. Open up the container and let the ladybugs start to crawl up and out.

Keeping Pests Away Using Ladybugs In The Garden and strawberries

3. Let your three year old shake the container over all parts of the garden. You don’t want all of the ladybugs in one area. (The three year old isn’t necessary but makes a fun adventure!)

4. Watch as the ladybugs wake up and start moving. The ladybugs might take a few minutes to perk up but soon they’ll start crawling all over and exploring your garden. A good amount of the ladybugs will leave to other gardens but a surprising amount stay.

Watch the little guys for a bit at your child’s level. You’ll be amazed at the sheer joy your little ones find in this activity!

Keeping Pests Away Using Ladybugs In The Garden crawling around

5. Continue to mist the garden with the lady bugs twice a day. Just enough to make sure that the dirt and plants are moist and the ladybugs have water to drink.

You can also mist the garden with a 1:1 ratio of sugar based soda to water. This will make the ladybug’s wings sticky and will allow them to explore your garden instead of flying away. This solution works for about a week and then wears off.

Keeping Pests Away Using Ladybugs In The Garden spreading out

Have you released ladybugs in your garden before?

* The photos in this post are a flashback to our March 2012 ladybug adventure 🙂

7 Tips for Picking the Perfect Pond Pet

7 Tips for Picking The Perfect Pond Pet

Are you ready to add a little life to your backyard pond? Adding a pond pet can be the perfect addition, as it adds character, color, and most definitely life to the space. I can’t tell you how much enjoyment we get out of watching our animals in the pond. It’s especially entertaining when the turtle decides to play “tag” with the fish. Oh yes, hours of fun!

When we first moved into our home, we were stoked to be inheriting a large, old koi and a red eared slider turtle with the pond in the back yard. But after a few months of just the two animals in the pond, we thought it’d be fun to add some more. So we did some research and found a few shubunkin goldfish to add to the mix.

There’s been a lot of change over the past two years in our pond and we now have 10 shubunkin goldfish and our red eared slider, Franklin. The original three shubunkin were eaten by a juvenile red tailed hawk and we’ve since put a net over the pond. But somehow between adding them to the pond and them disappearing we were left with 13 baby fish swimming around.  10 have survived to be the size you see in the photos below.

You can find enjoyment in being able to provide a peaceful refuge to a pond pet, as they are sure to enjoy being there just as much as you enjoy having them. But how do you pick the perfect pond pet? If you aren’t sure where to begin, take a look below at 7 tips for picking the perfect pond pet!

Picking the Perfect Pond Pet - know breeding habits

7 Tips for Picking the Perfect Pond Pet

1. Know what sort of space you are working with.

Frogs and turtles will be able to come up for much needed oxygen, but your fish won’t. If you are considering koi or goldfish, you want to be sure there is at least 8-10 square feet of pond per large fish.

This will ensure they get the space and oxygen they need to grow properly. If you are working on limited space, opt for one or two goldfish or amphibians that can come and go as they need.

The number of fish in our pond is higher than we’d like so we’ll be looking to re-home about 1/2 of them so that the other 1/2 can live with enough room to freely move around.

2. Be realistic about maintenance.

Adding fish to your pond means regular feeding (sometimes more than once a day) as well as regular filter maintenance. Amphibians as you know can typically find insects on their own, but the occasional sprinkling of crickets may be needed. If you are short on time, fish that need daily feeding may not be feasible and you should opt for amphibians.

We’ve found that we clean the pond and pond filter once a month and feed frequently (1-2 times in the day) during the summer, and less frequently in the winter.

3. Know your climate.

Most fish and amphibians can survive a harsh winter if proper preparations are made with the pond. If you have the time to do this yearly, go for it! If you live in an area where extreme heat or frost is an issue, you might be setting up these pets for failure. Instead, add bird feeders around the pond to attract birds who can fly south/north as needed to survive.

Luckily we live in Southern California and have no need to bring in our red eared slider during the winter months. But many turtle lovers set up a tank in their homes for the winter months with no issues. So don’t completely shy away from amphibians or turtles if you think you’ll be able to take them inside in the winter.

4. Talk to your local pet shop.

Don’t pick out pond pets blindly. Be sure to talk to a local pet shop or business that specializes in ponds so they can make suggestions for you. They are sure to offer helpful advice and product suggestions so you can have a successful experience.

We have had such a great amount of luck at Aquatic Warehouse in Kearny Mesa. They help us every time we have a problem and were able to recommend an awesome pond pump and filter for the size of our pond.

5. Consider kids into the decision.

Do you have small children who can pose harm to the pond pets? Or perhaps be intrigued by them and get too close to the pond? Be sure your children know how to be respectful of the pond pets and know how to care for them properly. You also want to avoid pond pets if children don’t know pond safety precautions, as their curiosity can result in harm.

We are currently working on wrapping a seating bench around the pond to help in deterring our kids from leaning over and reaching into the pond. We should have that complete by the time our youngest is old enough to open our sliding glass door leading to the back yard.

6. Know breeding habits.

So you think you want a few snails or frogs in your pond? Think just a few fish won’t be a big deal? Be warned that pond pets can and will breed and before you know it you can be up to your ears with new pets! Know how to deal with fish/amphibian eggs so you don’t quickly become overrun.

As I mentioned before, after our shubunkin passed and we thought we only had the one koi and one turtle, we ended up finding baby fish in our pond! At first we assumed the shubunkin laid the eggs and left them, but now as the fish get older, some look like koi and some look like shubunkin! You never know if the animals you’re adding to the mix are already pregnant and will be making babies in the pond.

7. Consider your reasons for wanting a pond pet.

Do you want to add a little life? Frogs are great for that, but be warned they can be quite noisy at night! Turtles are fantastic, but may wander into the grass and will need to be watched out for when mowing. Our turtle stays in the pond at all times right now but we are planning on creating an area for him to climb out and sun bathe in. It will be gated off so that the dog and chickens can’t get in and hurt him.

Each pond pet comes with unique needs you should be prepared for. If you want one solely for decoration, you might want to think again. Remember these are living creatures that need care and are for more than decoration. If you keep this in mind and are ok with it, a pond pet is sure to appreciate the space you provide!

Picking the Perfect Pond Pet - consider kids in the decision

A pond pet can be a lot of fun, a learning experience, and add greatly to your backyard pond. Keep these tips in mind when choosing the perfect pond pet, and you are sure to enjoy success.

Do you have a pond? Or are you considering creating one?

Teaching My Daughter To Find Her Dreams + a DIY Vertical Toy Storage Tutorial

This shop featuring a tutorial on DIY Vertical Toy Storage has been compensated by Collective Bias, Inc. and its advertiser. All opinions are mine alone. #InspireBigDreams #DreamBigPrincess #CollectiveBias

DIY Vertical Toy Storage Tutorial

My daughter. She is so strong. She’s always known what she wanted since she was a small child. I’m sure many of my family members remembered how she’d refuse a bottle because she knew she only wanted to nurse. She’d make my husband drive her all the way to my work to nurse her at lunch time. And then would wait until I got home to eat again. She still, to this day, knows exactly what she wants. And for the most part she knows how to get it.

From finishing fun projects she’s set out to start, to learning new things and going on fun exploratory journeys to do so. She is so brave. And so generous. And just the kindest girl I know. Sometimes I look at her and wonder how I got so lucky to have a daughter like her. She’s a lot like some of her favorite Disney Princesses. Inquisitive like Ariel, adventurous like Rapunzel, and smart like Tiana.

The other day she came to me asking if she could help kids who might not have as much as her. We had talked about how blessed we are as a family a few nights prior and how much we have after one of the kids had a meltdown after not getting a toy at a store. We went over how not everyone was blessed enough to have a huge birthday party every year, or is able to go to theme parks with their family, or even get new toys at Christmas and on birthdays. So my sweet girl asked how she could help make sure other kids got the gifts and toys they deserved. How could I not help her with this?

Building a DIY Vertical Toy Storage needs precise measurementsDIY Vertical Toy Storage - glue pieces before screwing together

So we set out to make a list of all of the places we could ask for donations. We also thought about how we could also chip in a bit to purchase new toys. And we came up with a game plan. Any time we head over to Toys ‘R Us to window shop or pick out a gift, we’re going to grab one extra. Guess what Molly’s doing to help? She’s saving up her dollars to use on the extras we purchase. Yup! She thought of that all by herself too. That kid. She makes me proud. 

And then she asked if we could make a toy chest for her room so she could put all of the extra toys we collect somewhere as we collect them. Since I’m not one to squash her ideas and dreams, we set fourth to make a great DIY vertical toy storage with her help, of course.  Why not build up her dreams literally and figuratively? 

DIY Vertical Toy Storage - measure twice cut onceDIY Vertical Toy Storage takes focus to build

With the help of a few princesses, some tiny field mice, a dad’s guiding hand, and a mother’s encouragement our project came together quite nicely. I think it’s absolutely amazing that both of our older kids love helping my husband and me with our projects. Whether it’s sanding, glueing, hammering, and even using a drill, they’re up for the challenge. It doesn’t hurt to have a super handy husband who can make just about anything. So when I drew out my vision he was 100% on board with creating a plan. 

Now her new dolls have a home, and we have designated to top box for new toys we’ve collected to donate. At the end of every quarter we’ll collect up our toys and find a local charity in need to donate them to. 

The best part about all of this? Now my youngest will have her own person to look up to and learn from. And I know her sister is going to teach her every thing she knows about following her dreams. Sure she’s only 1, but it’s never too early to encourage them to be strong and think for themselves even if it is a bit difficult at times. I’m up for the challenge! 

DIY Vertical Toy Storage Tutorial top tiers

DIY Vertical Toy Storage Tutorial and twirling with princessesDIY Vertical Toy Storage disney princess royal shimmer dolls

DIY Vertical Toy Storage

What you need:

  • 2 2’x6’x8′ doug fir boards
  • 3 1’x8’x8′ western red cedar boards
  • wood glue
  • miter saw
  • 3/8ths inch drill bit + drill
  • pocket screw jig
  • 12 1 1/2″ pocket screws
  • 12 2 1/2″ 5/16ths bolts
  • 12 5/16ths T nuts
  • 12 5/16ths washers

What you do:

Build 3 Boxes

  1. For the first box, cut one 1 x 8 x 8′ board into the following:
    – 2 – 24″ sections (front and back of boxes),
    – 1 – 22 1/2″ section (bottom),
    – 2 – 7 1/2″ section (sides)
  2. Screw and glue the pieces together. 
  3. Repeat again to make 3 boxes total

Build Side Box Supports

  1. Cut 2 x 6 x 8″ boards to 74″ long. These will become the side supports of your vertical storage.
  2. Lean one of the sides against a wall. Put a straight edge on ground against 2 x 6. Trace angle on 2×6. We used a 50 degree angle. Cut along line you have drawn. Transfer angle to other 2 X 6 and cut to match.
  3. Now put straight edge against wall and trace line on 2 X 6. Cut along line. Repeat for other 2 X 6. Both pieces should be identical.

Attach Boxes

  1. Lay one of the 2 x 6’s flat on the ground. Position one of the boxes in the lowest spot (bottom of box should be about 8-12 inches up from bottom of the board). Make sure to adjust box so that it’s level once it is resting on the wall. Next, lay out the second box. Finally position the third.
  2. When happy with the spacing, use screws to attach box to 2 x 6 side. Now put other 2 x 6 side flat on the ground. Flip partially assembled side to rest on 2 x 6. Attach with screws once lined up.
  3. Reinforce with bolts once unit is assembled with screws.

DIY Vertical Toy Storage close up of boxes DIY Vertical Toy Storage inside of box

DIY Vertical Toy Storage also good for books

If your daughter is interested in following her dreams and ideas, check out this great video from Disney on how she can be a champion too. You can find the full line of Disney Princesses at Toys ‘R Us including my daughter’s favorite Disney Princess Royal Shimmer Dolls and Little Kingdom Ariel’s Sea Castle. They’re easy to find when you look for the dedicated Disney Princesses aisle in store. 

Dream Big Princess Display at Toys R Us

How do you support your daughter’s dreams?

How to Create a Smart Home: DIY Home Energy Efficiency Tips

The reviewer has been compensated in the form of a Best Buy Gift Card and/or received the product/service at a reduced price or for free. This post contains affiliate links.
home energy efficiency tips

One bill I hate to see every month is our electric bill. Not only can the amount fluctuate from month to month but I feel as if now that I’m working from home I am the sole cause of the increases to our bill. But after doing my research I feel confident in applying these home energy efficiency tips in our home to help lower our electric bill.

And this couldn’t be a better time to start thinking about energy efficiency in our homes. Especially since our cost of electricity is expected to rise greatly come Winter.

If you’re concerned about high electric bills and want to do something to make your home more energy efficient (as well as save on your monthly bill!) consider making a few simple DIY changes around the home to help conserve your electrical usage.

home energy efficiency tips weather stripping

Home Energy Efficiency Tips

1. Close up the air gaps!

Talk a walk around your house and inspect the outer perimeter of your home to find where air can get in. Using weather stripping around doors and windows, eliminate air from getting in and out.

2. Replace your light bulbs

By replacing your light bulbs to CFLs or LEDs you can save up to 75% in lighting cost. An added bonus? They last longer too!

home energy efficiency tips cfl bulbs

3. Look at your HVAC system

Your HVAC system consists of the heating/cooling equipment, the thermostat, the pipes, the filters, and the duct work found in a central forced air system. Inspect your HVAC system to make sure it’s been properly maintained. If you aren’t sure when the last time it was checked is consider contacting a certified HVAC contractor to do an inspection.

If you don’t already have a programmable thermostat I suggest picking up a Home Nest Smart Thermostat. This is the new 3rd generation version, which is thinner, sleeker in design, and allows for a bigger, crisper display than the prior 2nd generation version.

Not only can you set where the temperature should stay throughout the day and night but you can save money by having your system run only when you want it to. We like to keep our air off until it reaches 78 in the house in the summer. We normally keep the house between 75 and 78 degrees when we’re home. And the heater doesn’t kick on until it’s 65 degrees in the house. But usually the temperature is between 65-70 depending on who’s home. With the Nest there is no need to set preferences – within a week, the Nest learning thermostat starts programming itself. It learns your habits and adjusts automatically, regulating your home’s temperature based on your schedule – which can save you energy and money.


Programmable Nest Thermometer

When used with the new Netgear exclusive router (on store shelves 11/4) you’ll be able to increase or decrease the temperature whenever you need to, even if you’re upstairs! This is a brand new router that was exclusively developed between Netgear, an industry leader in the networking world, and Best Buy, to help provide consumers with an easy, all-in-one solution to support their home’s connected devices.

Best Buy makes it easy with this new high performance Wi-Fi router, which includes a Wi-Fi extender and Geek Squad Set Up and Support via phone & web, for one full year. The Geek Squad service via phone & web allows customers to call or get help 24/7 whenever they want, vs. the need to schedule an appointment. Plus they’re always so friendly and helpful when you do connect with them!

home energy efficiency tips filtertone alarm

4. Check your appliances

Appliances make up about 17% of the average home’s energy usage. Refrigerators, clothes washers and dryers are at the top of that list. Make sure that your fridge temperature is set between 38-40 degrees F and your freezer is set to 0 degrees F. Use a digital thermometer to check the temperature.

If you have appliances older than 10 years you should consider investing in a newer, more energy efficient model.

5. Test your hot water

Heating water for bathing, washing clothes, and dishes accounts for as much as 15-30% of your household energy use. And the temperature setting of the hot water heater determines the energy used to heat your water. Make sure to check your hot water temperature with a digital thermometer. The temperature should be between 120 and 130 degrees F.

Don’t forget the insulation! Hot water heaters also need to be insulated. If the shell of the heater feels warm to the touch then it should be wrapped in an insulating blanket.

If your hot water heater is 15 years old it might be time to replace it. Look for replacement tanks that have an energy factor of over .62 for gas and .93 for electric. Gas-heated tankless water heaters save about 320% on your yearly energy usage.

home energy efficiency tips digital thermometer

6. Turn off your lights and computer

By simply turning off your lights when not in use, or installing timers to turn them off for you, you can save a lot on your utility bill!

Consider solar lights for the outside of your home or in your garden. Not only will they not be using electricity but you can still feel safe knowing the lights are on outside. We love our solar powered motion censored light out in our front and back yards.

Take a walk around the house and make note of the equipment that is plugged in but not being used. Consider unplugging these devices or investing in a smart strip. Smart strips are easy and convenient to use and will shut off the power to devices that are plugged into it but not in use. You can reduce your energy output by 21$ with just one smart strip installed!

home energy efficiency tips smart strip

Incentives from your local utility, plus federal tax credits and other options, can save you thousands of dollars on your Energy Upgrade. It takes a little bit of research and some work but you, too, can reap the rewards of having an energy efficient home and feel good about saving money and conserving energy.

If you decide to do a whole house energy upgrade it’s best to start with a professional home audit. Your local utility company can provide you with a list of auditors and may even cover all or some of the cost!

How do you save on your utility bill?

How to Build a Vertical Garden Using Pallets

 This post contains affiliate links. 

How to Build a Vertical Garden Using Pallets

Ever wonder what else you can do with pallets? I mean besides the thousands of other ideas you find all over the interwebs? Well, my husband and I figured out how to build a vertical garden using pallets. And they’re quite fun!

Now, I want to tell you right now that we’ve had some interesting finds when building these. The first? It’s really difficult to get dirt to stay IN the pallets once you start watering them. Especially if you don’t use a soaker hose line and just spray them with the garden hose.

My son had fun with the muddy clumps that came with that! But once the dirt is settled into the pallets it’s actually quite a good way to grow fun things and makes an awesome display for your yard.

build a vertical garden using pallets - before

This above was the side of our house in the front yard before we put the pallets in. I hated how empty and plain the space was and wanted to use the vertical garden to spruce it up and bring life to this part of the yard.

I don’t think my husband quite understood exactly what I was envisioning in my head but with some team work, a few dirty looks and rolling eyes, and some muddy kids, we got it done.

Oh… and if you’re having trouble finding pallets because everyone and their mom is grabbing them up to make things like this, go to Home Depot or whatever other hardware stores you have around and ask for their sod pallets. They’re more flimsy/rickety (hence the support added) but are perfect for this type of project!

Here’s how!

build a vertical garden using pallets - pallets

How to Build a Vertical Garden Using Pallets

Supplies:

Wood

  • wooden pallet
  • 2×2 doug fir
  • 2×4 doug fir
  • 1×8 cedar fence board
  • 2 4×4 cedar posts

Materials

What you do:

build a vertical garden using pallets - drilling on support beams1. Measure length of pallet and cut 2x2s to that length. These will give extra support to the pallet.

build a vertical garden using pallets - staple black garden cloth

2. Staple weed block fabric to the back of the pallet, pulling taut to make sure it’s stretched all the way across. Layer if needed to cover the full back.

build a vertical garden using pallets - add support panels

3. Measure the width of the pallet from 2×2 to 2×2 and cut 1×8 fence boards to that length. Screw in place over the weed block fabric.

build a vertical garden using pallets - dig post holes and level post

4. Measure the distance you need your posts to be installed on the ground and dig holes for posts. Cut posts to size depending on how far above the ground you want the pallets to be. Make sure to bury them about 1-2′ in the ground to provide a sturdy base.

5. Set posts in the ground by covering with dirt and using a level to determine if you need to move or shift the posts. Measure the back dimensions of the pallet to determine exactly how far apart the posts should be. This will vary with every pallet.

build a vertical garden using pallets - attaching pallet to posts

6. Measure where you want the bottom of hte pallet to be and mark off that height on each post with a pencil. Then cut the 2×4 to the width between the posts. This board will act as a frame for the pallet to sit on. Screw the 2×4 into position directly underneath the line you’ve drawn.

7. Lift pallet into place on the frame and screw to secure.

build a vertical garden using pallets - fill with dirtHow pretty are they??

Next up is the hard part… this is where we had the most trouble… trying to pack in the soil to make sure it stayed in place and didn’t spill all out.

Now you’re probably asking why we didn’t start our pallet garden on the ground and then lift it into place once the plants were established. Well.. you *could* do that but just think of how heavy those pallet gardens would be. Crazy heavy! So we did it this way.

build a vertical garden using pallets - dirt in pallet

8. Using the cardboard stapled to the front of the pallet, fill the pallet with mulchy garden soil. Pack down each layer as you go to make sure it’s secure. There will be some dirt that falls out, simply fill it back again or leave it as is to settle more and fill later.

9. Plant with whatever seeds you think will grow best! We stick to lettuce in one planter and herbs in another with a few strawberries at the bottom. It’s pretty fun to step out and grab herbs whenever I need them!

build a vertical garden using pallets - planting from startersAnother problem we ran into was using starter plants we purchased instead of seeds. While in theory this would work great, when you put a plant that’s been growing vertically in a horizontal planter into a vertical planter and ask it to grow horizontally it looks like this above… droopy.

It’s also quite messy and hard to get the starter plants IN the planter and you spill a TON of dirt everywhere. Our solution? Seeds… start from seed and install an irrigation system with a soaker hose. You can find everything you need for the soaker hose in the irrigation aisle at your local hardware store.

build a vertical garden buckets for run offIf you’re going to use an irrigation system with your garden, know that there will be water that drips down constantly. In order to conserve that water to use on our other plants and in our raised garden beds, we simply put buckets underneath to catch the excess water.

You know what else we found? Bees LOVE to come and drink the water that pools on the last rung of the pallet because they love mineral rich water. That means you’re helping the bees with your vertical garden too! Here’s a close up of a bee drinking. This is a regular sighting.

build a vertical garden using pallets - plant from seed

While it’s been a crazy process, I absolutely love how the vertical gardens make the side of our house look. I consider them more of a decorative piece in our front yard but love that we also get the benefits of growing our own herbs and lettuce.

And since our pallets are in the shade for most of the day, we had to choose plants that would work well in these conditions. I’m sure there are other things one could grow if their vertical garden were directly in full sunlight.

build a vertical garden using pallets - planted

What would you plant in a vertical garden?


© A Crafty Spoonful - All Rights Reserved
It is OK to use one of my photos provided a link back and/or proper credit is given. It is NOT ok to copy and paste a whole post including instructions. Please do not remove watermarks or alter images in any way. Please contact me with any questions at danielle@acraftyspoonful.com

.