10 Halloween Craft Ideas for Kids

halloween craft ideas for kids

Looking for great ways to bring the upcoming Halloween season to life with your kids? Why not try your hands at these easy, creative crafts that they can do right along side you!

There’s something for everyone in these 10 Halloween craft ideas for kids.
10 Halloween Craft Ideas for Kids [Read more…]

Smarties Are The Perfect Halloween Sweet Treat

One of my favorite parts of my childhood Halloween experience was racing home from trick or treating to sort out all of the Halloween candy I received. I was obsessed with finding my favorites (Smarties were at the top of the list along with chocolate). And one of my favorite parts of Halloween now are the decorations we put up each year. I absolutely love how festive and creative we get each year.

My husband is quite the Halloween decor enthusiast. Each year he purchases foam pumpkins from the store and creates a new face. And in an effort to keep up with him, I try to get creative as well in the decor inside our home.

Smarties Halloween candies #IAmASmartie

Gluten-Free and Allergen Free

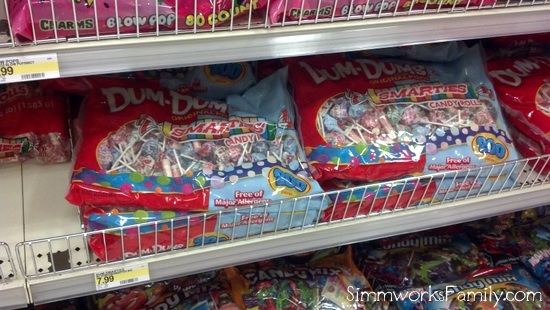
This year I headed to Target to pick up some decorating supplies and candy to pass out. Since there are so many allergies and special diets these days, we went simple. Smarties all around! And I planned on decorating with Smarties as well.

Smarties are not only gluten-free, but they also contain no peanuts and are fat free! They’re the worry-free, one-size-fits-all candy this holiday and are the perfect choice for passing out. I was able to pick up a large bag of Smarties and another bag of Smarties and Dum-Dums mixed together. My daugther was absolutely elated to put these bags into the cart to take home.

Fun for All Ages

I always make sure to pick up some goodies for smaller children who aren’t able to eat candy so I grabbed a pack of Play-Doh as well. Once I had everything I needed to pass out to the kids, I grabbed some decorations to make our home festive.

Since we also needed a bucket for my daughter (she was a bit too young last year for a bucket), we picked up a classic pumpkin bucket to match her brother’s. My son’s bucket is personalized so I grabbed some scrapbooking alphabet stickers to personalize hers as well. It makes a simple bucket their own and I love the ease of it.

You can check out the rest of my shopping experience in my Smarties Google+ Album.

Fun and Festive Wreath

In an effort to tie in the fun of one of my favorite candies with the decor in my home, I decided to turn a Target $1 Spot foam wreath into a festive piece for my front door. Along with the pumpkins and spider webs in our front yard, our trick-or-treaters would also see this gorgeous wreath and know exactly what they’d be getting in their buckets.

To create my wreath I simply glued Smarties in their wrappers onto the wreath. By gluing them seam side down, the wreath can stay in tact for many years. Because the Smarties left gaps as I glued the first layer I decided to add a second layer. And even though it added a bit of weight to the wreath I absolutely loved the look it gave to the finished piece. I simply tied dome wire ribbon to the top and hung it on my door.

To find out how to make this wreath step by step, check out my Smarties Wreath DIY Tutorial here.

Sweet Treats

After creating our wreath, we wanted to celebrate by using our Smarties in a different way.With our Parish Festival coming up we were already planning on making some delicious goodies to sell in the Bake Shop to raise money for the church. We made some delicious Smarties Sugar Cookies that were absolutely delicious.

Instead of using the Smarties whole in our cookies I decided to crush them into a flour and use them in a family sugar cookie recipe. not only did they give great flavor to the sugar cookies, they were the perfect treat for Halloweentime. We packaged them in with a few whole Smarties in with the package to share our Smarties love.

You can check out my Smarties Sugar Cookies recipe here

If you’re looking for a great treat to pass out to the goblins and ghouls who come to your door this Halloween, pick up a large bag of Smarties and you’ll be set! And if you want to get a bit creative… see what you can make with Smarties this Halloween.

Make sure to head over to visit Smarties on Facebook and follow Smarties on Twitter to indulge in their sweet goodness.

What would you do with Smarties candy?

Disclaimer: I am a member of the Collective Bias™ Social Fabric® Community. This shop has been compensated as part of a social shopper insights study for Collective Bias™ and Smarties. All opinions are my own. #CBias #SocialFabric

Smarties Sugar Cookies

I love when I can take something that I love and create something equally as great. Smarties are one of my favorite Halloween sweet treats and I love passing them out to trick-or-treaters. Not only are they gluten-free, they’re free of most allergens and are low in fat as well. But in this recipe they are most definitely not gluten free. Nor are they low in fat…

By pulsing the Smarties in a food processor I created a flour and used the Smarties in a family sugar cookie recipe. I simply reduced the amount of sugar called for in the recipe and subbed the Smarties flour. The end result was fantastic! A not-too-sweet sugar cookie that was definitely flavored by the Smarties. Yum!

And perfect for any Halloween party coming up. We baked them up for our parish festival’s bake sale and they were quite a hit. Three to a bag with a few Smarties thrown in. Who could resist? [Read more…]

How to DIY a Smarties Wreath this Halloween

When we get ready for Halloween, decorations in our home are up there with Christmas. We decorate the whole house inside and out to celebrate for the whole month of October. Many of the decorations we use can be carried into November as well with a festive Fall theme but a few we make just for Halloween!

This Smarties Wreath is just that. The perfect celebration of Halloween and the excitement that each child feels as they go from door to door saying, “Trick or Treat!” This wreath is not only festive, it’s easy to make as well! You only need a few simple items to put it together and it takes less than 30 minutes to make!

As an added bonus, it only cost me $5 to make. The $1 Spot at Target has these foam wreaths and the Smarties candies are only $7.99 for a huge bag and I only needed 1/2 the bag to make the wreath. I had the ribbon on hand from the end of season sale last year. And the left over Smarties will be passed out to trick or treaters on Halloween! [Read more…]

Pumpkin Cupcakes with Maple Cream Cheese Frosting {Dessert Recipe}

As I mentioned before, I’m a bit obsessed with pumpkin. And as soon as I got a whiff of coolness in the air I got to baking. I’ve been craving these cupcakes since the first time I made them a few years ago and with a few minor tweaks I think I’ve perfected my recipe.

These were delicious! And even better when left in the fridge overnight and eaten for breakfast the next morning with a hot cup of coffee 😉 But if you can’t wait that long to savor the goodness just make sure to allow the cupcakes enough time to cool before frosting them. You won’t be disappointed!

Pumpkin Cupcakes With Maple–Cream Cheese Frosting

Cupcakes

  • 1 stick unsalted butter, room temperature
  • 1 cup firmly packed dark-brown sugar
  • 1/3 cup granulated sugar
  • 2 cups cake flour
  • 2 teaspoons baking powder
  • 1 teaspoon baking soda
  • 1 teaspoon ground cinnamon
  • 1 teaspoon ground ginger
  • 1/2 teaspoon ground nutmeg
  • 1/8 teaspoon ground cloves
  • 1/2 teaspoon salt
  • 1/4 teaspoon freshly ground black pepper
  • 3 large eggs
  • 1/2 cup buttermilk
  • 1 teaspoon vanilla
  • 1 cup canned pumpkin

Frosting

  • Two (8-ounce) packages cream cheese, softened
  • 1 stick unsalted butter, room temperature
  • 2 cups confectioners’ sugar
  • 1/4 cup pure maple syrup
  • 1 cup heavy whipping cream

 Preheat the oven to 350° (175°C). Line a cupcake pan with 18 liners.

Cupcakes:
Pour the milk into a measuring cup and add vanilla.

In a stand mixer, beat the butter and sugars on medium speed until fluffy, about 5 minutes. Meanwhile, sift the flour, baking powder, baking soda, cinnamon, ginger, nutmeg, cloves, salt, and pepper into a medium bowl.

Add the eggs one at a time to the mixer, scraping down the sides after each addition. Alternate adding the flour and milk mixtures, beginning and ending with the flour. Beat in the pumpkin until smooth. Scoop the batter into the cupcake liners, about 3/4 of the way up. Bake the cupcakes until a toothpick inserted into the center comes out clean, about 20 to 25 minutes. Cool the cupcakes on racks completely.

Frosting:
In a stand mixer beat all the ingredients on medium until fluffy but firm. Frost the cupcakes using either a spatula or a pastry bag w/ a large tip. Refrigerate the cupcakes for 30 minutes to set up frosting.

Cutest Sushi Roll Ever {The Wishing Elephant}

Some moms and dads would rather not attempt to DIY a costume for their kids. Whether it be a hectic schedule, lack of materials or they’re just plain bad at crafts, it’s ok! There is a way to have your kids look super adorable in a DIY costume with none of the super glue or felt flying around the house. A great place I like to look for DIY costumes is Etsy. Some of the Etsy stores I’ve stumbled upon have costumes that would be perfect for your little ones.
 

A few weeks ago a good friend, Heather, posted a link to The Wishing Elephant’s Etsy store. The link went to a sushi roll costume and I knew it was the perfect idea for a great DIY costume. Now I don’t have a lot of time on my hands but I was prepared to try and re-create this costume for a news segment we were invited to participate in for The Mama Mary Show and Fox 5 News. I was already making the dino costume for my son so what’s another costume, right? But when I showed Mary the costume she contacted The Wishing Elephant and they surprised us by offering to send over a onesie in my daughter’s size!

Photo Courtesy of The Wishing Elephant

We were able to get the costume in time for the segment and as soon as we made it to the Fox 5 green room we put it on and were in awe of the cuteness! Everyone who saw Miss M fell in love with the costume and I’m pretty sure that she stole the show. At least she caught the eye of the news anchors! The costume was simple, well made and super comfy for any infant. I added a pair of neutral cream baby legs to protect Miss M’s knees and a cute headband from Evi Luna Boutique to create the look you see above.

And not only does The Wishing Elephant have adorable costumes for Halloween, they have a whole array of cute onesies that range from adorable gnomes to the ever so popular Mario and Luigi from The Super Mario Brothers. I’m especially smitten with the bow tie onesie. If we ever had another little boy I’d have to purchase it for pictures (NO! I’m not pregnant!). If you are looking for unique onesies for your little one or the perfect baby shower gift, you’ll find it here! Their appliques are made with eco felt (100% post consumer recycled plastic bottles) so you can feel good about your purchase.

Make sure to head on over to The Wishing Elephant’s Facebook page or blog and show them some love from The Simmworks Family Blog! We truly appreciate their generosity.

Ah! Sushi-zilla!

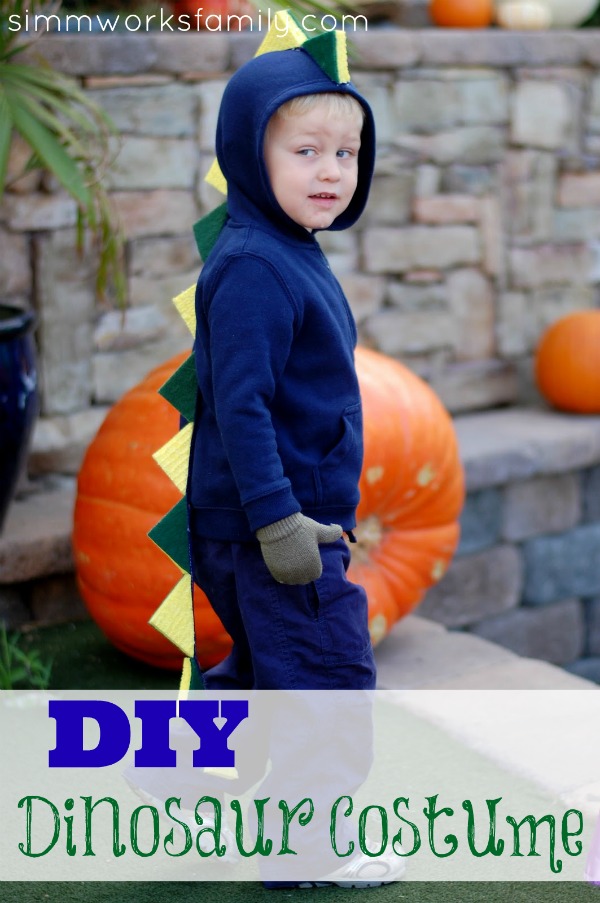
Rawr Dinosaurs! {DIY Dinosaur Costume}

DIY Dinosaur costume

My son is obsessed with dinosaurs. He’s loved them ever since he was introduced to Dinosaur Train on PBS Kids shortly before his second birthday. I thought it’d be fun to try and design a simple dinosaur costume for him to wear whenever he wanted around the house. I didn’t want to spend too much money so I used simple materials I already had and some sponges I picked up on a recent shopping trip. I got the idea from Rookie Mom by doing a simple search for DIY Dino costumes and just adjusted it to fit a two year old. For his 3rd birthday I might attempt to make this Buddy the Dinosaur costume (the no-sew option)… maybe.

If you want to make your own DIY Dinosaur costume just follow these simple steps below.

How to make a DIY Dinosaur Costume [Read more…]

Bates Nut Farm 2011 – A Family Tradition

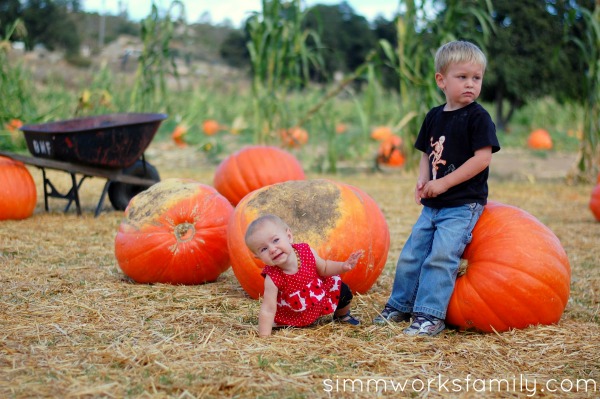
I don’t know if I’ve mentioned this before but I love traditions. And when I had kids I knew I wanted to create some traditions with my little family that we could continue to do every year. One of those traditions was going to a pumpkin patch every year. And not just any pumpkin patch, Bates Nut Farm. Ok… so no, it’s not called Bates Pumpkin Patch but this farm is a great location for family fun during the Fall season.

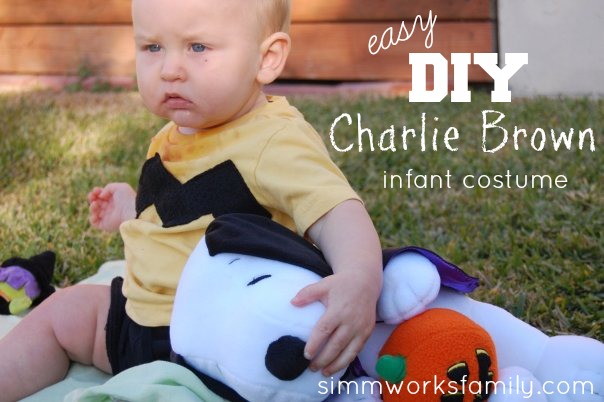
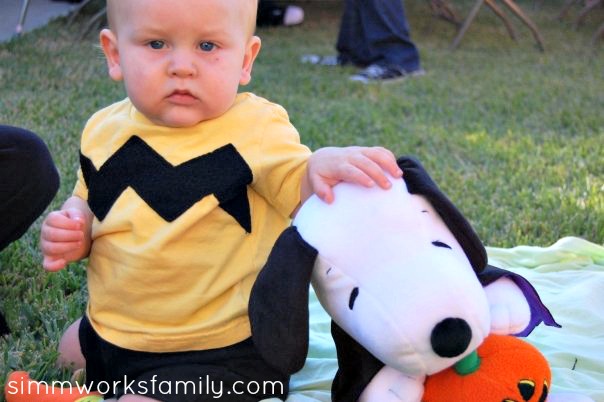
Charlie Brown Halloween Costume for Baby

We had a wonderful day today. It all started with pumpkin carving and ended with a wonderful Halloween party at my neighbor’s mother’s house. Little E had a wonderful time with all the kids and I took many pictures!

Everyone loved his costume and we got many compliments for it. Most were shocked to find we made it ourselves but it was so simple I couldn’t see NOT making it!

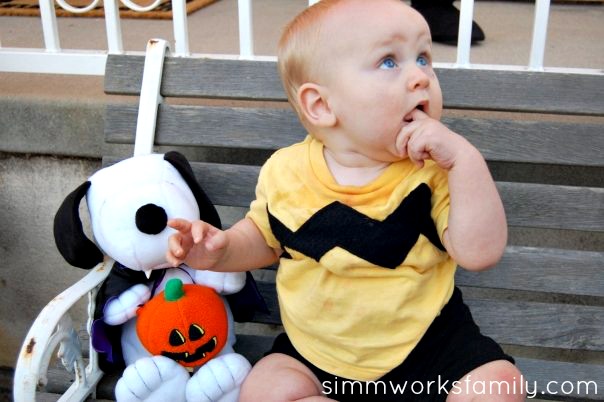
Since this was Ethan’s first Halloween we didn’t want a costume that would make him too hot or uncomfortable so we stuck with an easy Charlie Brown costume. A t-shirt with a squiggle and shorts, how simple is that!

Charlie Brown Halloween Costume for Baby

How to make a Charlie Brown Halloween Costume for Baby

What you’ll need: 

What you do: 

Ok guys… this can’t get more simple. Cut your black fabric in a zig-zag pattern. Apply No-Sew to the back of the fabric and adhere to shirt. Let dry completely.

Try the shirt on, add the black pants and brown shoes and your Charlie Brown is ready for his big debut! Remember to add Snoopy for an added touch so no one will ask what your little man is for Halloween.

Extra bonus points if baby is still bald… like mine!

charlie brown halloween costume for baby 1

My husband made an iron-on transfer for his shirt that had a picture of Charlie Brown and it said “Wah, Wah, Wah” all over it and underneath Charlie it said “Charlie Brown’s Dad” so everyone would know what the “Wah, Wah, Wah” meant. So cleaver he is!

Image and video hosting by TinyPic

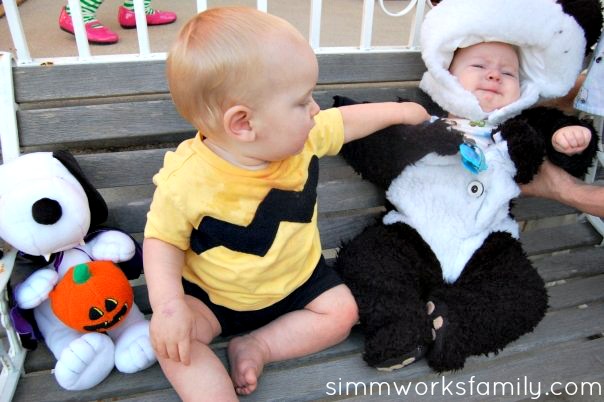
And one more showing Charlie Brown with his Pirate mommy… my neighbor is the lady in front of me with the most adorable panda bear 🙂 He’s 5 months old and we always talk about how E and him are going to be the best of buds when they’re older.

E and his buddy. And shortly after this was taken…

charlie brown halloween costume for baby 4

He didn’t know what he did wrong 🙂

charlie brown halloween costume for baby 5

I hope everyone had a safe and Happy Halloween!

Here’s a Quick Way to Make a Maternity Bun In The Oven Halloween Costume

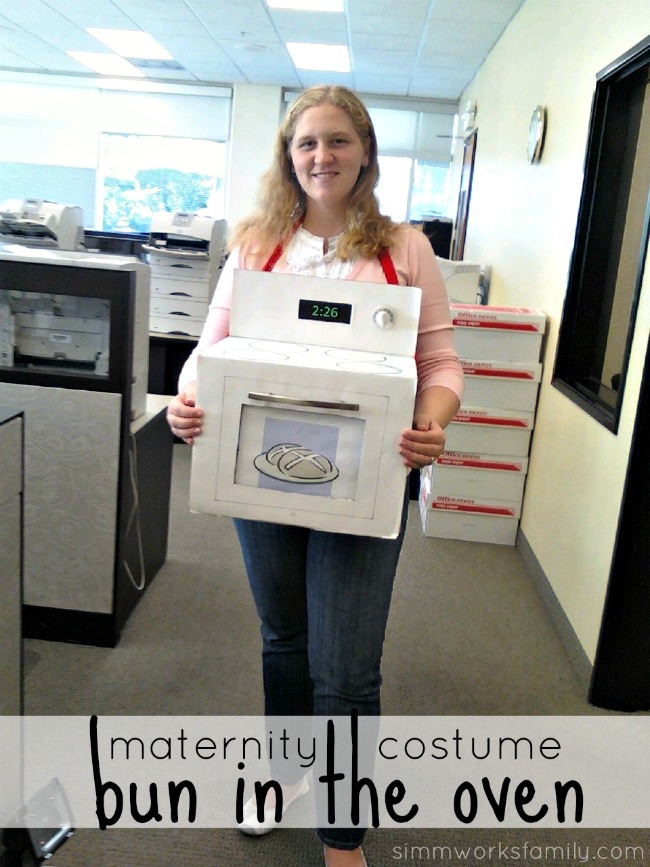
Bun in the Oven Halloween Costume


I had to share my Halloween costume with everyone. Yes, there is a bun in the oven. Yes, my hair looks really bad and I have no makeup on… hopefully, I can get a better picture to post soon!

Making this costume was super easy. I grabbed a white box I had lying around, printed off a clip art photo of a bun, grabbed some hardware from my work, and printed out the due date as the time on the oven. All in all, it took less than 30 minutes and was perfect for me to wear to work. This would also be great for parties and is super comfortable and not too intrusive. 

Bun In The Oven Halloween Costume

What you’ll need:

What you do:

1. Close up one side of the box and tape shut.

2. Turn the box around and cut off the two smaller panels and one of the longer panels off leaving one long panel.

3. On the closed side, paste the bun image onto the box. Trace with a sharpie to create the oven window. Attach the cabinet door hardware.

4. On the top of the box create oven range coils by using the sharpie.

5. On the long flap add rectangle print out of due date in time form as the clock on the oven. Then add the oven knob.

6. Add the ribbon on either side of the long flap and place over your neck to wear.

Were you ever pregnant on Halloween? What did you dress up as? 

Love this idea and want more? Read on! 


© A Crafty Spoonful - All Rights Reserved
It is OK to use one of my photos provided a link back and/or proper credit is given. It is NOT ok to copy and paste a whole post including instructions. Please do not remove watermarks or alter images in any way. Please contact me with any questions at danielle@acraftyspoonful.com

.