Upcycled Container Gardens: Housing Your Herbs

Upcycled Container Gardens Housing Your Herbs

Around this house, we try to repurpose and upcycle as many things as we can. If it can’t be composted or turned into something else, we try to donate. So very rarely do we end up with things that go in the trash. This makes for a great assortment of containers to be used in the garden.

When we picked up our chicks I knew we’d need a little home for them until they were big enough to go straight into our coop. At 3 weeks old they’d need to stay warm indoors so I picked up a metal bucket at our local hardware store.

Since I knew I would only be using the bucket for a short period of time I already had it earmarked for a project I’d wanted to do for quite a while… a stand alone herb garden!
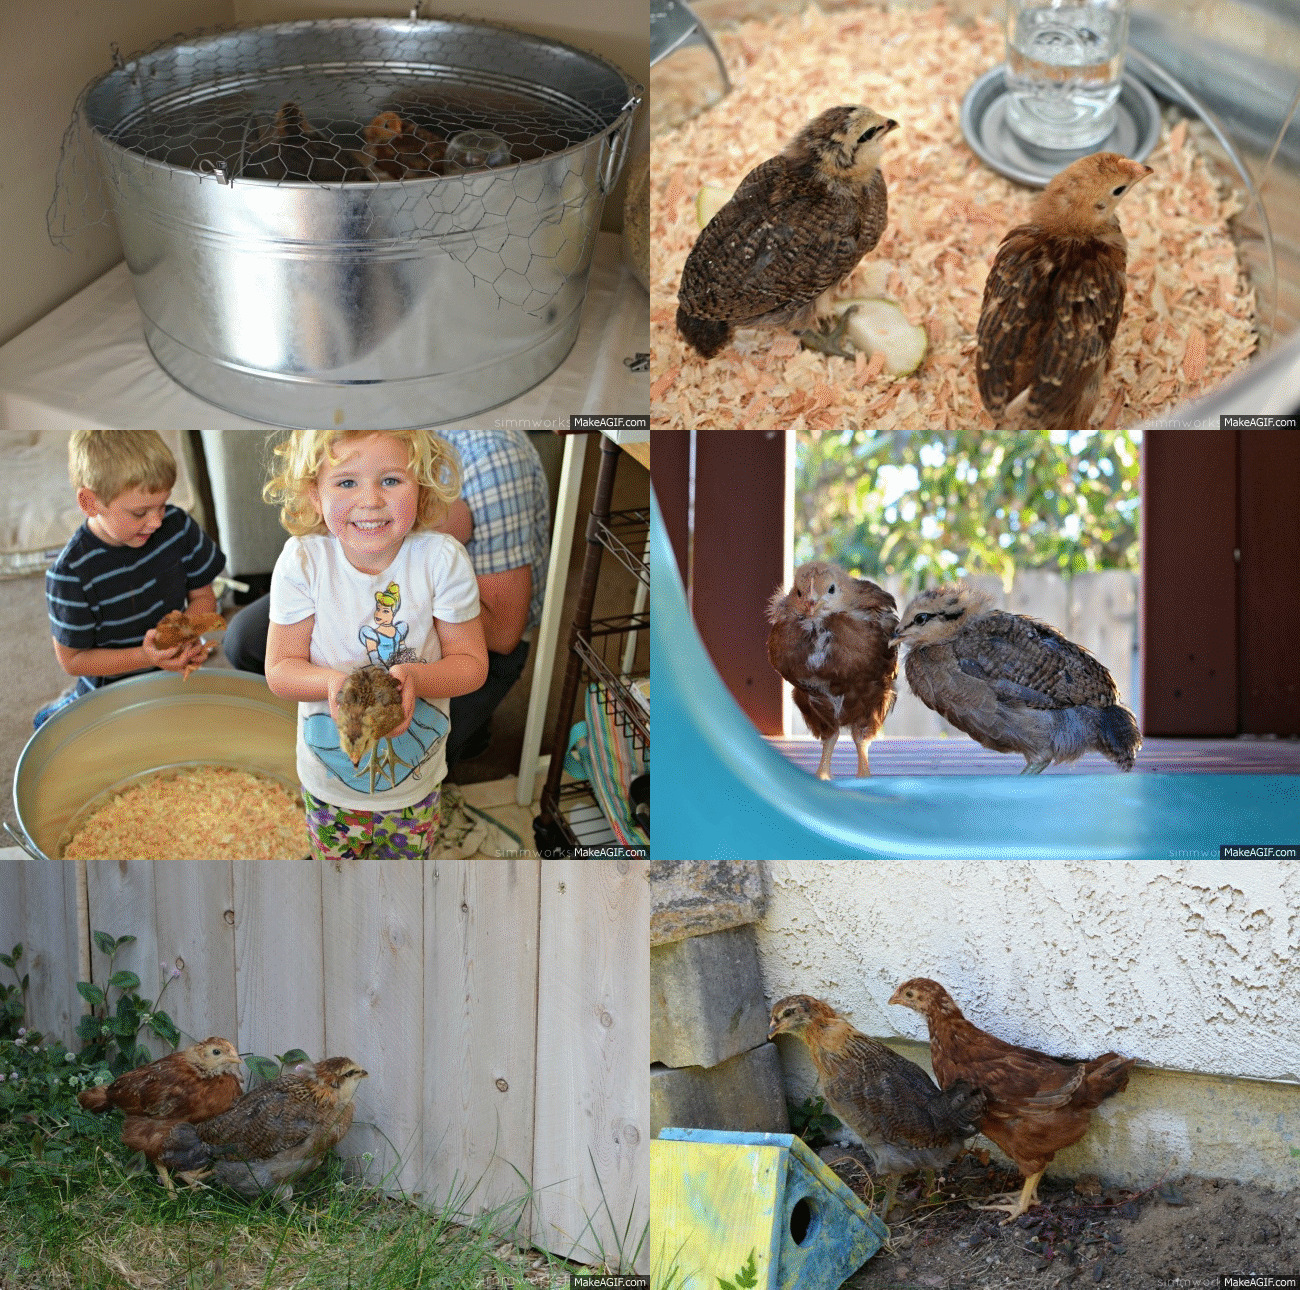
Growing Chicks
I’m not sure if you know this but chicks, like children, grow like weeds! Seriously.

I turned around for a second and these cute little baby chicks are almost chickens at 2 months! But we still have 4 more months until they’re actually laying eggs (so I’m told).
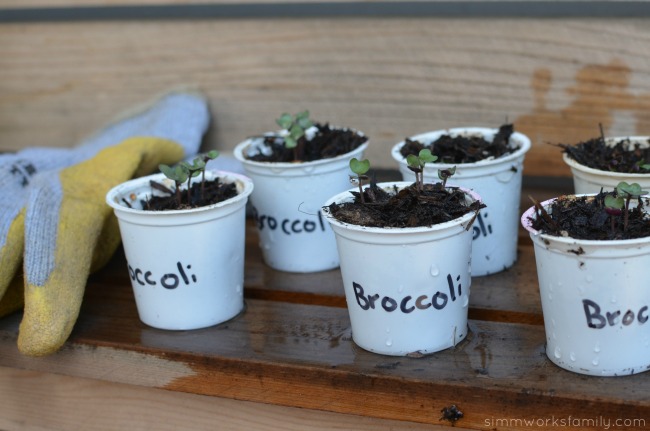
Upcycled Container Gardens - growing seedlings

With so many things growing in our raised beds (like the broccoli that’s sprouting from our DIY K-Cup Seed Starters) we didn’t have any more room for the herbs I love to have on hand for cooking.

So it just made sense to have a container garden on the patio. What’s a better green work of art than a container garden?

Our next step will be to build a stacked container garden to house the strawberries we’ll be planting soon! How awesome does that sound? It’s as simple as taking this idea and stacking a few smaller containers on top of one another. Then planting in each tier.

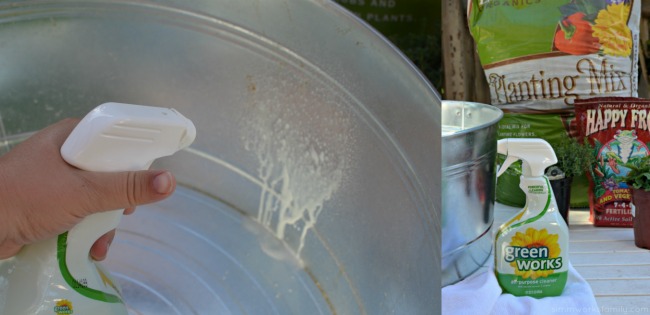
Upcycled Container Gardens - cleaning out the container


Because our tub housed the chicks, I wanted to make sure that I cleaned the container very well before putting the soil and plants inside.

While some might question why I would clean out the container first – don’t people buy chicken manure? – the chicken poo that may be on the container hasn’t been composted yet. And I don’t want any bacteria that may have been left in the container to contaminate my plants.

But more on composting chicken poo later! Let’s get to this herb garden. First up – the chalkboard label.

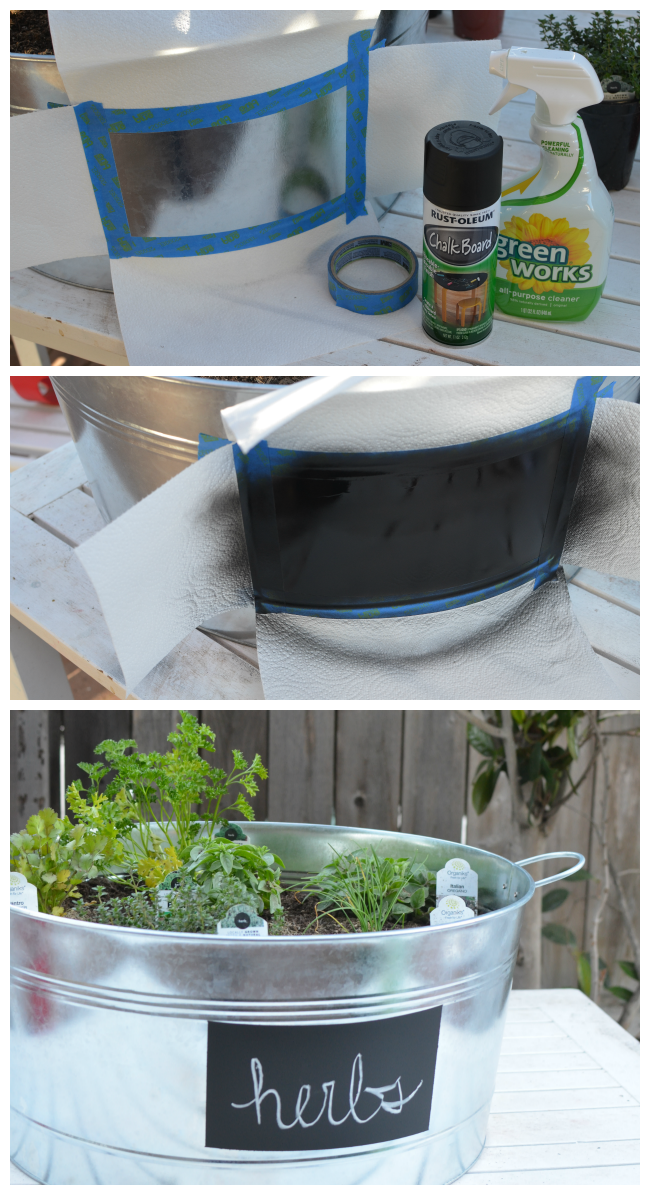
Upcycled Container Gardens - DIY Chalkboard Label

 Upcycled Container Garden Chalkboard Label

What you’ll need:

  • 2 paper towels (can also use newspaper)
  • painters tape
  • chalkboard spray paint
  • metal container

What You Do:

1. Wipe down the area you wish to put the chalkboard paint on with an all-purpose cleaner. Then rinse the container out with water and let dry.

2. Grab two paper towels and cut each in half (4 half sheets). Then cut one-half sheet in half again. You’ll have 3 half sheets and 2 quarter sheets.

3. Using the painter’s tape and the paper towel pieces, create a square or rectangle space to spray paint the chalk onto.

4. Put extra paper towels under the container to protect the table underneath from paint.

5. Using the chalkboard spray paint, spray on two coats of chalkboard paint onto the container. Wait about 20 minutes in between each coat to allow them to dry.

6. Remove the paper towels and tape to reveal your chalkboard label. Write on it with chalk and display for all to see!

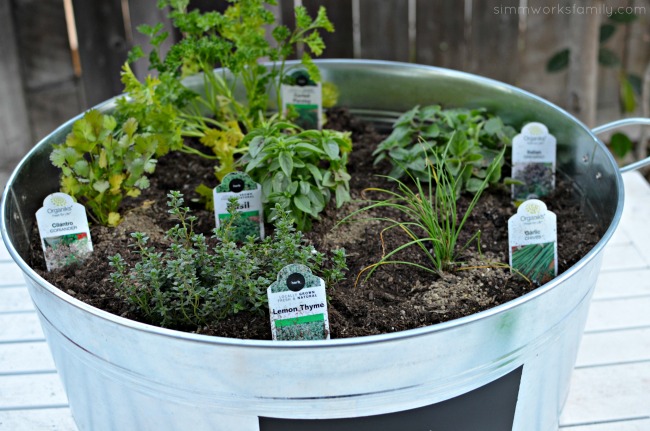
Upcycled Container Gardens - variety of herbs

Tips for Planting Herbs in a Container Garden

  1. Use good soil – find a soil that’s good for growing vegetables or use a good blend of soil and compost
  2. Depending on where you’re putting your container garden, consider the height each herb/plant gets and plant taller herbs in the back
  3. Plant what you know you already use now in the kitchen
  4. Make sure you are also giving your herbs vegetable food (found at any garden center)
  5. Place the container garden in a spot that will receive direct sunlight and make sure to water!
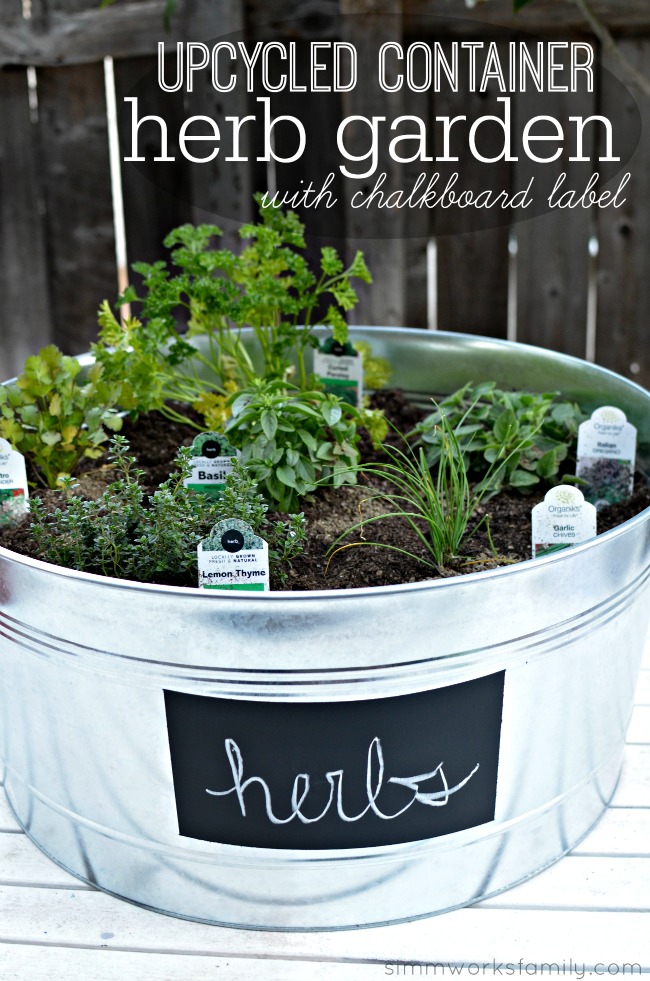
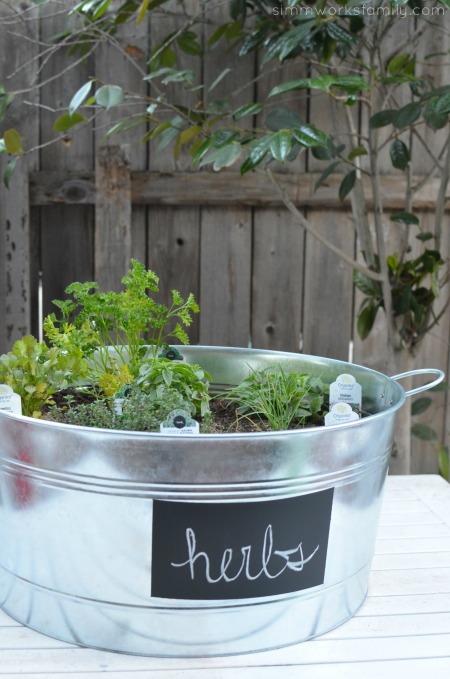
Upcycled Container Gardens with Chalkboard Label

What’s your favorite way to upcycle old containers?

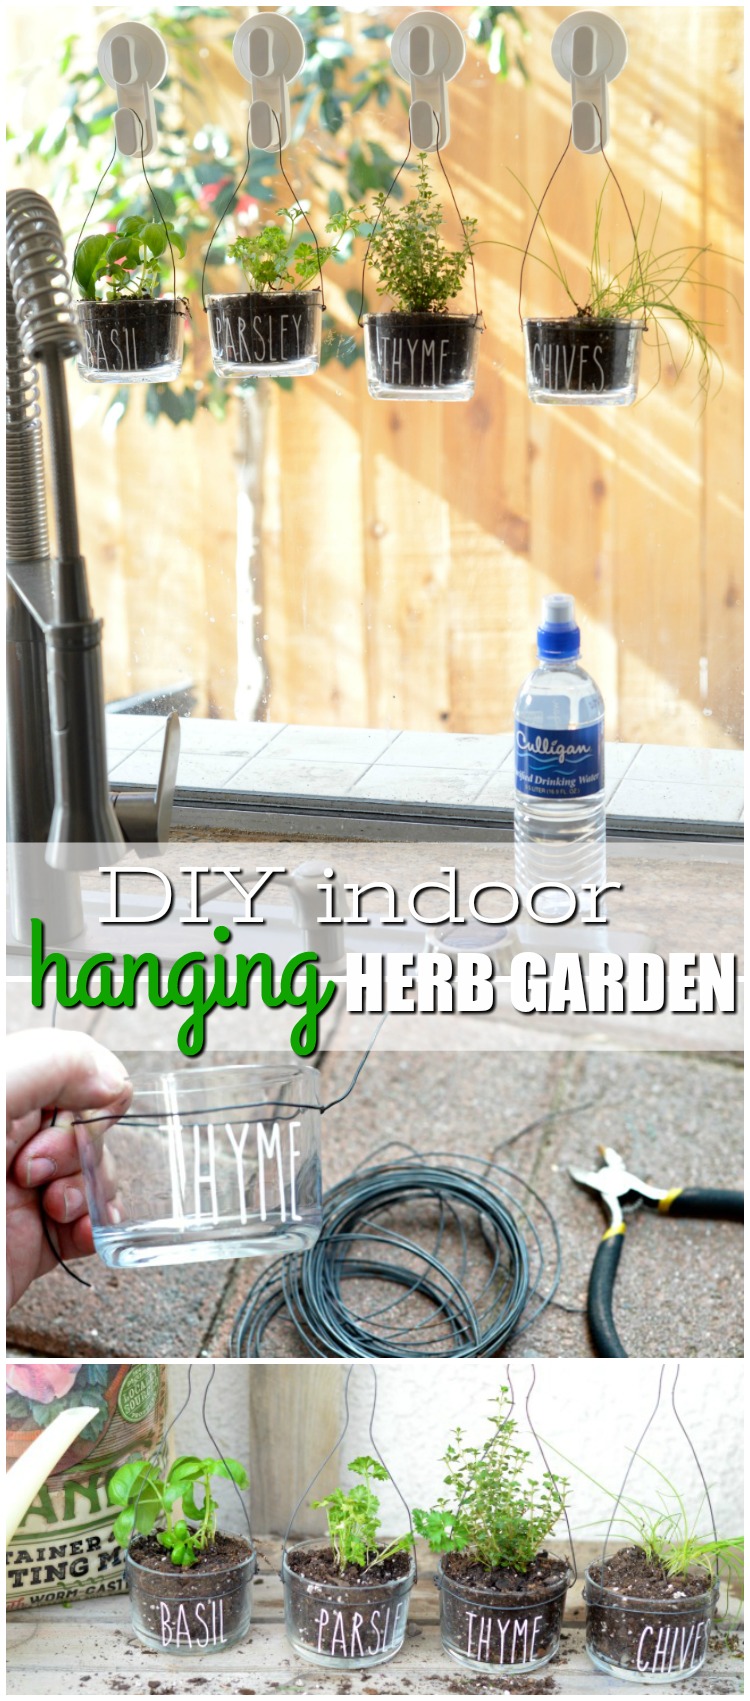
DIY Indoor Herb Garden Ideas: Easy to Make Indoor Hanging Herb Garden

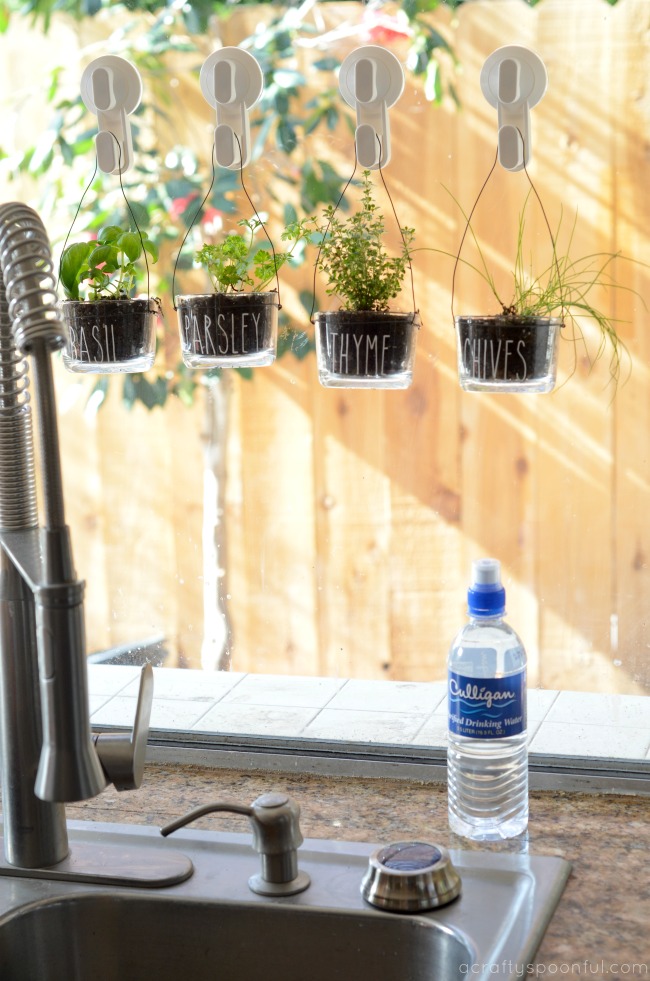
This DIY Indoor Hanging Herb Garden is the perfect way to bring the garden indoors! Plus you’ll have fresh herbs for whatever you’re whipping up for dinner. This post was sponsored by Culligan Water as part of an Integrated Program for Influence Central and all opinions expressed in my post are my own.

Water is the one thing that makes the world go round. And filtered water is something we can’t live without. As a busy mom of 3, I am constantly filling up water bottles at our fridge or turning on the tap to make dinner. And all of that water usage had me thinking… are we drinking the best water we could be drinking? The answer was no. And I’ll tell you why… while we had an under the sink water filter, it wasn’t pulling out everything it could be to ensure that our water was safe to drink. 

We live in Southern California. We’re known for our droughts and lack of water. So any water we do have is usually brought in from another source. Our source? The Colorado River. Since our water comes from so far away, it has quite a journey to reach us. and that means there’s more chance of contaminants leaching into our water supply. Being able to ensure that we get those contaminants out of our drinking water was goal #1 for me. The second goal? How our water affected not only drinking but other water usages like showering, our garden, and our pets. 

Luckily we were asked to check out Culligan’s Water Filtration System. We just had the ClearLink PRO installed in our home.

Stay tuned for a follow-up post sharing how Culligan has positively impacted our daily usage of water. As of now, while we’re still testing the system, we thought it’d be fun to share how we can bring the garden indoors and add a bit greener to the meals we’re making with the help of a DIY indoor hanging herb garden. Here’s how!

Changing How We See Water

We knew our home needed a few updates to our water filtration system. We previously used an under-the-sink filter for our tap water as well as another filter in our fridge for the water that came out of the fridge door. But one in-home consultation with a Culligan expert showed that even these filters we had in place weren’t taking out everything we wanted to keep out. With water playing such a crucial role in our daily life – being used in the food we make, the water we (and our pets) drink, and what we use to water our own edible garden – a few changes to our water filtration system was a must. 

Culligan’s goal is to provide water that its customers can trust and offer the best possible customer service experience out there. With over 80 years of water quality and service industry experience, they strive to help individuals identify their water issues right in their home – whether that be hard water, water filtration or taste of their water. After our in-home consultation, our new Culligan Water Filtration System was installed. And with the push of a button right by our sink, fresh and filtered water comes right out of our faucet. The system is so easy to use that even the kids can get their own filtered water from the sink. We also had a filtered water line run to our fridge as well. 

Now that our system is in place, we’ve been enjoying the perks of filtered water. We’ll be sharing our full journey from start to stop in our next post featuring Culligan so stay tuned. Now for our tutorial on this easy to make DIY Indoor Hanging Herb Garden! 

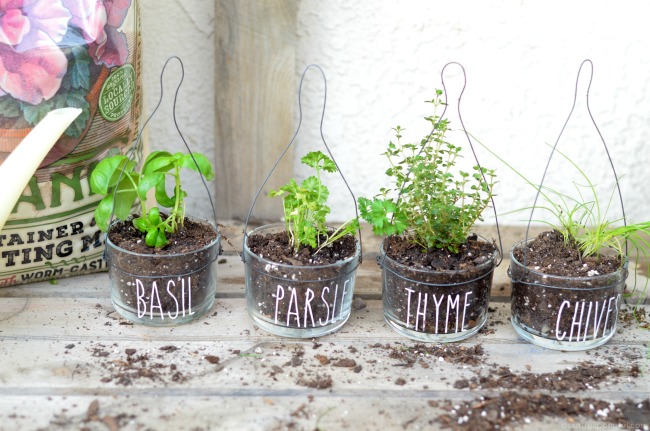
Easy to Make Indoor Hanging Herb Garden

What you’ll need: 

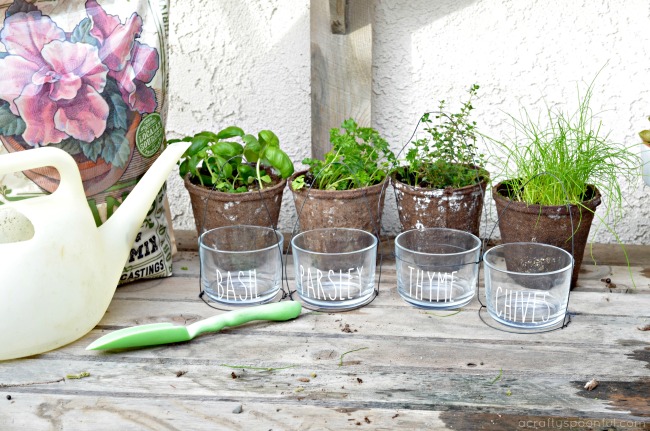
  • Glass containers
  • Wire
  • Wire cutters
  • Window hooks
  • Labels
  • Small rocks
  • Soil
  • 4″ herbs OR seeds
  • Water

What you do: 

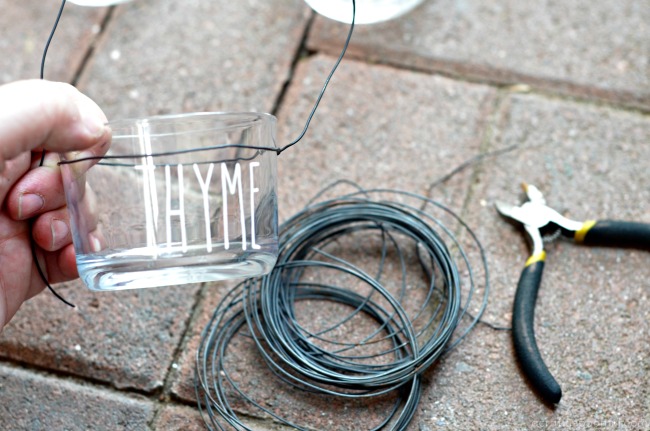
1. Wrap the wire around your container to form a circle. Connect the wire to itself tightly so that your container is secure in the wire. Don’t cut the wire just yet.

2. Make an arch with the wire over the glass container. 

3. Once you have the arch length you want, cut the wire leaving about 1 inch to attach it to the other side. 

4. Once you’ve secured the arch to the other side of the wire circle, make sure the wire is still securely around the glass container and can be lifted safely without the container falling out. 

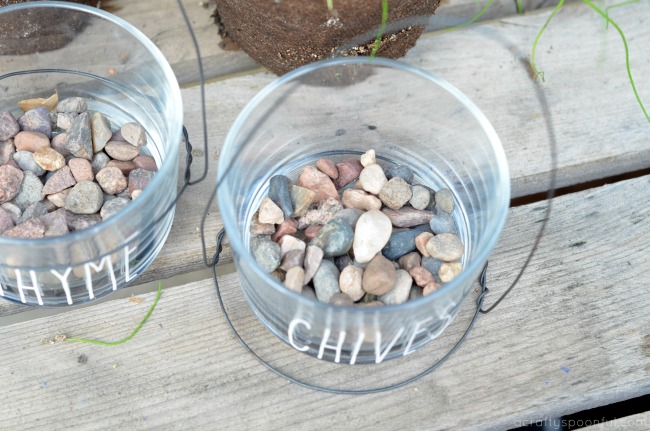
5. Fill the bottom of the containers with about 1/2 an inch of small rock to provide drainage. 

6. Top the rocks with soil up to about 1 inch from the top of the container and dig a well for the herbs. Add some filtered water to the bottom of the dirt well.  

7. Add the herbs to the container on top of the water and make sure the roots are buried/covered. 

8. Sprinkle a bit of vegetable food on the surface of the dirt by the herbs and then water again with filtered water. 

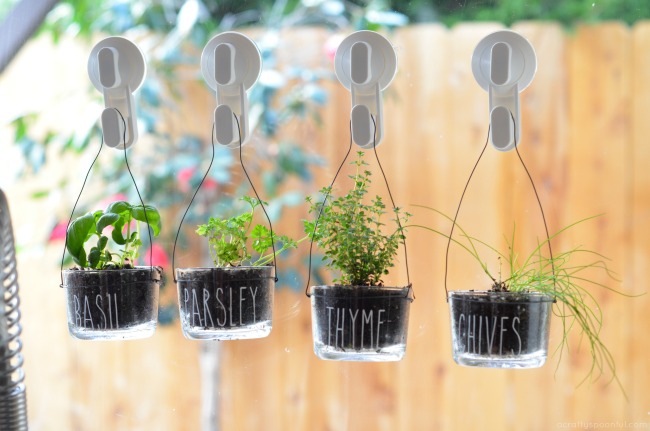
9. Place the window hooks in the window where you want the containers to hang. Find a place that will get sunlight during the day. 

10. Hang the herbs up in the window and watch them grow! Snip off what you need for meals in the kitchen as you cook. 

Water plays an important part in our everyday lives. Being able to have the kids go to the sink and fill up their water bottles, or fill up a watering can, and know that the water they’re drinking and using is water we can trust means a lot to our family. And now we can say that every day is a “Good Water Day” with Culligan! Stay tuned for our next post where we go in-depth into our experience with Culligan Water

How are you making healthy touches in the kitchen? 

Love this idea? Check out these other garden-related posts! 

Pin this article for later! 
Click the Pin button on the image below to save for later. 

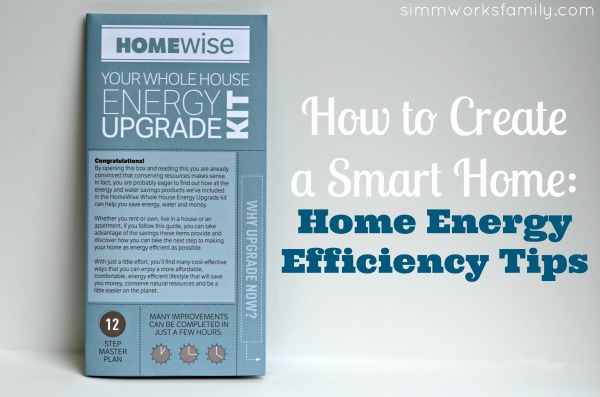
How to Create a Smart Home: DIY Home Energy Efficiency Tips

The reviewer has been compensated in the form of a Best Buy Gift Card and/or received the product/service at a reduced price or for free. This post contains affiliate links.
home energy efficiency tips

One bill I hate to see every month is our electric bill. Not only can the amount fluctuate from month to month but I feel as if now that I’m working from home I am the sole cause of the increases to our bill. But after doing my research I feel confident in applying these home energy efficiency tips in our home to help lower our electric bill.

And this couldn’t be a better time to start thinking about energy efficiency in our homes. Especially since our cost of electricity is expected to rise greatly come Winter.

If you’re concerned about high electric bills and want to do something to make your home more energy efficient (as well as save on your monthly bill!) consider making a few simple DIY changes around the home to help conserve your electrical usage.

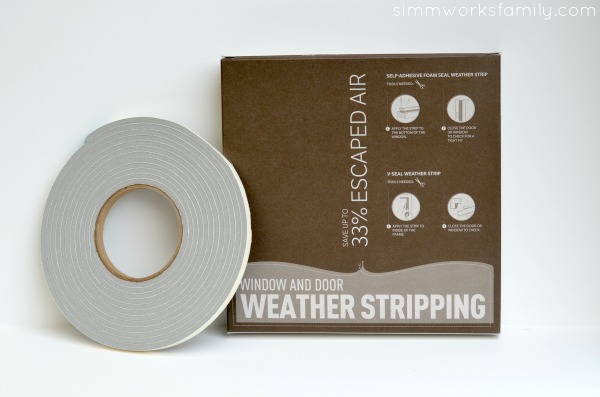
home energy efficiency tips weather stripping

Home Energy Efficiency Tips

1. Close up the air gaps!
Talk a walk around your house and inspect the outer perimeter of your home to find where air can get in. Using weather stripping around doors and windows, eliminate air from getting in and out.

2. Replace your light bulbs

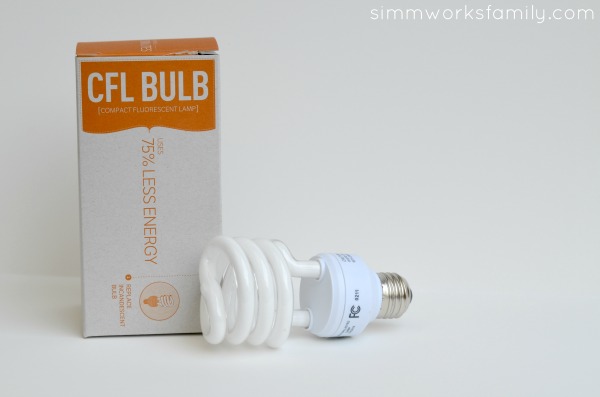
By replacing your light bulbs to CFLs or LEDs you can save up to 75% in lighting cost. An added bonus? They last longer too!

home energy efficiency tips cfl bulbs

3. Look at your HVAC system

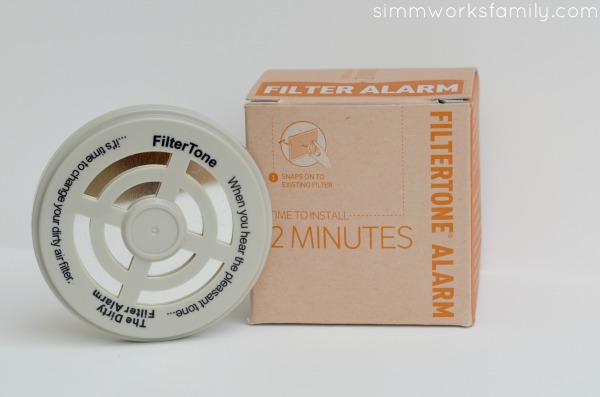
Your HVAC system consists of the heating/cooling equipment, the thermostat, the pipes, the filters, and the duct work found in a central forced air system. Inspect your HVAC system to make sure it’s been properly maintained. If you aren’t sure when the last time it was checked is consider contacting a certified HVAC contractor to do an inspection.

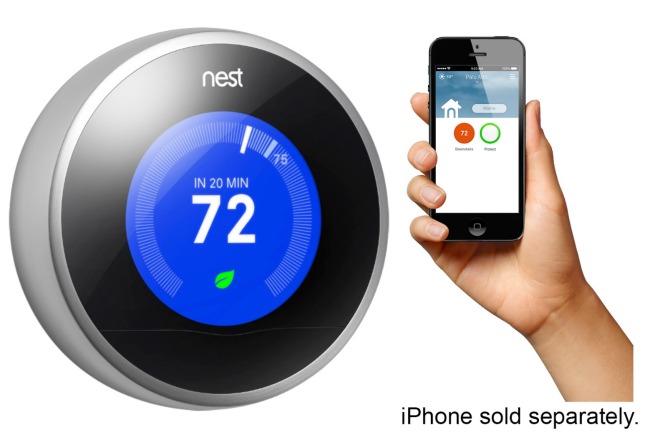
If you don’t already have a programmable thermostat I suggest picking up a Home Nest Smart Thermostat. This is the new 3rd generation version, which is thinner, sleeker in design, and allows for a bigger, crisper display than the prior 2nd generation version.

Not only can you set where the temperature should stay throughout the day and night but you can save money by having your system run only when you want it to. We like to keep our air off until it reaches 78 in the house in the summer. We normally keep the house between 75 and 78 degrees when we’re home. And the heater doesn’t kick on until it’s 65 degrees in the house. But usually the temperature is between 65-70 depending on who’s home. With the Nest there is no need to set preferences – within a week, the Nest learning thermostat starts programming itself. It learns your habits and adjusts automatically, regulating your home’s temperature based on your schedule – which can save you energy and money.


Programmable Nest Thermometer

When used with the new Netgear exclusive router (on store shelves 11/4) you’ll be able to increase or decrease the temperature whenever you need to, even if you’re upstairs! This is a brand new router that was exclusively developed between Netgear, an industry leader in the networking world, and Best Buy, to help provide consumers with an easy, all-in-one solution to support their home’s connected devices.

Best Buy makes it easy with this new high performance Wi-Fi router, which includes a Wi-Fi extender and Geek Squad Set Up and Support via phone & web, for one full year. The Geek Squad service via phone & web allows customers to call or get help 24/7 whenever they want, vs. the need to schedule an appointment. Plus they’re always so friendly and helpful when you do connect with them!

home energy efficiency tips filtertone alarm

4. Check your appliances

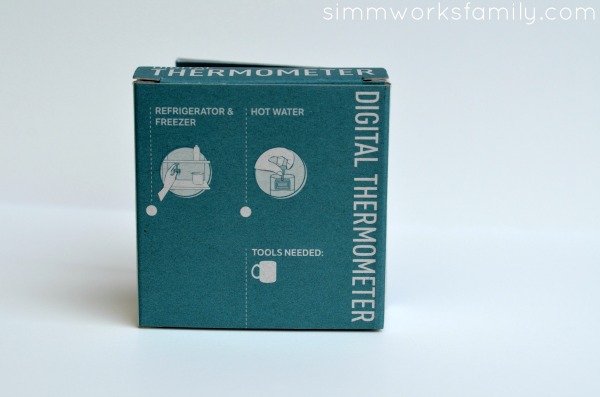
Appliances make up about 17% of the average home’s energy usage. Refrigerators, clothes washers and dryers are at the top of that list. Make sure that your fridge temperature is set between 38-40 degrees F and your freezer is set to 0 degrees F. Use a digital thermometer to check the temperature.

If you have appliances older than 10 years you should consider investing in a newer, more energy efficient model.

5. Test your hot water

Heating water for bathing, washing clothes, and dishes accounts for as much as 15-30% of your household energy use. And the temperature setting of the hot water heater determines the energy used to heat your water. Make sure to check your hot water temperature with a digital thermometer. The temperature should be between 120 and 130 degrees F.

Don’t forget the insulation! Hot water heaters also need to be insulated. If the shell of the heater feels warm to the touch then it should be wrapped in an insulating blanket.

If your hot water heater is 15 years old it might be time to replace it. Look for replacement tanks that have an energy factor of over .62 for gas and .93 for electric. Gas-heated tankless water heaters save about 320% on your yearly energy usage.

home energy efficiency tips digital thermometer

6. Turn off your lights and computer

By simply turning off your lights when not in use, or installing timers to turn them off for you, you can save a lot on your utility bill!

Consider solar lights for the outside of your home or in your garden. Not only will they not be using electricity but you can still feel safe knowing the lights are on outside. We love our solar powered motion censored light out in our front and back yards.

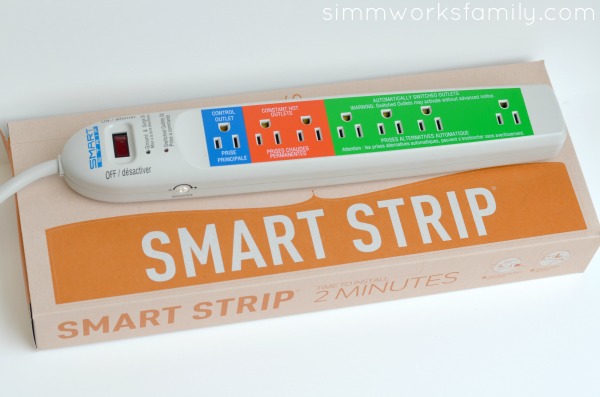
Take a walk around the house and make note of the equipment that is plugged in but not being used. Consider unplugging these devices or investing in a smart strip. Smart strips are easy and convenient to use and will shut off the power to devices that are plugged into it but not in use. You can reduce your energy output by 21$ with just one smart strip installed!

home energy efficiency tips smart strip

Incentives from your local utility, plus federal tax credits and other options, can save you thousands of dollars on your Energy Upgrade. It takes a little bit of research and some work but you, too, can reap the rewards of having an energy efficient home and feel good about saving money and conserving energy.

If you decide to do a whole house energy upgrade it’s best to start with a professional home audit. Your local utility company can provide you with a list of auditors and may even cover all or some of the cost!

How do you save on your utility bill?

How to Build a Vertical Garden Using Pallets

 This post contains affiliate links. 

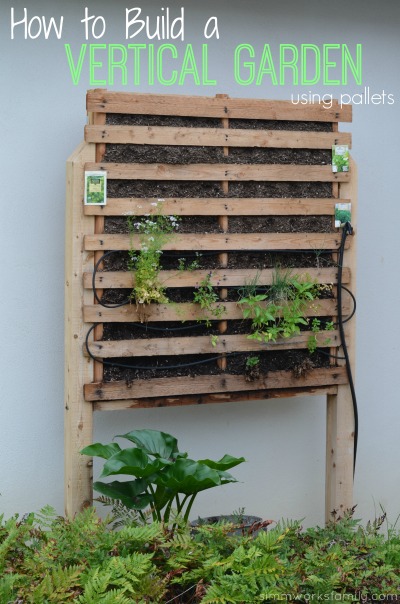
How to Build a Vertical Garden Using Pallets

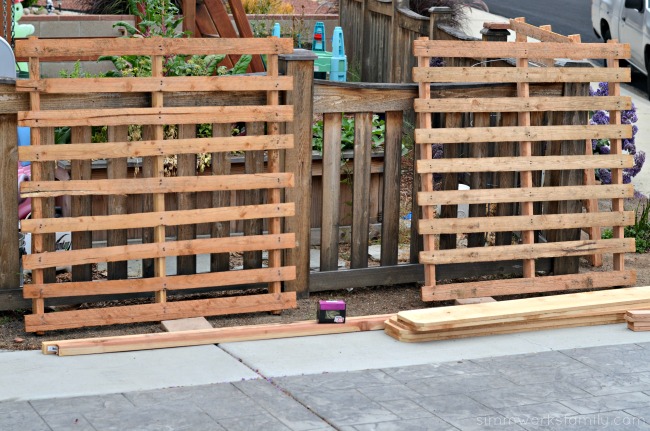
Ever wonder what else you can do with pallets? I mean besides the thousands of other ideas you find all over the interwebs? Well, my husband and I figured out how to build a vertical garden using pallets. And they’re quite fun!

Now, I want to tell you right now that we’ve had some interesting finds when building these. The first? It’s really difficult to get dirt to stay IN the pallets once you start watering them. Especially if you don’t use a soaker hose line and just spray them with the garden hose.

My son had fun with the muddy clumps that came with that! But once the dirt is settled into the pallets it’s actually quite a good way to grow fun things and makes an awesome display for your yard.

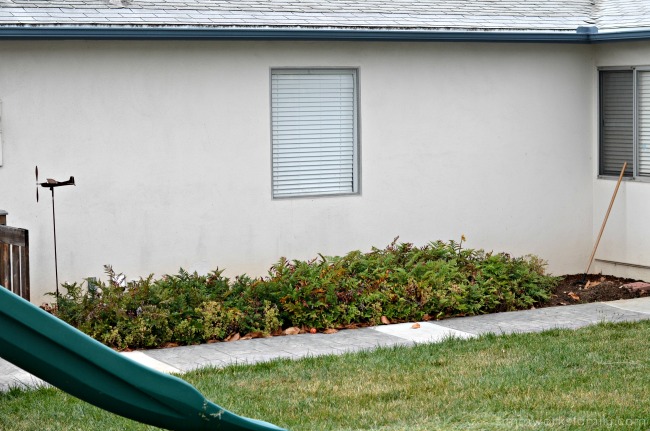
build a vertical garden using pallets - before

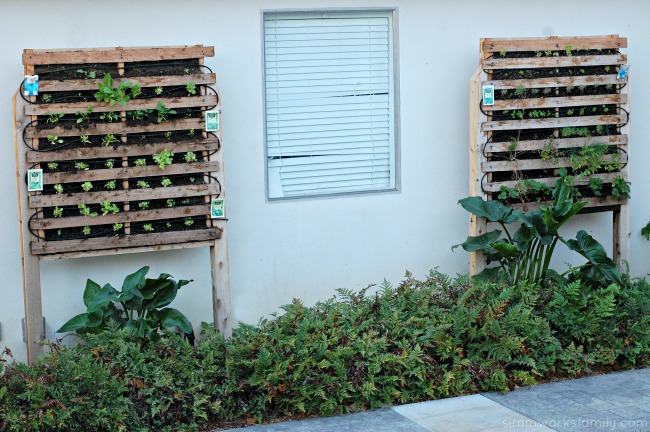
This above was the side of our house in the front yard before we put the pallets in. I hated how empty and plain the space was and wanted to use the vertical garden to spruce it up and bring life to this part of the yard.

I don’t think my husband quite understood exactly what I was envisioning in my head but with some team work, a few dirty looks and rolling eyes, and some muddy kids, we got it done.

Oh… and if you’re having trouble finding pallets because everyone and their mom is grabbing them up to make things like this, go to Home Depot or whatever other hardware stores you have around and ask for their sod pallets. They’re more flimsy/rickety (hence the support added) but are perfect for this type of project!

Here’s how!

build a vertical garden using pallets - pallets

How to Build a Vertical Garden Using Pallets

Supplies:

Wood

  • wooden pallet
  • 2×2 doug fir
  • 2×4 doug fir
  • 1×8 cedar fence board
  • 2 4×4 cedar posts

Materials

What you do:

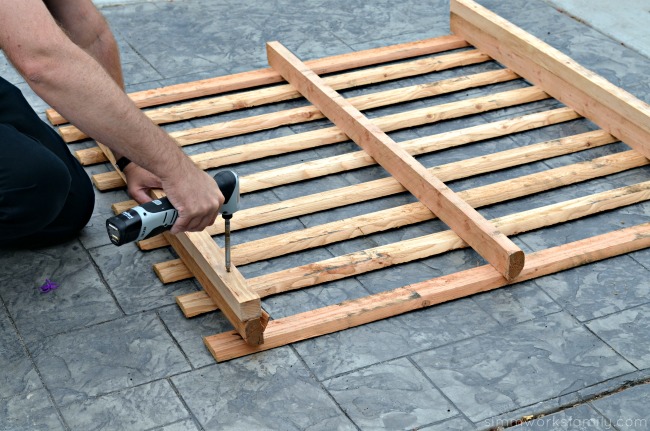
build a vertical garden using pallets - drilling on support beams1. Measure length of pallet and cut 2x2s to that length. These will give extra support to the pallet.

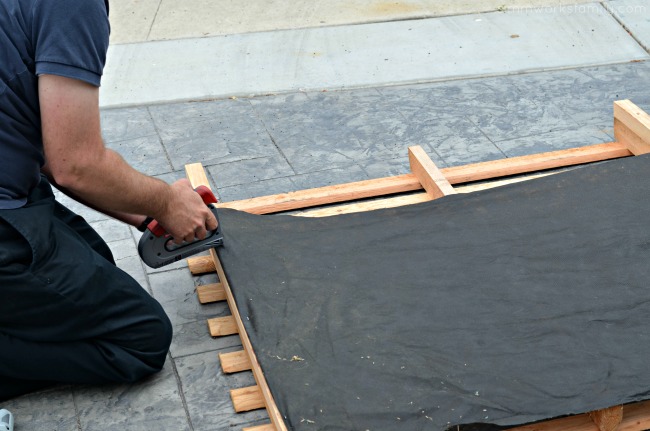
build a vertical garden using pallets - staple black garden cloth

2. Staple weed block fabric to the back of the pallet, pulling taut to make sure it’s stretched all the way across. Layer if needed to cover the full back.

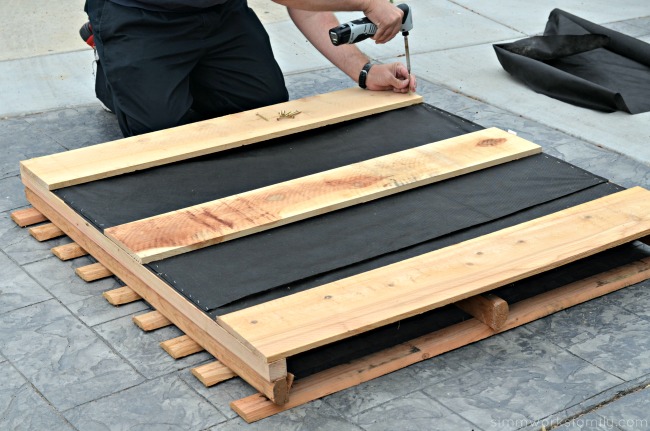
build a vertical garden using pallets - add support panels

3. Measure the width of the pallet from 2×2 to 2×2 and cut 1×8 fence boards to that length. Screw in place over the weed block fabric.

build a vertical garden using pallets - dig post holes and level post

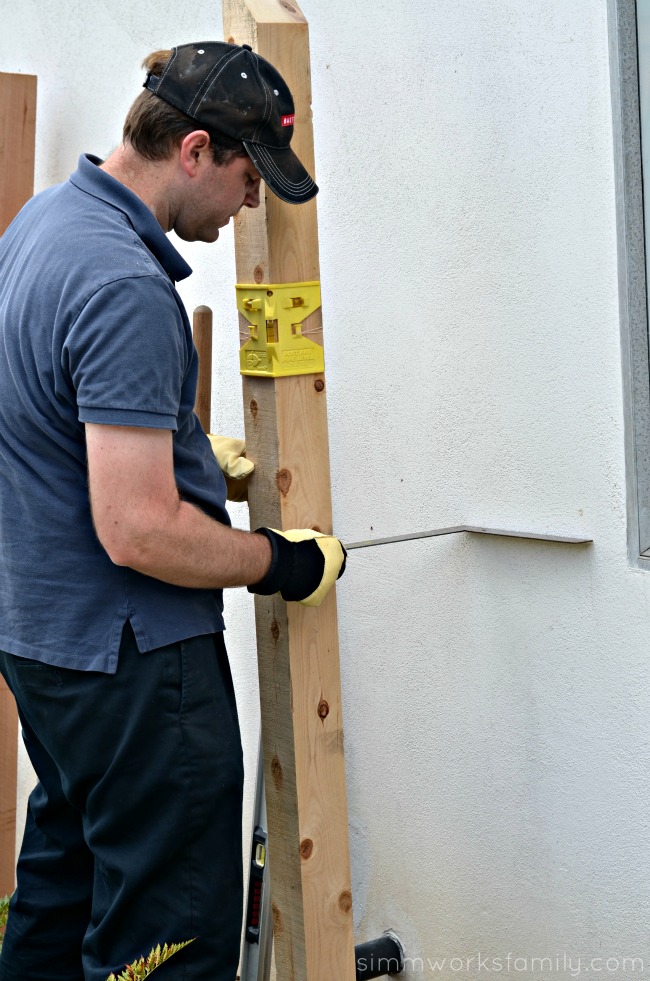
4. Measure the distance you need your posts to be installed on the ground and dig holes for posts. Cut posts to size depending on how far above the ground you want the pallets to be. Make sure to bury them about 1-2′ in the ground to provide a sturdy base.

5. Set posts in the ground by covering with dirt and using a level to determine if you need to move or shift the posts. Measure the back dimensions of the pallet to determine exactly how far apart the posts should be. This will vary with every pallet.

build a vertical garden using pallets - attaching pallet to posts

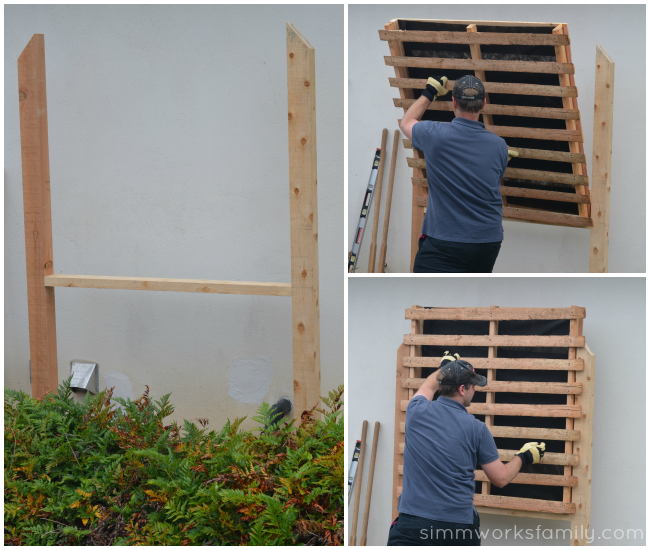
6. Measure where you want the bottom of hte pallet to be and mark off that height on each post with a pencil. Then cut the 2×4 to the width between the posts. This board will act as a frame for the pallet to sit on. Screw the 2×4 into position directly underneath the line you’ve drawn.

7. Lift pallet into place on the frame and screw to secure.

build a vertical garden using pallets - fill with dirtHow pretty are they??

Next up is the hard part… this is where we had the most trouble… trying to pack in the soil to make sure it stayed in place and didn’t spill all out.

Now you’re probably asking why we didn’t start our pallet garden on the ground and then lift it into place once the plants were established. Well.. you *could* do that but just think of how heavy those pallet gardens would be. Crazy heavy! So we did it this way.

build a vertical garden using pallets - dirt in pallet

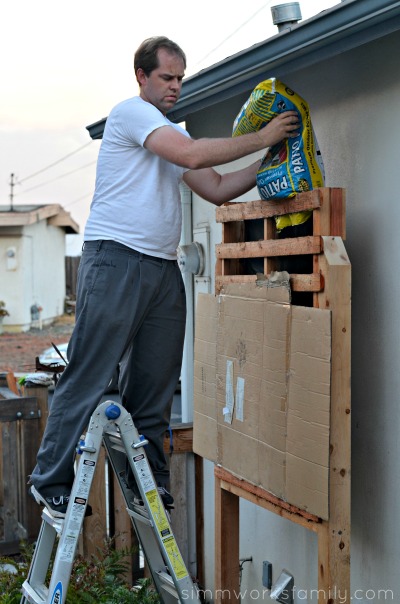
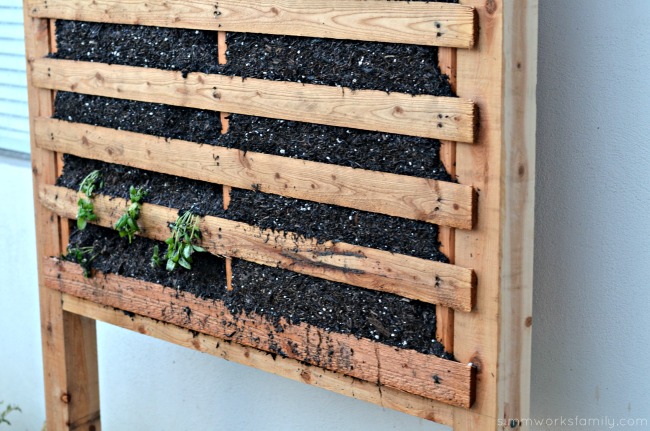
8. Using the cardboard stapled to the front of the pallet, fill the pallet with mulchy garden soil. Pack down each layer as you go to make sure it’s secure. There will be some dirt that falls out, simply fill it back again or leave it as is to settle more and fill later.

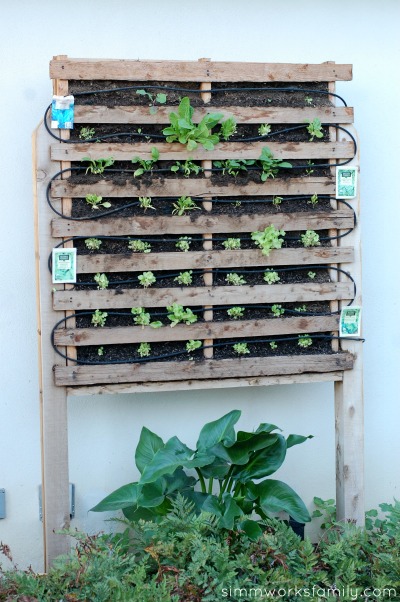
9. Plant with whatever seeds you think will grow best! We stick to lettuce in one planter and herbs in another with a few strawberries at the bottom. It’s pretty fun to step out and grab herbs whenever I need them!

build a vertical garden using pallets - planting from startersAnother problem we ran into was using starter plants we purchased instead of seeds. While in theory this would work great, when you put a plant that’s been growing vertically in a horizontal planter into a vertical planter and ask it to grow horizontally it looks like this above… droopy.

It’s also quite messy and hard to get the starter plants IN the planter and you spill a TON of dirt everywhere. Our solution? Seeds… start from seed and install an irrigation system with a soaker hose. You can find everything you need for the soaker hose in the irrigation aisle at your local hardware store.

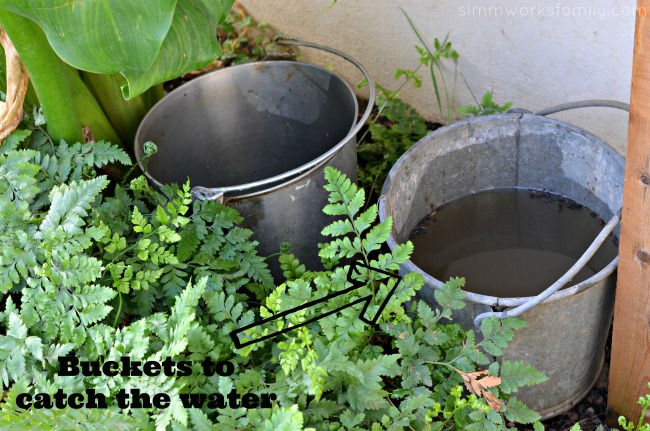
build a vertical garden buckets for run offIf you’re going to use an irrigation system with your garden, know that there will be water that drips down constantly. In order to conserve that water to use on our other plants and in our raised garden beds, we simply put buckets underneath to catch the excess water.

You know what else we found? Bees LOVE to come and drink the water that pools on the last rung of the pallet because they love mineral rich water. That means you’re helping the bees with your vertical garden too! Here’s a close up of a bee drinking. This is a regular sighting.

build a vertical garden using pallets - plant from seed

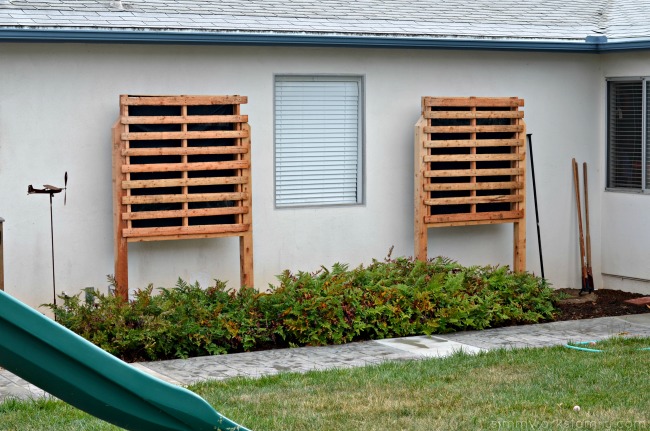
While it’s been a crazy process, I absolutely love how the vertical gardens make the side of our house look. I consider them more of a decorative piece in our front yard but love that we also get the benefits of growing our own herbs and lettuce.

And since our pallets are in the shade for most of the day, we had to choose plants that would work well in these conditions. I’m sure there are other things one could grow if their vertical garden were directly in full sunlight.

build a vertical garden using pallets - planted

What would you plant in a vertical garden?

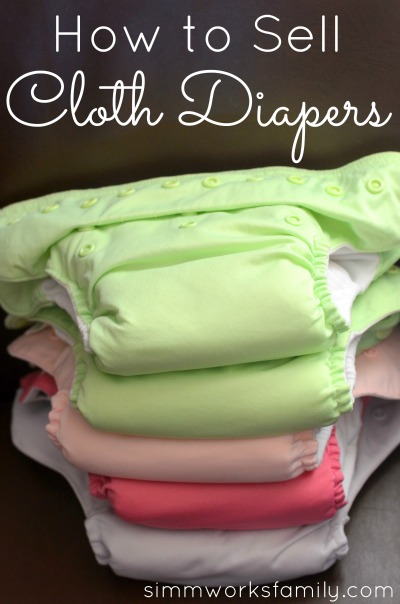
How to Sell Cloth Diapers

How to Sell Cloth Diapers

So you’ve finally decided that you are done with cloth diapering. Your kid(s) are potty trained, you just don’t love cloth diapers like you thought you would, or you have some extra diapers that just didn’t work for you, ore are too small,  and are looking to make room in your stash.

Now how do you sell the cloth diapers you have to make a little more money back?

Since I started cloth diapering 6 years ago, I knew that one of the awesome reasons I cloth diapered was that I’d recoup some of the money I put into the diapers I purchased. Because I could sell my cloth diapers after I used them.

And now the time has come to destash. So I’ve compiled a few great ways to sell cloth diapers. Here are some ways to approach selling your diapers!

How to Sell Cloth Diapers

1. Go local –

Have any friends looking to cloth diaper? Try here first. That way you know that the diapers will get great use and you might be able to help out a friend looking into cloth diapering. Plus you can show them how to use all of the diapers, etc.

And if you don’t have any friends who need cloth diapers, try Craigslist. Take a few photos, post them online and save a bit on the hassle of shipping out the diapers.

Local resale shops also purchase cloth diapers to resell. And while they aren’t the best way to make the most money for your diapers, they are probably the easiest way to sell your diapers quickly.

2. Sell Within Your Community Online –

There are quite a few eco-friendly facebook groups online that allow their community to purchase and sell cloth diapers amongst one another. You simply upload photos of the diapers you have for sale, list the price, and ship to the buyer.

The best way to accept funds is probably paypal since it’s quick, easy, and you can print out a shipping label right on their site!

3. Sell On An Online Forum –

There are a few websites dedicated to helping you sell your cloth diapers. You simply list what you have for sale and can set up everything through the site, including payment and shipping.

A few of my favorites are:

Whatever way you choose to sell your diapers just remember to take great photos, be honest about the condition, and do a little research on the value of the diapers you have for sale.

Have you sold diapers before? What worked for you

Great Tips for Gardening With Kids

Gardening with Kids

We’re starting to plan what we’re going to plant in our raised bed for spring right now and can’t wait to get our hands dirty. One of the best parts about gardening, for me, is the fact that the kids get involved in every step from planning, planting, and growing.

Over the years of gardening with them I’ve come to find that gardening with kids isn’t as hard as it sounds. In fact, it can be quite fun! The bonding we do over our garden has deepend our relationship and has acted as a teaching tool for life lessons.

Below are some great tips for gardening with kids that you can use if you’re just starting or have been gardening with your kids for a while.  [Read more…]

3 Ways to Create a Sustainable Home

This post featuring tips on ways to create a sustainable home is sponsored by Pure Energies

3 Ways to Create a Sustainable Home

Once we moved into our new home the one thing I wanted to get up and going was my garden – including a compost bin and rain barrels for water. Then I realized that our home didn’t even have gutters on the house!

Before moving forward with my garden I had to figure out what we needed to do to create a sustainable home now that we’ve moved. And while it all won’t happen overnight, we now have an idea of what needs to get done over the next few months or years.

After we tackle these we’ll be looking at if we’re ready for chickens! Now that will be an adventure.  [Read more…]

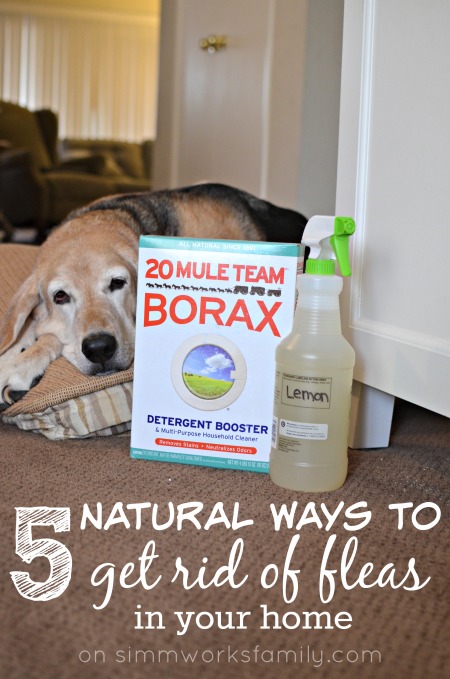
5 Natural Ways to Get Rid of Fleas in your Home

5 Natural Ways to Get Rid of Fleas in your Home

We ran into a little problem last week. Our poor Scout got fleas for the first time in his 12 years and we had no clue where to start with treatment! Since we moved next to a home with 3 other dogs we knew it was a possibility but we were hoping we’d get lucky and not have to deal with it.

Luckily we were able to find some great ways to eradicate the situation and, hopefully, reduce the chance of fleas returning again in our home. But if they do, we’ll be ready!

Here’s what we did to tackle our flea problem in our home and on our beloved dog. [Read more…]

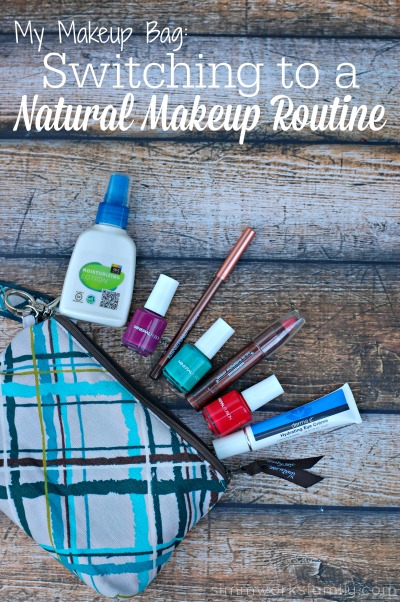
My Makeup Bag: Switching to a Natural Makeup Routine

Disclaimer: This is a sponsored post for Whole Foods Market La Jolla.

My Makeup Bag - Switching to a Natural Makeup Routine

Since having kids I’ve switched up most of our lifestyle to include natural alternatives to the chemical-filled products we used to use. I’ve switched to natural cleaners in the house and in the laundry room, purchase local organic produce and foods, and am now starting to switch to a natural makeup routine.

I am really not sure why I didn’t tackle my makeup bag sooner but after a trip to Whole Foods La Jolla for their Body Care Event I was able to learn about what to look for in great natural beauty care. I even learned that some of my favorite natural products I was already using in other areas of the home could be great for beauty care as well! [Read more…]

10 Steps to Creating a Toxin Free Home

10 Steps to Creating a Toxin Free Home #FightToxins

When I first became a mother I started to think long and hard about the chemicals we bring into our homes. And the number surprised me. Shortly after this realization I began creating a toxin free home in the hopes that my kids wouldn’t be exposed to the majority of the 80,000 synthetic chemicals introduced into the market since the Toxic Substances Control Act was passed in 1976.

Recently I’ve teamed up with Seventh Generation to help spread awareness about the importance of chemical reform in the United States. The Toxic Substances Control Act (TSCA) was passed in 1976, and unlike other major environmental laws, has never been updated. As it currently stands, tens of thousands of potentially harmful chemicals continue to be used in the marketplace since the 1970’s without proper testing and without disclosure by the companies that produce them.

Scientists have linked exposure to toxic chemicals to many health risks, such as Cancer, Alzheimer’s, learning disabilities, asthma, birth defects, and various reproductive problems. And those aren’t health risks I’m willing to expose my kids to.

toxin free home with kids

10 Steps to Creating a Toxin Free Home

Are you ready to fight toxins? Lets start at home.

Here are 10 steps to creating a toxin free home:

  1. Use non-toxic cleaning and washing products when possible, like Seventh Generation products that don’t release toxic chemicals into the air. This means chlorine-free products and cleansers with natural cleaning properties.
  2. In the shower and by the sink, fragrance-free, vegetable-oil-based soaps are a healthier choice and can be found at a variety of locations.
  3. Open your windows, when possible, to circulate fresh air in your home.
  4. Use exhaust fans in the bath and kitchen and attic that ventilate outdoors to circulate any toxins in the air outdoors.
  5. When re-painting your home, consider low- and zero-VOC paints now commonly available at paint stores. Be aware that even though the chemicals in these low- and no-VOC paints don’t off-gas, they are still present so make sure to air out the spaces you are painting.
  6. Avoid new furniture coated with polyurethane. To avoid this exposure, look into purchasing furniture made of whole wood, glass, metal or chrome.
  7. Purchase clothing, sheets and mattresses made of natural materials, such as unbleached cotton, wool and hemp as opposed to synthetics which are made with chemicals.
  8. When choosing flooring, consider natural fiber carpeting such as wool, sisal, cotton or jute, laid with solvent-free adhesives. Synthetic carpeting — made from petroleum-derived plastic fibers — is usually installed with solvent-based adhesives, which emit toxic gases believed to create asthma, dizziness, headaches, and other allergic reactions.
  9. Avoid plastic food packaging. Consider swapping plastic out for stainless steel or glass. And ditch the plastic bags and purchase a good set of reusable bags (or make your own!).
  10. Purchase non-GMO and organic whenever possible. If you can’t afford purchasing all organic food, take a look at the “Dirty Dozen” list and find out what foods are recommended to be purchased organically.

How are you creating a toxin free home?


© A Crafty Spoonful - All Rights Reserved
It is OK to use one of my photos provided a link back and/or proper credit is given. It is NOT ok to copy and paste a whole post including instructions. Please do not remove watermarks or alter images in any way. Please contact me with any questions at danielle@acraftyspoonful.com

.