Pumpkin Cheesecake Bars {Dessert Recipe}

When Fall comes there is one thing I am most excited about. The return of canned pumpkin on the shelves! I start out small. Buying maybe 4 cans of pumpkin on my first spotting. Then I get a bit crazy. I need to stock up for the rest of the year. How can I not have 10 or so cans of pumpkin in my pantry by mid-October? And what do I use these cans and cans of pumpkin for? Healthier recipes!

Pumpkin is a great ingredient in baking, cooking and no-bake recipes such as this one. It’s simple and easy to use and best of all… it’s super tasty and healthy! Now I’ve already been making my pumpkin waffles, pumpkin muffins and even a pumpkin oatmeal shake. But I hadn’t yet tried anything with pumpkin and cheesecake before. So this past weekend I decided to try out a no-bake recipe for pumpkin cheesecake bars. And they were delicious.

If you have a can of pumpkin lying around you have to try it!

Pumpkin Cheesecake Bars

  • 1 package (8 oz.) neufchatel cheese, softened*
  • 1 cup canned pumpkin
  • 1/3 cup agave nectar (or 1/2 cup sugar)
  • 1/2 tsp. pumpkin pie spice
  • 1 tub (8 oz.) Cool Whip Free whipped topping, thawed, divided
  • 1 package graham crackers (about 24), crushed
  • 4 tablespoons light butter, melted

Line an 8×8 or 9×9 baking dish with plastic wrap. Mix graham cracker crumbs and melted butter until the crumbs resemble moist sand. Push crumb mixture into dish with your fingers evenly to create a level crust on the bottom. Make sure to get the crumbs into the corners of the dish as well.

Beat cream cheese, pumpkin, agave and pumpkin pie spice with electric mixer on low speed for one minute. Increase speed to medium and mix for another 3 minutes or until no lumps are visible. Gently stir in 2-1/2 cups of the whipped topping. Cover and refrigerate remaining whipped topping for later use.

Spoon cream cheese mixture into crust and refrigerate 3 hours or overnight. Serve topped with remaining whipped topping. Store leftover cheesecake in refrigerator.

*How to Soften Cream Cheese
Place completely unwrapped package of cream cheese in microwavable bowl. Microwave on HIGH 10 to 15 seconds or until slightly softened. If you cannot find neufchatel cheese in your grocery store just go for the reduced fat cream cheese. Same thing, different name.

Serves 16 | 5 WW+ Points

Low-Fat Turkey Chili with Beans {4 WW pp+}

Turkey Chili with Beans

One thing that has become very apparent these past two weeks is that it is, in fact, football season again. My tv is once again taken over and Sunday afternoons and Monday nights are filled with the sound of yelling and cheering.

I have to be honest though, I’m not really that into football. But I am into football food! The excuse to invite people over to sit around and eat appetizers and yummy bbq is just too enticing. And one of my favorite go to recipes to make is a delicious turkey chili with beans.

Not only is it quick and easy, it can simmer in the slow cooker all day and be used as needed for munching. Plus it’s versatile. We put chili on just about everything. Hot dogs, nachos, fries, etc. It makes just about anything better. And it’s low fat! That’s right. This recipe is filled with low fat turkey chili, tons of veggies, and spices and seasonings to create a flavor you will love. [Read more…]

Overnight French Toast with Pecan Praline Topping {Breakfast Recipe}

I love having people over. I enjoy being forced into cleaning my home and making yummy food for my guests to enjoy.

I recently hosted a My Favorite Things party and similar to my first My Favorite Things party, I included a menu that highlighted my favorite eats. Since I hosted this event in the morning I served my favorite overnight french toast. It’s simple and easy to make the night before and tastes amazing after a whole night of soaking the flavors in.

Plus it’s topped with an out-of-this-world pecan praline mixture before it’s baked. Heaven! [Read more…]

Zoom, Zoom, Zoom! We’re Off with the Joovy Zoom 360

Ever since I found out I was pregnant with my first child I’ve wanted a quality jogging stroller. Before finding out I was pregnant, I started running with a group of co-workers. I would run about 12 miles a week, up to 6 miles each run, in an effort to lose weight and stay in shape. When I found out I was pregnant I stopped running as much and eventually stopped all together.

I assumed that if I got a jogging stroller I’d be able to pick right back up and start running again. But life got in the way, I didn’t purchase a jogging stroller, and the strollers I borrowed from neighbors and family just didn’t make the cut.

So here it is,4 years later, and I finally have my jogging stroller, the Joovy Zoom 360. And boy was it worth the wait!!

As soon as it arrived in the mail, I opened it and had it assembled in less than 15 minutes. Then my daughter and I started playing with it. We’ve had a lot of fun testing it out!

What I love about this jogger is that I didn’t have to purchase any optional accessories.

What the Joovy Zoom Includes:
  • Parent Organizer – Includes a neoprene parent organizer that holds 2 cups and has a zippered storage container.
  • Rain/Wind Cover
  • Wheel Pump
  • 5 Point Harness
  • Reflective
  • Safety Tether
  • Shock absorbing suspension

That means that the Joovy Zoom 360 is not only very affordable at $269.99, you also don’t have to purchase a lot of accessories after you purchase the stroller. They all come with it!

Weather Coverage 
The first thing I noticed about the Joovy Zoom after assembling it is the large canopy. None of my previous strollers have the coverage that this stroller does. Not only does it completely shade my daughter and son when they’re in full sun, it’s also adjustable to fit perfectly with any situation.

The Zoom also comes with a rain cover that easily covers your child from the weather and keeps them nice and dry as you enjoy your workout. That means no excuses!

Easy Fold & Compact Storage
The Zoom is also very easy to fold. With the simple push and lift of two items, the Zoom folds compactly and securely together with the help of a latch. The Zoom fits perfectly in the trunk of my small compact car and our family station wagon.

The Zoom is also very light weight. It’s very easy to lift up into the trunk of my car and to carry from one place to another when storing it.


Swivel Wheel

This stroller is built for running, walking, and everything in between.

For serious runners, the front wheel has an option to lock the swivel wheel in a straight position. It’s lightweight, steers easily with one hand, and includes a safety strap to wear while exercising. While walking around and more casual jogs, I’m able to unlock the straight wheel and use the swivel wheel for even easier mobility.

The Ride

As I’m running, I don’t want to struggle with steering a stroller. The Zoom simply glides where I push it. I steer with one hand and hardly feel any resistance when I’m on the go. I can run at my own pace, change up speeds, and switch from one terrain to another without affecting the performance of the stroller.

When my daughter falls asleep on on walks and runs I can easily adjust the seat by pulling on the straps in the back. There isn’t just one or two positions, I can recline the seat back as far as I’d like until I reach the fully reclined position. This is perfect for when I know my daughter is sleepy but she refuses to lay back when the seat is in the reclined position. I just recline it a bit so she doesn’t even realize she’s reclined a bit. Then 5 minutes into our jog, she’s passed out!


Optional Infant Car Seat Adapter

Joovy offers 3 optional car seat adapters for the Zoom 360:

  • Graco
  • Peg Perego
  • Chicco

And the cost of these adapters are very affordable! The fact that this is the only optional accessory you’ll need to buy is amazing.

Her baby fits perfectly in the snack/cup holder

If you’re looking for a stroller that will not only create a comfortable ride for your child as you exercise, but also act as your go to stroller for any occasion, the Joovy Zoom 360 is for you! We take ours everywhere! From the beach to the zoo to the amusement park, I’ve found the perfect stroller in the Joovy Zoom. And I have no excuses when it comes to exercising!

Since my Joovy Zoom arrived in the mail I’ve used it 5 out of 7 days in the week. And I now run 3 days a week! I know that this stroller will be key in keeping me on track and making my way towards my goal weight.

Disclaimer: I received a Joovy Zoom 360 for review purposes only. Regardless, I only recommend products or services I use personally and believe will be good for my readers.


Lighter Sesame Chicken {Dinner Recipe}

Since I’m back on track and counting points, I’ve been reverting back to old favorites! Favorite recipes that is. I absolutely love how simple and delicious this meal is. I can make it under 30 minutes and the longest part is waiting for the rice to finish cooking.

If you’re looking for a quick and easy take out meal without the cost of take out, try your hand at this delicious lighter sesame chicken! Feel free to play around with the flavors a bit as well. Add a little orange zest, or maybe some flaked red pepper. This dish is so versatile and can be changed up to fit any flavor profile.

Lighter Sesame Chicken

  • 3 tablespoons honey
  • 2 tablespoons sesame seeds
  • 2 tablespoons soy sauce
  • 1 clove garlic, finely chopped
  • 2 large egg whites
  • 1/4 cup cornstarch
  • 2 boneless skinless chicken breasts, cut into 2-inch chunks
  • Coarse salt and ground pepper
  • 2 tablespoons olive oil
  • 4 scallions, thinly sliced

In a small bowl, combine honey, sesame seeds, soy sauce, and garlic; set aside. In a large bowl, whisk together egg whites and cornstarch. Add chicken and season with salt and pepper. Toss to coat.

In a large nonstick skillet, heat 1 tablespoon olive oil over medium-high. Add half the chicken; cook, turning occasionally, until golden and opaque throughout, 6 to 8 minutes. Transfer to a plate.

Repeat with remaining tablespoon oil and chicken. Return all the chicken to skillet; add reserved sauce and scallions, and toss to coat.

Serve sesame chicken with broccoli and rice.

Serves 4 | 6 WW points

Healthy Ranch Yogurt Dip {Snack Recipe}

Yogurt Ranch Dip

My family is absolutely obsessed with ranch dressing. If the kids have veggies, they want to dip them in ranch. So I’ve tried to change up the way we make ranch and have ditched the sour cream!

Now sour cream isn’t bad. I love the stuff. But by swapping out sour cream with greek yogurt I not only am cutting calories but I’m increasing protein! All in all I’m very excited about the swap and the kids can’t seem to tell the difference.

And Greek yogurt can be subbed for more than just sour cream. I also swap it out for mayo in some recipes.

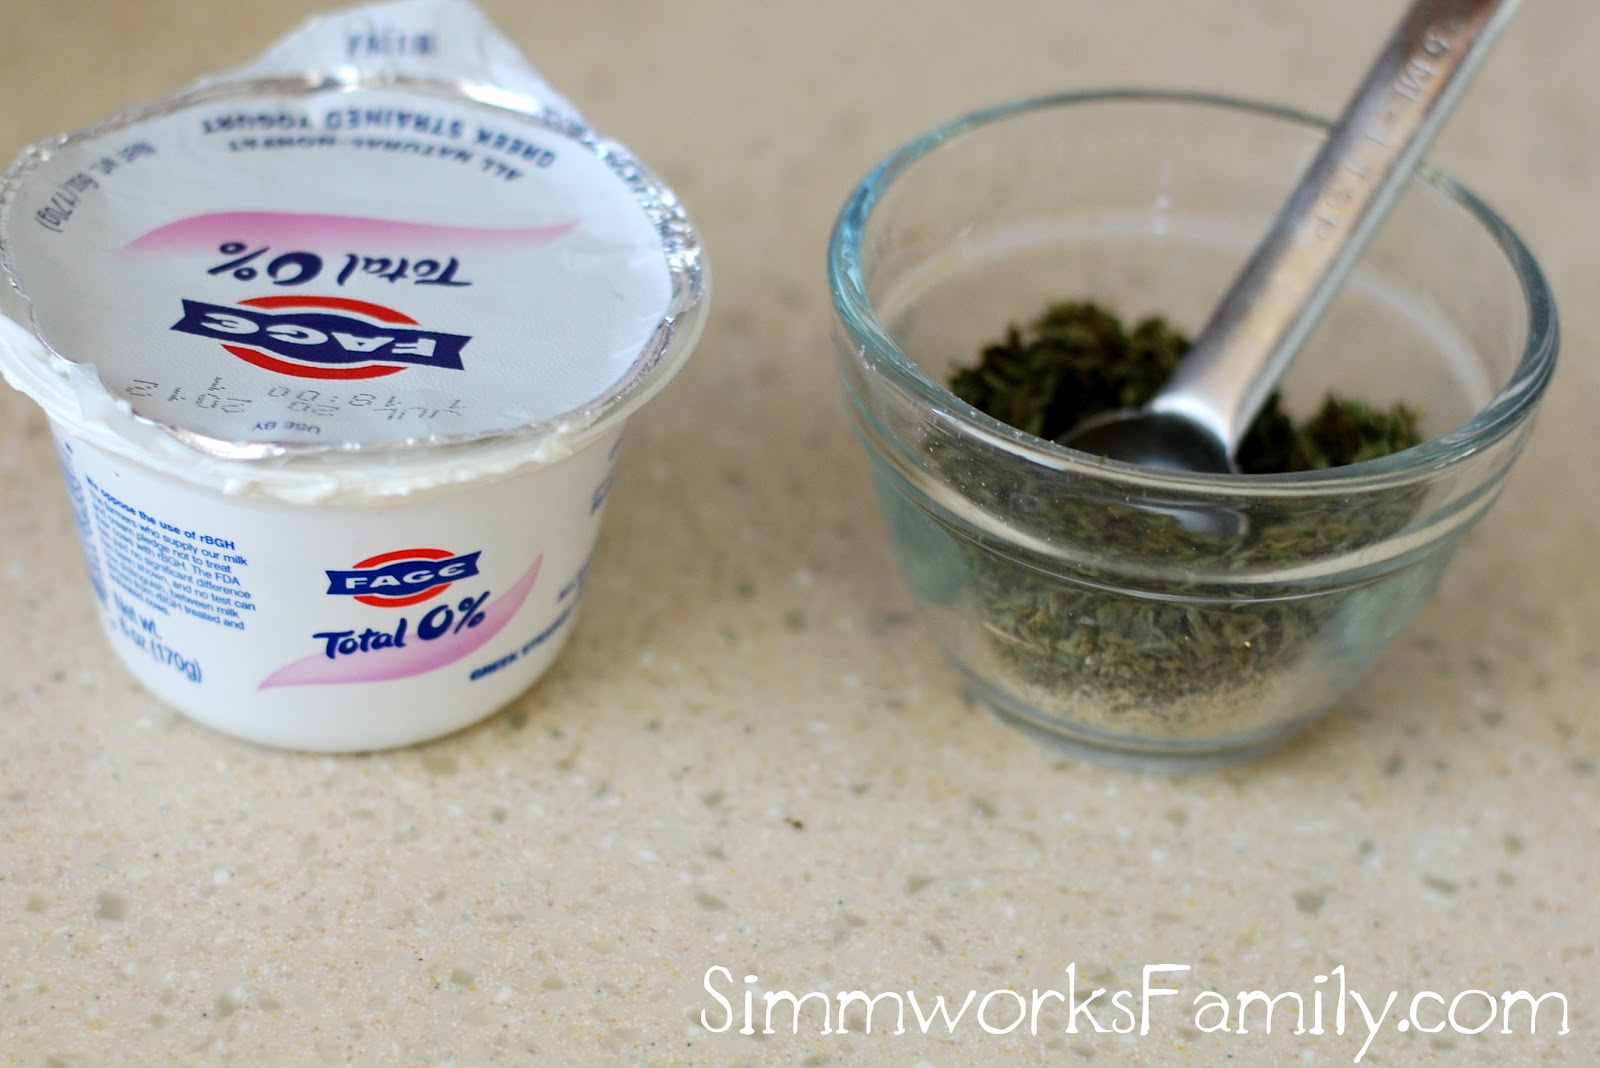
Yogurt Ranch Dip ingredients

Ranch Yogurt Dip
  • 1 cup greek yogurt
  • 2 tablespoons ranch mix (see below for ranch mix)

Mix ingredients together until well combined. Let sit in the fridge overnight. Serve with your favorite veggies or chips.

 
Ranch Dip Mix
  • 2 tablespoons dried parsley
  • 3/4 teaspoon ground black pepper
  • 1 teaspoon seasoned salt
  • 1 teaspoon dried dill
  • 1/2 teaspoon garlic powder
  • 1/4 teaspoon onion powder
  • 1/8 teaspoon dried thyme

Combine ingredients and store in an air-tight container for up to 3 months. Feel free to double or triple and use as needed.

Keeping Kids Healthy with Great Snack Options {Back to School Special}

Keeping Kids Healthy with Great Snack Options

Now that the kids are going back to school and the craziness of summer is coming to an end, it’s time to start talking healthy snack options!

One of my main concerns with my kids is the fact that they want to snack all.day.long. So I’ve tried my best to offer a variety of foods to not only keep them open minded about what they eat, but also keep them aware of the colors they eat and trying to make sure they get to every color of the rainbow!

If they’re going to snack, they’re going to snack the right way.  [Read more…]

“Roasted” Whole Chicken {Slow Cooker Dinner Recipe}

With the heat of the summer upon us the last thing I want to do in the afternoon is prepare for dinner. I don’t want to go anywhere near a stove or oven and have been quite bad about forgoing a traditional meal for one my husband can pick up on the way home more than once.

Since I am over being lazy about my health I decided to cook a whole chicken in the crock pot this week so that I could not only enjoy delicious, slow roasted goodness, but also have leftover chicken for meals later on in the week (as well including a great topping for salads for lunch)!

Not only is this chicken super easy to make, it’s tasty as well! And can be made in 3-4 hours. So if you forget to set the slow cooker in the morning and are home in the afternoon, there’s still hope for dinner!

“Roasted” Whole Chicken in the Slow Cooker
  • 1 whole chicken
  • 2 teaspoons red curry powder
  • 1 teaspoon salt
  • 1 teaspoon onion powder
  • 1 teaspoon sage
  • ½ teaspoon garlic powder
  • ¼ teaspoon cayenne (red) pepper
  • ¼ teaspoon black pepper
  • 1 onion
  • 2 garlic cloves, whole

Chop up the onion and place 3/4 of the onion on the bottom of your slow cooker. Set 1/4 aside.

Remove all giblets and neck from chicken (set aside if you want to use it to make chicken stock afterwards). Pat chicken dry.

Combine all herbs and spices in a bowl. Rub spice mixture onto skin of chicken making sure to get every inch covered.

Stuff chicken cavity (you know… were the giblets were?) with onion you set aside and garlic cloves. Place chicken breast side up on top of onions in slow cooker.

Set slow cooker on low and let cook 3-4 hours or until tender.

What do you do with leftover chicken?


Lego Duplo Party Playdate with HouseParty #LegoDuploParty

Our HouseParty Lego Duplo Playdate was an absolute blast!

I had so much fun figuring out what foods to serve, how to decorate, and how to keep the little ones entertained. Now normally when we have a playdate I grab whatever’s in the fridge and whip it up into something appealing for both the mamas and little ones.

HouseParty was kind enough to send along 4 of Lego Duplo’s new Read & Build Kits for us to play with!

2 of the 4 Read & Build kits were raffled off to my guests to take home with them so they could continue the fun. The other guests assured me they’d be picking up a few kids of their own because the kids had so much fun!

For this party I wanted to get a bit creative and really play on the Lego theme.

Lego Duplo Read & Build HouseParty

The Lego Party Food

I started by creating a Lego Duplo Pinterest Board. I was able to find amazing ideas and creations from other pinners, bloggers, online articles, and sites.  I had grand plans of cookies, skewers, and more detailed goodies but when it came down to it, I stuck with the basics. Foods my 1-4 year olds would love AND eat.

You can read all about the food I served here.

The Lego Party Decor 

Then I started thinking about the decorations I wanted to use. There were plenty of ideas for using the legos in the design of the party so I started with the basics, a simple lego brick, and built on that. I absolutely LOVED the fun use of lego-themed garland most of the sites posted but a majority of them were birthday themed.

Lego Duplo Read & Build HouseParty

So instead of going the wording route, I simply stuck to construction paper, scissors, and tape.

From there I decided to add a few more touches to the food decorations by turning the cups into lego heads, adding a lego head in between my two platters to serve the lego brick foods, and made a few empty boxes into legos to go with the theme.

You can read all about the decorations I made here.

Lego Duplo Read & Build 

I wanted to make sure that the Lego Duplo Read & Build kits were front and center throughout the party so I included them on the bar area of my kitchen right at eye level so that as people served themselves they’d see the boxes.

Alongside the Read & Build storybook kits were the Lego red plates and Duplo napkins that came in my HouseParty kit. I also was excited to pass out Lego Duplo play guides, magnets, and stickers to each of my guests.

Lego Duplo Read & Build HouseParty

Two of the sets were opened for the kids to play with on the table. I filled up a vase with some extra bricks we had lying around (shhh… don’t tell, these aren’t LEGO brand). The rest of our collection of Lego Duplo blocks were kept in the playroom on our train table so the kids could build and create as they pleased.

Lego Duplo Read & Build HouseParty

Play Time

Because I had two areas set up for the kids, the adults were able to converse and chit chat as the kids played around us. I loved having the playroom set up for the majority of the Lego fun. It made clean up a breeze and allowed a great space to build and create.

Lego Duplo Read & Build HouseParty

Although a few of my other toys were quite appealing and the kids quickly spread throughout the house with more than just Legos in hand.

I’m sure if I had a bit more time, help, and money I could have done more but the simplicity of this party was perfect. The kids had an absolute blast playing, building, and reading. 

Disclaimer: I received a HouseParty Lego Duplo Party Kit in exchange for hosting a Lego Duplo Party. Regardless, I only recommend products or services I use personally and believe will be good for my readers.

Lego Duplo Party {The Decorations}

I have been looking for a chance to throw a Lego themed party for quite a while. Pinterest has added to this obsession (along with a lot of other party themes I want to attempt).

HouseParty sent out an awesome hostess kit that included 4 Read & Build kits, a Lego Duplo poster (pictured below), Lego red plates, Lego Duplo napkins, and some awesome Lego goodies for my guests to take home including magnet frames, stickers, and a Lego Duplo fun guide.

I was excited to use my new large chalkboard and incorporated it into the party by copying the Lego logo on it with chalk. The logo was very simple and straight forward and I was pretty happy with how it turned out. I added duplo to the bottom and *almost* attempted to draw the Duplo bunny but didn’t want to mess anything up.

The decorations started with a garland of Lego bricks. I grabbed a stack of red, green, and blue 8×11 construction paper and cut 8×5 bricks out. I used the scraps to make circles (and used an HonestTea bottle cap as my template).

I adhered the circles onto the bricks with tape. Once I had enough of each color I used a hole punch to punch out the circles in the corners and strung the bricks up together with red yarn. I then hung the garland up in the kitchen where I was serving the food.

I added a little fun to the drink cups by turning each cup into a Lego head. Each cup matched the Lego guy I put on top of the cups .

In order to make a tiered serving tower I covered up a soup can with some construction paper and drew a Lego face on it as well to tie in with the theme.

To show off the Lego Duplo Read & Build kits I opened two up and put them on my dining room table. I grabbed one of my vases and added some blocks to make a colorful display. The kids were able to play with the new Read & Build storybook sets at the table and create fun animals as we read the Busy Farm story.


© A Crafty Spoonful - All Rights Reserved
It is OK to use one of my photos provided a link back and/or proper credit is given. It is NOT ok to copy and paste a whole post including instructions. Please do not remove watermarks or alter images in any way. Please contact me with any questions at danielle@acraftyspoonful.com

.