Wise Words from Ina May {Remember Your Natural Instincts}

 This past Sunday I had the pleasure to attend the Your Natural Baby Fair here in San Diego. Imagine a room filled with women and men passionate about natural childbirth and child-rearing. It was amazing. I was inundated with information and excited to take home what I learned. 

One of the best parts about the fair was listening to Ina May Gaskin, author of Ina May’s Guide to Childbirth and her latest book Birth Matters: A Midwife’s Manifesta. Ina May played a large role in my decision to persue natural childbirth for both of my babies. And even though I received pitocin and an epidural with my son I still felt empowered and informed about what was going on throughout the entire pregnancy and birth.

I have to thank my best friend, Miranda, for introducing me to the ideas behind natural childbirth and med-free labors. She is a doula and helped me through the delivery of my first. She’s also inspired me to become a doula myself. And while I haven’t started training yet I now have the local resources (and a new mentor!) to move forward with this goal.

After listening to Ina May I’m even more excited about this next journey in my life. One thing that Ina May said struck me. Her advice to new mothers and fathers to calm their newborn is, “If your newborn is in distress and crying just lick their head to calm them.” Simple as that. A little licking and you’re set! And before you say something about this being totally gross… that baby just came from the most sterile environment available.

Natural Instincts of Humans

You see, Ina May is all about following your natural instincts. Almost to the sense that you go primal. She told us of the story of a mom who had just gone through a c-section. Her baby was in hysterics and as the mother tried to get the baby to latch for the first time she became stressed as well.

Daddy came to the rescue though. He grabbed the baby and did what came naturally. He brought the baby’s soft little head up to his and nuzzled and licked the baby. After a few moments the baby calmed. Enough to latch perfectly to the mother. Ina May was very moved by the event and after hearing her re-tell the story so was I.

Sphincter Law

Ina May also mentioned something she calls the Sphincter Law. Basically, this law means that women go into labor and give birth more easily when the following criteria are met:

  • Privacy and intimacy are created
  • Time limits are removed
  • Demands are not made to ‘urinate now!’, ‘push!’, or ‘poop!’
  • Praise is given by another person in the proximity of the sphincter’s owner. This other person might be the mother of toddler or a midwife assisting a woman giving birth
  • Create an environment where the person is able to laugh, allowing the sphincter to open naturally
  • When a person’s sphincter is in the process of opening, it may suddenly close if that person becomes frightened, upset, embarrassed, or self-conscious. This is because high levels of adrenaline in the bloodstream do not favor (sometimes they actually prevent) the opening of the sphincters
  • The state of relaxation of the mouth and jaw is directly correlated to the ability of the cervix, the vagina, and the anus to open to full capacity. A relaxed and open mouth favors a more open vagina and cervix.

If medical professionals learn better how the sphincter works, we will more than likely see a decrease in caesarian sections. To read more about the Sphincter Law, check out Ina May’s article on the subject. And if you’re a pregnant woman, see if your OB or midwife are familiar with it as well. Just having this knowledge at hand is a powerful tool.

Natural Instincts of Animals

After speaking about our primal instincts and listening to Sphincter Law, Ina May also mentioned two videos we should check out on YouTube. The first was a video of a mother elephant resuscitating her newborn after it was born not breathing. What she did after following her own instincts is just amazing to watch.

She also suggested that we watch the birth of a chimp at the Attica zoo where the birthing mother’s mom (the baby’s grandma) acted as her doula. The grandmother proudly assisted her daughter and provided the moral support she needed to get through the birth.

These two videos are amazing examples of how uneducated wild animals with no medical degrees turned to their own natural instincts to take care of their young. And it only inspires me more to promote natural childbirth and the importance of knowing what our bodies are built for.

I cannot wait to learn more about natural childbirth as I start my journey to becoming a doula!

Have you read any of Ina May’s work? Are you interested in natural childbirth? 
Gardening with City Farmers Nursery

When I started thinking of planting our garden the first place I went to for information and advice was City Farmers Nursery. We’re lucky enough to live right around the corner from this awesome place so heading over a few times to get ideas, come up with a plan, and then eventually to purchase soil and plants was easy and fun.

The first time we heard about City Farmers Nursery was at our annual neighborhood block party. Farmer Bill came over and talked to the neighborhood about the native plants we could put in our yards to help create a landscape that was both drought resistant and beautiful. The next year he talked about a tree program from the city that was offering trees to residents to put in their yards. Most of those trees are now well established in the streets around our home.

Once we finally had a plan about what we wanted to do with our yard and where we wanted to place our raised bed we set it up and headed over to the nursery to pick out what plants we wanted to grow. We dropped off a soil sample and were told that Farmer Bill would call us once he’d analyzed the soil.

We got a call back the next day and had a plan! Bill set us up with the soil, additives, and food we needed and even helped us with choosing which plants (and how many) to purchase for our garden. It was time to get to work!

We set up our raised bed a few months before we actually were ready to start our garden and the kids quickly took advantage of the new dirt patch. So my son was quite sad to see his trucks and digging area go away. But as soon as I told him we were going to the nursery to purchase the plants he was all over helping us. He loves City Farmers Nursery as much as we do. But for different reasons.

At the nursery they not only have just about every plant imaginable. They also have animals too. A horse, chickens, a turkey, rabbits, koi, turtles and much more. The kids love going and just exploring the animals, plants, and trails on the nursery property. How can you not love going to a place like that?

We picked up different varieties of lettuce, mixed greens, swiss chard, broccoli, cauliflower, onions, celery, cilantro, and strawberries. Once we got the soil and additives mixed into the dirt we already had in our raised bed we got to planting. I let my son dig while I placed the plants into the bed.

Once everything was planted we watered, weeded, and fed the veggies and fruit until after a few weeks we started to notice that our garden was going crazy with growth! A few things didn’t make it or didn’t quite turn out as we thought they would but for the most part we now have a healthy, thriving garden! And the kids love going out to pick out their lettuce, broccoli, and celery when we eat it for lunch.

I can’t wait until we get to choose out a new veggie or two to plant in a few weeks when we harvest our lettuce and swiss chard. Hopefully we’ll have enough room for a zucchini plant! I can just taste the freshly baked zucchini bread coming out of the oven already.

I know exactly where we’ll be going to buy our seeds, dirt, and plants when we’re ready for our next project. And I have some pretty big plans for our back yard.

Do you have a garden? What are you planting?

Tuna Noodle Casserole {Dinner Recipe}

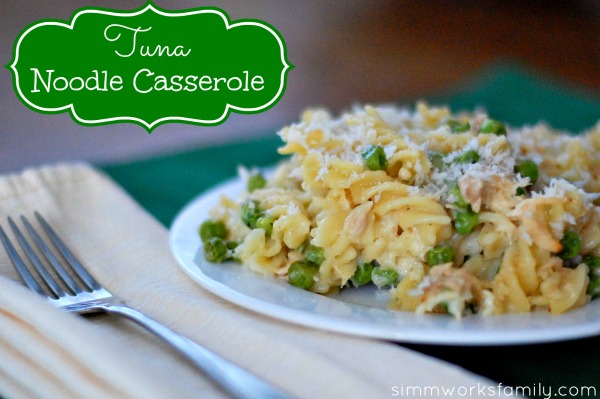
I’ve been pretty bad about keeping the cupboards stocked lately. I started to get lazy when it came to dinner planning and have been making sandwiches or eating what’s in the freezer to make up for it. So when Lent came around I was not prepared for a non-meat dish for dinner. But I didn’t have to worry… we always have the ingredients on hand for tuna noodle casserole. It’s a family favorite.

Only we were out of cream of mushroom AND cream of celery condensed soup.

So I went in search for an alternative. It was about time. I mean… really… I, er, we don’t need all of that extra sodium and additives. Plus I’m sure I read somewhere about canned stuff being bad. Or was that just for veggies?

Anyway… I only had 30 minutes until everyone under the roof starved and was already starting to get complaints about hunger pains so I searched the web until I found a recipe that sounded tasty and didn’t include canned soup.

This recipe is a winner! And I love how versatile I can be with the veggies. Next time I’m going to try some spinach. Delicious, nutritious, and the kids liked it. Added bonus.

tuna noodle casserole

[Read more…]

DIY Easter Bunny Basket {Guest Post}

Easter is right around the corner. To get the kids excited about this holiday I thought it’d be great to start doing Easter crafts. And the first thing that popped to mind was this bunny basket I saw on About.com.

My son loved putting it together with me and even decided to do one on his own after I helped him with this one. He loved being able to use the stapler and the scissors. And he surprised me by how well he did with the pen while drawing on whiskers. He’s getting quite skilled!


DIY Easter Bunny Basket

What you’ll need:

  • paper plates
  • googly eyes
  • glue dots
  • 2 cotton balls
  • 1 piece white construction paper (for ears)
  • 1″ strip of construction paper (for handle)
  • Black & pink marker
  • scissors
  • stapler

What you do:

1. Fold the white construction paper in half. Cut out two bunny ears and set aside.

2. Fold the paper plate in half.

3. Staple up each side of the paper plate 4 times.

4. Use glue dot to add googly eyes to either side of the paper plate. Add a nose to the bunny with the pink marker.

5. Add handle to the top of the paper plate with a staple.

6. Use pink pen to color the inside of the ears. Attach ears to the paper plate with glue dots.

7. Add whiskers to the bunny with the black marker on each side.

8. Place 2 glue dots at the opposite end of the bunny and add a cotton ball for a tail. Repeat on the other side.

9. Stuff with your favorite Easter goodies and have fun!

Every week Danielle brings great kids crafts to Formula Mom! Danielle is a work-at-home-mom of two beautiful kids and writes over at the Simmworks Family Blog. She loves to blog about her family, healthy living, going green and crafting. Danielle would love for you to come visit! You can reach her on facebook and twitter as well. If you have any questions feel free to email her at simmworksfamily@gmail.com

Green Monster Smoothies {Breakfast Recipe}

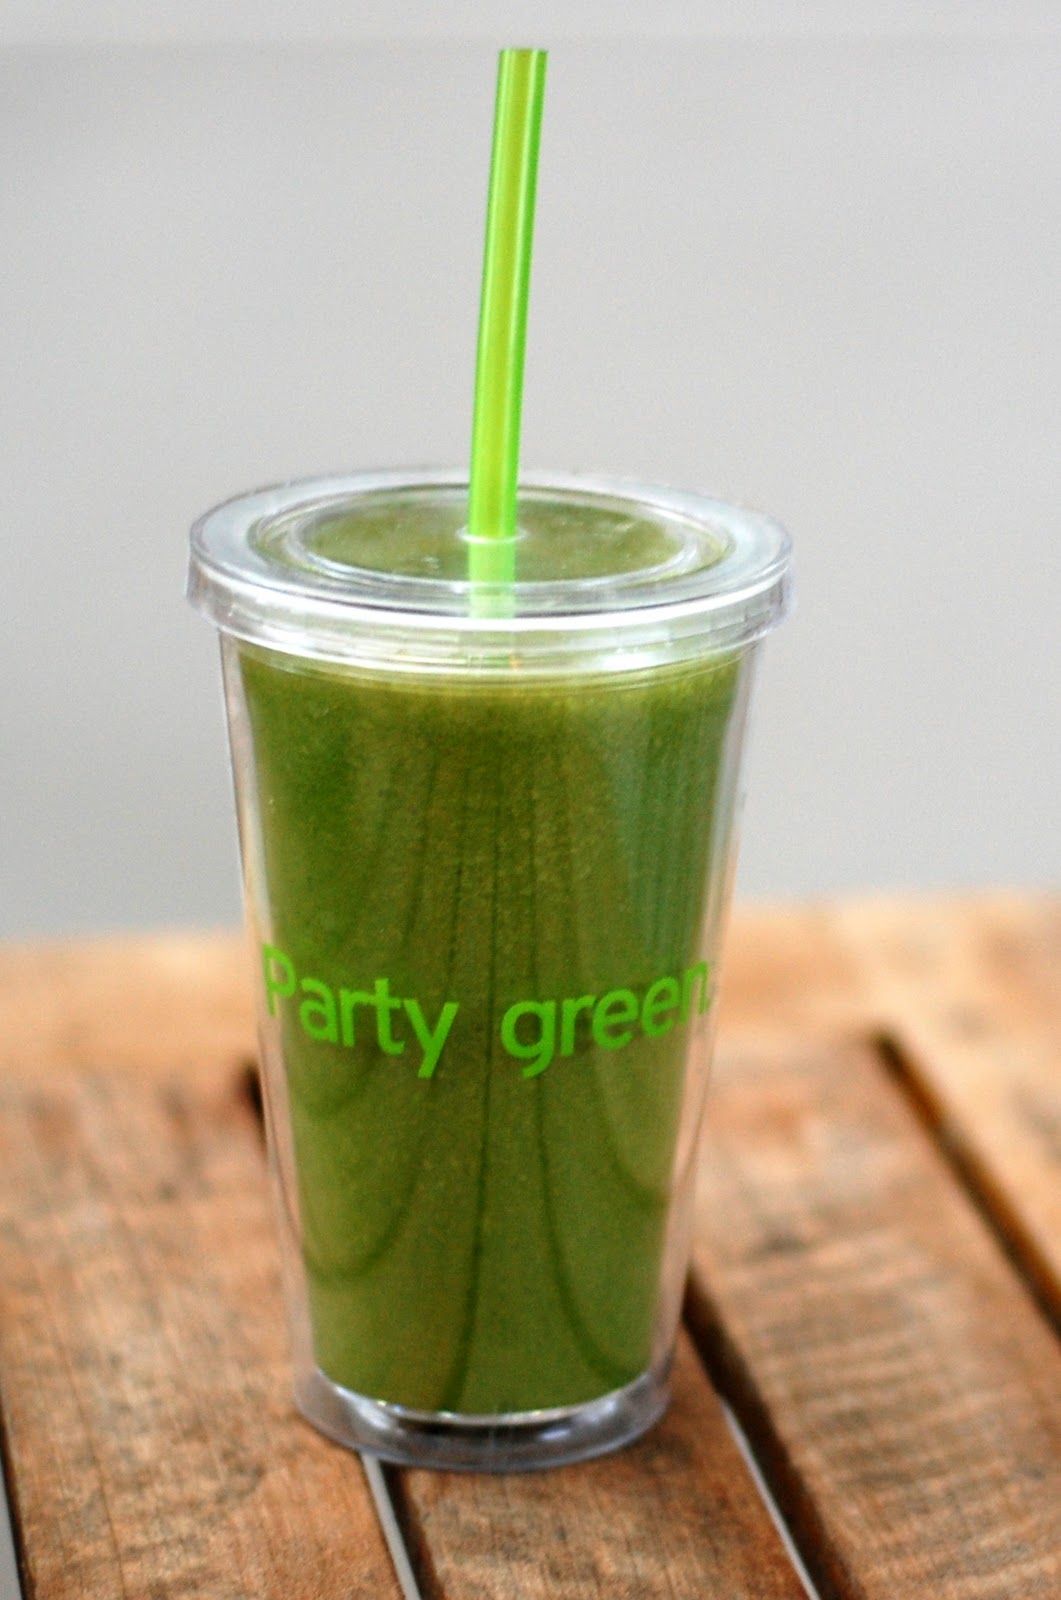
Green Monster Smoothie

One of my favorite new ways to get greens into my kids is by blending them up into smoothie form. And this smoothie started it all. Now this is just your basic Green Monster. There are so many different variations of this smoothie and my kids and I love to experiment with what we put in it when we make it.

For some awesome ways to shake up the original recipe check out my friend CB’s Green Monster journey over on her blog See Cupcake Run. Just search for “green monster” since I’m not sure how to link to one of her categories.

Green Monster Smoothie

  • 1 cup milk
  • 1 ripe, frozen banana, peeled
  • 3 handfuls organic spinach
  • 1 tablespoon ground flax
  • 1 tablespoon peanut butter (or PB2)
  • 4-5 ice cubes

Add 1 cup of milk to the blender.

Now add in the chia or flax (if using) and nut butter.

Next, add in the spinach followed by the banana on top.

Blend until smooth.

Add in your ice cubes and blend some more.

Serves 2 | 4 WW pp+ with PB2 (not including banana)

Meatballs and Polenta {Dinner Recipe}

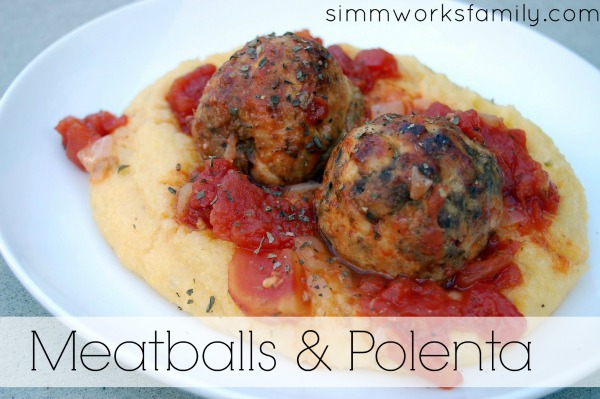
When I’m in need of a comfort meal the first dish that comes to mind is my Meatballs & Polenta. I’ve been making this dish for almost a year now after seeing it on my friend CB’s blog, Two Pink Hippos, and trying it out with a few changes. Now I make it at least once a month and love how versatile it is.

Plus I can never get over how easy it is to make polenta!

When I’m rushing to put dinner together 4 times out of 5 I always forget to start the grain or starch. So I’ve been saved quite a few times by quick cooking dried polenta. And the frozen brown rice from Trader Joe’s.

This is one of those meals that you can make ahead, freeze, and pull out when you want them too. So it’s the perfect dish to make for expecting mamas, friends in need, and any other meal in between. Plus you can turn left over meatballs into a meatball sandwich for the next day’s lunch. Mmmm…

Meatballs & Polenta

[Read more…]

Percentages… on the opposite end

With my son I never worried about weight and percentages when we went to the doctor for well baby check ups. He was always above the 50th percentile and usually was above the 75th percentile until he reached 2 years old. He was a fat, chubby, happy little baby and I loved it. I received comments quite frequently about how “healthy” he was. It made me feel like a good mama.

My son never had any food issues.

He also took a bottle quite well from the beginning and ate purees without a problem. Nowadays his eating is sporadic, as is any toddler’s, and I’m lucky to get in a full meal with him but he’s healthy and he snacks.

Then my daughter came. And since the beginning she’s been making me worry.

First came her refusal of the bottle. That lead to me quitting my job to nurse her full time… er… care for her and feed her. Then came her refusal of purees. She would only take one or two bites and then push the food away until I gave it to her in small pieces or chunks. That wasn’t much help since she didn’t get her first tooth until she was over 11 months old. Feeding was a very big chore.

But we kept at it and I thought she was getting enough food. Especially since she wasn’t yet one and she was still nursing.

However at each well-baby visit she seemed to be dropping in percentiles. And not by a little. She went from 50th to 40th. Then she hovered around 25th for a while before dropping down the 10th at her 9 month appointment. By her 1 year appointment she was down to the 3rd percentile however her height and head circumference seemed to be staying on their own curve so the doctor wasn’t worried.

But at her last check up, at 15 months, she fell off the chart for weight and is now below 0 percentile. And I’m kinda scared.

We have a weight check in 5 weeks.

I’m going to be doing everything I can to see if I can get her back up into the positive. The doctor reassured me that this is just a caloric thing. It has nothing to do with lack of nutrition. So I’m increasing the calories in this house.

I just purchased full fat milk… cream top milk to be exact. And I have full fat cream cheese, peanut butter, avocados, heavy cream, etc. She loves the green monster smoothies I make for myself so I’m going to start making her full fat versions to hope the extra calories do their thing.

And then we’ll go in for the weight check. And hope for the best!

Molly’s 15 Month Stats
18 pounds – below 0 percentile
30 inches – 45th percentile
47 centimeters – 75th percentile

Do you have any great pound-packing recipes for me to try with her? I’d love the suggestions! 

Baked Peanut Butter & Banana Oatmeal {Breakfast Recipe}

If you’re a peanut butter lover AND watching your figure don’t walk, run to go make these! They are so tasty. And super filling. And, really, if you look at the recipe, there’s nothing “diet” about them. I mean they have butter and real sugar!

No skimping out on this one. And if you’re like me and eat a hearty breakfast every morning help yourself to a serving piled with bananas on top and non-fat vanilla yogurt on the side for an awesome and very tasty breakfast.

My son begs for these and I love that I can make a large batch and re-heat in the morning for him.  He loves to help make them as well. Since it’s pretty straight forward I can usually pre-measure everything and let him take the lead.

Seriously… go make these now.

Inspiration: Two Pink Hippos (if you don’t already follow these ladies you should!)

Baked Peanut Butter & Banana Oatmeal

  • 1 1/2 cups quick cooking oats
  • 1/4 cup packed brown sugar
  • 1/4 cup white sugar
  • 1 teaspoon baking powder
  • 1 teaspoon cinnamon
  • 3/4 tsp salt
  • 2 ripe bananas, mashed
  • 1/2 cup peanut butter
  • 1/4 cup melted butter
  • 1 egg
  • 1 teaspoon vanilla
  • 3/4 cup 1% milk
  • cooking spray

Preheat oven to 350 degrees. Spray a 9 x 9* baking dish with cooking spray.

Mix dry ingredients in a bowl and set aside. Take peanut butter & bananas and mash together until combined. Add egg, vanilla and melted butter and mix well.

Add peanut butter mixture and add to the dry ingredients. Top with milk and stir until combined.

Spread out evenly in the baking dish. Bake 30-35 until the edges are golden brown.

* You can also use a 9×13 dish and cut the cooking time to 20 minutes

What’s your favorite breakfast recipe? 

5 Frugal Ways to Gift Wrap {Guest Post}

This past weekend I attended my future sister-in-law’s bridal shower. Like many showers I’ve attended, the couple was registered at a well known store that provided all of the necessary supplies for wrapping the gift we chose off of the couple’s registry. And since I’ve been to a few showers before, I knew that everyone else at the party, or so it would seem, would also have the same gift wrap provided by the store. So I decided to spruce up my package a bit to make it stand out.

By using the tissue paper the store provided I made a few tissue paper flowers following the tutorial I found on Martha Stewart Weddings. But I wasn’t the only one who decided to spruce up my package. A few other guests had the same idea and created some beautiful package decorations. And by making these flowers for the packages we also added to the uniqueness and beauty of the bride-to-be’s practice bouquet for the wedding rehersal.

Here are a few ways you can fugally wrap gifts with flair too: 

1. Reuse paper bags from the grocery store
Remove the bag’s handles, if any. Cut the paper bag down one side and cut out the bottom of the bag. Flip the bag over and use as you would wrapping paper.

To add a little color to the mix add a tissue paper flower or two. Or use some markers or paint and personalize the gift wrap.

2. Grab the comics
One of my grandfather’s signatures was his comic strip gift wrap. Just about any gift we received from him donned the faces of Garfield and Blondie. Not only are the comics in color, but they’re fun too! This is the perfect gift wrap for a birthday gift.

3. Roadtrip!
Remember those things we used to navigate the roads? Well they come in pretty handy when it comes to gift wrap. Grab those left over maps and start wrapping! They’re usually larger than your average piece of wrapping paper so they cover gifts rather nicely.

You can also make pretty bows out of them too. These would be a great addition to the paper bag gift wrap previously mentioned.

4. Painting a picture
Have any used paint cans laying around? Take off the label, paint the outside a solid color (or wrap with some scrapbook or craft paper), and add your gifts to the can. Place the lid back on and your set! Mason jars also make great gift giving containers.

5. Grab the fabric bin
Do you have any pieces of fabric left over from crafty projects? Grab those scraps and use them to wrap up your next gift. You can also sew up a fabric gift bag if you have the time. These are perfect for any size gift since they’re custom made.

Do you have any great DIY tips for gift wrapping? I’d love to hear them!

Danielle is a work-at-home-mom of two beautiful kids and writes over at the Simmworks Family Blog. She loves to blog about her family, healthy living, going green and crafting. Danielle would love for you to come visit! You can reach her on facebook and twitter as well. If you have any questions feel free to email her at simmworksfamily@gmail.com.

A Dinosaur Train Celebration {Birthday Party Ideas}

When my son mentioned having a Dinosaur Train themed party a few months back I was happy to start planning out all of the details. I searched through Google and Pinterest and even created a board of inspiration to go off of.

But I was surprised to find very little in the form of ideas and details. Most of the posts I came across linked back to the same two designs and I didn’t quite love them. So I decided to pick and choose design elements from various sources and pieced them together to form my son’s Dinosaur Train birthday.

The Cake

Any dinosaur themed birthday has to have a volcano cake. It’s a must. And my kid is kind of obsessed with any thing that explodes. We recently purchased a mini volcano set from Lakeshore Learning Center that allows you to add baking soda and vinegar to watch the volcano erupt over and over again. It’s one of the only toys that he asks repeatedly for every night when daddy gets home!

I had great visions of multi-tiered, fondant covered cakes with tunnels and trains but just couldn’t come up with the money and lacked the talent to make one myself.

So this easy-to-do volcano cake was my go-to. And boy did it give me trouble! The bundt cake stuck in the pan not once, but twice, the day before the party. But I just went with the flow and pieced the second failed cake together to create my final product.

To read more about the volcano cake check out my post here with recipe and design details.

The Cupcakes

In addition to the volcano cake, I also made cupckaes for the kids. They’re much easier to deal with when feeding 3 year olds and the kids love them for the frosting.

When I searched for ideas for cake toppers I knew my friend, Jeanna, over at the Sweets Fairy Bakeshop would know just what to do. She created these darling toothpick cupcake toppers with dinosaur train images on them and even created some decorative dinos and train fondant pieces to go along with the theme.

We placed the dinos and trains around the cupcakes and sprinkled the tray with the first bundt cake crumbs (way to reuse, right!?) to give the illusion of the cupcakes laying on dirt. Half of the cupcakes had the cute toothpick tags on them and half had whopper eggs on them to make dinosaur nests.

The recipe I used for the cupcakes is from Glorious Treats.

The Place Settings

Yes, I know it seems silly to have place settings for a kids birthday but I thought this added a special touch.

My husband’s aunt surprised my son on the morning of his birthday by dropping off some dinosaur cookies. These cookies were absolutely adorable so I asked if she wouldn’t mind making a few for his party too.

She packaged a few of them up for each kid and put them in a plastic bag with ribbon to make cute favors for the table. I also made some dinosaur and train paper hats for each of the kids as well and set them next to each plate, napkin and cookie.

To read more about how to make your own dinosaur party hats check out my post here.

The Food

In staying with the Dinosaur theme we created fun food names for each of the snacks we offered. Since the party started at 10am we stuck with a brunch menu. Here’s what our menu looked like:


Sweetivore Grub
Rip Apart Raptor Bread – Cinnamon Pull Apart Bread
Ceratops Cookies – sugar cookies
Cephalosaurus Cupcakes – vanilla cupcakes
Chocolate Lava Volcano Cake – devils food cake with chocolate frosting


Herbivore Grub
Brontosaurus Burritos – potato, egg & cheese, and bean, egg & cheese
Herbivore Delight – fresh fruit with fruit dip
Dinosaur Bones – pretzel sticks


Carnivore Grub
Brontosaurus Burritos – ham, egg & cheese, and bacon, egg & cheese

I was amazed at how much the kids (and adults) loved the breakfast burritos. They were seriously the easiest thing I’ve ever done besides ordering pizzas and pleased everyone. And since we live in So Cal everyone loves Mexican food! We also served some hot carrots and had salsa on hand. We also had Jurrasic Juice for the kids and coffee & tea for hte adults. Since the party was held at a place with a cafe there was no lack of caffeine.


Here are some photos of the grub: 

Herbivore Grub
Carnivore Grub

Paper Goods
For the food and drink labels I simply designed a template in Word that included the name of the food and the dinosaur train image. I played around with the fonts and downloaded a Jurrasic Park font from FontSpace.After playing around with the fonts, sizes and picture I decided to add a thick orange line around the wording and picture. After I printed the pages out I cut them to size and layered them with blue cardstock.

I did the same with the favor bag tags but used a different layout and orange and blue cardstock (without the orange line). I absolutely loved how the signs turned out. They were perfect for the party.
 Snacks
Jurassic Juice to drink
My son blowing out his number 3 candle

The Party Favors

We tried to include some fun goodies for the kids to take home in their favor bags. It all started with the wooden train whistles I found in the dollar section of Target. My son and I painted and personalized the whistles for each of his guests.

He had so much fun in the process and was so excited to give each bag to his friends (later at the party when he found out he didn’t get to hand them out he was a little upset but we remedied that by showing him all of the presents he received!).

Here’s what else we included in the favor bag:

All in all I’d consider this party a big success. I loved talking with my son about what he wanted to include and how he wanted to celebrate.

And seeing the joy in his face every time he talked about his “Dinosaur Train party at Kid Ventures” was more than enough reward for us. I’ll be posting more about my experience with KidVentures and their party packages soon!

I hope the guests had as much fun attending the party as we did throwing it!

Disclaimer: This post may contain affiliate links. By using these links you are supporting the Simmworks Family Blog.


© A Crafty Spoonful - All Rights Reserved
It is OK to use one of my photos provided a link back and/or proper credit is given. It is NOT ok to copy and paste a whole post including instructions. Please do not remove watermarks or alter images in any way. Please contact me with any questions at danielle@acraftyspoonful.com

.