5 Ways to Make Potty Training Fun + Sweet Incentives

We’re celebrating potty success with help from our sponsor, Pull-Ups Training Pants! Check out these 5 ways to make potty training fun plus a recipe for crazy cake below.

We’ve been on our potty training journey for a few months now and I’m happy to tell you that our youngest is now 100% potty trained. And we couldn’t have done it without the help of Pull-Ups Training Pants. Pull-Ups products are all about providing parents and kids with tips and advice to help make potty training easy and fun, plus they provide plenty of tools specifically designed to keep children engaged throughout the potty training journey. Pull-Ups has potty trained 50 million Big Kids and counting – so I’ll take this one from the experts.

Potty training success starts with attitude. And if you don’t have the right attitude, neither will your kid. This is such an important milestone for toddlers and it’s also an opportunity for parents to work together with their children to reach the end goal: potty training success! It sounds daunting to so many parents, but why not make it fun?

5 Ways to Make Potty Training Fun

1. Purchase your first pack of Pull-Ups – 

Pull-Ups Training Pants help your child recognize potty training as a significant milestone in their development by providing independence, teaching physical and cognitive skills, and offers a consistent representation to your child of their potty training journey.

With different design options, let your child choose a package that they identify with to make the process fun! 

2. Singing the “Time 2 Potty” song – 

Following the fun path, sing the Time 2 Potty song with your kid to get them used to the idea of being a big kid and all that being a big kid entails. 

Time2Potty Song:

We’re gonna do this together, 

we’re gonna stick to the plan. 

Do everything we can to make it easy and fun,

It’s time to potty everyone!

They’re designed like underwear, 

special friends make ’em fun to wear.

So boys and girls sing out loud:

I’m a Big Kid now!

3. Donate unused/leftover diapers – 

Find a local diaper bank that needs diapers or donate your unused diapers to a friend or family member with a baby to help your child get used to the idea of transitioning out of diapers and into Pull-Ups. By removing the diapers from your home, you’re preparing for the potty training journey and removing any crutches.

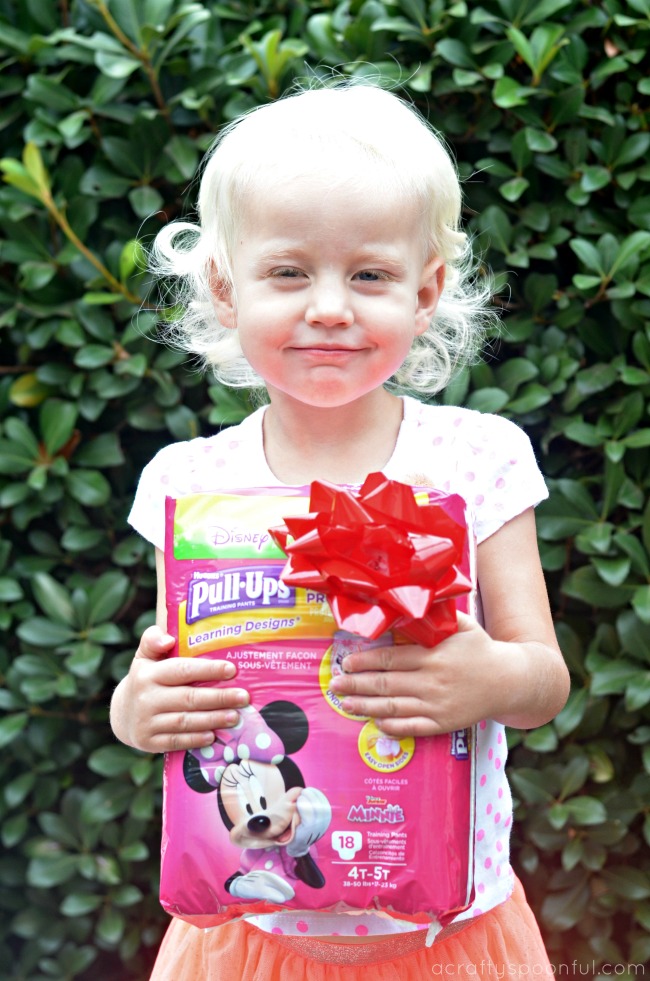
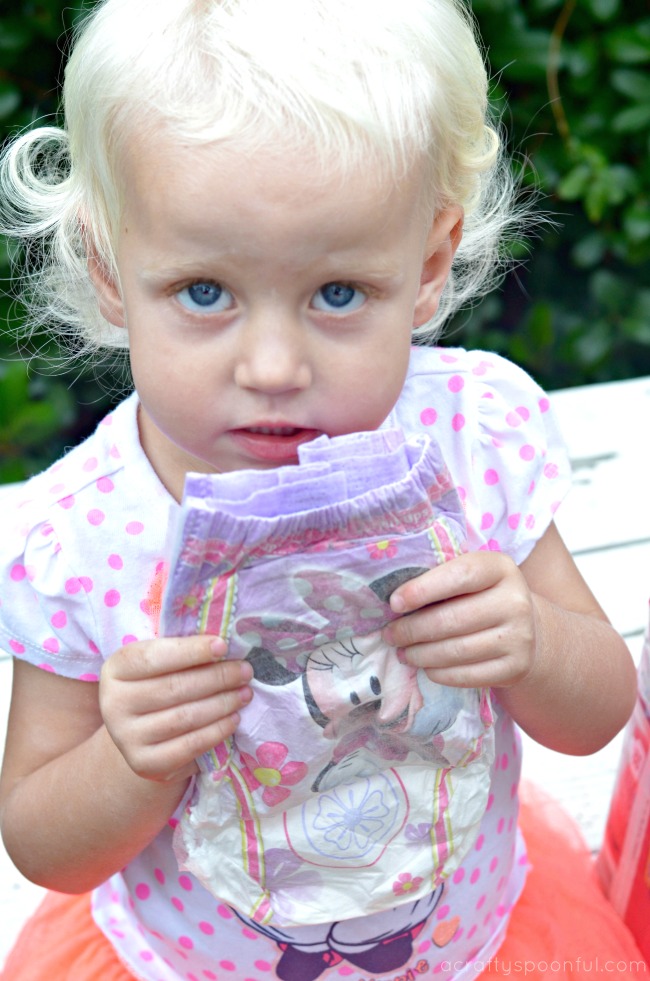
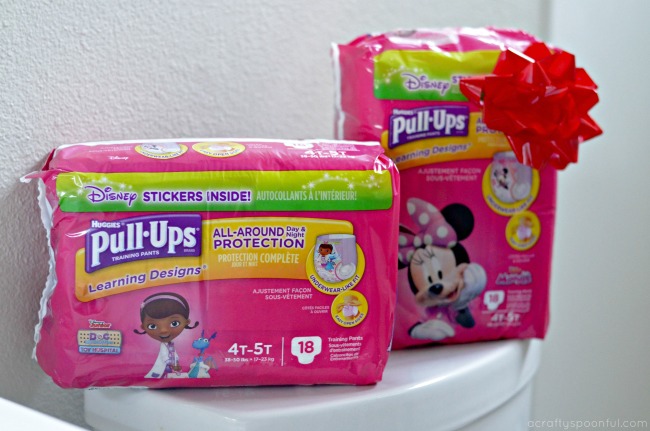
Once your child has transitioned from Pull-Ups to underwear, you can do the same thing with your unused Pull-Ups. My daughter decided to gift our Pull-Ups to her 1 year old cousin (hence the bow on the package in the photos). She may be too young just yet but my daughter knows that all the Pull-Ups were given to her cousin and we don’t have any more in the house to use. 

4. Print, color, pose and post with a Potty Training Certificate –

Grab a Potty Training Certificate and print it out for your child. Let them color and personalize it, then snap a photo of them with it to commemorate the moment. You can do the same thing when they’ve successfully potty trained to commemorate their progress and their “graduation” into big kid underwear.  

5. Celebrate potty training success with sweet incentives – 

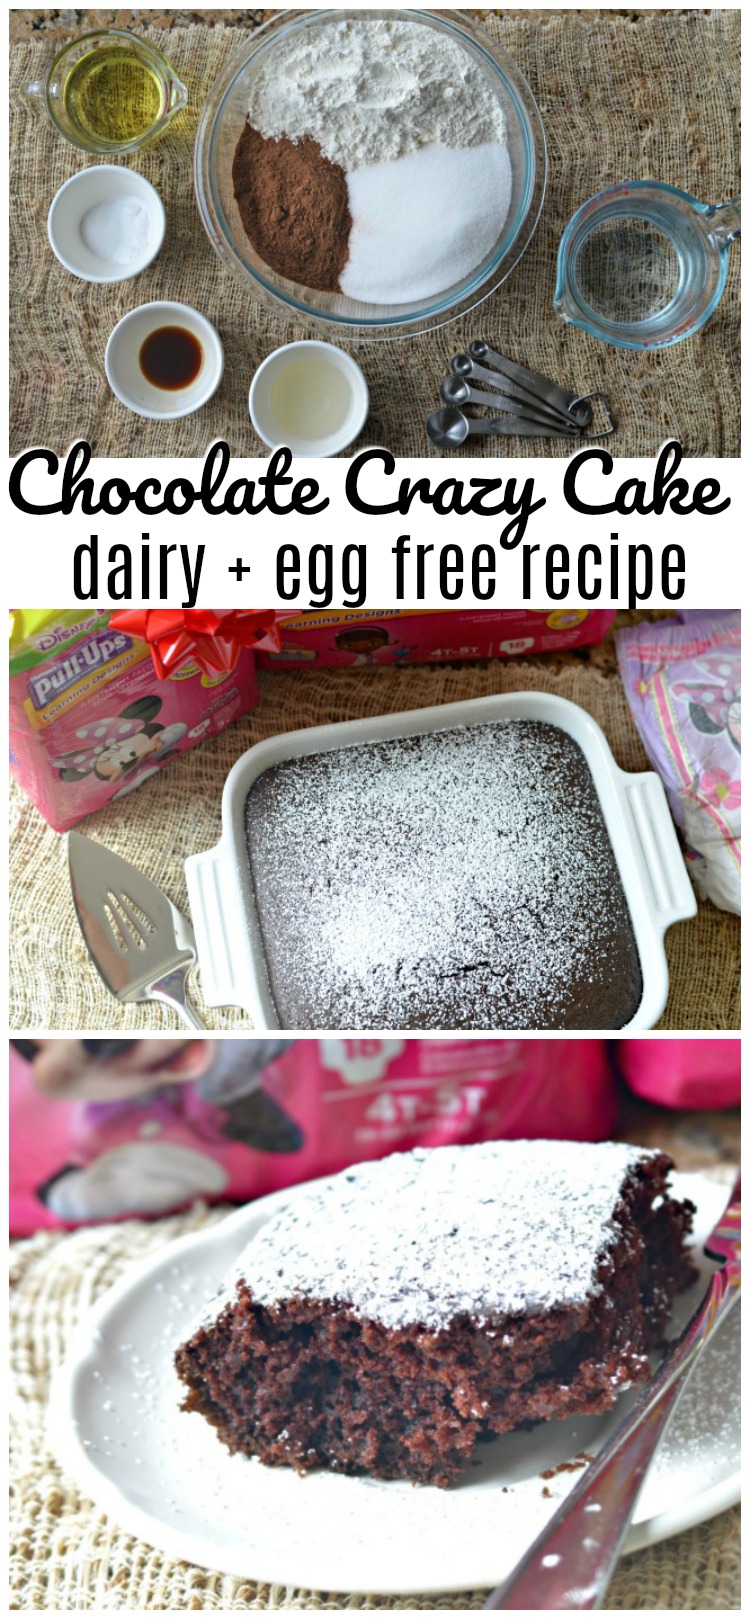
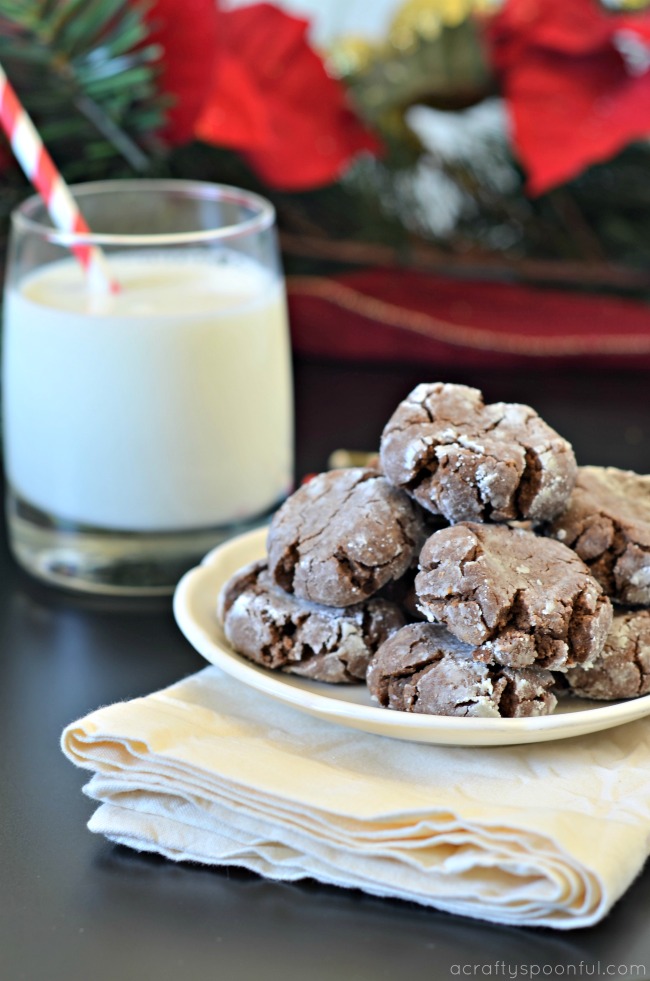
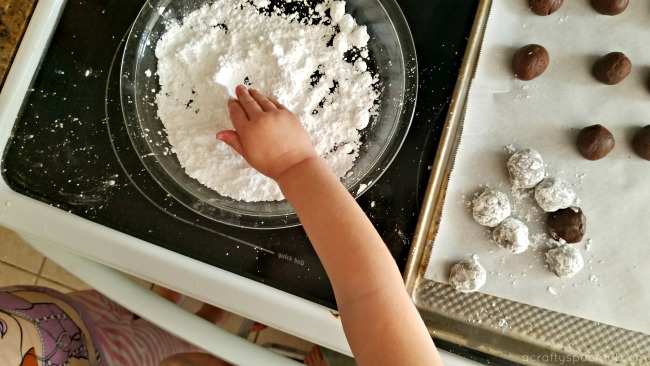
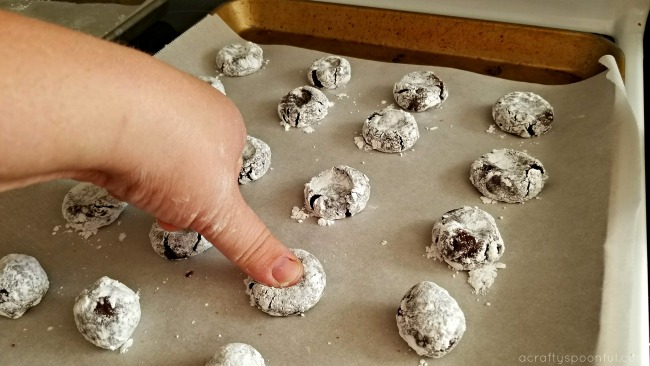
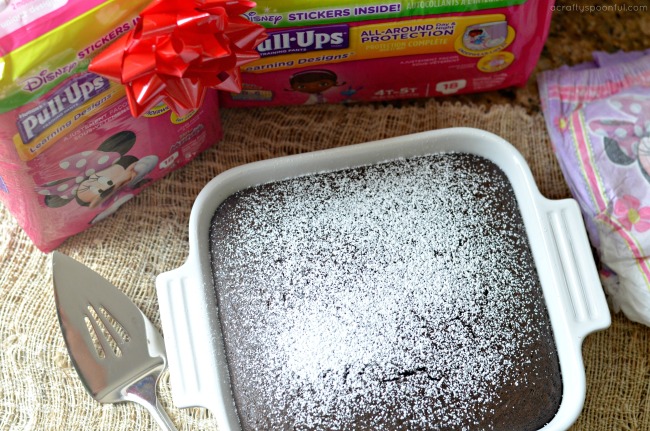
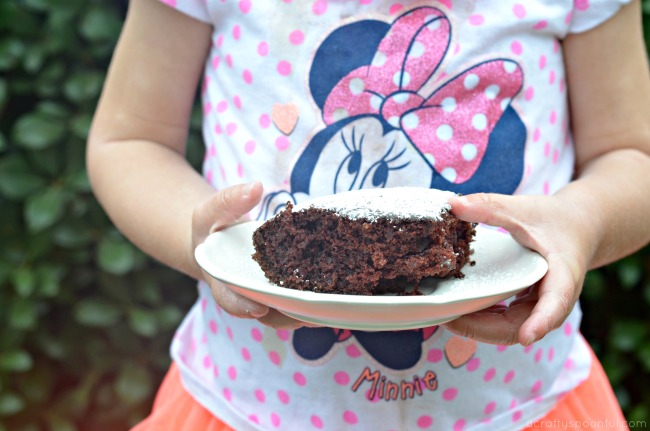
When your child has transitioned into Pull-Ups and starts to have accident free weeks, consider a sweet incentive to encourage them even more. We would use lollipops and other small prize rewards to give to our kids when they successfully went on the potty, when they had an accident free week, and finally, when they transitioned from Pull-Ups to big kid underwear, we celebrated with a Crazy Cake! 

Cakes mean celebrations for us and this Crazy Cake recipe is one that my husband’s family has been making for years. It’s a super easy recipe that the kids can help with AND it’s egg and dairy free. Most of the ingredients are staple pantry items. 

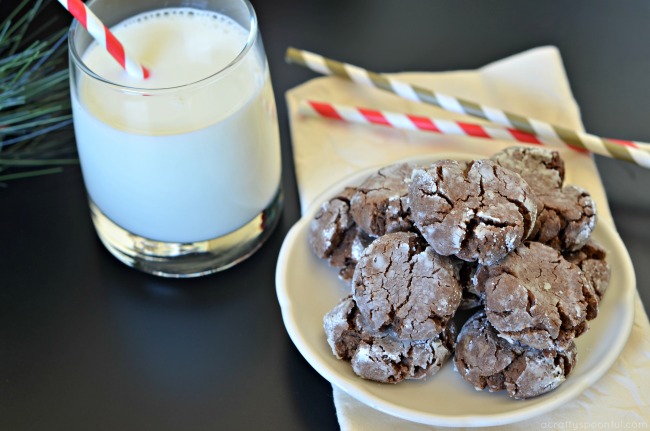
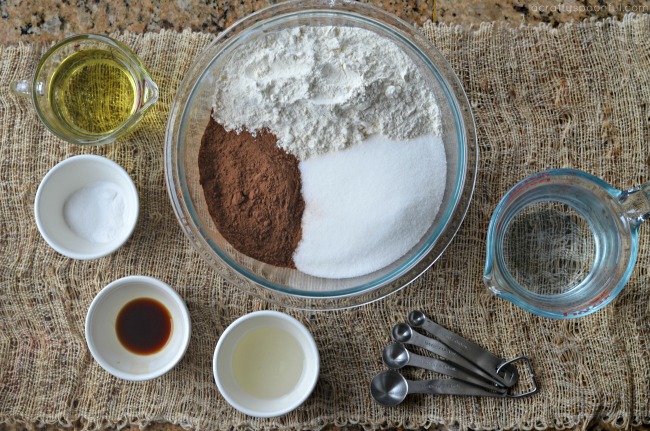
Chocolate Crazy Cake Recipe

Chocolate Crazy Cake

  • 3 cups all-purpose flour
  • 2 cups white sugar
  • 1 teaspoon salt
  • 2 teaspoons baking soda
  • 1/2 cup unsweetened cocoa powder
  • 3/4 cup vegetable oil
  • 2 tablespoons distilled white vinegar
  • 2 teaspoons vanilla extract
  • 2 cups cold water
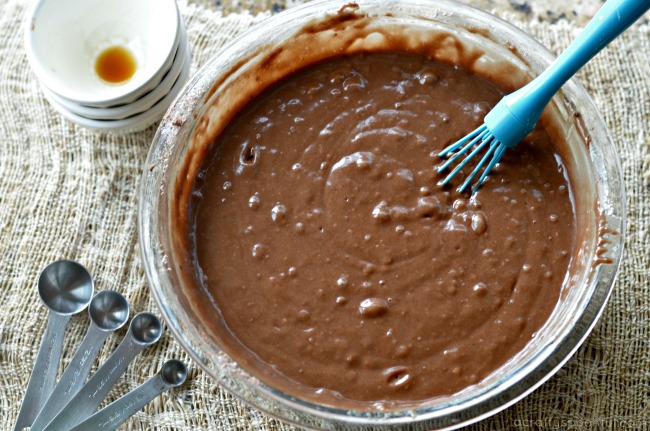
  1. Sift dry ingredients together directly into a 9 x 13-inch ungreased baking pan.

  2. Let your child make three wells in the dry ingredients. Pour the oil into one well, vinegar into the second well, and vanilla into the third well. Pour cold water over everything and stir well with a fork.
  3. Bake at 350 degrees for 30 to 40 minutes, or until a toothpick inserted comes out clean.
  4. Frost with your favorite icing.

What sweet incentives would your child love to celebrate with? 

Loved the tips we shared in this post? Check out these other potty training tips: 

Pin this article for later! 

Click the Pin button on the image below to save for later. 

How to Make Chocolate Peanut Butter Crinkle Cookies Your Guests Will Love

If you’re looking for the perfect holiday cookie this season then look no further than these Chocolate Peanut Butter Crinkle Cookies! Your guests will love their small perfection. Plus they pair perfectly with milk, cocoa, and coffee! 

How was your Thanksgiving? We spent the day baking in the morning with the kids and then enjoying a wonderful meal with our extended family. It was perfect. One of the things we decided to bake up that morning to bring to dinner were these deliciously perfect chocolate peanut butter crinkle cookies. They’re small, bite-size cookies that aren’t too sweet so they were perfect to pair with the pies and enjoy with a cup of coffee or cocoa to drink. 

Normally we make chocolate crinkle cookies but this time my older daughter wanted to add something a bit different to them to change things up. The addition of peanut butter was the perfect touch and added a great flavor combo to these classic cookies. I may try adding a pinch of cinnamon next time too! 

This recipe is one of many we’re sharing on the Houseful of Cookies tour this year. Last year we made another fun cookie recipe: Pfeffernüsse Cookies. You have to try them if you haven’t made them yet! The rest of the cookies on this tour are linked at the bottom of this post. 

When making cookies with the kids I always try to measure everything out before we start mixing so they don’t just dump everything out without knowing what they’re putting in. It helps them to understand the quantities needed for each recipe. 

But one thing we are working on is adding one egg at a time while mixing so each can be incorporated before the other is added. The 2 year old prefers to dump them all in at once! 

This dough is a thicker dough that, once all of the ingredients are combined, form a ball in the mixer. This makes it easier to get out to refrigerate once mixed up. 

And I’ll let you in on a little secret. Even though the recipe does say to chill for 1 hour… I don’t always let it chill. I’ll divide the dough up into two halves and place one in the fridge but will start rolling out the other right away. 

This is a great cookie to make before guests come over if you’re looking for something little to nibble on. Or to give as gifts during the holidays because they’re small and do well in an airtight container. 

Chocolate Peanut Butter Crinkle Cookies

  • 10 tablespoons butter (cut into 10 pieces (1/2 cup plus 2 tablespoons))
  • 1 1/4 cups light brown sugar (packed)
  • 10 ounces bittersweet chocolate (coarsely chopped)
  • 2 1/2 cups all-purpose flour
  • 1/2 cup unsweetened cocoa
  • 1 teaspoon baking soda
  • 1/2 teaspoon teaspoon salt
  • 2 eggs
  • 1/2 cup peanut butter
  • 1/2 cup powdered sugar
  1. Put the butter, sugar, and chocolate in that order into a 2-quart saucepan. Put the pan over low heat and warm the ingredients, stirring occasionally, until they are melted and smooth. Scrape everything into the bowl of a mixer.

  2. Sift together the flour, cocoa, baking soda, and salt.

  3. Working with a mixer with a paddle attachment, add the eggs, one at a time, beating until the eggs are well blended into the chocolate. With the mixer still on low, add the dry ingredients, mixing just until the dough is smooth and shiny; it will clean the sides of the bowl and form a ball. Then add the peanut butter and stir in until just combined. Turn the dough out onto a work surface, divide it in half, wrap each piece in plastic wrap and chill for at least 1 hour. 

  4. Preheat the oven to 350°F and line two baking sheets with parchment paper.

  5. Working with 1 tablespoon of dough at a time, roll the dough between your palms to form firm, shiny balls. (If the dough breaks as you work, squeeze and knead it a bit, then reroll it between your palms.) Add to a small shallow dish filled with powdered sugar and roll in sugar until lightly coated. Place the balls about 1 inch apart on the baking sheets and lightly press each one down a bit with your thumb.
  6. Bake the cookies for 9 to 10 minutes, rotating the baking sheets from top to bottom and front to back at the midway point. The cookies should be delicately firm and crackled across the top. (It’s better to under- than over bake.) Remove the sheets from the oven, let the cookies rest on the sheets for 2 minutes, then, using a wide spatula, gently transfer the cookies to a rack; cool to room temperature.

  7. Repeat with the remaining dough, cooling the baking sheets between batches. 

Looking for more deliciousness to enjoy this holiday season? Don’t forget to check out the rest of the stops on the Houseful of Cookies tour! 

Houseful of Cookies 2017 Blog List

Houseful Of Nicholes – Slow As Molasses Cookies

A Crafty Spoonful – Chocolate Peanut Butter Crinkle Cookies

A Real Urban Mom – Chocolate Chip Cookies

Dash Of Evans – Cranberry Hootycreeks

Divas With A Purpose – Houseful Of Cookies 2017

Everyday Party Magazine – Simple Caramel Cream Sugar Cookies Swirls

Fab Haute Mama – Belgian Waffle Cookies

Good Girl Gone Redneck – Perfect Holiday Saltine Toffee Treat

Happily Homegrown – Old Fashioned Hermit Bar Cookies

Her Life On Purpose – Red Velvet Cake Mix Cookies

Honest & Truly! – Triple Chocolate Dipped Cookie

How Was Your Day – Houseful Of Cookies 2017

Hysterical Mom – Lemon Sugar Cookies

I am the Maven® – Moldy Mice Cookies

Keep Calm & Teach Fifth Grade – Winter Wonderland Sugar Cookies

Kenya Rae – Pecan White Chocolate Chip Cookies

Kiss My Tulle – Chunky Christmas Cookies

Mom On The Side – Hopscotch Crunchies Holiday Cookies

More Than Thursdays – Mint Surprise Sugar Cookies

Mother Of The World – Houseful Of Cookies 2017

Our Crafty Mom – Houseful Of Cookies 2017

Peyton’s Momma – Houseful Of Cookies 2017             

Simplify Live Love – Double Chocolate Pomegranate Cookies

Teachable Mommy – 3 Ingredient Peanut Butter Cookies

The Analytical Mommy – Favorite Lactation Cookie Recipe

The Biswolds – White Chocolate Chip Toffee Cookies

The Olive Blogger – Gingerbread Biscotti

We’re Parents – Cranberry Cheesecake Cookies  

How to Make 11 Awesome Thanksgiving Desserts That Your Kids Will Love

Finding a dessert that makes all of the kids happy can be a difficult challenge. So we’ve rounded up 11 awesome Thanksgiving desserts for kids that meet a handful of kid-friendly requirements! 

Kids are weird. No, no, listen. They really are. One minute they hate whipped cream, and the next they’re trying to shoot it straight into their mouths because they love it so much. And trying to find a dessert to make them happy can sometimes be difficult during the holidays when the options aren’t cake, brownies, or ice cream. So we put together a few of our favorite Thanksgiving desserts for kids so everyone has options this holiday season. But make sure you have plenty of whipped cream. 

pumpkin pie with coconut milk, pumpkin pie made with coconut milk, dairy free pumpkin pie filling

11 Thanksgiving Desserts for Kids

Pumpkin Pie with Coconut Milk from A Crafty Spoonful

This pumpkin pie is great for those who may have dairy allergies. It tastes just like regular pumpkin pie but is made with coconut milk instead. And no, you can’t taste the coconut in the filling. Pair it with some coconut whipped cream and you are set for the holidays! This recipe is also perfect to use for mini pumpkin pies as well if you don’t want to make the whole pie. 

Candy Apple Dump Cake from A Crafty Spoonful

Still have leftover Halloween candy you’re hoarding away? I’m not judging. But if you want to get rid of some of it, this is the recipe to try! This dump cake is not only easy, all you need is one pan (no separate bowls) to make it! Less dishes = winning in my book. And the kids go crazy over the chocolate + apple combo. 

Mini Pecan Pie Bites from A Crafty Spoonful

Oh, these sinfully sweet little bites of heaven are the perfect grab-on-the-go dessert for the littles. The butter cracker hooks the kids and the chocolate drizzle on top of the pecan filling keeps them coming back. Plus, there’s not too much mess with this recipe. 

Pumpkin Cheesecake Bites from My Suburban Kitchen

For those with a more sophisticated palate, these pumpkin cheesecake bites totally hit the spot. They’re very portable, just like the mini pecan pie bites, and pack a punch of flavor with a combo of gingersnaps and pumpkin. 

Four Ingredient Pumpkin Pie Dip from My Suburban Kitchen

What kid doesn’t love dip? And this deliciously sweet pumpkin pie dip is the perfect way to enjoy those holiday cookies or a few graham crackers. Just make sure there isn’t any double dipping.  

Pumpkin Spice Cranberry Trifle from Flour on My Face

Who doesn’t love a good layered trifle? Kids can dig in and eat a layer at a time or go for the gold and scoop all the way down for a few layers of goodness in one bite. Plus these are a fun recipe to let the kids help assemble! 

Gluten Free Pumpkin Cake from Flour on My Face

In case your child has a gluten allergy, or if they’re just avoiding gluten as part of an elimination diet, you need to try this pumpkin cake. You can still stay festive and enjoy all the flavors of the holidays even when you’re gluten-free! 

Pumpkin Pecan Bundt Cake from Flour on My Face

Speaking of cake, if your kids are more in a cake and frosting kind of mood, this pumpkin pecan bundt cake is a delicious option. I’ve made mini bundtlets for individual kid portions before and it’s turned out great! 

Pumpkin Spice Dessert Bars from {Not Quite} Susie Homemaker

Another quick and easy go to that you can make ahead and bring with you are these pumpkin spice dessert bars. They’re made with pumpkin and applesauce AND have a delicious cream cheese frosting! 

Individual Apple Pies from The Love Nerds

What’s Thanksgiving without apple pie? In our house we always have pumpkin and apple pies in addition to the other dessert options so these individual apple pies are perfect for the kids table. A classic recipe with a fun spin. 

Favorite Pecan Pie from Unexpected Elegance

And if your kid loves the classics, you can’t go wrong with a pecan pie. Some kids are turned off by this tasty dessert but for those who want to venture out and try new things, this is a great recipe to start with! 

What are your go-to Thanksgiving desserts for kids? 

Love what you read? Check out these great posts! 

Pin this article for later! 

Click the Pin button on the image below to save for later. 

Instant Pot Mexican Rice Pudding

When you’re juggling work, kids, and life, it’s nice to have a dessert you can make with little to no effort to enjoy at the end of the day. This Instant Pot Mexican Rice Pudding is the perfect dessert to do just that! And it hits all of the right spots. 

Our lazy summer has turned into quite a busy one. I can’t even remember the last time I’ve been able to test out recipes to share here so when I had a craving for rice pudding, I knew I had to try it out in the Instant Pot to see if I could re-create one of my favorite desserts. With the help of the instant pot doing all of the work, I’ve gotten fairly close to replicating my favorite Arroz con Leche. This is the perfect dessert to dish out after a long day of juggling work and the kids when I want something no one else will steal bites of. 

One thing I love is that this recipe makes enough for 2 of my 3-cup Pyrex glass dishes. That way I can stack them in the fridge and take out 1/3 of a dish to enjoy. Because when I need a little comfort I don’t want to think about portions. 

You could try switching out the half and half with all milk but I feel the half and half adds a bit more creaminess to the dish. Also, if you have a ceramic pot insert for your Instant Pot you can reduce the amount of rice that may stick to the bottom of the pot. I’ve also found that there may be some spittle when releasing the pressure. That’s OK! Just put a dish towel over the top of your Instant Pot when you depressurize. 

Instant Pot Mexican Rice Pudding (Arroz con Leche)

  • 1 cup half and half
  • 1 cup milk
  • 1¼ cups water
  • 1 cup long-grain white rice
  • 1 can sweetened condensed milk
  • ⅛ cup sugar
  • ⅛ teaspoon salt
  • 1 teaspoon vanilla extract
  • 2 teaspoons cinnamon
  1. Rinse rice well using a mesh colander.

  2. Add half and half, milk, sugar, water, and salt to Instant Pot

  3. Add rice to liquid mixture and stir

  4. Place lid on Instant Post, seal lid, and close vent.

  5. Press the Porridge button. The rice will take 20 minutes to cook on this setting.

  6. When the timer beeps, allow the pressure to release slowly for 10 minutes.

  7. After 10 minutes, press the Cancel button and open vent to release pressure.

  8. When depressurized, open lid.

  9. Add Sweetened Condensed milk and vanilla.

  10. Sprinkle with cinnamon and stir until well mixed, adding a splash of half and half if needed for creamy consistency.

  11. Store in individual glass containers and top with a sprinkle of cinnamon.

  12. Refrigerate and serve or enjoy hot!

Love this recipe? Read more! 

Pin this article for later! 

Click the Pin button on the image below to save for later. 

Chocolate Peanut Butter Pecan Fat Bombs

These Chocolate Peanut Butter Pecan Fat Bombs hit the spot when you’re craving something sweet and help increase your fat macros. Plus they’re super easy to make! 

chocolate-peanut-butter-pecan-fat-bombs-recipe

I’m hopping back on the LCHF way of eating and have successfully been on plan for the past week. That means I’ve been able to get through a mini vacation up to Palm Springs AND our annual Cookie Christmas celebration + brunch on New Year’s day with my family. Now that I’ve tackled this first week, I know I can keep it going.  As I continue this journey I’ll be sharing over on my other blog, Low Carb San Diego. I’ll include great recipe ideas, tips and tricks, as well as my personal journey. I hope you follow along! 

These Chocolate Peanut Butter Pecan Fat Bombs hit the spot and help me increase my fats (something I always have a problem with). It’s a great treat for the end of the night or for when I know I’m going somewhere with lots of sweet treats. Bringing a fat bomb and one of my favorite low carb bars helps me say no to temptation and press forward. 

chocolate-peanut-butter-pecan-fat-bombs-with-monkfruit-in-the-raw

Find the full recipe here

Carlsbad Strawberry Napoleons

Chef Guillas' Strawberry Napoleon

In honor of Strawberry Shortcake Day yesterday, I headed down to Macy’s to check out their FREE cooking demonstration for the month (as I mentioned last week here). I have heard about these free demos for quite a while but never found the time to actually go down and check one out. But boy was I happy I did! We were greeted by Chef Bernard Guillas of The Marine Room here in San Diego and he shared his recipe for Carlsbad Strawberry Napoleons. And wow… these were GOOD.

If you have a chance to try out this recipe, do! But make sure you make the puff pastry right before you’re going to assemble and serve it. Not only does it make an amazingly delicious dessert, it’s also a beautiful one as well. A great treat for any summer party or barbecue. And there are so many ways you can customize it!

Chef Guillas' Strawberry Napoleon demo at Macy's

Strawberry Napoleons

by Chef Bernard Guillas of The Marine Room San Diego

Puff Pastry

  • 1 sheet frozen puff pastry
  • 1 large egg yolk beaten with 2 tablespoons of milk (can also substitute half and half or heavy whipping cream)
  • 3 tablespoons granulated sugar
  • 1/4 teaspoon sea salt flakes

Preheat oven to 375. Line a large baking sheet with parchment paper. Thaw dough just enough to be able to cut with a sharp knife.

Transfer to a lightly floured surface. Cut into 12 equally sized rectangles, 5 inch x 2 1/2 inch. Transfer rectangles to baking sheet, leaving 1 inch between each. Brush with egg yolk mixture. Prick dough with fork all over to prevent over rising. Refrigerate 15 minutes. 

Sprinkle with sea salt and sugar. Bake 15 minutes or until golden brown and flakey. Remove from oven. Transfer puff pastry to a rack to cool.

Creme Patisserie

  • 1 1/2 cup half and half
  • 1 vanilla bean, split in half and scraped
  • 5 egg yolks
  • 1/3 cup granulated sugar
  • 3 tablespoons all purpose flour
  • 3 tablespoons St. Germain liqueur

Bring 1 cup of half and half to simmer with vanilla in a large sauce pan over medium heat. Add egg yolks and sugar to large mixing bowl. Whisk vigorously until mixture is smooth, ribbony and pale. Whisk in flour and salt. Add remaining half and half. Whisk until smooth.

While stirring the yolk mixture, slowly pour 1/4 of the hot half and half into the yolk mixture to temper. Transfer yolk mixture into sauce pan. Cook until mixture comes to a simmer and thickens, whisking constantly. Whisk in St Germain liqueur. Cook an additional minute, whisking constantly. Transfer to a large bowl. Cover with plastic wrap to prevent skin from forming. Cool completely. Remove vanilla bean.

Presentation

  • 2 cups sliced strawberries
  • 1/4 cup St Germain liqueur
  • 1/8 teaspoon star anise powder
  • 1/8 teaspoon freshly ground black pepper
  • 1/4 cup toasted pistachios, crushed
  • 1/2 cup dark chocolate shavings
  • 2 tablespoons powdered sugar

Combine strawberries with St Germain liqueur, star anise, and black pepper in a mixing bowl. Marinate for 30 minutes. Strain strawberries. Reserve liquid syrup for presentation.

Spread 2 tablespoons of creme patisserie evenly onto 8 rectangles of puff pastry. Top with pistachios and strawberries, divided evenly. Place one on top of another, to form 4 double stacks. Top each with the remaining 4 rectangles. Garnish with chocolate shavings. Dust with powdered sugar. Spoon strawberry syrup on top of plate.

Enjoy!

Carlsbad Strawberry Napoleons by Chef Guillas

What’s your favorite way to enjoy fresh strawberries?

Strawberry Mango Cream Pops

This is a sponsored post written by me on behalf of The a2 Milk Company™. All opinions are 100% mine.

Strawberry Mango Cream Pops

One thing we always have to keep stocked in the house besides milk is fruit. My kids go through fruit like other kids might go through candy. We enjoy fruit for breakfast, with our lunch, and even for dessert! These strawberry mango cream pops are one of their favorites and reminds me of one of our favorite smoothies in popsicle form. So good! 

Strawberry Mango Cream Pops - 4 simple ingredients

What I love about this recipe is how easy it is to make. 4 ingredients all blended together and poured into cute popsicle molds then set overnight in the freezer. And because we use a2 Milk®, I don’t have to worry about my daughter having tummy troubles or breaking out with eczema. Over the past few months of using a2 Milk® with her we’ve found that reducing dairy and grabbing the a2 milk® instead has helped her. 
Strawberry Mango Cream Pops are perfect for toddlers

Strawberry Mango Cream Pops

  • 1 cup strawberries, hull removed
  • 1 cup mangos, sliced
  • 1/2 cup a2 Milk®
  • 2 tablespoons honey

Blend all ingredients in your blender until smooth. Grab popsicle molds and fill to fill line. Make sure not to overfill! Place molds in freezer and let set overnight. Remove molds from freezer and enjoy.

Strawberry Mango Cream Pops with fresh strawberries and mangos

Over the past few months we’ve incorporated a2 Milk® into our everyday lives and it’s now our go-to milk. The kids haven’t noticed a difference at all but I have. Since we’ve introducing our 15 month old to a2 Milk®, and me drinking it as well, she’s been happier and has had less breakouts with her eczema. Since all other forms of mammal’s milk (i.e. goat, sheep, human) only contain the A2-type proteins, she’s used to only getting the A2 protein. I’m hoping this continues to make her transition to cow’s milk easier as she nurses less and less. 

Strawberry Mango Cream Pops with a2 milk

What is your go-to dessert for kids?

Interested in more info about a2 Milk®? Check them out on Twitter and Facebook or find where you can purchase it by using their Product Locator! Or check out the great recipes they have on Pinterest. And right now you can take advantage of this a2 Milk® $1 Off Coupon.

Visit Sponsors Site

10 Red Velvet Desserts With A Twist

10 Red Velvet Desserts with a twist - if you're as obsessed about red velvet as I am, you have to give these a try!

Are you as obsessed with everything red velvet as I am? Well you are in for a treat! I am loving red velvet desserts lately and decided to take a look around to find a few I could enjoy with the family. And these desserts? OMG! From cookies to ice cream (no machine needed!) to amazing milkshakes, this list has you covered! I suggest going down from 1 to 10 and trying everything. But that may take you a few weeks to complete. Just don’t blame me for the weight gain. I kid!

10 Red Velvet Desserts With A Twist

  1. Red Velvet Cake Heart Bites
  2. Red Velvet Whoopie Pie Recipe
  3. Sweet Cream Red Velvet Ice Cream (No Machine Needed)
  4. Red Velvet Cake For Two
  5. Red Velvet Cheesecake Brownies
  6. Red Velvet Trifle
  7. Red Velvet Cheesecake Brownie Recipe
  8. Red Velvet Cake Milkshakes
  9. Red Velvet Cupcakes with Cream Cheese Frosting
  10. Red Velvet Cookie Bars with Cream Cheese Frosting

Red Velvet Desserts with a twist

Are you a big Red Velvet fan?

No Cook Chocolate Avocado Pudding: A Healthier Alternative

This is a sponsored post written by me on behalf of The a2 Milk Company™. All opinions are 100% mine.

No Cook Chocolate Avocado Pudding - a healthier alternative to the traditional recipe

Dessert is one of my family’s favorite parts of our meal. And most of the time when we all get together for a family meal, dessert is served. However I’ve noticed a few relatives who’ve declined dessert over the past few get togethers. After chatting with one of them about the reason, I found out that they’ve realized that they have an issue with lactose and since most of the desserts served have some sort of milk product, it’s easier to say no than deal with the consequences later. While they haven’t been formally diagnosed with lactose intolerance, by avoiding dairy they’ve reduced their tummy troubles. 

Because I hate seeing people feeling left out I figured I’d play around with one of my favorite pudding recipes and replace the dairy with a2 Milk®. Then I went a step further and figured out a way to make it thick and creamy without cooking it! Since I already use bananas and avocados in my smoothies to make them creamy and thick, I thought they’d be amazing together in this pudding recipe as well. And the best part? I mix everything together in the blender! Takes less than 5 minutes for everything to come together. 

No Cook Chocolate Avocado Pudding in blender

Haven’t heard of a2 Milk® before? It’s pretty awesome. Originally, all milk contained only the A2 protein. Over time a genetic mutation occurred in cows and a new type of protein developed called A1. This A1 protein causes digestive discomfort and is in all cows’ milk in-stores today, even organic milk.  a2 Milk® is the only fluid milk on the US market that is guaranteed A1 protein free.

How do they do it? 

The a2 Milk Company™ has partnered with U.S. family dairy farmers in upstate New York and the Midwest to expand the a2™ herd. Their cows naturally produce milk with only the A2 protein. And their farmers are certified in the humane treatment of animals, their cows are fed a vegetarian diet and never given hormones or rBST, and the milk is antibiotic free and contains no artificial ingredients or additives. Pretty cool huh? And it tastes no different than regular milk! My kids love it and haven’t caught on that it’s any different.

No Cook Chocolate Avocado Pudding ingredients

No Cook Chocolate Avocado Pudding

  • 1 avocado
  • 1 banana
  • 1/2 cup cocoa powder
  • 1/2 cup honey* (or other sweetener)
  • 1/2 cup a2 Milk®

Add all ingredients in a blender or food processor. Process until completely blended. Serve right away with some berries or chill in the fridge if you prefer cold pudding.

* If you’re making this for children under 1, use an alternative to honey like agave or maple syrup.

No Cook Chocolate Avocado Pudding with raspberries

The results are an amazingly creamy and chocolaty pudding that the kids (and adults) all gobble down! I call that a success.

What’s your go-to dessert when family come over?

Interested in more info about a2 Milk®? Check them out on Twitter and Facebook or find where you can purchase it by using their Product Locator! Or check out the great recipes they have on Pinterest. And right now you can take advantage of this a2 Milk® $1 Off Coupon.

Visit Sponsors Site


© A Crafty Spoonful - All Rights Reserved
It is OK to use one of my photos provided a link back and/or proper credit is given. It is NOT ok to copy and paste a whole post including instructions. Please do not remove watermarks or alter images in any way. Please contact me with any questions at danielle@acraftyspoonful.com

.