Here’s a Quick Way to Make Turkey Napkin Rings for The Kids Table

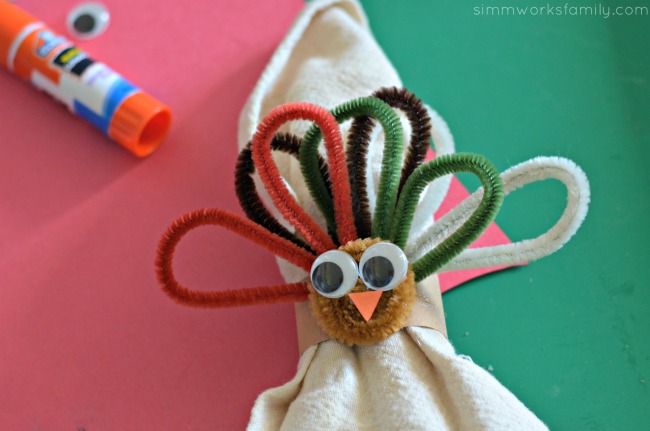
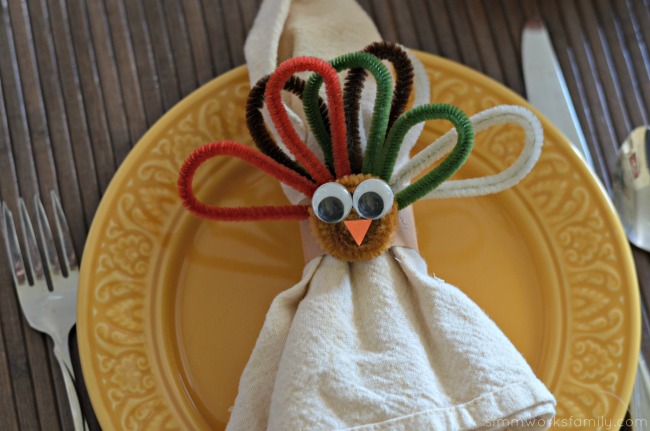
Looking for ways to make your Thanksgiving table festive? These turkey napkin rings will do just that! Grab a few supplies and get crafting!
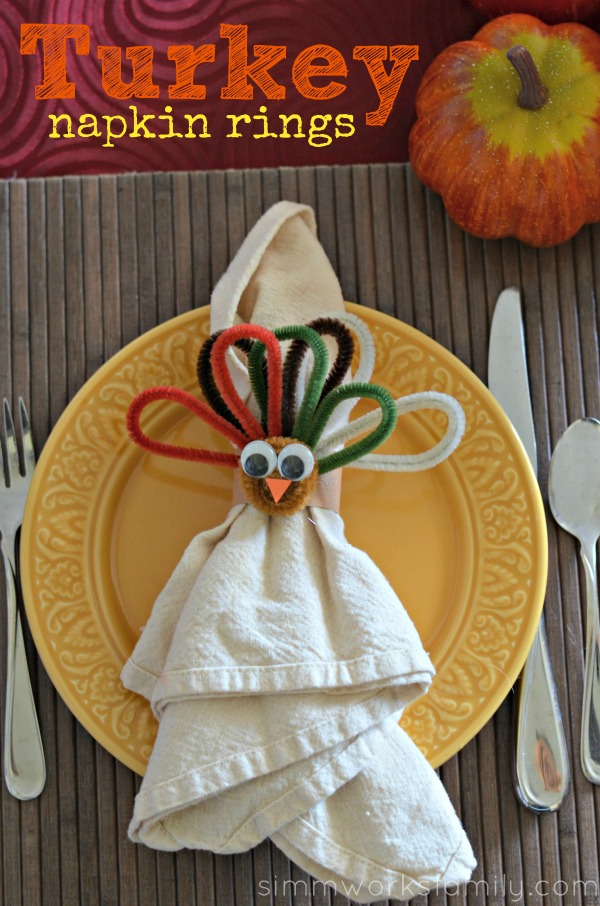
Turkey Napkin Rings resized

Looking for ways to make your Thanksgiving table more festive? Well, these turkey napkin rings will do just that!

Plus it’s an easy craft to get the kids involved in and they’ll be able to tell everyone around the table how they helped.

This is a craft you can easily do ahead of time if you already have the napkins you’re going to use. So check one more thing off of your holiday list and start crafting!

Don’t want to make them yourself? Buy a set of 4 for $10 on Etsy

Turkey Napkin Rings close up

Turkey Napkin Rings

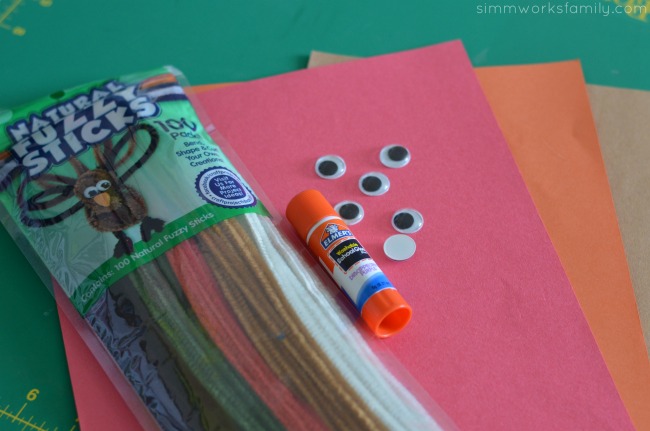
What you’ll need:

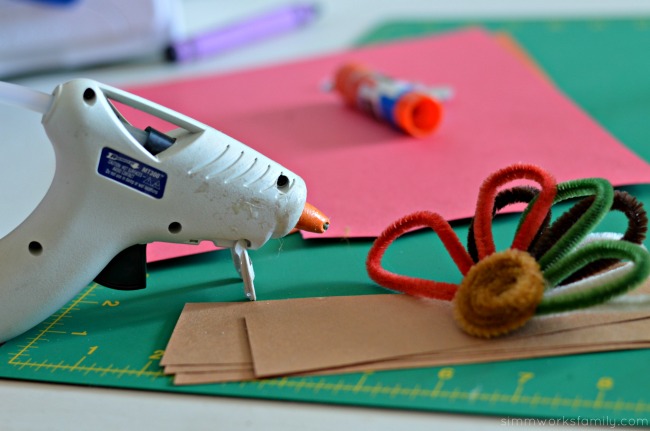
Turkey Napkin Rings materials

What you do:

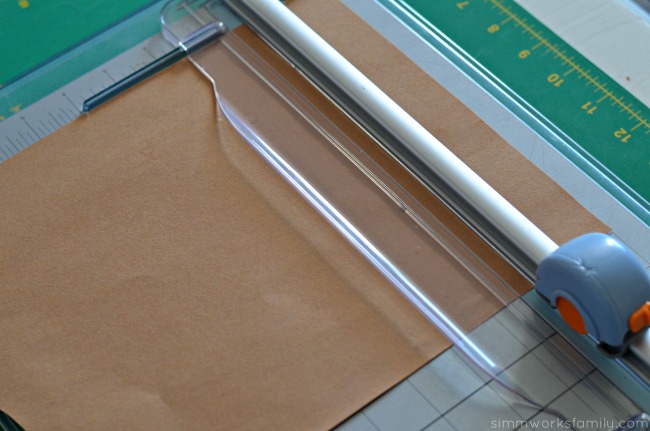
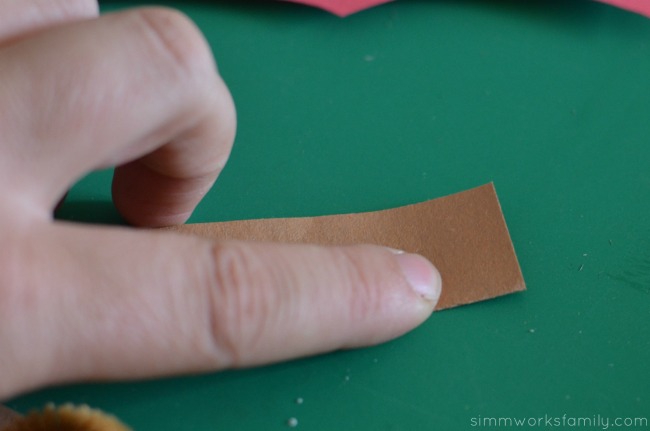
1. Cut brown paper widthwise into 2″ strips. Cut as many strips as you need napkin rings. Set aside.

Turkey Napkin Rings cut strips of brown paper

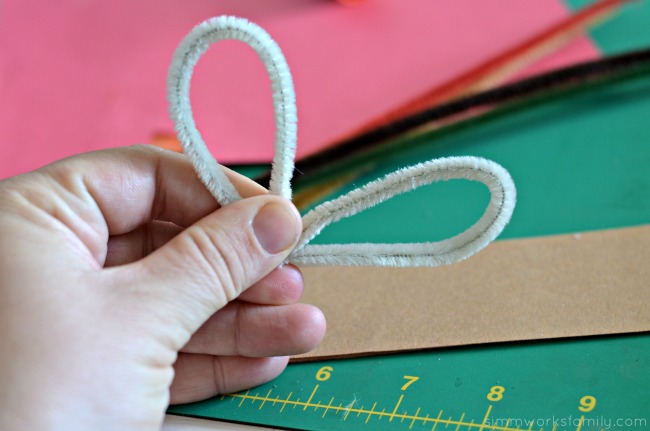
2. Grab pipe cleaners and start making feathers. Bend pipe cleaner in half and then make two loops. Use ends to wrap everything together so the loops stay closed.

Turkey Napkin Rings making feathers

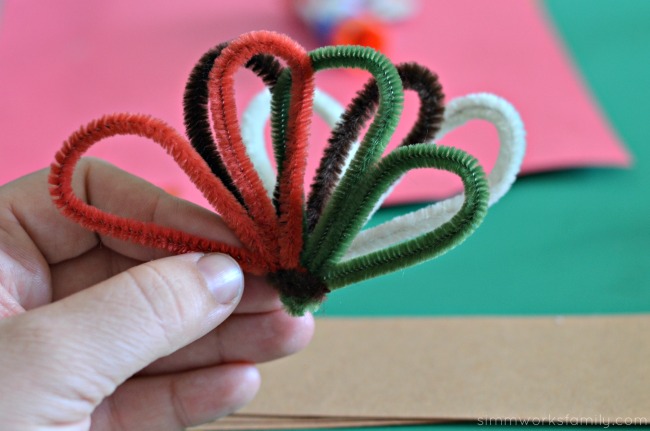
3. Repeat with rest of colors (I used 4 colors). Using the excess of one colored pipe cleaner, wrap all feathers up together.

  Turkey Napkin Rings attach feathers together

4. Using a light brown pipe cleaner, make a circle by spinning the pipe cleaner around in a spiral. Tuck in the end of the pipe cleaner so that it stays together and is not visible.
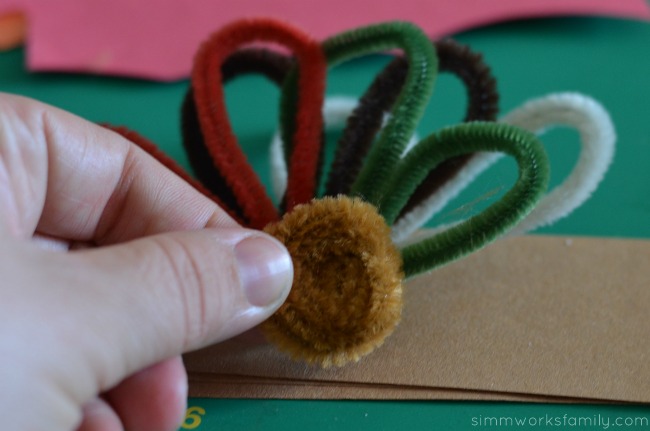
Turkey Napkin Rings pipe cleaner turkey head

Turkey Napkin Rings glue gun

5. Grab your glue stick or glue gun and adhere brown circle to the feathers. (side note: I became frustrated with my glue stick and opted for the glue gun but my kids used the glue sticks.)

Turkey Napkin Rings fold paper in half

6. Grab brown strips of paper and fold in half lengthwise.

Turkey Napkin Rings measure and cut paper

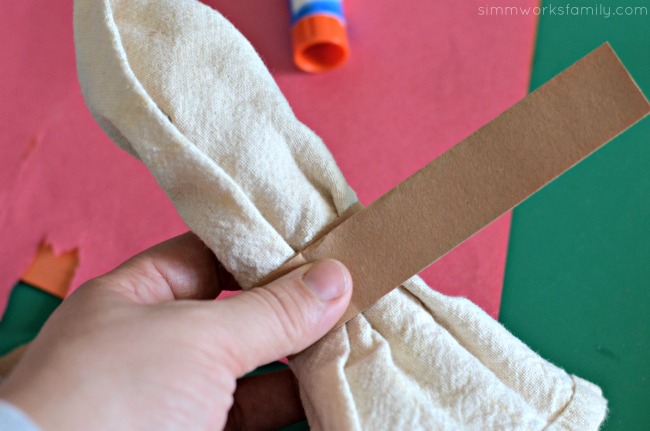
7. Wrap around napkin and cut off any excess (ends of paper should overlap by about an inch).

Turkey Napkin Rings tuck in ends

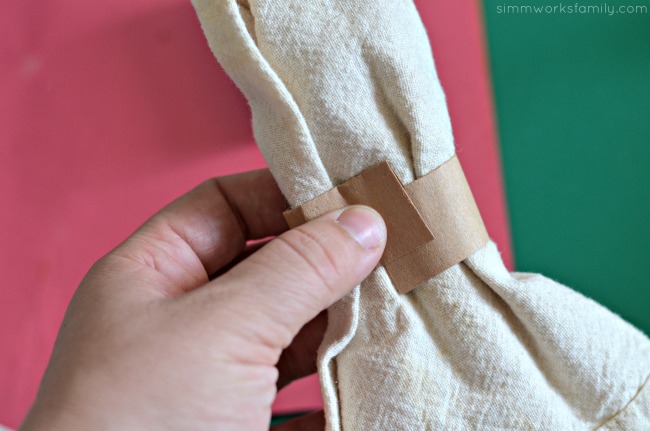
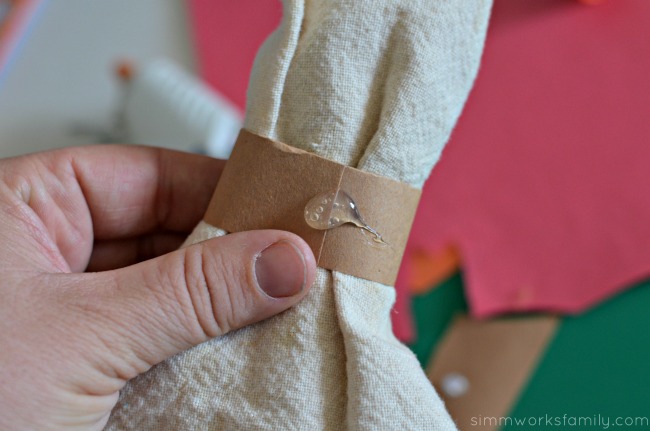
8. Tuck one end of the paper into the other end to secure it.

Turkey Napkin Rings glue turkey to napkin ring

9. Add a dab of glue on the seam of the tucked in paper and adhere turkey body to the napkin ring.

Turkey Napkin Rings glue turkey eyes and beak

10. Add googly eyes, beak, and anything else you might want to include onto the face of the turkey.

Turkey Napkin Rings close up

You’re all set! Now repeat this until you have enough napkins for everyone coming over. Once everyone is ready for dinner all they have to do is tear the back of the paper to access their napkins or simply tug the napkins out.

How awesome is that?

What’s your favorite turkey craft?

Looking for more Thanksgiving inspiration? Read on! 

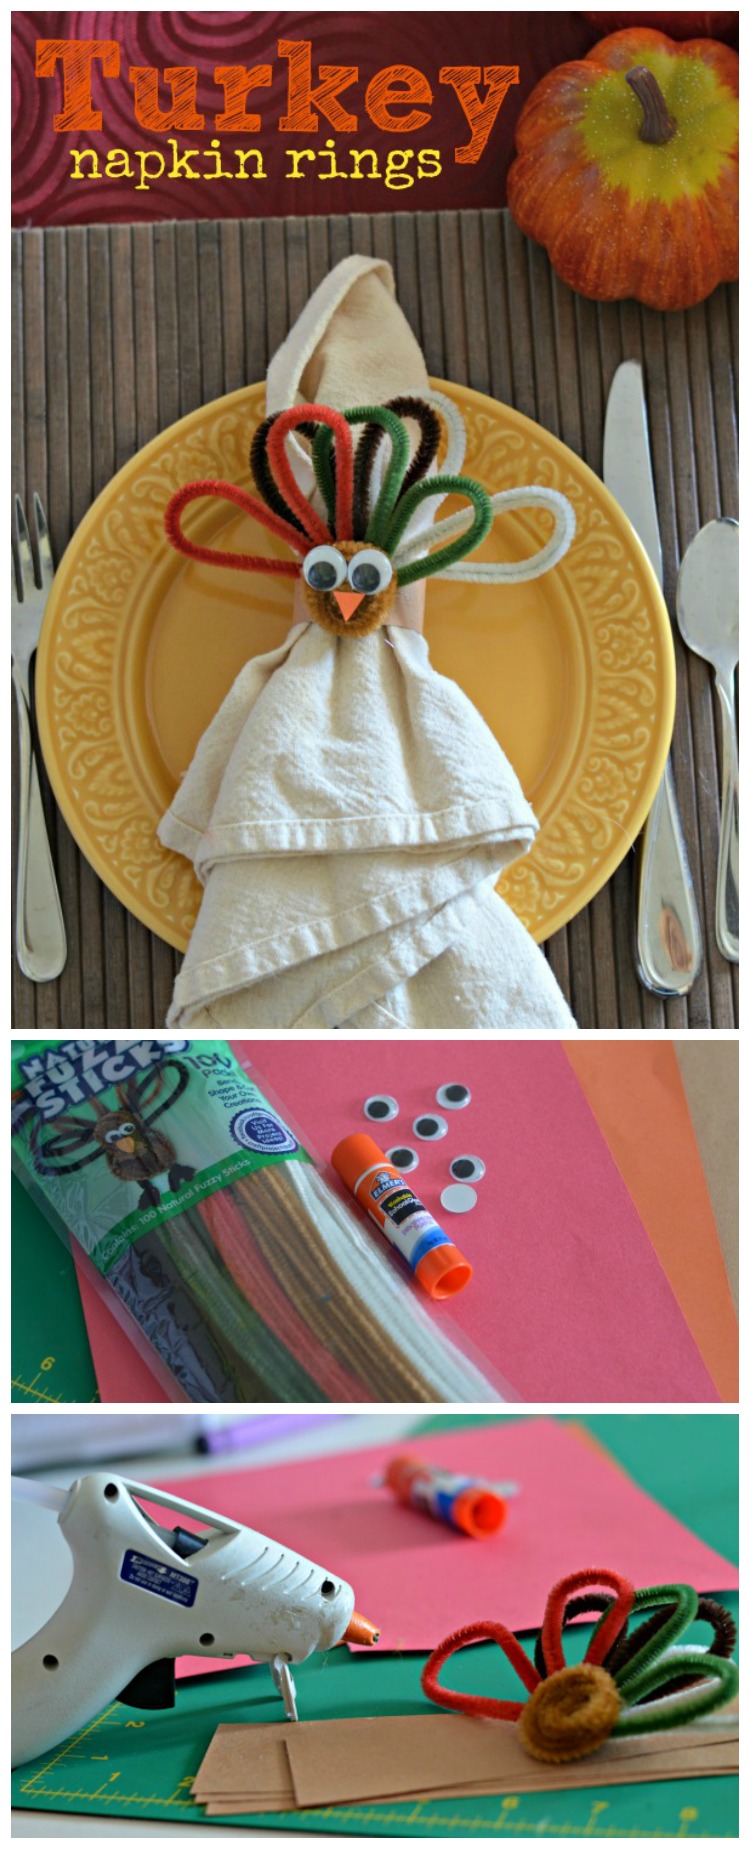
Pin this article for later! 

Click the Pin button on the image below to save for later. 
This post was first published on October 30, 2013
Wow Guests with These Easy DIY Thanksgiving Door Decorations + a DIY Cornucopia Wreath Tutorial

This shop has been compensated by Collective Bias, Inc. and its advertiser. All opinions are mine alone. #DIYHolidayWithSCJ #CollectiveBias

With Thanksgiving right around the corner, we’re making sure our home is in tip-top shape for guests. As the holidays get nearer, you never know who might stop by at any given moment. And the first thing they see when coming up to our home is our front door. So we’re sprucing things up with these easy DIY Thanksgiving door decorations and a simple DIY Cornucopia Wreath.

When we first moved into our new home, the one thing that stuck out like a sore thumb was the ugly solid brown door that stood in the doorway of our home. I didn’t care for it much and it always bugged me that it didn’t show off the awesomeness that is our home. So when my husband found a door in the exact style we were looking for on clearance at Home Depot, we picked it up right away and he installed it. Instead of leaving the trim around the door brown, we brightened things up with a deep red color to really make the door pop. 

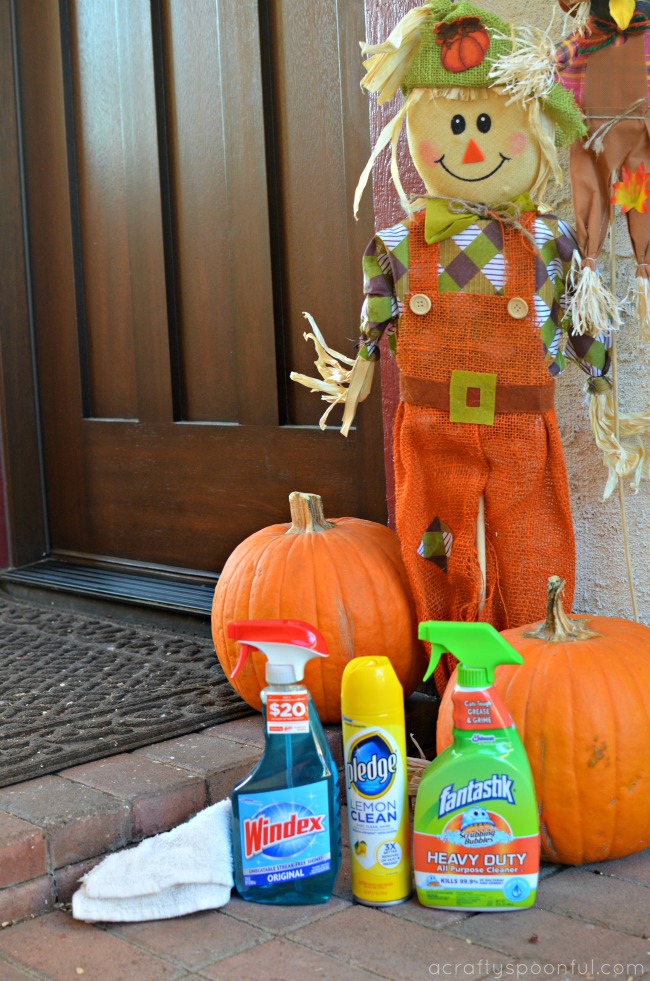
To keep the door in tip-top shape, we rely on our go-to cleaning products to spruce things up. With the door being the first thing all walk through to enter the home, it can get a bit beaten up over time and gather dust and grime from the outside elements. 

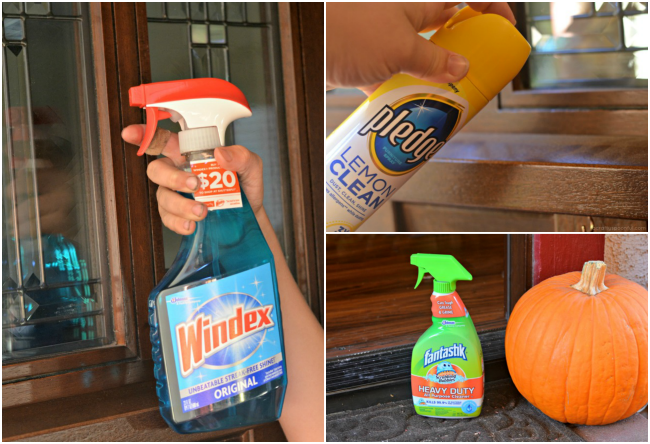
Since our new door has three windows in it, we keep Windex® Original close by. It has an Unbeatable Streak Free Shine and starts working on dirt and grime even before you wipe*. Trusted for generations, Windex® Original cleans and shines glass, mirrors, and more! 

Pledge® beautifies and enhances the appearance of your hard surfaces and our finished, sealed door always looks so much better after we wipe it down with Pledge®. Pledge® Lemon Clean can be used on furniture all around the house to quickly clean, condition and protect –all while leaving behind the classic, fresh lemon Pledge® scent. It also features Allergen Trappers® to remove dust and up to 90 percent of the allergens found in dust. That means in addition to cleaning the front door, we can clean up the other household hard surfaces including wood, laminate, stainless steel, leather, marble, granite and plastic.

Scrubbing Bubbles® Fantastik® 32 oz. All-Purpose Cleaner is the perfect cleaner for our door threshold. It gets a beating as the kids run in and out of the home so we need a powerful antibacterial solution cuts to the center of grease and grime and dissolves it on contact and disinfects the area. And the no-rinse solution means you don’t have to spend as much time cleaning.

Easy DIY Thanksgiving Door Decorations

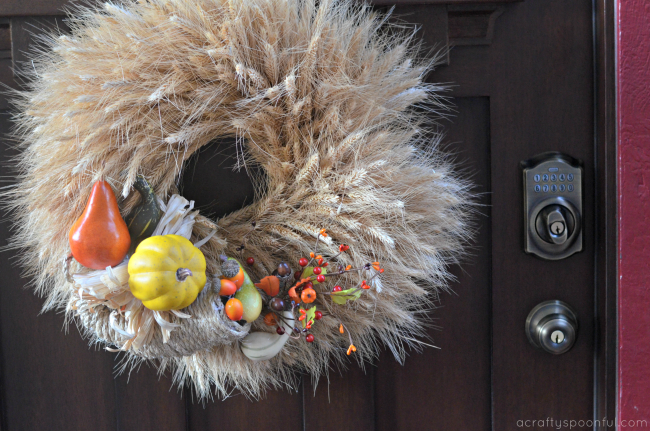
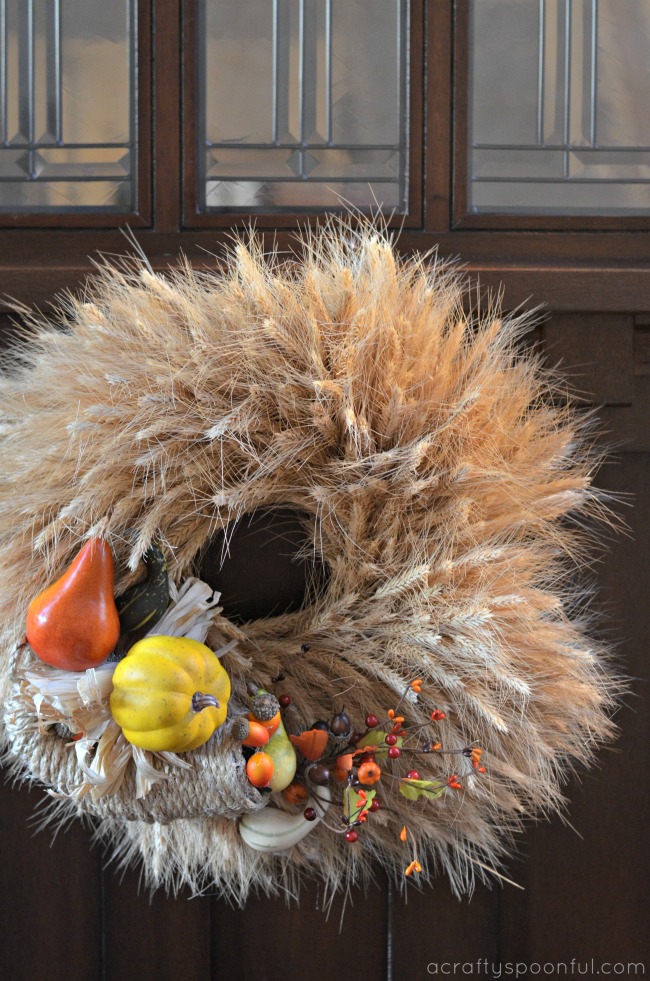
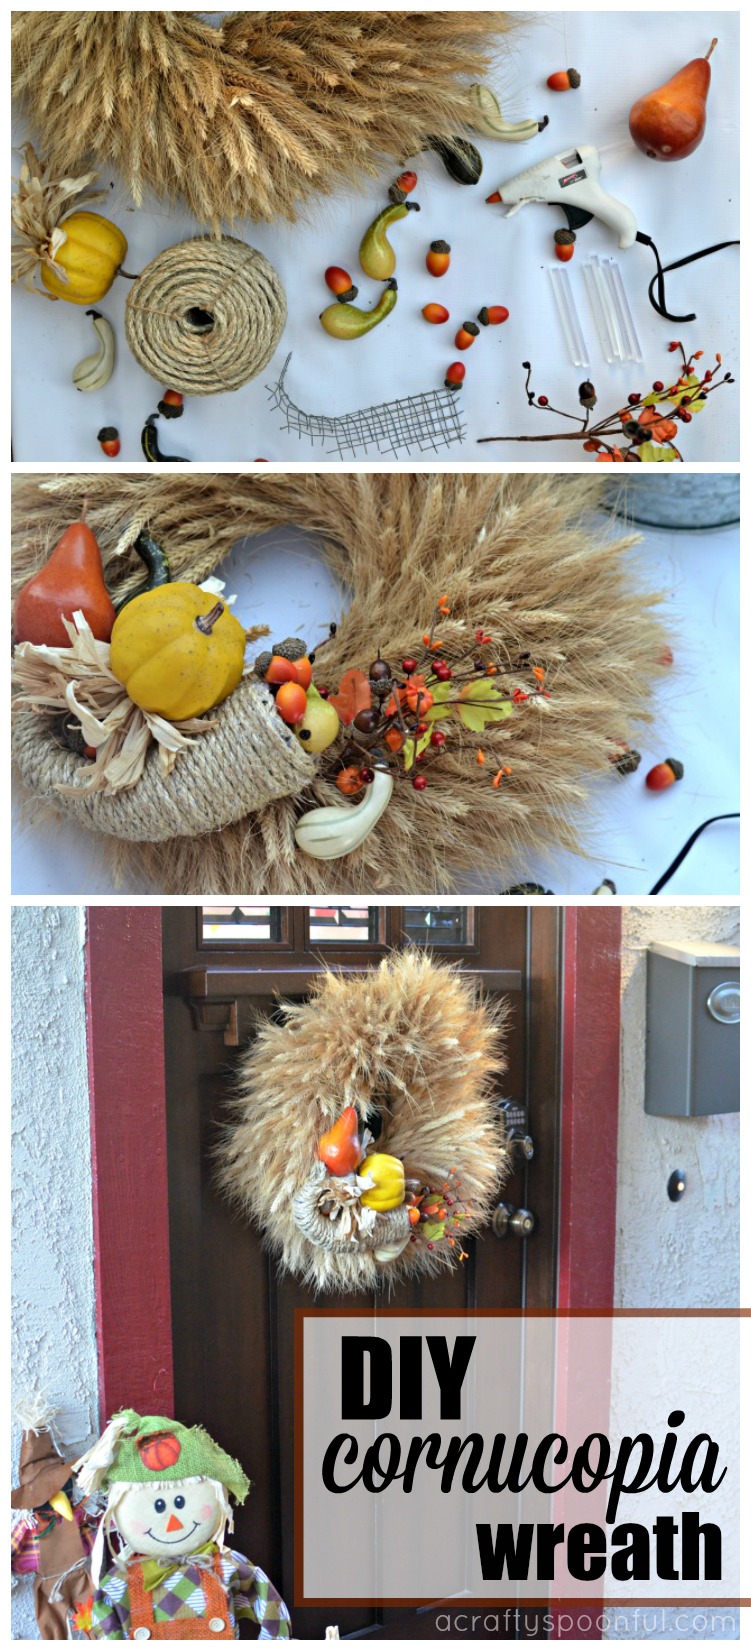
Now that our door is all nice and clean, it’s time to spruce things up even more with a few easy DIY Thanksgiving Door Decorations. This DIY Cornucopia Wreath is not only easy to make, it can be saved to use year after year! 

DIY Cornucopia Wreath

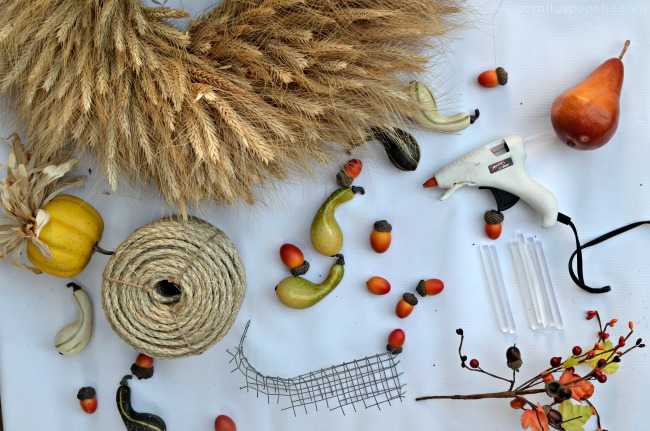
What you’ll need: 

  • Wheat wreath (found at Home Depot)
  • chicken wire
  • twine
  • hot glue gun
  • hot glue sticks
  • plastic/fake fruit and veggies

What you do: 

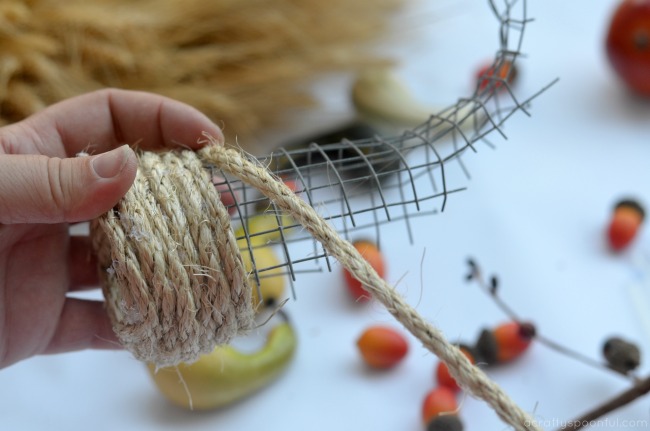
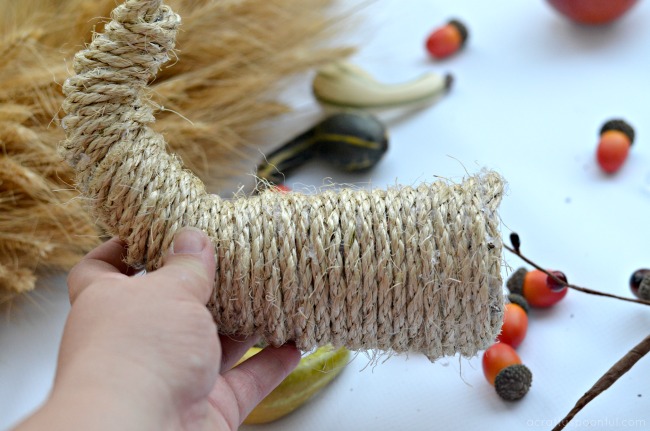
1. Cut a wide triangle out of the chicken wire and form into a cornucopia shape. 

2. Using the twine, wrap around the cornucopia frame and secure twine to the form and itself with hot glue. 

3. Continue wrapping the twine all the way down the form to the smallest tip and then secure the end by sticking it back in the end of the form.

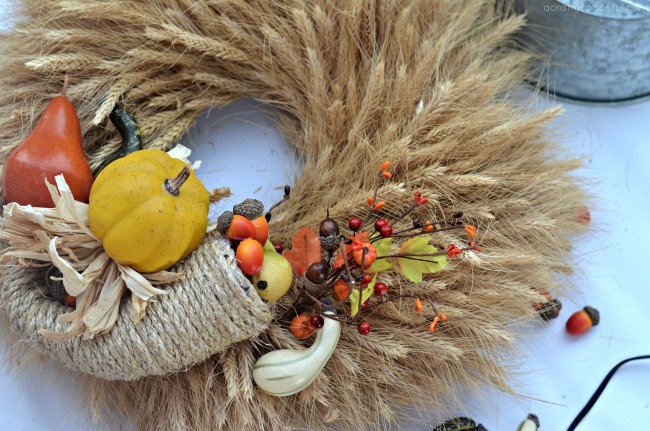
4. Secure the cornucopia onto the wheat wreath with hot glue. 

5. Add decor in and around the cornucopia by hot gluing it in place. Make sure to balance the size of each piece and the colors. 

6. Hang on the door and step back to enjoy your handiwork! 

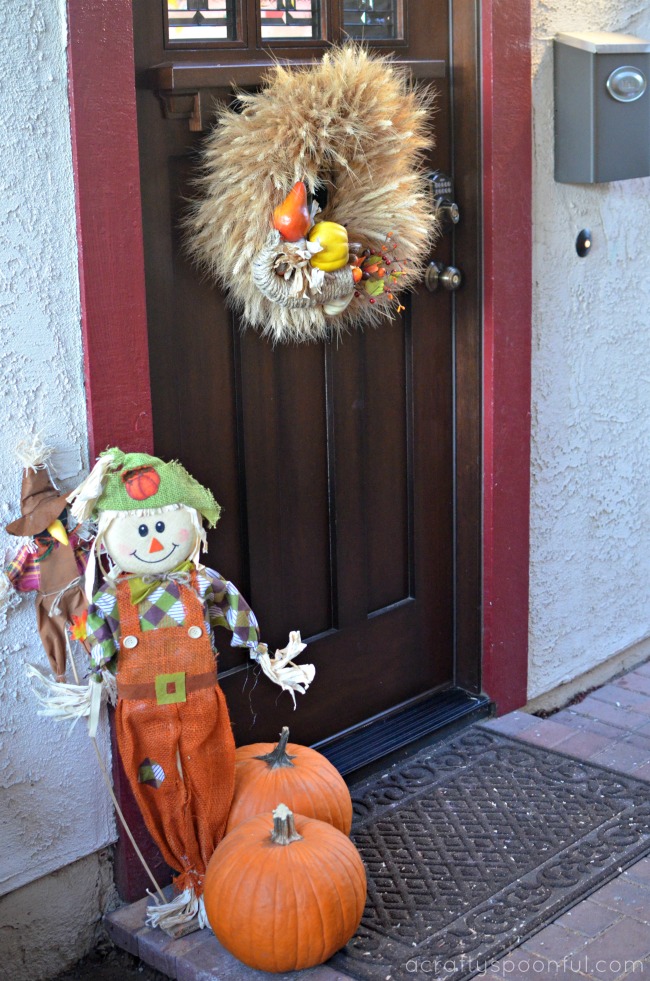
We grabbed a fun scarecrow and stacked two of the pumpkins from our trip to the pumpkin patch next to it to complete the Thanksgiving door decorations.

Keeping things simple yet welcoming is key. The front door doesn’t need too many decorations so choosing the pieces you use wisely will help keep a nice balance.  

Be on the lookout for Windex® and Scrubbing Bubbles® Fantastik® product promotions on display in Home Depot stores until 10/31/17, and Pledge® products on display starting 11/1/17. You can find all products in the cleaning products aisle at your local Home Depot store. 

What do you do to spruce up your front door during the holidays? 

*Claim Based on Windex® Original lab testing against leading competitor glass cleaners per AC Nielsen 52 weeks ended 7/29/2017

Love what you read? Check out these great posts! 

Pin this article for later! 

Click the Pin button on the image below to save for later. 

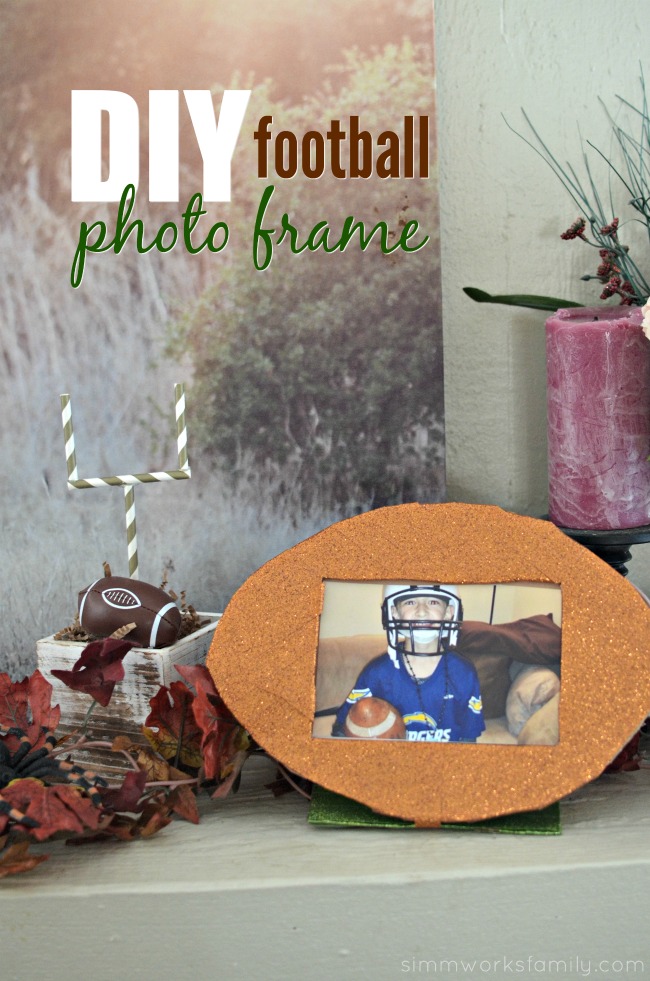
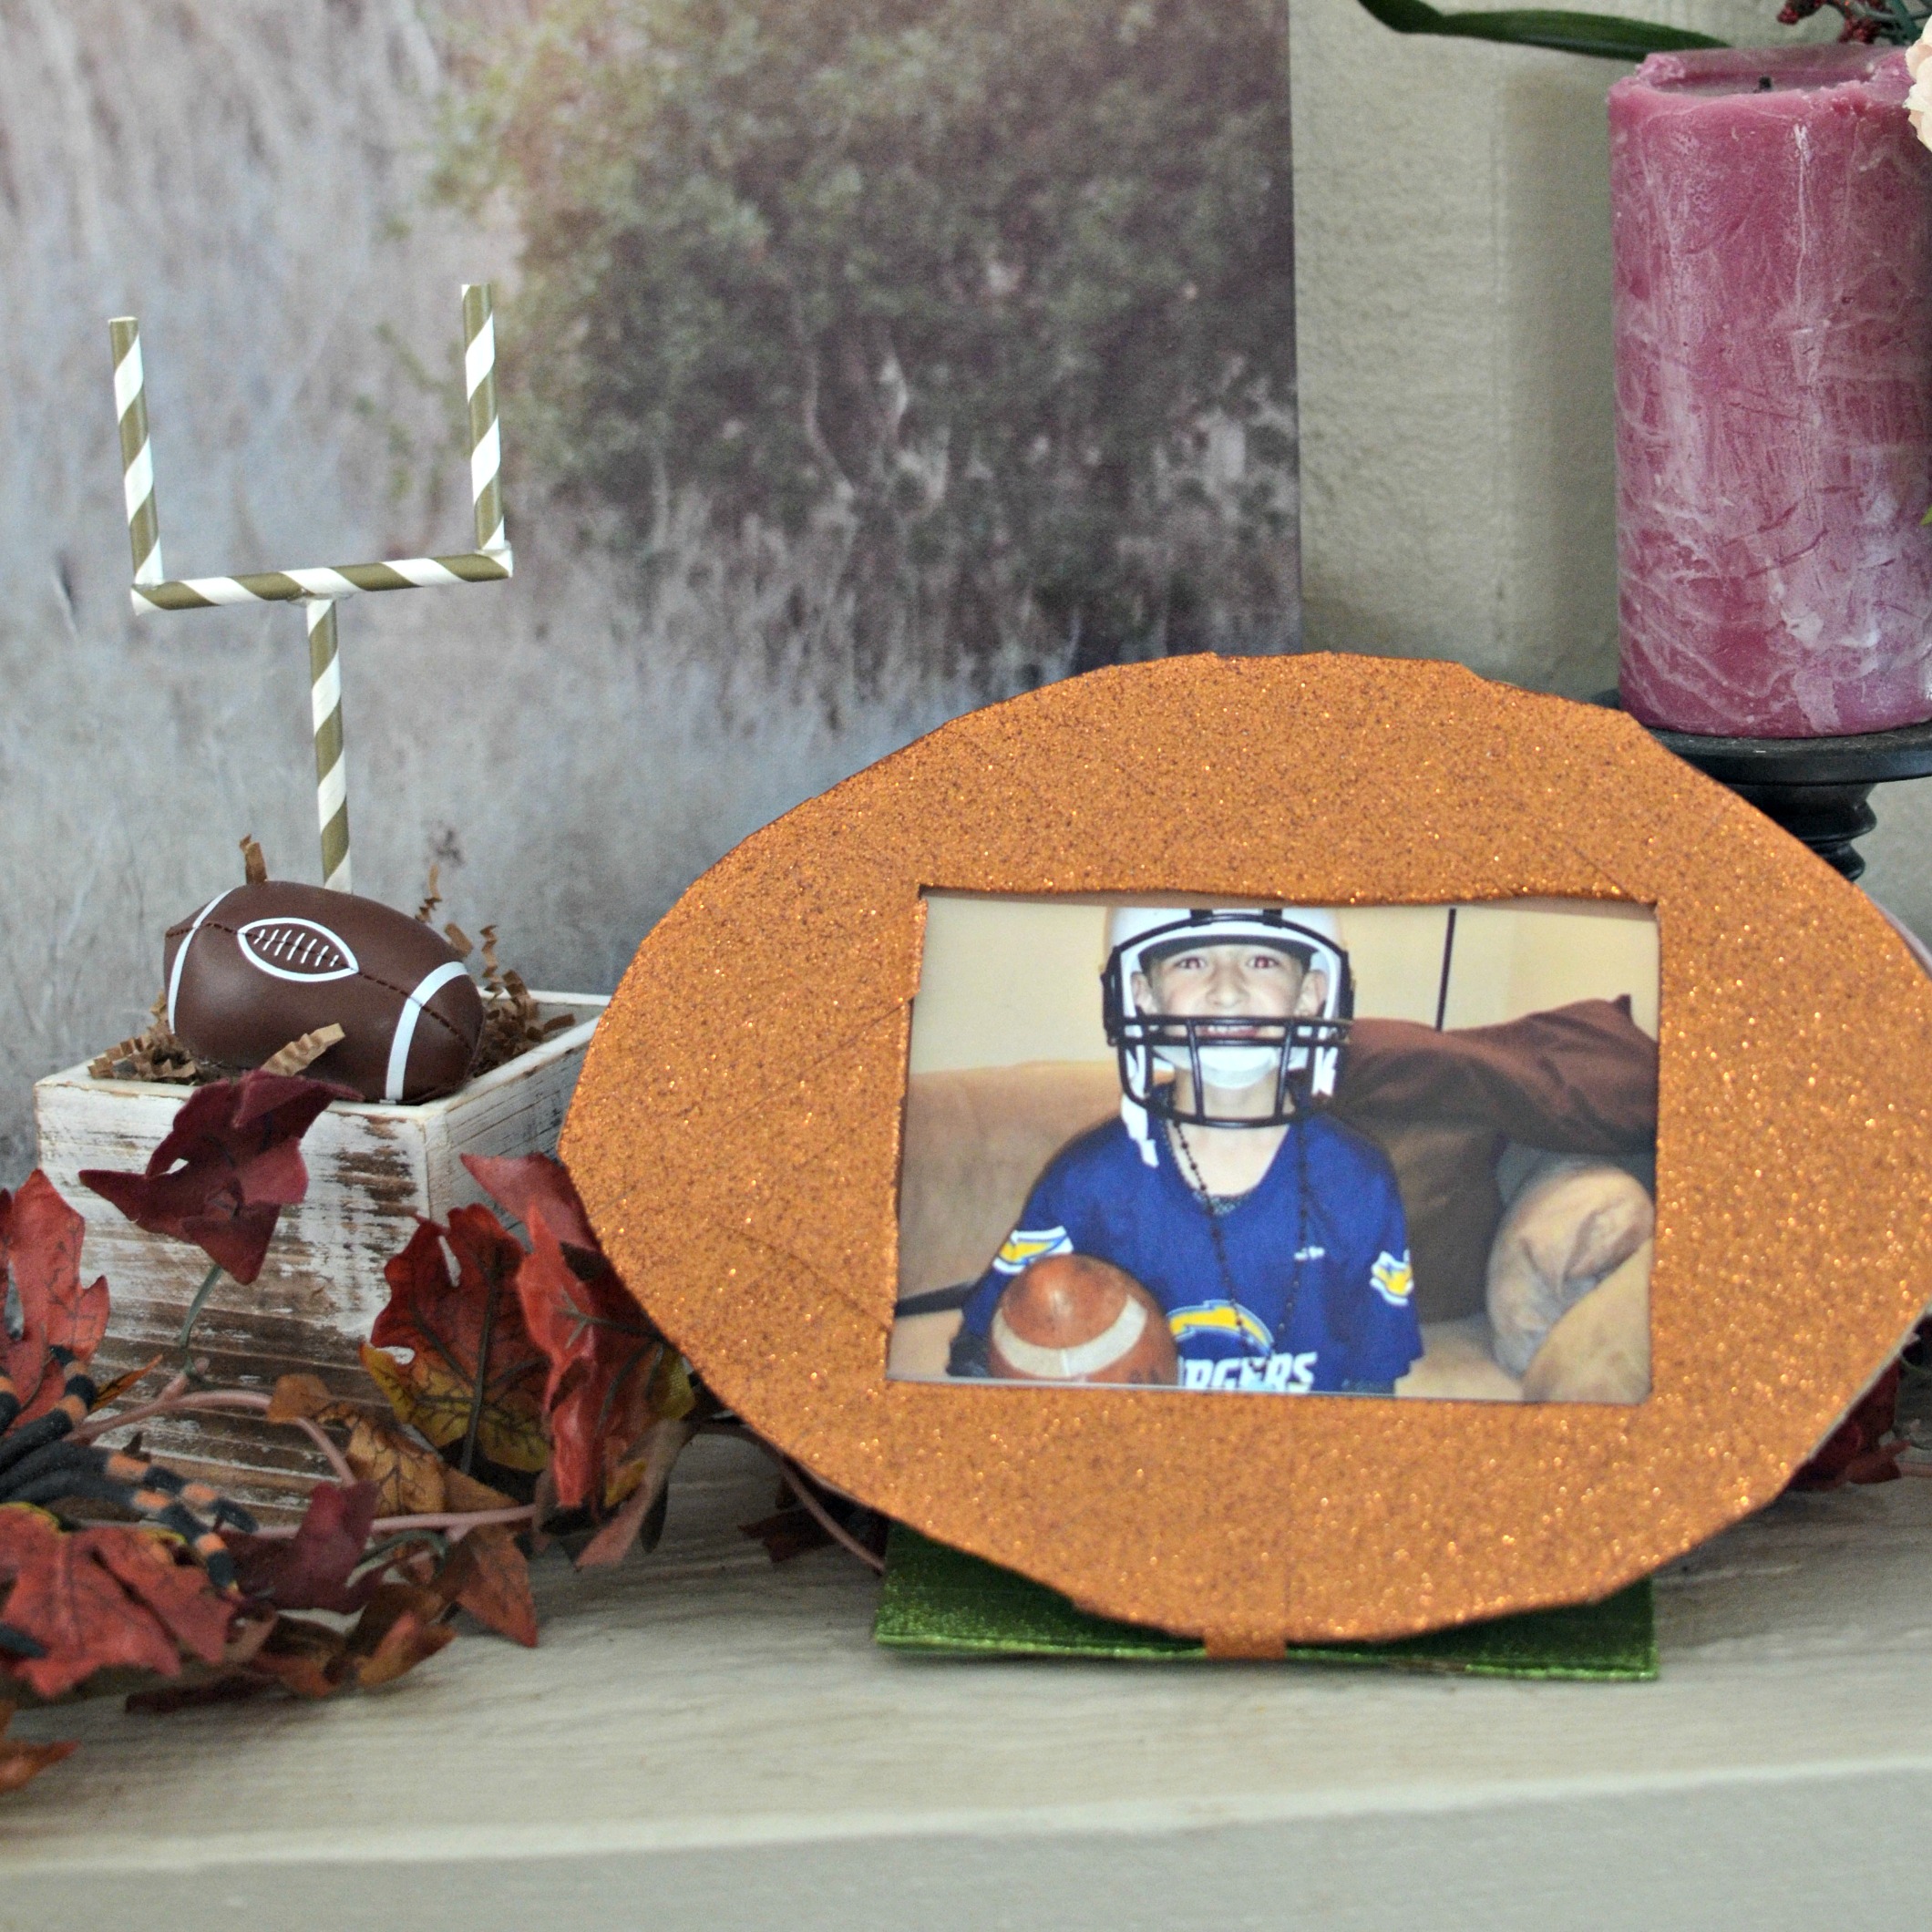
DIY Football Photo Frame For Kids

This shop featuring a DIY football photo frame that’s super easy for kids to make has been compensated by Collective Bias, Inc. and its advertiser. All opinions are mine alone. #HandsOnCrafty #CollectiveBias

diy-football-photo-frame-a-quick-and-easy-way-to-display-great-football-memories

Do you have a football fan in your life? Looking to spread a little cheer in their football loving lives? My daughter wanted to get crafty this week and asked if we could make a photo frame. So I decided to bust out the Scotch® Expressions Glitter Tape and make a DIY Football Photo Frame that’s easy for kids to make. With the help of an adult, of course! The adult cuts out all of the shapes while the kids get to have fun decorating! Just like our DIY bottle toss game from last week. 

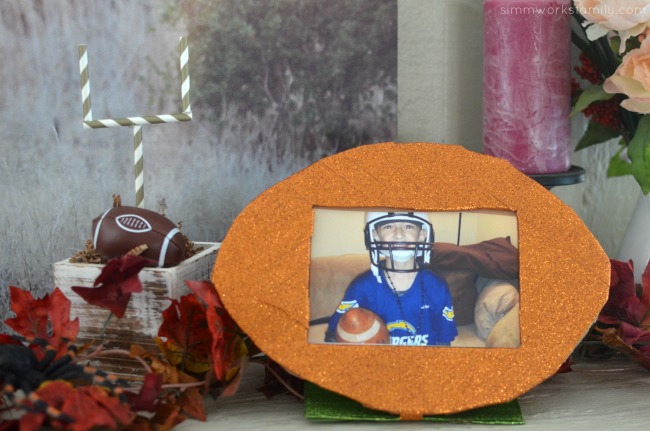
We ended up with the perfect gift for my football loving sister and brother in law with a photo of their oldest in the frame. How cute is that? And it was easy too! We were able to create this frame in an afternoon after school and display it on the mantel for when my sister comes over. How cute will this look on her mantel? 

Want to know JUST how easy it was? Read ahead to find out! 

diy-football-photo-frame-quick-and-easy-way-to-display-memories

DIY Football Photo Frame For Kids

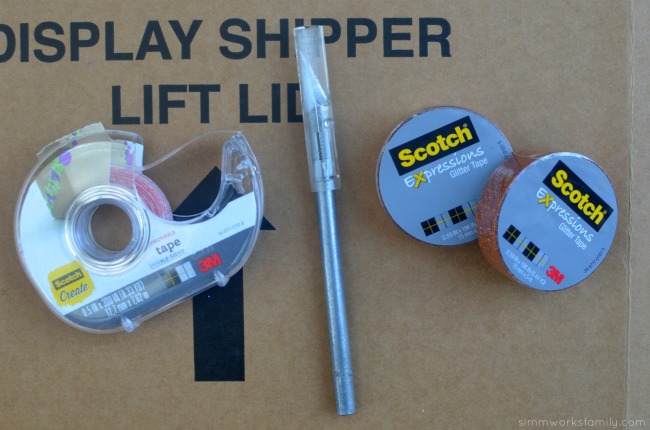
What you’ll need: 

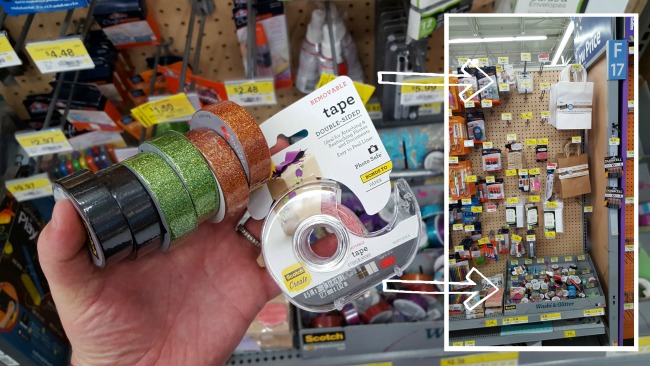
  • Scotch® Expressions Brown Glitter Tape
  • Scotch® Expressions Green Glitter Tape
  • Scotch® Create Double-sided Tape
  • X-acto knife (for parents only)
  • 1 piece 8.5 x 11″ brown construction paper
  • 1 piece 8.5 x 11″ white card stock
  • 4×6 picture

diy-football-photo-frame-supplies-needed

What you do: 

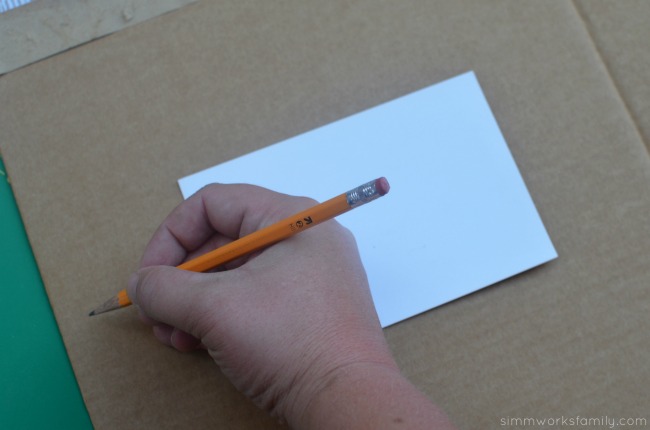
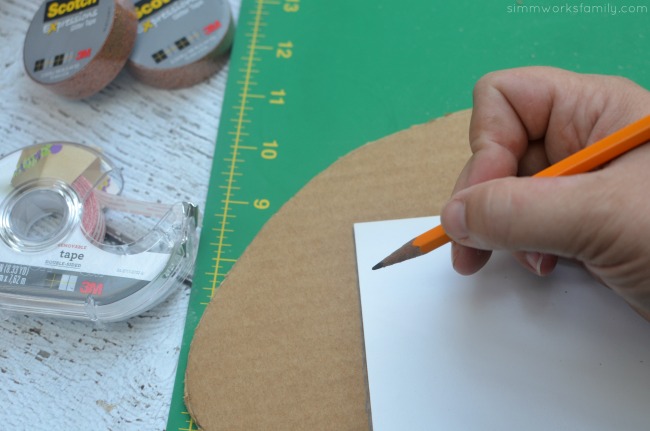
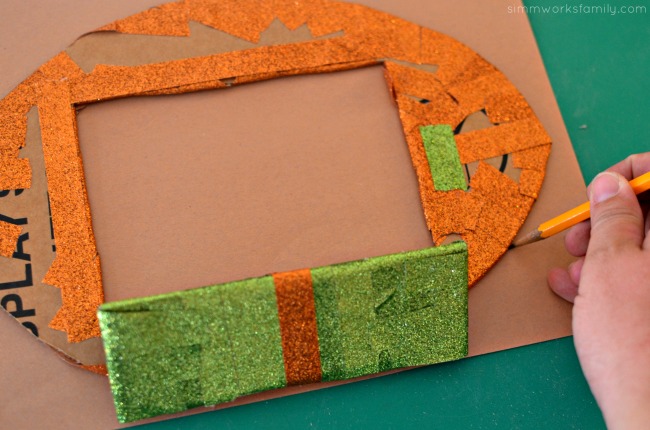
1. Grab your 4×6 photo paper and trace a football around the photo paper leaving about 1/2 an inch on each corner from the edge of the photo to the edge of the football. 

2. Cut out football shape with x-acto knife. 

diy-football-photo-frame-trace-football-outline-around-4x6diy-football-photo-frame-trace-4x6-cut-out

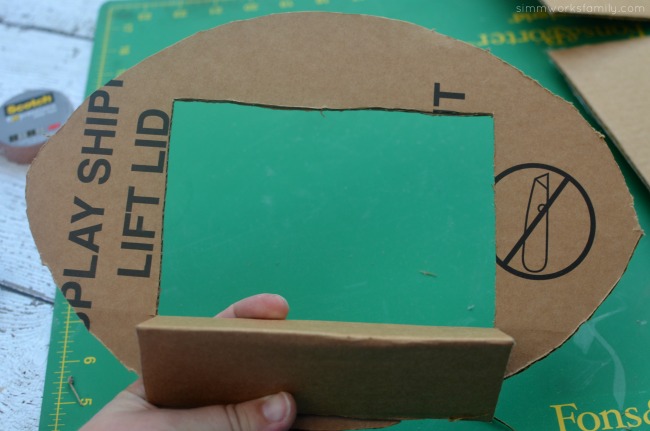
3. Using same 4×6 photo paper, trace around it to create where the frame opening will be. 

4. Cut out top and sides of 4×6 piece. Score on back side with x-acto knife and fold cut out piece into thirds to create stand for frame. 

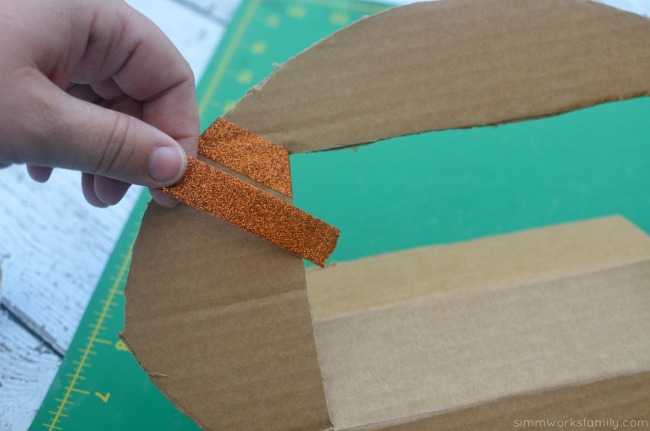
diy-football-photo-frame-cut-out-4x6-and-fold-cut-out-in-thirdsdiy-football-photo-frame-add-glitter-tapediy-football-photo-frame-taped-frame

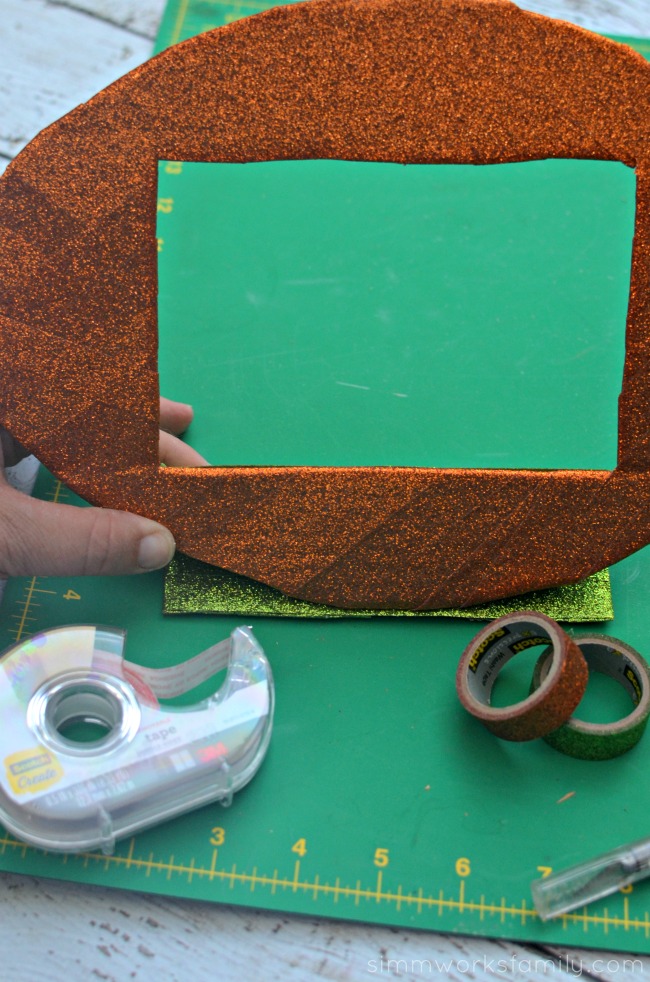
5. Using Scotch® Expressions Brown Glitter Tape, let your child wrap front side of the football frame completely until no cardboard is showing. Make sure the sides are covered complete. Don’t worry about the back side, we’ll be covering that up! 

6. Once you’ve covered out the front, wrap the stand with Scotch® Expressions Green Glitter Tape. Once the stand is covered, use a piece of Scotch® Expressions Brown glitter tape to secure the stand to the frame so it doesn’t unfold. 

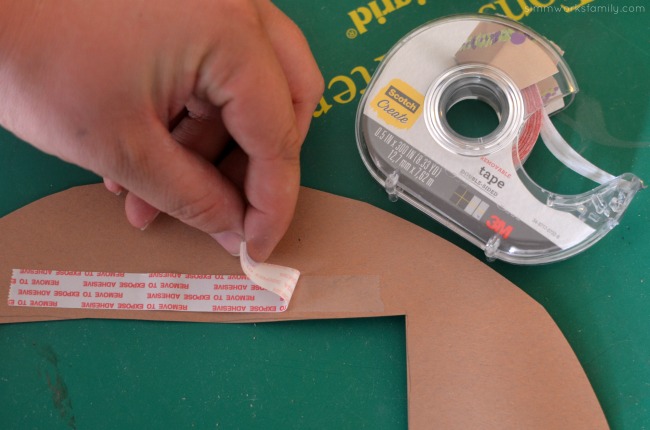
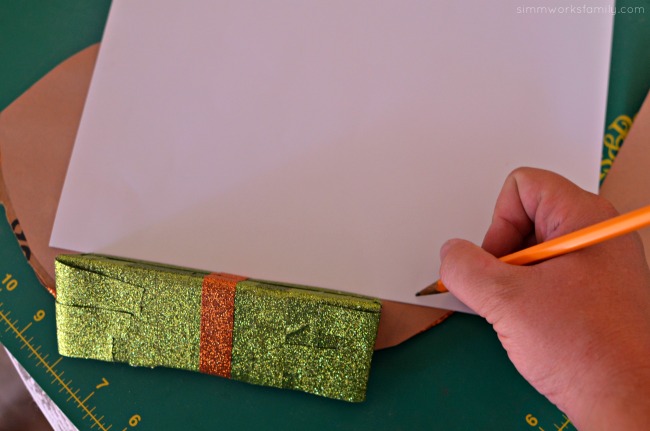
diy-football-photo-frame-trace-out-construction-paper-for-covering-back-of-framediy-football-photo-frame-add-double-sided-tape

7. Grab your brown paper and trace the outline of the football and the 4×6 spot for the photo. Cut out the football shape of the construction paper. Cutting from the bottom of the football, cut out the 4×6 piece and the bottom of the football (to leave space for the stand). 

8. Attach brown cut out to back of the frame using Scotch® Create Double-sided Tape. 

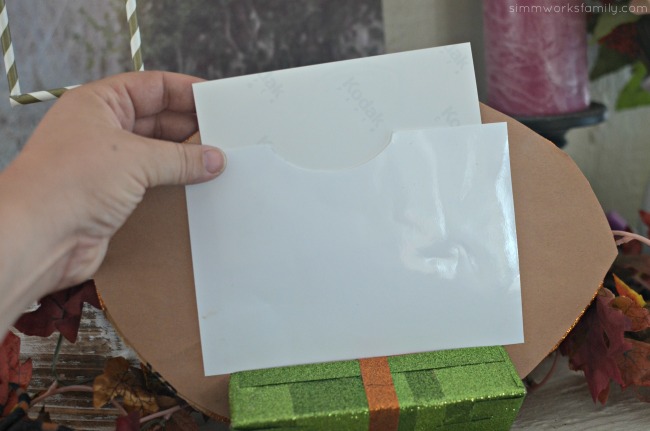
diy-football-photo-frame-draw-out-larger-than-4x6diy-football-photo-frame-add-photo

9. Cut out a 5×7 piece of white paper. Notch a small half circle on the top of the paper. Tape the white paper onto the back of the frame on the two sides with Scotch® Create Double-sided Tape. 

10. Add a photo and enjoy your frame! 

diy-football-photo-frame-ig

How do you celebrate sports in your home? 

I was able to find all of the crafting goodies I needed, including the Scotch® Expressions Glitter Tape, in the craft aisle in Walmart. So easy to find everything in one place! With a perfect combination of versatility, function & fun, Scotch® Expressions Tapes turn everyday projects into simply inspired creations. I love how simple and easy it was to make this frame with my daughter and how fun and sparkly it ended up! How awesome is that? 

scotch-at-walmart

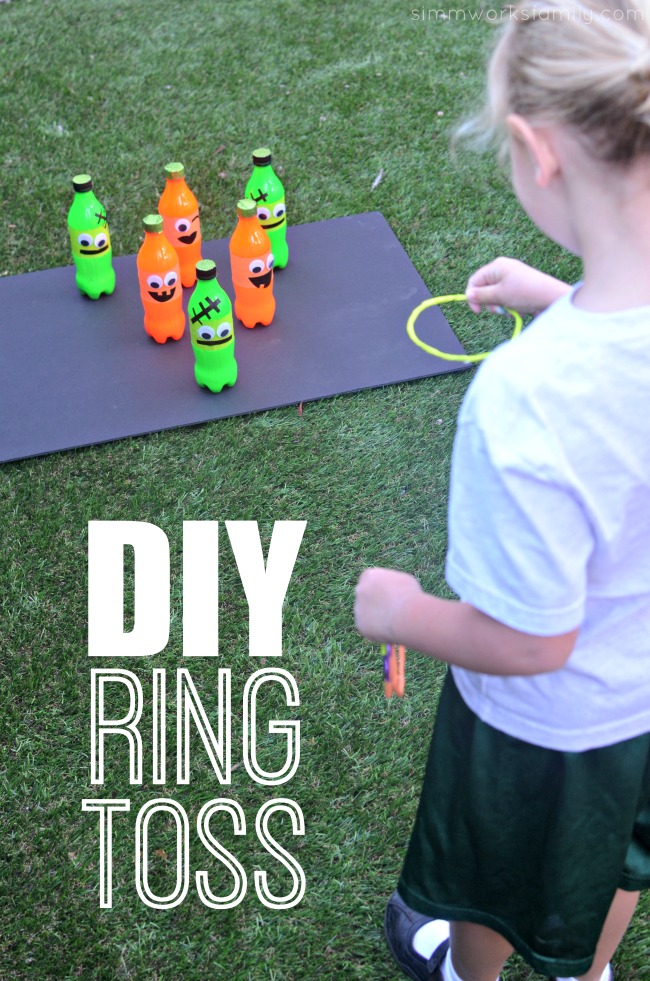
Fall Carnival Games: DIY Ring Toss Game Idea

This shop features an awesome DIY Ring Toss Game that’s super easy to make and has been compensated by Collective Bias, Inc. and its advertiser. All opinions are mine alone. #HandsOnCrafty #CollectiveBias

fall-carnival-games-diy-ring-toss-idea

Every year my kids’ school has a Halloween Carnival on or around Halloween. Each grade has a game or craft set up and the kids get to run around and play them for the last hour of the day. It’s a great way for the kids to enjoy a little Halloween fun at school in costume without getting distracted in class. Plus it’s a fun way for the parents to come up with small fall carnival games – like this DIY ring toss game. 

Since my son started Kindergarten, I’ve always helped out with his class’s game. The first year we built a cute bean bag toss where we painted three pumpkins on top of each other and cut out holes where their mouths went so the kids could toss the bean bags in. Each successful toss earned a piece of candy. Last year we made fun Halloween themed crafts like spider rings out of poms and pipe cleaners, and fun face masks that I got from an online retailer. 

But this year is my daughter’s first year joining in on the festivities so I thought I’d get her involved in making a fun activity that Kindergarten could host for their game. And we decided on this awesome Halloween-themed DIY ring toss game. You won’t believe how easy it is to make! Even a Kindergartener can do it. 

fall-carnival-games-diy-ring-toss-idea-playing-the-game

What I love about this project is that it’s so versatile! So much so that when my husband accidentally recycled the glass wine bottles I had set aside to use for this project, I was able to make due with the plastic bottles we had left over from the party we hosted last week

How To Make A DIY Ring Toss Game

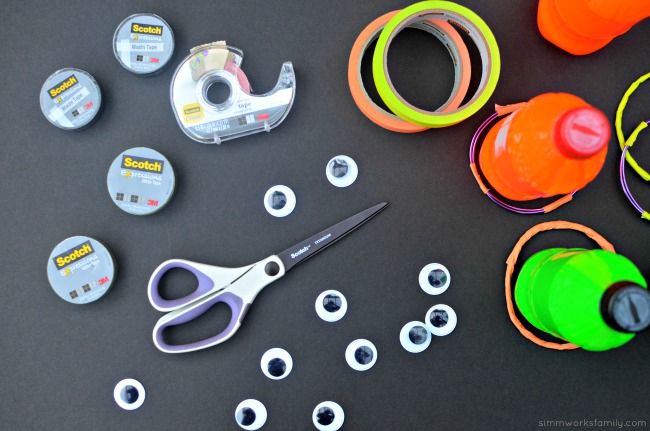
What you’ll need: 

  • 6 bottles – glass or plastic
  • washable paint in green and orange
  • Scotch® Create Double-sided Tape
  • Scotch® Expressions Washi Tape in black
  • Scotch® Expressions Glitter Tape in green
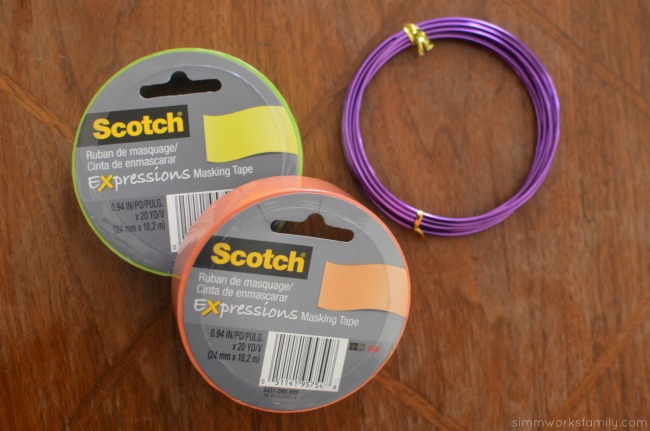
  • Scotch® Expressions Masking Tape in green and orange
  • Aluminum floral wire (found in the Walmart craft aisle)
  • Goggly eyes
  • scissors
  • Scotch® Create Glue Pen
  • large piece of cardboard or foam board in black
  • Scotch® Create Mounting Squares

What you do: 

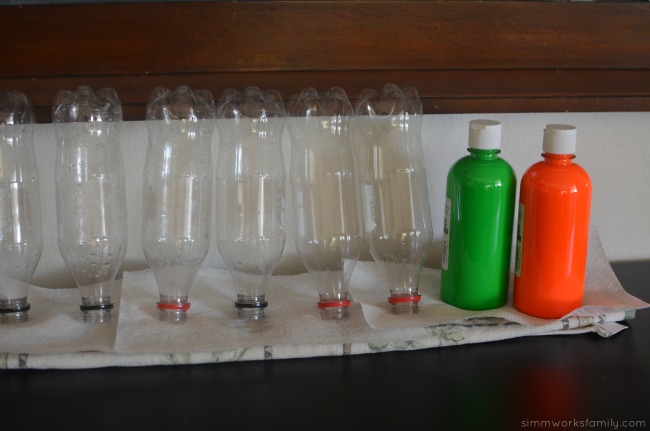
1. Remove the labels and rinse out the bottles you will be using. Let dry completely. 

fall-carnival-games-diy-ring-toss-idea-dry-bottles fall-carnival-games-diy-ring-toss-idea-make-the-rings

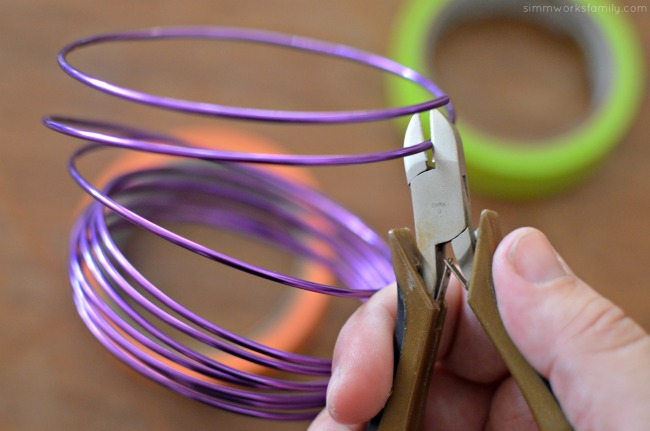
2. While bottles are drying, grab aluminum wire and cut into rings using wire cutters. 

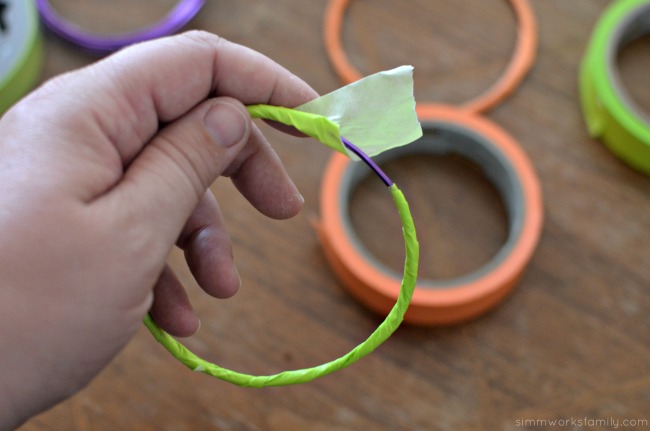
fall-carnival-games-diy-ring-toss-idea-cut-wire fall-carnival-games-diy-ring-toss-idea-wrap-tape-around-wire

3. Use the Scotch® Expressions Masking Tape to secure the ends of the wire together and then completely cover the wire with tape. You can also decorate the wire in various places with tape instead of covering completely as long as the ends are secured. 

fall-carnival-games-diy-ring-toss-idea-pour-paint-into-bottle fall-carnival-games-diy-ring-toss-idea-put-paint-in-bottles-and-shake

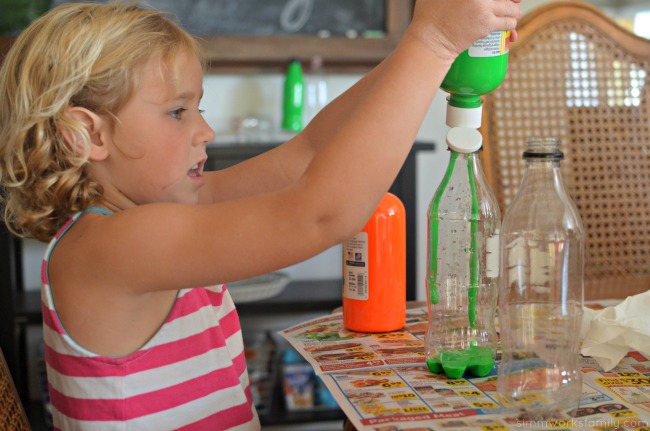
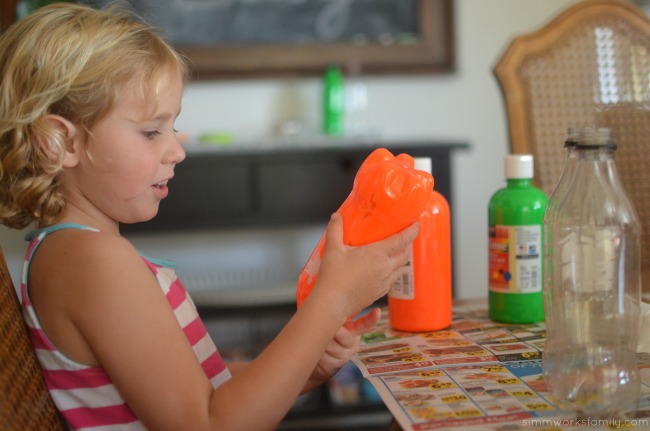
4. Squirt a good dollop of paint into each bottle. Secure the cap onto the bottle (if there is one) and shake the bottle until the paint has completely covered the inside of the bottle and you can’t see through anywhere. If you are using a glass bottle with no lid, simply use your thumb to cover the opening while shaking so the paint doesn’t go everywhere. Take cap off and let excess paint drip out. Let dry completely. 

This is the same technique I used to make my thumbprint ornaments for Christmas. 

5. Once paint is dry on the inside, glue cap onto top of bottle with Scotch® Create Glue Pen and let dry. Skip this step if you’re using a cap-less bottle.

fall-carnival-games-diy-ring-toss-idea-painted-bottles-and-rings fall-carnival-games-diy-ring-toss-idea-scotch-create-and-scotch-expressions fall-carnival-games-diy-ring-toss-idea-tape-top-of-bottles

6. Now for the fun part! Grab your Scotch® Expressions washi and glitter tape and start decorating! 

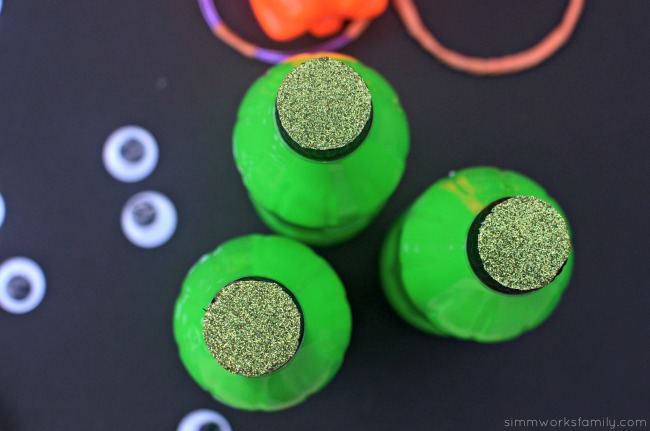
For the green bottles – Using the Scotch® Expressions Glitter Tape in green, cover the caps with two rows of glitter tape side by side. Then cut the excess around it so that there is a perfect circle on the top of the green bottles. You can use scissors or an xacto knife for this. If using an xacto knife, turn bottle upside down and cut around the edge of the cap on a piece of cardboard so you don’t cut anything else. 

For the orange bottles – cover the bottle cap with three pieces of tape in a star pattern on the top. This should completely cover the top of the bottle cap. Then use another piece of tape to go around the side of the bottle cap to cover the ends of the three pieces you put on the top. Now you have a cute pumpkin stem! 

Then, using the green and orange Scotch® Expressions masking tapes, tape the middle of the bottles with three layers of tape. This will create the base for your bottle’s face. 

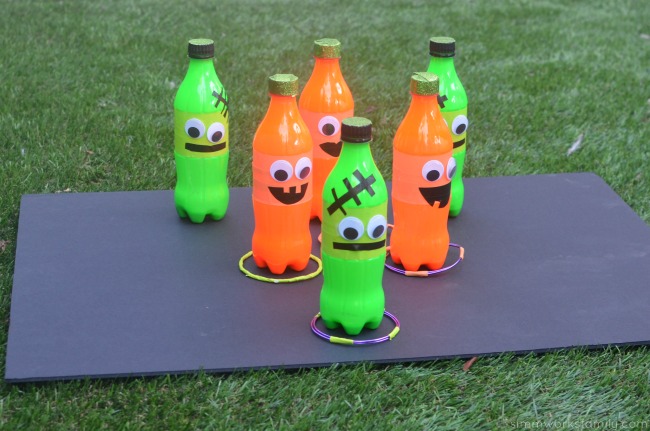
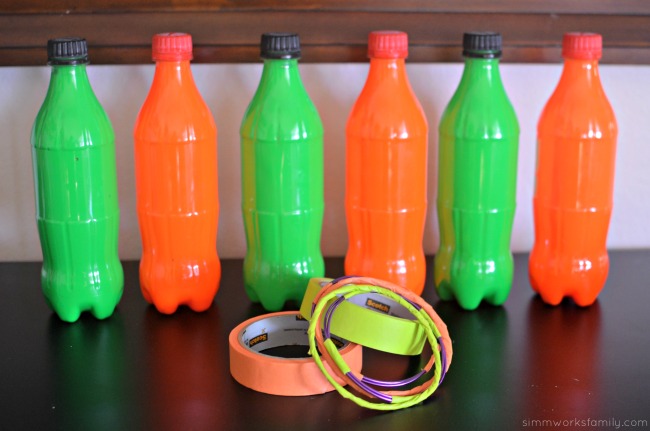
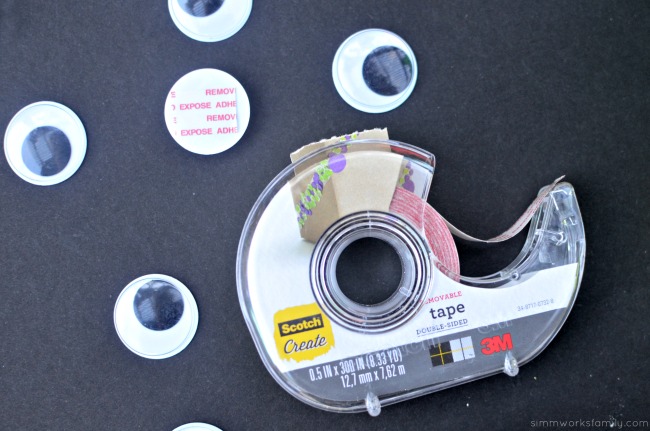
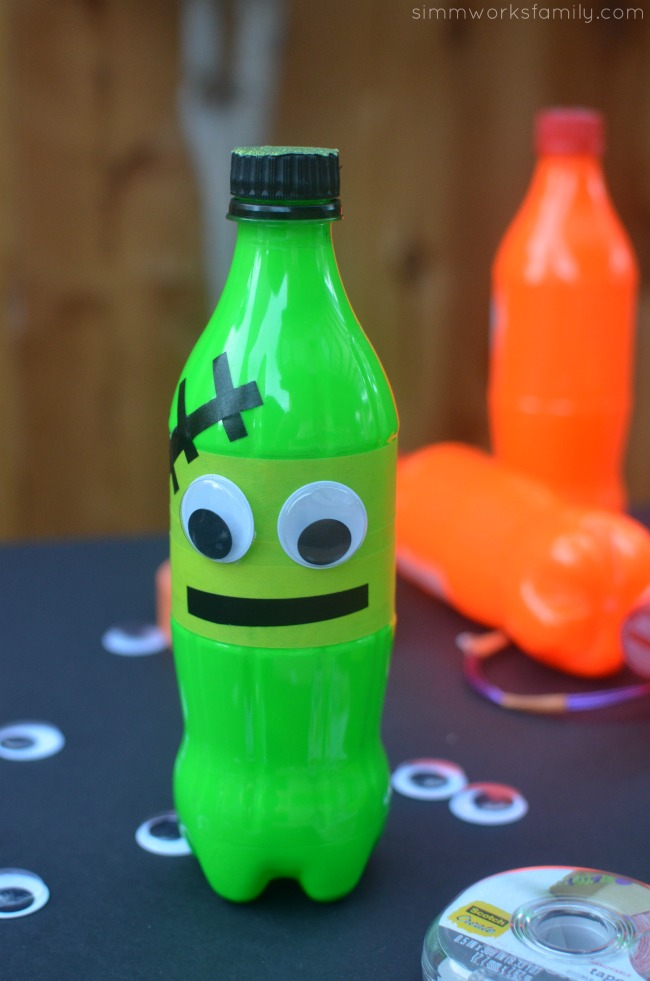
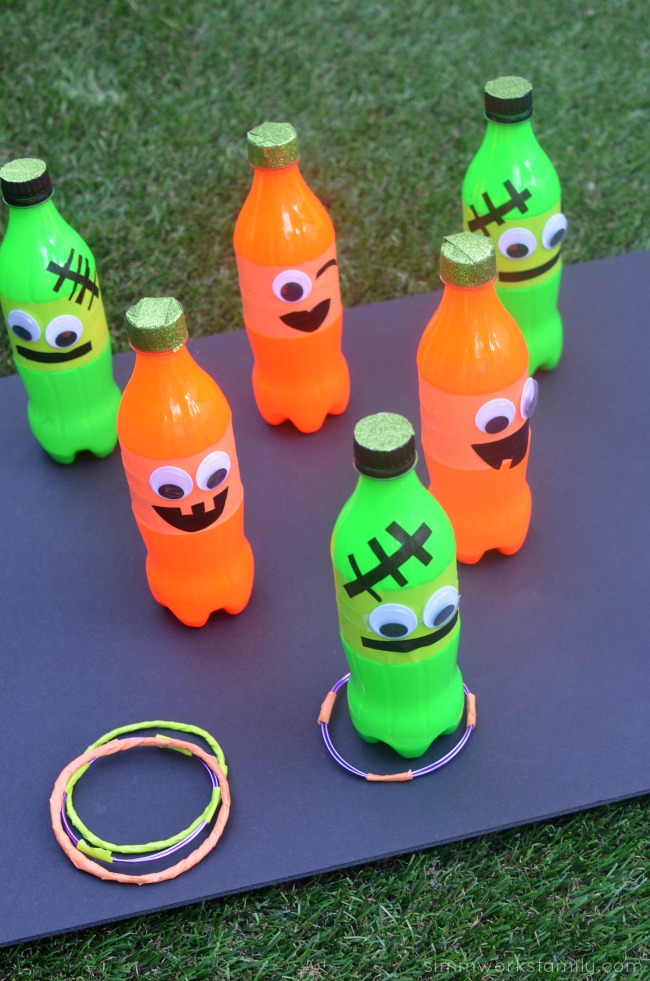
Grab the goggly eyes and Scotch® Create Double-sided Tape to secure the eyes onto the bottles. Now grab the Scotch® Expressions washi tape in black to make the mouth and any other decorations you’d like to add to your bottles. We layered two pieces of tape side by side and cut out mouths for our orange bottles and simply cut out lines for the mouths and “stitches” of our green bottles. Our end results were pumpkins and Frankensteins. 

fall-carnival-games-diy-ring-toss-idea-scotch-create-removable-tape fall-carnival-games-diy-ring-toss-idea-completed-bottle

7. Now that the bottles and rings are good to go, grab your black cardboard or foam board and space out your bottles so that the rings can be tossed onto them without any problems. Secure bottles to the board with Scotch® Create Mounting Squares

Once the bottles are secured in place, you’re ready to play! 

scotch-at-walmart

You can find everything you need for this project, including all of the Scotch® brand products, in the craft aisle at your local Walmart. How’s that for a one-stop shop? 

I love how the Scotch® Expressions washi and glitter tape were able to take my project to the next level. They were the perfect combo of versatility, function and fun! From masking tape in various colors to the easy to use Scotch® Create Glue Pen and everything in between, o matter the task, there’s a Scotch® Brand product to match AND make my life easier.

fall-carnival-games-diy-ring-toss-idea-ready-to-play

What’s your favorite school carnival game? 

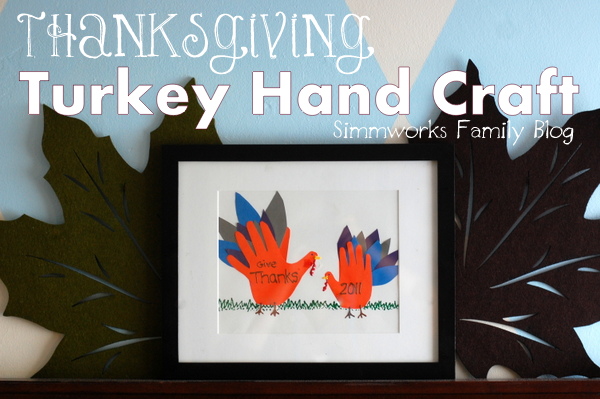
Thanksgiving Turkey Hand Craft

Thanksgiving Turkey Hand Craft

I absolutely love the simple crafts that I can do with the kids to prepare them for the holidays, like this turkey hand craft.

This past week we’ve been working on what we’re thankful for. We’re so thankful for how much we’ve all grown over the past year. My son is thankful that he’s taller and can ride more rides at Disneyland and my daughter must be thankful for the fact that she’s found her voice because she does not want to stop talking!

And I’m thankful for the milestones and memories we’ve made over this past year. In an effort to spruce up our mantel for this month of thanks giving, I’ve returned the turkey hand craft we made last year to remind me of how much my kids have grown this past year.

Here’s how you make it: [Read more…]

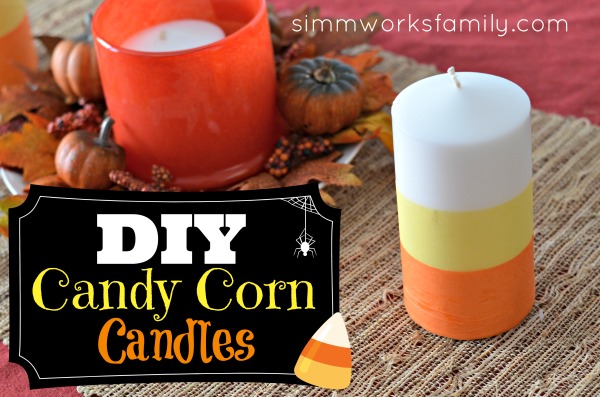
DIY Candy Corn Candles Perfect for a Halloween Centerpiece

DIY Candy Corn Candles

One of my favorite times of the year is coming up! Halloween time! I am so excited for Fall to be right around the corner and Halloween to be here. So much so that I busted out my craft supplies and made these awesome DIY Candy Corn Candles in anticipation of my fall tablescape.

Since these candles are oh-so-simple to make and pair perfectly with this cute orange candle holder I just scored at Target for $4 I figured why not get this up and posted now in case anyone else is as crazy as me about Halloween and Fall decor.

And how great do these look with my Halloween centerpiece? [Read more…]

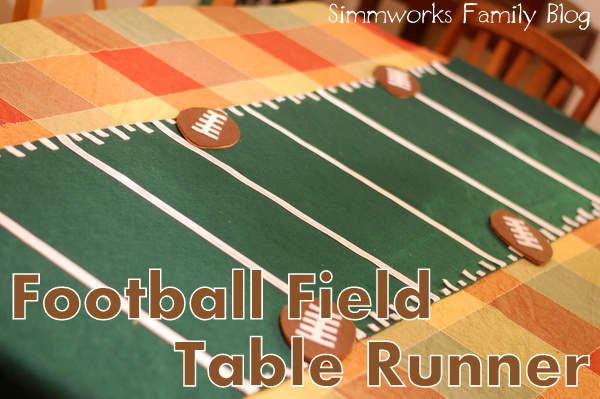
DIY Football Field Table Runner

DIY Football Table Runner

As I mentioned before, it’s football season! And that means one thing… my husband will not respond to a thing I say on Sundays unless we’re coming out of church or it’s during a commercial. So I do what I do best when I have no one to talk to… I craft! And this weekend I made this awesome football field table runner for our dining room table.

Not only is this a festive and fun piece for the house, it can also be brought to the game to spice up a boring folding table or a truck bed. Why not make tailgating fun with a little crafty decor, right?

This table runner is quick, easy, and the best part is there’s no sewing involved! So grab your glue, get some felt, and lets make a table runner! Then grab the scraps and make the football coasters to go along with it.

[Read more…]

How to Make Football Coasters

Football Coasters


Everyone in America knows that football season is upon us. Why not make watching the game a little more enjoyable with these fun DIY football coasters? With a little bit of felt, corkboard, and glue you can create these awesome coasters that are perfect for protecting your tables and properly holding your beer as you watch the game.

What’s even more awesome about these coasters is the fact that they take less than 10 minutes to make. No… seriously. All you do is cut, glue, and use!

We used these coasters for our tailgating party this weekend to go along with the football field table runner I made. Both paired perfectly together and made our game-time meal more enjoyable. These would also be perfect to pack up and take to the game for a proper tailgating party.

[Read more…]

5 Alternatives to Carving Pumpkins {Fun Kids Crafts}

Having small children can sometimes make pumpkin carving a bit difficult. So this year we went with something a little different and let the kids make a few varieties of pumpkins. Grab some glue, your potato head pieces, and even the paint and see what your kids do to create their Fall masterpieces!

If you’re in the same boat and are looking for great alternatives to carving pumpkins this year, here are our suggestions.  [Read more…]

How to Make a Spider Web Pumpkin

Each year we take the time to cut, gut, and carve out a few pumpkins. And every year we complain about the mess, the time, and the clean up. So this year we went simple! We let the kids paint pumpkins and we took an alternative approach.

We also used paints but used different kinds to make these spider web pumpkins. With the help of some spray paint and puffy paints we were able to make these super cool spider web pumpkins for our Amazing Spider-Man party and for our Halloween display.

It was super easy to do and I’m sure you’ll find it just as simple to create a pumpkin masterpiece of your own! Here’s what you do:

Spider Web Pumpkins

What you’ll Need: 

  • Pumpkin
  • Spray Paint
  • Puffy Paint

What you do: 

1. Paint your pumpkin with your base color. We chose to go with black.

2. Using the puffy paint, make lines going down and across the pumpkin to create your web.

3. Add a spider to the web with puffy paint and let dry completely. 

Once the pumpkin is completely dry set it outside your door for everyone to enjoy!

How do you decorate pumpkins for Halloween? 


© A Crafty Spoonful - All Rights Reserved
It is OK to use one of my photos provided a link back and/or proper credit is given. It is NOT ok to copy and paste a whole post including instructions. Please do not remove watermarks or alter images in any way. Please contact me with any questions at danielle@acraftyspoonful.com

.