Corn on the Cob with Herb Butter

BBQ corn on the cob with herb butter

Is there an item of food that just screams summer to you? For me, it’s corn on the cob. Every year my mouth starts to water as I think of the delicious ears of corn we’ll be eating come summer. And now we’ve taken it a notch higher with this corn on the cob with herb butter.

It’s so easy to just throw some corn husks into a pot, soak them, and then grill them up while grilling our favorite kabobs or steaks. And we don’t even have to bother with plates because the husks provide a great handle as we eat the corn.

The kids share our love of corn on the cob and as soon as they see in the store they start jumping up and down asking if they can put some in the cart.

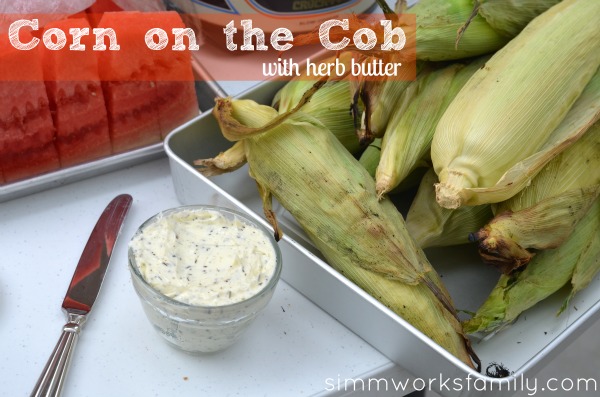
Here’s the best way we’ve found to make the perfect barbecued corn and the best way to take the flavor up a notch… with herb butter!corn on the cob with herb butter - soak cornCorn on the Cob with Herb Butter

What you’ll need: 

What you do: 

1. Rinse off corn. If there are many layers of husk, remove a few of the outer layers. Make sure to leave most of the layers on the corn.

2. Soak the corn in a large pot of water for at least 15- 30 minutes.

3. Shake off excess water and hrow the ears of corn on the grill with whatever else you’re grilling.

corn on the cob with herb butter - cooked on the barbecue
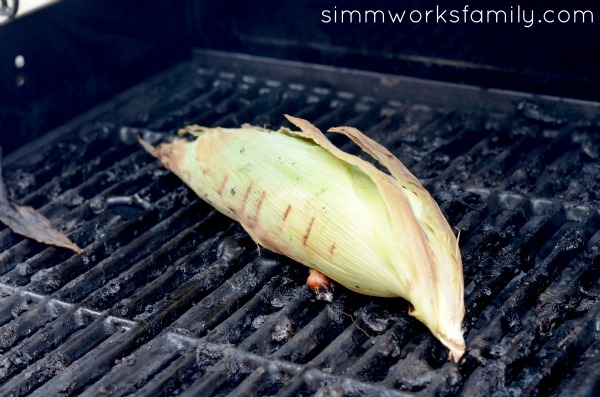
4. Grill the corn on medium heat (about 350) and rotate corn so that it’s charred evenly on each side.

5. Once the corn has been seared, remove from direct heat and place on indirect heat – like the top shelf of your grill. Allow to cook for 15 more minutes.

6. Using an oven mit, remove the corn and set on a tray to serve.corn on the cob with herb butter roasted corn
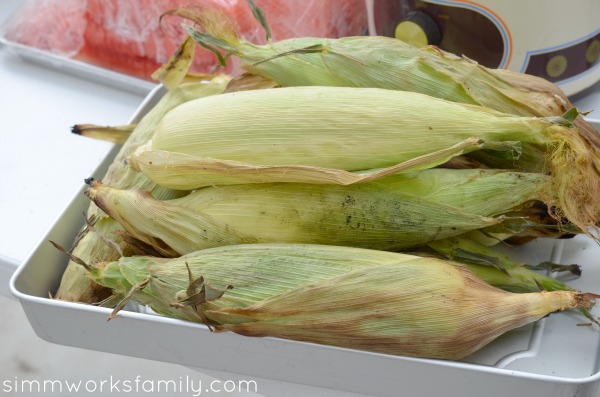
7. When you’re ready to eat, peel back the husks and remove all silk from the corn. Discard the silk.

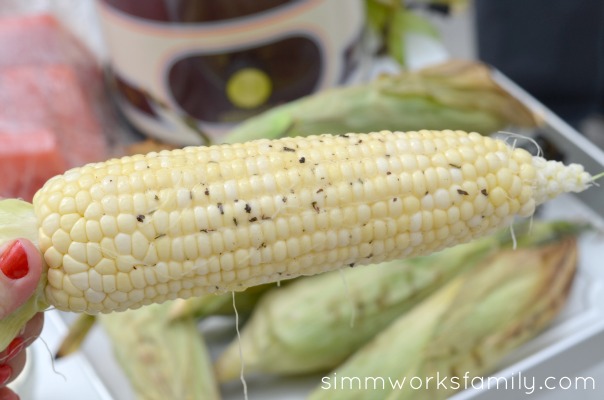
8. Slather with herb butter and enjoy!

corn on the cob with herb butter ready to eat
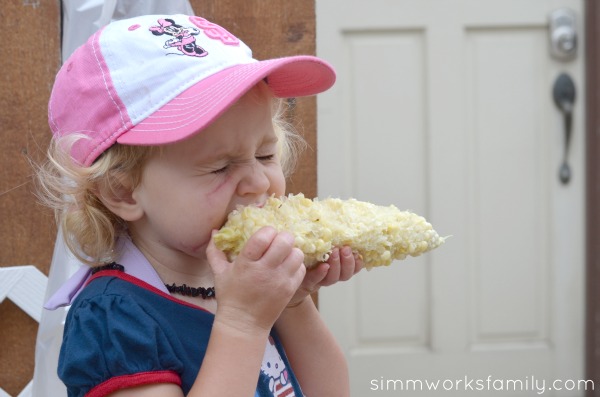
The corn will be hot so you may want to let it cool down a bit before letting the kids go crazy. My kids can hardly contain themselves once we take the corn off the grill.

Can you tell she loves it?

corn on the cob with herb butter eating

 What’s your favorite summer food?

Grilled Steak Sandwich with Garlic Aioli Recipe

Grilled Steak Sandwich with Garlic Aioli Recipe - a simple and easy meal perfect for tailgating!

It still very much feel like summer here. And that means I do not feel like cooking. So this weekend as we watched a little football we grilled up some steak sandwiches to munch on.  Since I didn’t want just a plain steak sandwich I decided to make a delicious roasted garlic aioli to give the sandwich more flavor.

While the barbecue was heating up to 400 degrees I put some garlic heads in some foil (bottom sliced off) with a good amount of olive oil. I sealed the foil and added it to the barbecue.

The garlic roasted while the steaks cooked and continued cooking while the steaks rested and took about 20 minutes to cook. Everything else went quickly after the garlic was ready. And everything was done on the grill! Well… except the salad. But you can always grill your salad next time.

Grilled Steak Sandwich with Garlic Aioli Recipe

Grilled Steak Sandwich with Garlic Aioli Recipe

Grilled Steak Sandwiches with Garlic Aioli

Prep time:
Cook time:
Total time:
Serves: 4-6
Ingredients
  • 2 steaks
  • 1 pack sliced provolone cheese
  • 1 pack french rolls or hamburger buns
  • garlic aioli (see below for recipe)
Instructions
  1. Preheat grill. Season steaks with salt and pepper. Cook steaks on grill until medium (slightly pink throughout inside).
  2. Set steaks aside to rest. Add rolls to grill to toast up. Take off once they have grill marks.
  3. Cut steak against the grain in thin strips. Slather each roll with a bit of aioli and add a good pile of steak on top. Top with provalone. Add to the top rack of the grill (or not directly over the coals if using a charcoal grill) and close the lid. Cook just long enough for cheese to melt.
  4. Serve with a tasty salad and enjoy!
 

Grilled Steak Sandwich with Garlic Aioli Recipe - roasted garlic aioli

Roasted Garlic Aioli

Prep time:
Cook time:
Total time:
Ingredients
  • 1 whole head of garlic
  • Extra-virgin olive oil
  • Kosher salt and freshly ground black pepper
  • 1 cup mayonnaise
  • 1/3 cup fresh lemon juice
  • 2 tablespoons grated Parmesan
  • 1/2 tablespoon Dijon mustard
  • 1/8 teaspoon cayenne pepper
  • Dash Worcestershire sauce
  • 2 tablespoons parsley, chopped
Instructions
  1. Preheat grill to 400 degrees. Slice off bottom of garlic head and put on a square piece of foil. Add olive oil to foil and wrap closed. Put garlic on grill and let roast 20 minutes.
  2. Let garlic cool. While garlic is cooling, mix all other ingredients together and set aside.
  3. Once garlic has cooled, squeeze garlic from the skin and place in a small bowl. Using a fork, mash the garlic up into smaller pieces and add to the mayo mixture. Stir well.
  4. Use to top the steak sandwiches (recipe above). Store in the refrigerator in an air tight container.
 

Grilled Steak Sandwich with Garlic Aioli Recipe for lunch

What’s your favorite tailgating meal?

Soy Ginger Marinated Chicken Drumsticks

This is a sponsored post written by me on behalf of The a2 Milk Company™. All opinions are 100% mine.

Soy Ginger Marinated Chicken Drumsticks

Remember when I shared about the awesomeness of a2 Milk®? Well we’re sharing some more with this yummy soy ginger marinated chicken drumsticks. Not only is this recipe easy to make, it has a fresh and delicious flavor that’s perfect for spring. Paired with some rice and roasted veggies and you have yourself a complete meal for the whole family. You could even throw this on the grill if the weather is nice outside!

Since this recipe can serve a crowd if doubled (or tripled) using a2 Milk® ensures that all of your guests will be able to enjoy eating it without tummy troubles. As I’ve mentioned before, a2 Milk® doesn’t have the A1 protein that gives some people issues after consuming dairy. That means this would be an awesome recipe for the next family barbecue or game day event! 

 Soy Ginger Marinated Chicken Drumsticks - how to build the marinade

[amd-yrecipe-recipe:1]

Soy Ginger Marinated Chicken Drumsticks - roasted in the oven

As I mentioned when I shared my strawberry vanilla overnight oats recipe, my 14 month old has been drinking more and more cow’s milk. And instead of hesitating, I’ve actually been more willing to give her milk because there is no A1 protein in a2 Milk®.

And so far, so good!

We’ve noticed a smooth transition from all breastmilk to breastmilk and cow’s milk and I couldn’t be happier. That means that Grandma is happier too because she can watch Norah longer and during the day.

Soy Ginger Marinated Chicken Drumsticks with green onions

Do you use a lot of marinades?

Interested in more info about a2 Milk®? Check them out on Twitter and Facebook or find where you can purchase it by using their Product Locator! Or check out the great recipes they have on Pinterest. And right now you can take advantage of this a2 Milk® $1 Off Coupon.

Visit Sponsors Site

Keto Friendly Grilling Meals: Hatch Green Chile Chicken Drumsticks

This shop has been compensated by Collective Bias, Inc. and its advertiser. All opinions are mine alone. #LegendaryTailgate #CollectiveBias

Keto Friendly Grilling Meals- Hatch Green Chile Chicken Drumsticks

So it’s been a little over a month since I’ve switched over to a low carb high fat lifestyle (LCHF) and I’m starting to get the hang of things. I’m a bit obsessed with experimenting in the kitchen and love to find great meals that I can tweak. One of my favorite recipes to make over and over again is mashed cauliflower. I don’t know why… maybe it’s the heavy whipping cream and butter? Yeah, it’s definitely the heavy whipping cream and butter!

But I can’t just eat mashed cauliflower for dinner. Or serve it to the family. They might riot.

This weekend I was doing my grocery run sans kids (yay!) with coffee in hand (double yay!) and I headed down the marinade and sauces aisle. It’s one of my favorite aisles to peruse for help for dinner. Not only are there plenty of lower carb/sugar options, but they help make tasty meals in little to no time. This time around I found a delicious green chile marinade in Stubbs Anytime Sauces. Paired with the Foster Farms drumsticks I picked up on sale, I was ready for grilling!

Keto Friendly Grilling Meals - foil wrapped asparagus Keto Friendly Grilling Meals Mashed Cauliflower with Butter

One thing I love about grilling, even in November, is that I can prepare just about anything on the grill. What’s not to love about a full meal being cooked outside while I don’t have to dirty up the kitchen? Less dishes in my sink. With the help of some foil, I was able to cook up the asparagus and the cauliflower right on the grill along side the drumsticks as they cooked. 

And? It’s perfect for tailgating meals too. When we head out to watch our team play on the field when they’re here in town we love enjoying a meal on the grill before heading into the stadium. Or when we’re hosting family over to watch the game on TV. Grilling makes it easier for us to host our family and enjoy time with them while they’re visiting with us. 

Keto Friendly Grilling Meals BBQ Hatch Green Chile Chicken Drumsticks

Hatch Green Chile Chicken Drumsticks

  • 1 jar Stubb’s Anytime Sauces in Green Chile
  • 1 package (24oz) Foster Farms Fresh & Natural Chicken Drumsticks
  • Olive Oil

Place the drumsticks in a 9×13 baking dish. Pour Stubbs Anytime Sauces over chicken. Cover dish with saran wrap or lid and marinate for 4-24 hours.

Preheat grill. Grab a paper towel and blot with olive oil. Rub on grates to prevent meat from sticking.

Once grill is heated, add drumsticks to the grill. Barbecue for 30-35 minutes or until completely cooked.

Let rest for 5 minutes and serve with veggies.

Serves 8 | Nutritional Info: 123 calories, 2 Net Carbs, 2g Carbs, 5g Fat, 16g Protein, 0g Fiber

Keto Friendly Grilling Meals Hatch Green Chile Chicken Drumsticks, Mashed Cauliflower, Asparagus

What’s your favorite thing to grill on the barbecue?

Looking to make grill time easier? Check out Stubbs anytime sauces at Vons! I found mine in the BBQ Sauce and Vinegar aisle.

When you’re in the store, check for an Instant Redeemable Coupon that can be found in-store on the Foster Farms chicken packaging for a discount on Stubbs BBQ sauce so you can save instantly. The coupons expire on 12/31/15.

Stubbs Anytime Sauces at Vons

Chili Cheese Crescent Dogs on the Grill

Looking for a fun and easy dinner this summer? Try these Chili Cheese Crescent Dogs on the grill. Not only are they delicious, they’re easy too! 

Chili Cheese Crescent Dogs on the grill

Do you ever have one of those days in the summer where you just don’t want to turn on the oven? Living in SoCal, we have about a month of that. So on those sweltering hot days I turn to the outdoors and our barbecue to get creative with dinner. But I don’t leave all of my kitchen tools in the kitchen! I also bring them to the grill.

This past weekend I busted out the pizza stone and made some delicious chili cheese crescent dogs on the grill. Not only were they quick to put together (I used leftover chili I froze earlier in the month), they took less than 15 minutes to cook on the grill. And? I wasn’t sweating while eating my meal. Now that’s a win!

Chili Cheese Crescent Dogs ingredientsChili Cheese Crescent Dogs with Hebrew National

Stuffed crescent dogs are so easy to make. And even when I’m watching what I eat, I can easily modify them by using fat free beef franks and fat free crescent rolls.

Just make sure you leave a little edge to use while wrapping them up together. And pinch the seams of the crescent dough together really well (or use a rolling pin to roll the dough out flat) so that none of the stuffing comes out.

Chili Cheese Crescent Dogs stuffed

Chili Cheese Crescent Dogs grilling on a stone

Chili Cheese Crescent Dogs baked on the grill

Chili Cheese Crescent Dogs

  • 4 Beef Franks ((or Reduced Fat Beef Franks))
  • 1 tube of Crescent Rolls
  • Chili
  • Cheddar Cheese
  1. Start up the grill. If using charcoal, make sure to wait until the charcoal is all white/gray. Place a pizza stone on the grill to heat up.
  2. While grill is heating up, roll out crescent dough and break off into four rectangles (each rectangle will be made out of 2 triangles). Press seam together by using your fingers or a rolling pin.
  3. Place a hot dog on each of the rectangles. Top with choice of toppings (about 1 tablespoon of chili and 1 tablespoon of cheese) and seal together by wrapping dough around the hot dog and toppings. Make sure the seams are pinched together.
  4. When grill is at the right temperature (375 if a gas grill, white hot coals if a charcol grill) place stuffed crescent rolls onto the pizza stone. Bake on the grill for 13-15 minutes or until golden brown and the dough is completely cooked.
  5. Remove from the stone and serve. Enjoy!

Chili Cheese Crescent Dogs on a pizza stoneChili Cheese Crescent Dogs grilledChili Cheese Crescent Dogs - simple and easy

What’s your favorite way to doctor up your hot dogs?

Easy Dinner Ideas On The Grill

This shop featuring easy dinner ideas on the grill has been compensated by #CollectiveBias, Inc. and its advertiser. All opinions are mine alone. #MyGoodLife

Easy Dinner Ideas On The Grill

The official end of summer is near and the unofficial end of summer has arrived. While I’m sad to see our summertime fun and memories fade, I’m excited that we’ll still have some warm days upon us to continue using our grill instead of heating up the house inside.

Over this past summer I’ve come to realize that you can grill just about anything. And that includes pizza! Not only is it the perfect way to get a crisp, delicious crust, it evenly cooks all of the toppings so no one is left with a doughy bite.

But pizza isn’t the only thing you can put on the grill… I’ve also started grilling up some desserts and even salad if you can believe it. These easy dinner ideas on the grill are not only simple to make but quick to cook up! This whole meal took less than 15 minutes from start to finish.  [Read more…]


© A Crafty Spoonful - All Rights Reserved
It is OK to use one of my photos provided a link back and/or proper credit is given. It is NOT ok to copy and paste a whole post including instructions. Please do not remove watermarks or alter images in any way. Please contact me with any questions at danielle@acraftyspoonful.com

.