Easy DIY Hair Bow Holder + Simple Girls Bedroom Decor Ideas with Leesa Sleep

This post is sponsored by BabbleBoxx.com on behalf of Leesa. Are you looking for fun ways to spruce up your girls’ room? Transfering from little girl room to big girl room? We’re sharing simple bedroom decor ideas on a budget and are sharing a fun and easy DIY hair bow holder to store all of your girl’s bows.

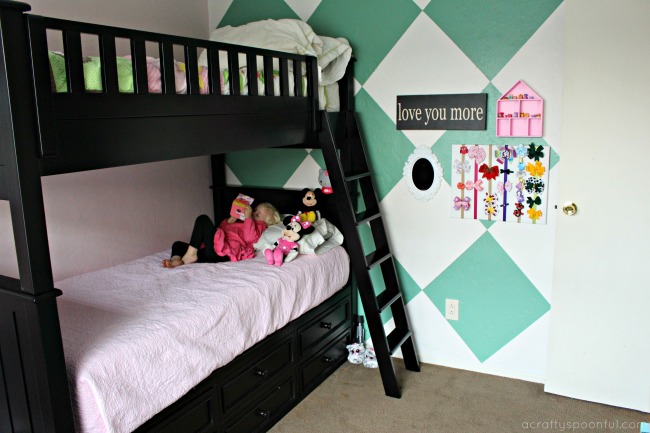
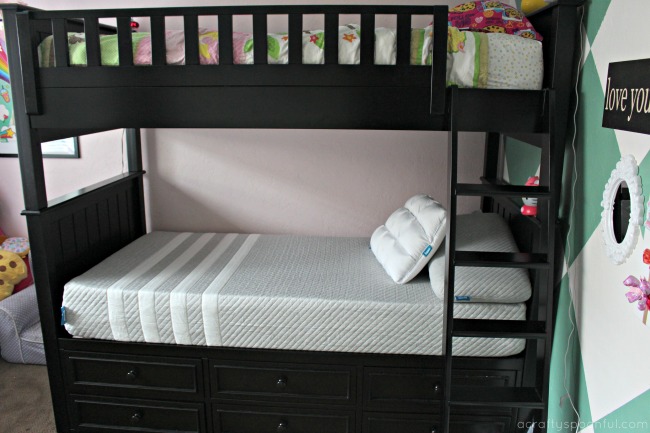
A few weeks ago the girls came to us and asked if they could get a bunk bed so that they could sleep in the same room together. We had just transitioned our youngest from our bed to her own bed at 3 years old and while she loved the idea of being in her own room, she missed the comfort of knowing someone else was sleeping with her in the room. So after much deliberation, we decided to make over our middle child’s room to fit her growing personality (hers was the only room we hadn’t made over since moving to our new home 3+ years ago). And this included a new bunk bed. 

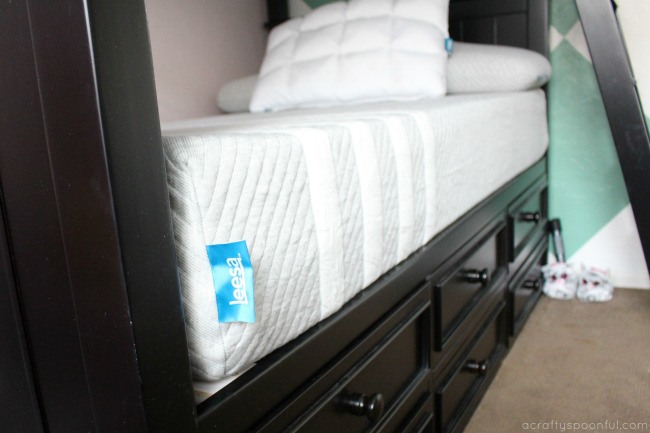
We did a bit of research and decided on a twin over twin model with dressers underneath the bottom bunk. Not only would this provide extra support under the bottom bunk but also give us the opportunity to eliminate a large piece of furniture from the room – the dresser! Win-win, right? Now for the important part of a good night’s sleep – the mattresses my girls would sleep on. We consider a mattress an investment not only for our home but our health as well. having the support needed for a good night’s rest is crucial for growing children. So when Leesa reached out to see if we’d like to use their mattresses for our new room, we were more than excited to try them out. Plus, not only are they committed to a good night sleep, they also provide community outreach and give back through two different give-back programs. 

Driven by the mission to provide “A Better Place To Sleep for Everybody”, Leesa donates one mattress to a shelter for every ten they sell through their One-ten program (over 22,000 mattresses donated so far!). Leesa also plants one tree for every mattress sold and donates 1% of each employee’s time to volunteer for local causes.

The Best Bed in a Box

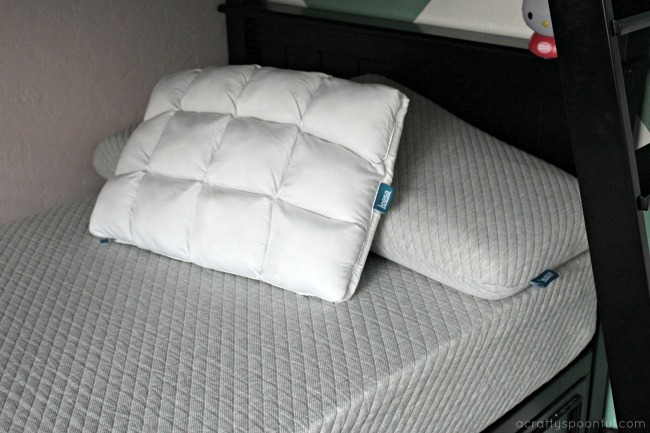
When our mattresses and pillows arrived, my husband was a bit skeptical. How in the world would a full mattress fit in this box? It was fun to find out exactly how the rolled up mattress expanded once put into place and opened. And even more cool to feel the difference in the mattress after an hour of being open vs. a whole day of being opened. Since I lay down with my youngest as she drifts off into sleep on the bottom bunk, I get to experience the comfort of Leesa each night. And with the adjustable and reversible hybrid pillow Leesa sent out, I relax in comfort as the girls fall asleep each night. 

The adjustable and reversible hybrid pillow has down-like quilted pockets on one side and a cooling side on the other. It’s adjustable and reversable depending on how our night is going. If I accidentally fall asleep in the bed with my daughter (oops!), and I get too warm, I can flip over the pillow for a more cool slumber. There’s also a pillow insert inside that sits between the quilted pocket and the cool layer that can be removed with a simple zip to change the support level to fit how one sleeps. Plus it’s a good cuddle pillow! 

But I can’t focus all of my attention on the awesome pillow I stole from the kids. Let’s get to the mattress! Leesa’s patented Universal Adaptive FeelTM is designed for all types of sleepers and features 3 premium foam layers including a 2-inch AvenaTM foam top layer for cooling and breathability, 2-inch memory foam middle layer for body contouring and pressure relief and 6-inch dense core support foam for durability and structure for sleepers of all sizes. All of this equals the support and comfort one needs for a restful sleep. And the proof is in my Fitbit tracker tracking how much more rest I receive when I accidentally fall asleep in the girls bed vs. going back to my own bed. It may be time to upgrade our own mattress too! 

Easy DIY Hair Bow Holder Tutorial

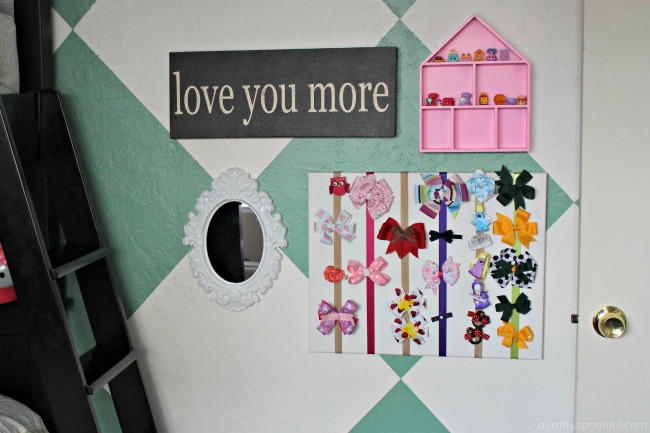
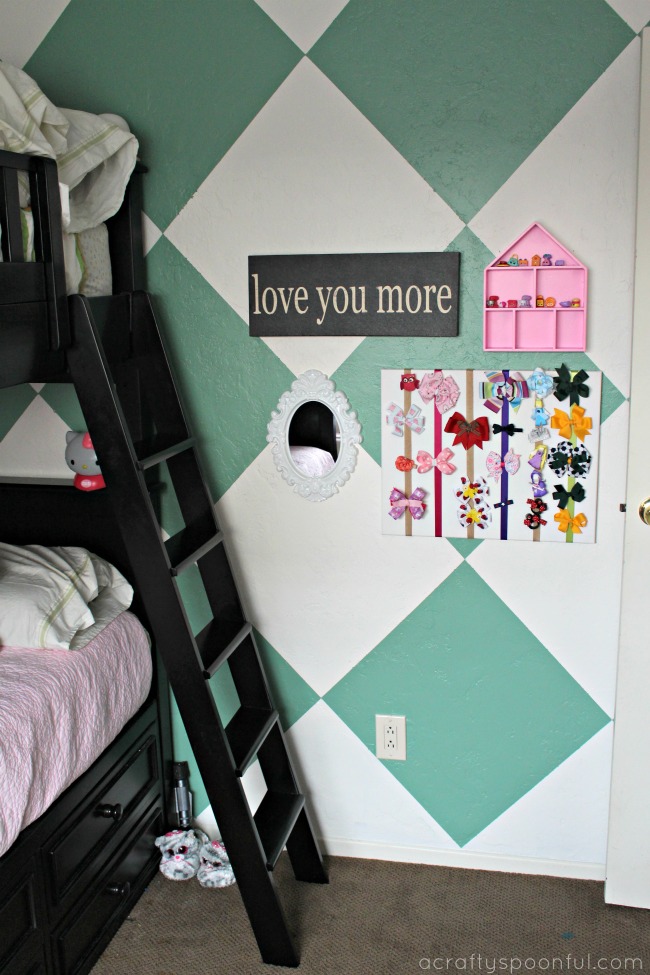
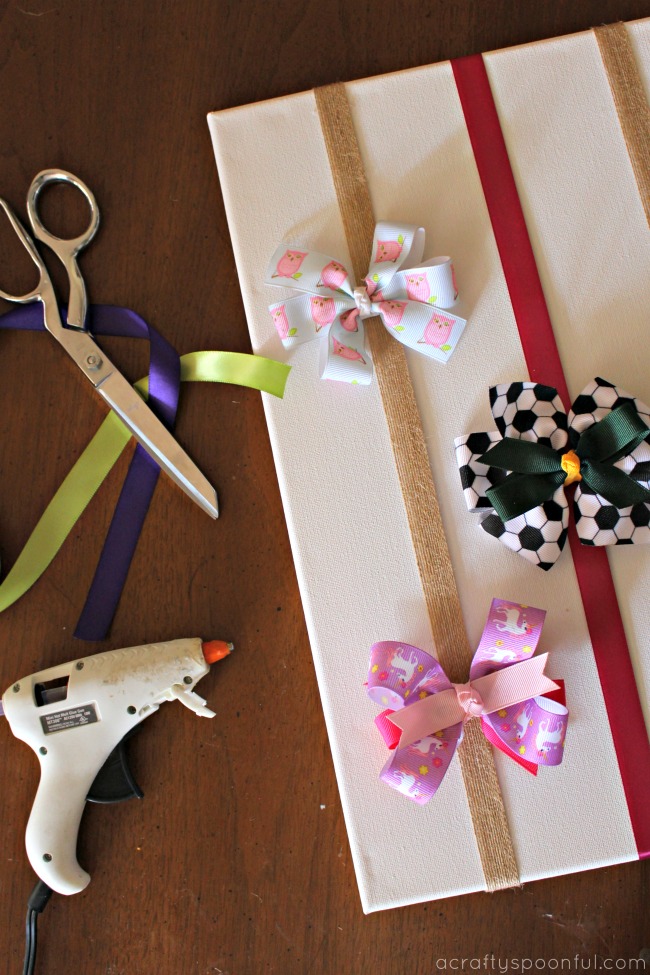
Along with the new bunk bed came a complete overhaul of our daughter’s room. That included new paint on the walls (including a fun diamond design you would have seen featured on my IG stories), and a fun little inspirational wall that included an updated DIY hair bow holder that fit the current room’s personality and my daughters larger bows. We’re sharing how to recreate our DIY hair bow holder in this simple tutorial that takes less than 30 minutes to make! The best part is that I was able to involve my daughter in making this and she did all of the measuring/cutting while I took care of the hot glue. 

DIY Hair Bow Holder

What You’ll Need: 

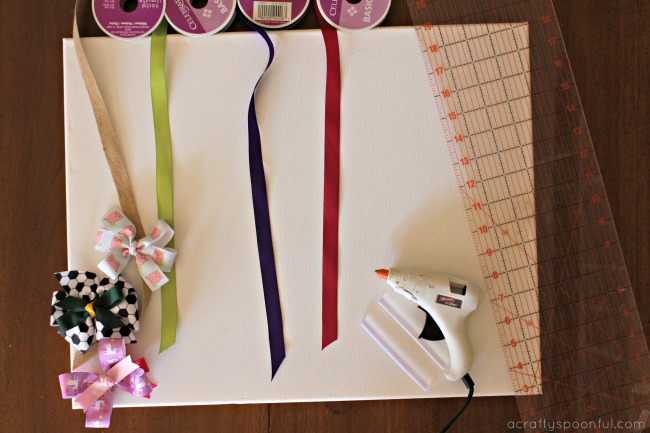
  • 16″ x 20″ Blank Artist Canvas with Wooden Frame
  • Assorted Ribbon
  • Measuring Tape
  • Hot Glue Gun
  • Pencil
  • Bows

What You Do: 

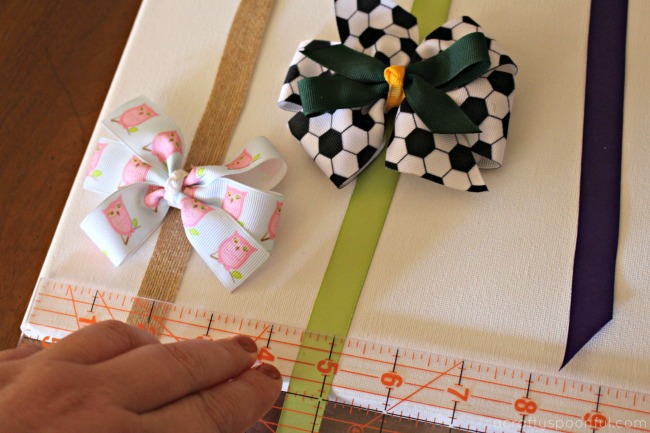
1. Grab the ribbon, a few bows, and a measuring tape to plan out how far apart you want the ribbon from each other. Use the bows as a guide to how much room is needed in between each bow. We measured 2 inches in from each side of the canvas and then 3 inches in between each ribbon strand. 

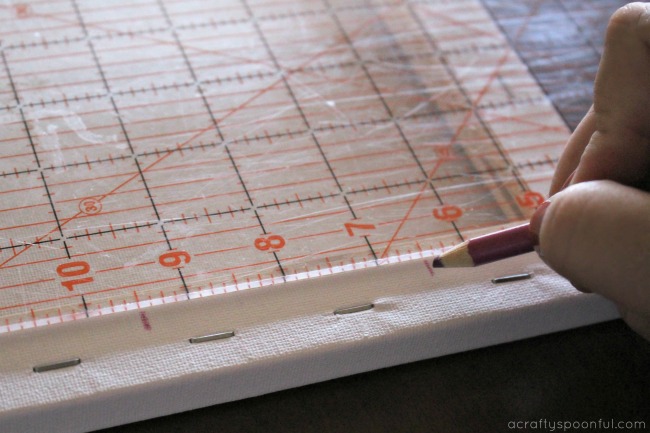
2. Turn the canvas over and mark where each of the ribbons should go on either side of the length of the canvas. 

3. Gather the ribbon in the colors you want to use for the project. Cut each color to about 21 inches in length. Make sure that this length wraps around the canvas and back over the frame to be glued into place. 

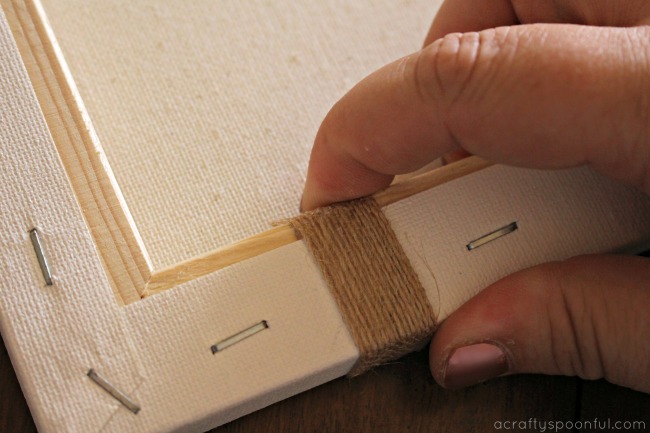
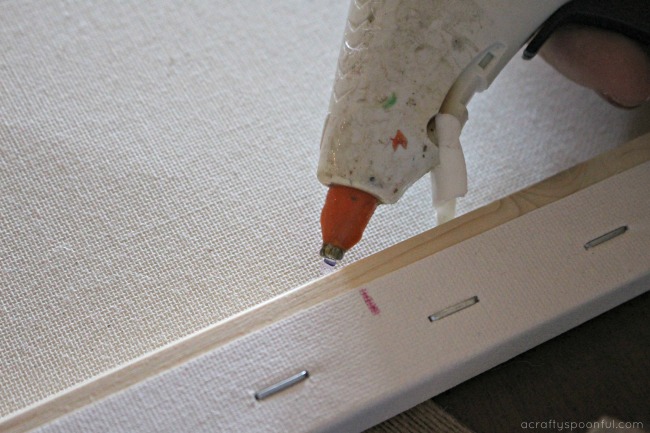
4. Using hot glue, attach the ribbon to the back frame of the canvas and wrap around to the top. Attach the top of the ribbon in the same way making sure that the ribbon isn’t twisted in the front. 

5. Repeat until all of the ribbon is secure and add your bows! 

See how easy that was! Now for a few alternative ways you can spice up your DIY hair bow holder: 

  • Paint the canvas a coordinating color (you can see what our daughter’s old painted bow holder looked like here)
  • Wrap the canvas in fabric and secure with hot glue before adding the ribbon
  • Add small hooks to the bottom of the canvas frame to hang hair ties and headbands

In addition to adding the DIY hair bow holder, we included a small mirror, an inspirational quote, and a small wooden unit to hold my daughter’s prized possessions: her Shopkins figurines. Having the figurines high up ensures that her little sister can’t reach them. Good thinking, right? Too bad she’s already tried to drag the step stool out to grab one or two. Oh well… I can try! Stay tuned for the full bedroom makeover post! We have more in store for you. 

Save on Your Girls Bedroom Decor Ideas with Leesa Sleep

Leesa is available online or at the Leesa Dream Gallery in SoHo NYC and Virginia Beach. And you can now try before you buy at over 80 West Elm stores nationwide. Try the mattress in your own home for 100 nights (risk-free!) with free shipping, always. And don’t forget to use code ACRAFYSPOONFUL for $100 Off your Leesa Mattress purchase.  Leesa is available in the US, UK, Canada, and Germany. They’re also continuing to expand their offerings to include: The Leesa Pillow, Blanket, Sheets, Foundation, and Frame. 

Looking for more kids bedroom ideas? 

Check out these posts you’ll love: 

5 Ways To Help Children Get Their Bedroom Organized

Shared Bedroom Ideas for Brother and Sister

DIY Lego Side Table

Pin this article for later! 

Click the Pin button on the image below to save for later. 
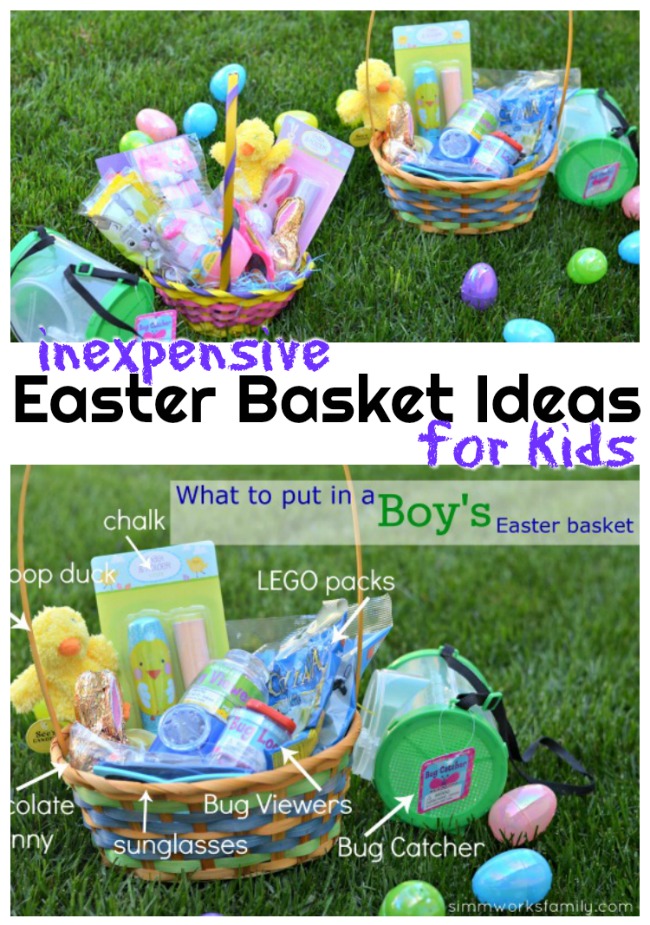
Inexpensive Easter Basket Ideas for Kids

These inexpensive Easter basket ideas for kids won’t break the bank! We take a simple approach to Easter baskets in our family and are sharing our tips and tricks with you. 

Easter is right around the corner and if you’re like me you’ve been racking your brain trying to think of great things to put in your child’s Easter basket. We always try and keep it simple. We definitely don’t want Easter turning into Christmas or a birthday where we shower our children with more than a few gifts. And we want our children to learn that not every holiday is a huge gift-giving event. 

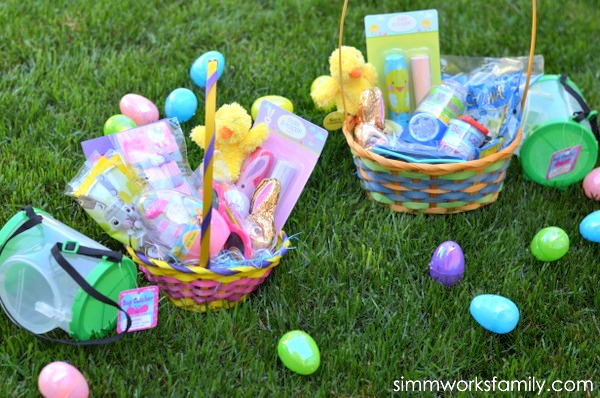
We’ve always used the same guidelines each year since our son was born… simple. The Easter Bunny will only bring what will fit in the Easter baskets (except for the eggs filled with treats that he hides everywhere). These Easter basket ideas for kids are not only simple but ones you can pick up at your local stores. 

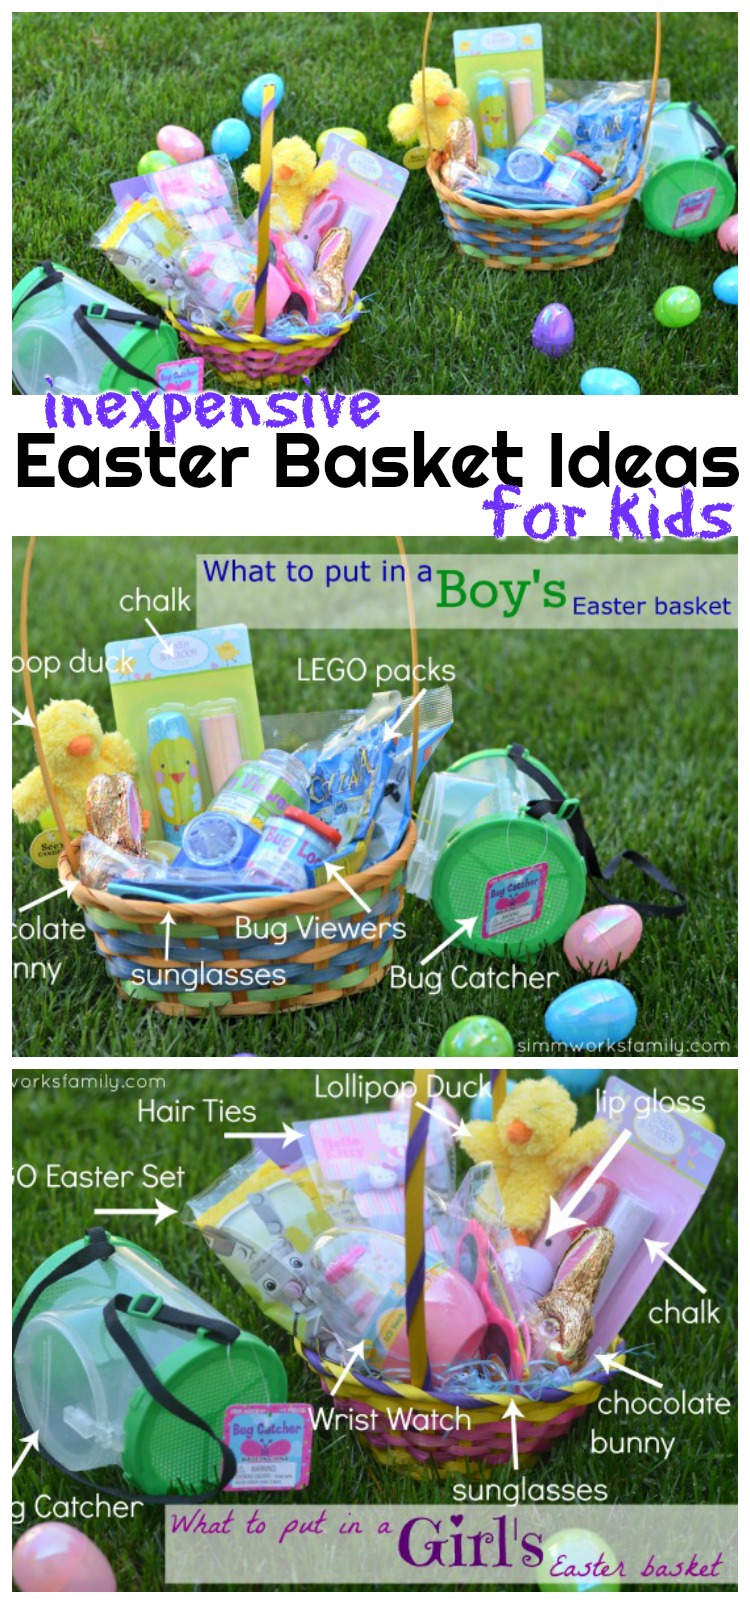
This year is no different. I went to a few different places to score the awesome loot found in my kids Easter baskets this year but didn’t spend more than $25 per basket and were purchased at Target (both the Easter section and $1 section) & See’s Candies. Plus, many of these things hold dual purpose and can be used over and over again. 

Here are our Easter Basket Gift Ideas for Kids:

inexpensive Easter ideas for kids

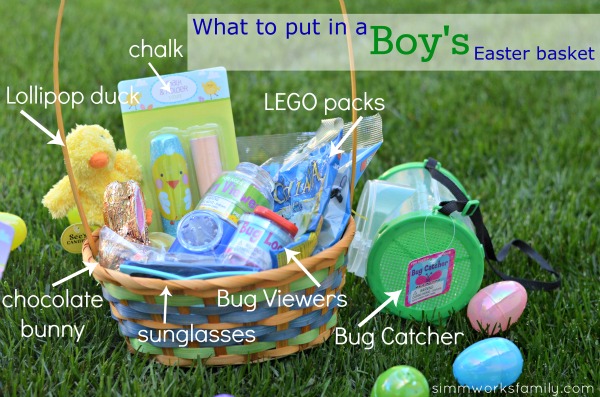
Easter Basket Ideas for Boys

  • Mini LEGO packs – found at the LEGO store and at Target or other retailers (pictured)
  • chalk (pictured)
  • sunglasses (pictured)
  • bug catcher gear (pictured)
  • See’s mini chocolate bunny & duck lollipop (pictured)
  • DVDs
  • wristwatch
  • jump rope
  • bubbles (we LOVE Gymboree bubbles!)
  • Hot Wheels cars

Inexpensive Easter ideas for kids

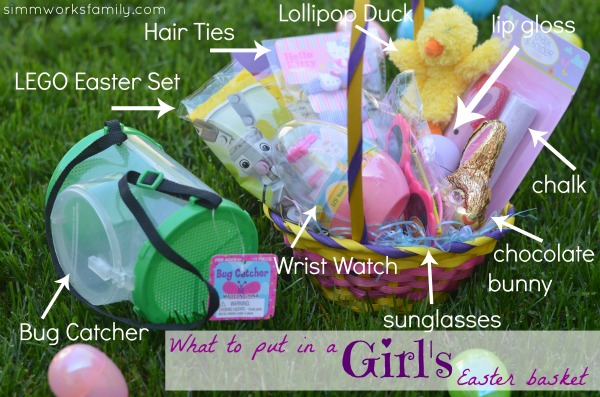
Easter Basket Ideas for Girls

  • Mini LEGO packs – found at the LEGO store and at Target or other retailers (pictured)
  • chalk (pictured)
  • sunglasses (pictured)
  • hair ties (pictured)
  • lip gloss (pictured)
  • wristwatch (pictured)
  • bug catcher gear (pictured)
  • See’s mini chocolate bunny & lollipop (pictured)
  • DVDs

Inexpensive Easter ideas for preschoolers

We’ll be stuffing fun stickers, temporary tattoos and See’s jelly beans in the plastic Easter eggs as well to hide for our family Easter egg hunt before brunch as well. And since they just saw Peter Rabbit in theaters, we added some fun Peter Rabbit plush toys we found on Amazon here. 

What do you add to your child’s Easter basket?

Love these Easter basket ideas for kids? Here are a few other fun Easter posts to read: 

Pin this article for later! 

Click the Pin button on the image below to save for later. 
Gift Basket Ideas for Mom + How to Make Lavender Epsom Salt Scrub

 This shop has been compensated by Collective Bias, Inc. and its advertiser. Product was provided by the client for review; however, all opinions are mine alone. #WorldsSmartestToothbrush #PhilipsSonicare #OprahsFavoriteThings #CollectiveBias

Sometimes my mom is the hardest person to shop for on my list. So that means going a little outside of the box when I think up things to gift her for Christmas. Sure there’s the photo of the kids, or the massage gift card, but you can’t just keep gifting that to her year after year, right? (she might disagree….)

This year I decided to get some ideas from a woman I’ve known for quite a long time; Oprah. Growing up, there was always one show playing at home when I got home from school and that was Oprah. My mom and I would watch together and talk about the topics of the day and our days at school/work. It was a great bonding time. Now I love finding out what is included in Oprah’s latest Favorite Things List so I can get ideas on what to send my mom for special gift giving occasions.

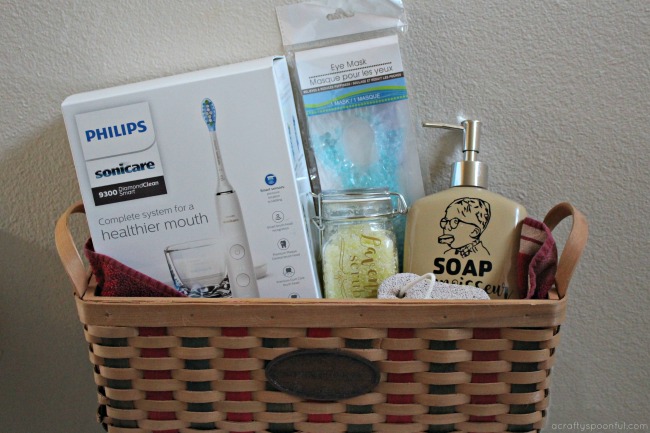
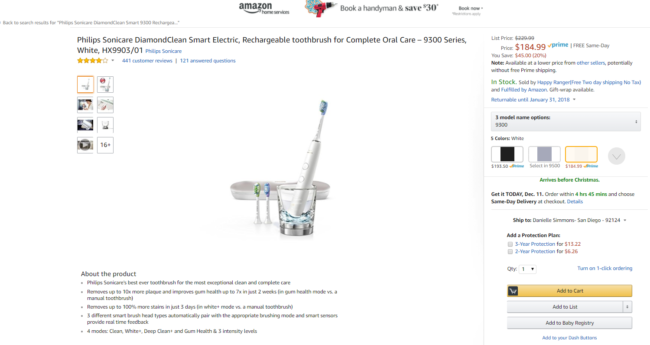
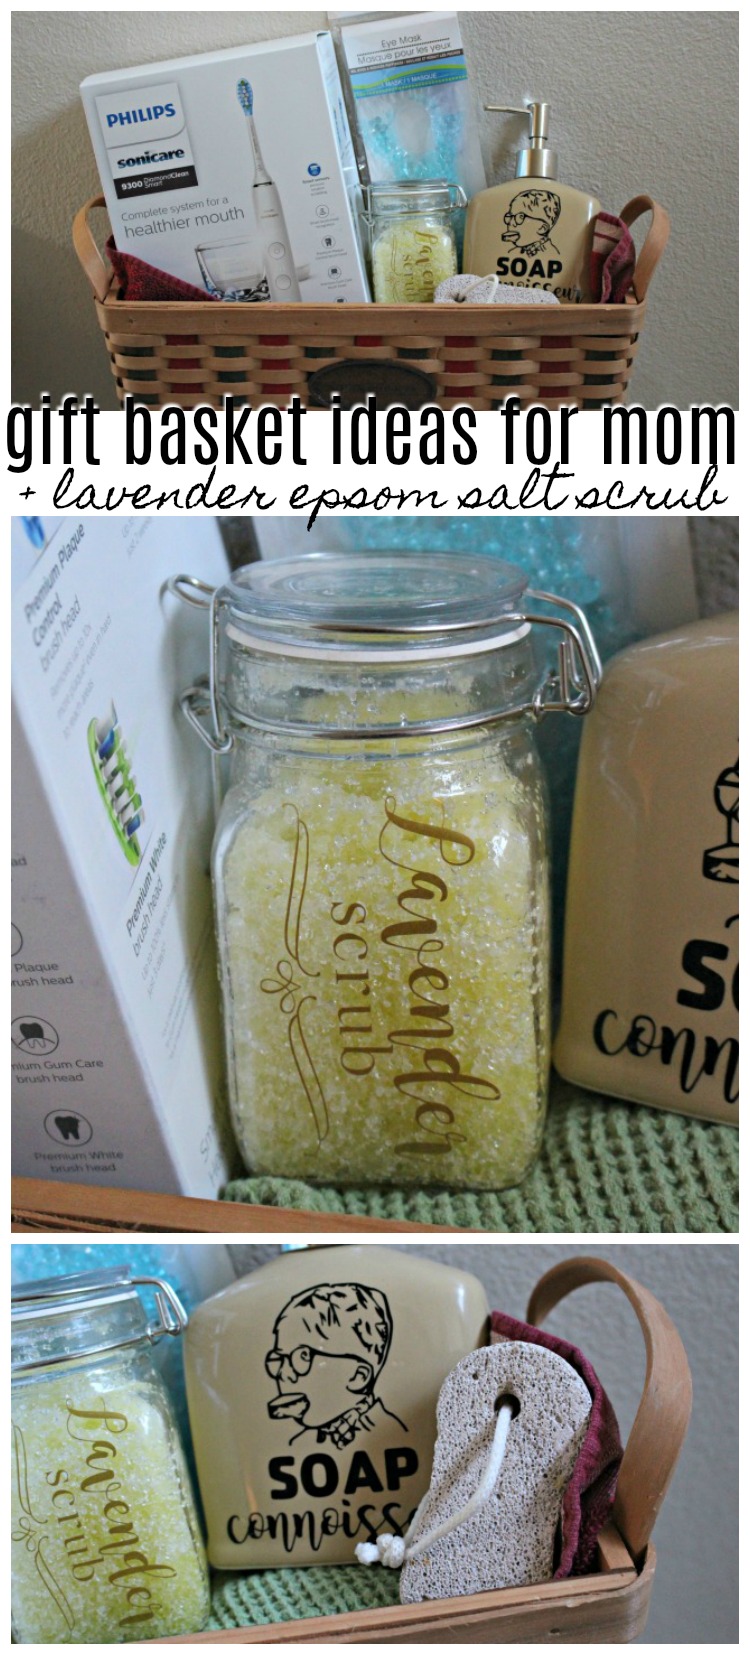
So front and center in the gift basket I created for my mom is the Philips Sonicare DiamondClean Smart 9300 Rechargeable Toothbrush. Now you may be saying, “A toothbrush for your mom???” but it really is the perfect gift to give for this holiday season. The Sonicare DiamondClean Smart 9500 Rechargeable Toothbrush was named one of Oprah’s Favorite things in 2017, and I had the chance to try a DiamondClean Smart for myself. Definitely can’t go wrong with anything on her list. 

It may sound weird, but my mom cares about the heath of her teeth. She’ll do anything she can at home to avoid going to the dentist. So a toothbrush with four high-performance brush heads and Smart Sensor technology is a must for her. Now she can care for her whole mouth, teeth, gums and tongue with the new Sonicare DiamondClean. Just click on the Sonicare DiamondClean in the image below to grab one for your loved ones (or yourself) from Amazon!

The Sonicare DiamondClean is Philips’ best ever toothbrush for complete oral care. It’s sensors and integrated app help you perfect your technique, and get a complete clean. The premium brush heads give you exceptional oral health results and its 4 modes and 3 intensities let you focus on each aspect of your oral health. But no need to worry about what mode or intensity you need. The smart brush heads automatically select the optimal mode and intensity you need. Looking to take your oral health to the next level? Connect with the Sonicare app to get real-time feedback and personalized coaching! How’s that for 100% confidence in your oral care?

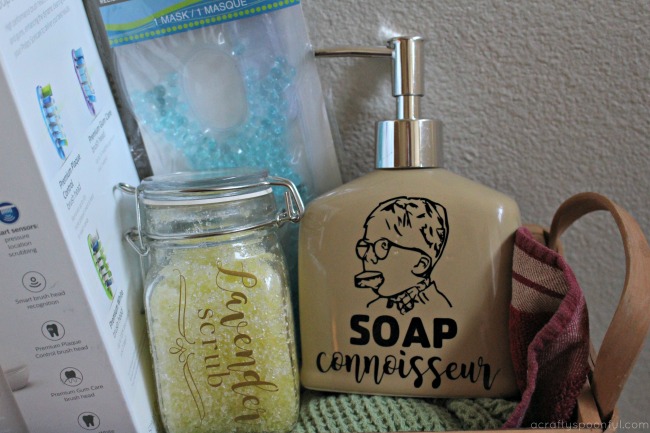
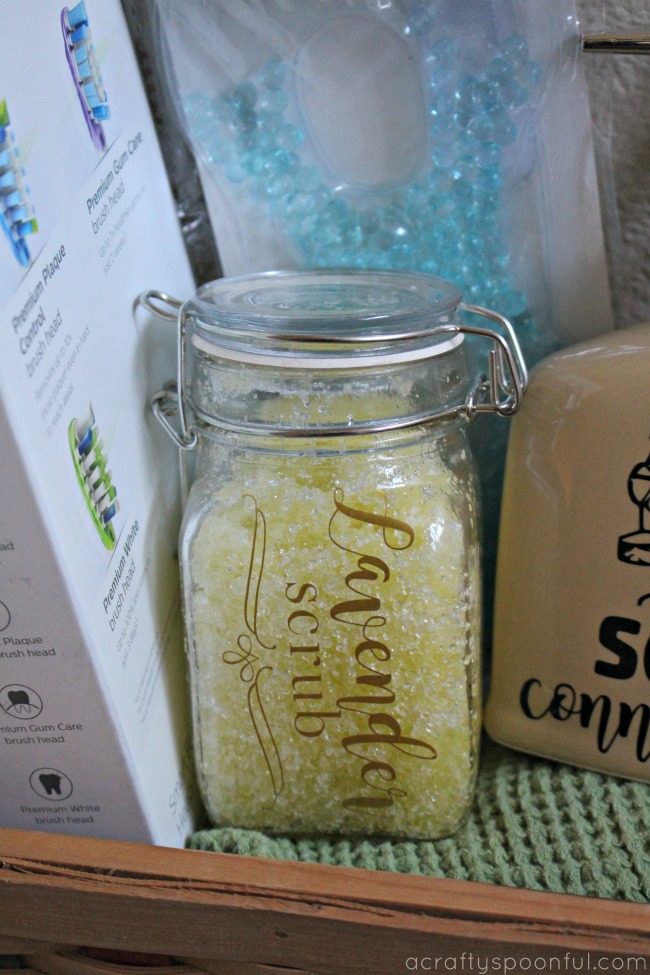
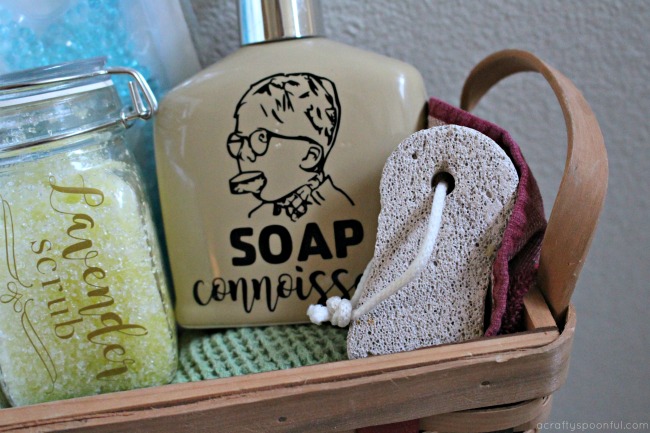
And in addition to complete oral care, I threw in some funny and pampering gift items too. I grabbed a tan soap dispenser and created an SVG file for the soap connoisseur image to allude to a favorite holiday Christmas movie, and then got to mixing and created a fun lavender epsom salt scrub for her to enjoy. To round it all out I added an eye mask and pumice stone. The perfect whole body pampering set! I’m sharing how you can make the scrub below AND sharing a free SVG file for the scrub label. 

How to Make Lavender Epsom Salt Scrub

What you need: 

  • 1 cup epsom salt
  • 1 cup olive oil
  • 3-5 drops lavender essential oil

What you do: 

Mix the salt and oil together until well blended. Add in the lavender oil and stir to combine. 

Place salt scrub in an air tight container and add a label. 

Grab the free Lavender Scrub SVG file here! 

What do you love placing in gift baskets to make them fun but different? 

Love this post? Check out a few others: 

Pin this article for later! 

Click the Pin button on the image below to save for later. 
The Best Ways to Impress Your Guests this Holiday Season + FREE A Christmas Story Toilet Seat Decal SVG

Who’s ready for holiday guests? This girl is! And with this free toilet seat decal inspired by A Christmas Story, no one’s falling in the potty! This shop has been compensated by Collective Bias, Inc. and its advertiser. All opinions are mine alone. #MerrySpritzmas #CollectiveBias

One thing I love about the holiday season is that I get to see a lot of my favorite people all in the same month. Whether it’s family coming into town, friends stopping by with plates of cookies, or the neighbor down the street, the end of the year is when all of the commotion happens. And that means one thing… the loo can be a busy place! 

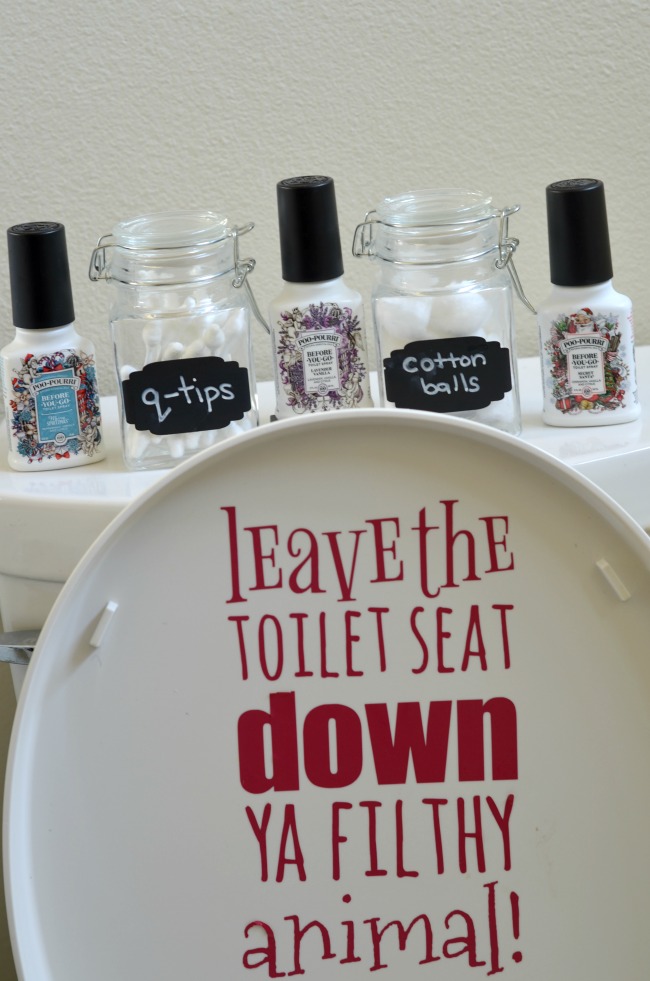
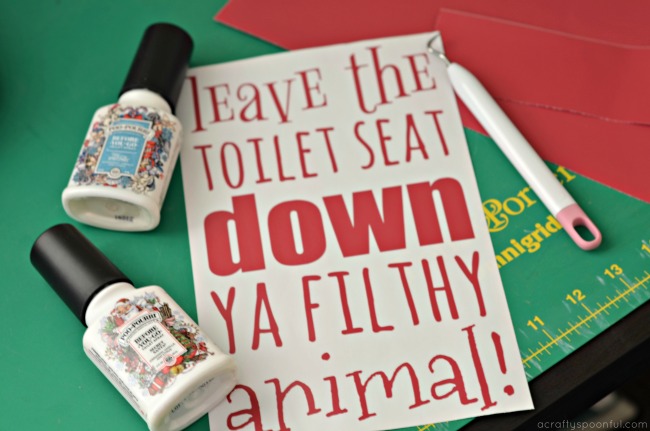
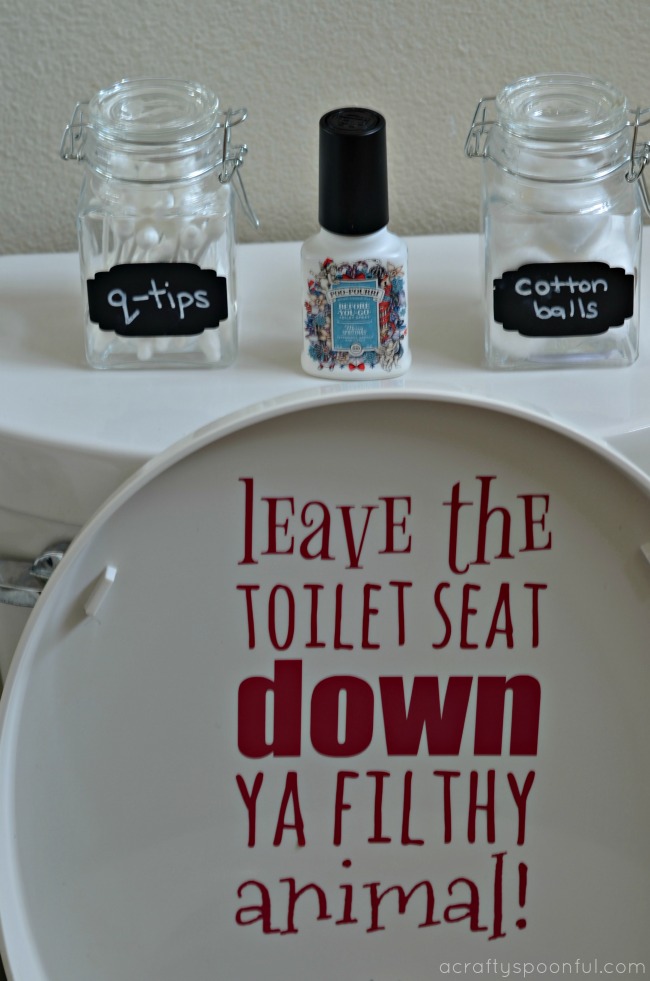
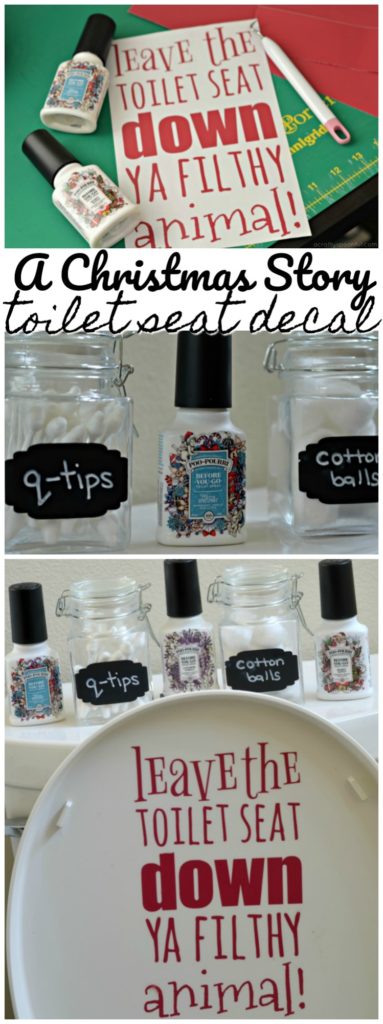
So in order to make sure our house is in tip-top shape and ready for guests, I do a few small things to prep in advance. Not only does this make it easier for guests, but makes my life easier as well. And since our guest bathroom is also the bathroom the girls use, I’ve made a funny decal inspired by a classic Christmas movie to remind male guests to keep the seat down. Because, yes, my kid has fallen into the toilet because someone forgot to do this…

(click on the images to visit Poo~Pourri.com and find your perfect match)

The Best Ways to Impress Your Guests this Holiday Season

One thing that I always hate is using the restroom at someone else’s house. Whether it’s a quick trip or something a little longer, I don’t want to put myself in an embarrassing situation. I’ve also found myself in need of a few necessities over the years when I’m at someone’s house and I don’t really know how to ask. So in an effort to make our home more inviting, I’ve taken a few proactive steps so that guests feel right at home when visiting. 

#1 – Have Toiletries Accessible

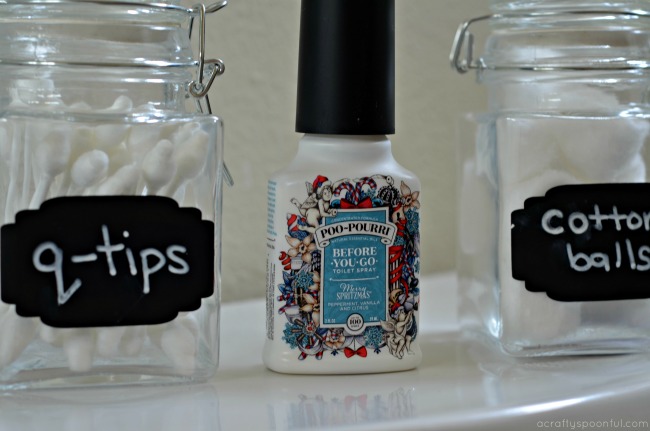
When guests come over I like to put out these cute labeled jars out so that they can help themselves to things like cotton balls, etc. I also stock the medicine cabinet with things like aspirin, acetaminophen, etc and hairspray, bobby pins, and tweezers. And underneath the sink I keep a few personal items. 

#2 – Don’t Skimp on the Toilet Paper

Another thing I keep plenty of under the sink is toilet paper. No one wants to visit your home, head to the bathroom, only to have to yell to get someone to bring some toilet paper to them (or find other ways of cleaning up). So I stock a good number of rolls under the sink for easy access. 

#3 – Have the Poo~Pourri Out

And front and center by the toiletries that are on the back of the toilet is the Poo~Pourri. Because there’s nothing worse than heading into the restroom at a friend or family member’s house and realizing that when you thought you only had to go #1, you really had to go #2. No one needs to know when you have Poo~Pourri available.

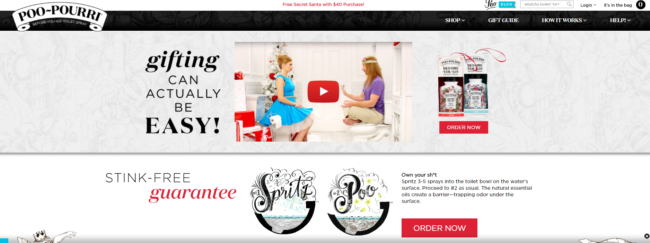
Guests simply need to spray 3-5 times and do their thing. Poo~Pourri’s pure blend of natural essential oils creates a film on the surface of the water. he protective barrier traps odor under the surface before it ever begins! All you’ll smell is a refreshing bouquet of natural essential oils. It’s as easy as that!

You can hover over the image above and click on the images to visit Poo~Pourri.com and find your perfect match. Whether you’re a spiced apple person or prefer the calming effects of lavender vanilla (my favorite!), there’s a scent out there for you. Add a spritz of holiday magic by leaving the porcelain sleigh smelling better than you found it with fun holiday scents like Merry Spritzmas® or Secret Santa that are perfect for a stocking or in place of a gift tag for that special someone. 

Finding the right scent of Poo~Pouri was fun. I chose a few festive holiday blends for the season and a more neutral scent for year round (or in my purse when I’m on the go). Poo~Pourri transforms your bathroom experience (and those who come in after you) by stopping bathroom odor before it begins…seriously!

Poo~Pourri Merry Spritzmas® is a blend of peppermint, vanilla and citrus natural essential oils and Poo~Pourri Secret Santa is a blend of cinnamon, vanilla and citrus natural essential oils. How amazing does that sound for spreading holiday cheer? The favorite holiday blend in our home is Merry Spritzmas®. Smelling is believing!

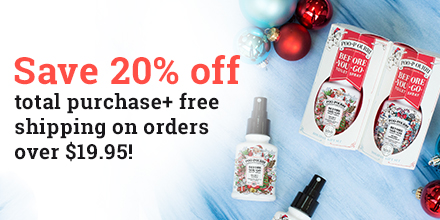
And right now you can enjoy 20% off your order! Just head over to the Poo~Pourri website to order now. While it’s a fun (and funny) gift, it’s also something that works. Win-win! Plus, there’s always free shipping on orders over $19.95.

Now on to how to download and put on this awesome toilet seat decal inspired by A Christmas Story.

How to Add A Decal To Your Toilet Seat

What you’ll need: 

  • Filthy Animal SVG file
  • Oracal 631 vinyl (or equivalent non-permanent vinyl).
  • Transfer paper (or clear contact paper)
  • clean terry cloth
  • rubbing alcohol
  • burnishing tool or credit card

What you do: 

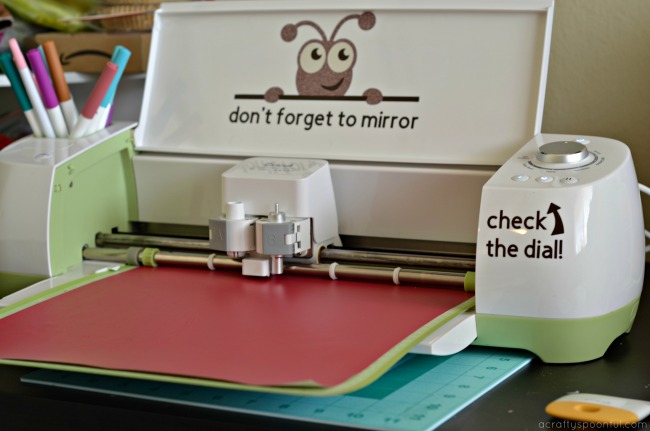
1. Download the Filthy Animal SVG file and cut it out on the vinyl of your choice using your cutting machine. 

2. Weed your design and transfer design onto transfer paper. 

3. Prep the inside of your toilet seat by putting a small amount of rubbing alcohol onto the clean terry cloth and wiping the surface down. Let dry. 

4. Grab your vinyl on transfer paper and try to eyeball the alignment so that the decal goes on evenly and in the middle of the lid. Press your design down. 

5. Using your burnishing tool or credit card, scrape the design gently onto the lid and get out any air bubbles to ensure that the vinyl is properly secured. Once secured, remove transfer tape 

6. Enjoy your decal and wait till guests come over to admire your throne! 

Grab the FREE A Christmas Story Toilet Seat Decal SVG Here

What are your top tips for making guests feel at home? 

Loved this post? Read on! 

Pin this article for later! 

Click the Pin button on the image below to save for later. 
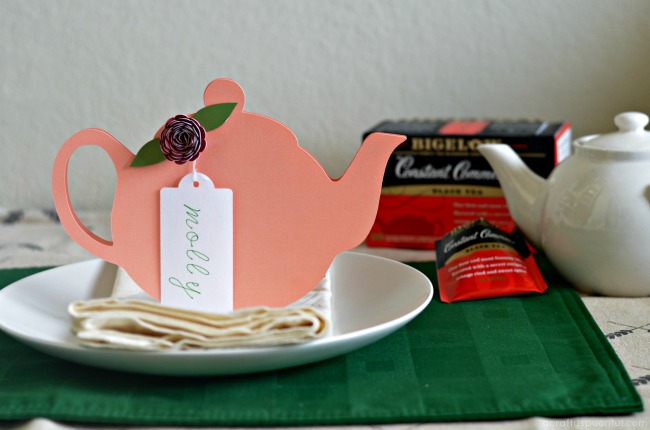
Tea Party Theme Ideas: Tea Pot Place Card Printable

Today we’re sharing some fun tea party theme ideas like this tea pot place card printable. This shop has been compensated by Collective Bias, Inc. and its advertiser. All opinions are mine alone. #TeaProudly #CollectiveBias

My middle child is turning 7 next week. 7! How did the time go by so fast?? Not only is she turning 7 but she’s turning 7 on the 7th. That means that this year is her Golden Birthday and as such we decided to celebrate in style by hosting a tea party at a local tea shop with 7 of her closest friends. 

Now if you know Molly, you know she LOVES going to tea. It’s something she’s done with me and Grandma as a special outing and sharing tea with loved ones holds a special place in our hearts. I would enjoy a cup of tea in the morning with my nanny growing up and it was always something that provided comfort. Plus, we celebrated with a tea party at home on her first birthday so it was only fitting to repeat for her golden birthday. 

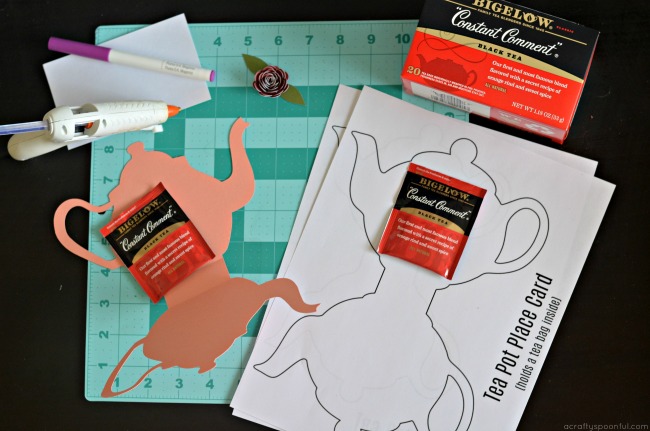
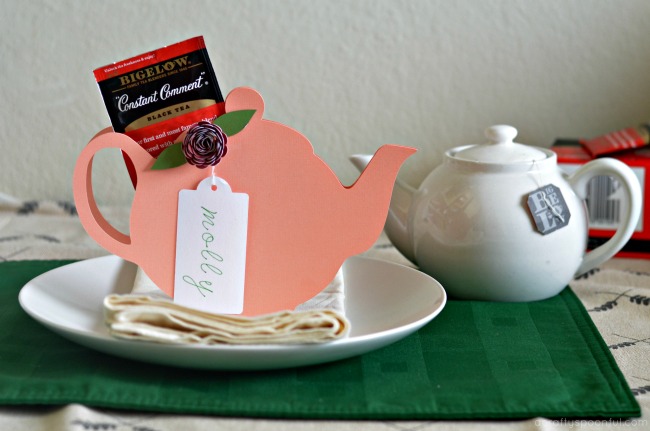
With every party we’ve hosted, we’ve always included a fun party favor for guests to take home with them. And this year we decided to not only make party favors but turn them into place cards so the girls know where to sit when they come to the tea house. We’ve hidden a fun surprise inside: a Bigelow tea bag to enjoy at home. We’re huge fans of Bigelow so it was only fitting that we include our favorite variety in our favors. 

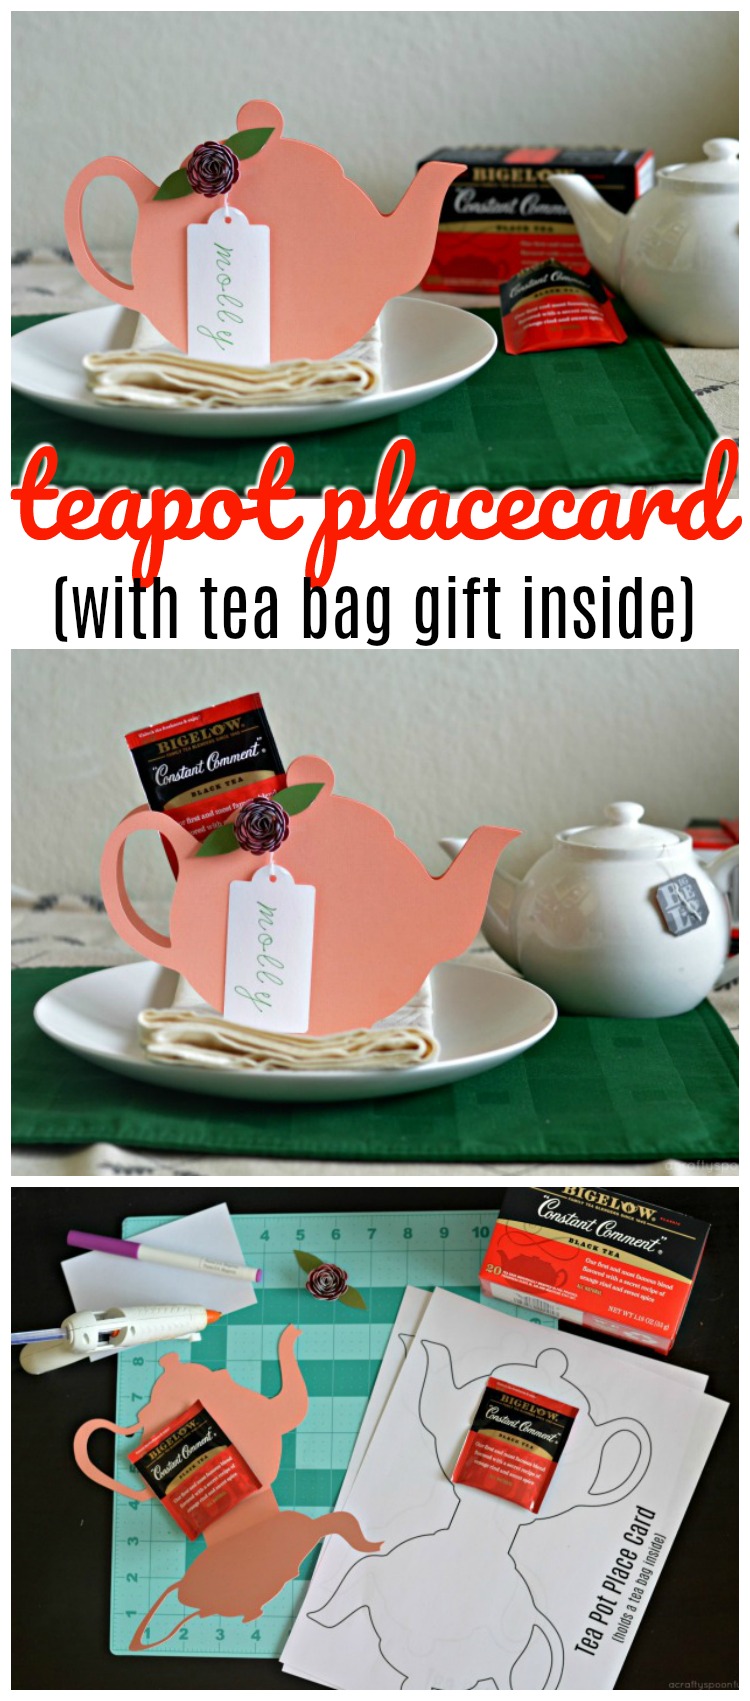
This fun project can be made with a paper cutting machine or you can print out the printable we have provided below and cut out with scissors. Either way, your guests will love taking this treat home with them after the party! 

Tea Party Theme Ideas: Tea Pot Place Card Printable

What you’ll need: 

What you do: 

1. Cut out printable or SVG file onto card stock. 

2. Fold each teapot up so that the top aligns together. 

3. Add flower to top of tea pot using hot glue gun and attach personalized gift tag with a piece of thread. 

4. Inside the tea pot, use double sided sticky tape to adhere one tea bag to the back tea pot. 

5. Close tea pot up and secure top with double sided sticky tape. 

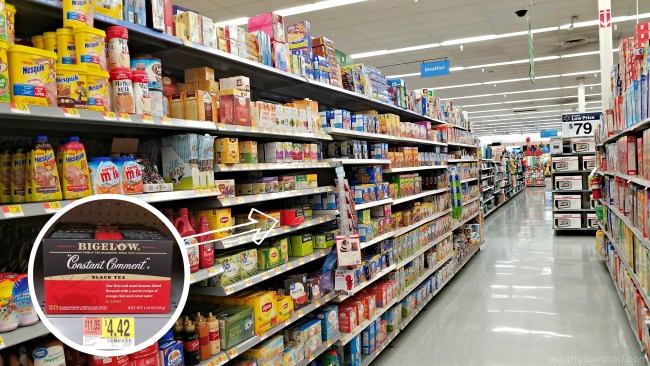
Looking to make your own tea pot place card holders but need the tea? You can find Bigelow Constant Comment at Walmart in the Tea and Coffee aisle! You can find more from Bigelow on Facebook, Twitter, and Instagram

Who do you share a pot of tea with? 

Love this post? Check out a few just like it: 

Pin this article for later! 

Click the Pin button on the image below to save for later. 
 

How to Make the Best Liquid Hand Soap from Bar Soap

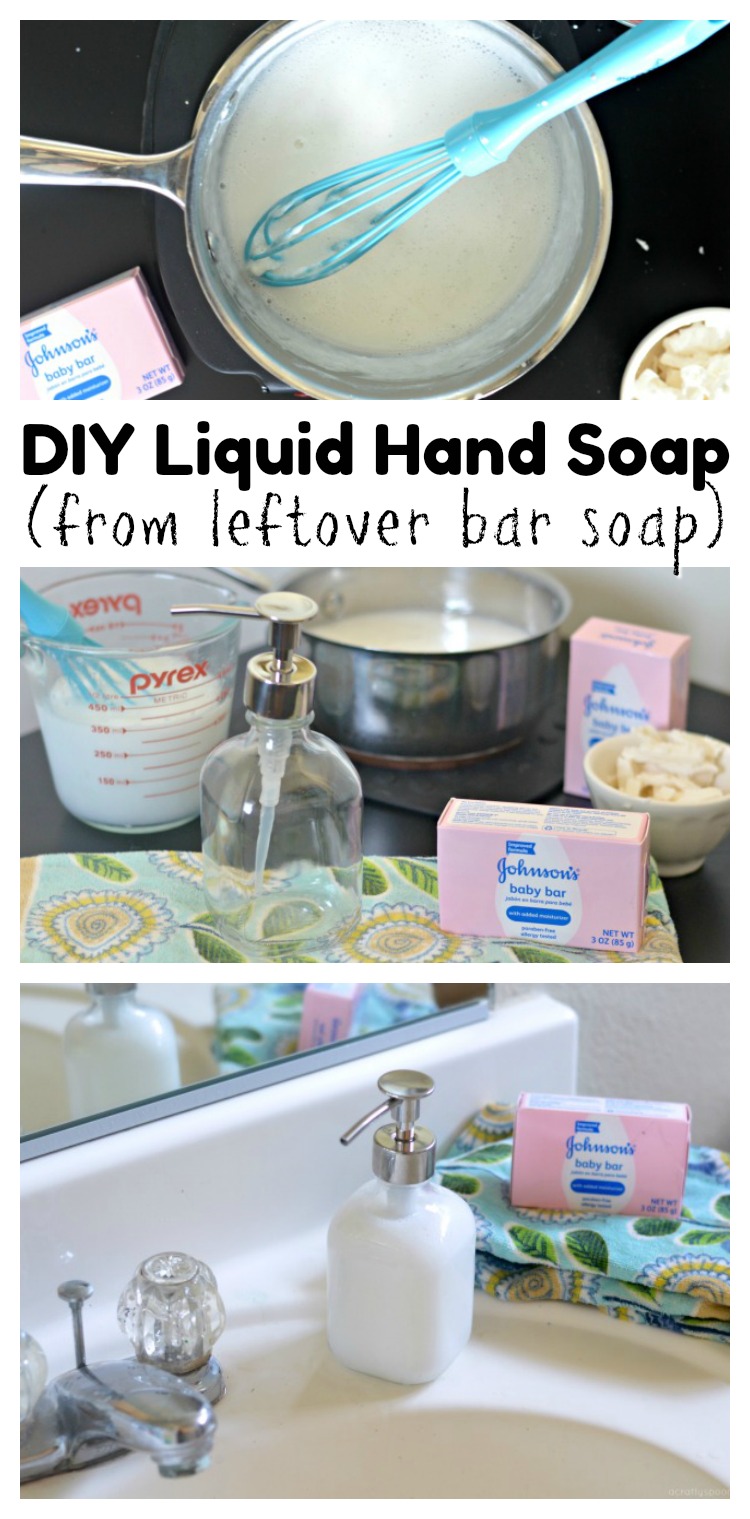
We’re sharing a few ways that you can save money and reduce waste by creating the best liquid hand soap from left over bar soap with help from our sponsor, Johnson’s® Baby. 

Don’t you hate it when you get to the end of the bar of soap and don’t quite get how to use it up? Are you like me and save the little nubs left and mold it into one big nub to use? 

It’s like the last of the lotion or shampoo stuck in the bottle. I feel like I’m wasting it if I throw it away without at least attempting to get the last bits out. But I found a better solution for those little left over bar soaps: DIY liquid hand soap! 

Yup. And you wouldn’t believe how simple it is to make. 

With 3 kids we go through a lot of soap. We order our favorite online from Walmart and have it picked up when we go in for our essentials. That way we’re always prepared for bath time! 

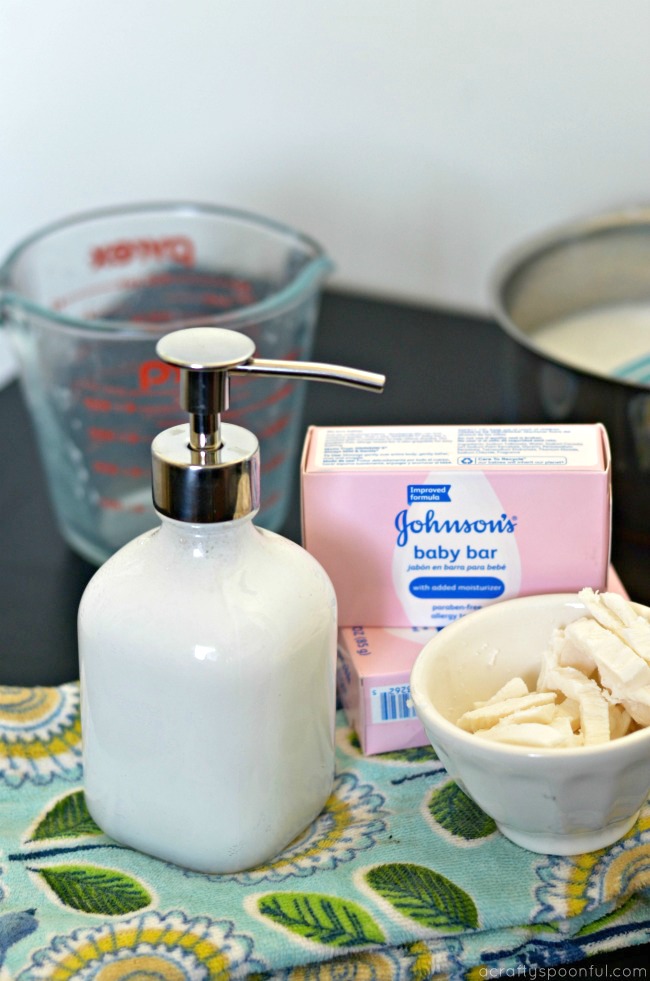
Once we get down to a little nub of Johnson’s Baby Bar soap after bath time, I set the nubs aside to make liquid soap. It only takes about 1 ounce of bar soap to make a small batch of liquid soap. 

Here’s how we do it! 

How to Make The Best Liquid Hand Soap

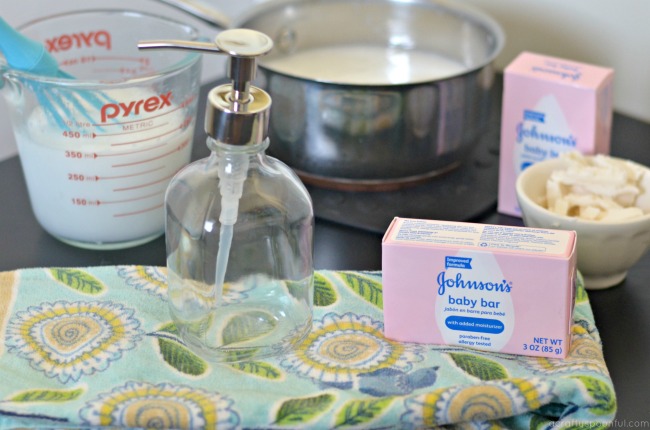
What you’ll need:

  • 1 ounce of Johnson’s Baby Bar 
  • 2 cups water
  • small pot
  • whisk
  • measuring cup
  • hand soap dispenser

What you do:

1. Take the small bits of Johnson’s Baby Bar you’ve collected after bath time and cut up into smaller pieces. Weigh out 1 ounce. 

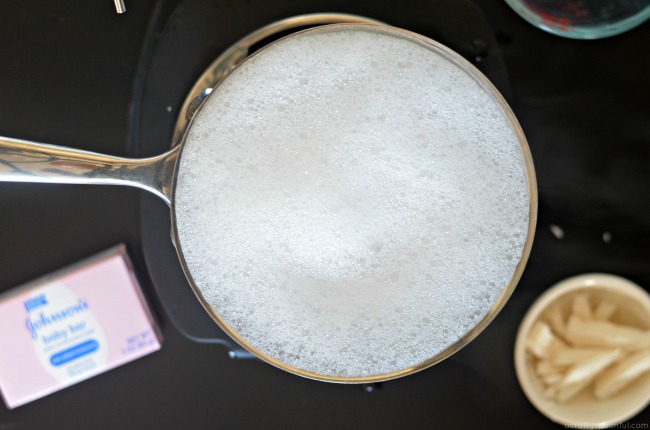
2. Boil 2 cups of water. Once the water is boiling, add 1 ounce of soap. 

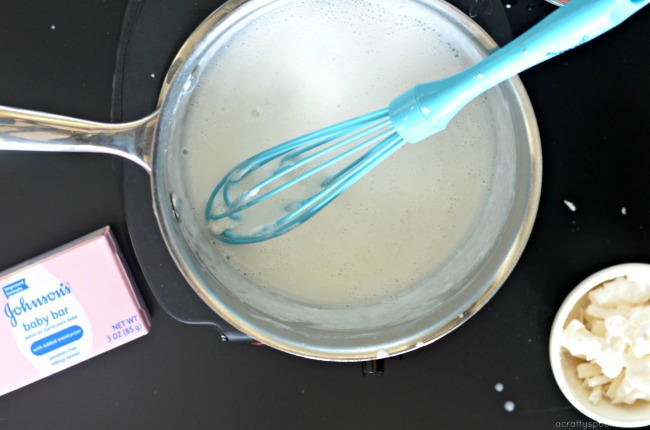
3. Take water off heat and whisk soap and water together until the soap has fully dissolved. 

4. Let soap mixture cool for 15 minutes then whisk again. Soap mixture should start getting thicker. 

5. Let mixture sit for a few hours (or overnight). If soap is too thick/gelatinous, add more water to thin out until you have the consistency of liquid glue. 

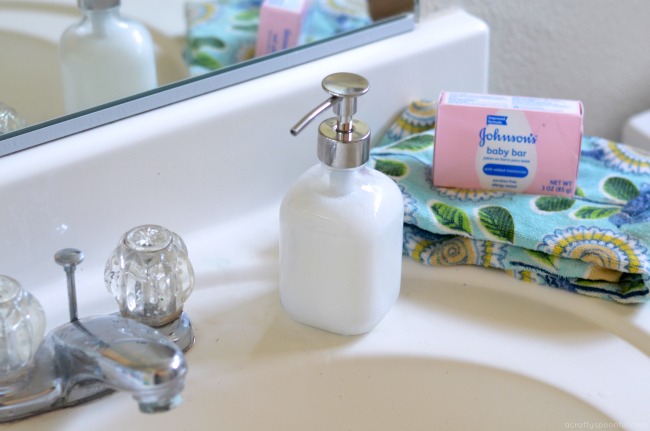
6. Pour into the soap dispenser and wash, wash, wash! 

If you’re looking to save some money (bar soap is so much cheaper than liquid soap!) and put those leftover bits of soap to good use, try this hack out and let me know how it works for your family! Check out these other great hacks and ideas here on this Pinterest board

If someone is reporting an adverse event or a product quality complaint, please tell them to call the Johnson & Johnson (J&J) North America Consumer Care Center at 800-361-8068 during normal business hours of operation: Monday through Friday, 8 a.m. to 8 p.m. ET. After normal business hours, they can report adverse events or product quality complaints through www.jnj.com Contact Us page.

What do you do to reuse the last bit of product? 

Looking for more DIY hacks? Read on

Pin this article for later! 

Click the Pin button on the image below to save for later. 
We thought you might like these similar posts:


How to Make Moana Kakamora Coconut Ornaments

how-to-make-moana-kakamora-coconut-ornaments

Moana has been and continues to be both of my daughter’s favorite movie. Each of them is glued to the screen as the story unravels every time they watch it. Three thousand years ago, the greatest sailors in the world voyaged across the vast Pacific, discovering the many islands of Oceania. But then, for a millennium, their voyages stopped – and no one knows why.

The story of Moana goes through the history of her people and the reason why they never leave their island. As Moana takes off on a new adventure, we come to learn more about this missing pieces of her story and watch as she creates a story of her own. 

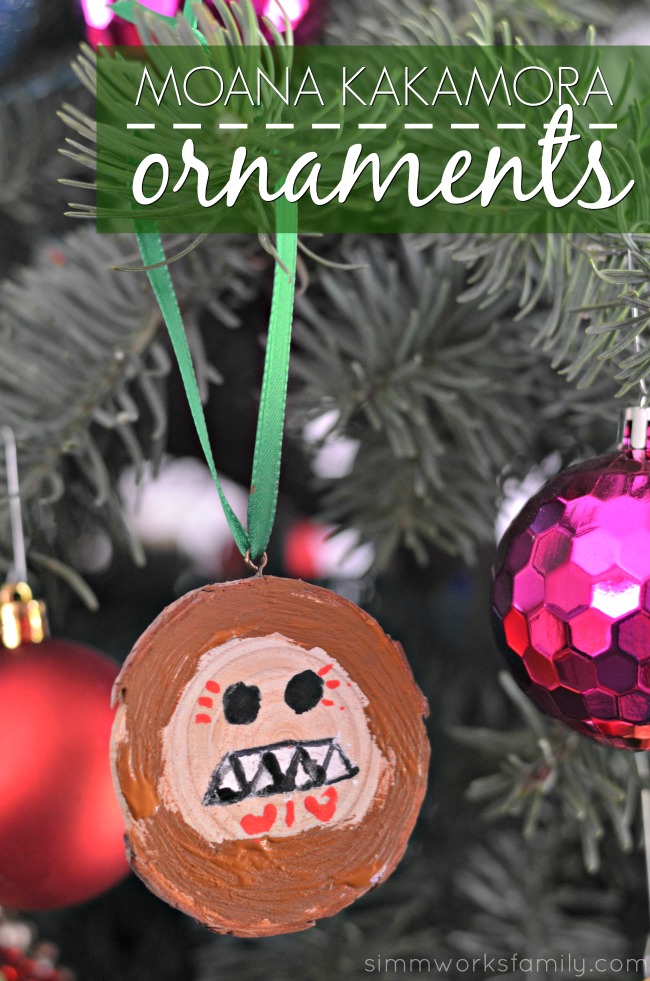
Throughout her adventures, my daughter’s favorite part in the movie is when Moana and Maui encounter the Kakamora. Seemingly sweet and gentle creatures in the beginning, Moana quickly learns of their fierce, warrior-like side. We’re recreating the Kakamora in these fun Kakamora Christmas ornaments for the holiday season.

Don’t want to make these yourself? Purchase one here in our Etsy store! 

how-to-make-moana-kakamora-coconut-ornaments-supplies

How to Make Moana Kakamora Coconut Ornaments

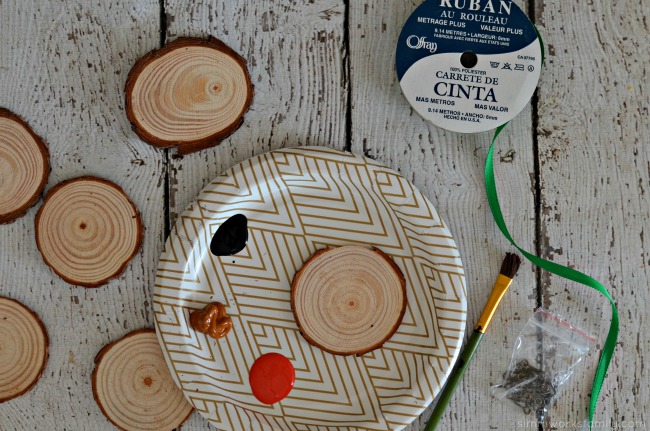
What you’ll need: 

What you do: 

1. Paint a circle around the edge of the wood slice with brown paint leaving the middle wood exposed. 

2. Using the black paint, make two circles for eyes. 

3. With the white paint, make a mouth full of teeth. Outline in black if you’d like. 

4. Add the final touches to the face by adding some designs with red paint.

5. Screw eye screw on top of the ornament and string with ribbon. 

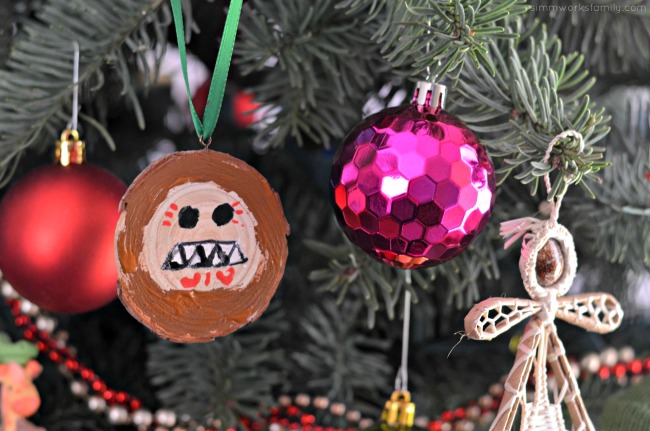
Let dry and hang on the tree to enjoy during the holiday season! 

how-to-make-moana-kakamora-coconut-ornaments-on-the-tree

* This post was originally published on Nov 21, 2016

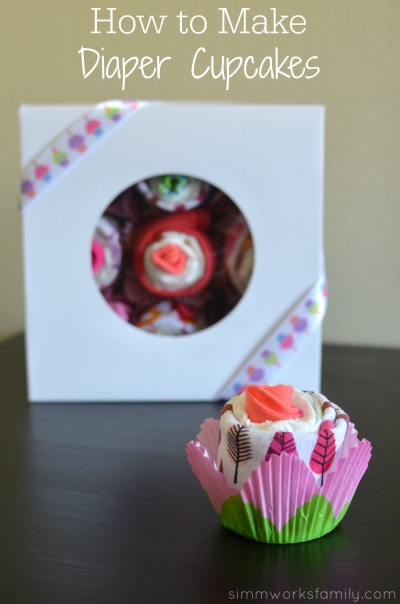
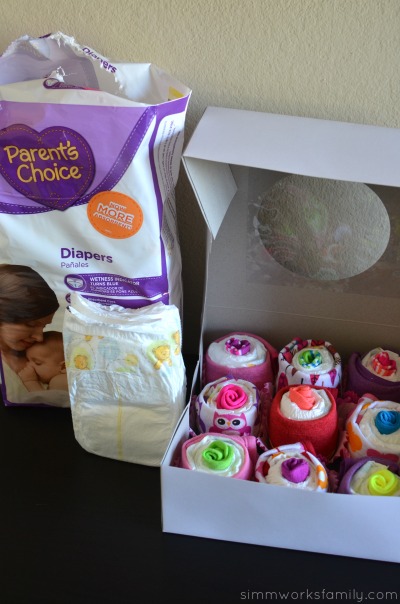
Baby Shower Gifts with Diapers: A Tutorial on How to Make Diaper Cupcakes

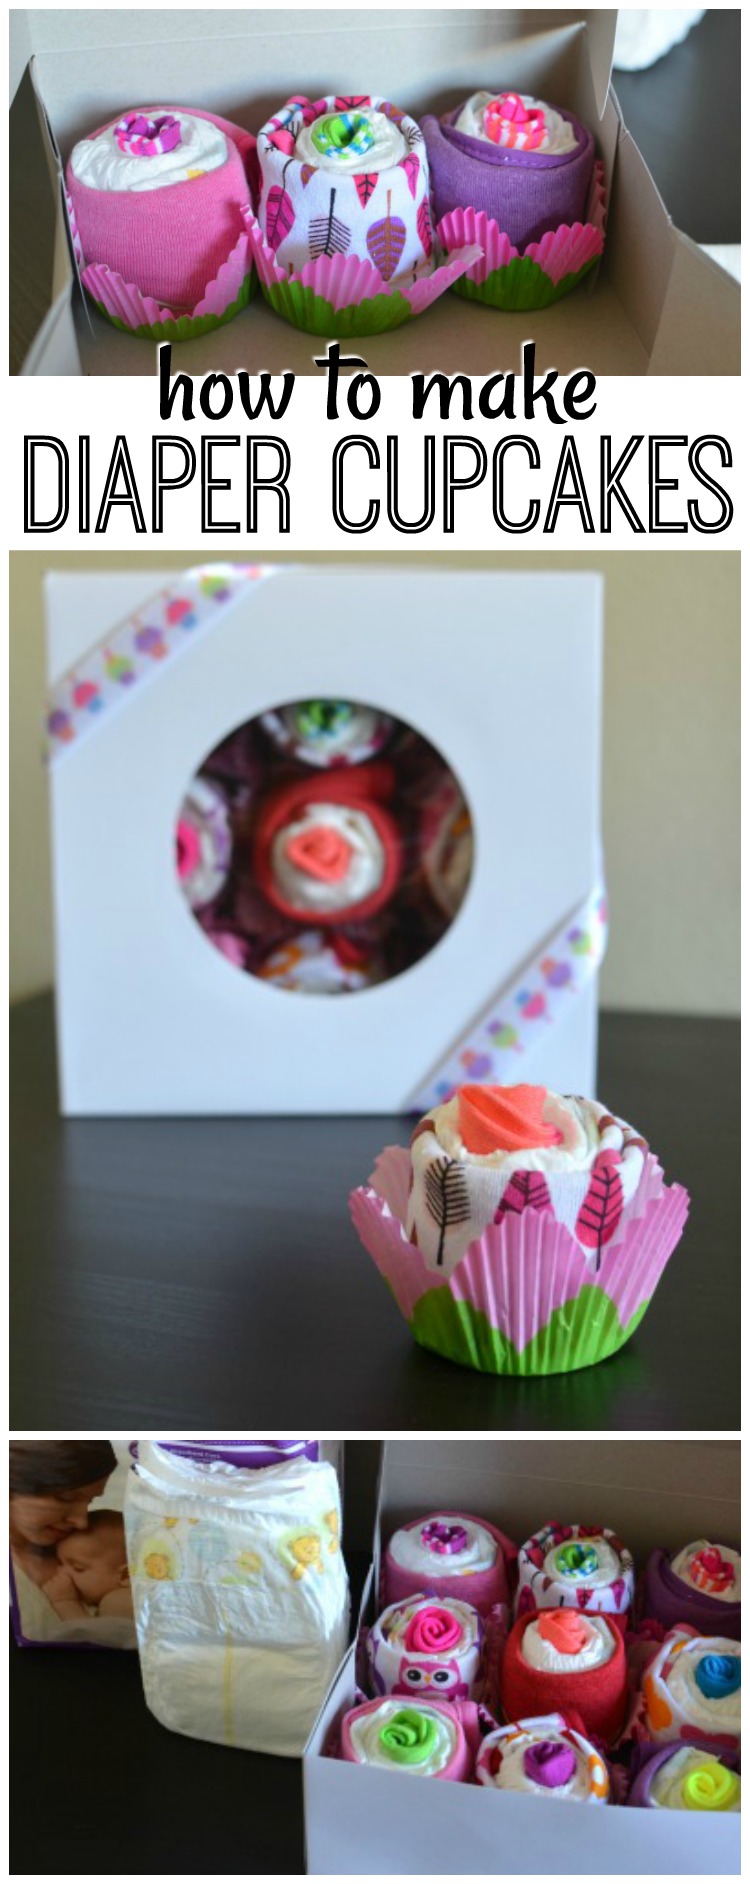
How to Make Diaper Cupcakes - a simple and easy tutorial for the perfect baby shower gift

Running a playgroup means that I know a lot of expecting mamas. Whether it’s their second, third, or fourth child, I always love to have a gift to give the expecting mama-to-be can use! Now usually I have a stock pile of handmade gifts ready to grab and go to include with something the mom has registered for to put a more personal touch on the gift.

With this pregnancy and the craziness of our lives lately I haven’t had a chance to make anything and my stockpile is dwindling. So I figured I’d do myself a favor and get started on an easy baby shower gift with diapers for one of my friends who’s expecting her third in November.

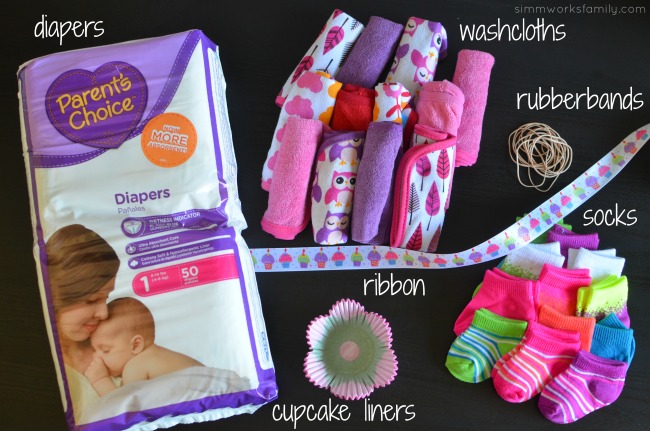
This diaper cupcake tutorial is not only easy but includes all of the essentials needed for a newborn… diapers, socks, and washcloths! Because once you get to the third child you need new socks and washcloths!

Don’t want to make your own? Purchase a set of 9 diaper cupcakes here from our Etsy store! 

How to Make Diaper Cupcakes - what you need

How to Make Diaper Cupcakes

What You’ll Need: 

What you do: 

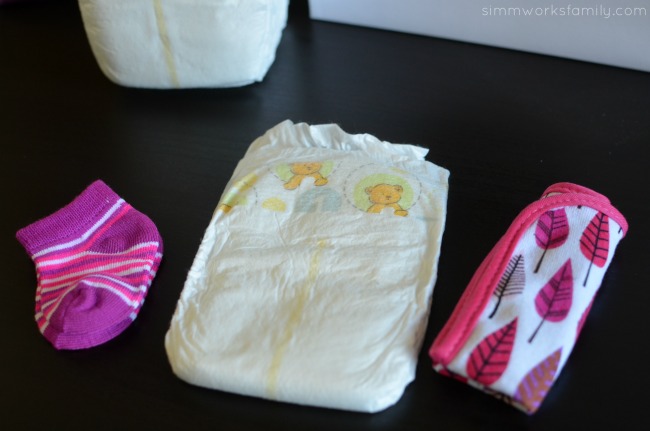
How to Make Diaper Cupcakes - start with socks, diaper, and washcloth

1. Grab a pair of socks, a diaper, and a washcloth.

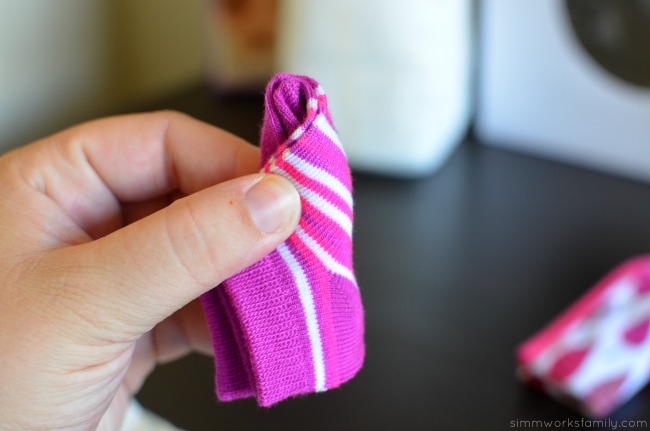
How to Make Diaper Cupcakes - roll sock

2. Roll the socks up from the toes to the heel.

How to Make Diaper Cupcakes - fold diaper in half lengthwiseHow to Make Diaper Cupcakes - wrap folded diaper around sock

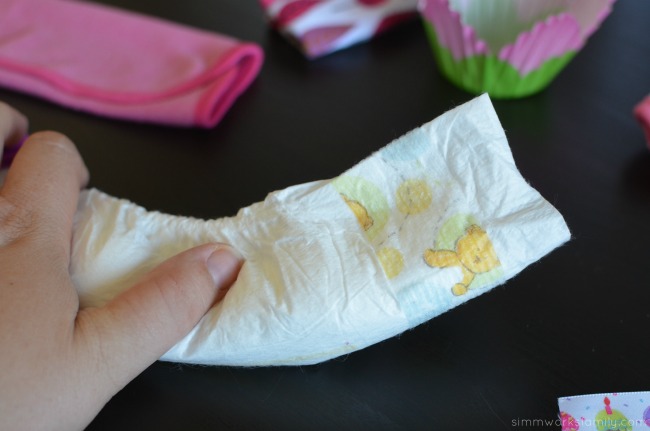
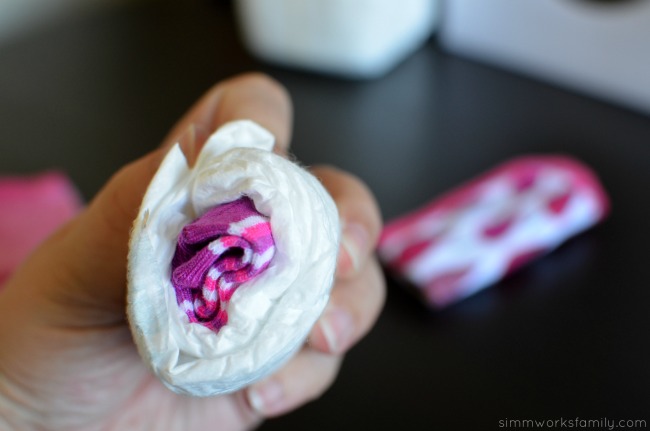
3. Flatten the diaper and fold in half lengthwise. Wrap diaper over socks tightly.

How to Make Diaper Cupcakes - wrap with washcloth and cover with rubberband

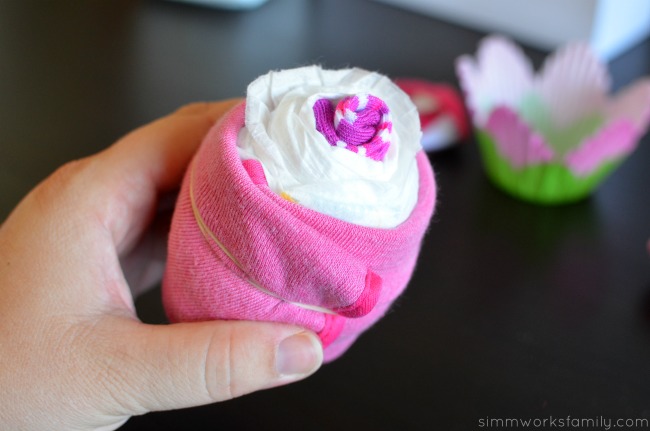
4. Fold washcloth into thirds. Wrap washcloth over top of diaper and wrap with a rubber band on the bottom third of the cupcake.

How to Make Diaper Cupcakes - cupcakes in cake box

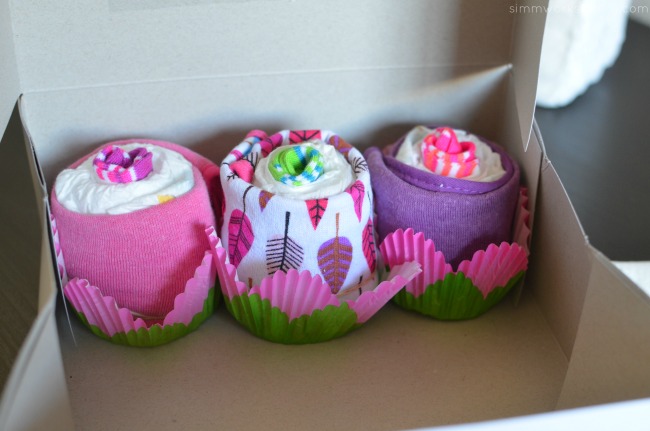
5. Place cupcake into a cupcake liner and put in cake box. Wrap cake box with festive ribbon and add a card for the recipient!

How to Make Diaper Cupcakes with Parent's Choice Diapers

Once you’re all done making these cute diaper cupcakes you can give the rest of the diapers to the expecting mama. I know how important it is to be well stocked on diapers when baby comes home!

What’s your favorite way to doctor up baby shower gifts?

This post was originally featured on September 8th, 2014.

Love this gift idea? Check out a few others!

Pin this article for later! 

Click the Pin button on the image below to save for later. 
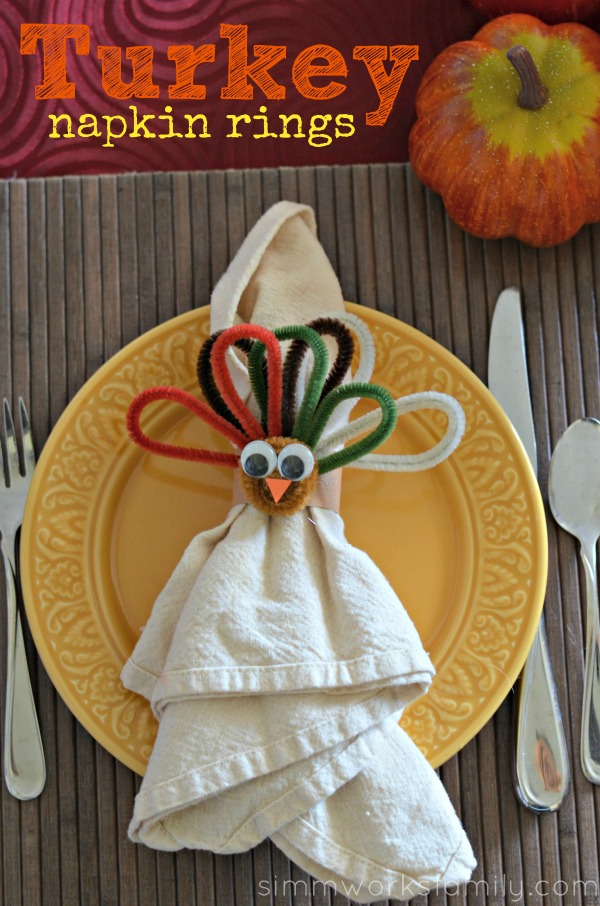
Here’s a Quick Way to Make Turkey Napkin Rings for The Kids Table

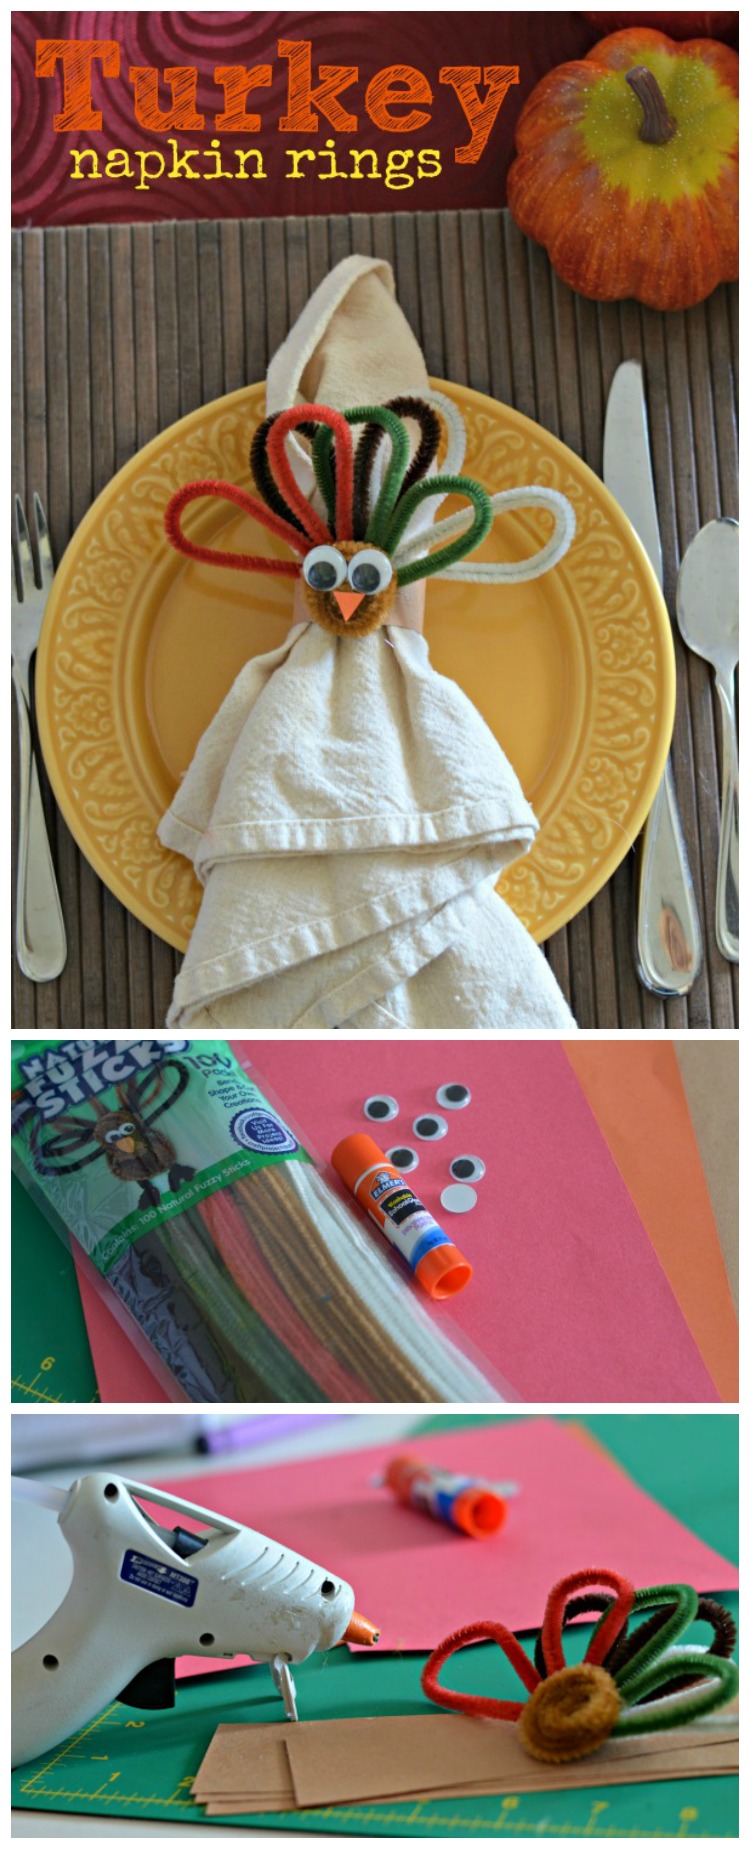
Looking for ways to make your Thanksgiving table festive? These turkey napkin rings will do just that! Grab a few supplies and get crafting!

Turkey Napkin Rings resized

Looking for ways to make your Thanksgiving table more festive? Well, these turkey napkin rings will do just that!

Plus it’s an easy craft to get the kids involved in and they’ll be able to tell everyone around the table how they helped.

This is a craft you can easily do ahead of time if you already have the napkins you’re going to use. So check one more thing off of your holiday list and start crafting!

Don’t want to make them yourself? Buy a set of 4 for $10 on Etsy

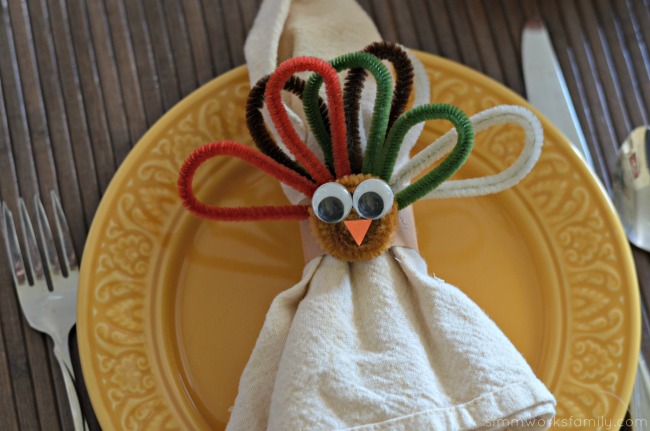
Turkey Napkin Rings close up

Turkey Napkin Rings

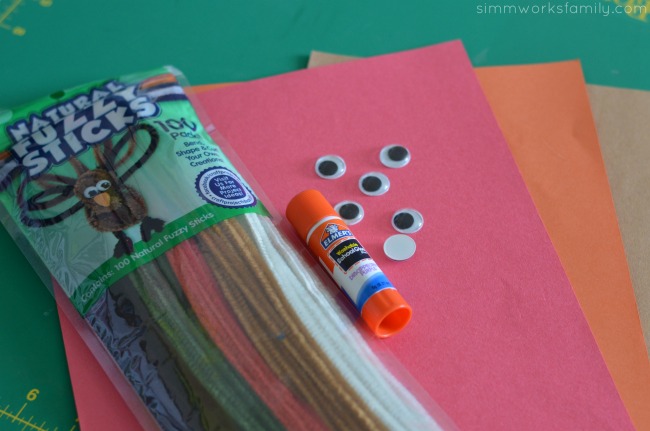
What you’ll need:

Turkey Napkin Rings materials

What you do:

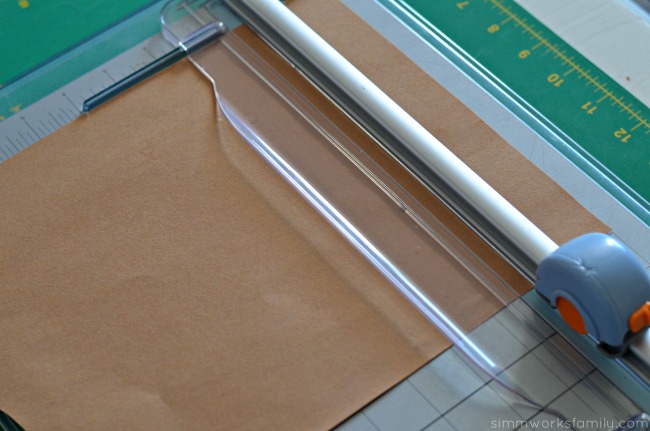
1. Cut brown paper widthwise into 2″ strips. Cut as many strips as you need napkin rings. Set aside.

Turkey Napkin Rings cut strips of brown paper

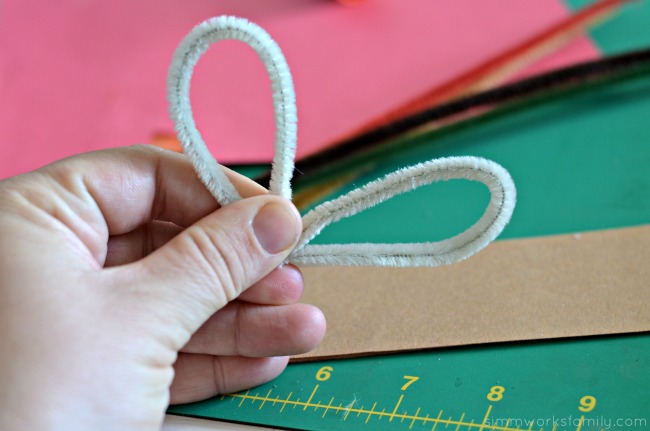
2. Grab pipe cleaners and start making feathers. Bend pipe cleaner in half and then make two loops. Use ends to wrap everything together so the loops stay closed.

Turkey Napkin Rings making feathers

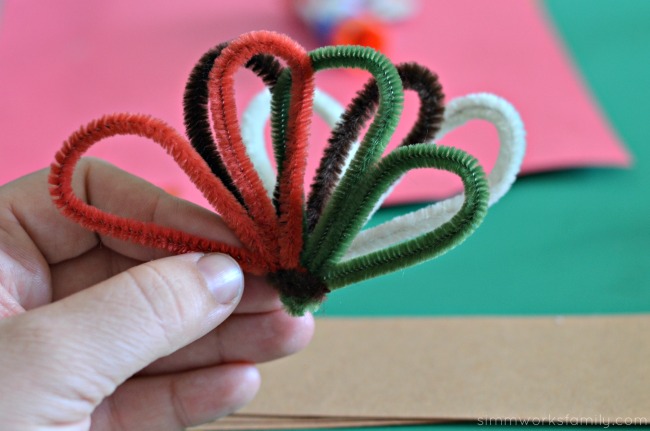
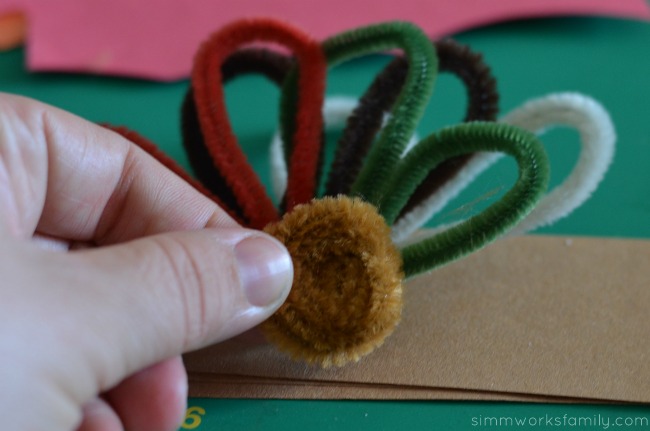
3. Repeat with rest of colors (I used 4 colors). Using the excess of one colored pipe cleaner, wrap all feathers up together.

  Turkey Napkin Rings attach feathers together

4. Using a light brown pipe cleaner, make a circle by spinning the pipe cleaner around in a spiral. Tuck in the end of the pipe cleaner so that it stays together and is not visible.

Turkey Napkin Rings pipe cleaner turkey head

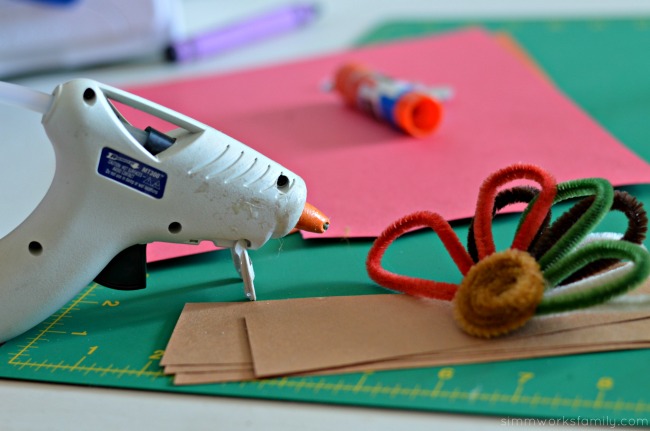
Turkey Napkin Rings glue gun

5. Grab your glue stick or glue gun and adhere brown circle to the feathers. (side note: I became frustrated with my glue stick and opted for the glue gun but my kids used the glue sticks.)

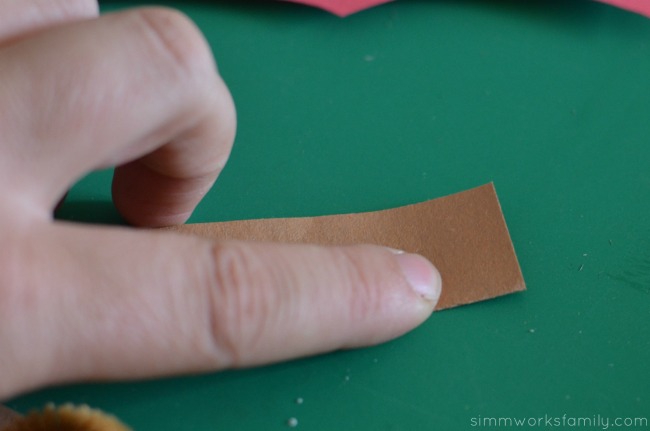
Turkey Napkin Rings fold paper in half

6. Grab brown strips of paper and fold in half lengthwise.

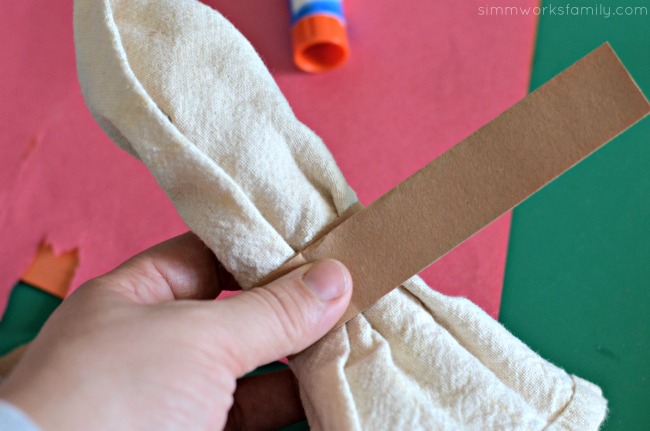
Turkey Napkin Rings measure and cut paper

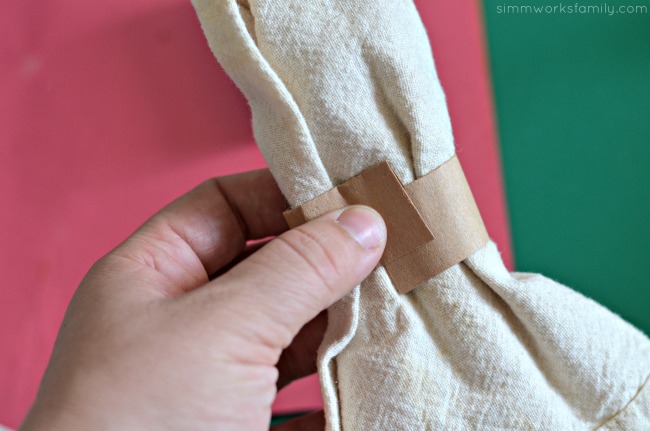
7. Wrap around napkin and cut off any excess (ends of paper should overlap by about an inch).

Turkey Napkin Rings tuck in ends

8. Tuck one end of the paper into the other end to secure it.

Turkey Napkin Rings glue turkey to napkin ring

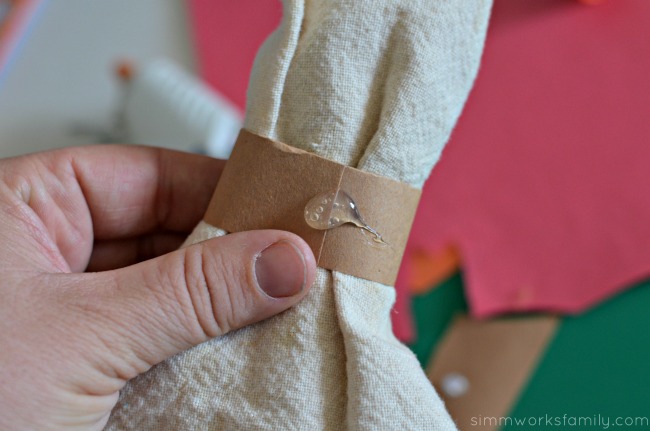
9. Add a dab of glue on the seam of the tucked in paper and adhere turkey body to the napkin ring.

Turkey Napkin Rings glue turkey eyes and beak

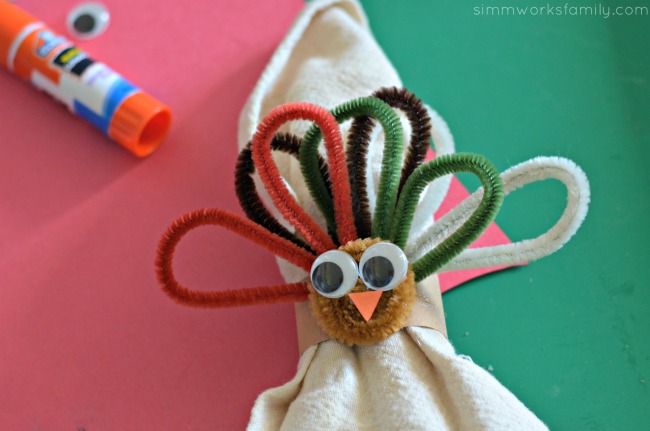
10. Add googly eyes, beak, and anything else you might want to include onto the face of the turkey.

Turkey Napkin Rings close up

You’re all set! Now repeat this until you have enough napkins for everyone coming over. Once everyone is ready for dinner all they have to do is tear the back of the paper to access their napkins or simply tug the napkins out.

How awesome is that?

What’s your favorite turkey craft?

Looking for more Thanksgiving inspiration? Read on! 

Pin this article for later! 

Click the Pin button on the image below to save for later. 
This post was first published on October 30, 2013

Wow Guests with These Easy DIY Thanksgiving Door Decorations + a DIY Cornucopia Wreath Tutorial

This shop has been compensated by Collective Bias, Inc. and its advertiser. All opinions are mine alone. #DIYHolidayWithSCJ #CollectiveBias

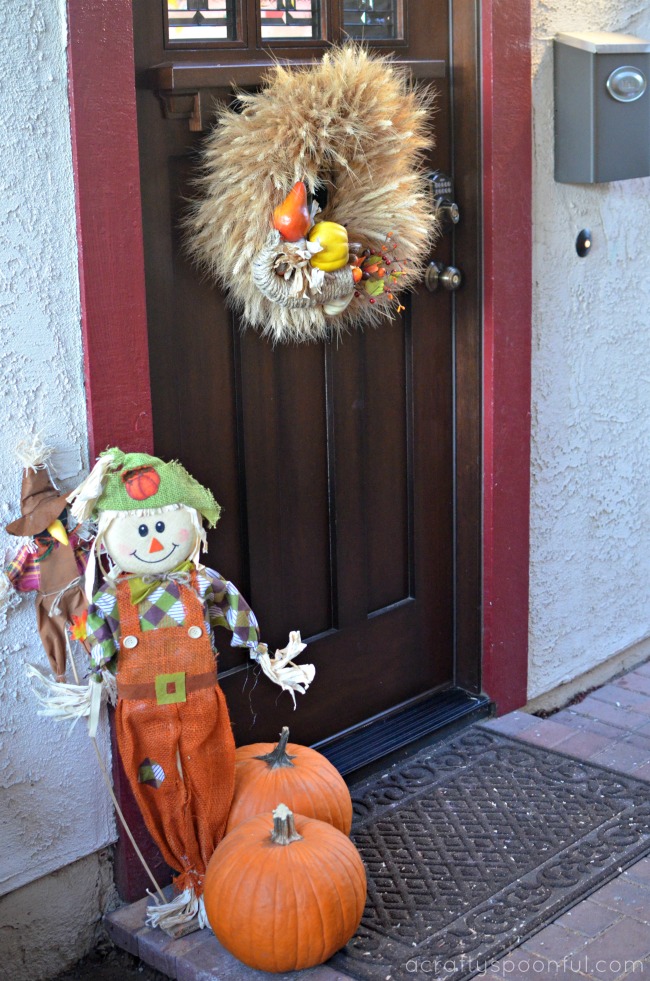
With Thanksgiving right around the corner, we’re making sure our home is in tip-top shape for guests. As the holidays get nearer, you never know who might stop by at any given moment. And the first thing they see when coming up to our home is our front door. So we’re sprucing things up with these easy DIY Thanksgiving door decorations and a simple DIY Cornucopia Wreath.

When we first moved into our new home, the one thing that stuck out like a sore thumb was the ugly solid brown door that stood in the doorway of our home. I didn’t care for it much and it always bugged me that it didn’t show off the awesomeness that is our home. So when my husband found a door in the exact style we were looking for on clearance at Home Depot, we picked it up right away and he installed it. Instead of leaving the trim around the door brown, we brightened things up with a deep red color to really make the door pop. 

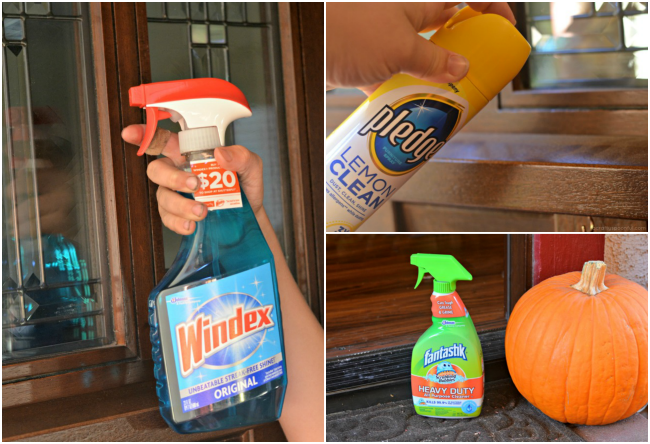
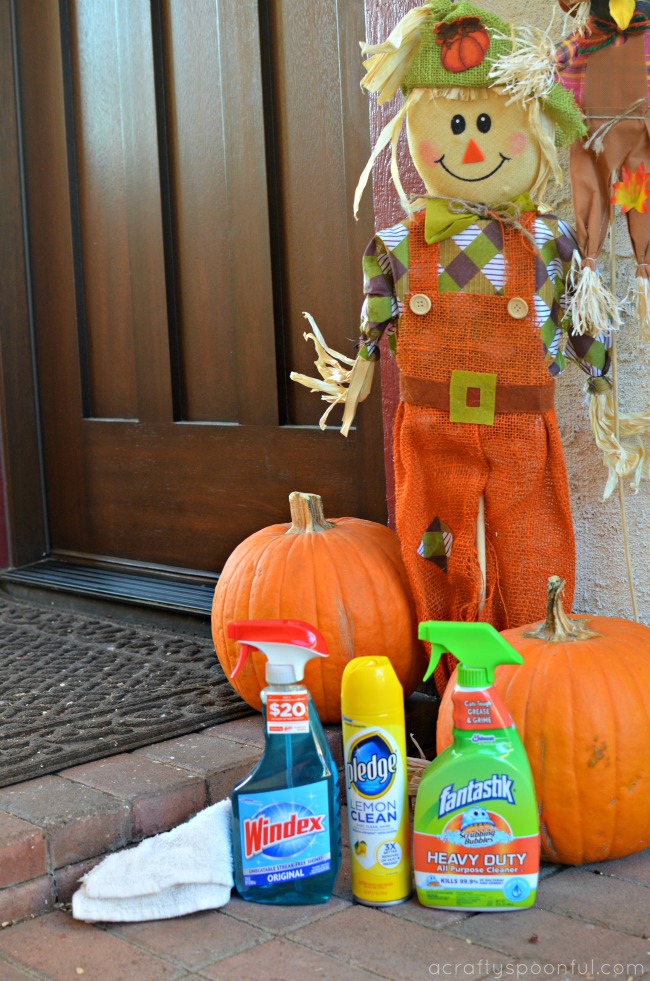
To keep the door in tip-top shape, we rely on our go-to cleaning products to spruce things up. With the door being the first thing all walk through to enter the home, it can get a bit beaten up over time and gather dust and grime from the outside elements. 

Since our new door has three windows in it, we keep Windex® Original close by. It has an Unbeatable Streak Free Shine and starts working on dirt and grime even before you wipe*. Trusted for generations, Windex® Original cleans and shines glass, mirrors, and more! 

Pledge® beautifies and enhances the appearance of your hard surfaces and our finished, sealed door always looks so much better after we wipe it down with Pledge®. Pledge® Lemon Clean can be used on furniture all around the house to quickly clean, condition and protect –all while leaving behind the classic, fresh lemon Pledge® scent. It also features Allergen Trappers® to remove dust and up to 90 percent of the allergens found in dust. That means in addition to cleaning the front door, we can clean up the other household hard surfaces including wood, laminate, stainless steel, leather, marble, granite and plastic.

Scrubbing Bubbles® Fantastik® 32 oz. All-Purpose Cleaner is the perfect cleaner for our door threshold. It gets a beating as the kids run in and out of the home so we need a powerful antibacterial solution cuts to the center of grease and grime and dissolves it on contact and disinfects the area. And the no-rinse solution means you don’t have to spend as much time cleaning.

Easy DIY Thanksgiving Door Decorations

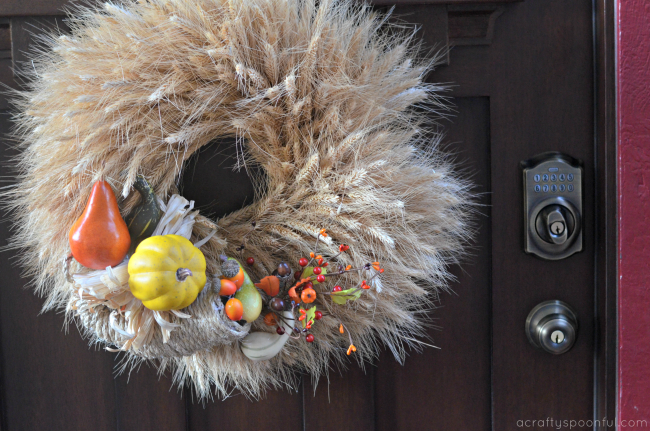
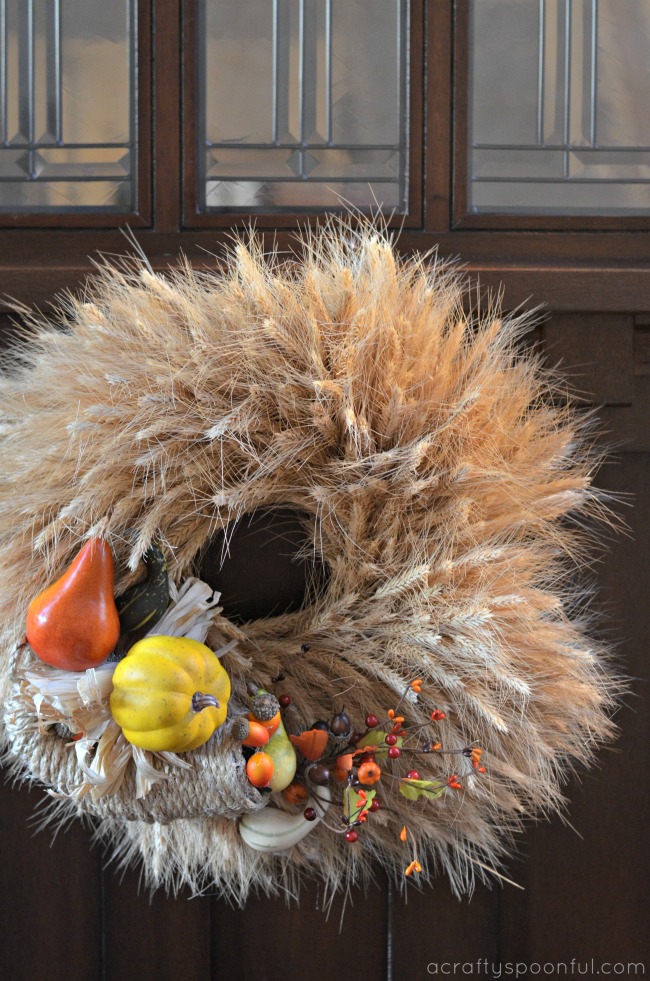
Now that our door is all nice and clean, it’s time to spruce things up even more with a few easy DIY Thanksgiving Door Decorations. This DIY Cornucopia Wreath is not only easy to make, it can be saved to use year after year! 

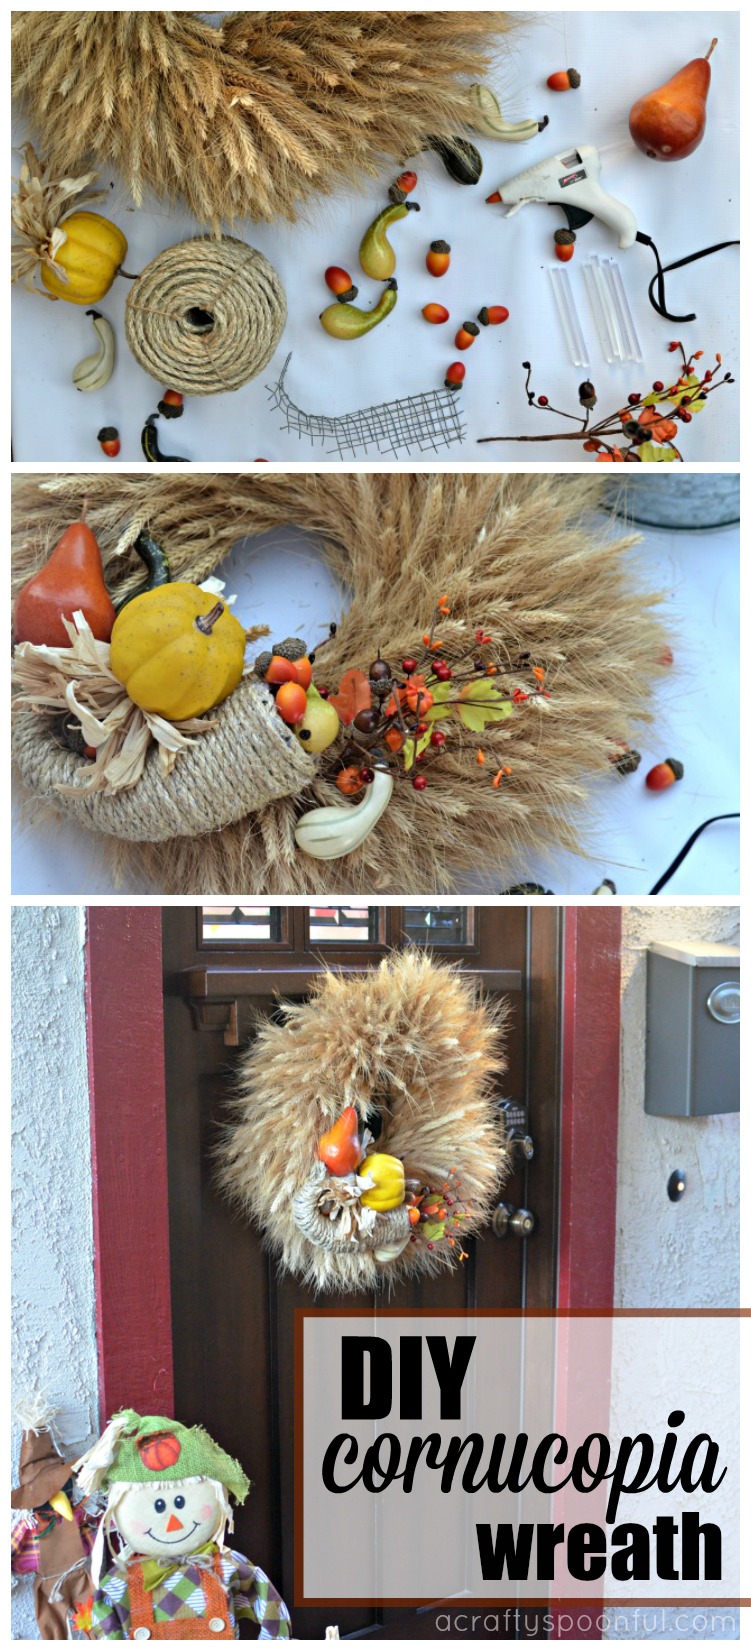
DIY Cornucopia Wreath

What you’ll need: 

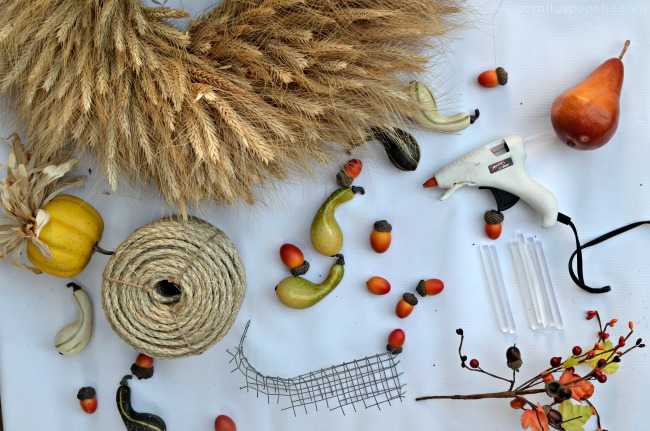
  • Wheat wreath (found at Home Depot)
  • chicken wire
  • twine
  • hot glue gun
  • hot glue sticks
  • plastic/fake fruit and veggies

What you do: 

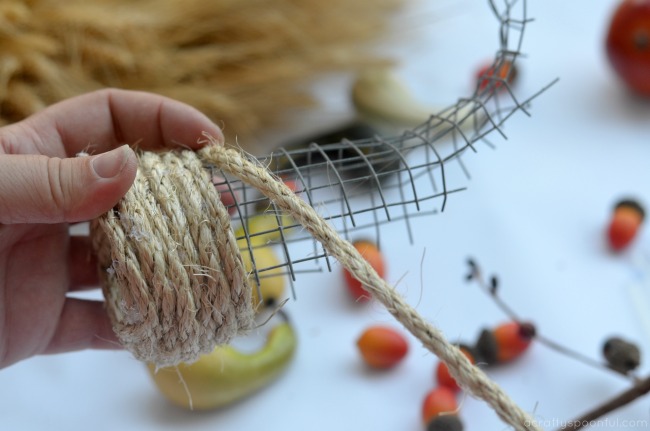
1. Cut a wide triangle out of the chicken wire and form into a cornucopia shape. 

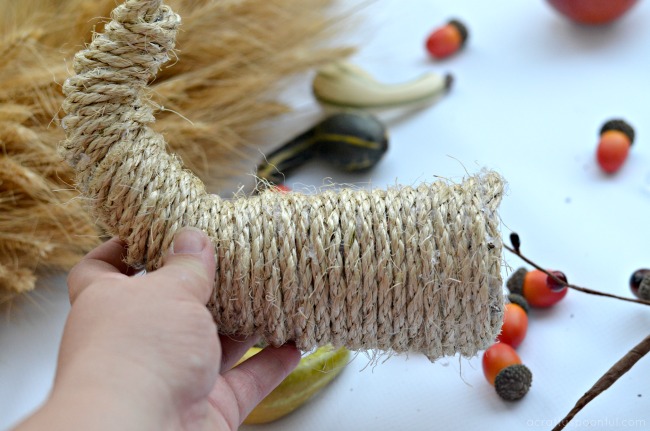
2. Using the twine, wrap around the cornucopia frame and secure twine to the form and itself with hot glue. 

3. Continue wrapping the twine all the way down the form to the smallest tip and then secure the end by sticking it back in the end of the form.

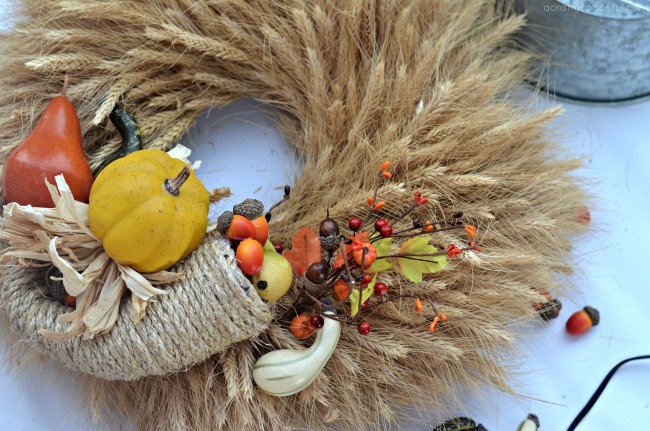
4. Secure the cornucopia onto the wheat wreath with hot glue. 

5. Add decor in and around the cornucopia by hot gluing it in place. Make sure to balance the size of each piece and the colors. 

6. Hang on the door and step back to enjoy your handiwork! 

We grabbed a fun scarecrow and stacked two of the pumpkins from our trip to the pumpkin patch next to it to complete the Thanksgiving door decorations.

Keeping things simple yet welcoming is key. The front door doesn’t need too many decorations so choosing the pieces you use wisely will help keep a nice balance.  

Be on the lookout for Windex® and Scrubbing Bubbles® Fantastik® product promotions on display in Home Depot stores until 10/31/17, and Pledge® products on display starting 11/1/17. You can find all products in the cleaning products aisle at your local Home Depot store. 

What do you do to spruce up your front door during the holidays? 

*Claim Based on Windex® Original lab testing against leading competitor glass cleaners per AC Nielsen 52 weeks ended 7/29/2017

Love what you read? Check out these great posts! 

Pin this article for later! 

Click the Pin button on the image below to save for later. 


© A Crafty Spoonful - All Rights Reserved
It is OK to use one of my photos provided a link back and/or proper credit is given. It is NOT ok to copy and paste a whole post including instructions. Please do not remove watermarks or alter images in any way. Please contact me with any questions at danielle@acraftyspoonful.com
.