How Plant Tape Can Change Farming in California

Today we’re sharing how Plant Tape can change farming in California. This sponsored post is in partnership with the California Farm Water Coalition.
When I was growing up most of the produce I ate came from cans. And the only lettuce we ate was iceberg. As I got older and started to expand my palate, I realized how many fruits and veggies were out there to enjoy. I have to wonder if the lack of veggies in my life were due to the availability or my family.

Last month I was able to get an inside peek into the world of farming and produce in California thanks to the California Farm and Water Coalition. I was able to walk through and see for myself how hard the owners and laborers on our California farms work. And was able to hear first hand what challenges they’re facing in today’s world of farming.
Innovation and Technology in Agriculture

At each of the farms we toured there was one thing in common. Lack of laborers. With today’s political climate and the difficulty of getting enough H-2A visas (not to mention the cost) farms are seeing less and fewer workers show up each day to pick the crops. And unpicked crops means wasted food. Laborers don’t just pick the crops, they also help plant the crops as well.

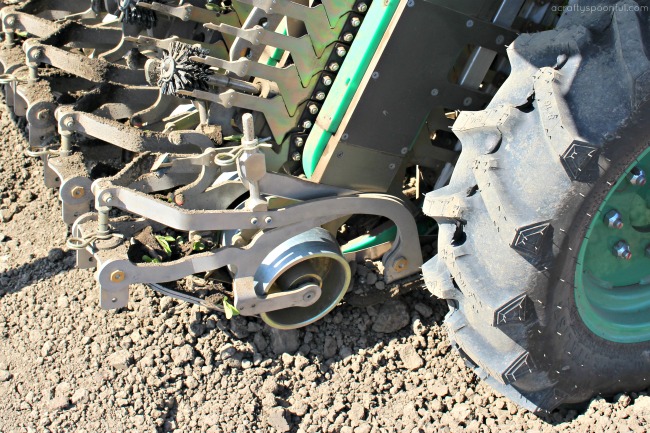
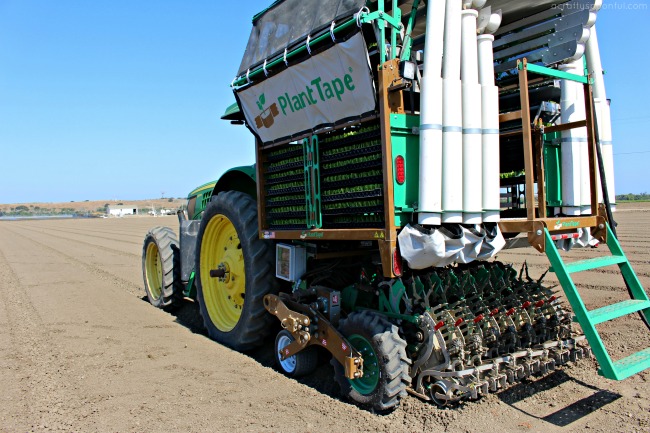
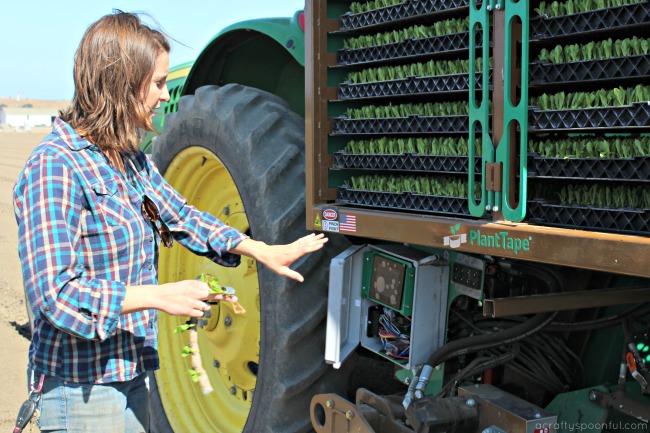
In an effort to come up with a solution to the labor shortage, Tanimura & Antle turned to innovation and technology in the agricultural world to help aid in their crop planting. Did you know that seedlings need to be placed in the right direction or else they won’t grow? With most technology today, the one underlying problem was the inconsistency of the placement of the seedlings. Enter Plant Tape and Tanimura & Antle have seemingly found the solution they were looking for.
The Power of Plant Tape

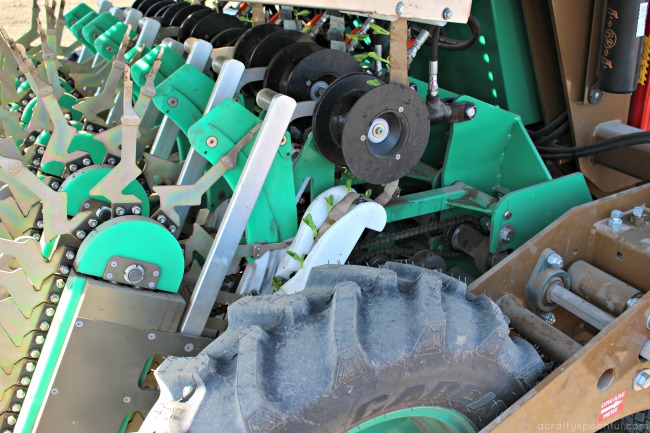
Originally developed in Spain, PlantTape was acquired by Tanimura & Antle in 2014 for technical development and commercialization in the United States. The PlantTape automated transplanting system is ideal for farmers wh are looking to increase efficiency and productivity for their crops. This system is more efficient than conventional transplanting methods.

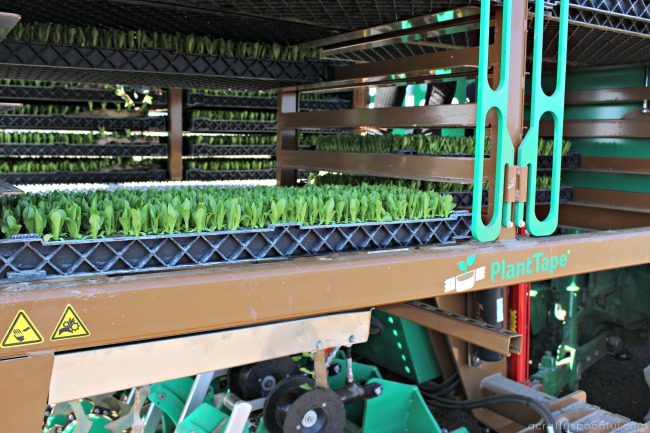
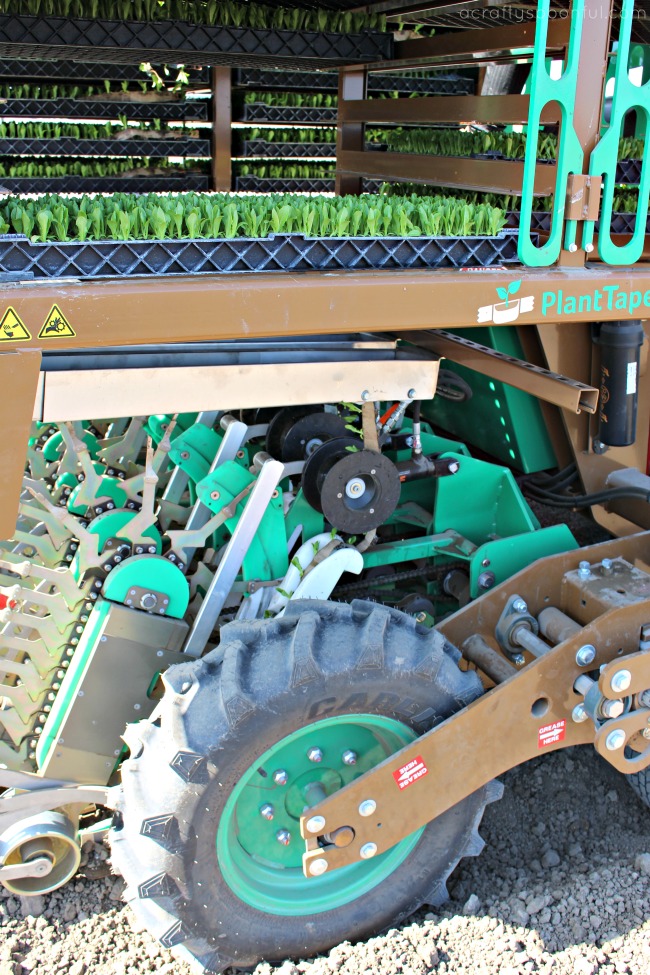
PlantTape offers a fully integrated system from sowing the tape, to germination and nursery care, to transplanting in the field. PlantTape is commercially used to plant lettuces, broccoli, cauliflower, celery, onions, tomatoes, cabbage. Other crops are currently on trial.
8 Reasons Why Plant Tape Is Changing the Agricultural Future

1. Less Plant Stress  

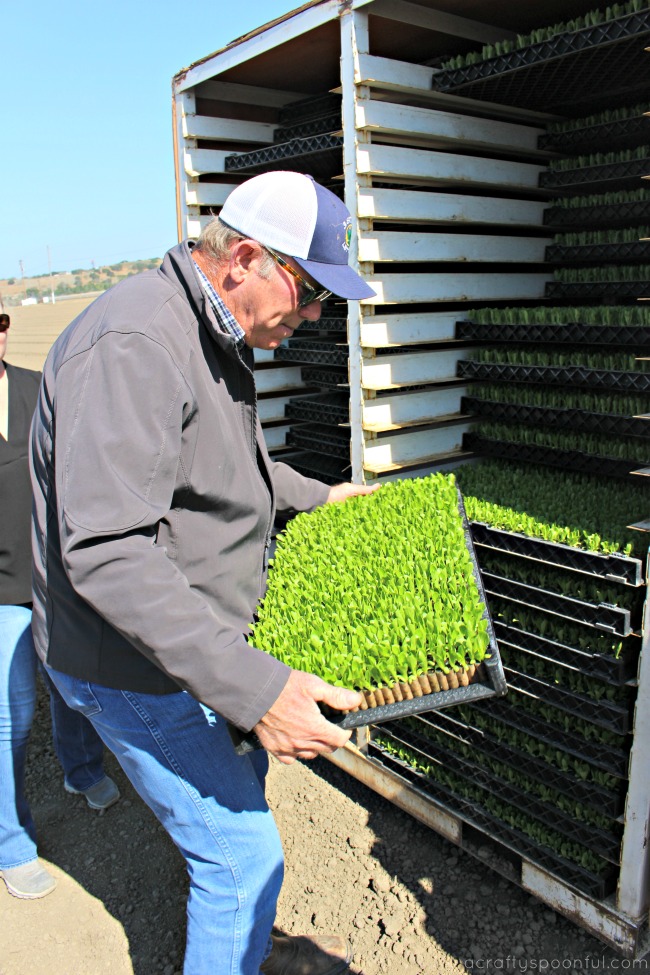
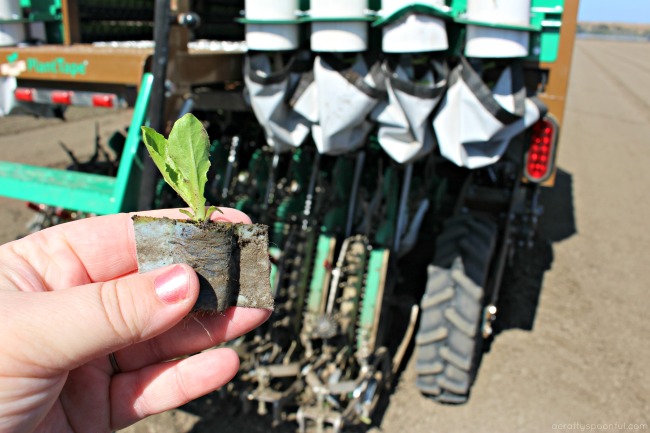
Plants are germinated in the nursery under ideal conditions and then transplanted in the field at optimal spacing without causing stress or damage to the plants or the planting beds.

2. Greater Plant Density

PlantTape provides a greater density of plants per tray than the standard plug system to maximize efficiencies.

3. Reduced Seed Cost

Due to the controlled nature of this process, fewer seeds are wasted through misplanting, blowing away, etc. This lowers the cost of seeds per crop.

4. Reduced Labor

The automated transplanter minimizes the need for additional labor in the field and allows farms to focus on utilizing their workers in other aspects of farming.

5. Transplant Flexibility

PlantTape seedlings can be transplanted at nearly any stage of maturity, from a few days after germination to fully developed seedling plants. This provides tremendous flexibility with logistics and planting schedules.

6. Sustainability

PlantTape uses less peat than conventional transplanting plugs and all of the PlantTape materials are biodegradable. There are also water conservation advantages with less irrigation needed in the field.

7. High Quality Crops

Plants are germinated in the nursery under ideal conditions and then transplanted in the field at optimal spacing without causing stress or damage to the plants or the planting beds. The result? A uniform and high quality crop.

Want a peek at the process? Check out more here.
In addition to innovation and technology in the agricultural world, we also learned quite a bit about the farming process, the packaging process, and the challenges our farmers face in the world today. We’ll be sharing more of our experience with California farms soon to continue the conversation.

But for now, check out these posts from my influencer friends who joined me on this trip to learn more: 

13 Things You Didn’t Know About Your Produce 

Have you toured a farm? What did you learn?

Love this post? Check out these articles!
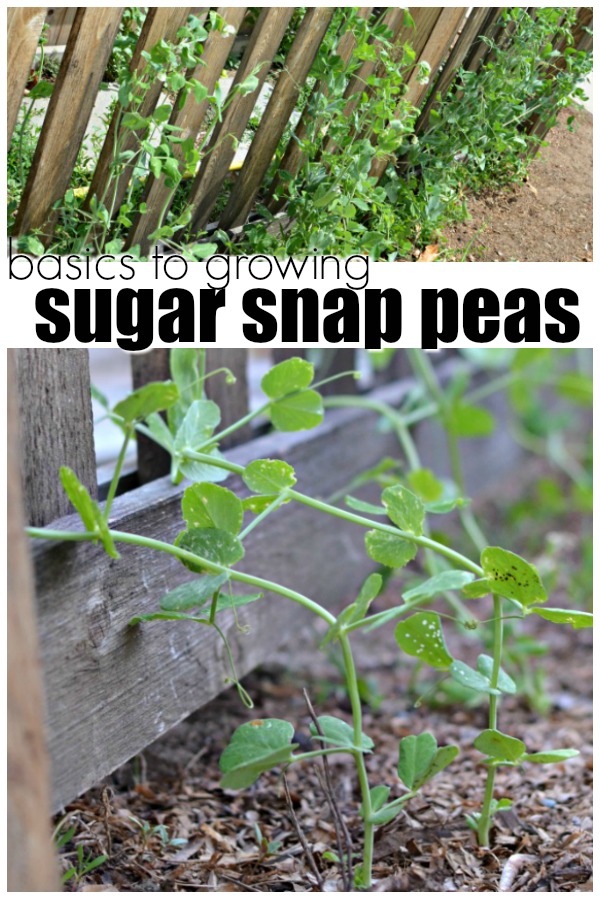
Basics to Growing Sugar Snap Peas

Painted Rock Garden Markers

Using Ladybugs in the Garden

Basics to Growing Sugar Snap Peas

We love being able to grow new things each season. And this season we’re learning the basics to growing sugar snap peas! If you are looking for a great plant for kids to get involved in, you have to try growing sugar snap peas.
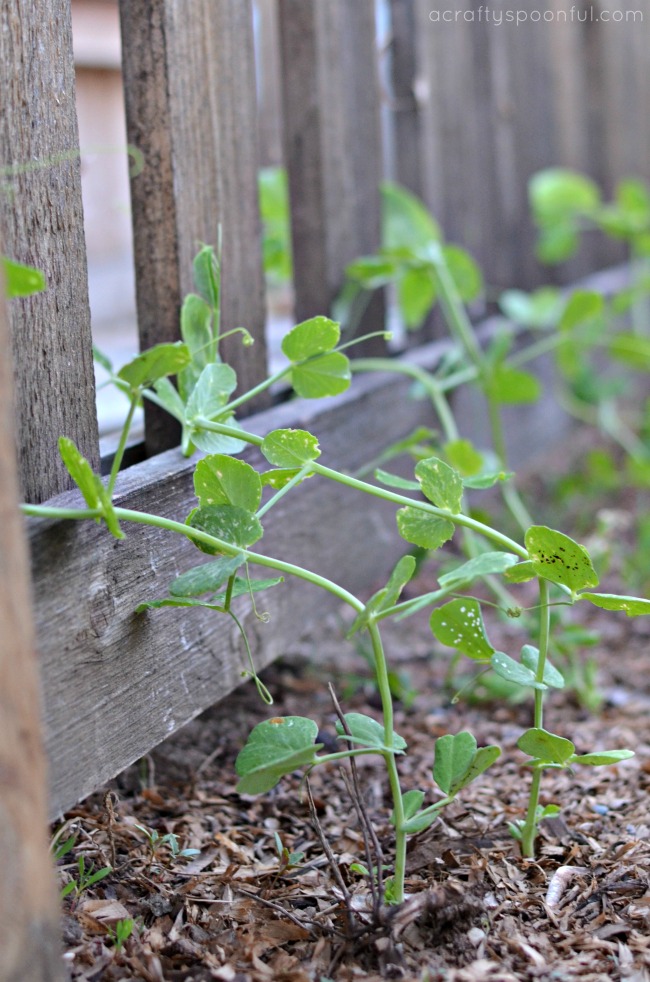
Peas are one of the easiest vegetables to grow from seed that you can choose from, and they constantly give you something to harvest. As long as you provide peas with the things that they need anyone can be a pro at growing peas. There are a few basics that hold true for every variety of pea plant that you are interested in growing, so as soon as you understand those basics you can begin growing your own pea crop.

Once you have decided what type of pea plants to grow, from snap to snow to vine to bush, learn these basics and get started.

Basics to Growing Sugar Snap Peas

Start From Seed

Peas are best grown from seed, so it is always the best idea to decide where you are going to plant and grow your peas and then stick to that site. Pea plants do not do well with transplanting, so it is essential that the garden space or container that they are in is able to provide for their growing and nutrient needs. Do not plant all the seeds that you purchase at once, but just a few at a time so that you can replant in rounds throughout the growing season and always have plants at different stages of growth to harvest from.

Provide For Pea Plant Basic Needs

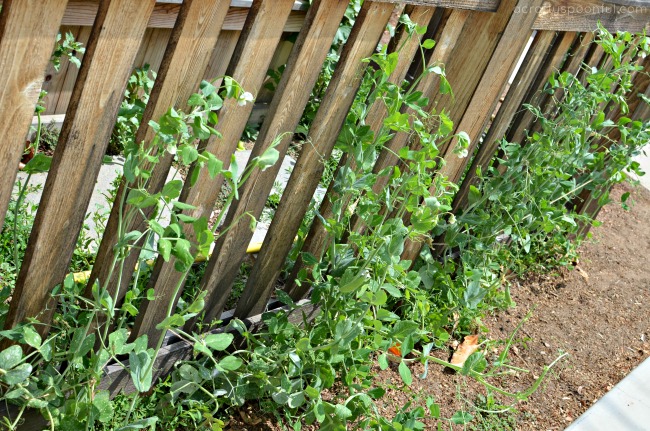
Sugar snap peas require full sun, well-worked soil that is organic-rich soil and space to spread out. Vine varieties of peas need to be planted next to a trellis, fence or stakes so that they have something to grab onto as they climb. Bushy varieties need space to spread out because they form clumps that do not like being crowded. As long as you can provide these three key needs and regular waterings, peas should be able to thrive in your garden with minimal attention.

Thinning Peas

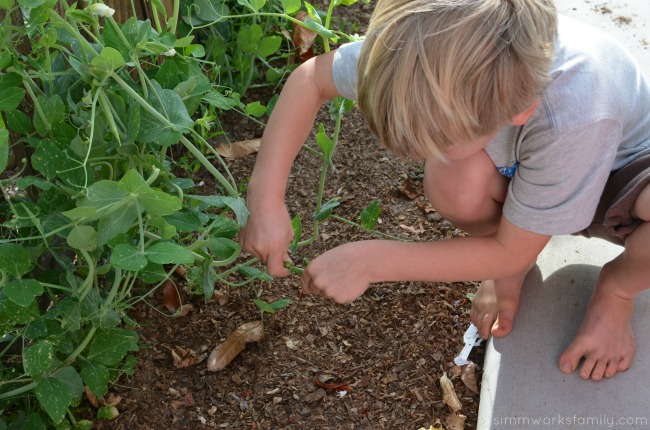
Sugar snap peas should be planted 1 to 2 inches apart and then thinned out to 3 to 4 inches apart, so if you have a very successful show of seedlings, you will have to thin them out more than average. Use garden scissors to thin out your seedlings, or pinch them close to the soil, so that you do not uproot pea seedlings nearby.

Harvesting Your Peas

Pea pods will begin to appear on your plants about 6-8 weeks into their growing season, depending on variety. Do not wait for the pea pods to begin splitting and showing the peas inside, pick them before this happens when they have reached their final length. Pea pods will show bumps from the peas inside, but you do not want them to be bulging open. As long as you harvest early, your plants should give you another crop or two before the plant is entirely spent.

What are you growing in your garden right now?

Looking to grow more in your garden? Try these kid-friendly crops!
DIY Indoor Hanging Herb Garden Ideas

Creating a Beautiful Butterfly Garden

How to Grow Carrots with Kids

Pin this article for later! 

Click the Pin button on the image below to save for later. 

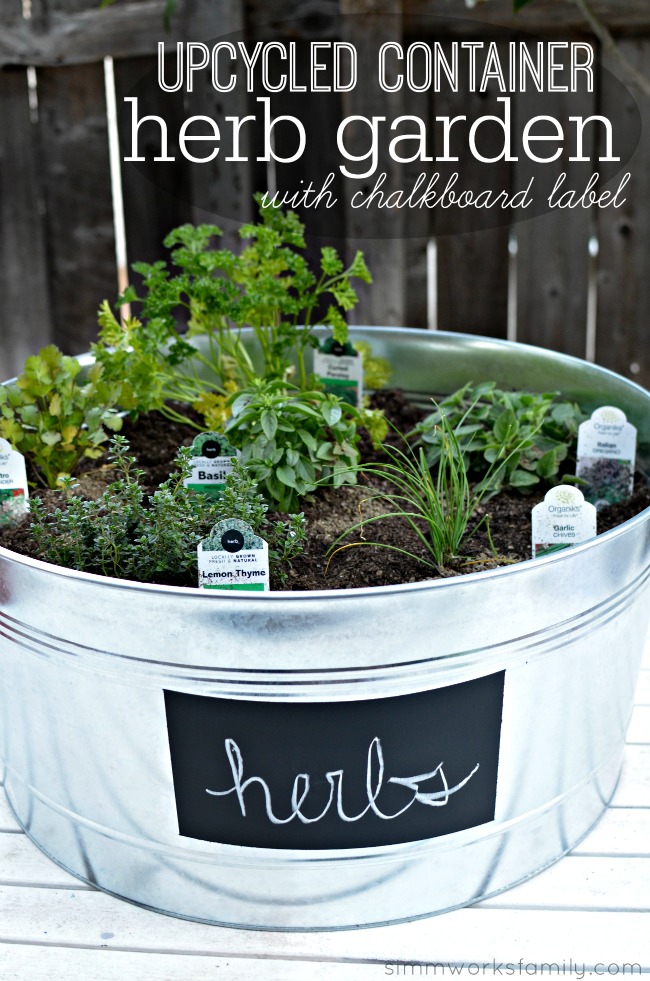
Upcycled Container Gardens: Housing Your Herbs

Upcycled Container Gardens Housing Your Herbs

Around this house, we try to repurpose and upcycle as many things as we can. If it can’t be composted or turned into something else, we try to donate. So very rarely do we end up with things that go in the trash. This makes for a great assortment of containers to be used in the garden.

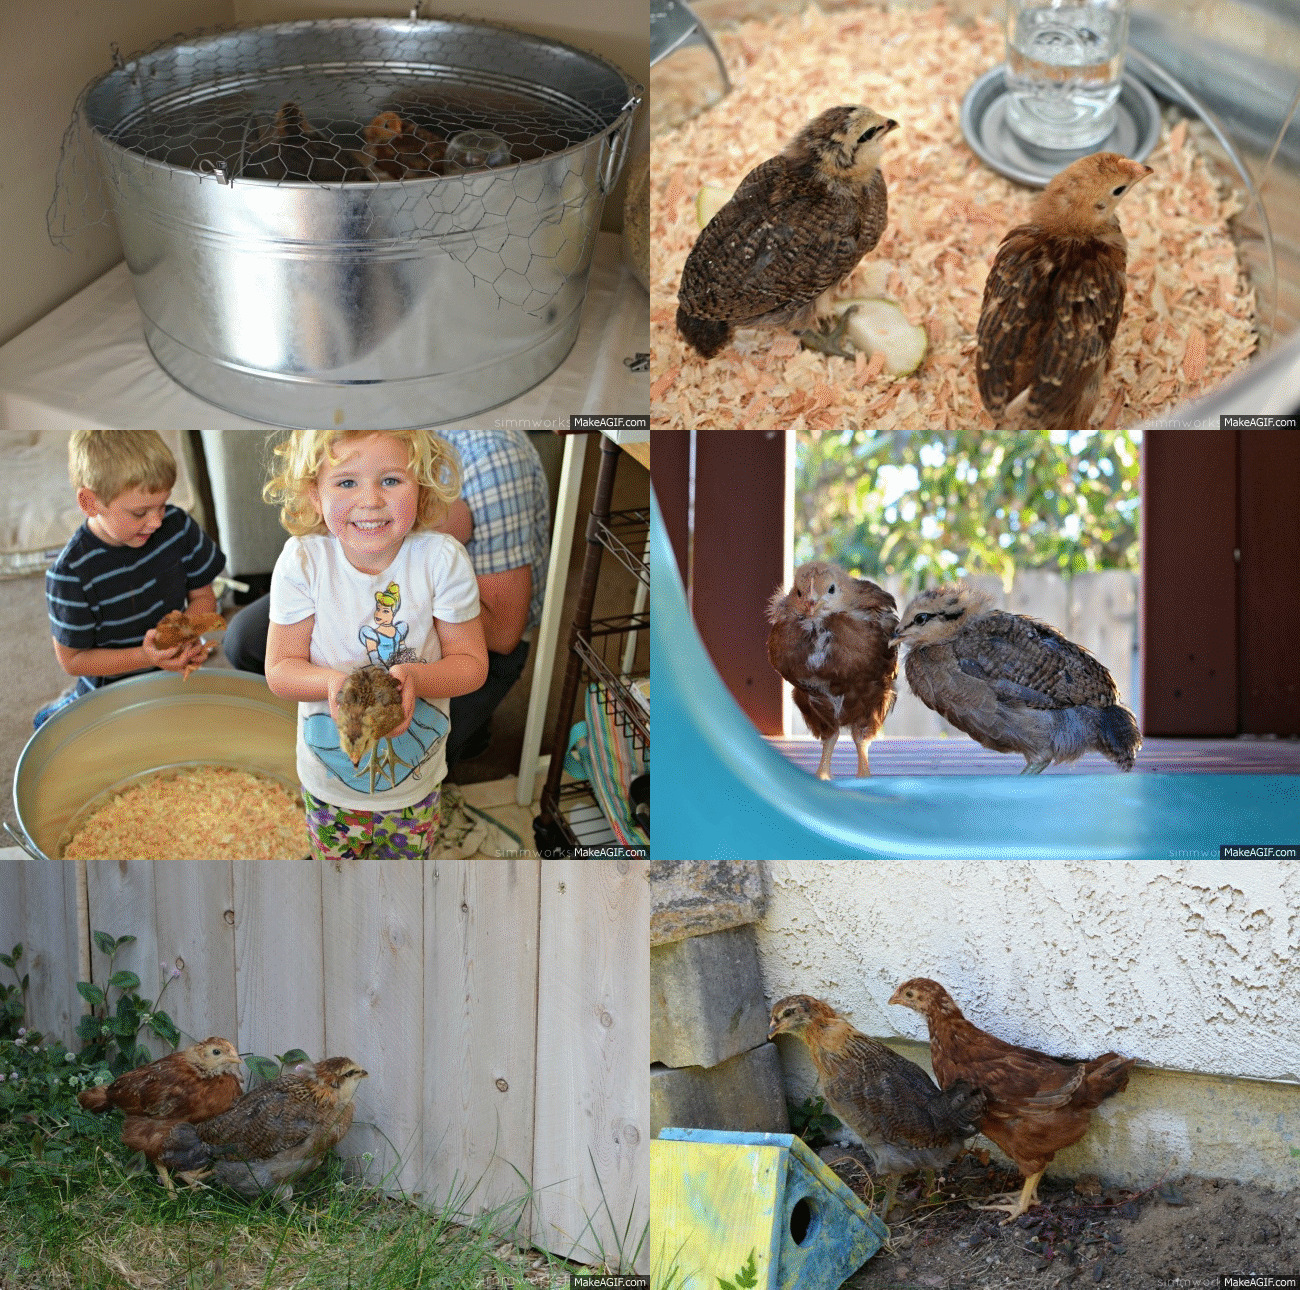
When we picked up our chicks I knew we’d need a little home for them until they were big enough to go straight into our coop. At 3 weeks old they’d need to stay warm indoors so I picked up a metal bucket at our local hardware store.

Since I knew I would only be using the bucket for a short period of time I already had it earmarked for a project I’d wanted to do for quite a while… a stand alone herb garden!

Growing Chicks
I’m not sure if you know this but chicks, like children, grow like weeds! Seriously.

I turned around for a second and these cute little baby chicks are almost chickens at 2 months! But we still have 4 more months until they’re actually laying eggs (so I’m told).

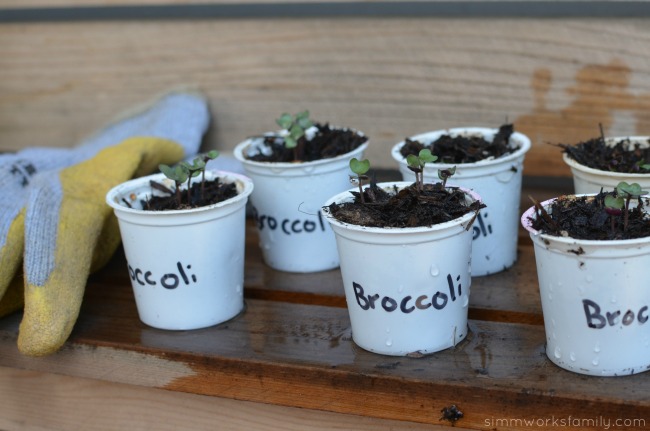
Upcycled Container Gardens - growing seedlings

With so many things growing in our raised beds (like the broccoli that’s sprouting from our DIY K-Cup Seed Starters) we didn’t have any more room for the herbs I love to have on hand for cooking.

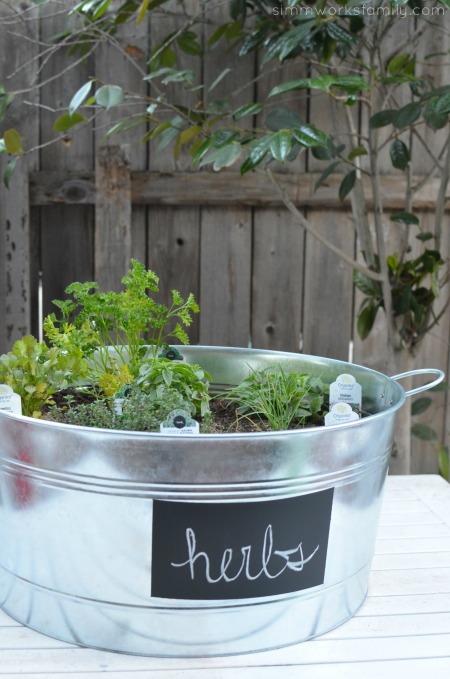
So it just made sense to have a container garden on the patio. What’s a better green work of art than a container garden?

Our next step will be to build a stacked container garden to house the strawberries we’ll be planting soon! How awesome does that sound? It’s as simple as taking this idea and stacking a few smaller containers on top of one another. Then planting in each tier.

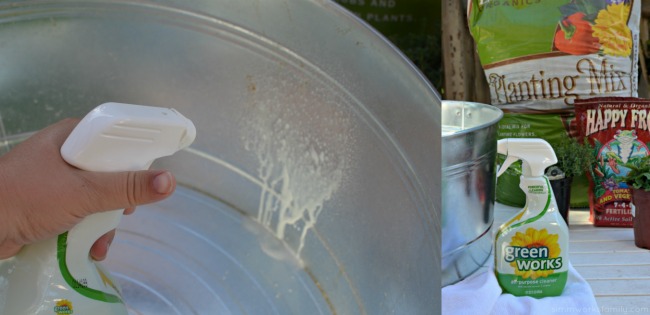
Upcycled Container Gardens - cleaning out the container


Because our tub housed the chicks, I wanted to make sure that I cleaned the container very well before putting the soil and plants inside.

While some might question why I would clean out the container first – don’t people buy chicken manure? – the chicken poo that may be on the container hasn’t been composted yet. And I don’t want any bacteria that may have been left in the container to contaminate my plants.

But more on composting chicken poo later! Let’s get to this herb garden. First up – the chalkboard label.

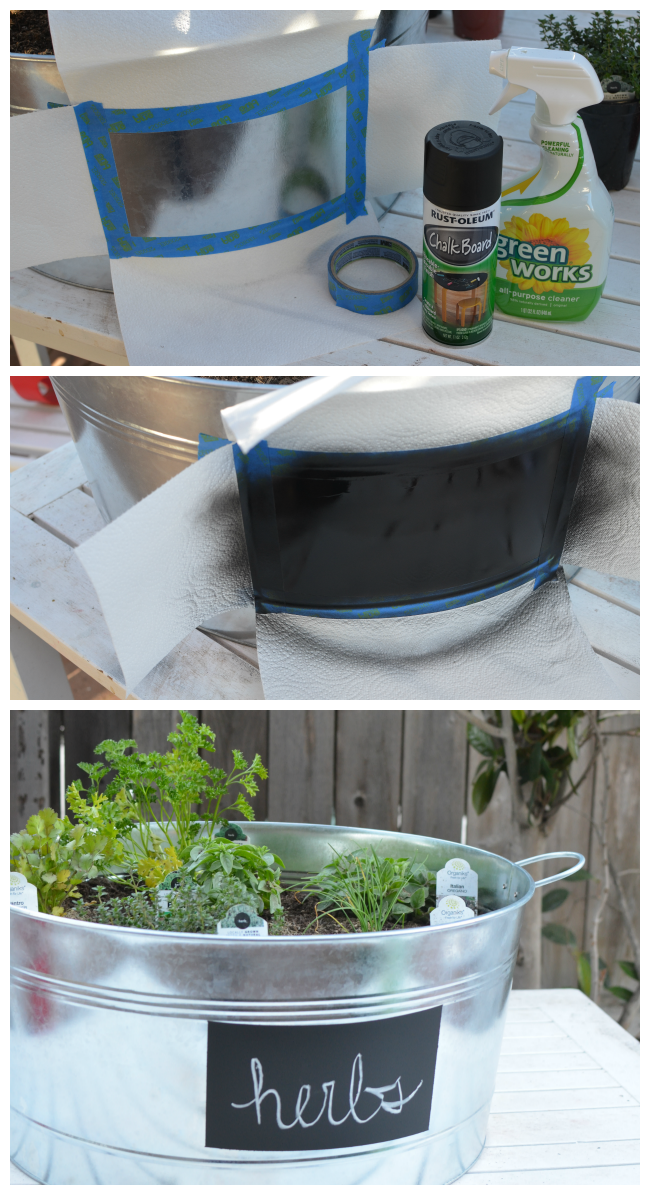
Upcycled Container Gardens - DIY Chalkboard Label

 Upcycled Container Garden Chalkboard Label

What you’ll need:

  • 2 paper towels (can also use newspaper)
  • painters tape
  • chalkboard spray paint
  • metal container

What You Do:

1. Wipe down the area you wish to put the chalkboard paint on with an all-purpose cleaner. Then rinse the container out with water and let dry.

2. Grab two paper towels and cut each in half (4 half sheets). Then cut one-half sheet in half again. You’ll have 3 half sheets and 2 quarter sheets.

3. Using the painter’s tape and the paper towel pieces, create a square or rectangle space to spray paint the chalk onto.

4. Put extra paper towels under the container to protect the table underneath from paint.

5. Using the chalkboard spray paint, spray on two coats of chalkboard paint onto the container. Wait about 20 minutes in between each coat to allow them to dry.

6. Remove the paper towels and tape to reveal your chalkboard label. Write on it with chalk and display for all to see!

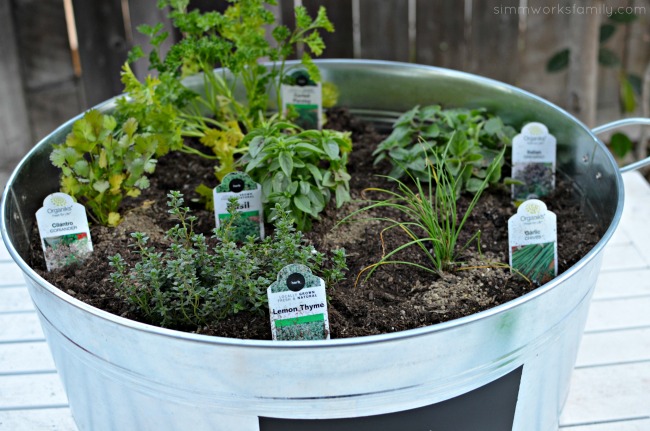
Upcycled Container Gardens - variety of herbs

Tips for Planting Herbs in a Container Garden

  1. Use good soil – find a soil that’s good for growing vegetables or use a good blend of soil and compost
  2. Depending on where you’re putting your container garden, consider the height each herb/plant gets and plant taller herbs in the back
  3. Plant what you know you already use now in the kitchen
  4. Make sure you are also giving your herbs vegetable food (found at any garden center)
  5. Place the container garden in a spot that will receive direct sunlight and make sure to water!

Upcycled Container Gardens with Chalkboard Label

What’s your favorite way to upcycle old containers?

Getting Crafty in the Garden: Painting Rocks for Garden Markers

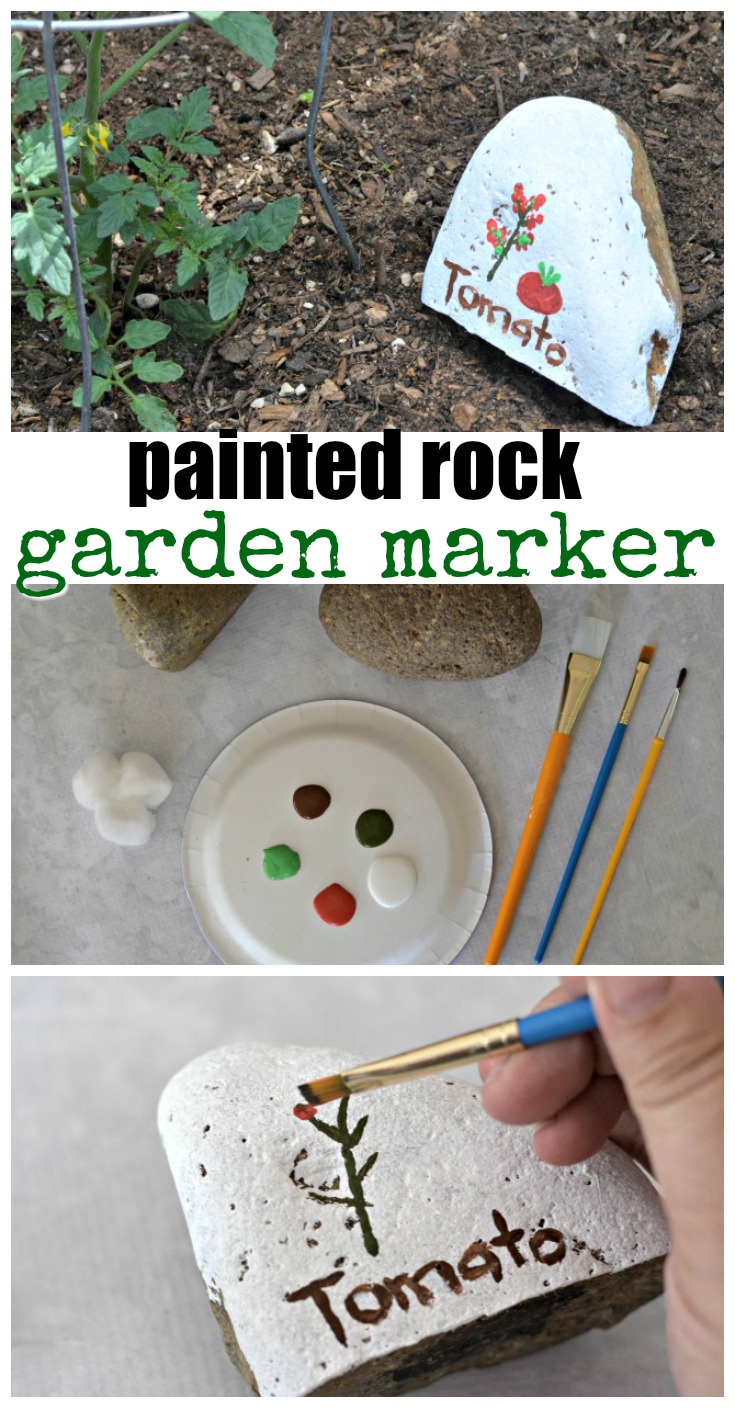
Kids helping in the garden this Spring? Why not use these painted rocks for garden markers! This craft is super easy to make and you can just use supplies you have around the house.


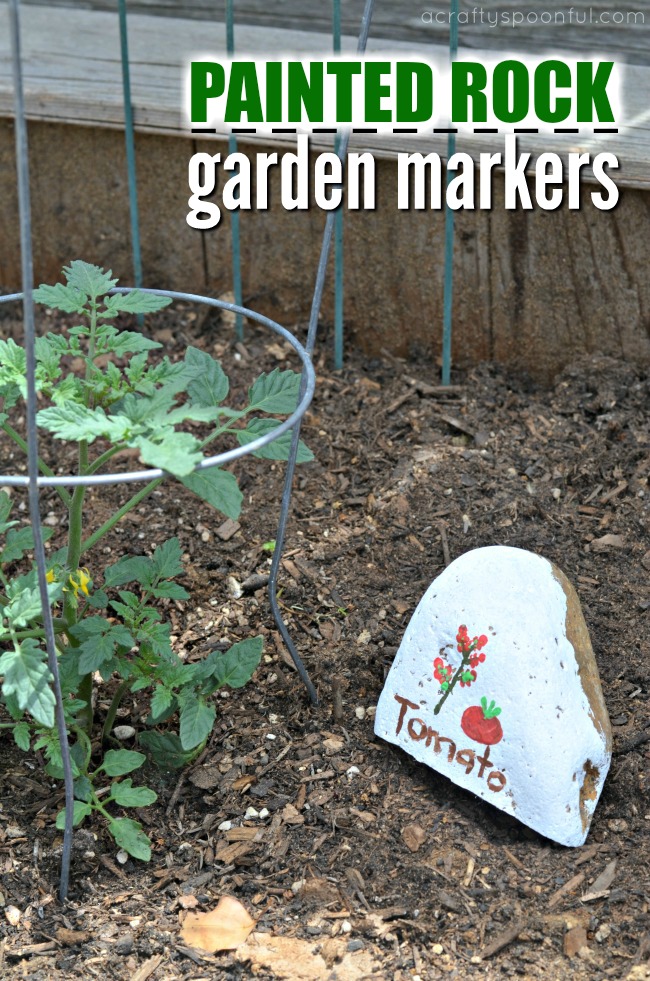
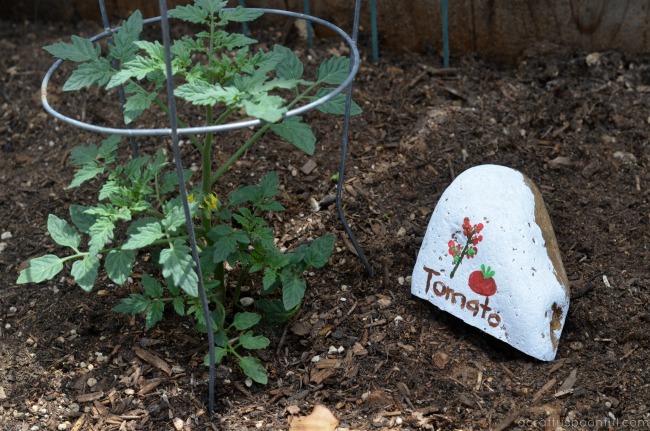
One thing I love about this time of year is all of the green and new growth sprouting about everywhere! And that means that our garden goes from sad and lackluster to full of life within a few short weeks. With that new life comes a bit of confusion for the kids with what plant is growing what type of fruit, herb, or vegetable. So we had a little fun and used painted rocks for garden markers to distinguish each plant from one another. 

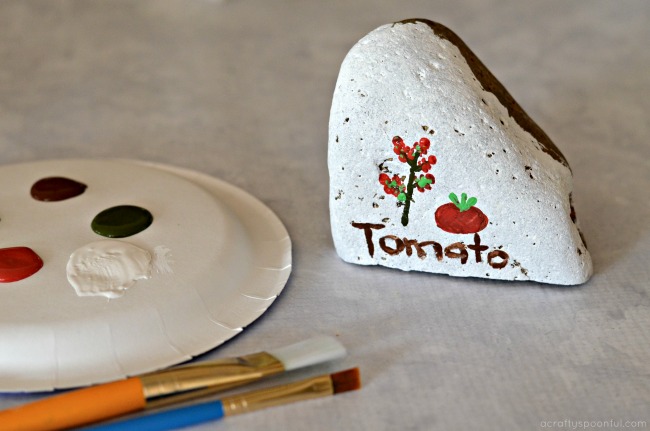
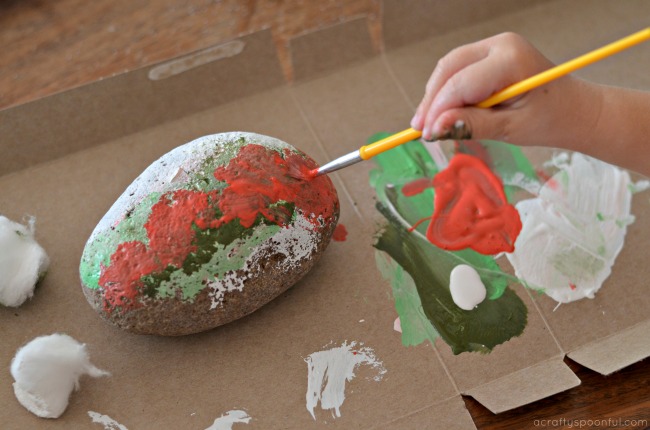
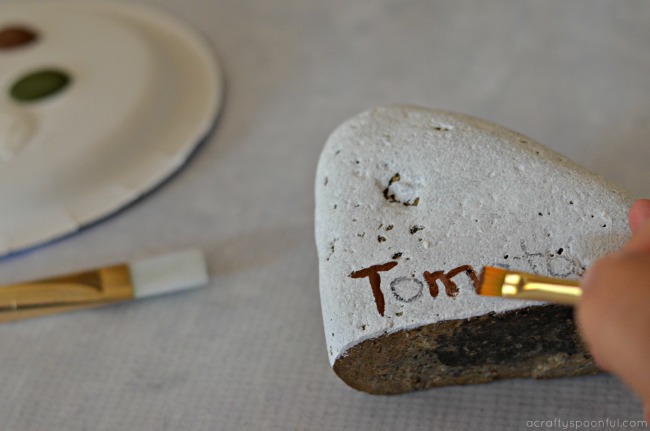
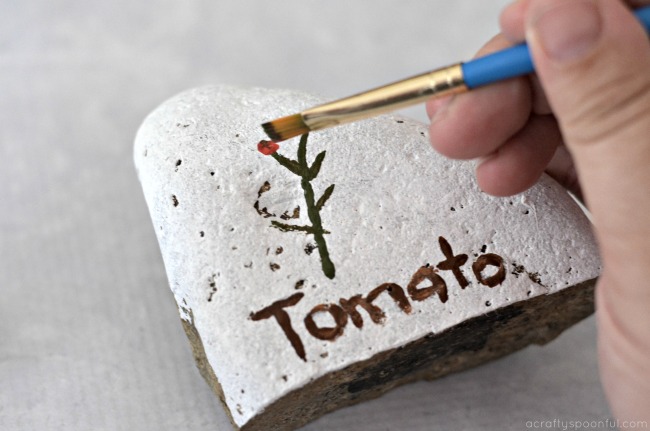
Now there’s no real huge planning that goes into these painted rock garden markers. We simply used a base color that would make our illustrations stand out, and I let the kids paint each of the plants that we were growing. They had fun choosing the colors and making different types of veggies and herbs on their rocks. 

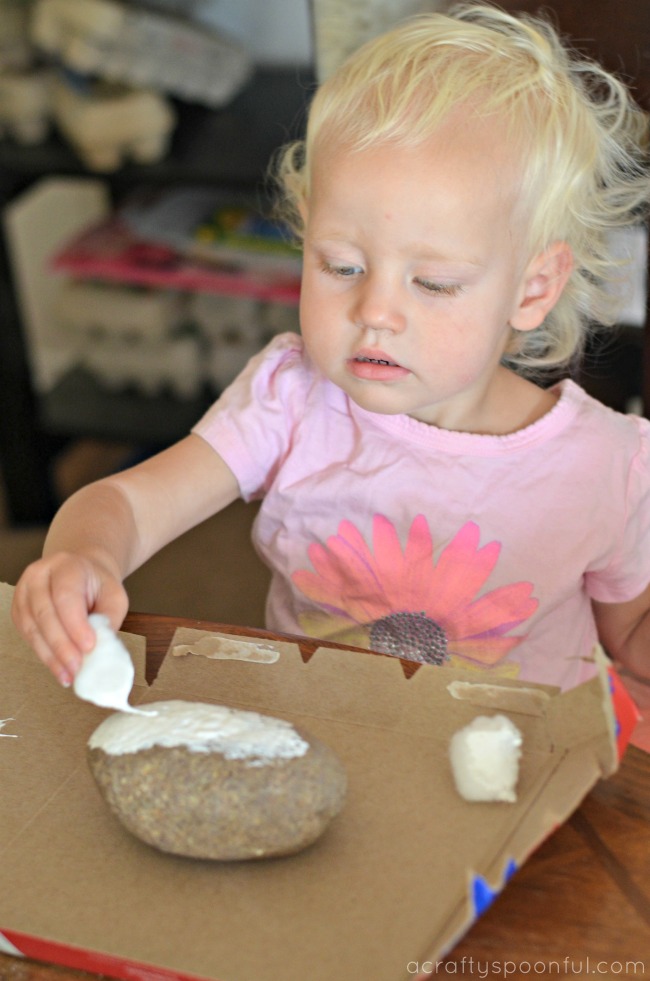
I think the most fun was when they tried to trace my penciled in names with paint to make each name stand out a bit more. The concentration my littlest had in her eyes (and brow) was quite humorous. 

If you’re planning out your spring garden, or are already growing, these are a great addition to share with kids and guests alike what you’re growing this season. Here’s how to make these painted rocks for garden markers: 

Painted Rocks for Garden Markers

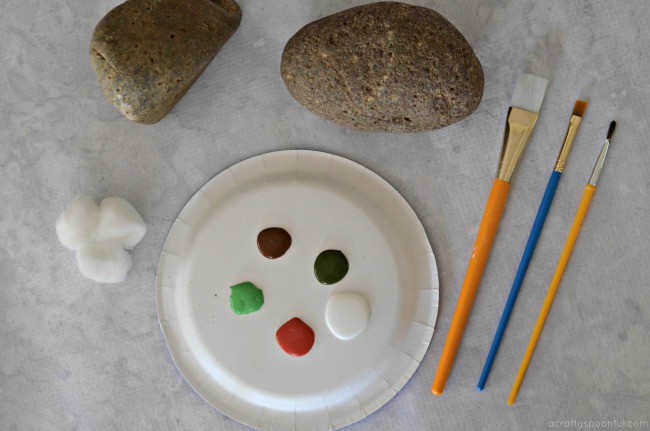
What you’ll need: 

  • good sized rocks
  • paint in a variety of colors based on what you’re growing
  • a variety of brush types, cotton balls, and/or cotton swabs

What you do: 

1. Using either a brush or cotton ball, layer the base color on the rock so that the illustrations you paint will stand out. We used a white base but any light color will due. 

2. Once the base coat is dry, now it’s time to paint the objects you’re growing. As you can obviously see from the rock above, my daughter was painting strawberries. Remember, it’s ok if the artwork is a bit… abstract… in the next step we’ll make things a bit clear. 

3. With a pencil, write out the names of each of the plants onto the rock. Then let your child trace the written names with their paint brush to make the name of the plant stand out. 

4. Once your painted rock is completely dry, set it outside next to your plant and enjoy! 

With Spring upon us, we’ve planted a variety of different seeds and plants in our garden. Here’s what my preschooler helped plant: 

  • Cherry Tomatoes
  • Bell Peppers
  • Radishes (from seed)
  • Carrots (from seed)
  • Cucumber (from seed)
  • Snap Peas (from seed)
  • Mint
  • Sage
  • Basil
  • Parsley
  • Thyme

And the big kids help by watering, weeding, and keeping an eye on the bugs that are in our garden beds

Looking to get your kids more involved in the garden? You’ll love these tips! 

DIY Indoor Herb Garden Ideas

Using Ladybugs in the Garden

Tips for Gardening with Kids

Kid Friendly Ideas to Get Your Kids In The Garden

Pin this article for later! 

Click the Pin button on the image below to save for later. 

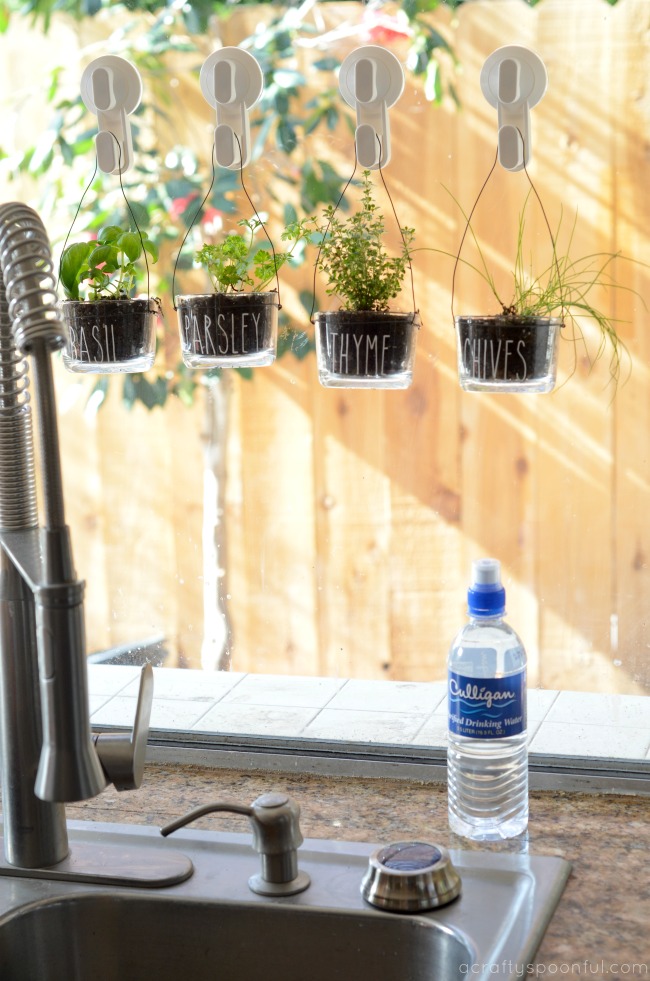
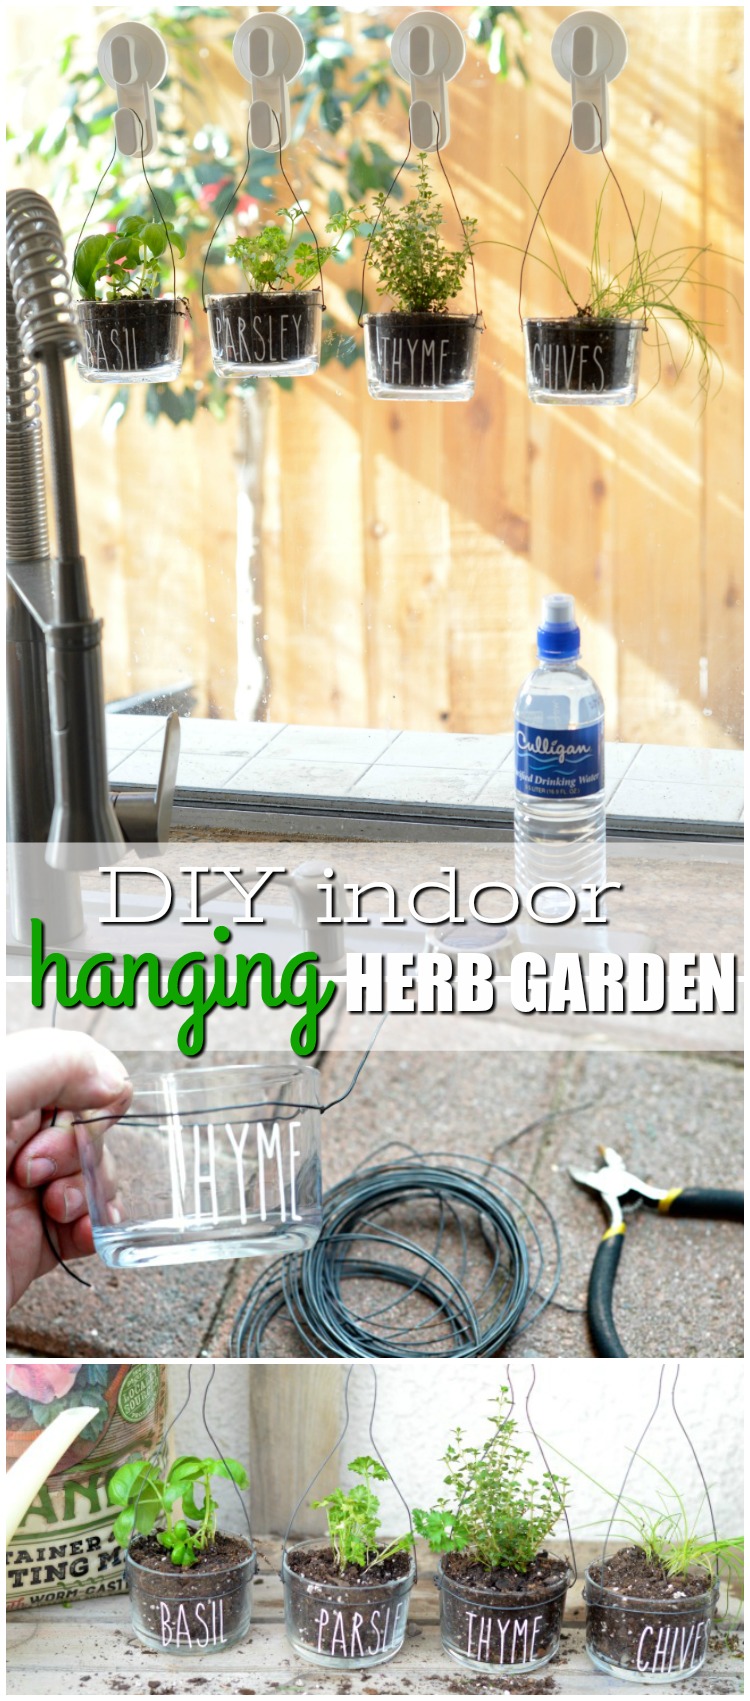
DIY Indoor Herb Garden Ideas: Easy to Make Indoor Hanging Herb Garden

This DIY Indoor Hanging Herb Garden is the perfect way to bring the garden indoors! Plus you’ll have fresh herbs for whatever you’re whipping up for dinner. This post was sponsored by Culligan Water as part of an Integrated Program for Influence Central and all opinions expressed in my post are my own.

Water is the one thing that makes the world go round. And filtered water is something we can’t live without. As a busy mom of 3, I am constantly filling up water bottles at our fridge or turning on the tap to make dinner. And all of that water usage had me thinking… are we drinking the best water we could be drinking? The answer was no. And I’ll tell you why… while we had an under the sink water filter, it wasn’t pulling out everything it could be to ensure that our water was safe to drink. 

We live in Southern California. We’re known for our droughts and lack of water. So any water we do have is usually brought in from another source. Our source? The Colorado River. Since our water comes from so far away, it has quite a journey to reach us. and that means there’s more chance of contaminants leaching into our water supply. Being able to ensure that we get those contaminants out of our drinking water was goal #1 for me. The second goal? How our water affected not only drinking but other water usages like showering, our garden, and our pets. 

Luckily we were asked to check out Culligan’s Water Filtration System. We just had the ClearLink PRO installed in our home.

Stay tuned for a follow-up post sharing how Culligan has positively impacted our daily usage of water. As of now, while we’re still testing the system, we thought it’d be fun to share how we can bring the garden indoors and add a bit greener to the meals we’re making with the help of a DIY indoor hanging herb garden. Here’s how!

Changing How We See Water

We knew our home needed a few updates to our water filtration system. We previously used an under-the-sink filter for our tap water as well as another filter in our fridge for the water that came out of the fridge door. But one in-home consultation with a Culligan expert showed that even these filters we had in place weren’t taking out everything we wanted to keep out. With water playing such a crucial role in our daily life – being used in the food we make, the water we (and our pets) drink, and what we use to water our own edible garden – a few changes to our water filtration system was a must. 

Culligan’s goal is to provide water that its customers can trust and offer the best possible customer service experience out there. With over 80 years of water quality and service industry experience, they strive to help individuals identify their water issues right in their home – whether that be hard water, water filtration or taste of their water. After our in-home consultation, our new Culligan Water Filtration System was installed. And with the push of a button right by our sink, fresh and filtered water comes right out of our faucet. The system is so easy to use that even the kids can get their own filtered water from the sink. We also had a filtered water line run to our fridge as well. 

Now that our system is in place, we’ve been enjoying the perks of filtered water. We’ll be sharing our full journey from start to stop in our next post featuring Culligan so stay tuned. Now for our tutorial on this easy to make DIY Indoor Hanging Herb Garden! 

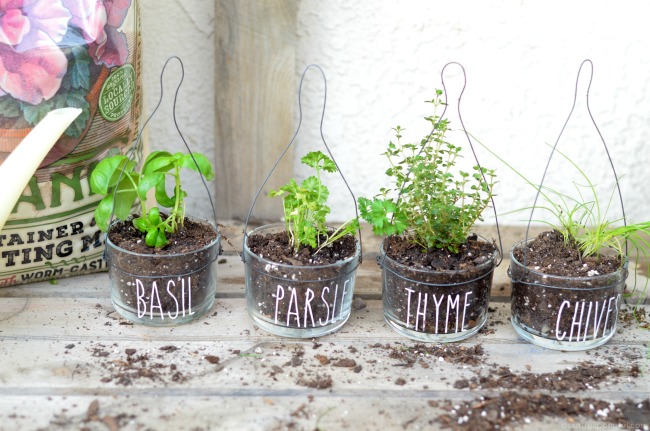
Easy to Make Indoor Hanging Herb Garden

What you’ll need: 

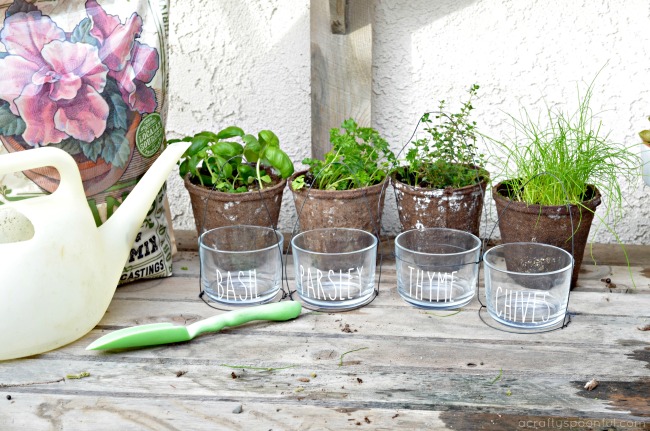
  • Glass containers
  • Wire
  • Wire cutters
  • Window hooks
  • Labels
  • Small rocks
  • Soil
  • 4″ herbs OR seeds
  • Water

What you do: 

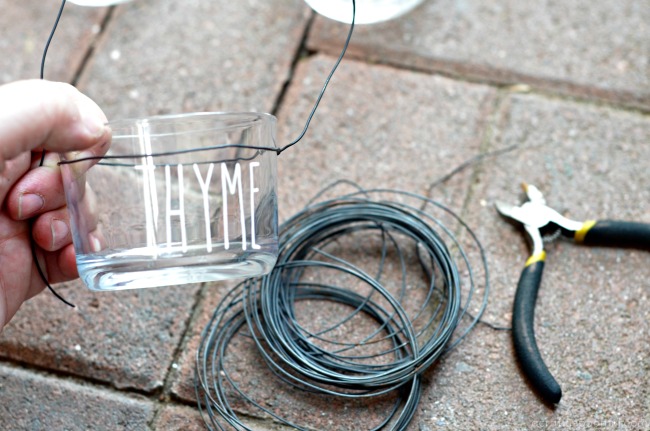
1. Wrap the wire around your container to form a circle. Connect the wire to itself tightly so that your container is secure in the wire. Don’t cut the wire just yet.

2. Make an arch with the wire over the glass container. 

3. Once you have the arch length you want, cut the wire leaving about 1 inch to attach it to the other side. 

4. Once you’ve secured the arch to the other side of the wire circle, make sure the wire is still securely around the glass container and can be lifted safely without the container falling out. 

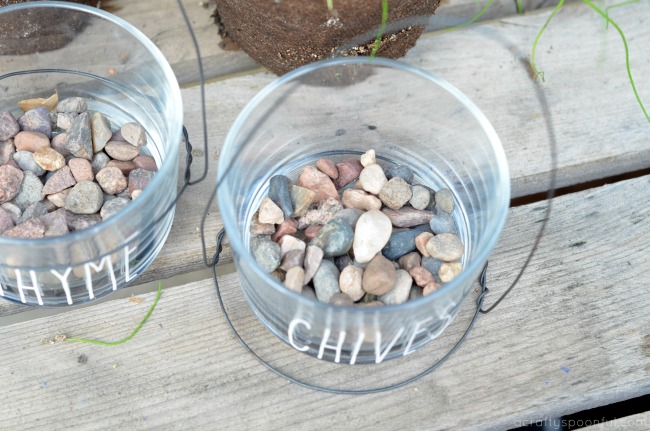
5. Fill the bottom of the containers with about 1/2 an inch of small rock to provide drainage. 

6. Top the rocks with soil up to about 1 inch from the top of the container and dig a well for the herbs. Add some filtered water to the bottom of the dirt well.  

7. Add the herbs to the container on top of the water and make sure the roots are buried/covered. 

8. Sprinkle a bit of vegetable food on the surface of the dirt by the herbs and then water again with filtered water. 

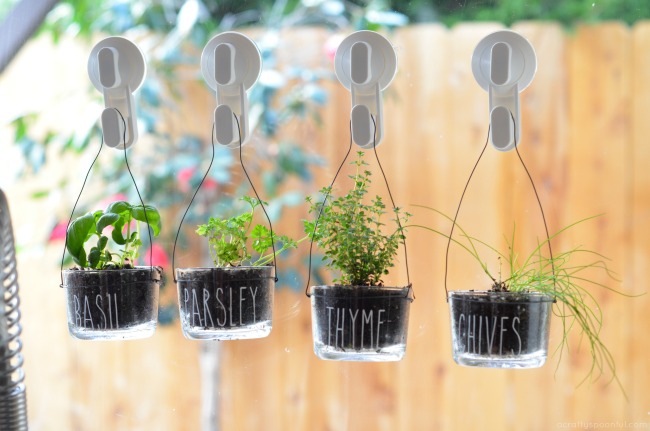
9. Place the window hooks in the window where you want the containers to hang. Find a place that will get sunlight during the day. 

10. Hang the herbs up in the window and watch them grow! Snip off what you need for meals in the kitchen as you cook. 

Water plays an important part in our everyday lives. Being able to have the kids go to the sink and fill up their water bottles, or fill up a watering can, and know that the water they’re drinking and using is water we can trust means a lot to our family. And now we can say that every day is a “Good Water Day” with Culligan! Stay tuned for our next post where we go in-depth into our experience with Culligan Water

How are you making healthy touches in the kitchen? 

Love this idea? Check out these other garden-related posts! 

Pin this article for later! 

Click the Pin button on the image below to save for later. 

Easy DIY Hair Bow Holder + Simple Girls Bedroom Decor Ideas with Leesa Sleep

This post is sponsored by BabbleBoxx.com on behalf of Leesa. Are you looking for fun ways to spruce up your girls’ room? Transfering from little girl room to big girl room? We’re sharing simple bedroom decor ideas on a budget and are sharing a fun and easy DIY hair bow holder to store all of your girl’s bows.

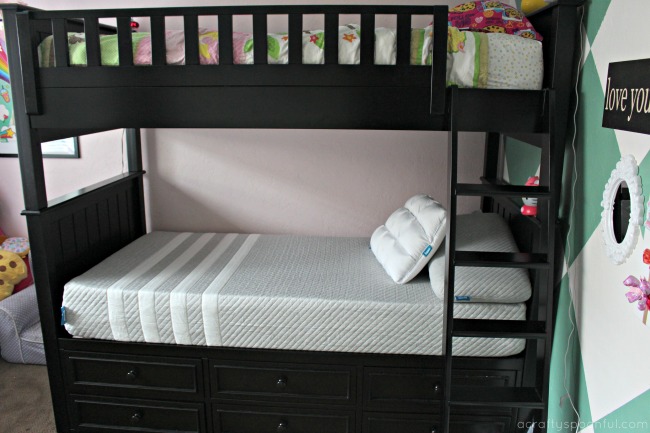
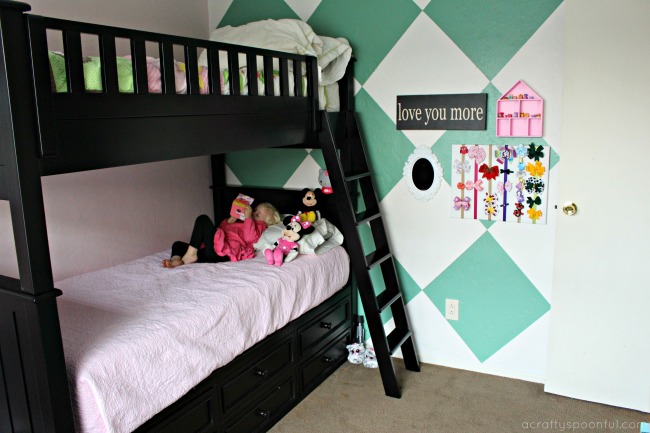
A few weeks ago the girls came to us and asked if they could get a bunk bed so that they could sleep in the same room together. We had just transitioned our youngest from our bed to her own bed at 3 years old and while she loved the idea of being in her own room, she missed the comfort of knowing someone else was sleeping with her in the room. So after much deliberation, we decided to make over our middle child’s room to fit her growing personality (hers was the only room we hadn’t made over since moving to our new home 3+ years ago). And this included a new bunk bed. 

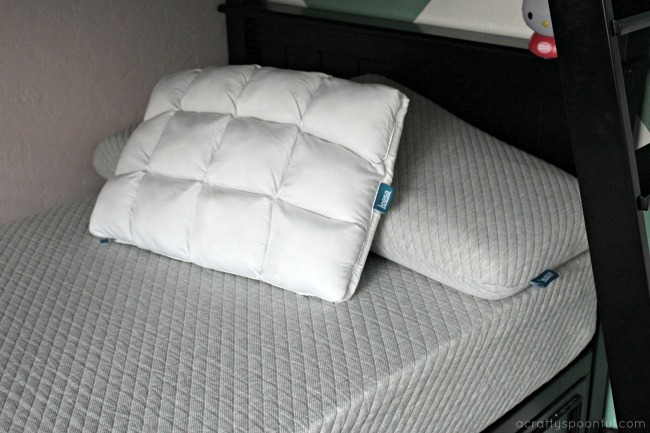
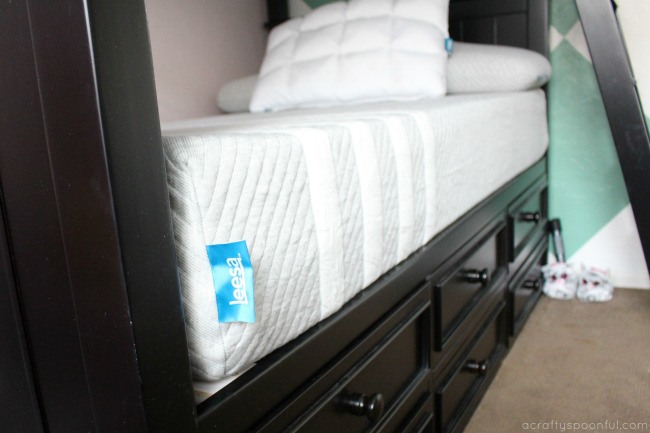
We did a bit of research and decided on a twin over twin model with dressers underneath the bottom bunk. Not only would this provide extra support under the bottom bunk but also give us the opportunity to eliminate a large piece of furniture from the room – the dresser! Win-win, right? Now for the important part of a good night’s sleep – the mattresses my girls would sleep on. We consider a mattress an investment not only for our home but our health as well. having the support needed for a good night’s rest is crucial for growing children. So when Leesa reached out to see if we’d like to use their mattresses for our new room, we were more than excited to try them out. Plus, not only are they committed to a good night sleep, they also provide community outreach and give back through two different give-back programs. 

Driven by the mission to provide “A Better Place To Sleep for Everybody”, Leesa donates one mattress to a shelter for every ten they sell through their One-ten program (over 22,000 mattresses donated so far!). Leesa also plants one tree for every mattress sold and donates 1% of each employee’s time to volunteer for local causes.

The Best Bed in a Box

When our mattresses and pillows arrived, my husband was a bit skeptical. How in the world would a full mattress fit in this box? It was fun to find out exactly how the rolled up mattress expanded once put into place and opened. And even more cool to feel the difference in the mattress after an hour of being open vs. a whole day of being opened. Since I lay down with my youngest as she drifts off into sleep on the bottom bunk, I get to experience the comfort of Leesa each night. And with the adjustable and reversible hybrid pillow Leesa sent out, I relax in comfort as the girls fall asleep each night. 

The adjustable and reversible hybrid pillow has down-like quilted pockets on one side and a cooling side on the other. It’s adjustable and reversable depending on how our night is going. If I accidentally fall asleep in the bed with my daughter (oops!), and I get too warm, I can flip over the pillow for a more cool slumber. There’s also a pillow insert inside that sits between the quilted pocket and the cool layer that can be removed with a simple zip to change the support level to fit how one sleeps. Plus it’s a good cuddle pillow! 

But I can’t focus all of my attention on the awesome pillow I stole from the kids. Let’s get to the mattress! Leesa’s patented Universal Adaptive FeelTM is designed for all types of sleepers and features 3 premium foam layers including a 2-inch AvenaTM foam top layer for cooling and breathability, 2-inch memory foam middle layer for body contouring and pressure relief and 6-inch dense core support foam for durability and structure for sleepers of all sizes. All of this equals the support and comfort one needs for a restful sleep. And the proof is in my Fitbit tracker tracking how much more rest I receive when I accidentally fall asleep in the girls bed vs. going back to my own bed. It may be time to upgrade our own mattress too! 

Easy DIY Hair Bow Holder Tutorial

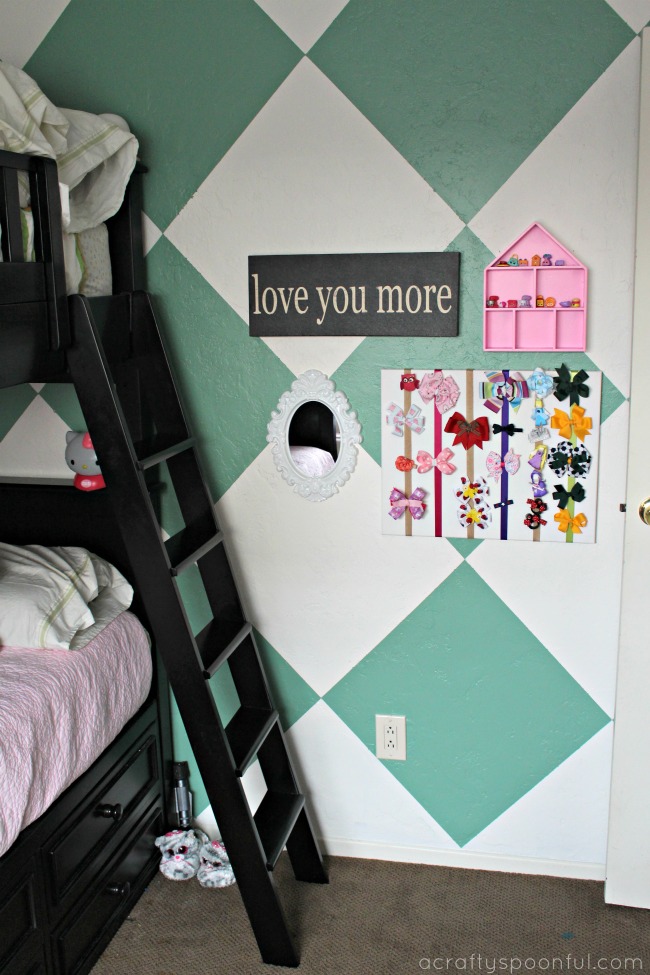
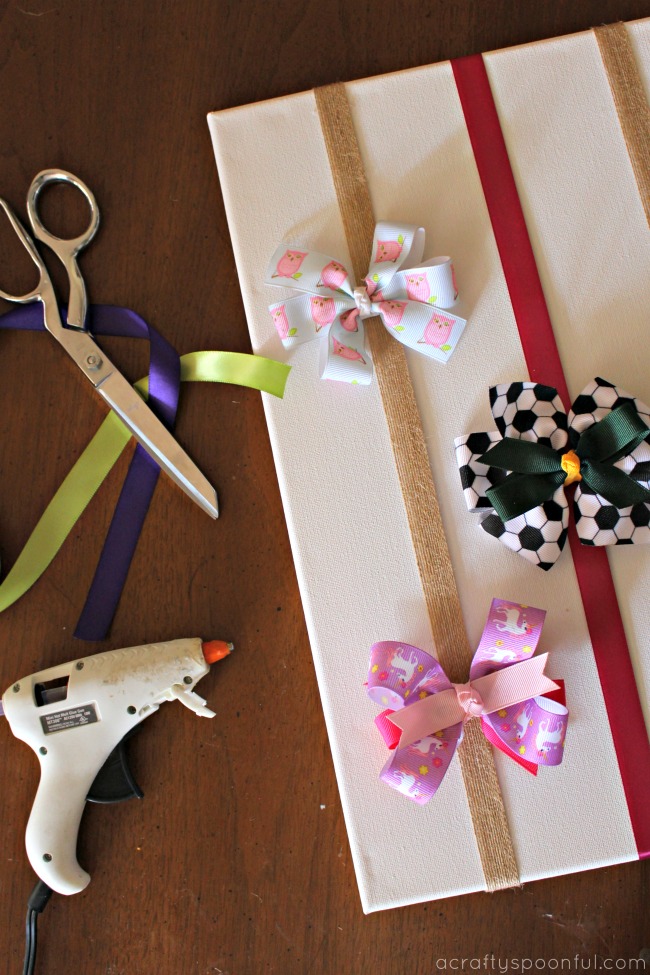
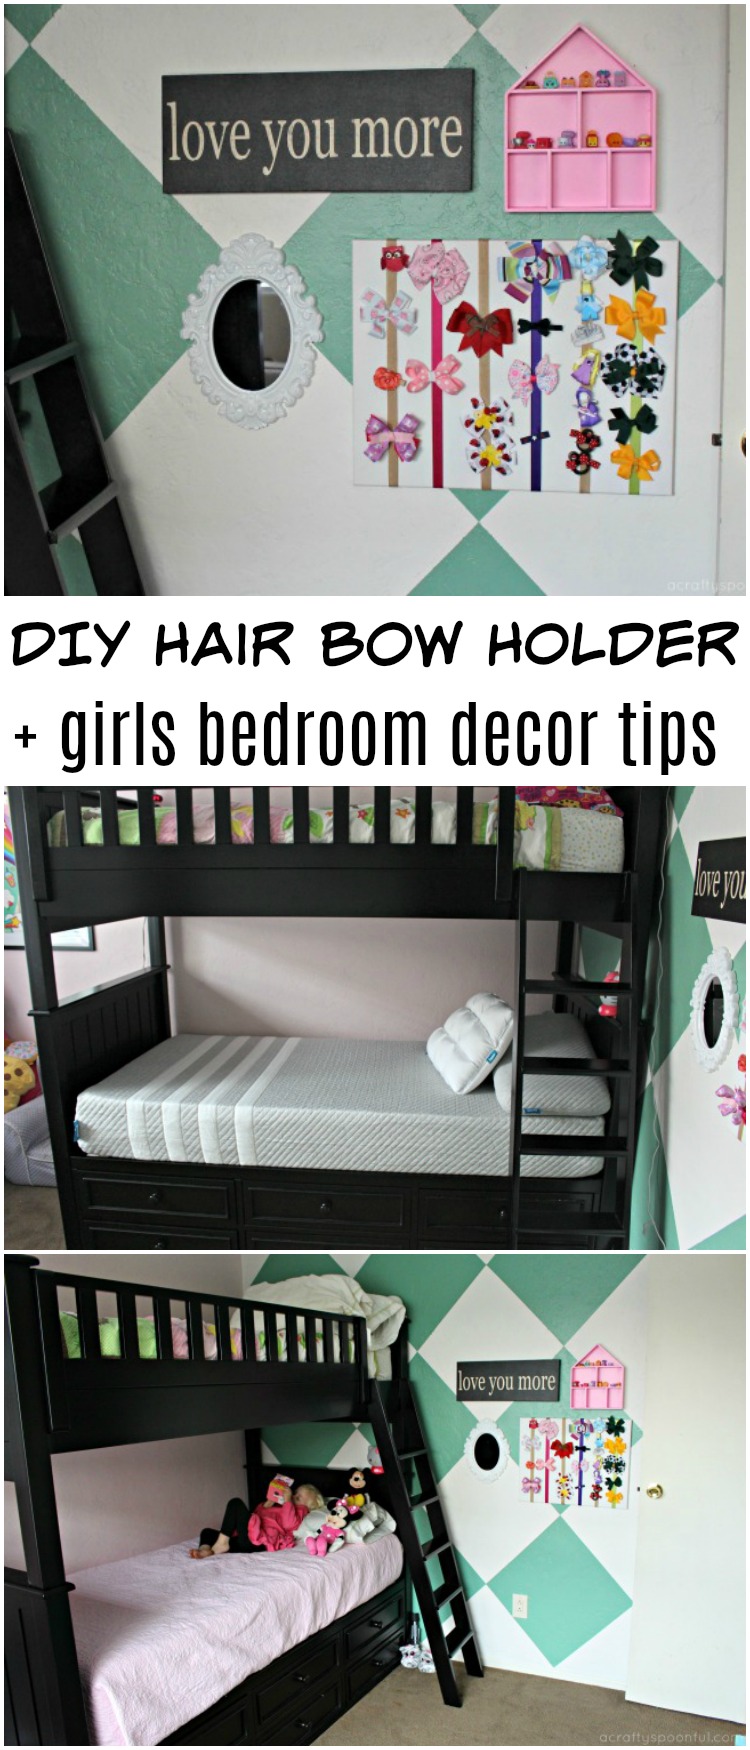
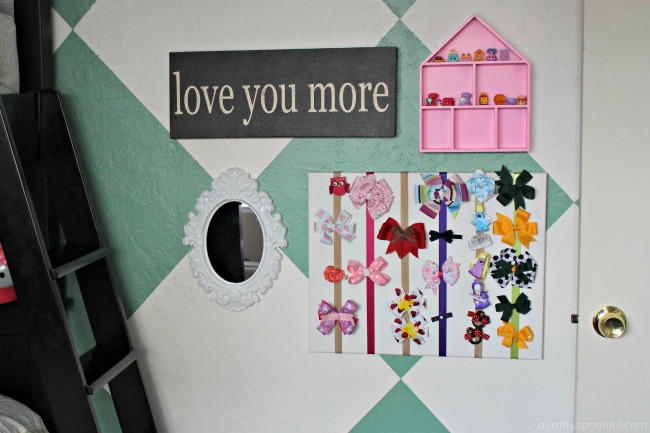
Along with the new bunk bed came a complete overhaul of our daughter’s room. That included new paint on the walls (including a fun diamond design you would have seen featured on my IG stories), and a fun little inspirational wall that included an updated DIY hair bow holder that fit the current room’s personality and my daughters larger bows. We’re sharing how to recreate our DIY hair bow holder in this simple tutorial that takes less than 30 minutes to make! The best part is that I was able to involve my daughter in making this and she did all of the measuring/cutting while I took care of the hot glue. 

DIY Hair Bow Holder

What You’ll Need: 

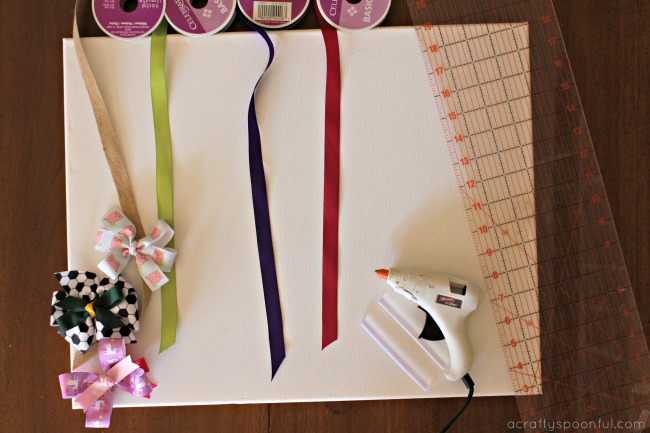
  • 16″ x 20″ Blank Artist Canvas with Wooden Frame
  • Assorted Ribbon
  • Measuring Tape
  • Hot Glue Gun
  • Pencil
  • Bows

What You Do: 

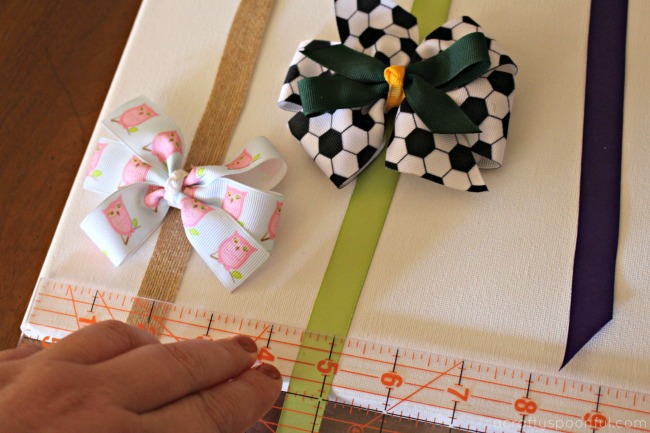
1. Grab the ribbon, a few bows, and a measuring tape to plan out how far apart you want the ribbon from each other. Use the bows as a guide to how much room is needed in between each bow. We measured 2 inches in from each side of the canvas and then 3 inches in between each ribbon strand. 

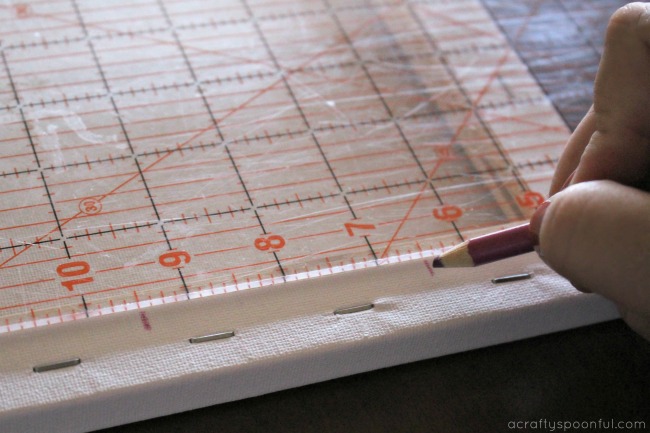
2. Turn the canvas over and mark where each of the ribbons should go on either side of the length of the canvas. 

3. Gather the ribbon in the colors you want to use for the project. Cut each color to about 21 inches in length. Make sure that this length wraps around the canvas and back over the frame to be glued into place. 

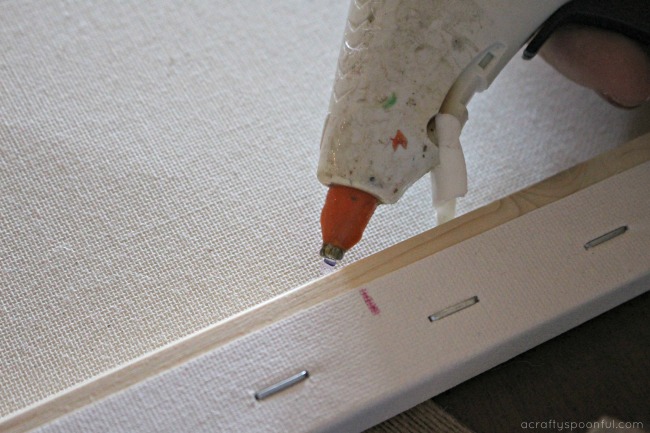
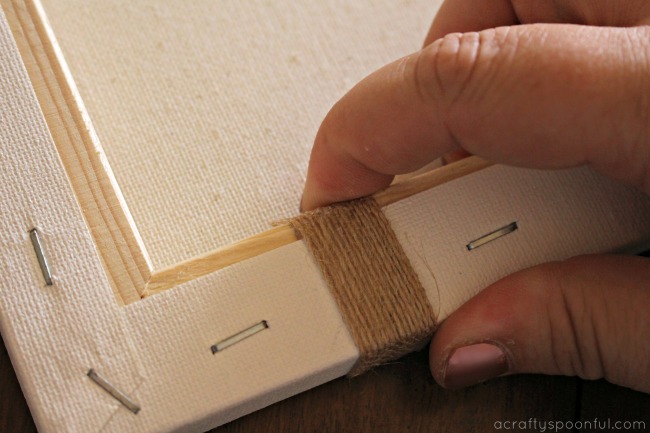
4. Using hot glue, attach the ribbon to the back frame of the canvas and wrap around to the top. Attach the top of the ribbon in the same way making sure that the ribbon isn’t twisted in the front. 

5. Repeat until all of the ribbon is secure and add your bows! 

See how easy that was! Now for a few alternative ways you can spice up your DIY hair bow holder: 

  • Paint the canvas a coordinating color (you can see what our daughter’s old painted bow holder looked like here)
  • Wrap the canvas in fabric and secure with hot glue before adding the ribbon
  • Add small hooks to the bottom of the canvas frame to hang hair ties and headbands

In addition to adding the DIY hair bow holder, we included a small mirror, an inspirational quote, and a small wooden unit to hold my daughter’s prized possessions: her Shopkins figurines. Having the figurines high up ensures that her little sister can’t reach them. Good thinking, right? Too bad she’s already tried to drag the step stool out to grab one or two. Oh well… I can try! Stay tuned for the full bedroom makeover post! We have more in store for you. 

Save on Your Girls Bedroom Decor Ideas with Leesa Sleep

Leesa is available online or at the Leesa Dream Gallery in SoHo NYC and Virginia Beach. And you can now try before you buy at over 80 West Elm stores nationwide. Try the mattress in your own home for 100 nights (risk-free!) with free shipping, always. And don’t forget to use code ACRAFYSPOONFUL for $100 Off your Leesa Mattress purchase.  Leesa is available in the US, UK, Canada, and Germany. They’re also continuing to expand their offerings to include: The Leesa Pillow, Blanket, Sheets, Foundation, and Frame. 

Looking for more kids bedroom ideas? 

Check out these posts you’ll love: 

5 Ways To Help Children Get Their Bedroom Organized

Shared Bedroom Ideas for Brother and Sister

DIY Lego Side Table

Pin this article for later! 

Click the Pin button on the image below to save for later. 

The Best Ways to Impress Your Guests this Holiday Season + FREE A Christmas Story Toilet Seat Decal SVG

Who’s ready for holiday guests? This girl is! And with this free toilet seat decal inspired by A Christmas Story, no one’s falling in the potty! This shop has been compensated by Collective Bias, Inc. and its advertiser. All opinions are mine alone. #MerrySpritzmas #CollectiveBias

One thing I love about the holiday season is that I get to see a lot of my favorite people all in the same month. Whether it’s family coming into town, friends stopping by with plates of cookies, or the neighbor down the street, the end of the year is when all of the commotion happens. And that means one thing… the loo can be a busy place! 

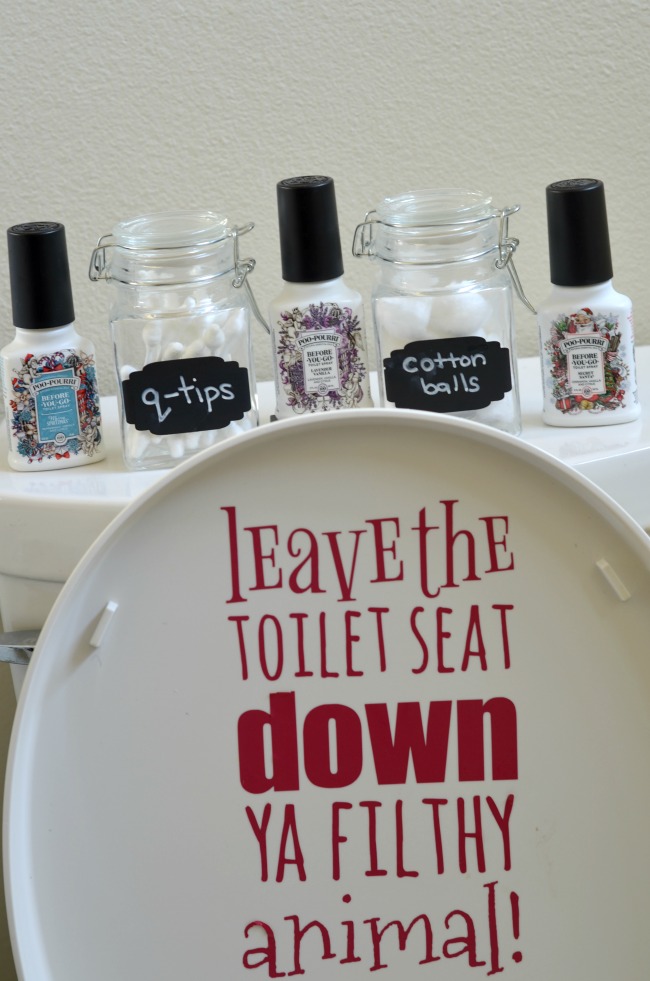
So in order to make sure our house is in tip-top shape and ready for guests, I do a few small things to prep in advance. Not only does this make it easier for guests, but makes my life easier as well. And since our guest bathroom is also the bathroom the girls use, I’ve made a funny decal inspired by a classic Christmas movie to remind male guests to keep the seat down. Because, yes, my kid has fallen into the toilet because someone forgot to do this…

(click on the images to visit Poo~Pourri.com and find your perfect match)

The Best Ways to Impress Your Guests this Holiday Season

One thing that I always hate is using the restroom at someone else’s house. Whether it’s a quick trip or something a little longer, I don’t want to put myself in an embarrassing situation. I’ve also found myself in need of a few necessities over the years when I’m at someone’s house and I don’t really know how to ask. So in an effort to make our home more inviting, I’ve taken a few proactive steps so that guests feel right at home when visiting. 

#1 – Have Toiletries Accessible

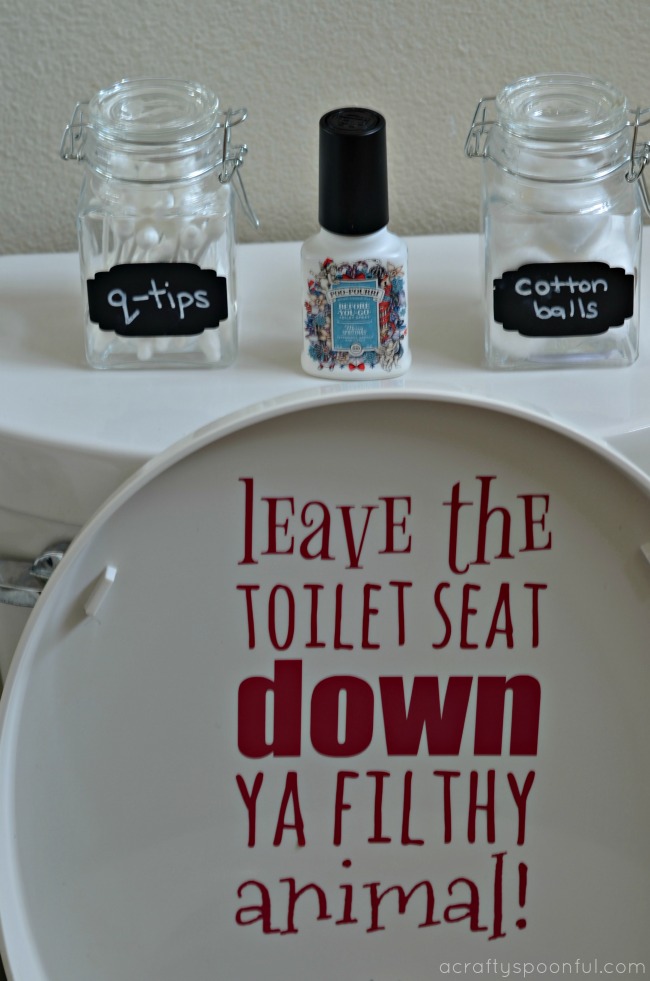
When guests come over I like to put out these cute labeled jars out so that they can help themselves to things like cotton balls, etc. I also stock the medicine cabinet with things like aspirin, acetaminophen, etc and hairspray, bobby pins, and tweezers. And underneath the sink I keep a few personal items. 

#2 – Don’t Skimp on the Toilet Paper

Another thing I keep plenty of under the sink is toilet paper. No one wants to visit your home, head to the bathroom, only to have to yell to get someone to bring some toilet paper to them (or find other ways of cleaning up). So I stock a good number of rolls under the sink for easy access. 

#3 – Have the Poo~Pourri Out

And front and center by the toiletries that are on the back of the toilet is the Poo~Pourri. Because there’s nothing worse than heading into the restroom at a friend or family member’s house and realizing that when you thought you only had to go #1, you really had to go #2. No one needs to know when you have Poo~Pourri available.

Guests simply need to spray 3-5 times and do their thing. Poo~Pourri’s pure blend of natural essential oils creates a film on the surface of the water. he protective barrier traps odor under the surface before it ever begins! All you’ll smell is a refreshing bouquet of natural essential oils. It’s as easy as that!

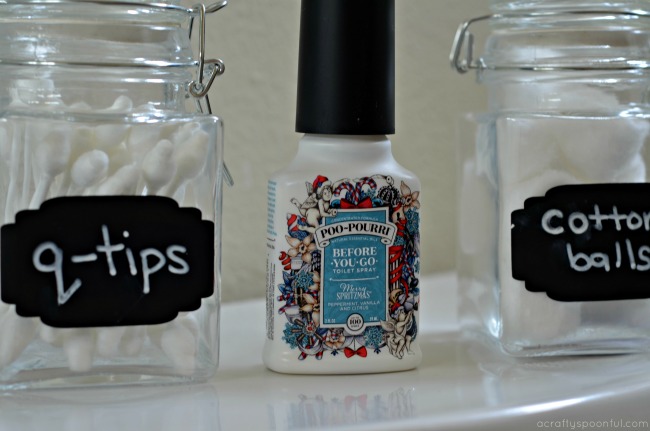
You can hover over the image above and click on the images to visit Poo~Pourri.com and find your perfect match. Whether you’re a spiced apple person or prefer the calming effects of lavender vanilla (my favorite!), there’s a scent out there for you. Add a spritz of holiday magic by leaving the porcelain sleigh smelling better than you found it with fun holiday scents like Merry Spritzmas® or Secret Santa that are perfect for a stocking or in place of a gift tag for that special someone. 

Finding the right scent of Poo~Pouri was fun. I chose a few festive holiday blends for the season and a more neutral scent for year round (or in my purse when I’m on the go). Poo~Pourri transforms your bathroom experience (and those who come in after you) by stopping bathroom odor before it begins…seriously!

Poo~Pourri Merry Spritzmas® is a blend of peppermint, vanilla and citrus natural essential oils and Poo~Pourri Secret Santa is a blend of cinnamon, vanilla and citrus natural essential oils. How amazing does that sound for spreading holiday cheer? The favorite holiday blend in our home is Merry Spritzmas®. Smelling is believing!

And right now you can enjoy 20% off your order! Just head over to the Poo~Pourri website to order now. While it’s a fun (and funny) gift, it’s also something that works. Win-win! Plus, there’s always free shipping on orders over $19.95.

Now on to how to download and put on this awesome toilet seat decal inspired by A Christmas Story.

How to Add A Decal To Your Toilet Seat

What you’ll need: 

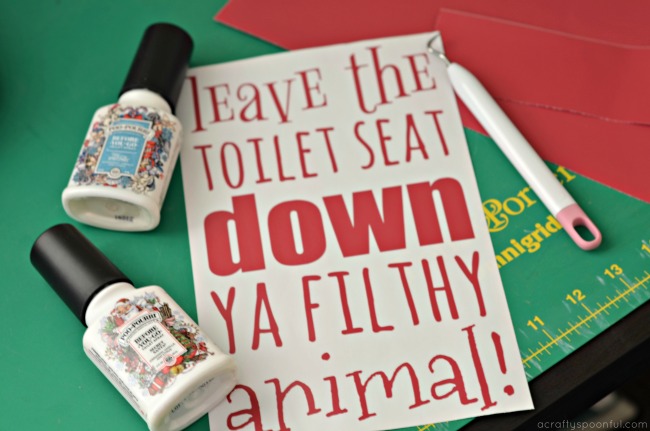
  • Filthy Animal SVG file
  • Oracal 631 vinyl (or equivalent non-permanent vinyl).
  • Transfer paper (or clear contact paper)
  • clean terry cloth
  • rubbing alcohol
  • burnishing tool or credit card

What you do: 

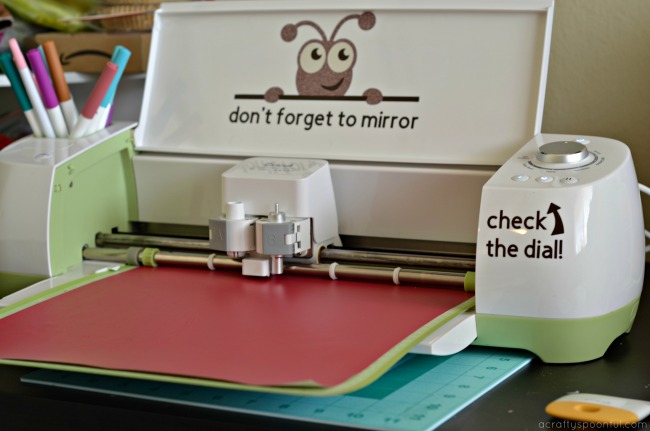
1. Download the Filthy Animal SVG file and cut it out on the vinyl of your choice using your cutting machine. 

2. Weed your design and transfer design onto transfer paper. 

3. Prep the inside of your toilet seat by putting a small amount of rubbing alcohol onto the clean terry cloth and wiping the surface down. Let dry. 

4. Grab your vinyl on transfer paper and try to eyeball the alignment so that the decal goes on evenly and in the middle of the lid. Press your design down. 

5. Using your burnishing tool or credit card, scrape the design gently onto the lid and get out any air bubbles to ensure that the vinyl is properly secured. Once secured, remove transfer tape 

6. Enjoy your decal and wait till guests come over to admire your throne! 

Grab the FREE A Christmas Story Toilet Seat Decal SVG Here

What are your top tips for making guests feel at home? 

Loved this post? Read on! 

Pin this article for later! 

Click the Pin button on the image below to save for later. 

How to Make the Best Liquid Hand Soap from Bar Soap

We’re sharing a few ways that you can save money and reduce waste by creating the best liquid hand soap from left over bar soap with help from our sponsor, Johnson’s® Baby. 

Don’t you hate it when you get to the end of the bar of soap and don’t quite get how to use it up? Are you like me and save the little nubs left and mold it into one big nub to use? 

It’s like the last of the lotion or shampoo stuck in the bottle. I feel like I’m wasting it if I throw it away without at least attempting to get the last bits out. But I found a better solution for those little left over bar soaps: DIY liquid hand soap! 

Yup. And you wouldn’t believe how simple it is to make. 

With 3 kids we go through a lot of soap. We order our favorite online from Walmart and have it picked up when we go in for our essentials. That way we’re always prepared for bath time! 

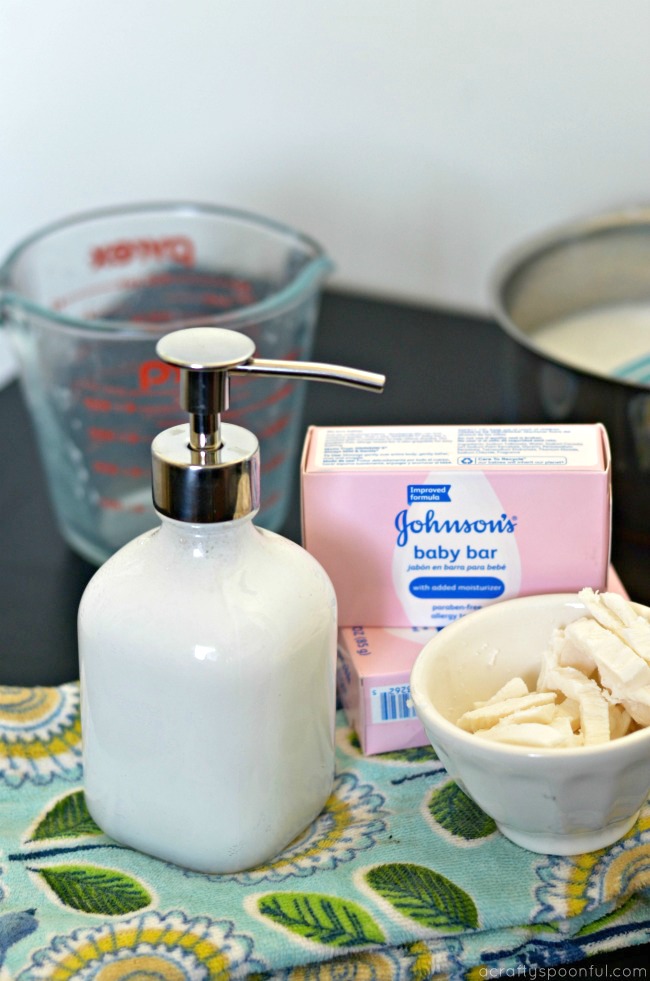
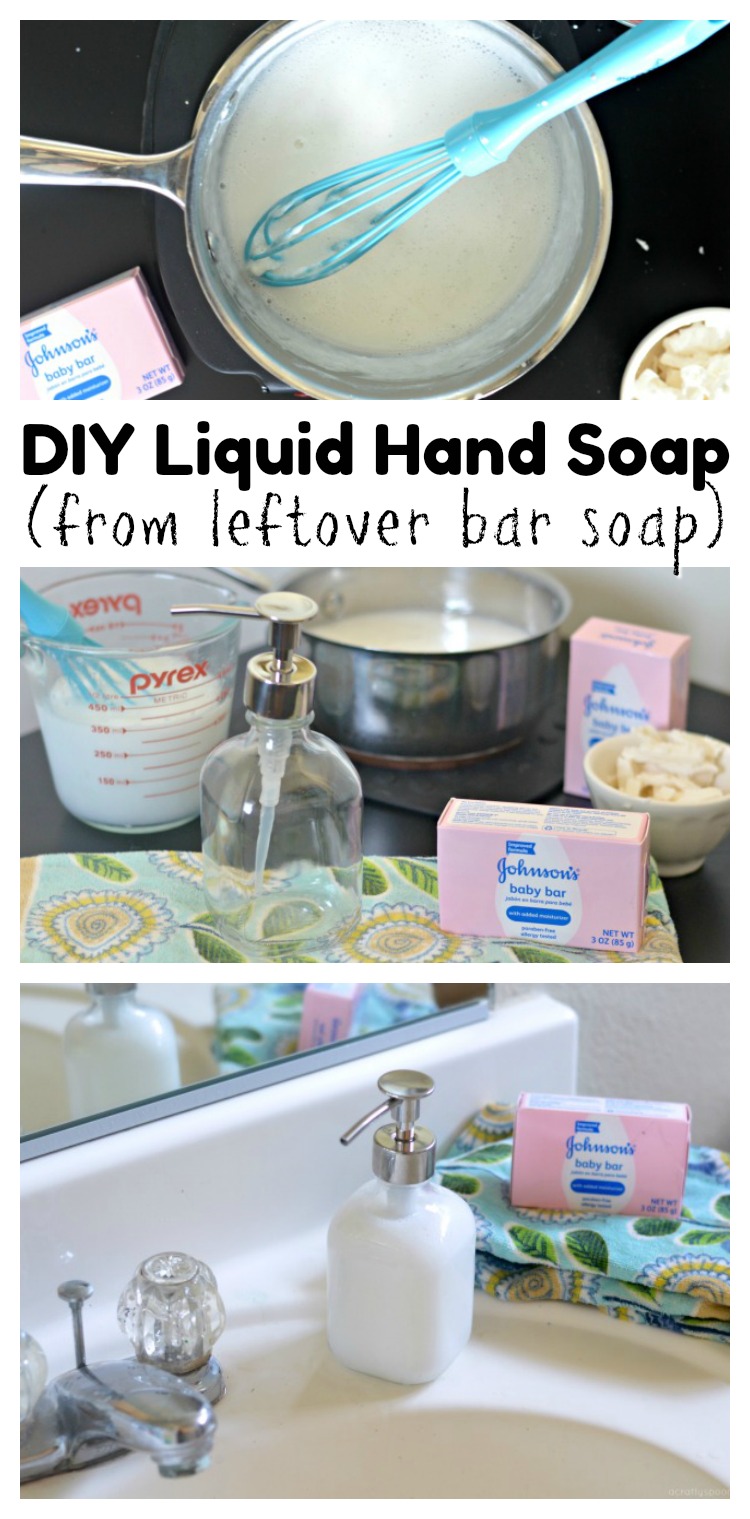
Once we get down to a little nub of Johnson’s Baby Bar soap after bath time, I set the nubs aside to make liquid soap. It only takes about 1 ounce of bar soap to make a small batch of liquid soap. 

Here’s how we do it! 

How to Make The Best Liquid Hand Soap

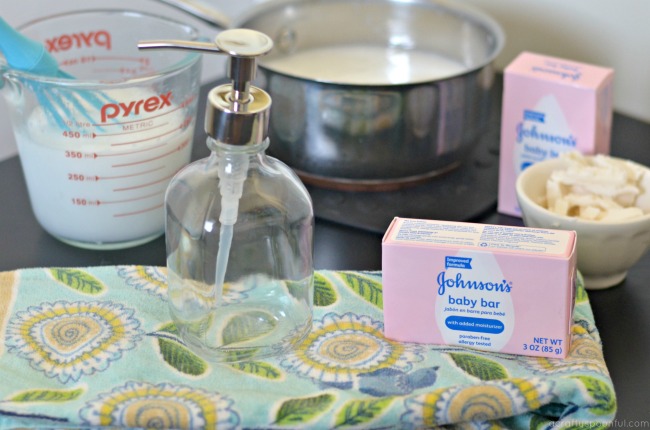
What you’ll need:

  • 1 ounce of Johnson’s Baby Bar 
  • 2 cups water
  • small pot
  • whisk
  • measuring cup
  • hand soap dispenser

What you do:

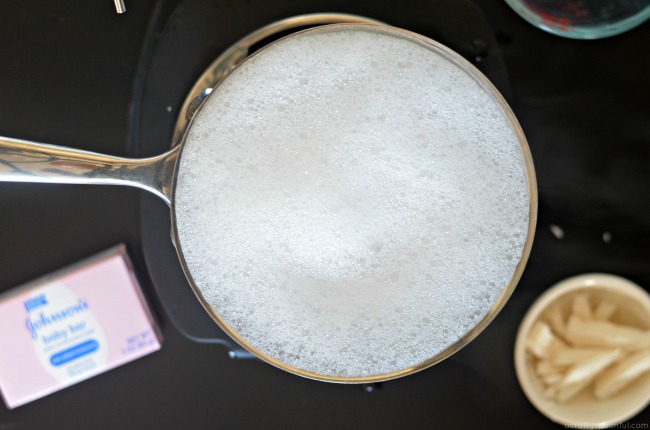
1. Take the small bits of Johnson’s Baby Bar you’ve collected after bath time and cut up into smaller pieces. Weigh out 1 ounce. 

2. Boil 2 cups of water. Once the water is boiling, add 1 ounce of soap. 

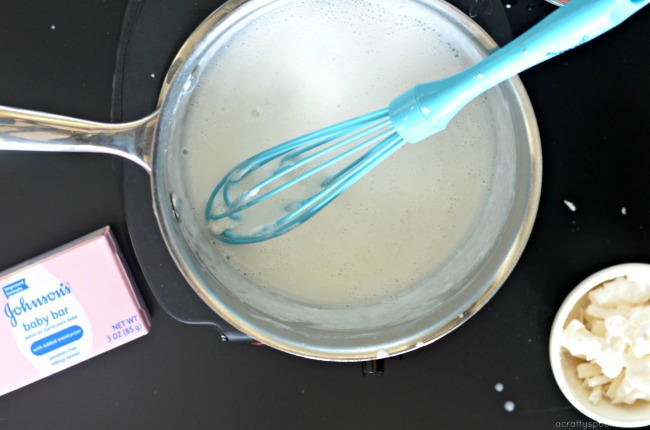
3. Take water off heat and whisk soap and water together until the soap has fully dissolved. 

4. Let soap mixture cool for 15 minutes then whisk again. Soap mixture should start getting thicker. 

5. Let mixture sit for a few hours (or overnight). If soap is too thick/gelatinous, add more water to thin out until you have the consistency of liquid glue. 

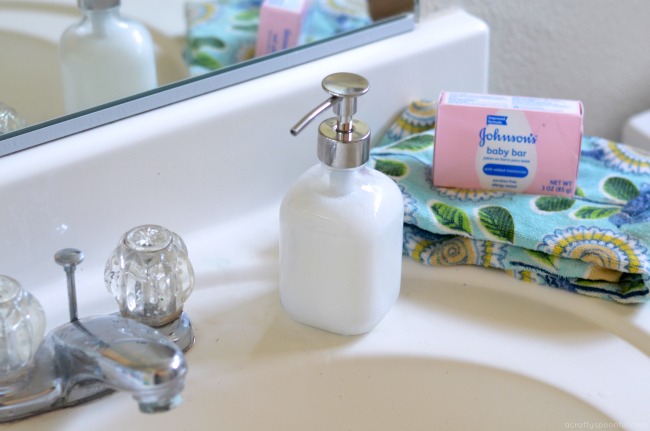
6. Pour into the soap dispenser and wash, wash, wash! 

If you’re looking to save some money (bar soap is so much cheaper than liquid soap!) and put those leftover bits of soap to good use, try this hack out and let me know how it works for your family! Check out these other great hacks and ideas here on this Pinterest board

If someone is reporting an adverse event or a product quality complaint, please tell them to call the Johnson & Johnson (J&J) North America Consumer Care Center at 800-361-8068 during normal business hours of operation: Monday through Friday, 8 a.m. to 8 p.m. ET. After normal business hours, they can report adverse events or product quality complaints through www.jnj.com Contact Us page.

What do you do to reuse the last bit of product? 

Looking for more DIY hacks? Read on

Pin this article for later! 

Click the Pin button on the image below to save for later. 

We thought you might like these similar posts:


Wow Guests with These Easy DIY Thanksgiving Door Decorations + a DIY Cornucopia Wreath Tutorial

This shop has been compensated by Collective Bias, Inc. and its advertiser. All opinions are mine alone. #DIYHolidayWithSCJ #CollectiveBias

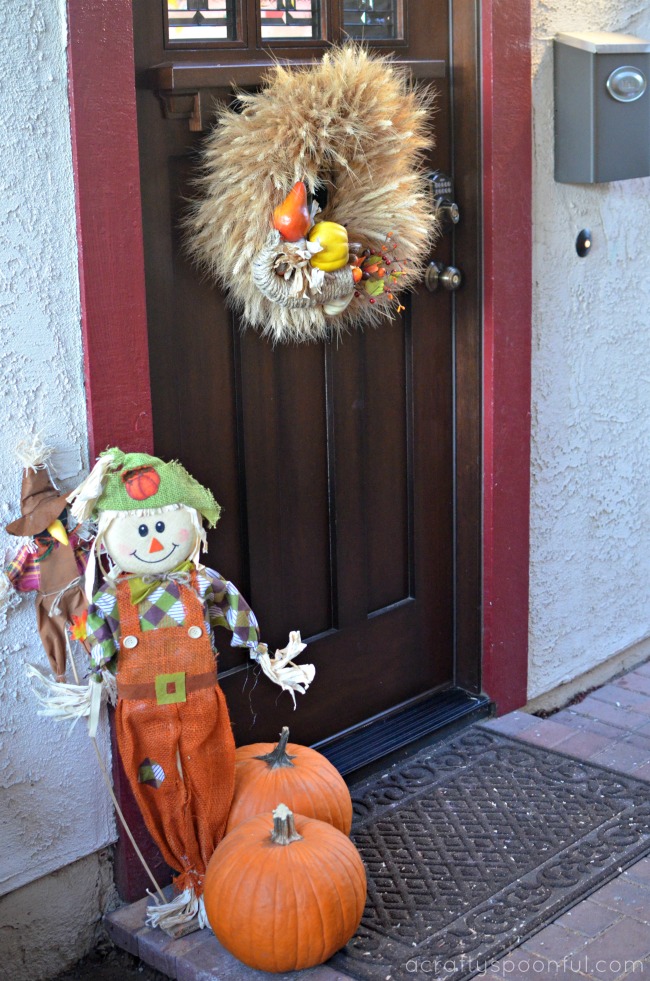
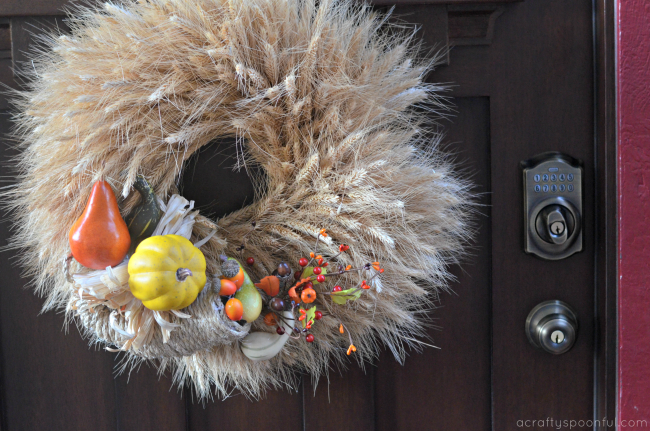
With Thanksgiving right around the corner, we’re making sure our home is in tip-top shape for guests. As the holidays get nearer, you never know who might stop by at any given moment. And the first thing they see when coming up to our home is our front door. So we’re sprucing things up with these easy DIY Thanksgiving door decorations and a simple DIY Cornucopia Wreath.

When we first moved into our new home, the one thing that stuck out like a sore thumb was the ugly solid brown door that stood in the doorway of our home. I didn’t care for it much and it always bugged me that it didn’t show off the awesomeness that is our home. So when my husband found a door in the exact style we were looking for on clearance at Home Depot, we picked it up right away and he installed it. Instead of leaving the trim around the door brown, we brightened things up with a deep red color to really make the door pop. 

To keep the door in tip-top shape, we rely on our go-to cleaning products to spruce things up. With the door being the first thing all walk through to enter the home, it can get a bit beaten up over time and gather dust and grime from the outside elements. 

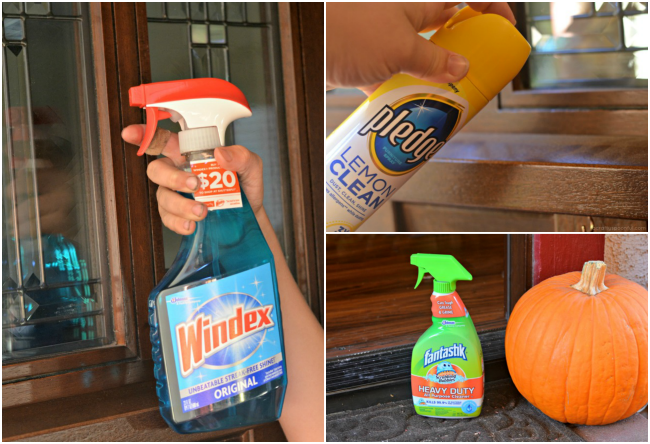
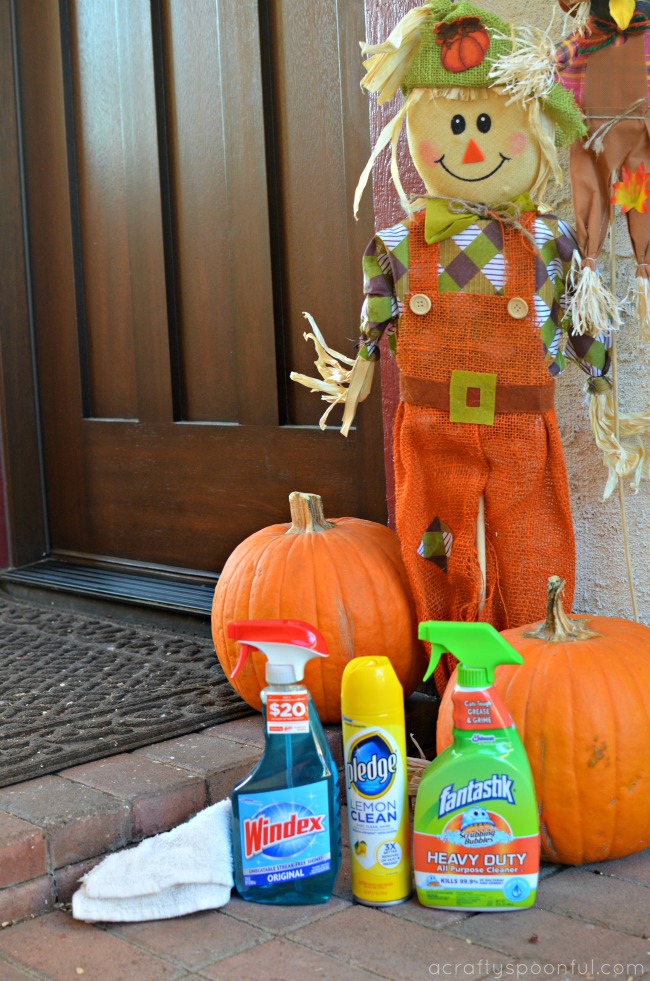
Since our new door has three windows in it, we keep Windex® Original close by. It has an Unbeatable Streak Free Shine and starts working on dirt and grime even before you wipe*. Trusted for generations, Windex® Original cleans and shines glass, mirrors, and more! 

Pledge® beautifies and enhances the appearance of your hard surfaces and our finished, sealed door always looks so much better after we wipe it down with Pledge®. Pledge® Lemon Clean can be used on furniture all around the house to quickly clean, condition and protect –all while leaving behind the classic, fresh lemon Pledge® scent. It also features Allergen Trappers® to remove dust and up to 90 percent of the allergens found in dust. That means in addition to cleaning the front door, we can clean up the other household hard surfaces including wood, laminate, stainless steel, leather, marble, granite and plastic.

Scrubbing Bubbles® Fantastik® 32 oz. All-Purpose Cleaner is the perfect cleaner for our door threshold. It gets a beating as the kids run in and out of the home so we need a powerful antibacterial solution cuts to the center of grease and grime and dissolves it on contact and disinfects the area. And the no-rinse solution means you don’t have to spend as much time cleaning.

Easy DIY Thanksgiving Door Decorations

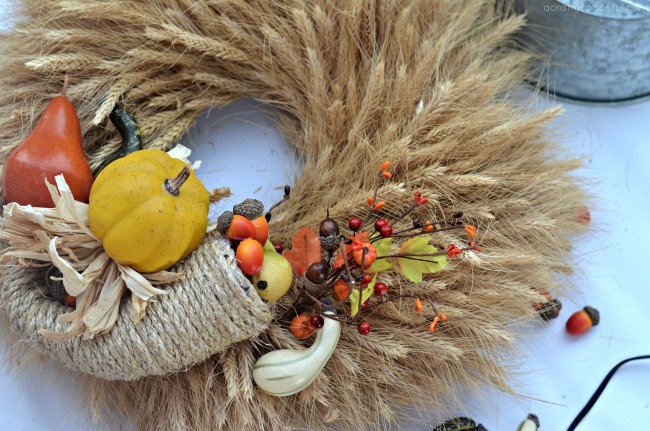
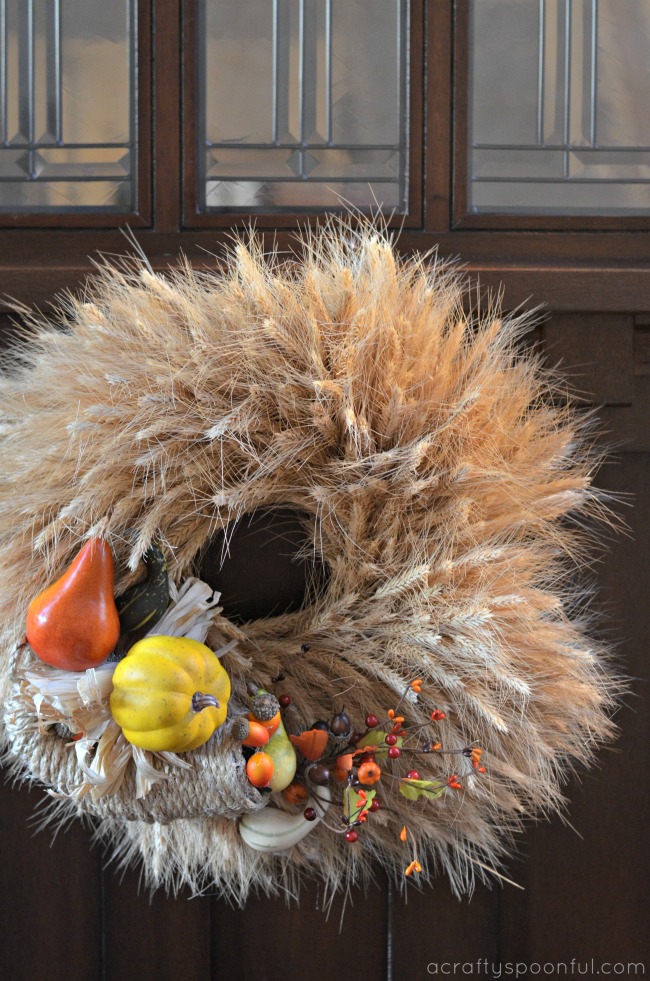
Now that our door is all nice and clean, it’s time to spruce things up even more with a few easy DIY Thanksgiving Door Decorations. This DIY Cornucopia Wreath is not only easy to make, it can be saved to use year after year! 

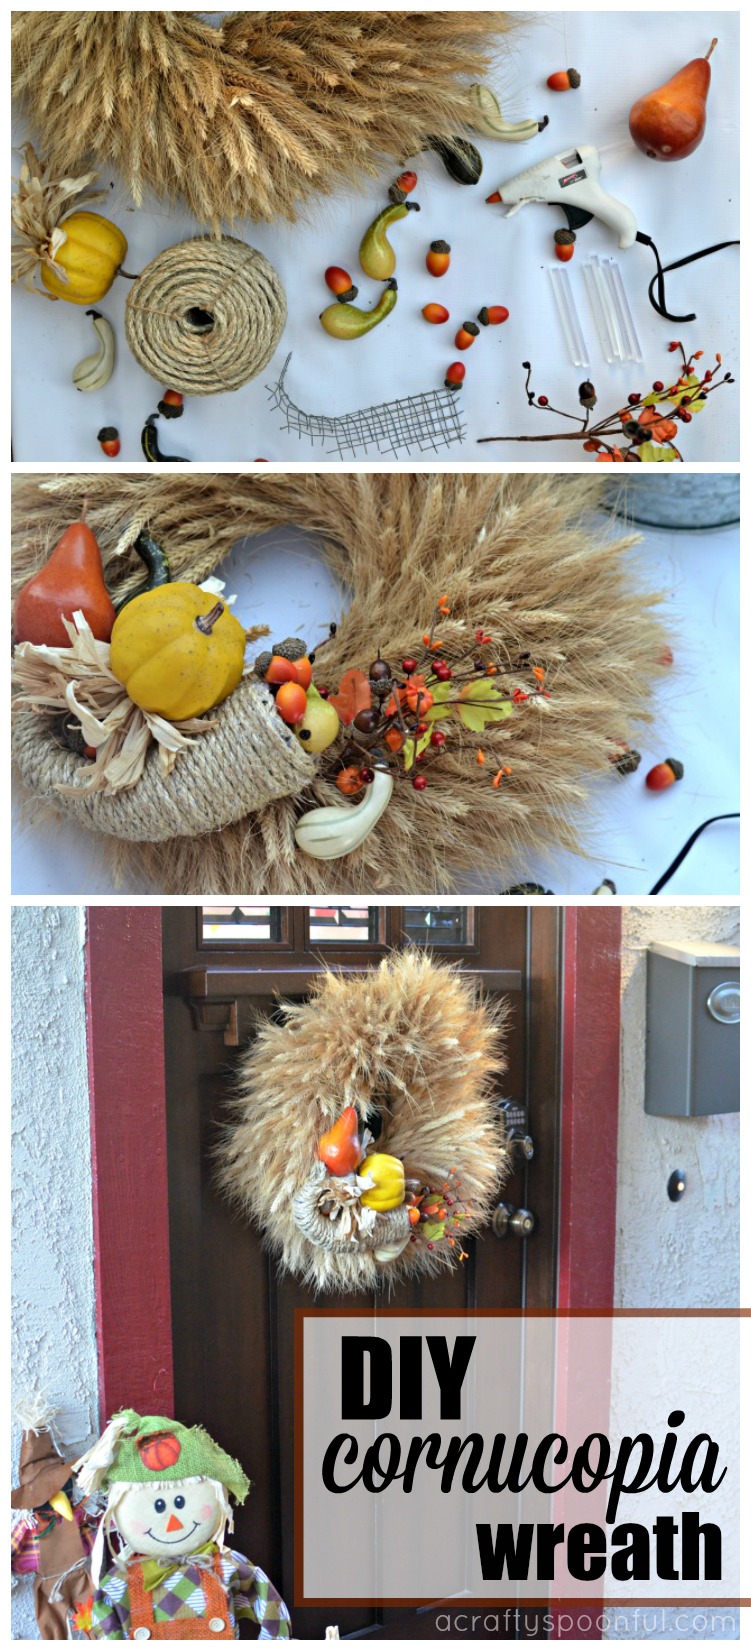
DIY Cornucopia Wreath

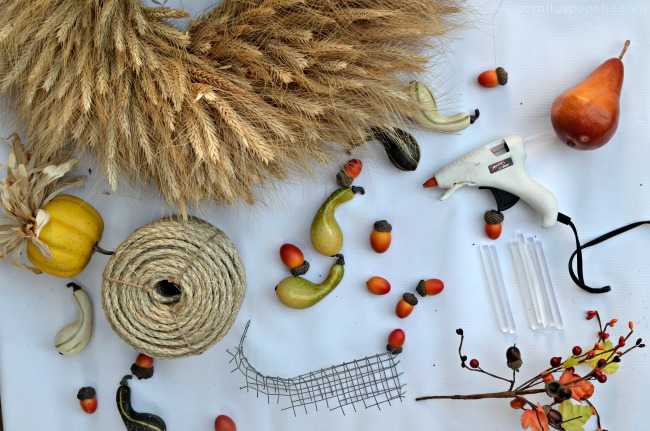
What you’ll need: 

  • Wheat wreath (found at Home Depot)
  • chicken wire
  • twine
  • hot glue gun
  • hot glue sticks
  • plastic/fake fruit and veggies

What you do: 

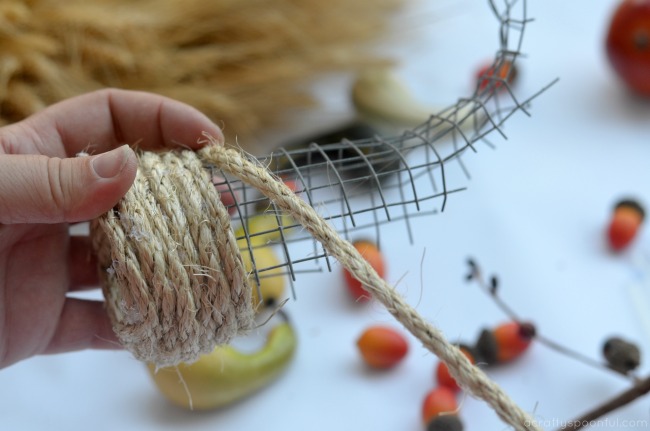
1. Cut a wide triangle out of the chicken wire and form into a cornucopia shape. 

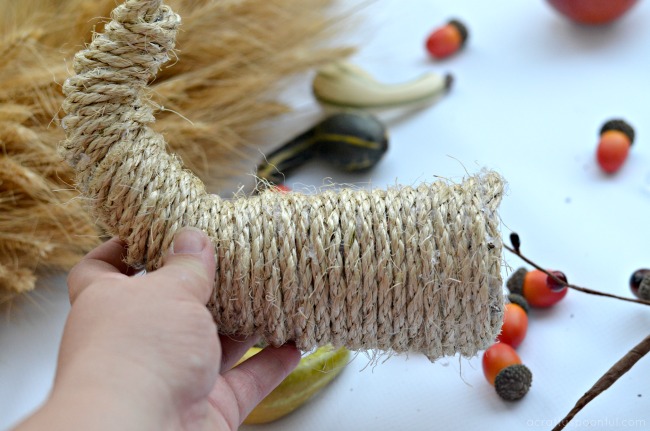
2. Using the twine, wrap around the cornucopia frame and secure twine to the form and itself with hot glue. 

3. Continue wrapping the twine all the way down the form to the smallest tip and then secure the end by sticking it back in the end of the form.

4. Secure the cornucopia onto the wheat wreath with hot glue. 

5. Add decor in and around the cornucopia by hot gluing it in place. Make sure to balance the size of each piece and the colors. 

6. Hang on the door and step back to enjoy your handiwork! 

We grabbed a fun scarecrow and stacked two of the pumpkins from our trip to the pumpkin patch next to it to complete the Thanksgiving door decorations.

Keeping things simple yet welcoming is key. The front door doesn’t need too many decorations so choosing the pieces you use wisely will help keep a nice balance.  

Be on the lookout for Windex® and Scrubbing Bubbles® Fantastik® product promotions on display in Home Depot stores until 10/31/17, and Pledge® products on display starting 11/1/17. You can find all products in the cleaning products aisle at your local Home Depot store. 

What do you do to spruce up your front door during the holidays? 

*Claim Based on Windex® Original lab testing against leading competitor glass cleaners per AC Nielsen 52 weeks ended 7/29/2017

Love what you read? Check out these great posts! 

Pin this article for later! 

Click the Pin button on the image below to save for later. 

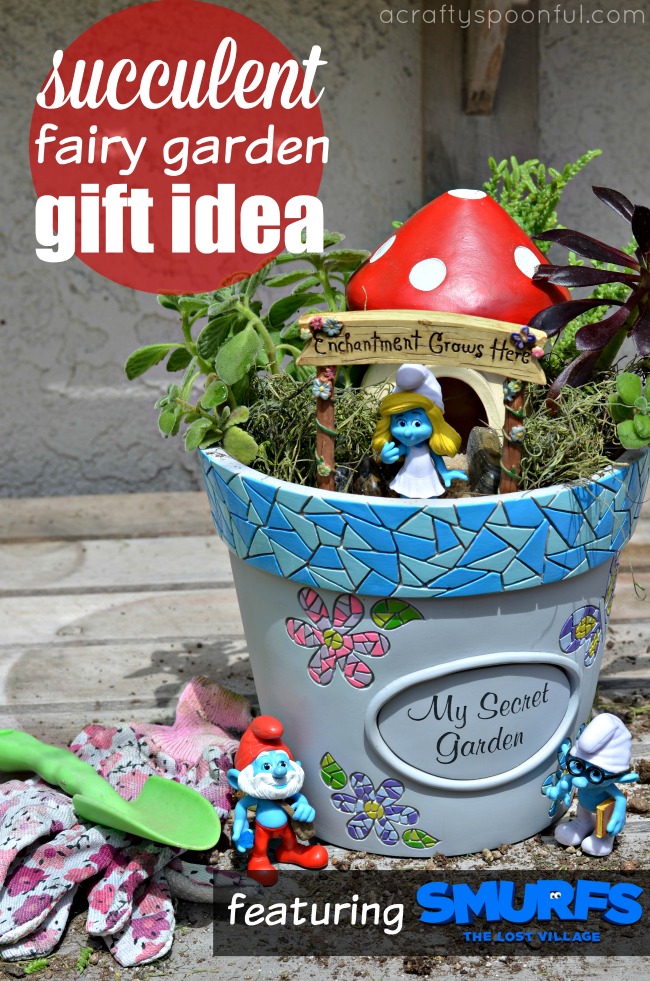
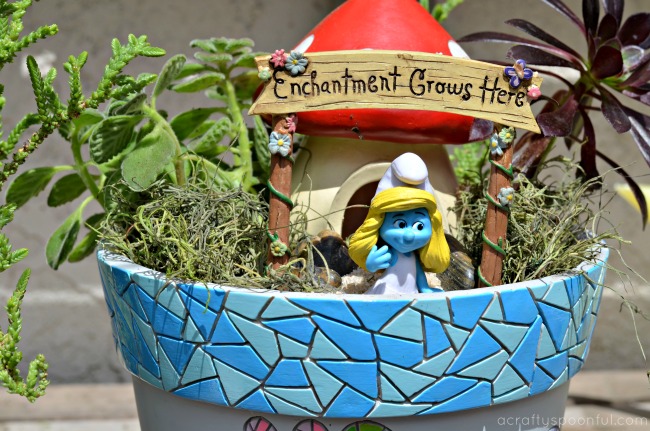
Smurfette’s Secret Succulent Fairy Garden

This secret succulent fairy garden would make a perfect gift for Mother’s Day or any other special occasion. Plus, it’s super easy to put together when you have the right tools!

A few weeks ago we were invited to a screening of Smurfs The Lost Village and boy did my kids love it! The movie took us through the story of Smurfette’s creation and her struggle with finding her unique talent. Since she was made out of clay and different from the other Smurfs, she grew sad and frustrated with her lack of being able to master one skill. 

As the story unfolds, she and a few Smurf friends head off on an adventure that brings her to realize who she really is and the power she holds inside. 

Well… my kids were quite inspired by the movie because as soon as we got home they wanted to create their own Smurf village in the back yard! The fun plants that came alive and the various creatures found along Smurfette’s journey were all they could talk about. 

So I pitched a fairy garden but instead of fairies, we used Smurfs! And how perfect did it turn out? Plus? It was so easy for the kids to make! 

Watch the video at the end of this post for more details! 

[Read more…]


© A Crafty Spoonful - All Rights Reserved
It is OK to use one of my photos provided a link back and/or proper credit is given. It is NOT ok to copy and paste a whole post including instructions. Please do not remove watermarks or alter images in any way. Please contact me with any questions at danielle@acraftyspoonful.com

.