Homemade Turkey Instant Pot Tamales + How To Battle Heartburn

This shop featuring Homemade Turkey Instant Pot Tamales has been compensated by Collective Bias, Inc. and its advertiser. All opinions are mine alone. #ad #MakeHeartburnHistory #CollectiveBias
homemade-tamales-in-the-instant-pot

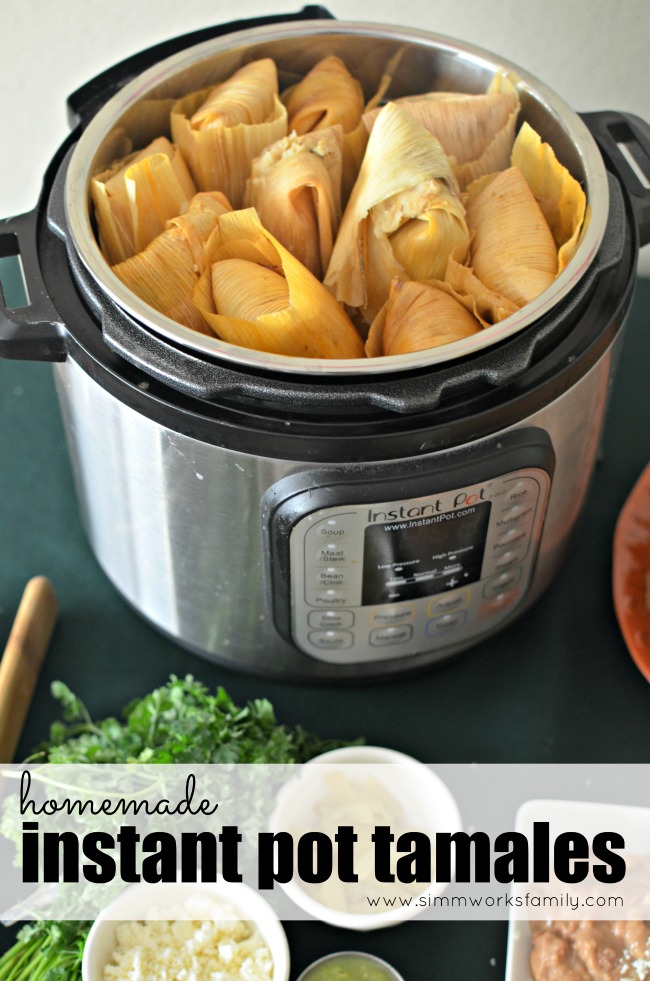
With the holidays right around the corner, we’re already planning our Thanksgiving meal. Since my mother in law will be out of town, I’m trying to think outside the box and am considering a few alternate main courses for our Thanksgiving dinner table. And these homemade instant pot tamales totally fit that bill! Paired with some rice, beans, and some bunuelos for dessert, our whole meal could take less than an hour to prep with family and make instead of the full day of cooking it normally takes. 

Every year my mom would make enchiladas for Christmas so why not tamales for Thanksgiving, right? Tamales are the perfect meal to get the whole family involved with. Everyone can help make tamales. Plus you can use a turkey filling for the traditional turkey meal! And when you can make them in the instant pot, it’s even better! Because they cook a lot faster than the stovetop steaming method.  But for those who may suffer from frequent heartburn, this meal may not look so appetizing. 

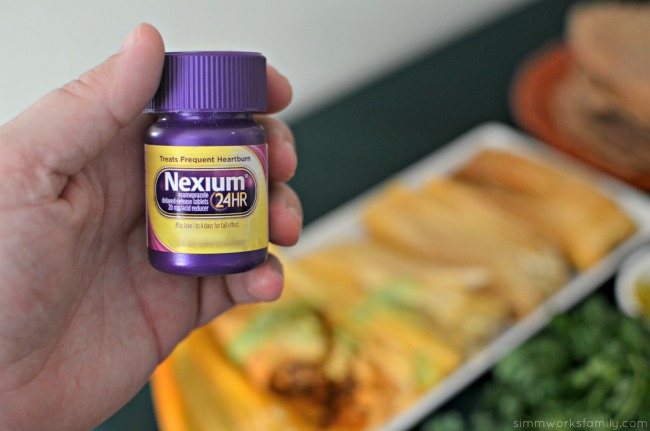
Heartburn sucks. As someone who’s suffered from heartburn since I was a young teen, I’m very familiar with the symptoms and issues that come with frequent heartburn. Not being able to enjoy my favorite foods because they trigger heartburn would take the joy out of family meals. And as someone who’s grown up eating Mexican food on a regular basis, not having my favorite spicy foods just isn’t going to work! Luckily I have Nexium® 24HR 42ct Tablets* in my medicine cabinet.
homemade-tamales-in-the-instant-pot-load-into-pot

Homemade Turkey Instant Pot Tamales

  • 36 corn husks
  • 3 cups of masa harina
  • 2 cups low sodium chicken stock
  • 8 ounces lard (manteca)
  • 2 teaspoons baking powder
  • 2 teaspoons kosher salt
  • 4 cups shredded cooked turkey

Soak corn husks for about 1-2 hours in water. Mix 3 cups of masa harina with 2 cups chicken stock and let rest, covered, for 15 minutes.

Combine lard, salt, and baking powder in the bowl of a stand mixer and beat on medium-high speed until well whipped, about 1 minute.

Add one-fourth of the masa at a time to the lard, beating between additions until thoroughly incorporated. Add chicken stock and continue beating until dough is light and has a soft and spreadable hummus-like texture. Cover dough with plastic wrap and refrigerate for 1 hour.

Remove tamale dough mixture from the fridge.

Working one at a time, grab a corn husk and place 2-3 tablespoons of tamale dough on larger end of husk and spread into a rectangle approximately 1/4 inch thick, leaving a 1-inch border around edges of husk. Place a heaping tablespoon of turkey in a line down center of dough. Fold over sides of husk so dough surrounds filling, then fold bottom of husk up and secure closed by tying a thin strip of husk around tamale. Repeat with remaining husks, dough, and turkey.

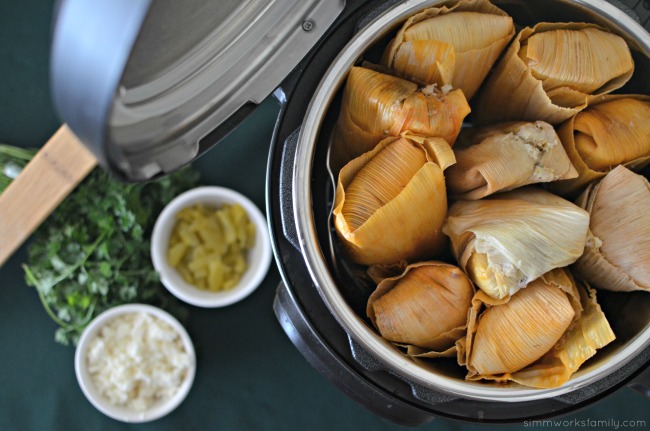
Fill Instant Pot with 1 cup of water and add steam basket or rack. Rest tamales upright in Instant Pot above the water level. Cover and cook on manual for 20 minutes. Use the quick pressure release method to release pressure in the Instant Pot. Once the silver pin has dropped and it’s safe to open the lid, remove tamales from Instant Pot and let rest until dough firms up, about 15 minutes. Serve immediately with salsa verde or store in refrigerator for up to a week or freeze for up to four months. Defrost and reheat tamales in Instant Pot using the same timing.

Makes 3 dozen tamales.

homemade-tamales-in-the-instant-pot-the-perfect-holiday-meal

Getting together for the holidays is about the experiences we create with our loved ones. Sharing a meal doesn’t have to mean we stick with our traditional ideas of Thanksgiving dinner. Consider stepping out of the box yourself and trying something new this holiday season! Instead of spending hours in the kitchen while the family is in the living room, cut it down to 30 minutes of cook time and spend that extra time with your friends and family making tamales. 

Don’t want to skip the traditional bird for Thanksgiving? Enjoy these tamales the weekend after Thanksgiving and use up the leftovers! Perhaps host your own friendsgiving and have friends come over to help make them with you. 

And if frequent heartburn hits, don’t let it ruin your holiday! Nexium® 24HR provides protection from frequent heartburn so everyone can enjoy the best flavors of the holidays. Did you know just one pill a day provides all-day, all-night protection from frequent heartburn – no matter what triggers it?* Pretty awesome! 
homemade-tamales-in-the-instant-pot-how-to-battle-heartburn-with-nexium

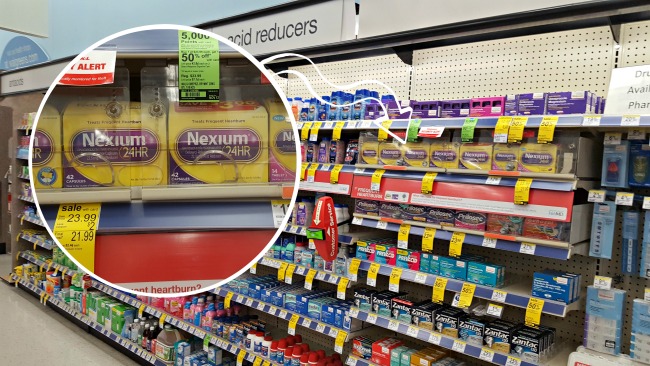
You can save now on Nexium® 24HR at Walgreens! Just head over to the aisle with the acid reducers and check out these savings: 

  • November 13, 2016 -National FSI – $5.00 coupon on Nexium 24HR (28 ct. and 42 ct.)
  • November 1 – 30, 2016 – In-Store Walgreens coupon – $2.00 off Nexium 24HR (48 ct.)
  • November 1 – 30, 2016 – Special price in-store – Two Nexium 24HR (28 ct.) for $40.00

*May take 1 to 4 days for full effect. Use as directed.
nexium-24hr-at-walgreens

What’s your favorite holiday meal? 

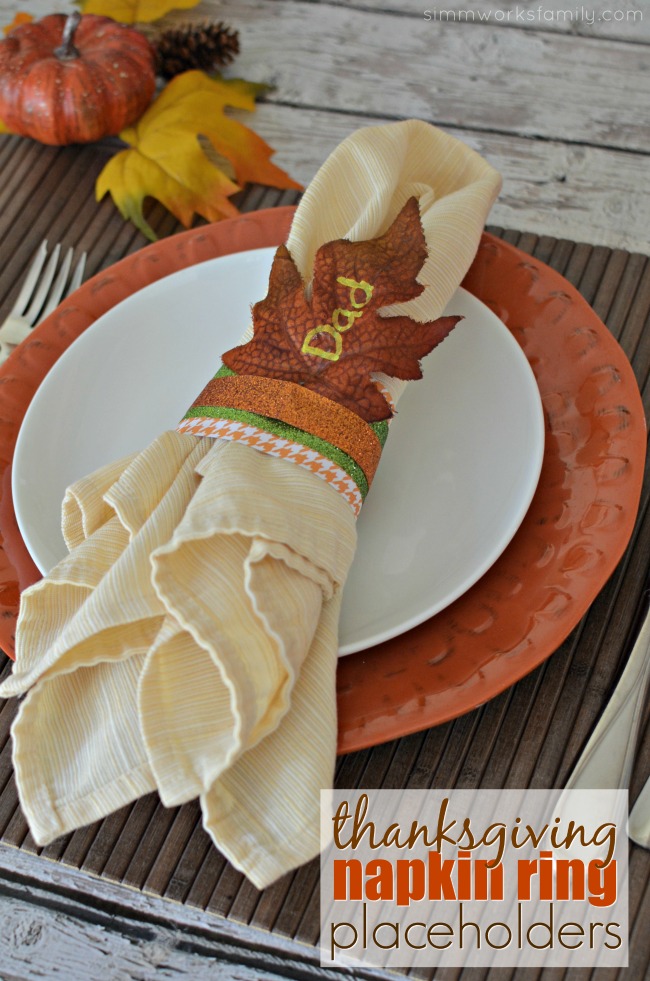
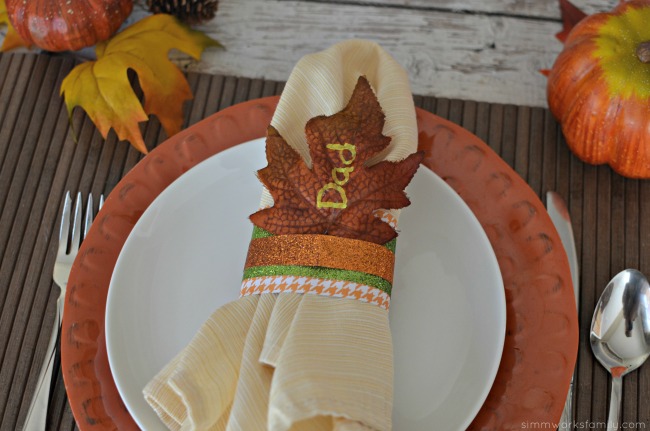
Thanksgiving Napkin Ring Placeholders

This shop featuring Thanksgiving napkin ring placeholders has been compensated by Collective Bias, Inc. and its advertiser. All opinions are mine alone. #HandsOnCrafty #CollectiveBias

thanksgiving-napkin-ring-placeholders-adding-sparkle-to-the-thanksgiving-table

While spring may be my favorite season, I love the fall for the way it brings friends and family together in thanksgiving. We celebrate the month of November by sharing what we’re thankful for and spending time around the table together. And every year for Thanksgiving, we head over to my mother in law’s house to share a meal. 

My mother in law loves creating a beautiful table scape and, after making these napkin rings a few years back, I’m in charge of the napkin rings and place holders. And my daughter loves helping out so I always try and find something a. that she can do and b. that’s easy and quick since we usually have to make at least 20 of them. 

thanksgiving-napkin-ring-placeholders-a-quick-and-easy-table-setting

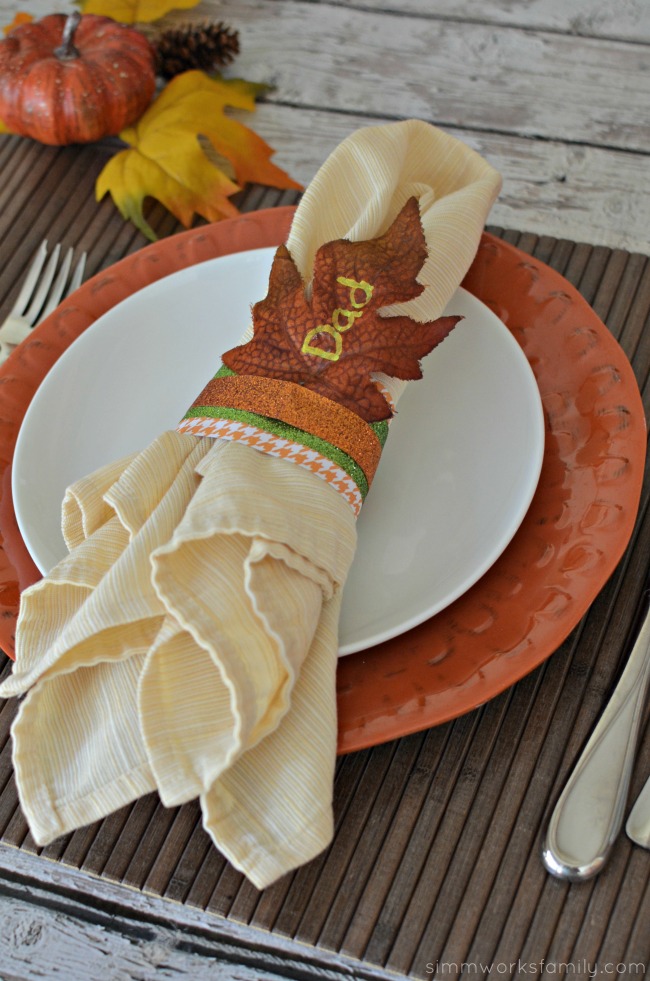
Well this year my mother in law will be heading out to Boston to celebrate with my husband’s brother so we’re still trying to figure out what our plans are. But no matter where we go, we’ll be prepared with these awesome thanksgiving napkin ring placeholders that my daughter and I put together this past weekend. 

She was dying to get started and make them so we got a head start and prepped about 10 of these bad boys (no names yet on half of them). We’ll be ready for whatever house we end up at on Turkey Day.  

Thanksgiving Napkin Ring Placeholders

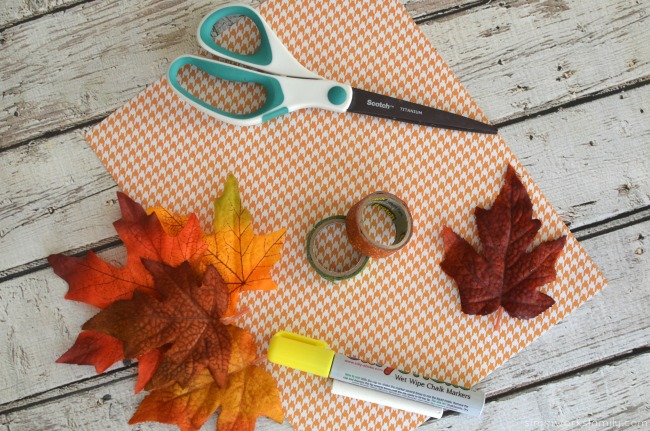
What you’ll need: 

  • Scotch® Expressions Brown Glitter Tape
  • Scotch® Expressions Green Glitter Tape
  • Scotch® Create Double-sided Tape
  • 1 piece 8.5 x 11″ card stock (solid or patterned color)
  • scissors
  • chalk marker in fall colors
  • fake fall leaves
  • cloth or disposable napkin

thanksgiving-napkin-ring-placeholders-materials-needed

What you do: 

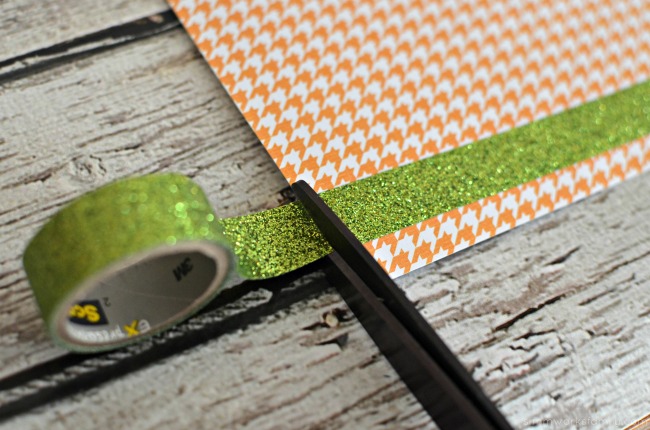
1. Grab the Scotch® Expressions Green Glitter Tape and, with your paper in the portrait position, place a row of green tape about 1/2 inch up from the bottom of the paper. Repeat once more with a second row of green glitter tape directly above the first. 

2. Cut a straight line about 1/2 inch from the top of the second row of green glitter tape. This will be your napkin ring base. Repeat as many times as you need to in order to get the desired amount of napkin rings. 

thanksgiving-napkin-ring-placeholders-cut-tape thanksgiving-napkin-ring-placeholders-write-in-name

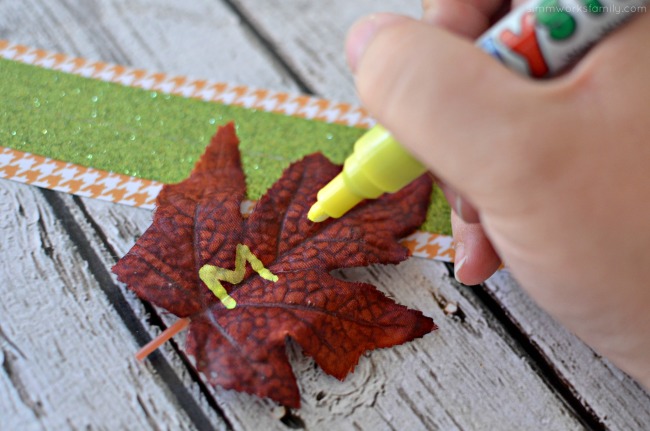
3. Grab the leaf and write the name of the person this napkin ring placeholder is for. 

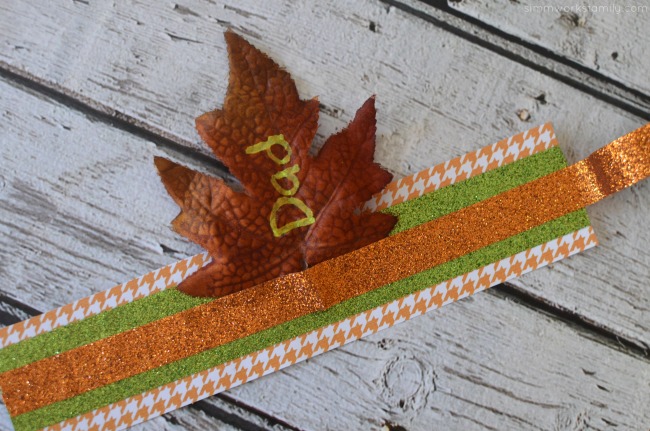
4. Position the Scotch® Expressions Brown Glitter Tape in the middle of the two green tape lines. Place the leaf in the center of the paper and use the brown glitter tape to secure it. Leave a small tail at the end of the brown tape to secure the placeholder around the napkin. 

thanksgiving-napkin-ring-placeholders-secure-leaf-in-place-with-tape thanksgiving-napkin-ring-placeholders-wrap-napkin-ring-around-napkin

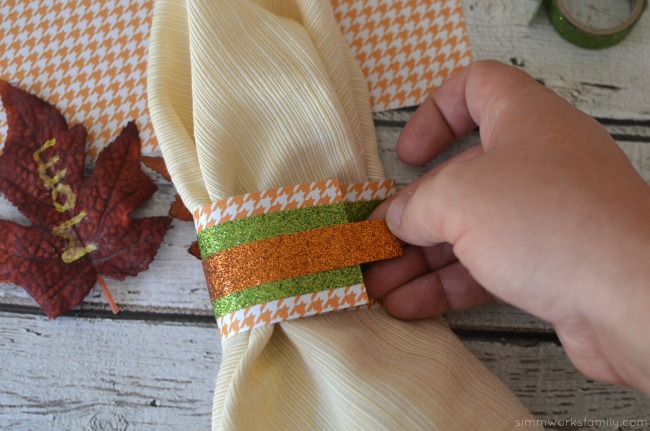
5. Wrap the napkin ring around the napkin and secure in place with tail of the brown glitter tape and reinforce with some Scotch® Create Double-sided Tape underneath the overlapping paper. 

Tada! You’re all set! 

thanksgiving-napkin-ring-placeholders-a-simple-way-to-add-sparkle-to-the-table

How do you celebrate Thanksgiving in your home? 

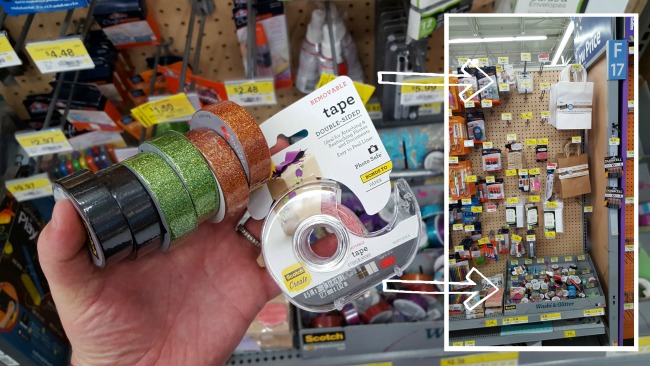
I was able to find all of the crafting goodies I needed, including the Scotch® Expressions Glitter Tape, in the craft aisle in Walmart. So easy to find everything in one place! With a perfect combination of versatility, function & fun, Scotch® Expressions Tapes turn everyday projects into simply inspired creations. I love how simple and easy it was to make these Thanksgiving napkin ring placeholders with my daughter and how fun and sparkly they ended up! How awesome is that? 

scotch-at-walmart

Tips On How To Navigate Health Care Plans + $100 Amazon GC Giveaway

This post featuring tips on how to navigate health care plans is sponsored by UnitedHealthcare. 

are-you-a-health-plan-pro-tips-on-how-to-navigate-health-care-plans

Having kids can be expensive. Even from the very beginning. Throughout pregnancy, childbirth, and the first year of life, if you haven’t chosen the right health care plan for your growing family, health care costs can skyrocket. That’s why it’s good to know your options when open enrollment comes around so you know what health care plan to choose and how to get the best plan for your family. 

When I was pregnant with my second child we switched over to a completely new health care plan. We had switched over from our old provider and weren’t quite sure what to do. Luckily UnitedHealthcare was there to help us out and show us the ropes. 

Now UnitedHealthcare is here again with a fun way for families to find out what health plan is best for them with two games to play on their website:Are You a Health Plan Pro andWhat’s The Word.

tips-on-how-to-navigate-health-care-plans-time-with-family

What’s The Word

Our family’s health is something that’s very important to us but navigating the health care system can seem daunting. Luckily UnitedHealthcare is here to help make those choices a little easier. And they have a fun way of doing it too! 

Right now they’re running two fun activities where you can learn more about the world of health plans AND enter for a chance to win prizes. Pretty cool huh?  These contests both run until November 30th. 

The first activity you can participate in is an interactive crossword puzzle called What’s The Word.  The concept is pretty easy to understand. It’s a terminology game where viewers have to fill in the correct word in the puzzle for the definition that it matches with. 

While you’re doing your crossword puzzle, print out this FREE printable so your kids can play along as well! 
health-care-word-search1

Are You A Health Plan Pro? 

Done with the crossword and ready for more of a challenge? Then play Are You a Health Plan Pro? and jump into this 4-stage game: 

Stage 1: Answer a few quiz questions about health care (mostly terminology)…if you get an answer wrong, it tells you the right answer so you are learning no matter what.

Stage 2: Play a matching game surrounding the three different types of health care accounts—the FSA, HSA, and HRA. You will be given three different descriptions of the accounts, and will have to drag and drop each account label to the description it matches.

Stage 3: Use United Healthcare’s slide configurator to learn more about premiums versus out-of-pocket ratios. You will be given a family description and their health care needs (family of four / children 8 and 14, occasional need of prescriptions, visits ER once or twice a year, etc.) and must use the sliders to figure out the correlation between the premium and out-of-pocket costs for that specific scenario.

Stage 4: Use United Healthcare’s ranker to organize 8 health care situations from least expensive to most expensive (examples are having a baby, going to urgent care, having a surgery). Once you rank them, it will correct any mistakes you made so you know which item belongs where in the list…it will also tell you how each item affects your out-of-pocket costs.

After you have completed each stage (should take a total of around 5-6 minutes) you will enter your name and email to be entered to win a prize. Then you will receive a score on a scale of 1 to 5 stars for how ready you are to purchase a plan. That way, you know whether you need to do more research or that you feel confident in yourself to purchase the best plan for you and your family.

There are prizes given for both the crossword puzzle and the Health Plan Pro game. There will be a $100 weekly winner chosen and $500 monthly winner chosen for each sweepstake. So on top of learning more about the health plans out there, you can win cash money as well. How awesome is that! Are you ready to play? 

These are two separate sweepstakes and two separate chances to win prizes!

Play Are You A Health Plan Pro by clicking here | Play What’s The Word by clicking here

tips-on-how-to-navigate-health-care-plans-saving-for-the-future

How do you decide on a health care plan? 

Want another chance to win big JUST for checking out these sweepstakes? Enter to win a $100 gift card to Amazon below! 

Open to US only, 18+. Giveaway ends November 30th at 11:59pm PST and a winner will be randomly chosen December 1st and announced right here. 

Are You A Health Plan Pro?

*Important: By completing any entry in our giveaways, you agree to ALL of our giveaway terms and conditions. Comments such as “Thank you for the giveaway” “I want to win” etc will not be counted as the mandatory entry and will be deleted. Please be aware that comments are moderated and may not appear right away. Make sure you use a valid email address so we may notify you if you’ve won! Giveaway winners will receive their prize through email directly from the sponsor. Winner must provide email address to receive this gift card.
Ways to Reduce Stress During The Holidays

This post was developed in partnership with Tom’s of Maine. All opinions are my own.

ways-to-reduce-stress-during-the-holidays-simple-stress-relievers-for-the-holiday-season

The holidays are upon us and the countdown is on to get all the things done before the end of the year. And for some that means a lot of stress all at once. Trying to get everything done, go to every event, and get everything one needs to make a great holiday season. But you don’t have to stress yourself out during the holidays! 

I see my kids watching me, learning how to act and react by observing me. And I want to make sure they know what’s truly important in life. As they’re taking in everything I do, I want them to know that they are why I do everything I do. I also want my girls to know that it’s ok to think about themselves. To take time to care for themselves so they don’t get burnt out. And they’re really starting to pick up on it. 

With these simple tips you can reduce stress during the holidays and enjoy more time with your family and friends. And that’s all that matters, right? 

Ways to Reduce Stress During The Holidays

ways-to-reduce-stress-during-the-holidays-workout

1. Exercise. 

One of the first things I try to remember when I feel stress coming on is the last time I took a walk or worked out. I’ve found that I’m a lot less stressed when I burn off the extra tension I have built up. Plus it helps to have something to think about other than the long laundry list of to-do’s. 

2. Meditate. 

I know it sounds silly but taking just 5 minutes out of your day to focus on something positive really helps. Just sit down in a relaxing position, close your eyes, try to clear your head, and repeat a positive affirmation of your choosing. Allow it to help you focus on what you need to get done. 

ways-to-reduce-stress-during-the-holidays-relax

3. Eat Better. 

Yes, I know, I know. It’s the holidays and the sweets are everywhere. But overindulging will only drag you down. Make sure not to skip meals either! While you may be busier than usual, keep a good high-protein snack at hand just in case you start to get hungry but aren’t able to get a good meal in. We’re all becoming more conscious of what goes in our body so try to make good eating decisions. 

4. Sleep. 

While it’s tempting to stay up all night checking off every box of your to-do list, sometimes it’s better to just start over in the morning. You’ll be more refreshed and your mind clearer. Consider trying to go to bed just 1/2 an hour earlier than normal and see if your body reacts to the change well. Make sure you’re giving yourself time to decompress at the end of the day before going to sleep. 

5. Be Prepared. 
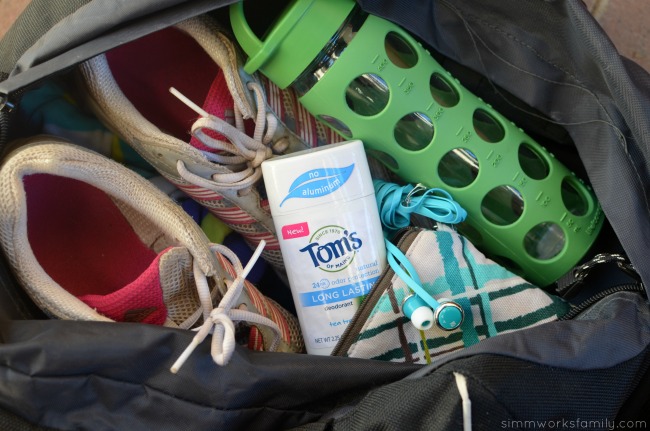
For me, lists and calendar notifications are my friends during this busy season. I write everything down so I don’t forget it and if I do forget, I’ve already set a reminder on my calendar to pop up and tell me. Another great thing to do during the holiday season is meal plan and meal prep. By having freezer meals on hand, I don’t have to stress about feeding my family. And I always keep a stick of Toms of Maine natural deodorant in case things get… a little stinky… due to all of the running around I’ve been doing. 

ways-to-reduce-stress-during-the-holidays-stay-dry-with-toms-of-maine

All of these tips have one thing in common: Take care of yourself! 

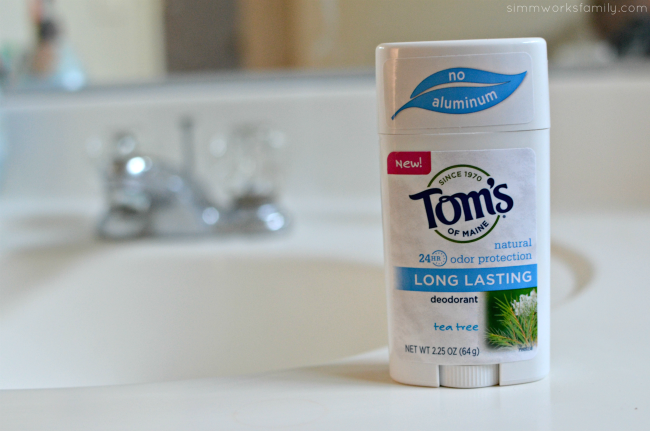
Tom’s of Maine harnesses the power of nature for a more naturally effective way to care for yourself and your family. Tom’s of Maine natural deodorant is the best-selling natural deodorant and has been for decades. And it helps me stay smelling great even under stress with it’s clinically proven, 24-hour odor protection using odor-fighting hops and the mineral zinc and only natural fragrances.

Tom’s of Maine is introducing a new deodorant formula with new and improved scents, and as always, is free of aluminum, artificial fragrances and petrochemicals. And I have to tell you – it works! I’ve switched from my deodorant of many years to Tom’s over the past few weeks and I’m impressed with it’s ability to keep up with me. 

Whether at the gym, in a PTG meeting, or while I’m working away at home trying to get everything done, I know Tom’s of Maine deodorant is right for me. And Tom’s of Maine products are right for my family. 

Why am I so focused on staying less stressed and more “in the now” this holiday season? My kids. 

My kids watch everything I do and are already starting to mimic me. So when I head into the bathroom in the morning to put on my deodorant, they want to as well. By switching to a natural, preservative and petrochemical-free deodorant I’m keeping the stink away without putting “bad stuff” on my skin and near my kids. And when my daughter wants to put it on too to be just like me, I don’t have to worry about her sensitive skin.  

How are you de-stressing this holiday season?

Share in the comments below how you destress and be entered to win an assortment of three Tom’s of Maine Long Lasting deodorants!

Open to US only, 18+. Giveaway ends November 7th at 11:59pm PST and a winner will be randomly chosen November 8th and announced right here. 

Want to enter to win more? Click here to enter to win a $50 Amazon Gift Card, a Tom’s of Maine tote, plus six Tom’s of Maine deodorants: Lavender, Tea Tree, Natural Powder, Unscented, Apricot and Lemongrass!

Thank you and good luck!

*Important: By completing any entry in our giveaways, you agree to ALL of our giveaway terms and conditions. Comments such as “Thank you for the giveaway” “I want to win” etc will not be counted as the mandatory entry and will be deleted. Please be aware that comments are moderated and may not appear right away. Make sure you use a valid email address so we may notify you if you’ve won! Giveaway winners will receive their prize through the mail directly. Winner must provide mailing address to receive these tickets.
Leftover Halloween Candy Blondies

This post featuring Leftover Halloween Candy Blondies originally appeared on our site on November 6th, 2012

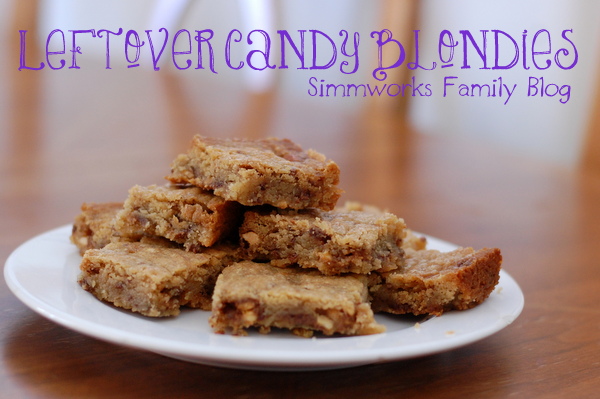
Leftover Halloween Candy Blondies

With Halloween past us, the one thing I needed to do was get rid of all of the leftover Halloween candy. Especially the ones I loved… anything containing chocolate. So we went with a simple plan. We were going to turn our chocolate treasure into new, yummy treats to share with our friends and family.

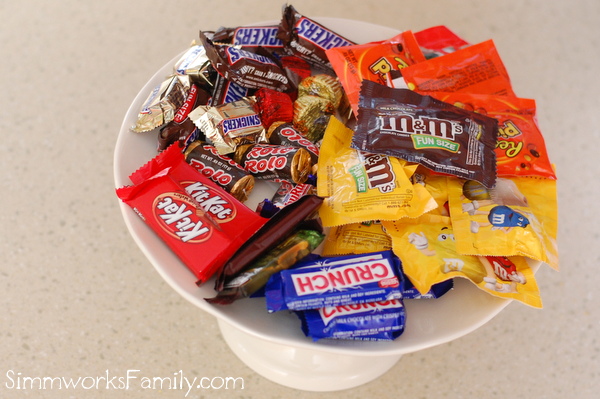
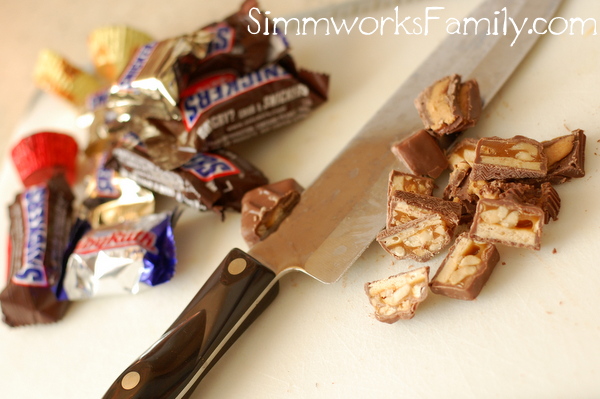
This year we had not one but two trick-or-treaters and let me tell you that two adorable children in costumes are magnets for the good stuff. Yes, look at our score of yummy chocolate candies! 

So I had to act fast and turn the above into something I could giveaway as a homemade goodie bound to attract attention and hungry mouths no longer wanting holiday candy. Good thing our extended family loves sweets! It took less than 2 days for the whole batch of blondies to be completely demolished. A few crumbs left in their place. And oh were they worth it!

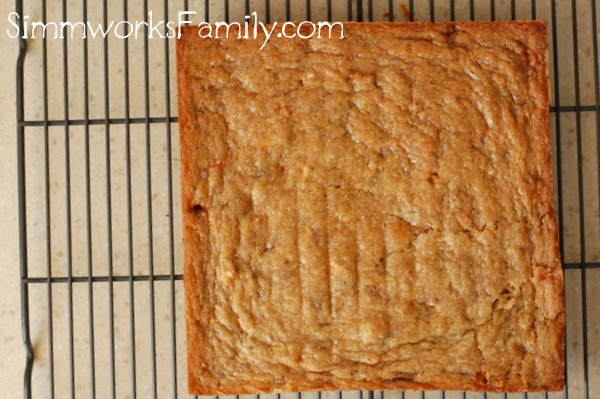
If you’ve never heard of or made blondies before, think of them as the brownies’ distant cousin. Still ooey gooey but without the cocoa. You can basically put just about anything into a blondie. They’re a great catch all for any ingredients you have on hand and want to combine. We stuck with the Snickers, Reeses peanut butter cups, and Baby Ruths for these blondies. The m & ms are earmarked for cookies and the rest will be taken to work by my husband.

If you have any leftover candy in your cupboards or on your countertop you should definitely try to make these delicious bars of gooey goodness. 

Leftover Halloween Candy Blondies

Leftover Halloween Candy Blondies

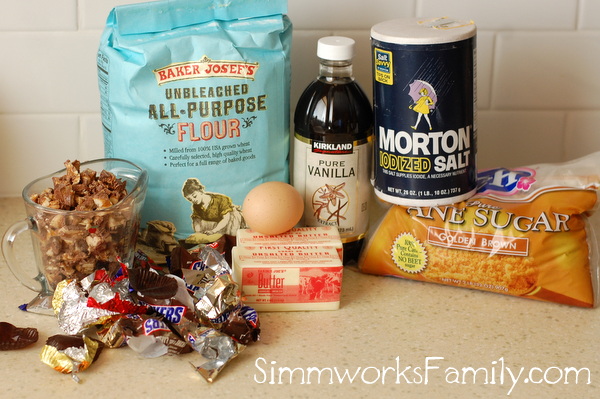
Ingredients

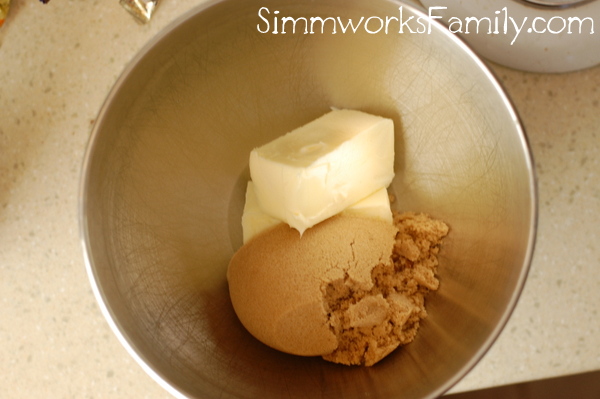
  • 1 cup butter, almost melted
  • 1 cup brown sugar
  • 1 egg
  • 1 teaspoon vanilla
  • 1 pinch salt
  • 1 cup flour
  • 1 cup diced candy bars

Candy Blondies Ingredients

 Instructions

1. Preheat the oven to 350. Grease an 8×8 baking pan. Cut up candy bars.

2. Cream the butter and brown sugar until light and fluffy

Candy Blondies sugar and butter

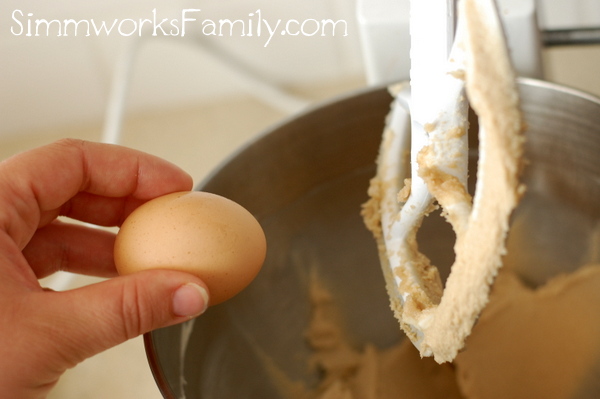
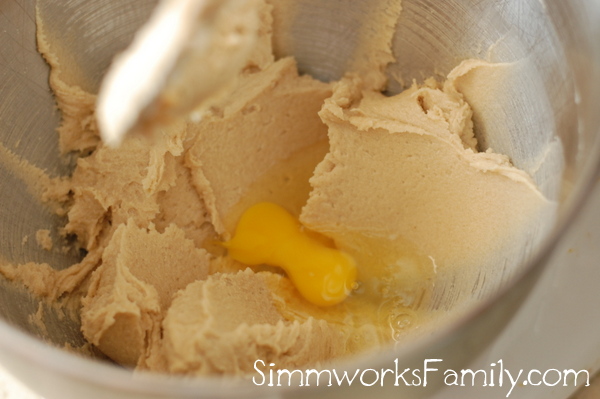
3. Add in the egg and beat until well combined.

4. Add vanilla and salt and mix again.

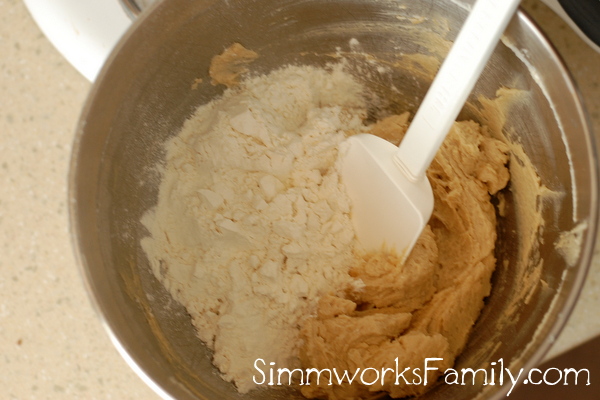
5. Take bowl off stand mixer. Fold in flour until just combined.

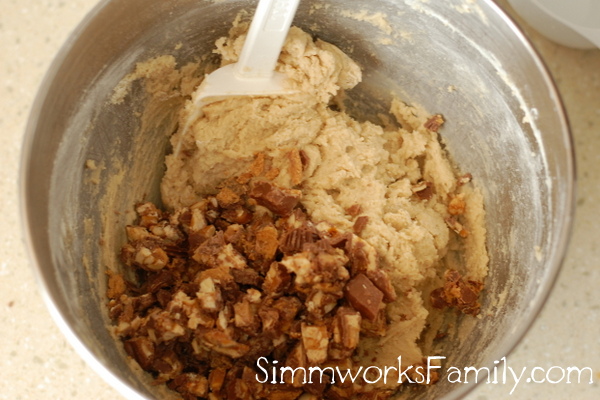
6. Fold in candy bar pieces until just combined.

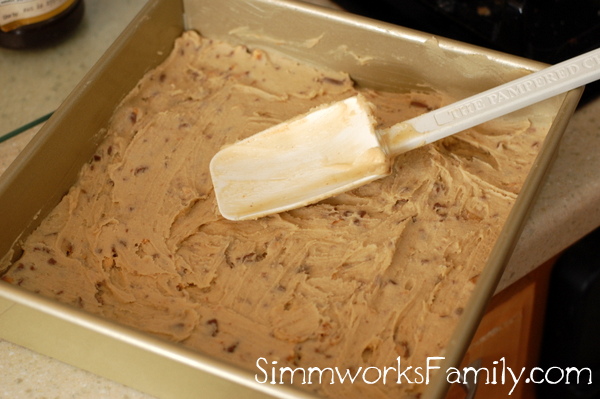
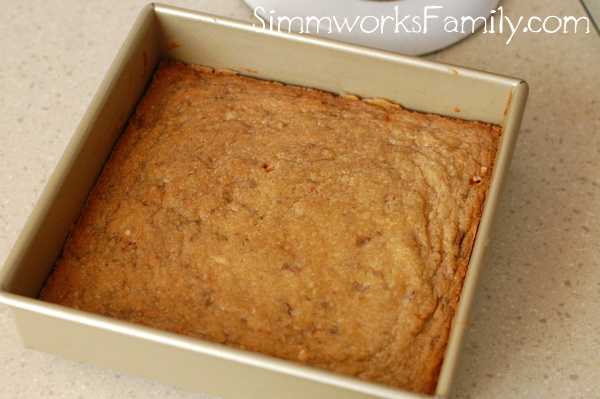
7. Spread mixture into pan and cook for 20-25 minutes or until crust is golden brown.

8. Let cool in pan for 5 minutes.

9. Turn onto a wire rack and let cool completely before digging in.

10. Cut into squares and serve.

Makes 16 servings

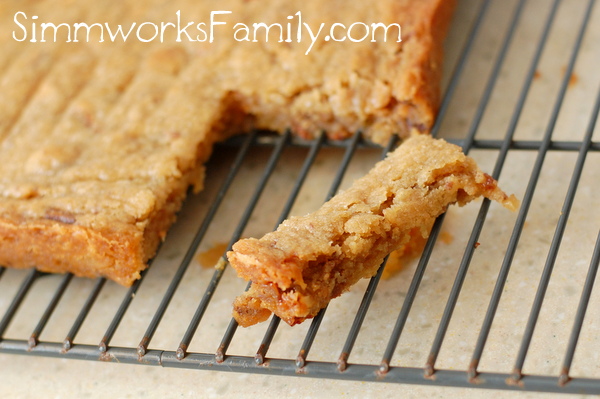
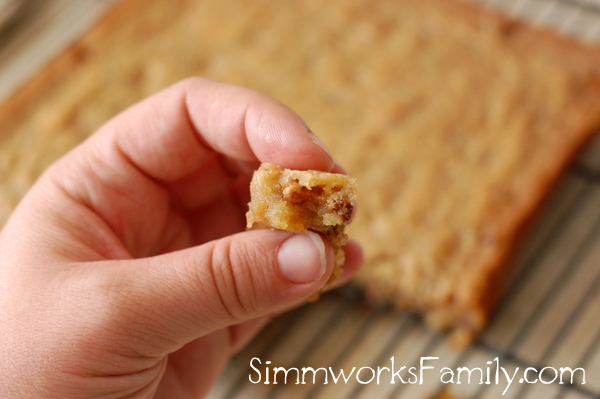
If you’re like me and cant wait to dig in, grab a small piece from the edge and enjoy it’s yummy gooeyness while everything’s still warm and hasn’t set. You’ll be glad you did. Then enjoy the rest when it’s cooled completely to enjoy the full effect of the melded flavors and crisp edges.

Do you have a great recipe for leftover Halloween candy?

I’d love to hear it!

3 Tips On Creating Passwords For Kids

This is a sponsored post featuring 3 tips on creating passwords for kids and is written by me on behalf of LastPass. All opinions are 100% mine.

3-tips-on-creating-passwords-for-kids

With the kids getting older and becoming more tech-saavy I’ve come to realize that I don’t have just my passwords to remember anymore. As I create accounts for my son and daughter on their various devices – iPad, Amazon Fire tablet, and even YouTube Kids – I’ve realized that keeping track of all of these sites and passwords has become a real chore. In an effort to reduce the clutter in my head, I’ve found an awesome solution with LastPass. 

Now I can keep track of the passwords for the sites I log into as well as the sites I log my kids into. And I don’t have to let them know when I change their passwords either. I just make sure to update LastPass! This comes in handy when one of them loses their screen time and tries to hide the device from us. Yes… it’s happened before. 

Are you ready to make your life easier? 

3-tips-on-creating-passwords-for-kids-passwords-made-easy

Source: LastPass

3 Tips On Creating Passwords For Kids

1. Get creative with your passwords – Consider using a phrase instead of a word and replacing some letters with numbers as well as symbols to help strengthen your password. Since each site should have it’s own password, change a few letters and numbers of the phrase for each site. This will create a stronger password and allow you to change each site’s password slightly using the same phrase or words. 

2. Sign up for LastPass – start writing down all of the passwords you create for the family in your LastPass account. Getting started with Last Pass is easy and even better its free, you can Get LastPass for Free here! You can manage and keep track of everything all through LastPass. 

3. Manage Your Passwords – LastPass is accessible wherever you are so you don’t have to worry about forgetting the 50 passwords you already have. You will never be without your passwords and you can now keep your passwords and life in order. But just in case, always make sure to answer the security questions on the site you’re setting your password up with so you can retrieve it in case you don’t add it to your LastPass account. You’ll also want to manage your passwords and update them every 6-12 months just in case.  

3-tips-on-creating-passwords-for-kids-lastpass-vault

Source: LastPass

With LastPass you can access things quickly and easily while reducing the frustration that comes from different passwords in different places. LastPass organizes them all in one safe place! LastPass allows for easy access to your passwords no matter where you are or what account you need to access so you can save time for more important things. 

With new accounts being created constantly you no longer have to remember them all as all your passwords are held in the LastPass vault.

Do you have to remember your kids passwords for various sites? Or do you use your own password? 

Visit Sponsors Site

5 Must Have Products For Exhausted Moms

This post featuring 5 Must Have Products For Exhausted Moms is sponsored by BabbleBoxx.com on behalf of Single Edition Media.

5-must-have-products-for-exhausted-30-year-old-moms

When I turned 30 I had no qualms about the next decade in my life. In fact I have been waiting for 30. Waiting to feel the age I’ve always felt. Is that weird? Maybe. But it’s so true. And being 30. It’s so right for me. But the one thing I didn’t realize as I became another decade older was the toll it would start to take on my body. The fine lines, the lack of elasticity in my skin. And the myriad of other things I started to notice. 

It could be the 3 kids I had or maybe it was stress but one day I just stopped and looked at myself in the mirror as I was brushing my hair and realized that hair was literally coming out in clumps. And I had a minor panic attack until I read somewhere that hair loss is normal. But is it? And that much? What was going on? 

That realization that my body was starting to change made me realize that I might need to look into a good routine. I might need to find products that would help this exhausted 30 year old mom look somewhat put together the next time I showed up at a PTG meeting or the soccer field. Luckily I found just that in these 5 must have products for exhausted moms I’ve listed below! I’m tackling hair care, skin care, and self care. 

5 Must Have Products For Exhausted 30 Year Old Moms

kubik-160425-spire_0973_side_table_2_final-1

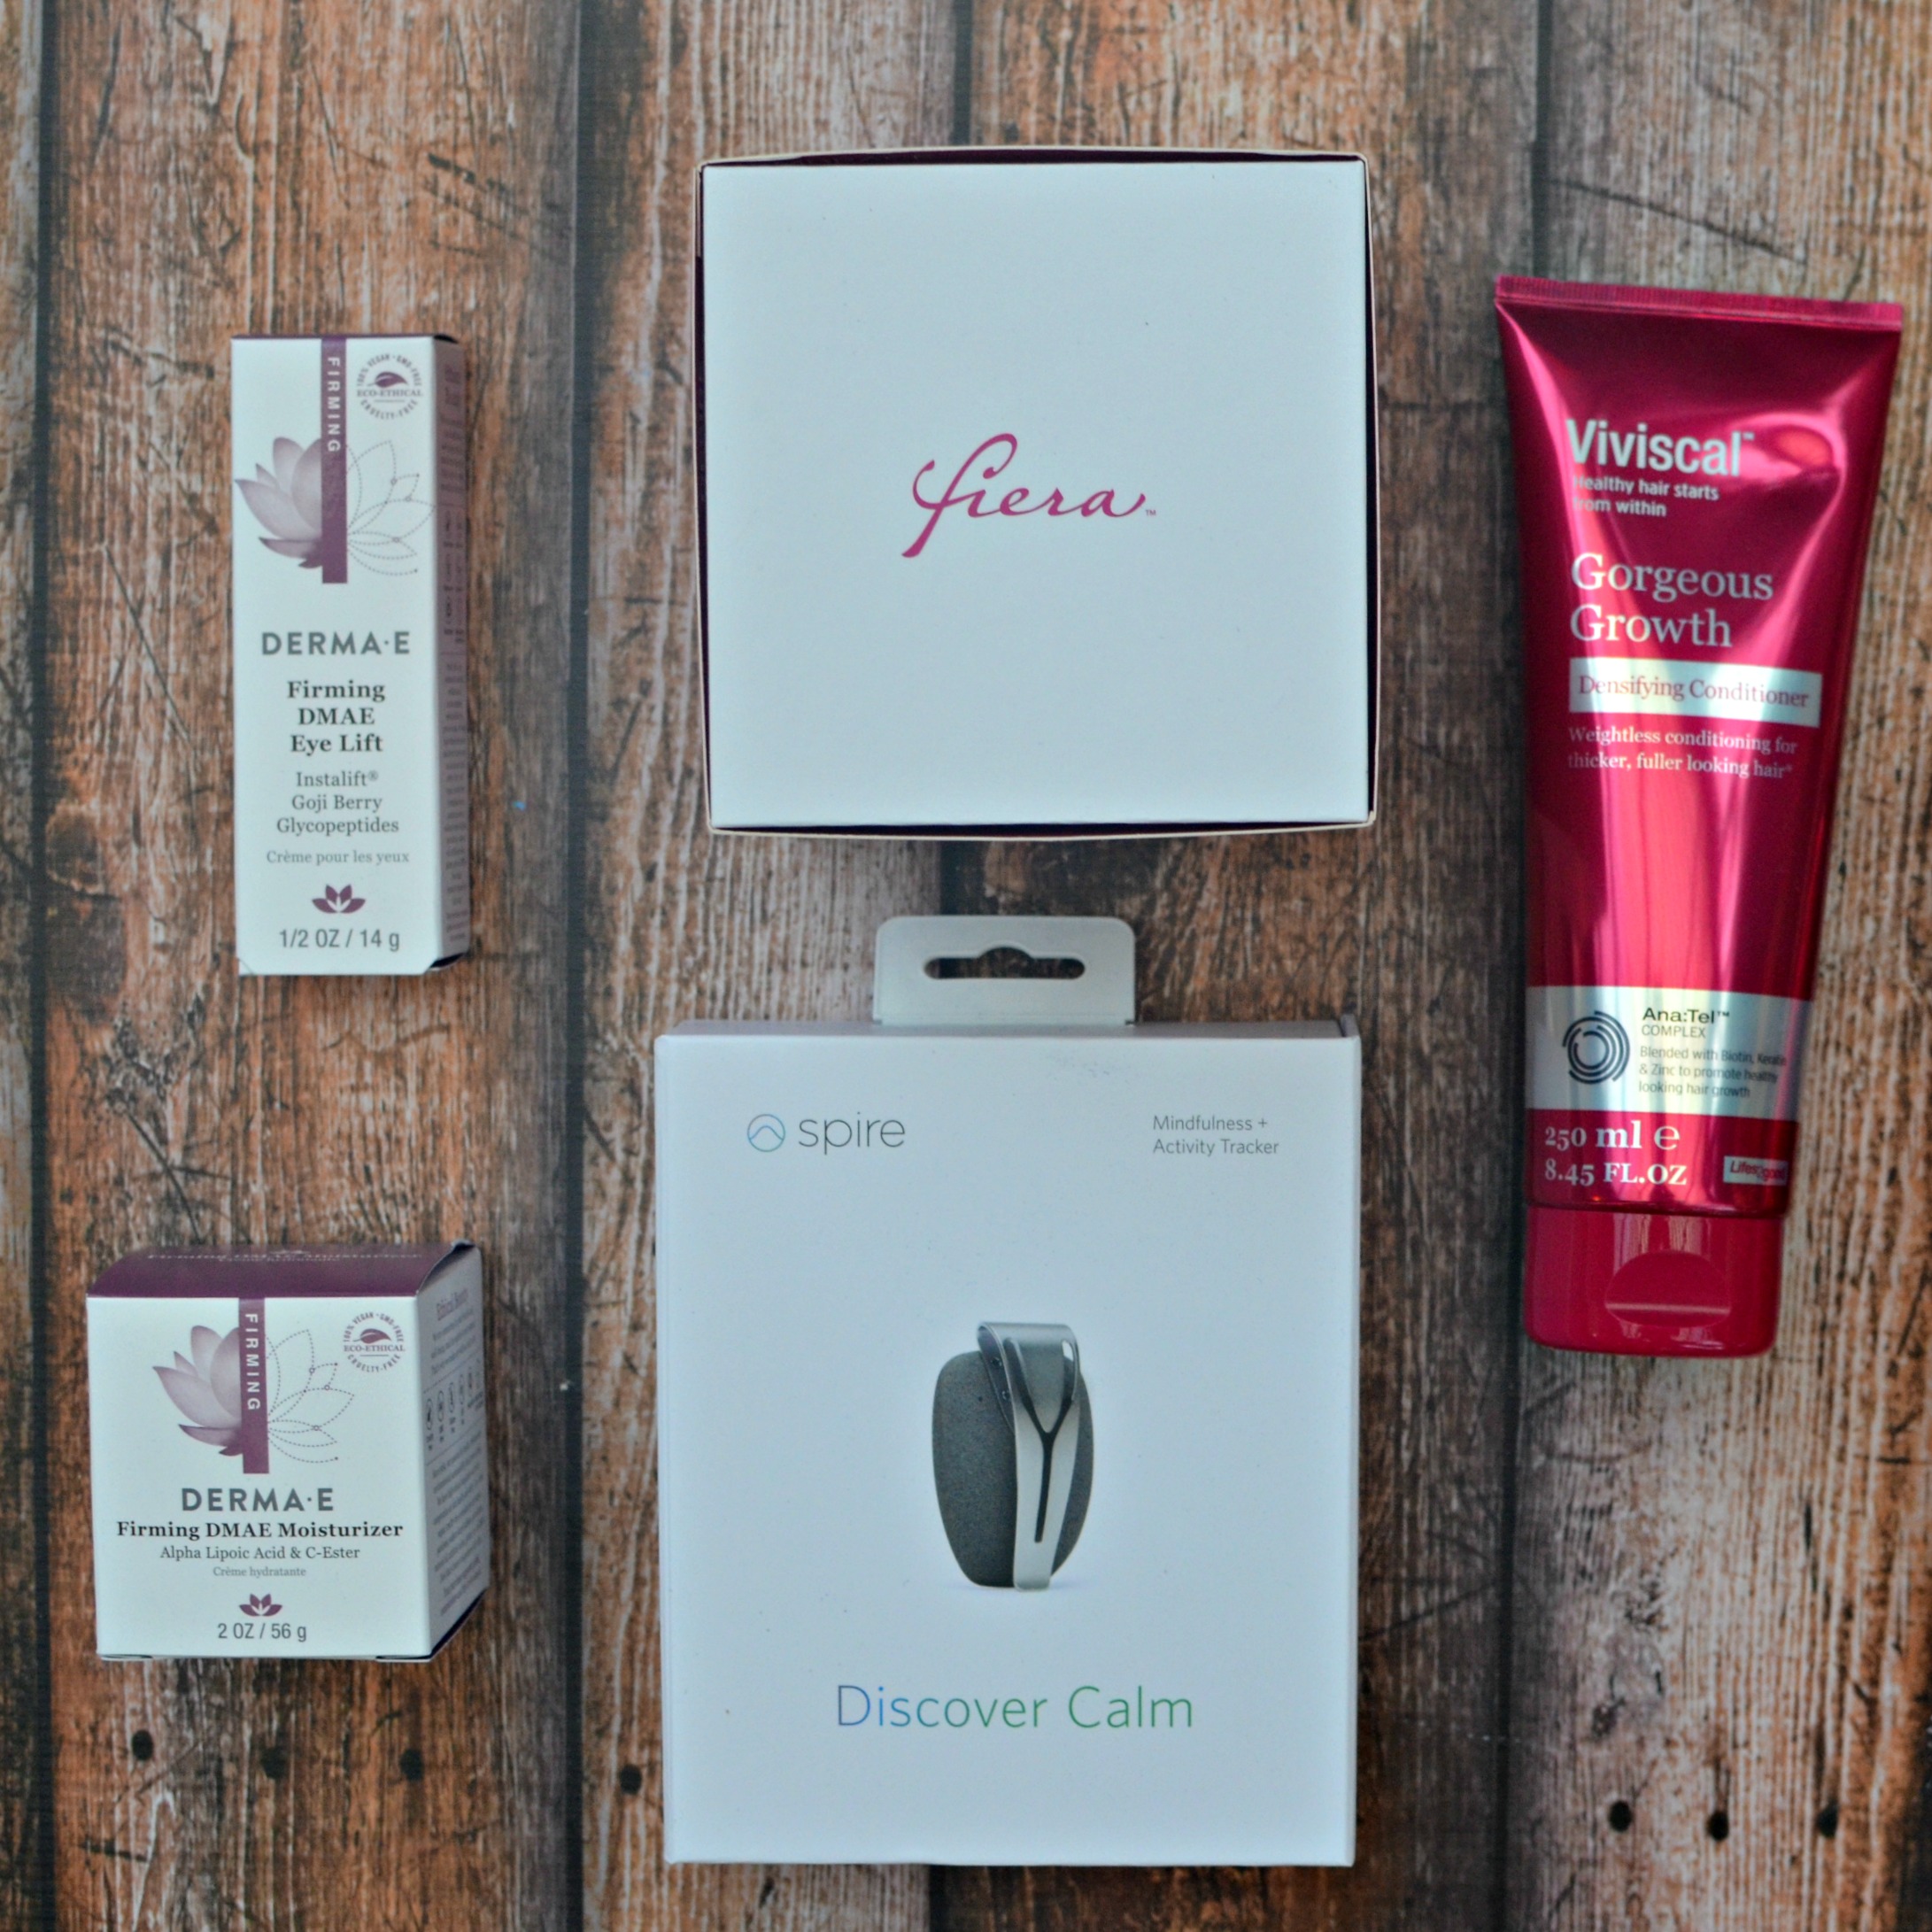
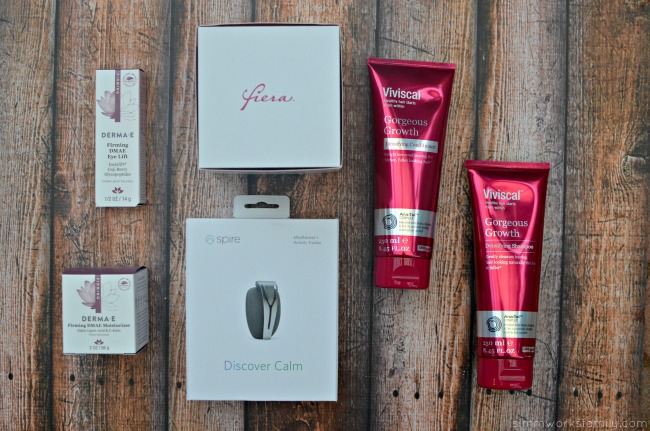
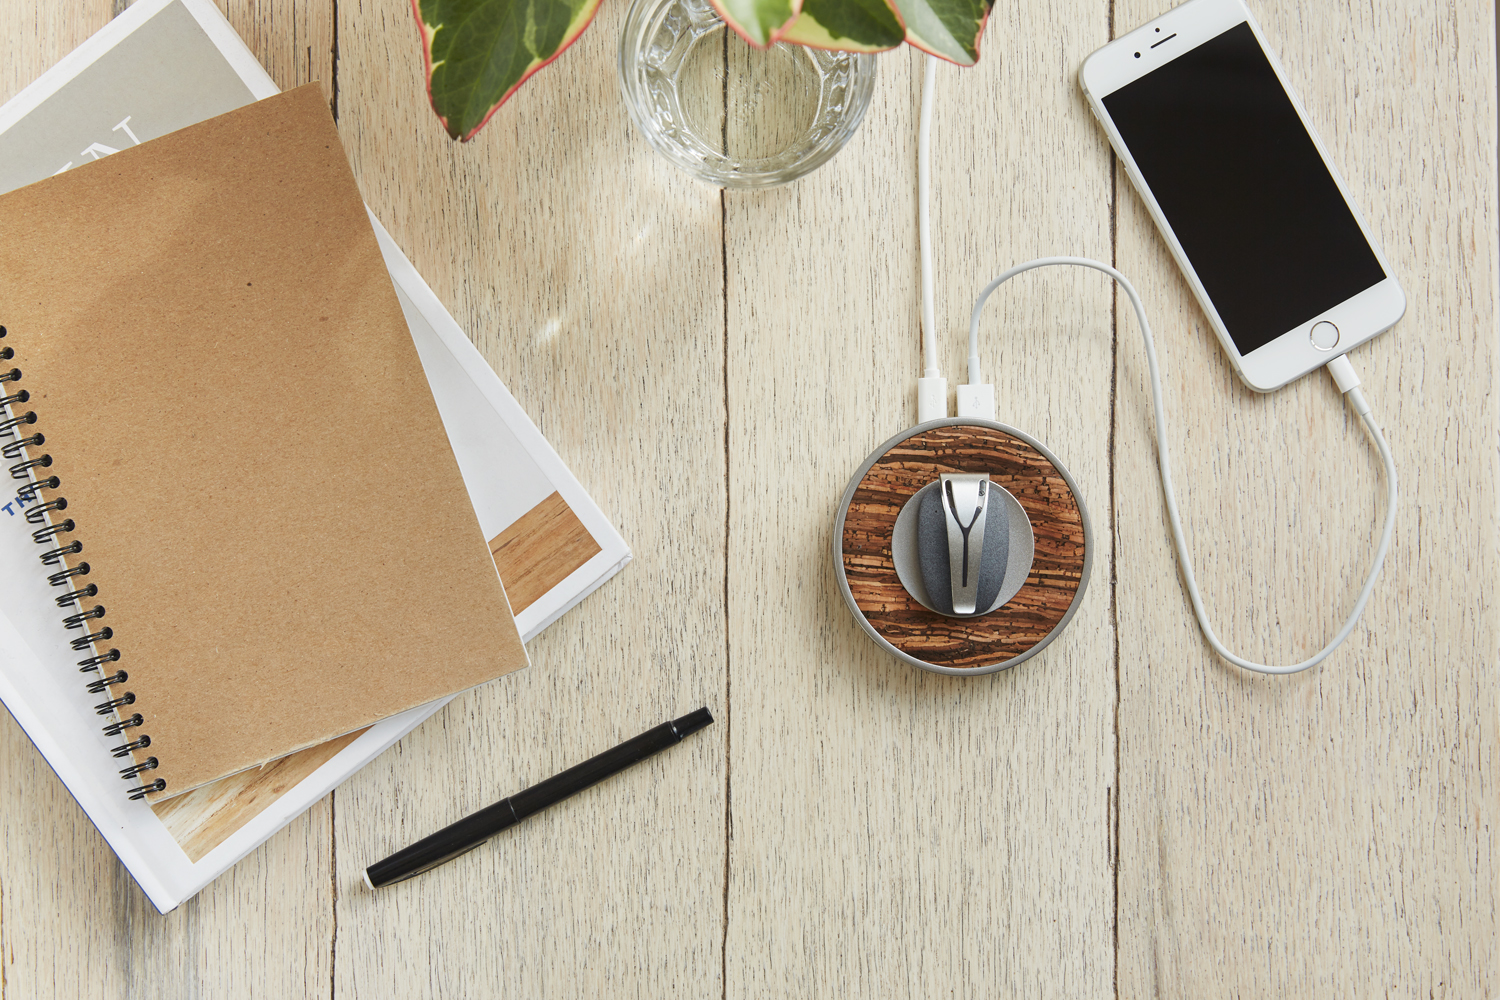
1. Spire Wearable Wellness & Activity Tracker
State of mind affects how you breathe, but how you breathe can also change your state of mind. That’s pretty deep, right? Well it’s true. Studies have shown that slow, deep and consistent breathing can lower blood pressure, reduce stress and increase the flow of endorphins in the blood stream. 

Working with leading experts on the respiratory system, digital health and medical/wellness devices, Spire is the only wearable that increases mindfulness and productivity by tracking breathing patterns reflecting our state of mind. And for busy moms that means one thing – realizing when you need to step back and take a moment for yourself. 

Spire is a “trainer” for mindfulness & mindful living Spire makes mindfulness more attainable by alerting users in-the-moment and suggesting breathing exercises and meditations to lead to a more mindful behavior change be it a calmer and focused state – goodbye stress! – or even becoming more active. While wearing, the Spire PLATFORM will learn to anticipate stressful events before they are likely to happen and alert users with actionable insights on how to prepare and experience more calm in their life.

Spire is fully integrated into the Apple Health App and works with Apple watch. And if you’re like me and have an Android based phone, an Android App is also now available. You can score $10 off when you purchase the Spire here. The discount is applied at checkout.

5-must-have-products-for-exhausted-30-year-old-moms-viviscal

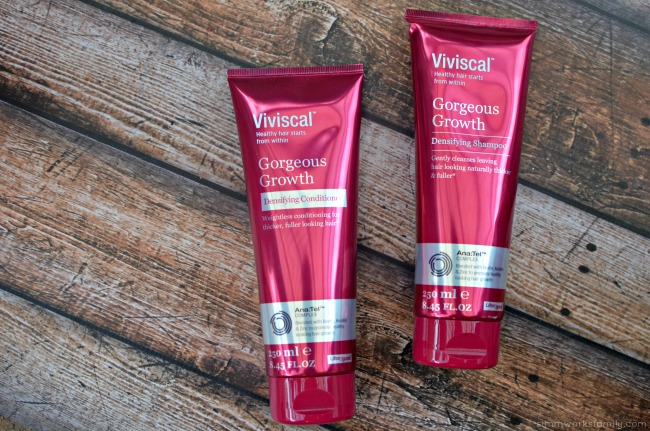
2. Viviscal
After each kid I seemed to lose a bit more hair. And while it hasn’t visibly been something to worry about, I’ve noticed that the fullness I once had is starting to wane. So I researched various brands to find one that would work well with my hair and I’ve had a great experience with Viviscal. They’ve been the leading brand of dietary supplements in the US for the nourishment of thinning hair and promoting existing hair growth for over 25 years. Backed by extensive research and clinical studies that prove the brand’s effectiveness, the Viviscal Hair Growth Program nourishes hair from the inside out with the proprietary marine complex called AminoMarTM for strong, healthy hair!

Viviscal Gorgeous Growth Densifying Shampoo is scientifically formulated with Ana:Tel™, a proprietary complex blended with Biotin, Keratin and Zinc to promote healthy looking hair growth. Viviscal Densifying Shampoo gently cleanses, leaving hair looking fuller, thicker and healthier instantly. Viviscal Gorgeous Growth Densifying Conditioner contains the proprietary Ana:Tel™ complex blended with Biotin, Keratin and Zinc to nourish hair from the outside and promote the appearance of healthy looking hair growth. The lightweight formula moisturizes and conditions hair leaving it looking naturally thicker, fuller and gorgeous.

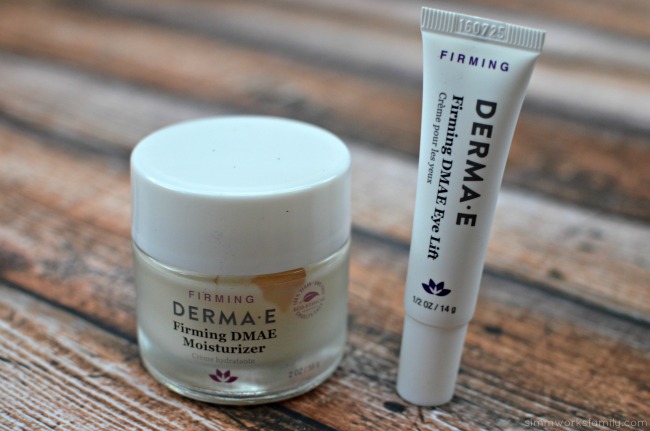
3. Dermae Firming DMAE Eye Lift –
While I was looking for a new skin care routine to help with the lack of sleep I’ve been getting, I stumbled on Dermae products. This multi-action eye cream helps to revive and smooth the look of your delicate eye area. And who doesn’t need help with our eye area, right? Widely-acclaimed DMAE helps to visibly improve the appearance of skin’s firmness for a more lifted look. While wrinkle-fighting peptides including Instalift® Goji Berry help to smooth the look of fine lines and wrinkles for younger-looking eyes. Now I just need to get rid of the dark circles! 

5-must-have-products-for-exhausted-30-year-old-moms-derma-e

4. Dermae Firming DMAE Moisturizer –
I know the importance of moisturizer so if I can find one that doesn’t feel too thick but soaks in well and makes my skin feel hydrated, I know I have something that will work. This nutrient-rich moisturizer is clinically proven to improve the appearance of skin’s firmness, hydration and elasticity. Widely-acclaimed DMAE helps skin to appear visibly firmer, smoother and lifted. Antioxidant-rich Alpha Lipoic Acid and Vitamin C Ester nourish your skin for a more revitalized appearance.

5. Fiera® by NuelleTM
As I’ve looked at every other area of my life – stress level, skin and hair care, etc – I also look at the relationships in my life and how they’ve changed in my 30s. Especially my most important relationship – my marriage. I’ve checked out Fiera for a little help reconnecting with my husband and love the changes it’s made for us. If you’re looking to reconnect with your partner, you can use code Babble for 10% off when you check out here

5-must-have-products-for-exhausted-30-year-old-moms-ig

Have you found any great products you use daily? 

5 Reasons Why You Should Check Out LEGOLAND California Brick Or Treat

5-reasons-why-you-should-check-out-legoland-california-brick-or-treat-photo-opps

Looking for something to do the weekend before Halloween and not sure what to do? Brick-or-Treat Party Nights at LEGOLAND® California Resort, presented by Shutterfly®, is back and sweeter than ever! 

The biggest kids’ Halloween celebration in San Diego offers children and their families trick-or- treating and entertainment throughout the Park. Every Saturday night in October starting at 5 p.m., LEGOLAND California transforms into a not-too-spooky Halloween party. We were invited to attend our first Brick-or-Treat Party Nights as LEGOLAND California ambassadors and boy did we have fun! 

Featuring a new Ghost Cruise adventure, a new pop-badge challenge through Fun Town, a new theater show in Castle Hill, a fall festival complete with a LEGO® pumpkin patch building activity and blue-grass style music in LEGO Friends Heartlake City, treat stations with specialty items including a LEGO® commemorative Brick, roaming candy carts throughout the Park and two bonus treat stations inside SEA LIFE® Aquarium. 

Plus, LEGOLAND® Hotel joins in the fun with its own Halloween party on Oct. 31 with candy giveaways, a dance party and a special visit from Brick-Or- Treat Characters exclusively for Hotel guests!

5-reasons-why-you-should-check-out-legoland-california-brick-or-treat-decorations-around-the-park

5 Reasons Why You Should Check Out LEGOLAND California Brick Or Treat

1. Halloween Fun for as low as $35 – 

Brick-or- Treat Party Nights is a special event and admission can be purchased for as low as $35 if purchased online in advance. Special event ticket holders can enjoy costume contests, trick-or- treating at treat stations and candy carts filled with tasty goodies and other surprises, festive music, live entertainment including the hilarious “Boo Crew,” a dazzling animated Spirits of Brick-or- Treat light show, and new Ghost Cruise adventure. 

5-reasons-why-you-should-check-out-legoland-california-brick-or-treat-candy-stops

2. LEGO themed treat stations

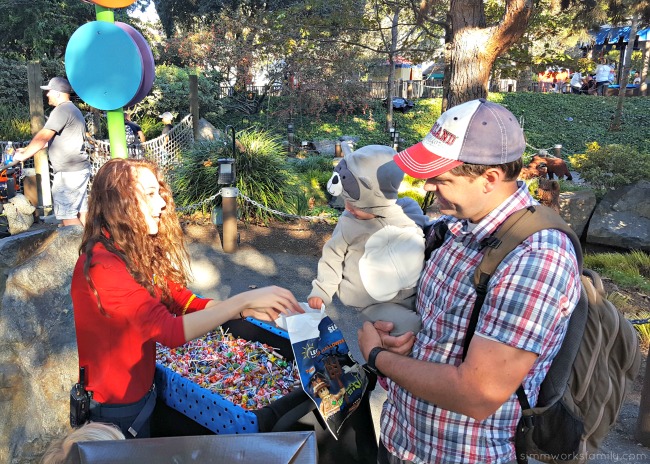
The LEGO themed treat stations and candy carts offer a safe, fun and entertaining trick-or- treating experience for all to enjoy. 

3. All New Shows!

An all new show, “The Curse of the Hallowmeenie” debuts at the Castle Stage in Castle Hill. Special event guests can also enjoy entertainment from The Witchettes, Bluegrass Band Jamboree.

5-reasons-why-you-should-check-out-legoland-california-brick-or-treat-the-curse-of-the-hallowmeenie

4. Fun Crafts and Activities

There is a special LEGO Friends meet and greet in Heartlake City, where kids can decorate their own craft! Guests can also “boo-gie” down at frighteningly-fun dance parties: Hubble Bubble’s Dance Party atop the Model Shop in Miniland U.S.A., Pirate Booty Boogie at SEA LIFE Aquarium, plus sing and dance along to the music and mayhem in the Monster Fighter Mash featured at the Fun Town Stage.

5-reasons-why-you-should-check-out-legoland-california-brick-or-treat-ride-rides

5. Halloween Costume Contest

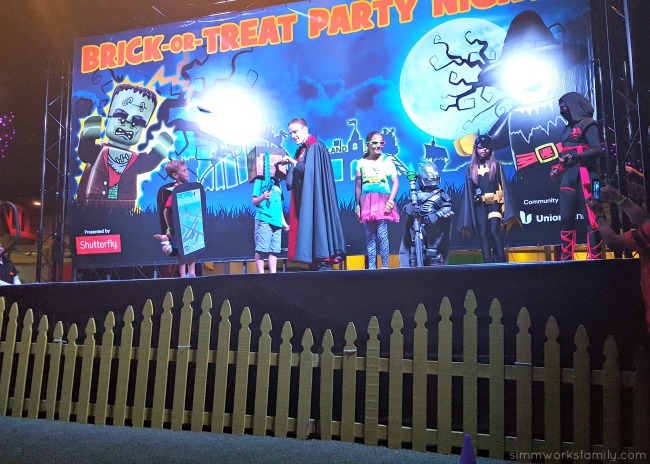
My son went out of his comfort zone when we visited Brick-or-Treat Party Nights and entered the costume contest. There are three categories for guests to enter: group, LEGO themed, and creative. Each participant needs to register before the event and line up to take center stage in front of the judges when their category is up. 

1st, 2nd, and 3rd prize winners are chosen and the prizes are definitely worth it! 2nd and 3rd place winning 2 park hopper tickets to LEGOLAND California as well as LEGO goodies and souvenirs. And 1st place takes home 4 Merlin annual passes, a stay at the LEGOLAND Hotel, and more! My son entered the creative round and did something I never thought he’d do – talk on stage! It was quite a fun experience even if he didn’t come close to winning with his Steve from Minecraft costume. He had a great time and that’s all that matters! 

5-reasons-why-you-should-check-out-legoland-california-brick-or-treat-costume-contest

LEGOLAND California and SEA LIFE Aquarium are open from 10 a.m. to 5 p.m. on select dates throughout October. With special event admission to Brick-or-Treat Party Nights on October 1, 8, 15, 22 and 29 guests can extend their day until 9pm at both LEGOLAND California and SEA LIFE Aquarium to enjoy all the Halloween festivities. 

Have you ever joined LEGOLAND California for their Brick-or-Treat Party Nights? 

For exclusive savings and more information, visit www.BRICKORTREAT.com or call 760-918-5346.

DIY Football Photo Frame For Kids

This shop featuring a DIY football photo frame that’s super easy for kids to make has been compensated by Collective Bias, Inc. and its advertiser. All opinions are mine alone. #HandsOnCrafty #CollectiveBias

diy-football-photo-frame-a-quick-and-easy-way-to-display-great-football-memories

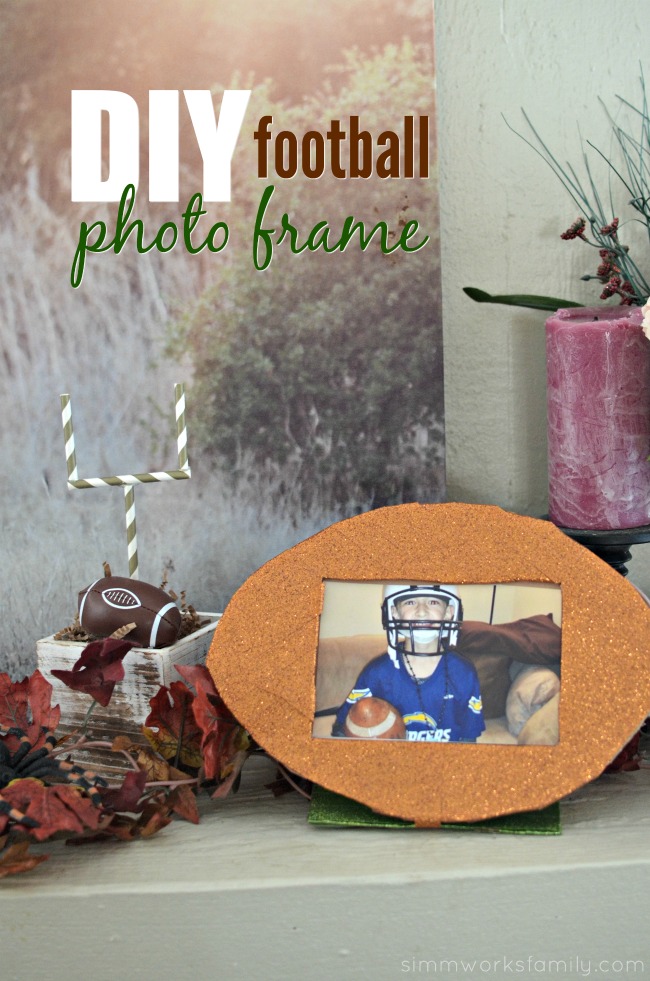
Do you have a football fan in your life? Looking to spread a little cheer in their football loving lives? My daughter wanted to get crafty this week and asked if we could make a photo frame. So I decided to bust out the Scotch® Expressions Glitter Tape and make a DIY Football Photo Frame that’s easy for kids to make. With the help of an adult, of course! The adult cuts out all of the shapes while the kids get to have fun decorating! Just like our DIY bottle toss game from last week. 

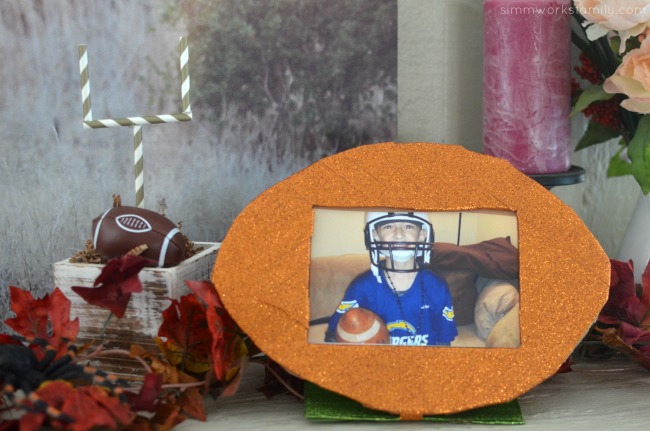
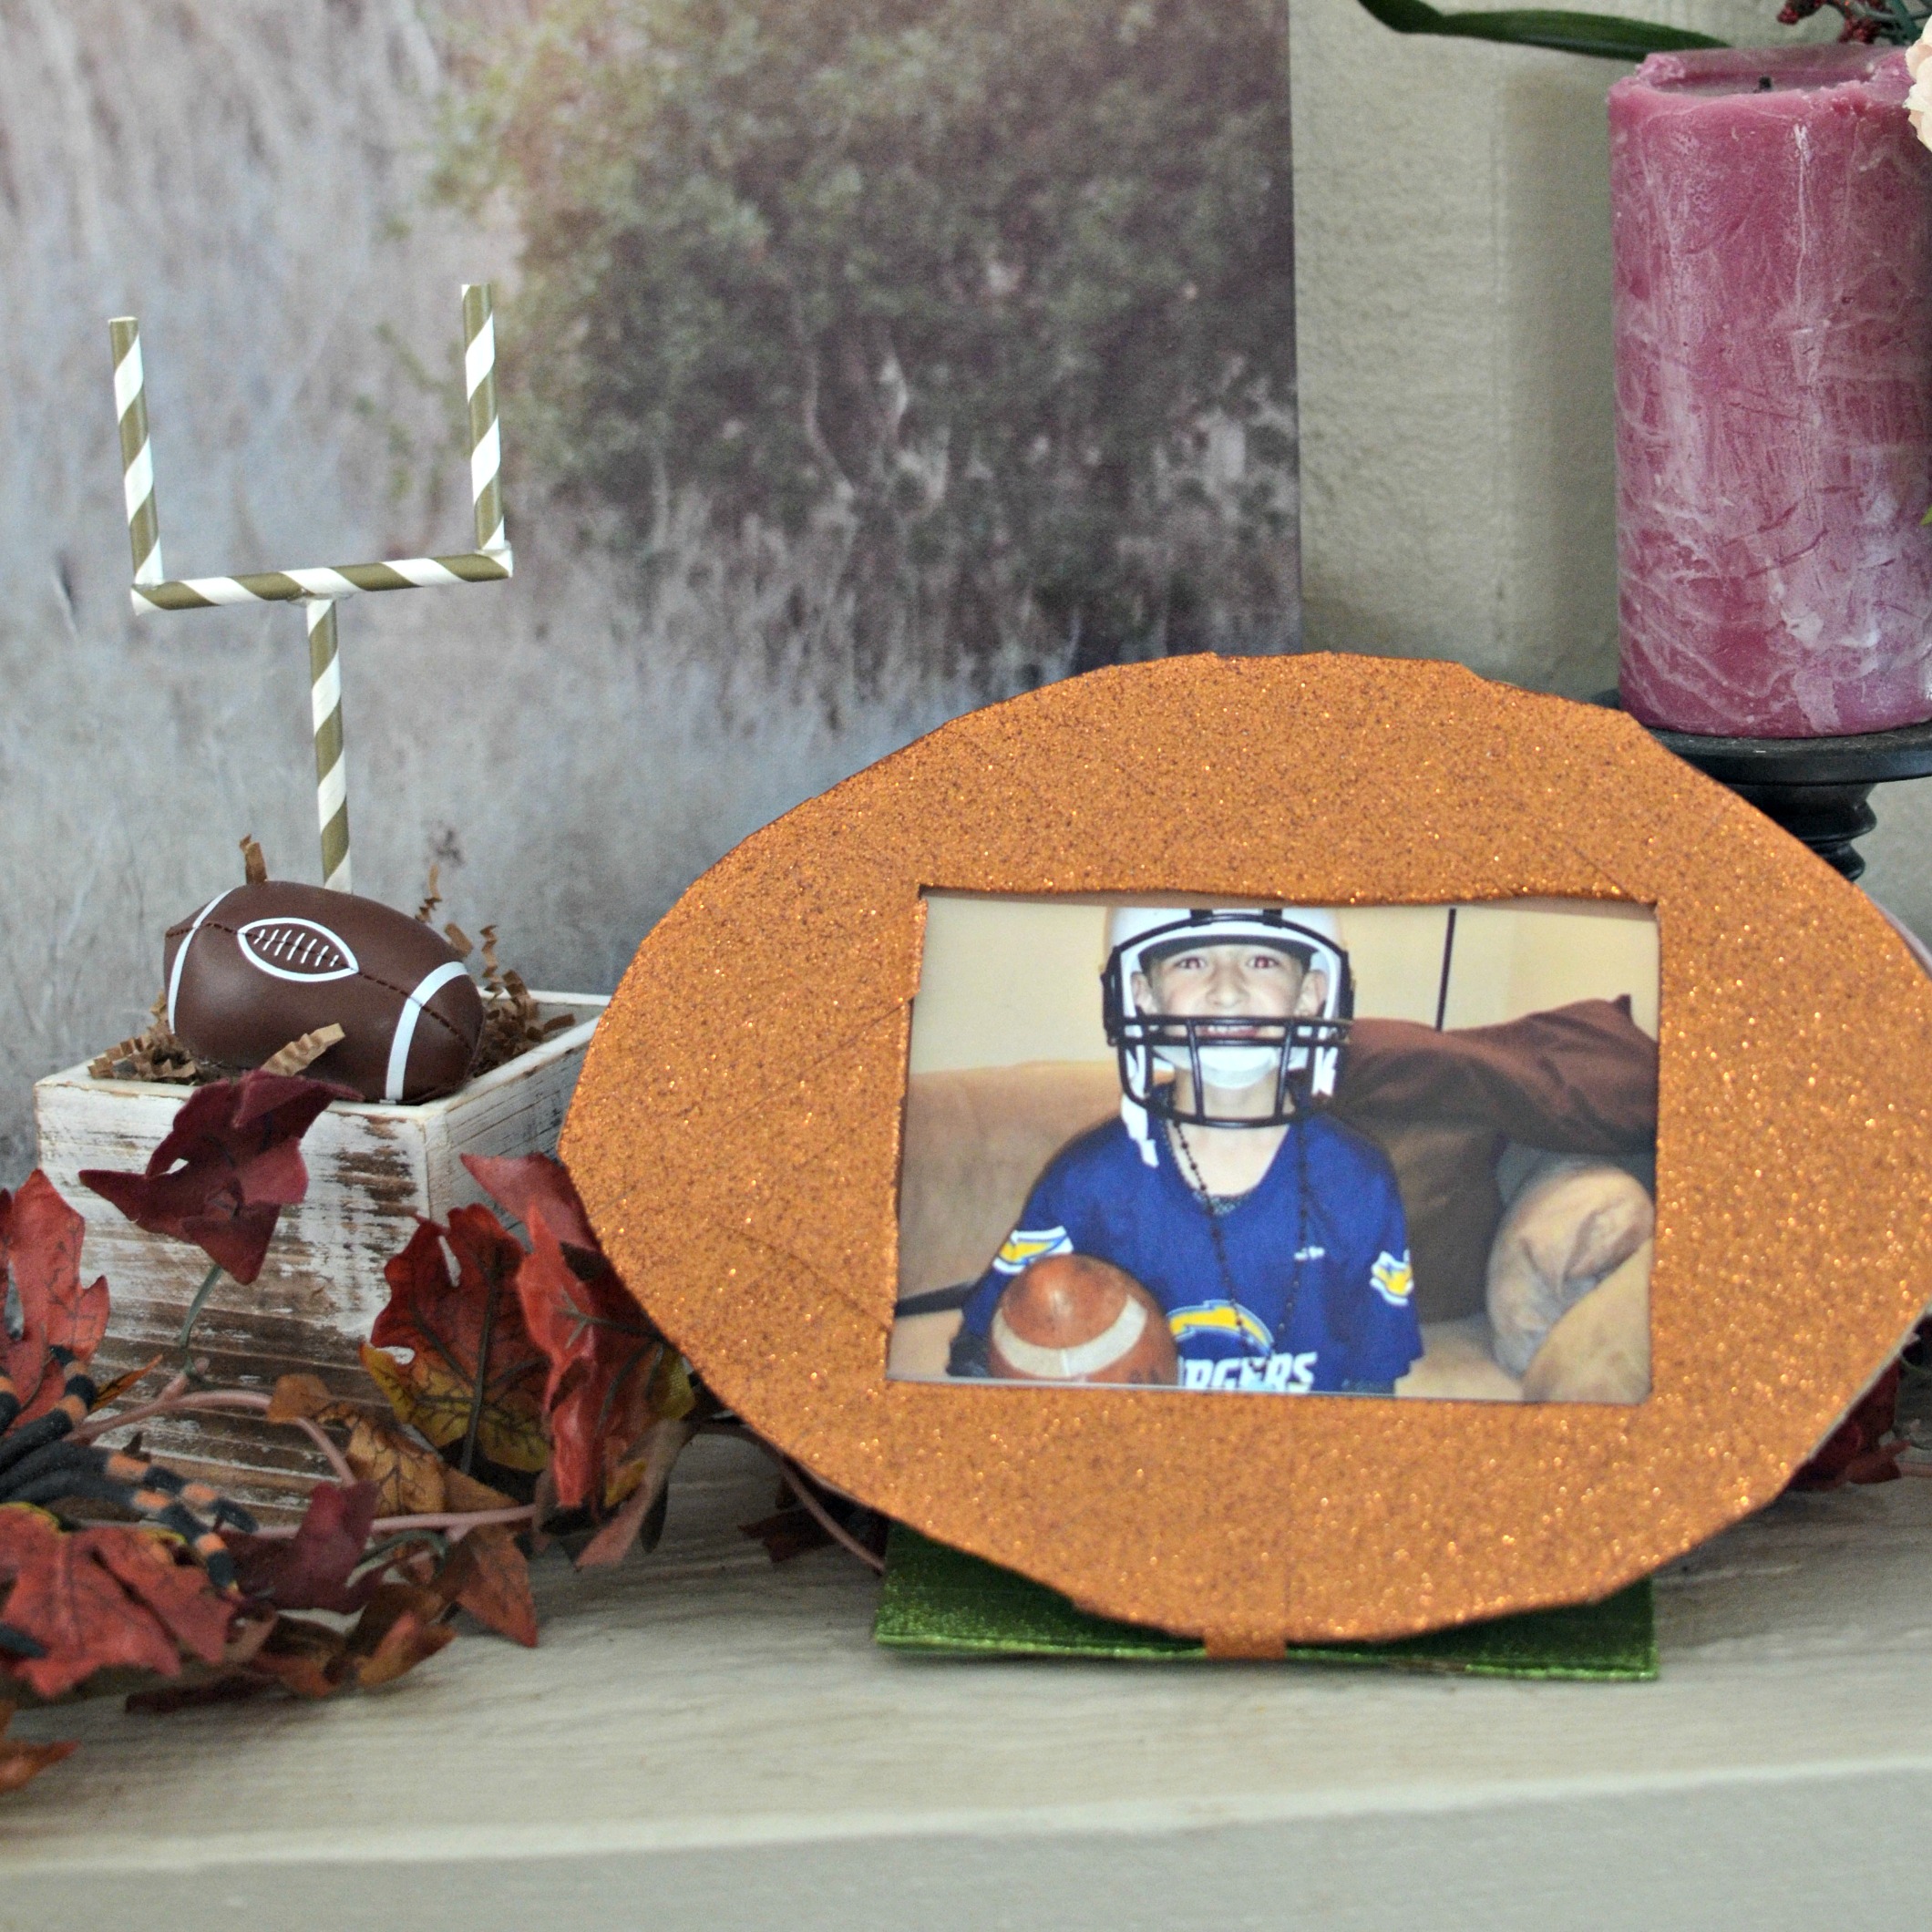
We ended up with the perfect gift for my football loving sister and brother in law with a photo of their oldest in the frame. How cute is that? And it was easy too! We were able to create this frame in an afternoon after school and display it on the mantel for when my sister comes over. How cute will this look on her mantel? 

Want to know JUST how easy it was? Read ahead to find out! 

diy-football-photo-frame-quick-and-easy-way-to-display-memories

DIY Football Photo Frame For Kids

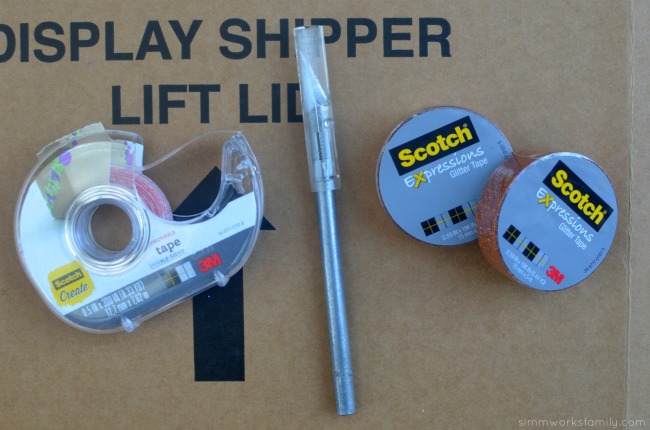
What you’ll need: 

  • Scotch® Expressions Brown Glitter Tape
  • Scotch® Expressions Green Glitter Tape
  • Scotch® Create Double-sided Tape
  • X-acto knife (for parents only)
  • 1 piece 8.5 x 11″ brown construction paper
  • 1 piece 8.5 x 11″ white card stock
  • 4×6 picture

diy-football-photo-frame-supplies-needed

What you do: 

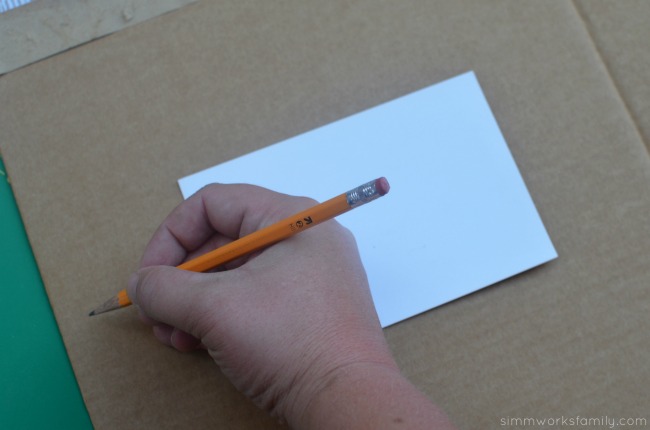
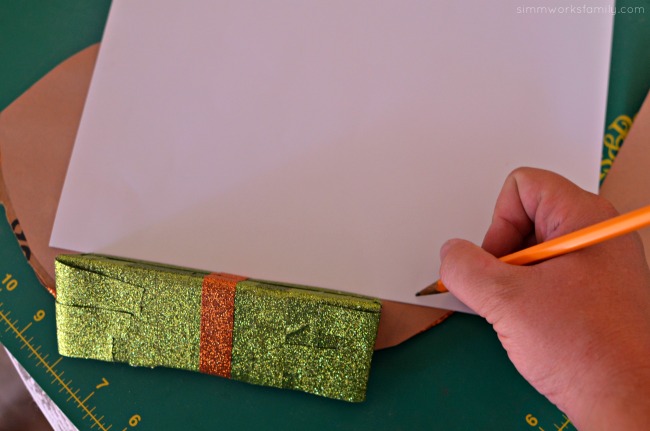
1. Grab your 4×6 photo paper and trace a football around the photo paper leaving about 1/2 an inch on each corner from the edge of the photo to the edge of the football. 

2. Cut out football shape with x-acto knife. 

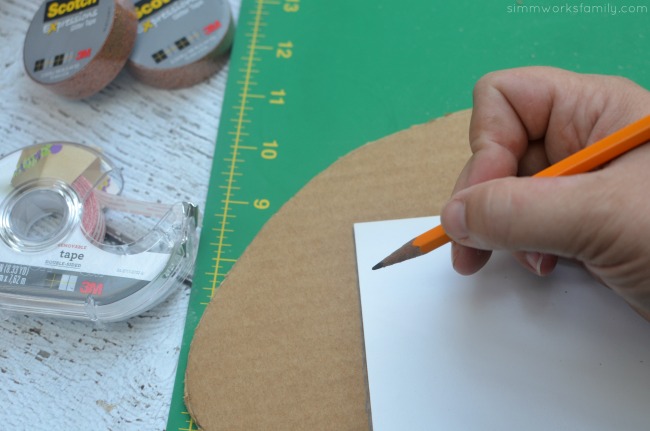
diy-football-photo-frame-trace-football-outline-around-4x6diy-football-photo-frame-trace-4x6-cut-out

3. Using same 4×6 photo paper, trace around it to create where the frame opening will be. 

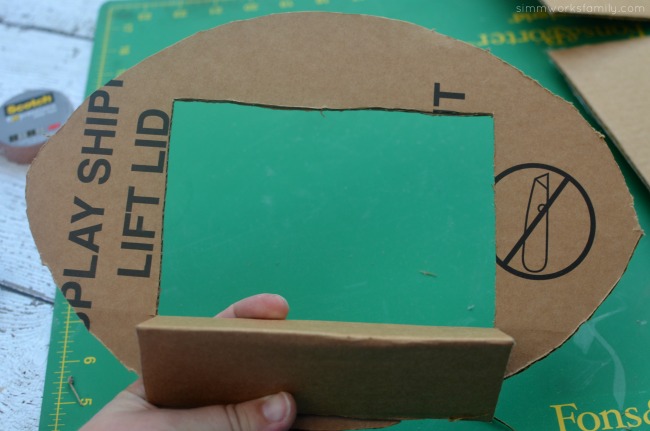
4. Cut out top and sides of 4×6 piece. Score on back side with x-acto knife and fold cut out piece into thirds to create stand for frame. 

diy-football-photo-frame-cut-out-4x6-and-fold-cut-out-in-thirdsdiy-football-photo-frame-add-glitter-tapediy-football-photo-frame-taped-frame

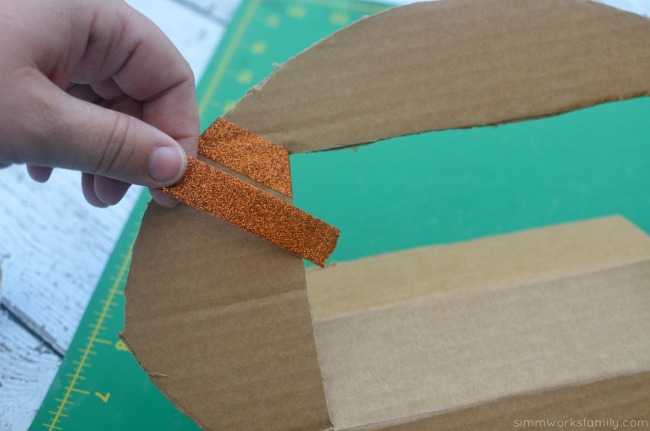
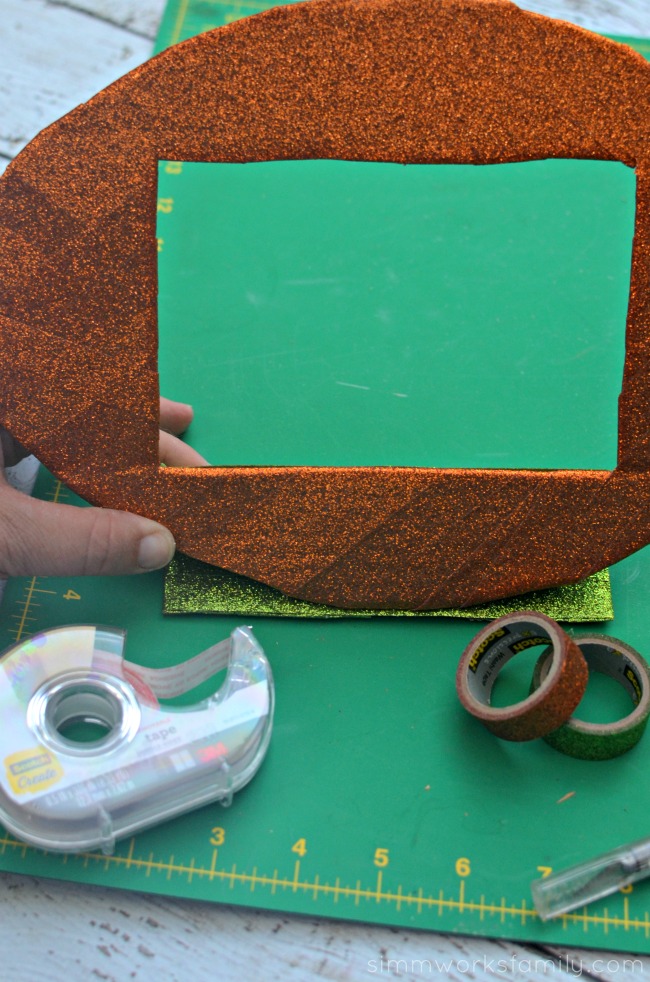
5. Using Scotch® Expressions Brown Glitter Tape, let your child wrap front side of the football frame completely until no cardboard is showing. Make sure the sides are covered complete. Don’t worry about the back side, we’ll be covering that up! 

6. Once you’ve covered out the front, wrap the stand with Scotch® Expressions Green Glitter Tape. Once the stand is covered, use a piece of Scotch® Expressions Brown glitter tape to secure the stand to the frame so it doesn’t unfold. 

diy-football-photo-frame-trace-out-construction-paper-for-covering-back-of-framediy-football-photo-frame-add-double-sided-tape

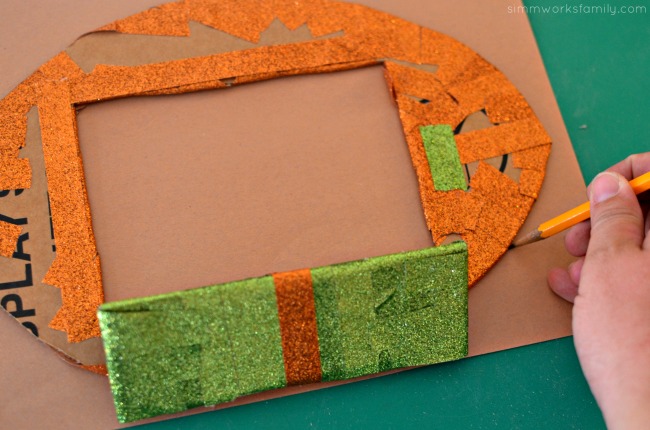
7. Grab your brown paper and trace the outline of the football and the 4×6 spot for the photo. Cut out the football shape of the construction paper. Cutting from the bottom of the football, cut out the 4×6 piece and the bottom of the football (to leave space for the stand). 

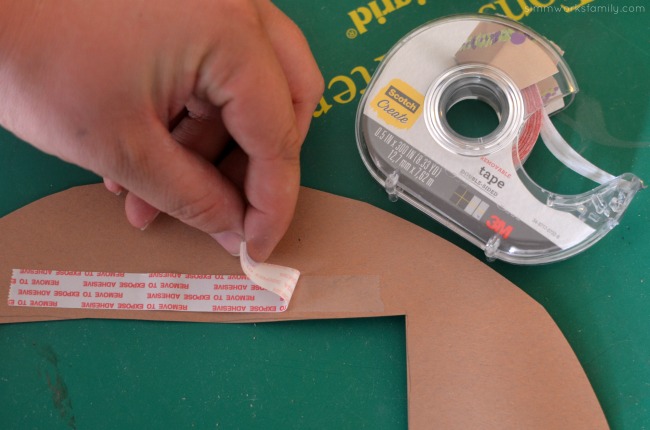
8. Attach brown cut out to back of the frame using Scotch® Create Double-sided Tape. 

diy-football-photo-frame-draw-out-larger-than-4x6diy-football-photo-frame-add-photo

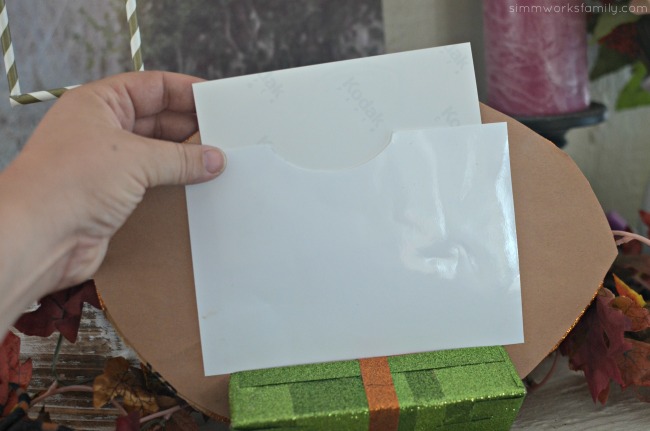
9. Cut out a 5×7 piece of white paper. Notch a small half circle on the top of the paper. Tape the white paper onto the back of the frame on the two sides with Scotch® Create Double-sided Tape. 

10. Add a photo and enjoy your frame! 

diy-football-photo-frame-ig

How do you celebrate sports in your home? 

I was able to find all of the crafting goodies I needed, including the Scotch® Expressions Glitter Tape, in the craft aisle in Walmart. So easy to find everything in one place! With a perfect combination of versatility, function & fun, Scotch® Expressions Tapes turn everyday projects into simply inspired creations. I love how simple and easy it was to make this frame with my daughter and how fun and sparkly it ended up! How awesome is that? 

scotch-at-walmart

Fall Carnival Games: DIY Ring Toss Game Idea

This shop features an awesome DIY Ring Toss Game that’s super easy to make and has been compensated by Collective Bias, Inc. and its advertiser. All opinions are mine alone. #HandsOnCrafty #CollectiveBias

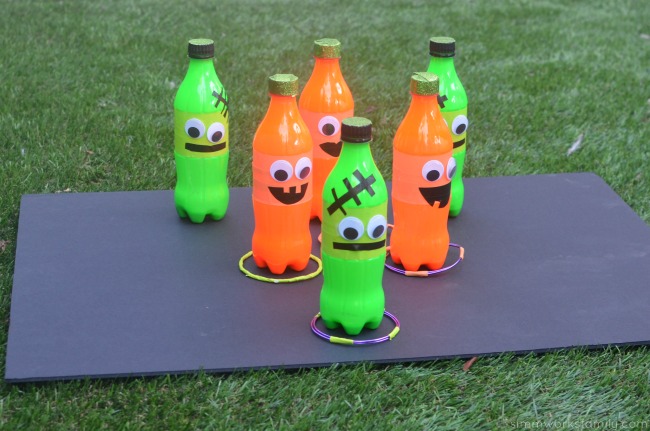
fall-carnival-games-diy-ring-toss-idea

Every year my kids’ school has a Halloween Carnival on or around Halloween. Each grade has a game or craft set up and the kids get to run around and play them for the last hour of the day. It’s a great way for the kids to enjoy a little Halloween fun at school in costume without getting distracted in class. Plus it’s a fun way for the parents to come up with small fall carnival games – like this DIY ring toss game. 

Since my son started Kindergarten, I’ve always helped out with his class’s game. The first year we built a cute bean bag toss where we painted three pumpkins on top of each other and cut out holes where their mouths went so the kids could toss the bean bags in. Each successful toss earned a piece of candy. Last year we made fun Halloween themed crafts like spider rings out of poms and pipe cleaners, and fun face masks that I got from an online retailer. 

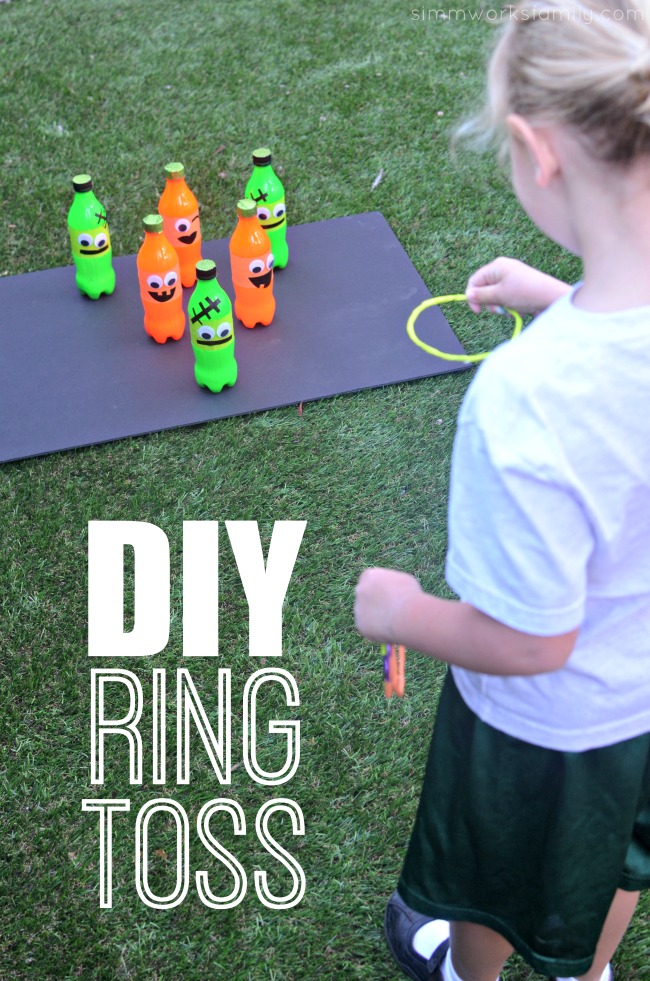
But this year is my daughter’s first year joining in on the festivities so I thought I’d get her involved in making a fun activity that Kindergarten could host for their game. And we decided on this awesome Halloween-themed DIY ring toss game. You won’t believe how easy it is to make! Even a Kindergartener can do it. 

fall-carnival-games-diy-ring-toss-idea-playing-the-game

What I love about this project is that it’s so versatile! So much so that when my husband accidentally recycled the glass wine bottles I had set aside to use for this project, I was able to make due with the plastic bottles we had left over from the party we hosted last week

How To Make A DIY Ring Toss Game

What you’ll need: 

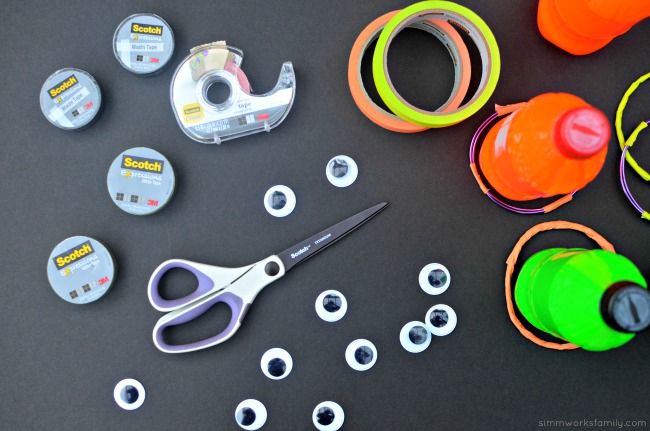
  • 6 bottles – glass or plastic
  • washable paint in green and orange
  • Scotch® Create Double-sided Tape
  • Scotch® Expressions Washi Tape in black
  • Scotch® Expressions Glitter Tape in green
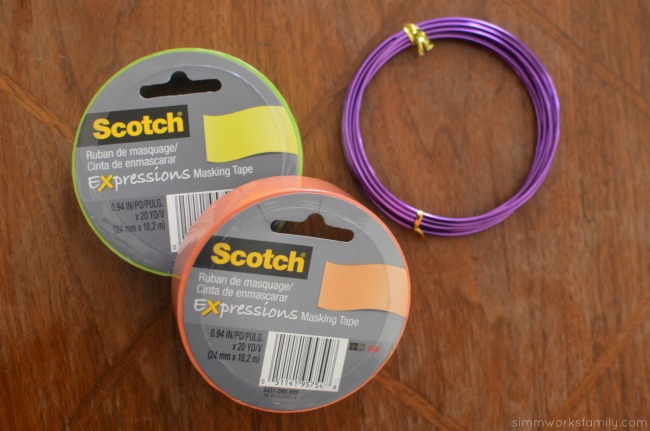
  • Scotch® Expressions Masking Tape in green and orange
  • Aluminum floral wire (found in the Walmart craft aisle)
  • Goggly eyes
  • scissors
  • Scotch® Create Glue Pen
  • large piece of cardboard or foam board in black
  • Scotch® Create Mounting Squares

What you do: 

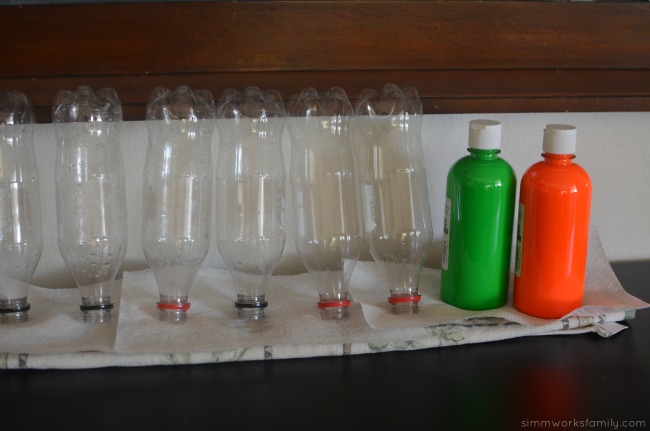
1. Remove the labels and rinse out the bottles you will be using. Let dry completely. 

fall-carnival-games-diy-ring-toss-idea-dry-bottles fall-carnival-games-diy-ring-toss-idea-make-the-rings

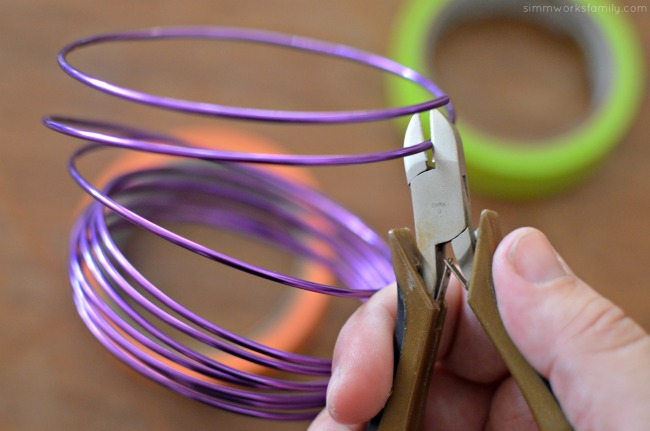
2. While bottles are drying, grab aluminum wire and cut into rings using wire cutters. 

fall-carnival-games-diy-ring-toss-idea-cut-wire fall-carnival-games-diy-ring-toss-idea-wrap-tape-around-wire

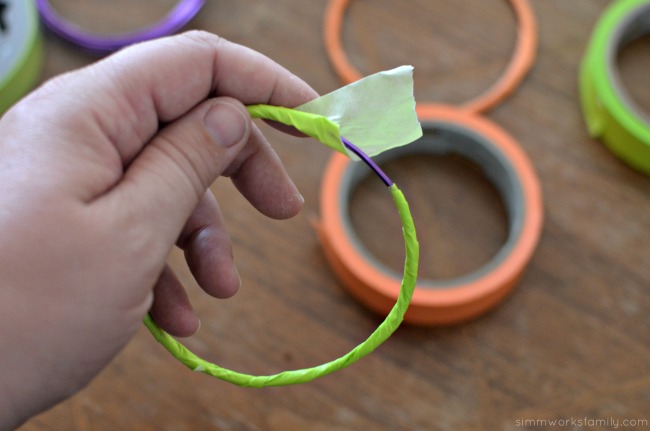
3. Use the Scotch® Expressions Masking Tape to secure the ends of the wire together and then completely cover the wire with tape. You can also decorate the wire in various places with tape instead of covering completely as long as the ends are secured. 

fall-carnival-games-diy-ring-toss-idea-pour-paint-into-bottle fall-carnival-games-diy-ring-toss-idea-put-paint-in-bottles-and-shake

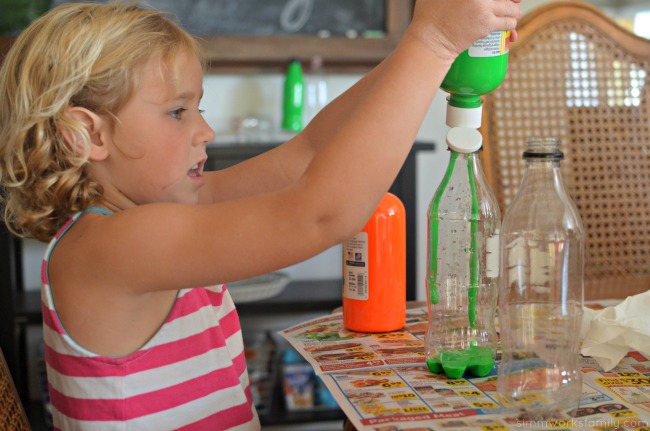
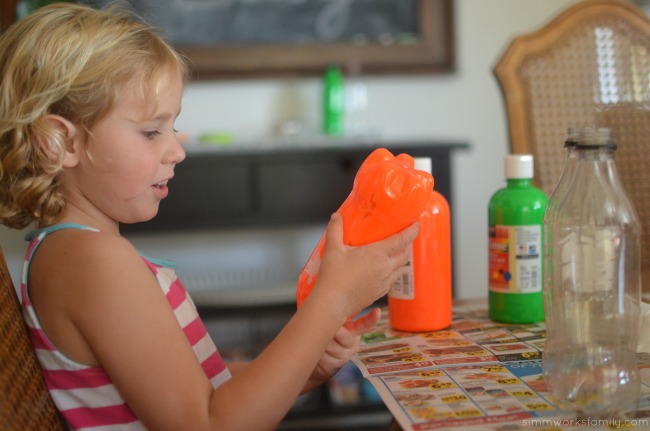
4. Squirt a good dollop of paint into each bottle. Secure the cap onto the bottle (if there is one) and shake the bottle until the paint has completely covered the inside of the bottle and you can’t see through anywhere. If you are using a glass bottle with no lid, simply use your thumb to cover the opening while shaking so the paint doesn’t go everywhere. Take cap off and let excess paint drip out. Let dry completely. 

This is the same technique I used to make my thumbprint ornaments for Christmas. 

5. Once paint is dry on the inside, glue cap onto top of bottle with Scotch® Create Glue Pen and let dry. Skip this step if you’re using a cap-less bottle.

fall-carnival-games-diy-ring-toss-idea-painted-bottles-and-rings fall-carnival-games-diy-ring-toss-idea-scotch-create-and-scotch-expressions fall-carnival-games-diy-ring-toss-idea-tape-top-of-bottles

6. Now for the fun part! Grab your Scotch® Expressions washi and glitter tape and start decorating! 

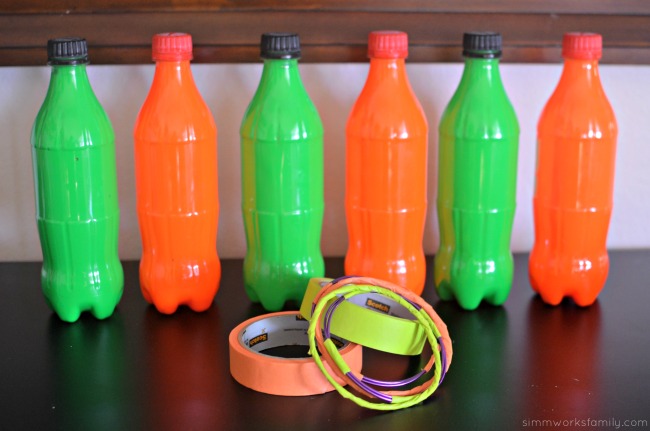
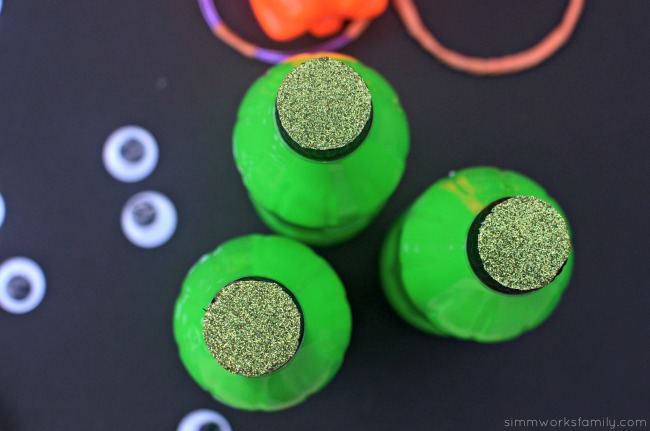
For the green bottles – Using the Scotch® Expressions Glitter Tape in green, cover the caps with two rows of glitter tape side by side. Then cut the excess around it so that there is a perfect circle on the top of the green bottles. You can use scissors or an xacto knife for this. If using an xacto knife, turn bottle upside down and cut around the edge of the cap on a piece of cardboard so you don’t cut anything else. 

For the orange bottles – cover the bottle cap with three pieces of tape in a star pattern on the top. This should completely cover the top of the bottle cap. Then use another piece of tape to go around the side of the bottle cap to cover the ends of the three pieces you put on the top. Now you have a cute pumpkin stem! 

Then, using the green and orange Scotch® Expressions masking tapes, tape the middle of the bottles with three layers of tape. This will create the base for your bottle’s face. 

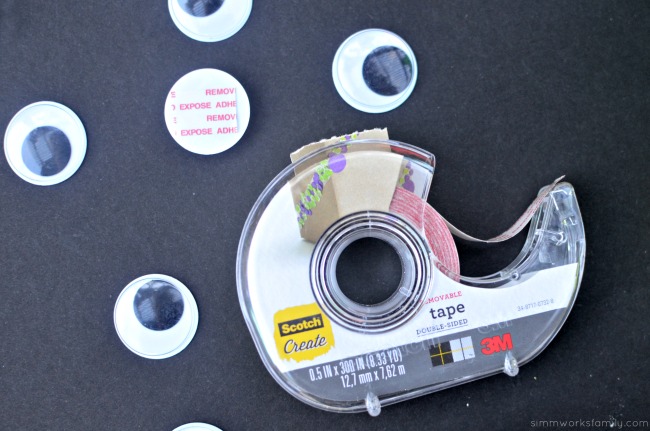
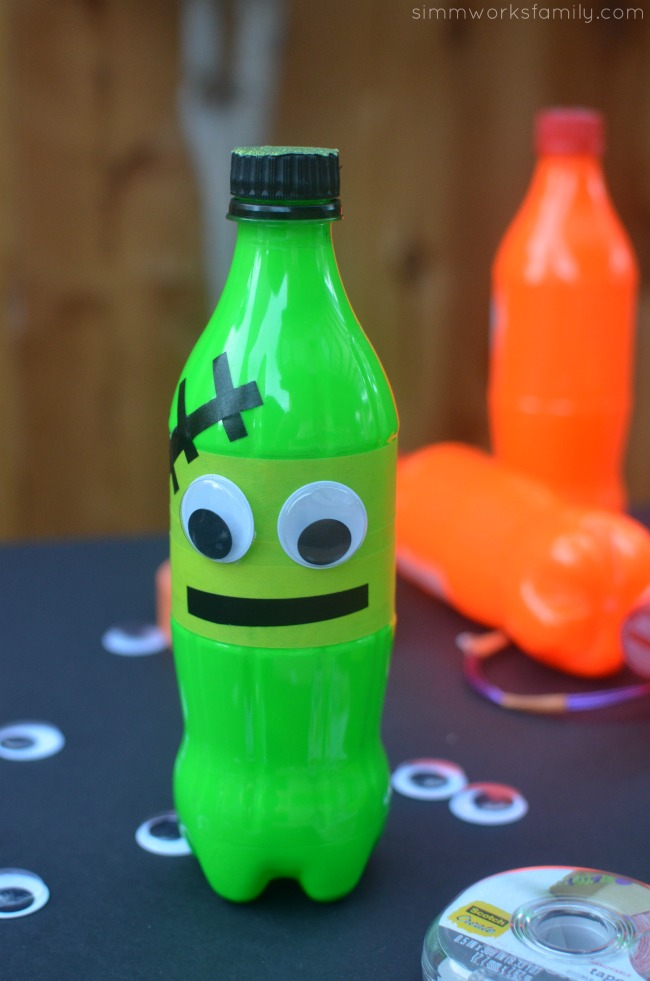
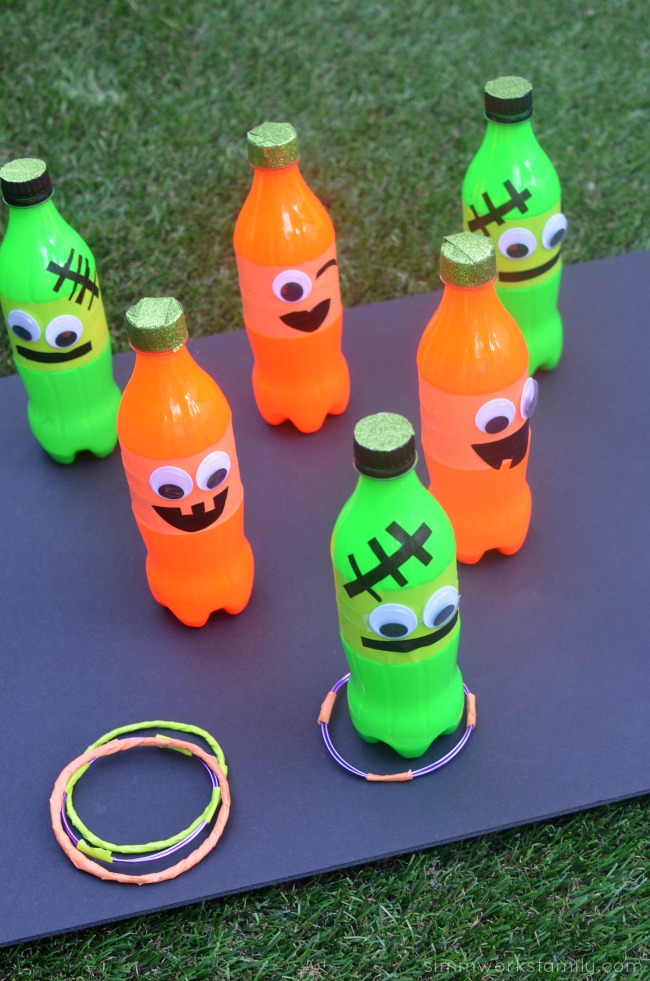
Grab the goggly eyes and Scotch® Create Double-sided Tape to secure the eyes onto the bottles. Now grab the Scotch® Expressions washi tape in black to make the mouth and any other decorations you’d like to add to your bottles. We layered two pieces of tape side by side and cut out mouths for our orange bottles and simply cut out lines for the mouths and “stitches” of our green bottles. Our end results were pumpkins and Frankensteins. 

fall-carnival-games-diy-ring-toss-idea-scotch-create-removable-tape fall-carnival-games-diy-ring-toss-idea-completed-bottle

7. Now that the bottles and rings are good to go, grab your black cardboard or foam board and space out your bottles so that the rings can be tossed onto them without any problems. Secure bottles to the board with Scotch® Create Mounting Squares

Once the bottles are secured in place, you’re ready to play! 

scotch-at-walmart

You can find everything you need for this project, including all of the Scotch® brand products, in the craft aisle at your local Walmart. How’s that for a one-stop shop? 

I love how the Scotch® Expressions washi and glitter tape were able to take my project to the next level. They were the perfect combo of versatility, function and fun! From masking tape in various colors to the easy to use Scotch® Create Glue Pen and everything in between, o matter the task, there’s a Scotch® Brand product to match AND make my life easier.

fall-carnival-games-diy-ring-toss-idea-ready-to-play

What’s your favorite school carnival game? 


© A Crafty Spoonful - All Rights Reserved
It is OK to use one of my photos provided a link back and/or proper credit is given. It is NOT ok to copy and paste a whole post including instructions. Please do not remove watermarks or alter images in any way. Please contact me with any questions at danielle@acraftyspoonful.com

.