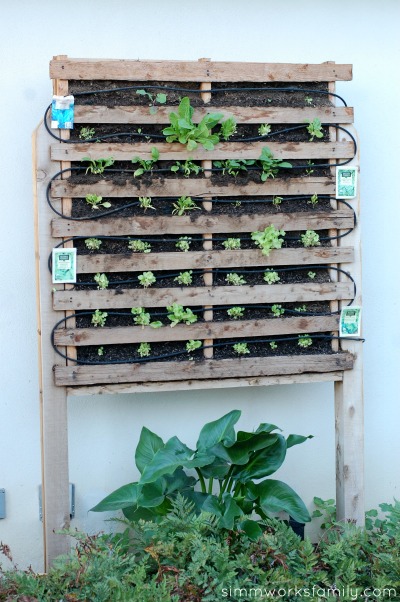
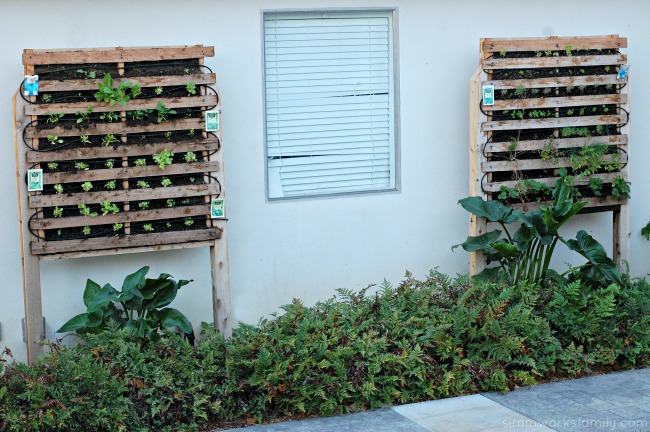
How to Build a Vertical Garden Using Pallets

 This post contains affiliate links. 

How to Build a Vertical Garden Using Pallets

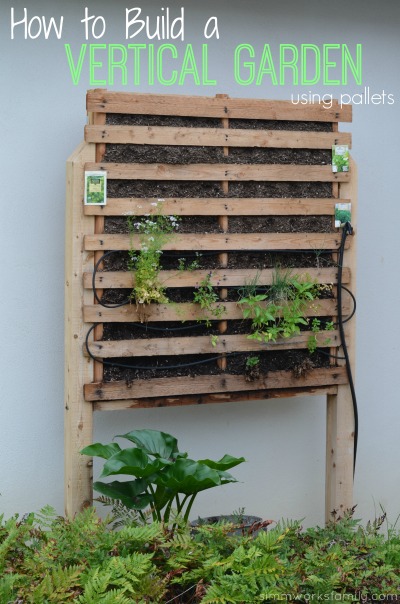
Ever wonder what else you can do with pallets? I mean besides the thousands of other ideas you find all over the interwebs? Well, my husband and I figured out how to build a vertical garden using pallets. And they’re quite fun!

Now, I want to tell you right now that we’ve had some interesting finds when building these. The first? It’s really difficult to get dirt to stay IN the pallets once you start watering them. Especially if you don’t use a soaker hose line and just spray them with the garden hose.

My son had fun with the muddy clumps that came with that! But once the dirt is settled into the pallets it’s actually quite a good way to grow fun things and makes an awesome display for your yard.

build a vertical garden using pallets - before

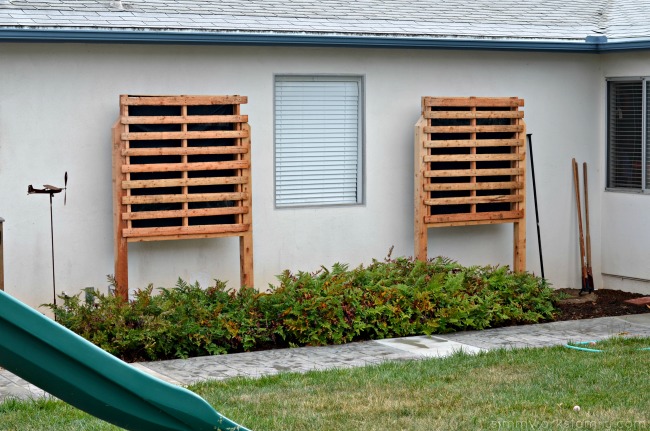
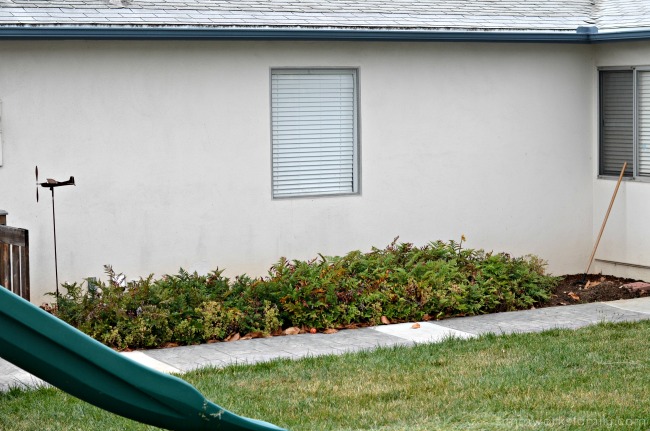
This above was the side of our house in the front yard before we put the pallets in. I hated how empty and plain the space was and wanted to use the vertical garden to spruce it up and bring life to this part of the yard.

I don’t think my husband quite understood exactly what I was envisioning in my head but with some team work, a few dirty looks and rolling eyes, and some muddy kids, we got it done.

Oh… and if you’re having trouble finding pallets because everyone and their mom is grabbing them up to make things like this, go to Home Depot or whatever other hardware stores you have around and ask for their sod pallets. They’re more flimsy/rickety (hence the support added) but are perfect for this type of project!

Here’s how!

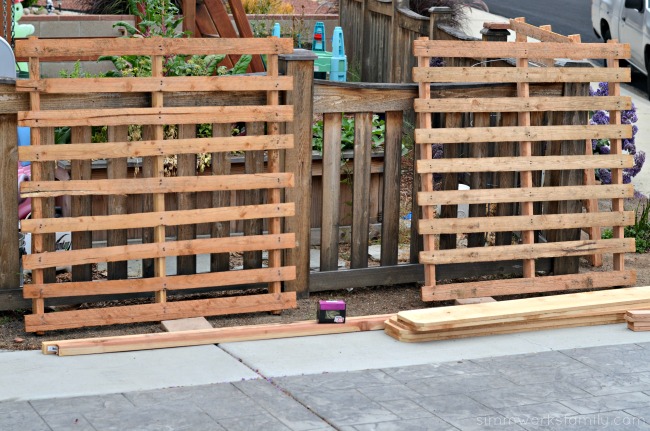
build a vertical garden using pallets - pallets

How to Build a Vertical Garden Using Pallets

Supplies:

Wood

  • wooden pallet
  • 2×2 doug fir
  • 2×4 doug fir
  • 1×8 cedar fence board
  • 2 4×4 cedar posts

Materials

What you do:

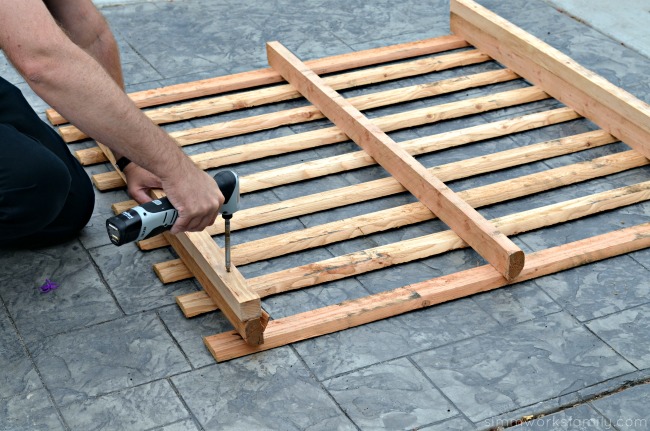
build a vertical garden using pallets - drilling on support beams1. Measure length of pallet and cut 2x2s to that length. These will give extra support to the pallet.

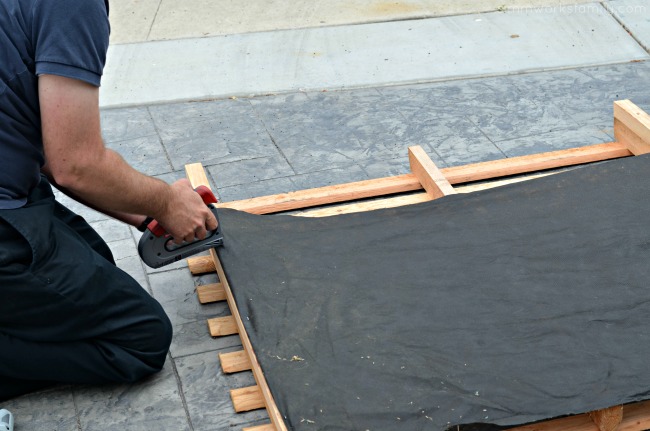
build a vertical garden using pallets - staple black garden cloth

2. Staple weed block fabric to the back of the pallet, pulling taut to make sure it’s stretched all the way across. Layer if needed to cover the full back.

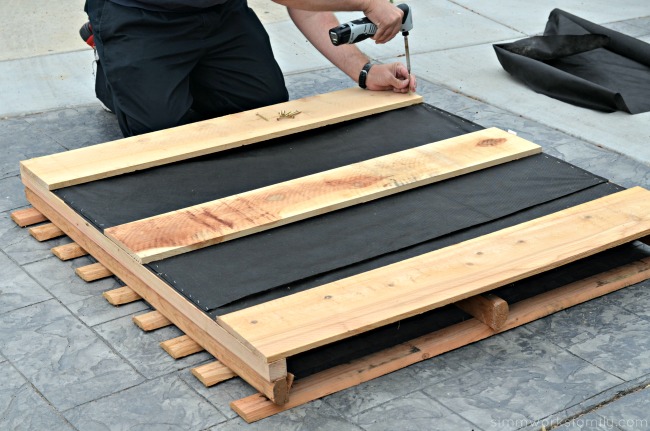
build a vertical garden using pallets - add support panels

3. Measure the width of the pallet from 2×2 to 2×2 and cut 1×8 fence boards to that length. Screw in place over the weed block fabric.

build a vertical garden using pallets - dig post holes and level post

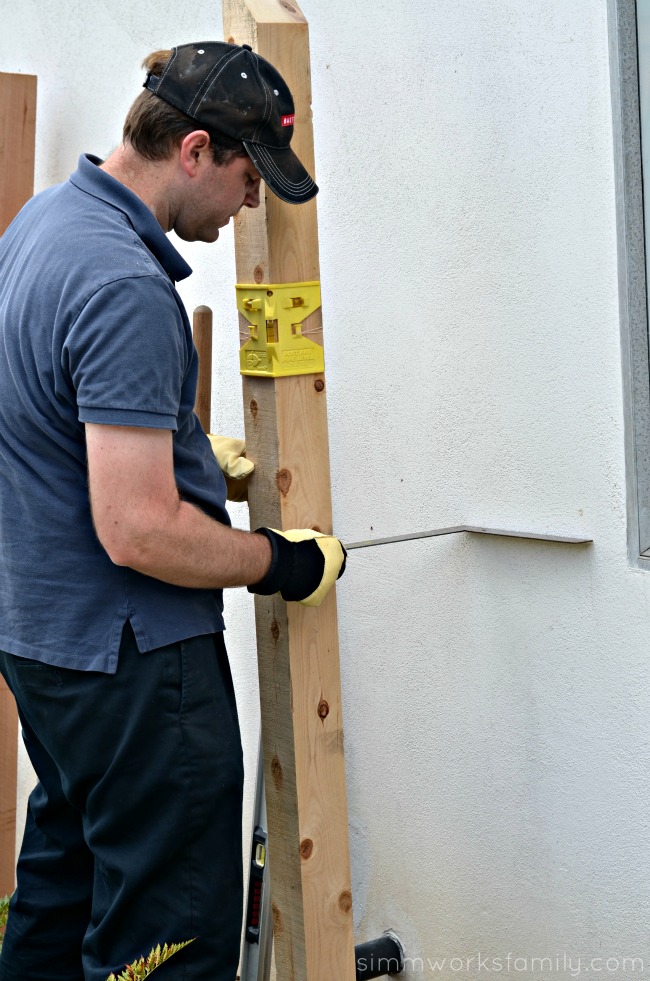
4. Measure the distance you need your posts to be installed on the ground and dig holes for posts. Cut posts to size depending on how far above the ground you want the pallets to be. Make sure to bury them about 1-2′ in the ground to provide a sturdy base.

5. Set posts in the ground by covering with dirt and using a level to determine if you need to move or shift the posts. Measure the back dimensions of the pallet to determine exactly how far apart the posts should be. This will vary with every pallet.

build a vertical garden using pallets - attaching pallet to posts

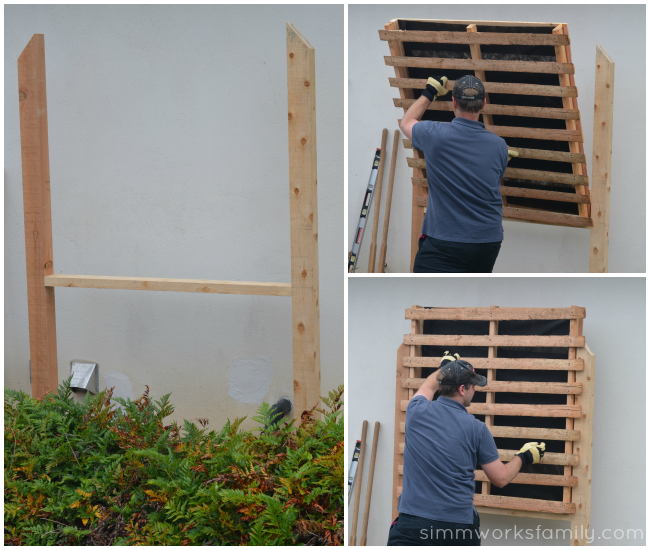
6. Measure where you want the bottom of hte pallet to be and mark off that height on each post with a pencil. Then cut the 2×4 to the width between the posts. This board will act as a frame for the pallet to sit on. Screw the 2×4 into position directly underneath the line you’ve drawn.

7. Lift pallet into place on the frame and screw to secure.

build a vertical garden using pallets - fill with dirtHow pretty are they??

Next up is the hard part… this is where we had the most trouble… trying to pack in the soil to make sure it stayed in place and didn’t spill all out.

Now you’re probably asking why we didn’t start our pallet garden on the ground and then lift it into place once the plants were established. Well.. you *could* do that but just think of how heavy those pallet gardens would be. Crazy heavy! So we did it this way.

build a vertical garden using pallets - dirt in pallet

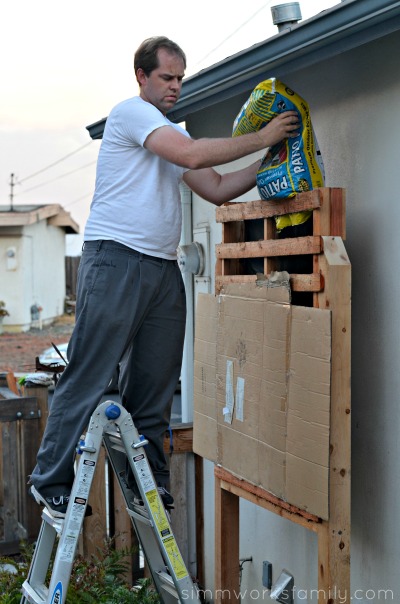
8. Using the cardboard stapled to the front of the pallet, fill the pallet with mulchy garden soil. Pack down each layer as you go to make sure it’s secure. There will be some dirt that falls out, simply fill it back again or leave it as is to settle more and fill later.

9. Plant with whatever seeds you think will grow best! We stick to lettuce in one planter and herbs in another with a few strawberries at the bottom. It’s pretty fun to step out and grab herbs whenever I need them!
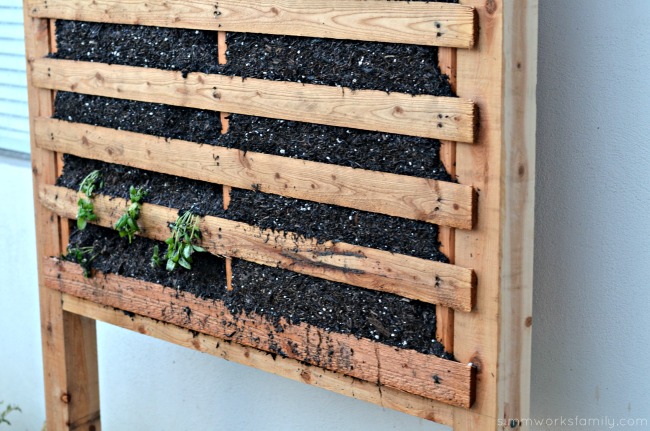
build a vertical garden using pallets - planting from startersAnother problem we ran into was using starter plants we purchased instead of seeds. While in theory this would work great, when you put a plant that’s been growing vertically in a horizontal planter into a vertical planter and ask it to grow horizontally it looks like this above… droopy.

It’s also quite messy and hard to get the starter plants IN the planter and you spill a TON of dirt everywhere. Our solution? Seeds… start from seed and install an irrigation system with a soaker hose. You can find everything you need for the soaker hose in the irrigation aisle at your local hardware store.
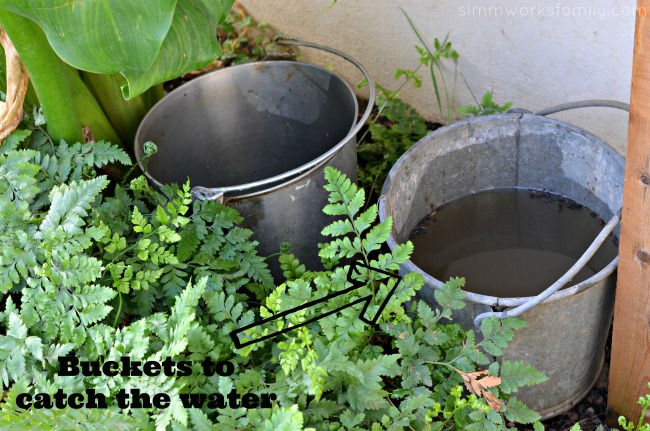
build a vertical garden buckets for run offIf you’re going to use an irrigation system with your garden, know that there will be water that drips down constantly. In order to conserve that water to use on our other plants and in our raised garden beds, we simply put buckets underneath to catch the excess water.

You know what else we found? Bees LOVE to come and drink the water that pools on the last rung of the pallet because they love mineral rich water. That means you’re helping the bees with your vertical garden too! Here’s a close up of a bee drinking. This is a regular sighting.

build a vertical garden using pallets - plant from seed

While it’s been a crazy process, I absolutely love how the vertical gardens make the side of our house look. I consider them more of a decorative piece in our front yard but love that we also get the benefits of growing our own herbs and lettuce.

And since our pallets are in the shade for most of the day, we had to choose plants that would work well in these conditions. I’m sure there are other things one could grow if their vertical garden were directly in full sunlight.
build a vertical garden using pallets - planted

What would you plant in a vertical garden?

10 Vacation Tips With Kids

10 Vacation Tips with Kids

Recently I read on Facebook from a friend that vacations with kids are simply trips, not vacations. Because as a mom, or a parent, there’s no relaxing as one would expect on a vacation. And while I see where this friend is coming from, I don’t know if I buy it. Maybe that’s because the larger vacations we’ve taken with the kids usually end up being with one set of grandparents coming along as well (which I HIGHLY recommend for those who get along with their parents/in-laws). Or maybe it’s because I put myself into the vacation mentality and try to balance rest/relaxation with exploration.

I guess it all depends on the mindset of the parents, right? And the planning. As a family of 5, our next vacation is going to take a bit of planning. Luckily I’ve found some great tips for vacationing with the kids… and planning the vacations. So starting now means I’ll be ahead of the game when our next vacation gets closer, right? Because planning a vacation for a family of four seems a lot easier than planning for the five of us. And I have no idea why! 

Vacation Tips with Kids

1. 7 Tips for Surviving Family Vacations with Teens & Tweens | Shaken Together

2. Staying Sane While Traveling with Kids | Turning the Clock Back

3. Taking a Road Trip to Disney World with Kids | My Mommy World

4. 12 Tips to Traveling with Kids (Without Losing Your Mind) | That Bald Chick

5. How to Stay Happy When Traveling with Toddlers | Smarty Pants Mama

6. Baby Air Travel Essentials | Meet Kristy

7. Surviving Road Trips with Children | More Than A Mom of Three

8. How Do You Potty Train When On-The-Go? ~Sunshine and Sippy Cups

9. Your Ultimate Family Road Trip Resource Guide ~Carrie Elle

10. Tips for Traveling with Children on the Auto Train ~A TIPical Day


Need more help with planning your next vacation? Planning a road trip with the kids? You might find this article helpful!

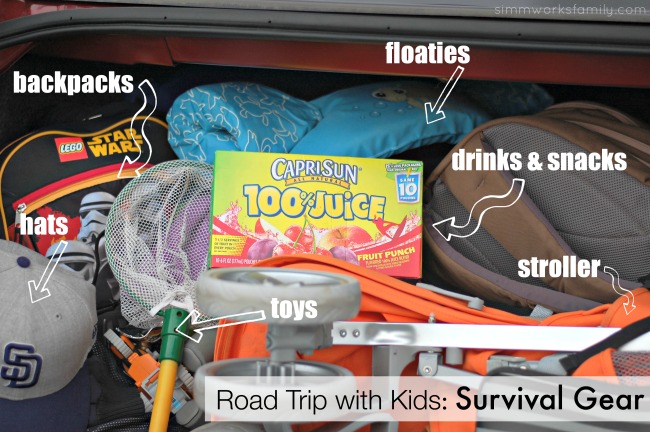
Road Trip with Kids Survival Gear

Clear The Shelters: Tips On Adopting A Dog

This weekend we headed to the San Diego Humane Society to check out the Clear the Shelters event sponsored by NBCUniversal and Overstock. In an effort to help families find their newest furry member, this sponsored post features tips on adopting a dog. Adding a dog to the family can be such a great thing, if a good fit is found.

Clear The Shelters Tips On Adopting A Dog

As Scout, our coonhound, gets older I’ve been thinking a lot about getting a companion dog for him to make the transition easier when he does finally pass. When Jetta passed we were so glad to have Scout in our home. And since Scout is now older than Jetta when she passed, and is starting to slow down a lot, we know his time will come soon. So I’m adimate on finding the perfect pooch to add to our family zoo. However my husband thinks we’ve maxed out on the number of pets we can handle. I’m hoping to sway him over to my side once we narrow down the search.

When I heard about the Clear the Shelters event happening at our local shelter, I knew I wanted to check it out. The Clear the Shelters initiative, spearheaded by NBC and Telemundo local television stations, in partnership with Overstock.com, put on an amazing event this weekend at various shelters in the US and Puerto Rico to help find homes for the many many animals living in shelters. Finding forever homes for these animals was the main goal. And finding homes is what they did.

Clear The Shelters event at the San Diego Humane SocietyClear The Shelters event with NBC and Overstock


I took Norah with me as we visted the dogs, cats, and bunnies at the shelter and had a chance to see families find their perfect pet while we were there. It was magical seeing someone walk into a room to meet their newest family member. The joy, the emotion, and and the instant bonds that were made left my heart feeling full.

And I was drawn to one pooch while we were there. A 2 year old beagle mix who looked like he’d be the perfect match for my family. I got all of his information to bring home and discuss with my husband and the family. But by the time we headed out to see if the whole family felt the same way (including Scout) we found that he was already adopted. YAY for him!

The event here in San Diego was a success. I found out on the San Diego Humane Society facebook page that there were 283 adoptions today at their Gaines Street location and 741 countywide! I’m sure that number increased across the country. The animal shelter is the perfect place to find a dog. But there are a few things to consider when looking to add a furry member to ones family.

If you’re looking to adopt a dog, consider these tips before doing so:

Clear The Shelters Tips On Adopting A Dog - know the temperament

Tips On Adopting A Dog

Research. Research. Research.

Finding the right breed for your family is very important. Doing the necessary research ahead of time on the type of dog that will work best for your family will save both you and a dog from a potentially disasterous combo. Know how active a breed is, if they’re known for being escape artists. If they do best in a home with a yard or need lots of frequent walks. Being aware of a breed’s quirks can make it easier to narrow down what would work best for your lifestyle. And size is important too! When we adopted Scout he was a 3 months old little pup . But had HUGE paws. So even though his sign said beagle/coonhound mix, we knew he was going to be a large breed dog. More coonhound than beagle. If we weren’t prepared for his size we might not have had the resources needed for him.

Check The Local Shelters Frequently

Whether you’re looking online at your local shelter’s website, or heading into them in person, be aware that dogs go in and out of shelters quickly. If you’ve done your research and know what type of breed you want to get, make sure to act quickly so that you won’t be heartbroken to find that a dog has already been adopted out already.

Heed The Shelter Notes

All of the dogs at the shelter have a sheet of paper next to them that tell a potential adoptive parent about the dog. How active they are, if they get along well with other animals or kids in the home, etc. The shelters are good about watching a dog and seeing how they react to different situations. They will also note anything that might have happened before they received the animal. Make sure that you take all of this information in and are honest in your adoptive application about your home life and what type of situation the dog is getting into. If you have another dog at home, consider bringing them in to meet the new member before you adopt. And bring in the whole family. Kids and all. You want to make sure you see how the new dog reacts to these changes and people before bringing them home.

Prepare Your Home

Make sure that before you get your pup you have prepped your home for their arrival. Make sure your yard is secure, you have a leash, collar, dog food/water dishes, and a bed or spot for your doggy to sleep. Know in advance what you might need depending on the age of your new pet. A puppy may require a few nights of snuggling and letting out until they get used to going out the doggy dor you have or feeling comfortable sleeping in a new home. Just like having a newborn!

Adopting A Dog Is Forever

By doing your research, finding the perfect match for your family, and being prepared when you take your pooch home, you are sure to find the perfect match for your family and will spend many years happily reaping the rewards of the unconditional love a dog can give. But please remember that shelter dogs have already been abandoned or given up once before. So they need to know that you’ll be their forever parent and this will be their forever home. There’s no taking a dog back or returning them because it just isn’t working out. Know that you’re making a commitment to this animal to love and care for them. And they’ll love and care for you right back!

Clear The Shelters Tips On Adopting A Dog - cats too!Clear The Shelters Tips On Adopting A Dog - and bunnies!

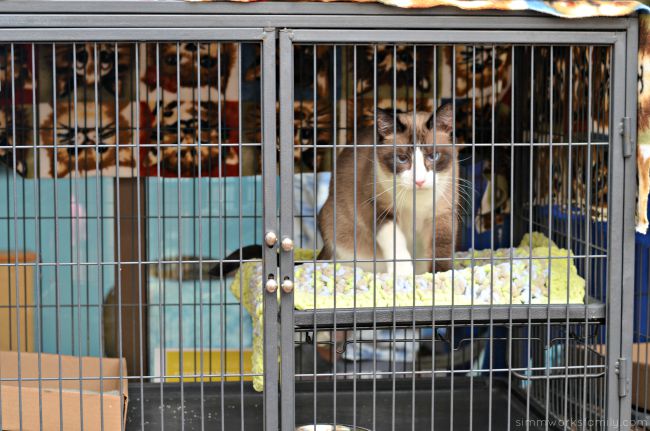
Dogs aren’t the only animals at shelters! You can also find many cats, kittens, and bunnies ready to find their forever home too!

Overstock Pet Adoptions has helped pet lovers search for and adopt animals from thousands of shelters across the country. Overstock.com believes every life is valuable and has used their technology and resources to help save the lives of homeless and abandoned pets. You can find pets to adopt by looking at Overstock’s pet adoption pageOver 40,000 pets have found homes through the Overstock.com technology! How awesome is that? And you can find all of your pet essentials right on the site so you’re home is ready for your new family member.

Did you miss out on this year’s event? Mark your calendar for next year’s event slated for 7/16/16!

Is your family looking to add a new furry member? Have you considered visiting your local shelter?

Updating Our Home: How To Decide On Flooring

Today we’re sharing how we decided on the flooring for our home. With help from Mohawk Flooring, this sponsored post features tips on what to consider when making flooring decisions.

Updating Our Home How To Decide On Flooring

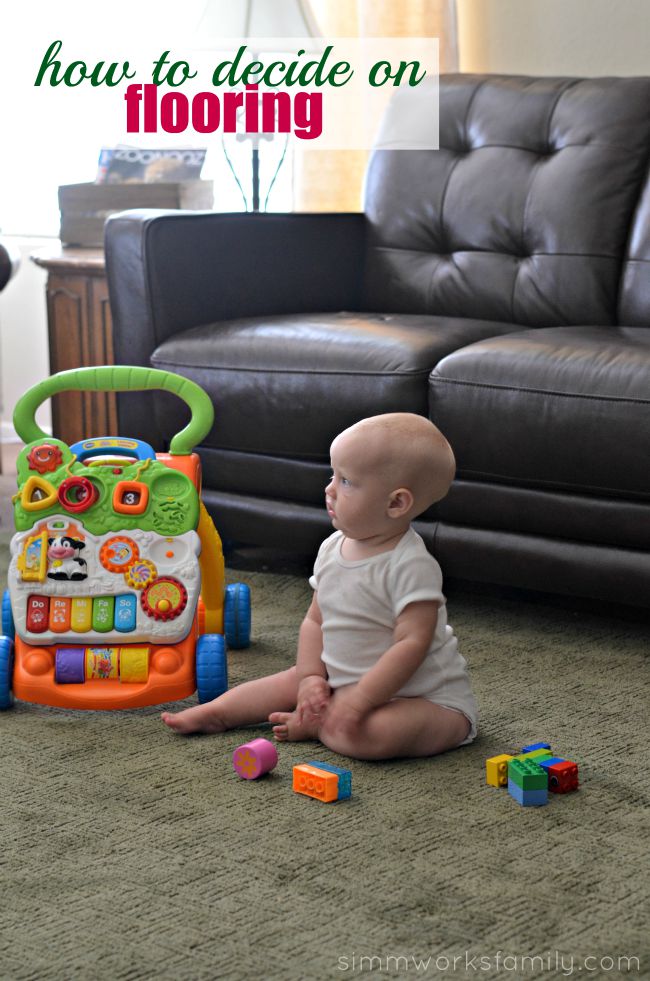
As the little miss gets closer and closer to crawling, one thing is on our minds: flooring. When we moved into our new home a year ago we knew we wanted to change things up and update the existing flooring but we wanted to wait a bit to get a feel for exactly what we wanted. Now that we’ve lived in the home for a while we know exactly what we want and are saving up to create the home of our dreams, flooring and all.

We’ve gone to check out flooring quite a few times and have finally decided on what we’ll be doing. Since we have to do this in stages, we’ll focus on the downstairs first.My big change will be to take out the carpet in the living and family rooms as well as the hallway to the bedrooms. Then I want to update the carpeting in the downstairs bedrooms, the stairs, and the upstairs rooms to SmartStrand Forever Clean carpet. After our experience with our SmartStrand bound carpets, we know that this product is perfect for our family. Luckily, Mohawk is having a sale!

Updating Our Home How To Decide On Flooring - consider pets and children

How To Decide On Flooring

  1. What Room Are You Updating? – Consider the room the flooring will be in and what you’re using it for. Also consider who will be walking on it. Since we have a dog and small kids, that factors into our decision making. In high traffic areas like our hallways and living/family rooms, we need something that’s durable and easy to clean. In the bedrooms we prefer to have the soft, plush feel of carpet to step on when we wake up. 
  2. What Type Of Flooring Is Best? – Now that you’ve decided what type of flooring you want in your room (carpet, hardwood, etc) you can now narrow down what’s best for that room. Just like the factors you took into consideration when choosing what would go best in the room, you’ll also consider those same things when deciding the specific flooring you get. Also consider the warrenty on the flooring you choose as well as the expected life of the flooring so you know when you’ll need to replace it. 
  3. What Other Colors Are In The Room? – Once you have the type of flooring picked out, now it’s the fun part! Deciding on color/pattern. The biggest deciding factor for me with color is looking at the color palette of the room it’s going in and determining what color would look best. But don’t just go by a small sample square. Most flooring stores will have someone come out with a few large samples so you can see what the color will look like better than those small squares. 

Updating Our Home How To Decide On Flooring - consider colorscape of the room

You can follow Mohawk on Pinterest, Facebook, Twitter, Instagram and Google+ for more flooring inspiration.

Where will you install your new flooring if you win?

Fire and Fettucini San Diego: The Perfect Pairing

Stone & Glass Storefront

A few weeks ago I took a few hours to spend with my oldest. He hasn’t gotten much one on one with me since the baby was born and we were due for a mommy and son date. We were invited to Stone & Glass to preview their new Fire and Fettucini classes. Perfect for just about any coupling you could think of – mother son, father daughter, significant others, girlfriends, “bros” … hahaha – Stone & Glass has paired with Charlie’s Classic Cooking to bring together a glass making class and a cooking class.

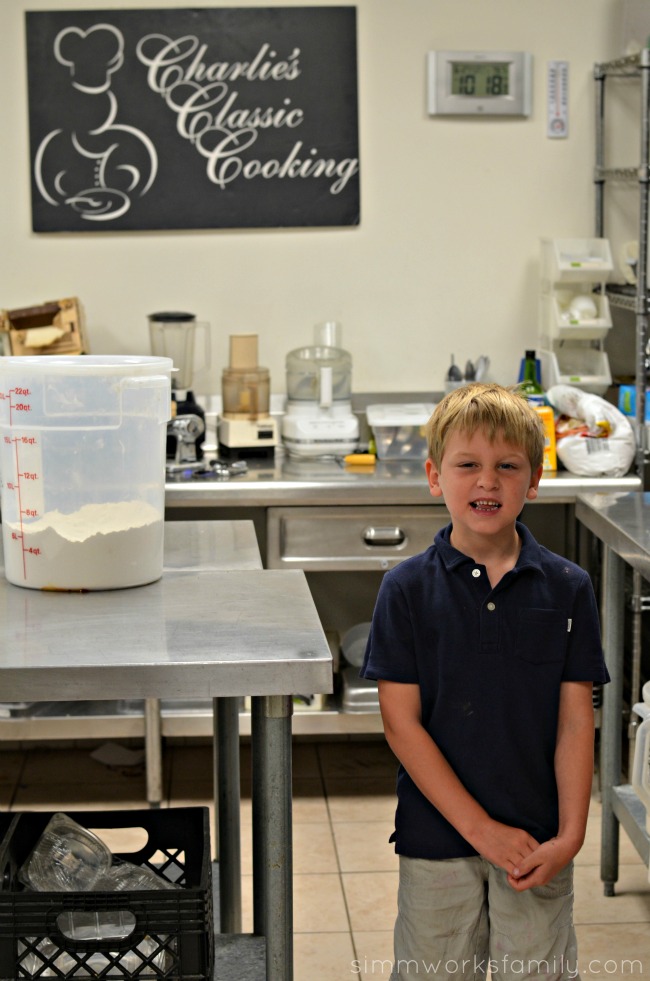
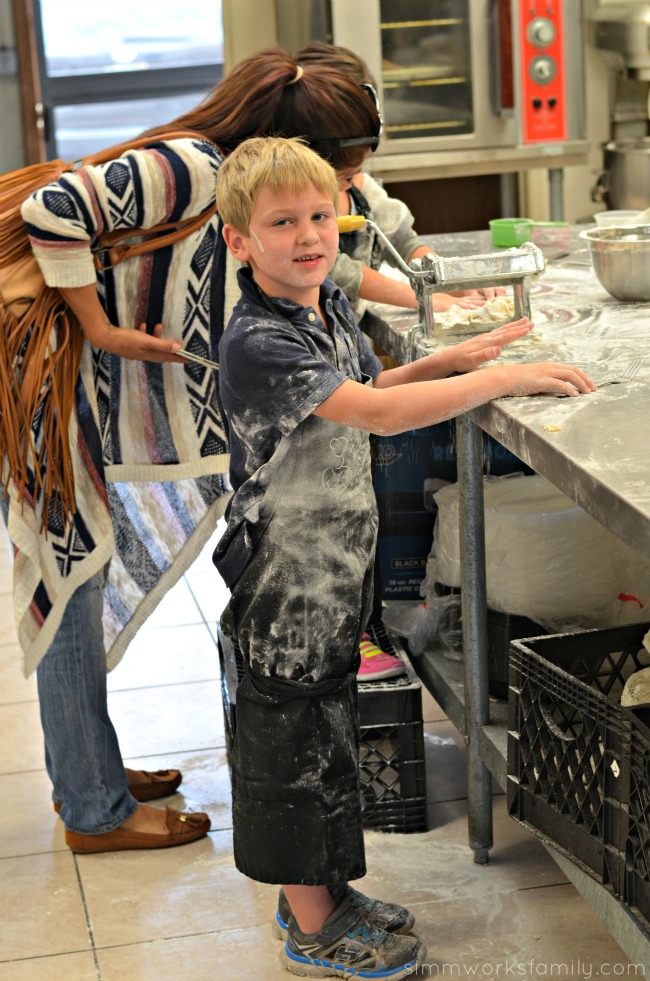
One person learns how to make something with glass while the other learns how to cook a meal. So while I was learning how to make a beautiful glass heart, my son was learning how to make pasta by hand. Talk about a hands on experience! And afterwards we all were able to eat together and enjoy the meal he made.

Making Pasta at Charlie's Cooking Class

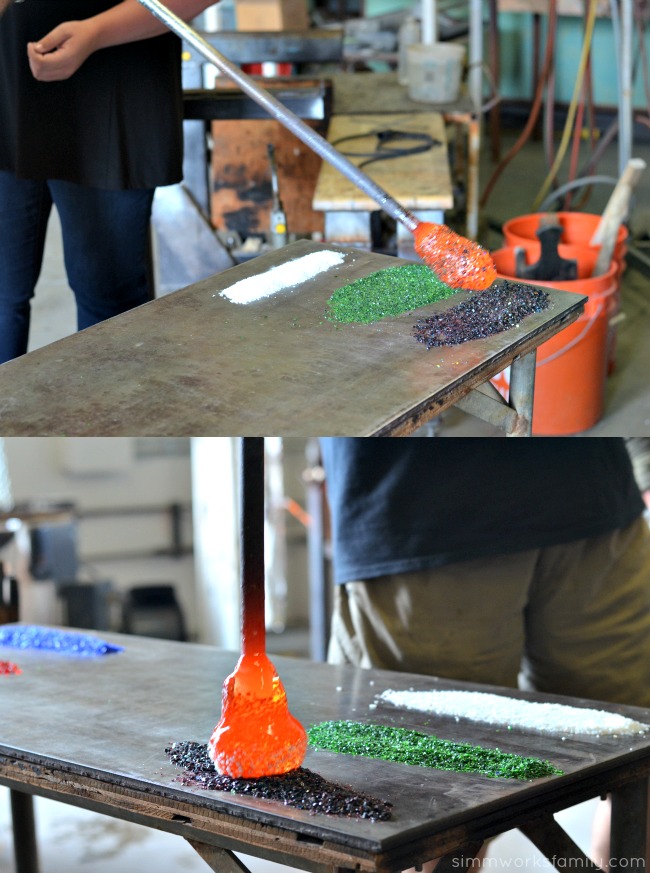
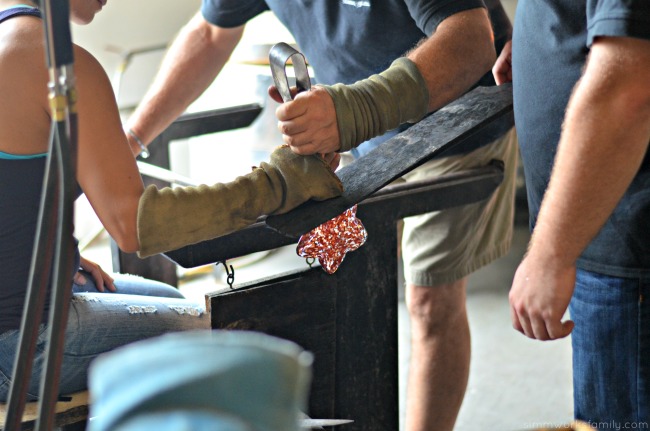
During the glass blowing session the Stone & Glass team will explain safety tools and basic skills, you will learn how to shape and control the glass and apply color to create your masterpiece.  Every student will design and create handmade artwork in glass and gain a strong understanding of how glass art is made. My other two classmates made sea stars with different colors and designs. 

Stone & Glass making a heart

Stone & Glass glassmaking

Stone & Glass making starfish

In the cooking session Chef Charles of Charlie’s Classic Cooking will lead you through making your pasta and sauce from scratch, perhaps adding a few surprises, preparing a side dish and dessert. And once you’ve had handmade pasta, you won’t want to go back to the boxed stuff! Oh my word is it good. 

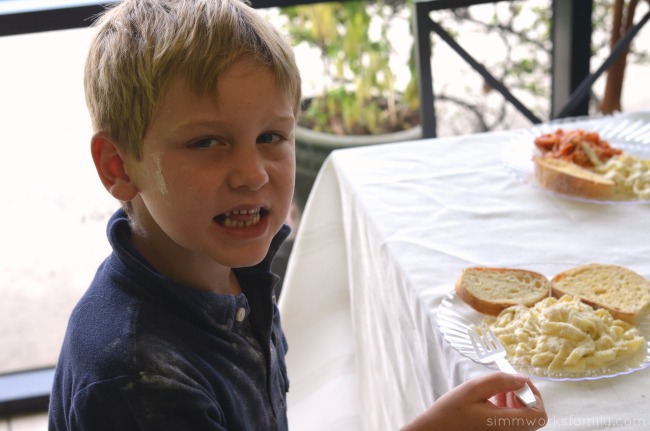
Can you tell he had fun?

The best part? It’s only $125.00 per pair! This class is offered the last Saturday of each month and available for private parties.

And while my son was too young for the glassmaking portion, he was the perfect age for cooking. Children 9 years and older can partake in the glassmaking and children 5 years and older can participate in the cooking. You can find more info on the Stone & Glass website.

Charlie's Classic Cooking making pasta doughCharlie's Classic Cooking eating pasta

Looking for a great opportunity for the kids?

Speaking of kids,  Stone & Glass is offering a One Day Glass Camp for children ages 9 to 13 on Thursdays in August from 9am to 3pm. In the morning session the kids will be working with cold class; creating glass tiles following patterns and samples provided or unique masterpieces using various pre-cut glass materials. 

Lunch is another creative opportunity – a nutritious lunch prepared with Chef Charlie of Charlie’s Classic Cooking. They ramp up the excitement in the afternoon with a hot glass demonstration, after which each student will work with our glass blowing team to create solid glass objects.

The glass camp is $120.00 per child per day. All tools and materials are provided. Pieces are ready for pick up in a week. These are small group sessions with a minimum 4 participants and maximum of 6. For more info, visit the Stone & Glass website.

Who will you be taking on a Fire & Fettucini adventure? 

Stone & Glass on FacebookStone & Glass on YouTube | Stone & Glass on Instagram

Cinnamon Zucchini Cake

Cinnamon Zucchini Cake
Getting creative with what we harvest from our garden has never been too tough. There are so many ways to make veggies delicious and fun. This time isn’t any different. I had the kids help me cut up the zucchini and shred it in our food processor. They love getting involved in the kitchen and are even more apt to try things that they make. Even when it’s zucchini. 
 
Since it’s almost the end of the summer and I really didn’t think I’d still be growing zucchini out of my ears, we’re making the best of it and even incorporating veggies in our baking. And these zucchini aren’t the little dinky zucchini you find in the grocery store. They’re huge!! So huge that one would probably make enought for 3-4 times this recipe easily. But we don’t need that many baked goods in our home right now.
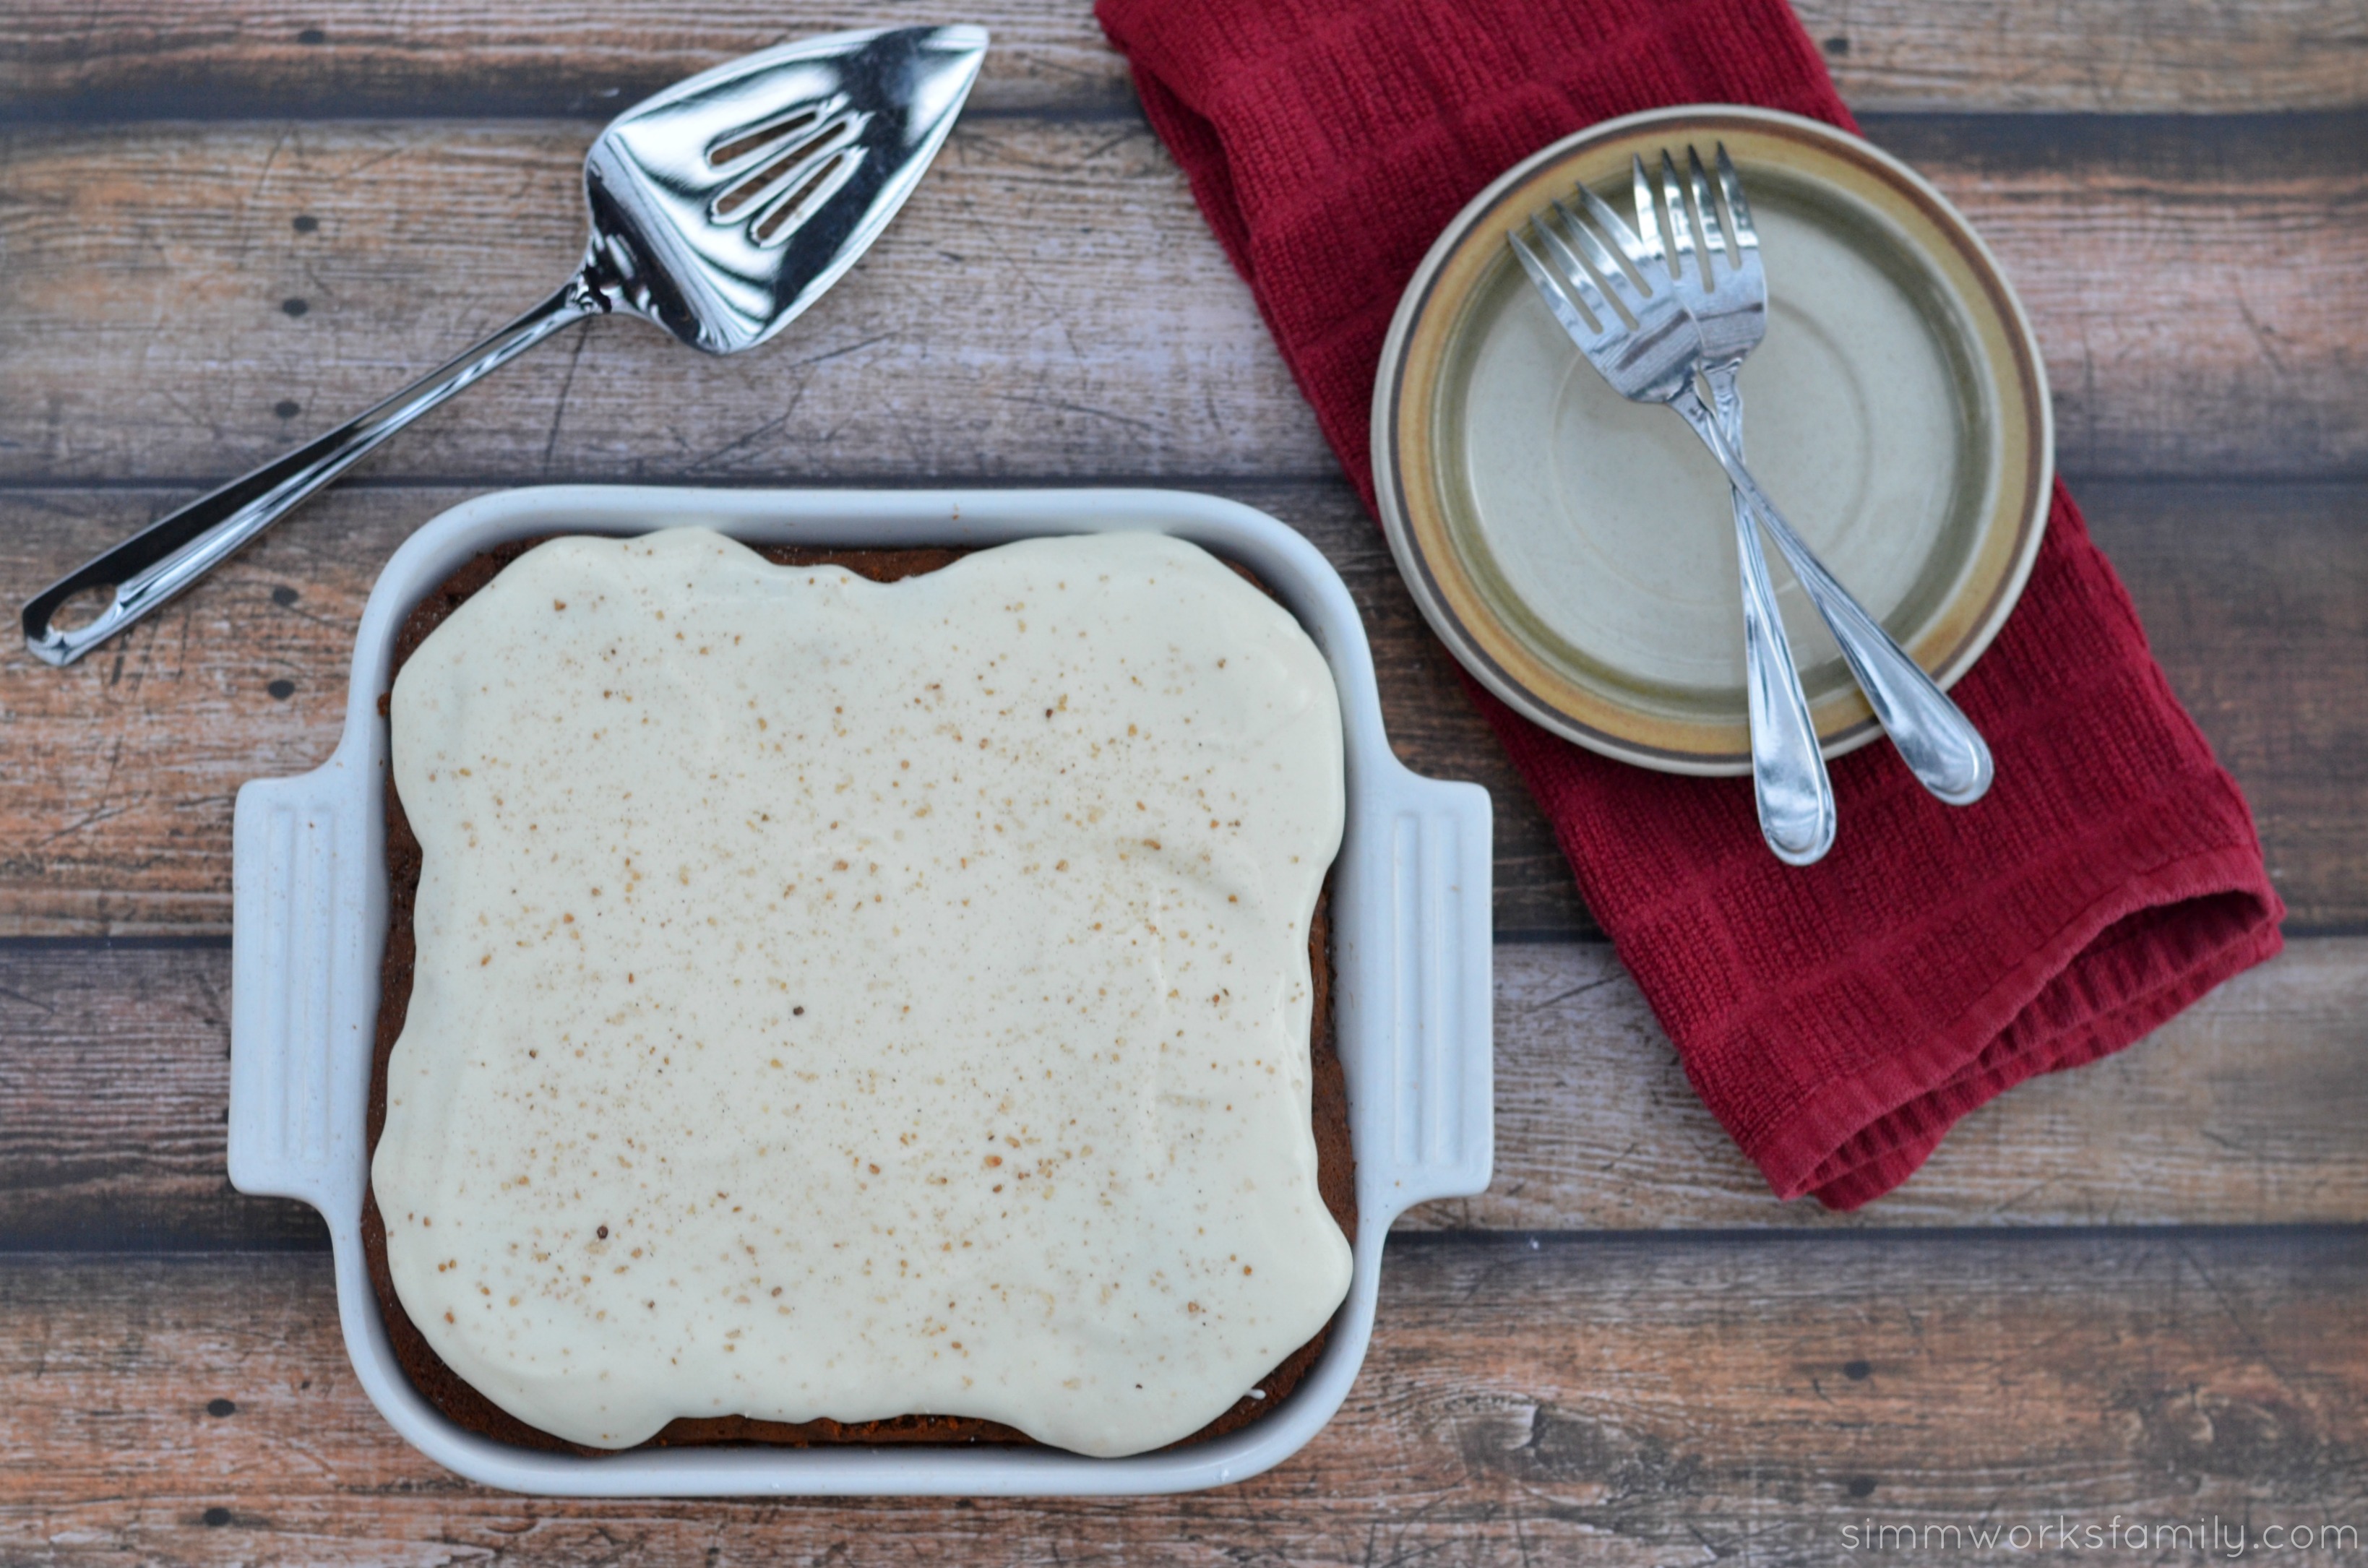
This cake is moist, slightly sweet but not too sweet, and amazingly delicious. It’s perfect for an afternoon snack without the icing but adding the icing takes it to dessert level. And it pairs perfectly with a scoop of vanilla ice cream.
Cinnamon Zucchini Cake with Frosting

Cinnamon Zucchini Cake

Cake
  • 3 eggs
  • ½ cup coconut oil
  • ½ cup cinnamon applesauce
  • ¾ cup white sugar
  • ¾ cup brown sugar
  • 2 teaspoons vanilla
  • 2½ cups all-purpose flour
  • ¼ teaspoon baking powder
  • 2 teaspoons baking soda
  • 1½ teaspoons cinnamon
  • ½ teaspoon nutmeg
  • 1 teaspoon salt
  • 2 cups shredded zucchini
Frosting:
  • 1/2 cup butter, softened
  • 3 cups powdered sugar
  • 1 teaspoon vanilla

Preheat oven to 350 degrees. Spray a 9×9″ baking pan* with non-stick cooking spray (we like coconut cooking spray).

Beat eggs, coconut oil, cinnamon applesauce, white sugar, brown sugar, and vanilla together in a large mixing bowl.

In a medium bowl, mix flour, baking powder, baking soda, cinnamon, salt, and nutmeg. Mix 1 cup flour mixture into egg mixture until combined. Repeat using one cup at a time until all of the flour mixture is used.

Fold in zucchini and stir until completely mixed in. Pour batter into prepared 9×9″ pan. Bake for 55-60 minutes or until toothpick inserted into the center comes out clean.

While the cake cools, mix together frosting ingredients and spread over the top of the cake. If desired, sprinkle the top of the cake with cinnamon and sugar. I love the cinnamon sugar grinder from Trader Joe’s for this!

*If using a 9″x13″ pan, bake for 35-40 minutes. If making into 24 cupcakes, bake for 25-30 minutes or until golden brown and toothpick comes out clean.

Incorporating STEM Into Our Daily Routine: Math For Screen Time

Today we’re sharing how we incorporate STEM into our daily routine. With help from Post-it® Brand, this sponsored post features how we use Post-it® Products to help our son with STEM learning.

Incorporating STEM Into Our Daily Routine Math For Screen Time

As we’re prepping our son for back to school, I wanted to make sure that he didn’t have a summer slump over break. We’ve been working on the curriculum he was learning at the end of the school year through his summer vacation so that doesn’t happen.

At the last PTG meeting I attended, we learned that a STEM curriculum would be added into the coursework for the new school year for all grades. Since my son thrives on those subjects this was music to my ears. And since he has an engineer for a father and a mother who loves math and science, we were hoping a little of that interest would rub off on our children.

But even though he loves math, science, and engineering, he seems to be using a lot more technology than the other three STEM subjects. He’s found Minecraft and it’s sucked him in.

It is important for parents to understand their child’s learning style and adapt STEM  study techniques to that learning style. Our son is a visual learner, so it is helpful for him to see information to absorb and understand it. In an effort to still make math fun, we’ve come up with some unique ways for him to earn more screen time and learn other STEM subjects.

Here’s what we did.

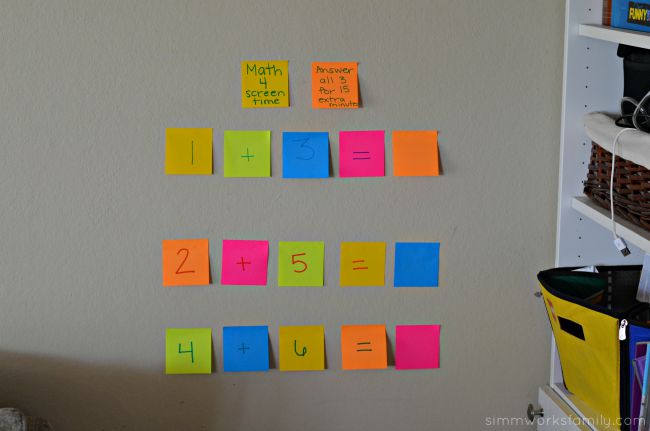
Incorporating STEM Into Our Daily Routine Math For Screen Time on Post its

Visual STEM Learning Project: Math For Screen Time

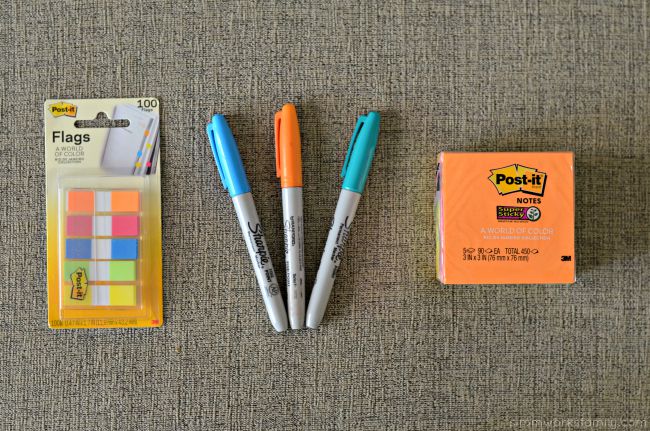
What you’ll need:

  • Post-it® Super Sticky Notes from the World of Color, Rio de Janeiro collection
  • Post-it® Flags from the World of Color, Rio de Janeiro collection
  • Pens or Permanent markers

Incorporating STEM Into Our Daily Routine - Post it products

What you do: 

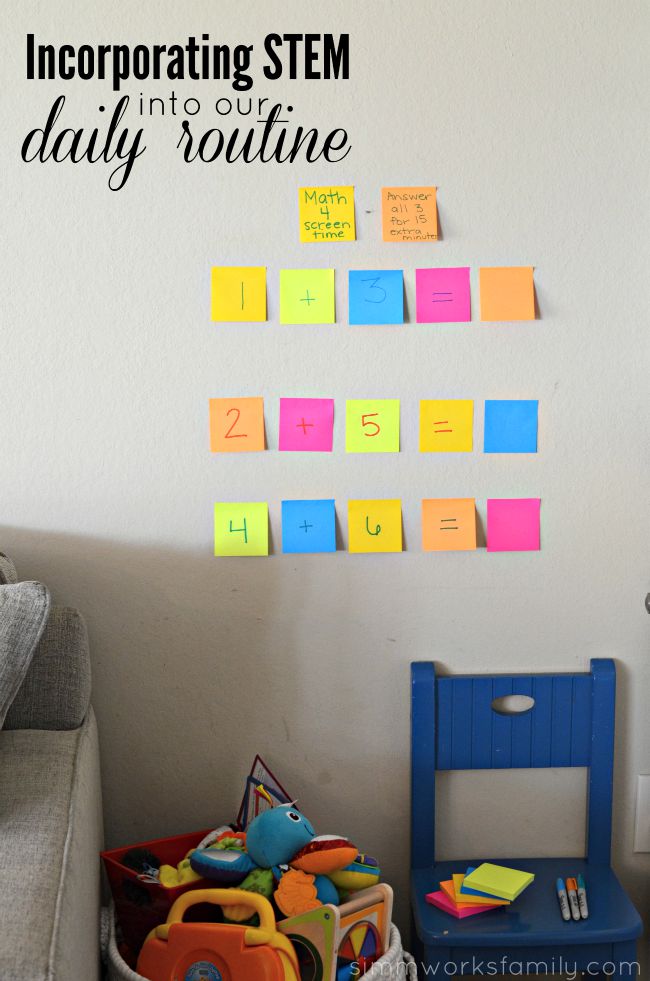
1. Using the Post-it® Super Sticky Notes from the World of Color, Rio de Janeiro

collection, use one color for each part of the equation.

2. Leave the answer Post-it® Super Sticky Note blank to let your child fill in the answer.

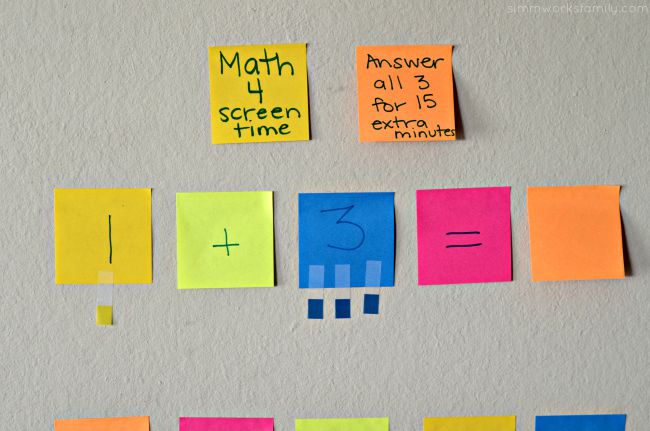
Incorporating STEM Into Our Daily Routine - addition

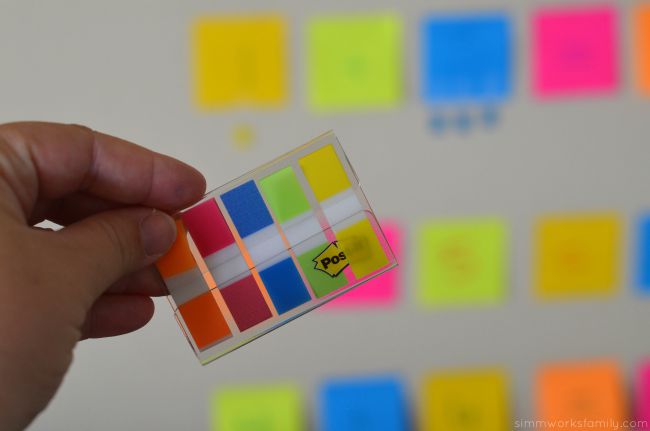
3. On each of the colored numbers, use the Post-it® Flags and attach the same color to each of the numbered Post-it® Super Sticky Notes.

4. Have your child complete the equation.

One answered question equals 5 minutes of screen time. Please add or subtract minutes as you see fit.

Incorporating STEM Into Our Daily Routine - Post it flagsIncorporating STEM Into Our Daily Routine Math For Screen Time practice

By creating a simple visual for my son to see the numbers on the Post-it® Super Sticky Notes AND see the Post-it® Flags on each number, he is learning quicker than simply seeing an equation on a piece of paper. In a study conducted by Post-it® Brand, results showed that 86% of parents think the best way for their students to learn STEM-subjects is through visual learning, like reading or seeing pictures. And I believe it!

We’ve been able to switch around the equations each day by rearranging the Post-it® Super Sticky Notes, and add numbers in to mix things up. Next on our list is to enroll him in a Minecraft programming class. Since he’s become so interested, we’re finding more ways to increase his interest in STEM subjects.

Before long, I may need to start taking classes at the local community college to keep up so I can help him with his homework!

How do you inspire your children to be more interested in STEM-related activities?

Find out more great ways to inspire your kids to jump into STEM curriculum with the help of Post-it® Brand by following them on Twitter and Instagram, visiting them on Facebook, or pinning a few of their ideas on Pinterest.

Dear N: 6 Months Old

Norah 6 Months Old

Oh sweet, happy, precious baby girl! How you light up our lives every single day. You are smart, adventurous, and always wanting to go-go-go. You are scarring us a little with how quickly you are growing and developing. From becoming more mobile to saying your first word, you are changing daily.

You’re laughing and smiling more, you love when Daddy gets home and cuddles you, and you enjoy playing on the ground with your sister and brother. Even though they get a bit rough with you, you take it in stride and never complain… much.

You are still very interested in our food and are having so much fun exploring new tastes and textures. If you aren’t offered what we’re eating you try to lunge and grab after it yourself. It makes us laugh every time. Especially when we’re at a restaurant. Now we make sure to order you something (like a side of whole strawberries or slices of avocado) to keep you occupied.

Norah 6 Months - playing with toysNorah 6 Months Old - almost crawling

You’ve mastered getting up on all fours and are even starting to move your legs forward. But you still don’t know what to do with your hands. Each day you get a little stronger. I’m sure you’ll be crawling within the next month! And even though you aren’t crawling yet, you’re getting more and more mobile. You try and pull yourself up onto your knees, spin around to grab objects, and roll and scoot around. Mostly in the wrong direction but you’ll get it. 

For the past few weeks when you get upset or when you try to get my attention you’ve been saying mmmm, or mamama, but now you say Mom clearly and directly to me. I even got video of it! You’re the first out of your siblings to say mama before dada. And you’re starting to sound out b’s too. We love how vocal you are and how much you love hearing your own voice. You can’t help yourself when you’re in a room that echoes to get a bit loud.

Norah 6 Months Old kneeling

I love how adventurous you are and how well you take every new experience like a champ. You go with the flow and love being with your family. We love being with you too! You make life more exciting and we love learning more and more about you each year.

We love you, Norah!

6 Month Stats:

18lbs 8oz – 90th percentile

27.5 inches – 98th percentile

46cm – 97th percentile

6 Month Comparison

6 Month Comparison

Surgery Is Scheduled

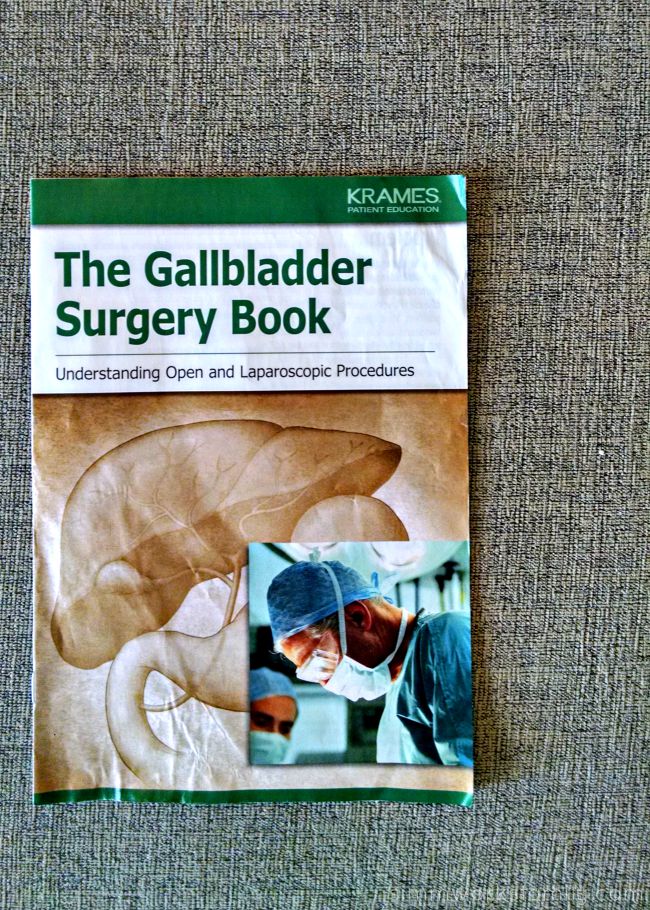
Surgery Is Scheduled - Gallbladder Surgery

After my gallbladder attack I did a lot of research. Research on the foods I could and couldn’t eat, research on surgery, and research on the effects the surgery would have on my life.

My biggest concern, however, had nothing to do with me, but with Norah.

She still isn’t taking a bottle very well when I’m out and for the most part I can’t leave for longer than 2 hours without her becoming upset and sometimes unconsolable. Especially at night.

So I needed to know that having her with me at the hospital would be OK. And nursing wouldn’t be an issue after surgery. Except I’m getting conflicting responses and information.

I met with my surgeon today to discuss everything. How long the procedure would be (1-2 hours tops), what my diet would be like after the surgery, and then I talked about Norah. And the fact that she won’t take a bottle and my concerns about not being able to nurse.

Surgery Is Scheduled - Gallbladder

He said that the only thing he would have any concern with is the anesthesia in my system. Not to worry about the meds because they could work around that. And he said that I could discuss the type of anesthesia used with the anesthesiologist beforehand so that we use something they’d use on an infant if an infant was being put under.


I felt better. I felt like this wasn’t going to be a problem. And I was ready to schedule my surgery knowing that my little one would be able to be with me and nurse before and after surgery. Until his nurse came in to schedule the date of the surgery.

And she… well she told me differently. She mentioned that most doctors recommend pumping and dumping 24-48 hours after surgery. And then she went on to give me tips on how to get Norah to take my milk. Spoon feeding, using a nursing bra over the bottle to give her a familiar scent, etc. She told me a story of how she had to go to the hospital after one of her little ones was born and dealt with the same thing. And she got me worried all over again.

I did a few internet searches – yes, I know this is NOT the same as my doctor’s word – and from what I can tell I should be fine to nurse after surgery. KellyMom and Anesthesia Web shared research to back up their answers and stories from LaLecheLeague also confirmed that I should be able to nurse after surgery just fine.

For now I won’t stress about it. I’ll go by what my surgeon has said and will wait to talk to my anesthesiologist a few days before surgery. I’ll also still continue to give Norah to daddy on the weekends to try a bottle and will have pumped milk ready for them before surgery next month. Just in case.

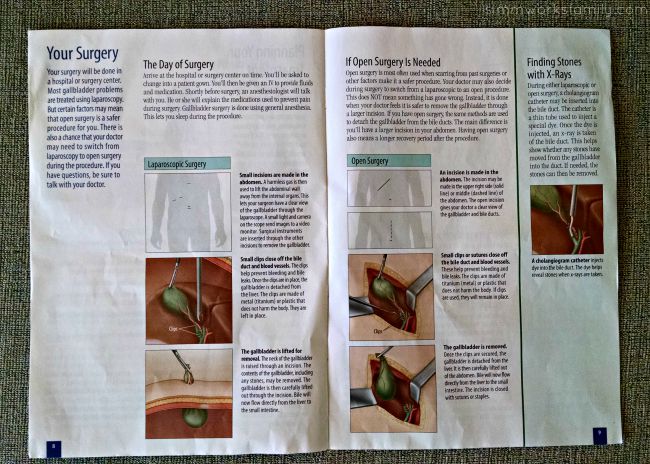
As for the actual surgery… That seems easy enough.

Surgery Is Scheduled - laparoscopic surgery

What to Know Before The First Day of First Grade

The first day of first grade can be scary but with these simple tips for first graders, you can make it easier on your child. 


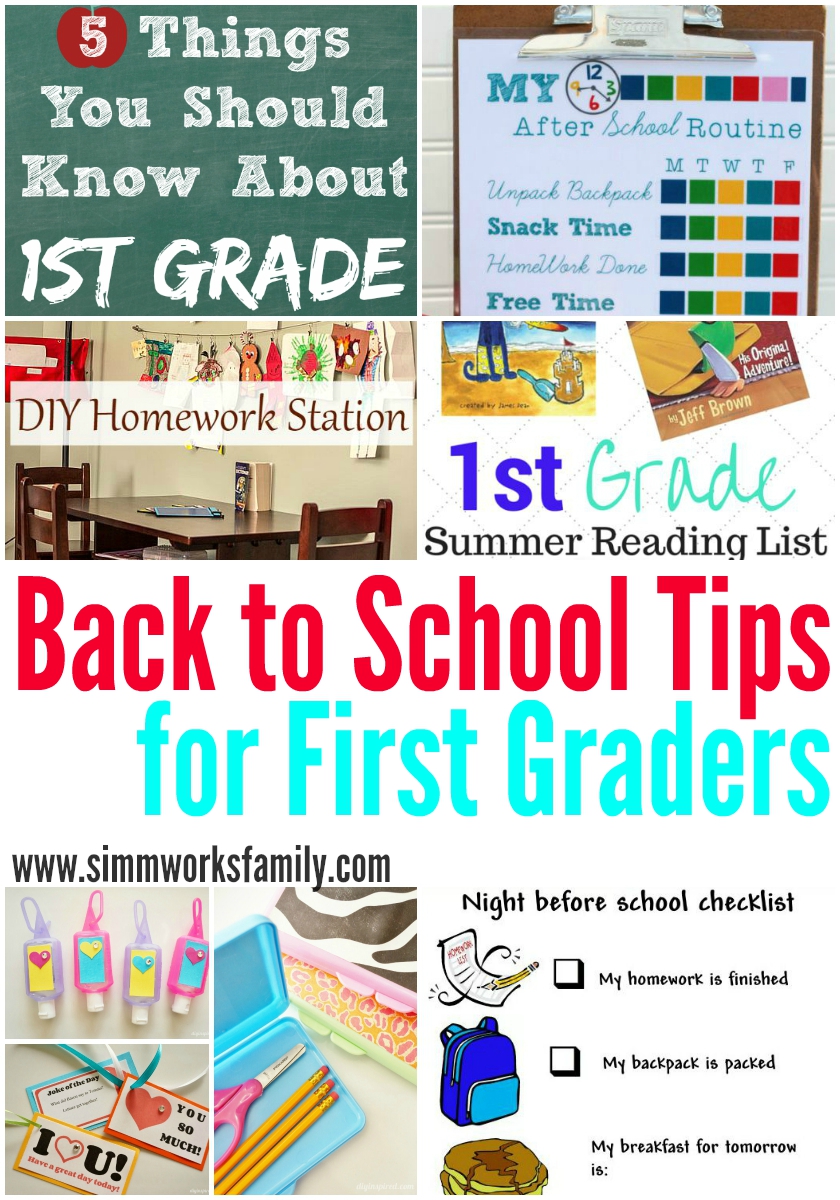
Back to School Tips for First Graders, first day of first grade prep

We are in full back-to-school mode right now in our home and prepping for the first day of first grade. We have the uniforms purchased, are buying supplies off our school supply list, and are making sure our kids are ready to head back to school at the end of August.

While I’m ready for the kids to be back in school, I want to make sure they’re prepared for the transition from summer fun to school mode. Throughout the summer we’ve been reading, working on sight words, practicing our math skills, and writing out our adventures.

But there are a few more things we can do to prepare the kids for their return to school. Especially my daughter who will be going from Kindergarten to First Grade. 

Below you’ll find some great back to school tips for first graders and what you should know before the first day of first grade.

Back to School Tips: What to Know Before The First Day of First Grade

While going back to school can be a scary time for some kids, you can prepare them by reading some books on what they can expect.

The night before the big day, have a checklist all ready to go so nothing gets forgotten or left behind at home.

Have your child help you make & personalize some of their school supplies and accessories, like a pencil box, their own hand sanitizer or personalized notes that you can stick in their lunch box.

Going from Kindergarten to one of the bigger grades can be a big change but creating a before and after school routine will definitely help!

Since there will be more homework this year, keep everything organized and in a quiet place with a DIY Homework Station.

For some kids, first grade means it will be the first time they’re eating lunch at school. Having a list of foods that they love and will eat is a huge help!

If you have the opportunity, take a tour of the school before school starts. Seeing where your child’s classroom is, where they’ll line up & where they’ll eat lunch might calm any nerves. If you’re able to meet the teacher before the first day, that’s a great bonus, too!

During summer, we tend to let our kids stay up a little bit longer. Two weeks before school, start having your child go to sleep at their new bedtime and practice getting up at the time they need to get up, too. It’ll make the first week of school a little easier.

A lot of what kids learned the year before is lost over summer. Help them to do some fun learning activities and it won’t even seem like “homework”, but will help them to maintain what they learned in Kindergarten. Sight Words | Reading | Math

And to get YOU ready for your child heading into first grade, learn tips & tricks from other parents that have been in your shoes before.

How are you preparing for back to school with your first grader?

Want to read more? Here are some great back to school tips to help start your school year off right: 


© A Crafty Spoonful - All Rights Reserved
It is OK to use one of my photos provided a link back and/or proper credit is given. It is NOT ok to copy and paste a whole post including instructions. Please do not remove watermarks or alter images in any way. Please contact me with any questions at danielle@acraftyspoonful.com

.