DIY Football Photo Frame For Kids

This shop featuring a DIY football photo frame that’s super easy for kids to make has been compensated by Collective Bias, Inc. and its advertiser. All opinions are mine alone. #HandsOnCrafty #CollectiveBias
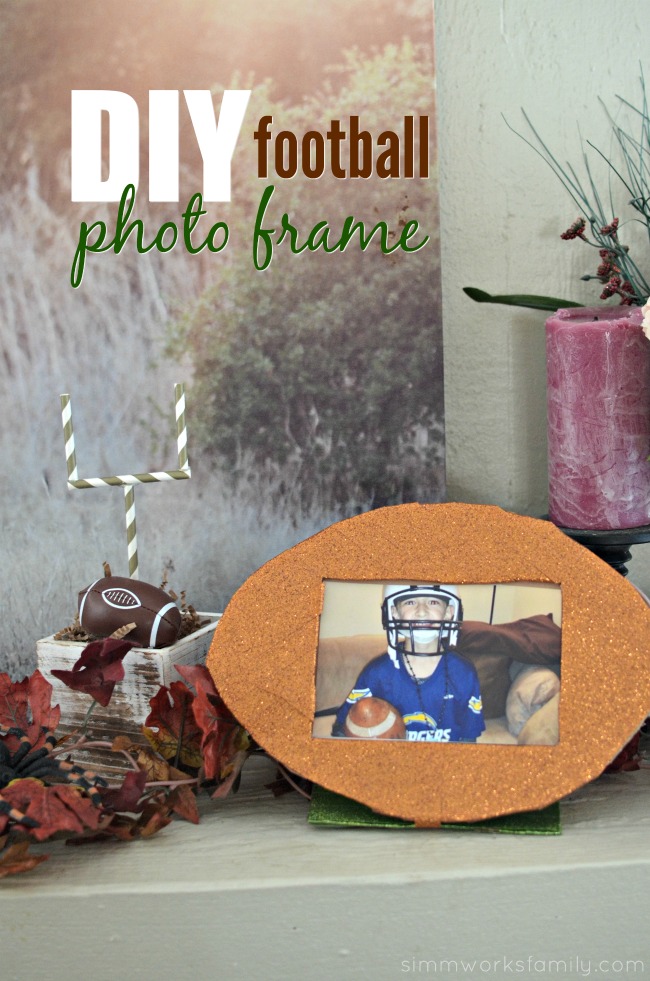
diy-football-photo-frame-a-quick-and-easy-way-to-display-great-football-memories

Do you have a football fan in your life? Looking to spread a little cheer in their football loving lives? My daughter wanted to get crafty this week and asked if we could make a photo frame. So I decided to bust out the Scotch® Expressions Glitter Tape and make a DIY Football Photo Frame that’s easy for kids to make. With the help of an adult, of course! The adult cuts out all of the shapes while the kids get to have fun decorating! Just like our DIY bottle toss game from last week. 

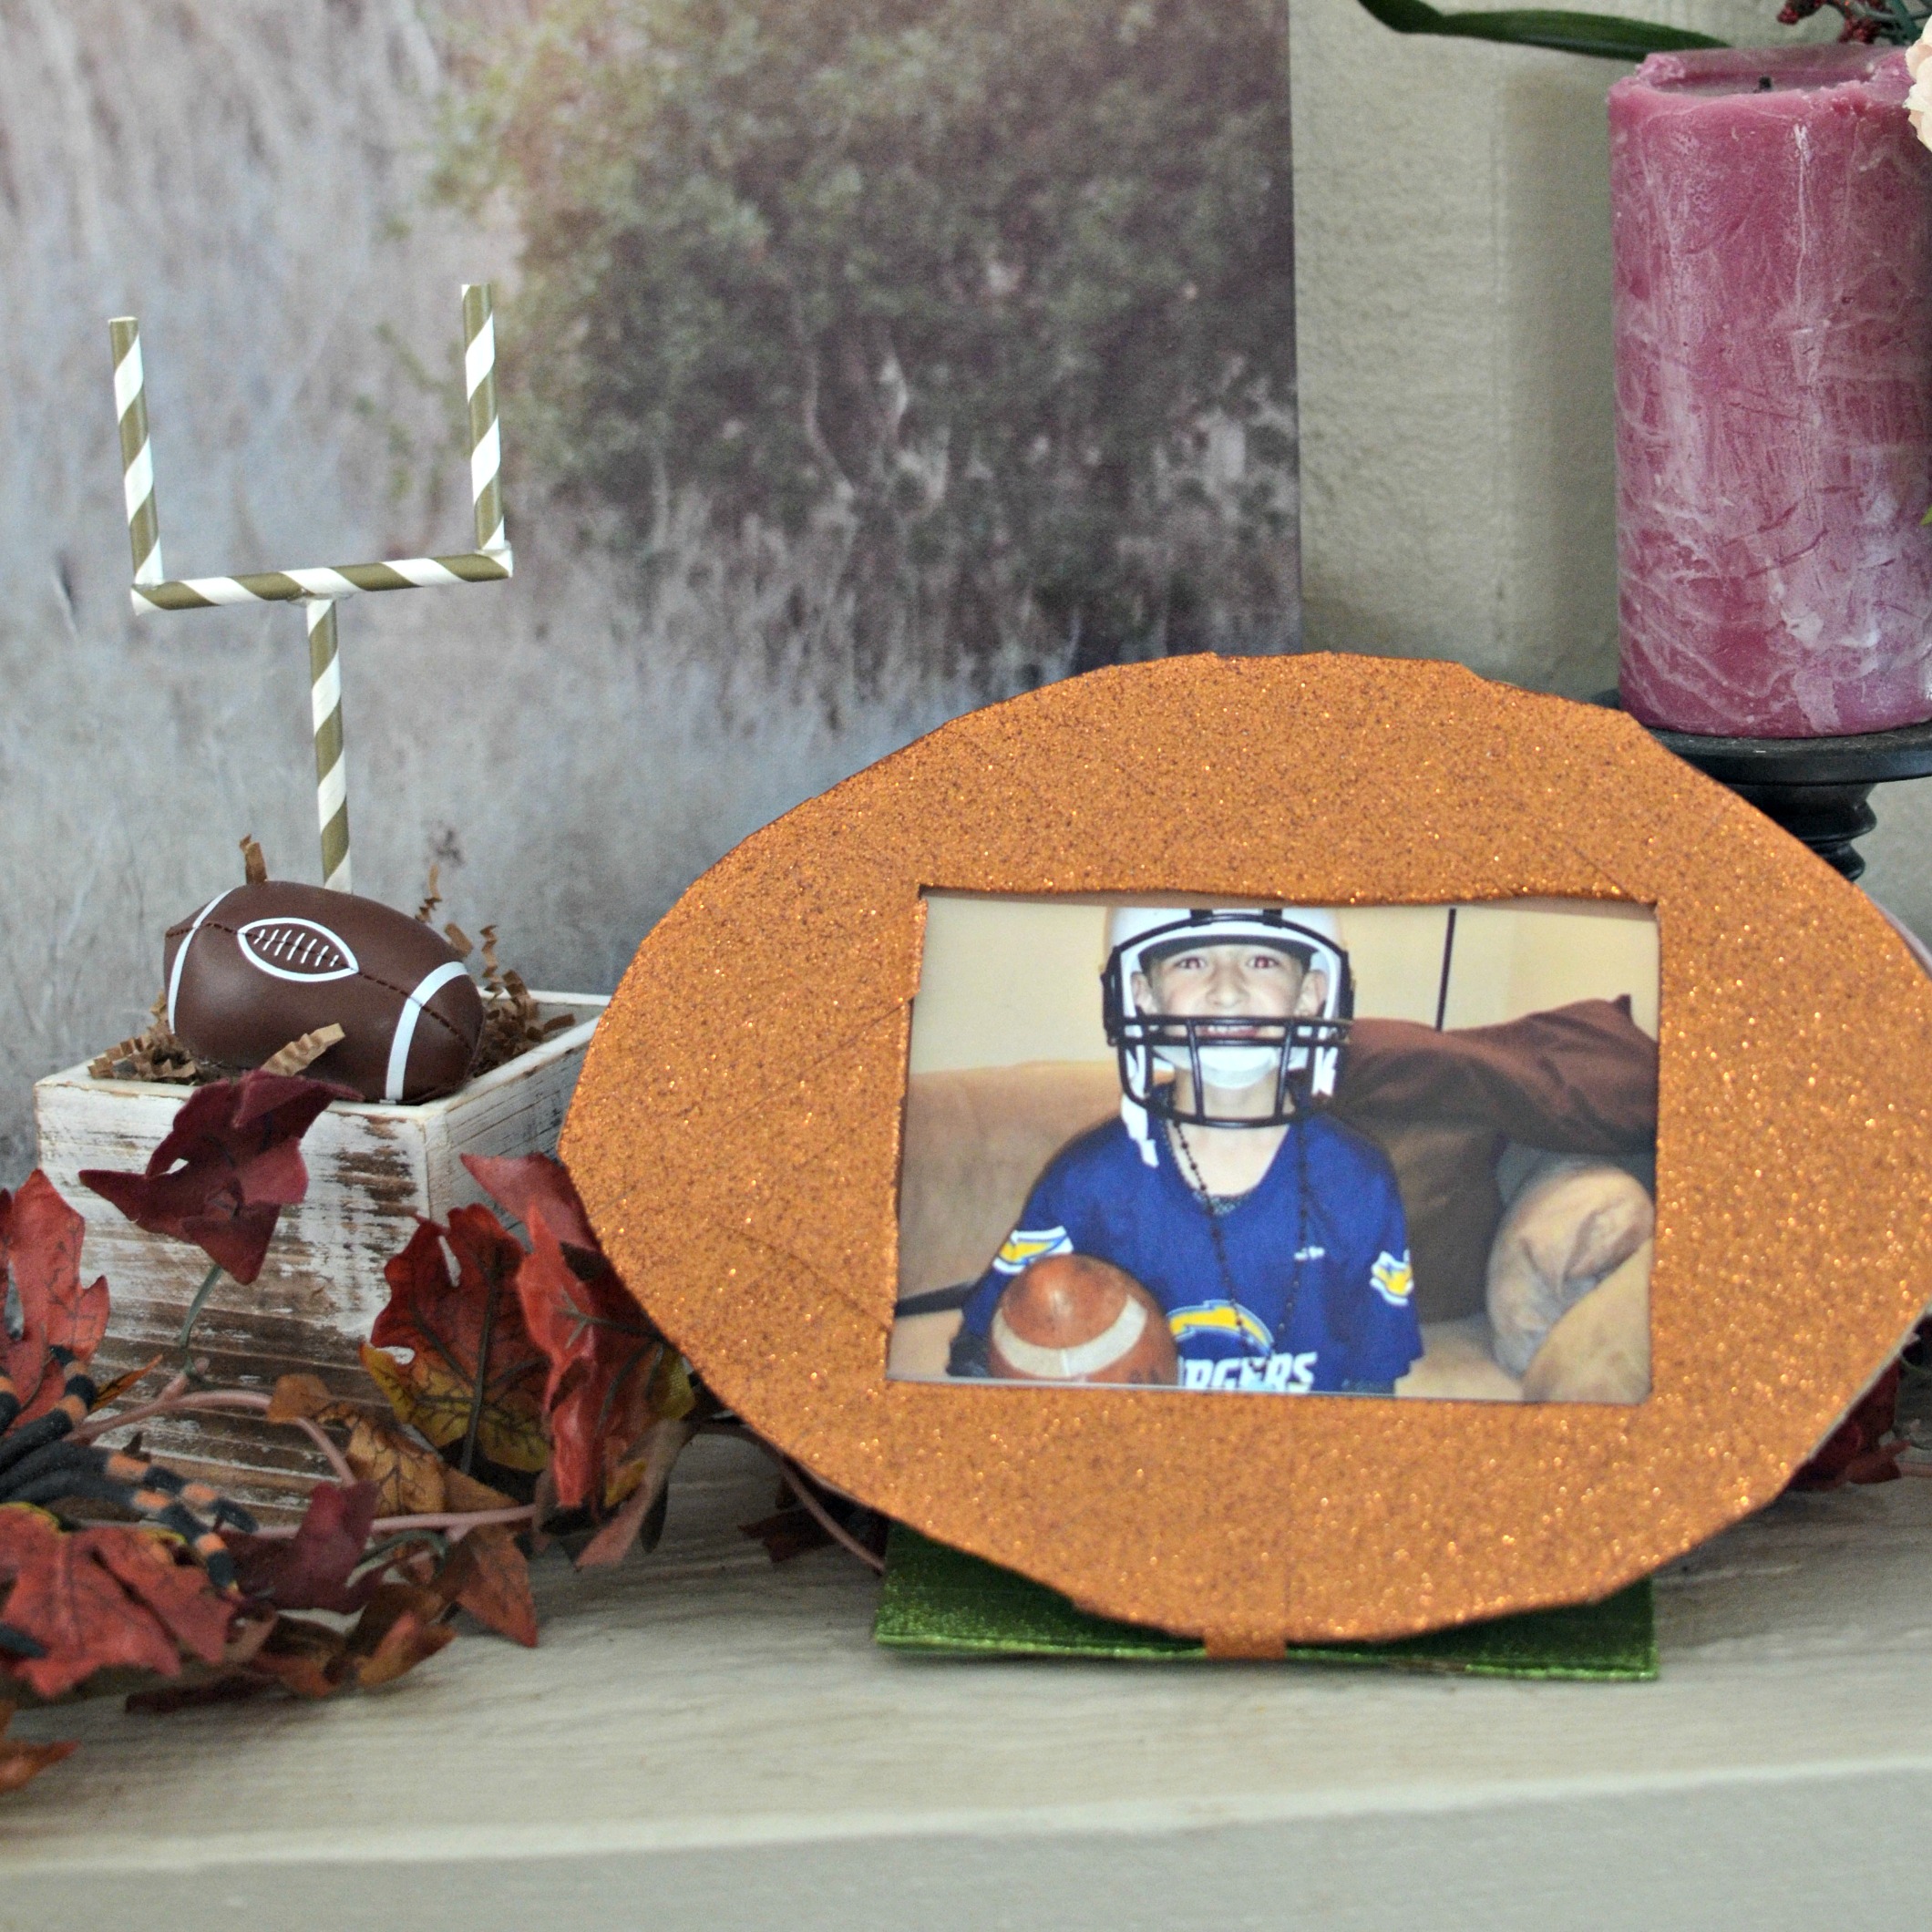
We ended up with the perfect gift for my football loving sister and brother in law with a photo of their oldest in the frame. How cute is that? And it was easy too! We were able to create this frame in an afternoon after school and display it on the mantel for when my sister comes over. How cute will this look on her mantel? 

Want to know JUST how easy it was? Read ahead to find out! 
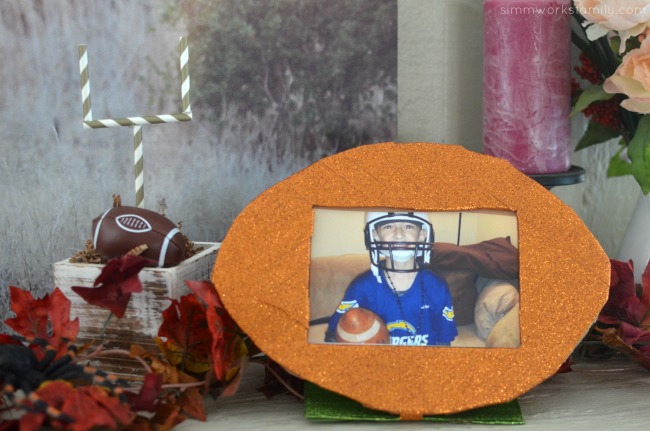
diy-football-photo-frame-quick-and-easy-way-to-display-memories

DIY Football Photo Frame For Kids

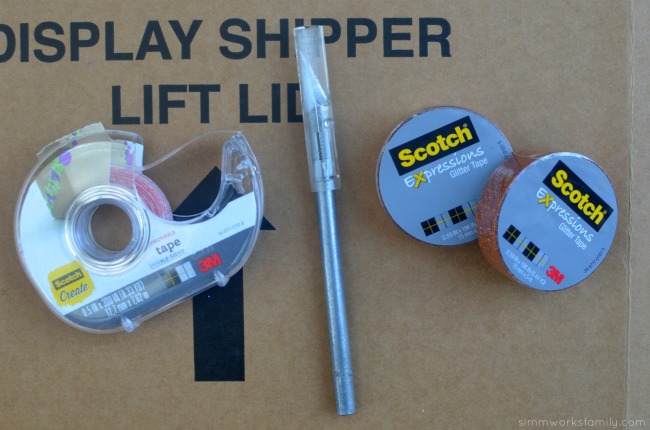
What you’ll need: 

  • Scotch® Expressions Brown Glitter Tape
  • Scotch® Expressions Green Glitter Tape
  • Scotch® Create Double-sided Tape
  • X-acto knife (for parents only)
  • 1 piece 8.5 x 11″ brown construction paper
  • 1 piece 8.5 x 11″ white card stock
  • 4×6 picture

diy-football-photo-frame-supplies-needed

What you do: 

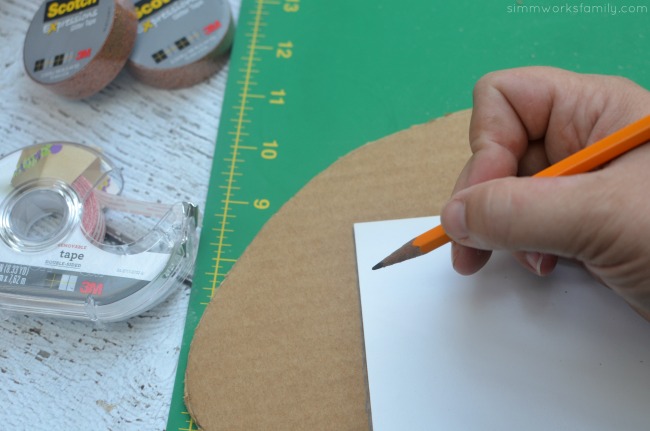
1. Grab your 4×6 photo paper and trace a football around the photo paper leaving about 1/2 an inch on each corner from the edge of the photo to the edge of the football. 

2. Cut out football shape with x-acto knife. 
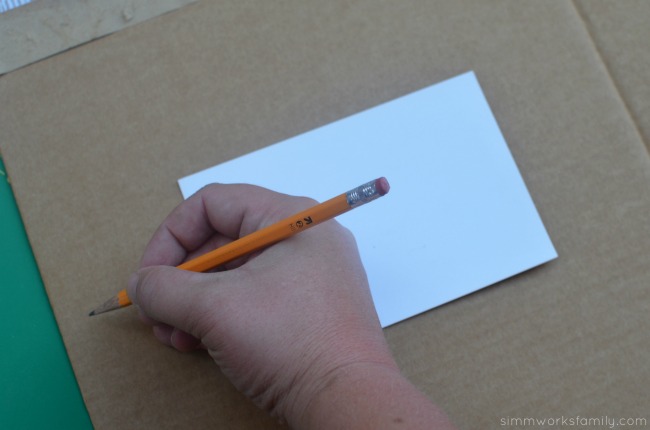
diy-football-photo-frame-trace-football-outline-around-4x6diy-football-photo-frame-trace-4x6-cut-out

3. Using same 4×6 photo paper, trace around it to create where the frame opening will be. 

4. Cut out top and sides of 4×6 piece. Score on back side with x-acto knife and fold cut out piece into thirds to create stand for frame. 
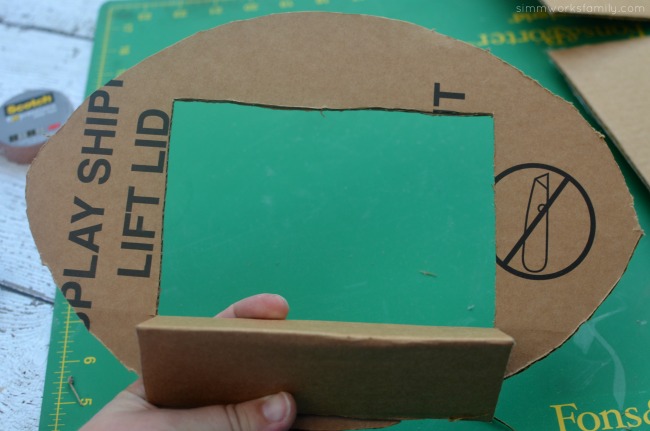
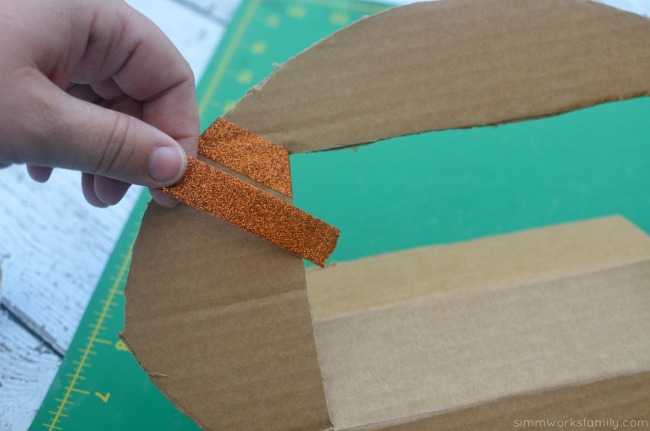
diy-football-photo-frame-cut-out-4x6-and-fold-cut-out-in-thirdsdiy-football-photo-frame-add-glitter-tapediy-football-photo-frame-taped-frame

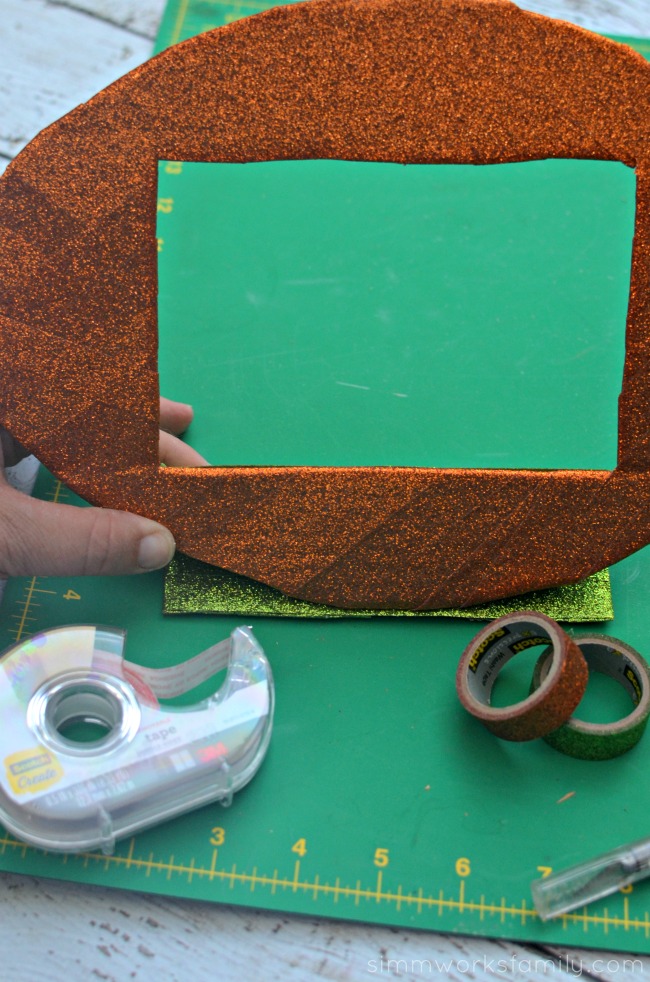
5. Using Scotch® Expressions Brown Glitter Tape, let your child wrap front side of the football frame completely until no cardboard is showing. Make sure the sides are covered complete. Don’t worry about the back side, we’ll be covering that up! 

6. Once you’ve covered out the front, wrap the stand with Scotch® Expressions Green Glitter Tape. Once the stand is covered, use a piece of Scotch® Expressions Brown glitter tape to secure the stand to the frame so it doesn’t unfold. 
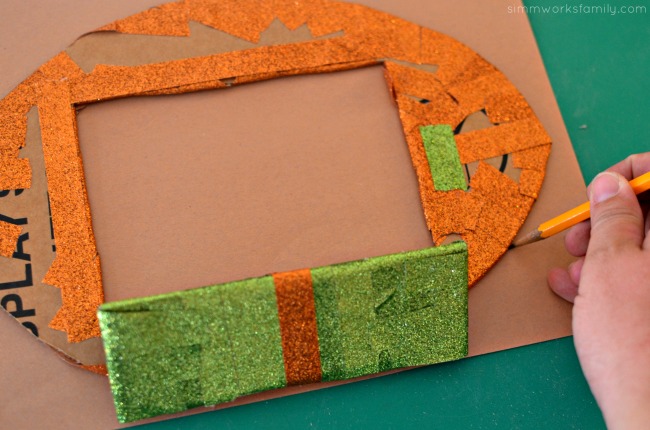
diy-football-photo-frame-trace-out-construction-paper-for-covering-back-of-framediy-football-photo-frame-add-double-sided-tape

7. Grab your brown paper and trace the outline of the football and the 4×6 spot for the photo. Cut out the football shape of the construction paper. Cutting from the bottom of the football, cut out the 4×6 piece and the bottom of the football (to leave space for the stand). 

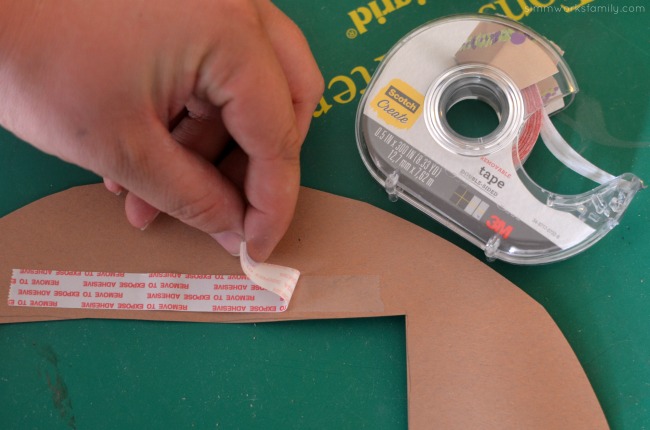
8. Attach brown cut out to back of the frame using Scotch® Create Double-sided Tape. 
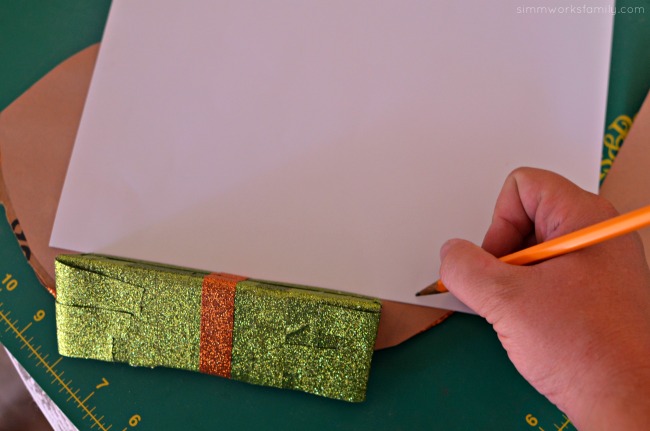
diy-football-photo-frame-draw-out-larger-than-4x6diy-football-photo-frame-add-photo

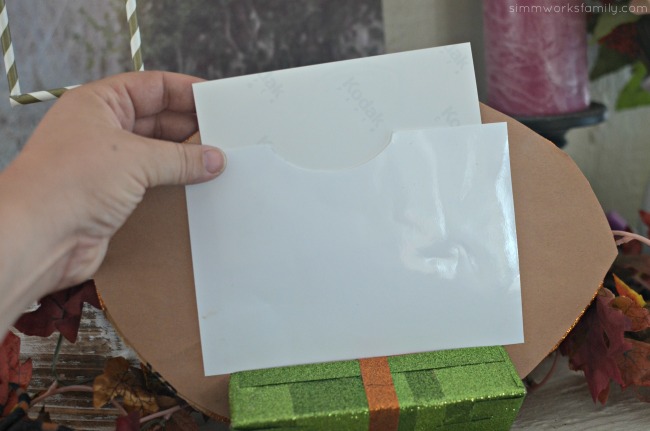
9. Cut out a 5×7 piece of white paper. Notch a small half circle on the top of the paper. Tape the white paper onto the back of the frame on the two sides with Scotch® Create Double-sided Tape. 

10. Add a photo and enjoy your frame! 
diy-football-photo-frame-ig

How do you celebrate sports in your home? 

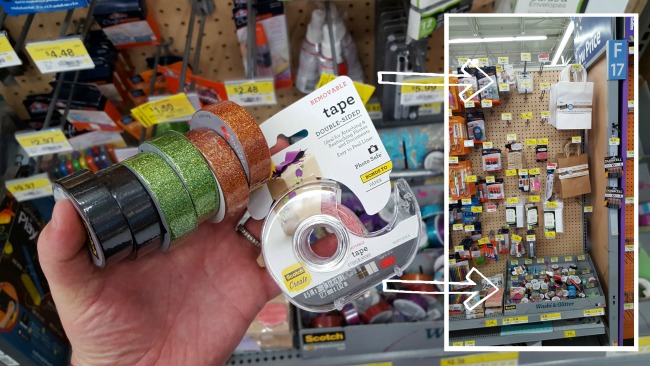
I was able to find all of the crafting goodies I needed, including the Scotch® Expressions Glitter Tape, in the craft aisle in Walmart. So easy to find everything in one place! With a perfect combination of versatility, function & fun, Scotch® Expressions Tapes turn everyday projects into simply inspired creations. I love how simple and easy it was to make this frame with my daughter and how fun and sparkly it ended up! How awesome is that? 
scotch-at-walmart

Fall Carnival Games: DIY Ring Toss Game Idea

This shop features an awesome DIY Ring Toss Game that’s super easy to make and has been compensated by Collective Bias, Inc. and its advertiser. All opinions are mine alone. #HandsOnCrafty #CollectiveBias

fall-carnival-games-diy-ring-toss-idea

Every year my kids’ school has a Halloween Carnival on or around Halloween. Each grade has a game or craft set up and the kids get to run around and play them for the last hour of the day. It’s a great way for the kids to enjoy a little Halloween fun at school in costume without getting distracted in class. Plus it’s a fun way for the parents to come up with small fall carnival games – like this DIY ring toss game. 

Since my son started Kindergarten, I’ve always helped out with his class’s game. The first year we built a cute bean bag toss where we painted three pumpkins on top of each other and cut out holes where their mouths went so the kids could toss the bean bags in. Each successful toss earned a piece of candy. Last year we made fun Halloween themed crafts like spider rings out of poms and pipe cleaners, and fun face masks that I got from an online retailer. 

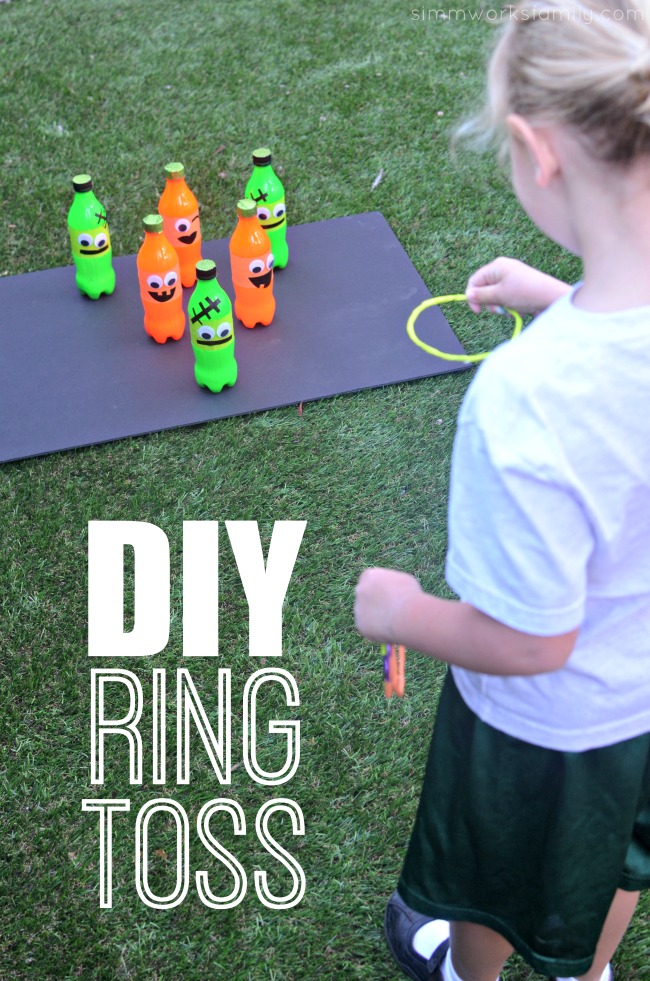
But this year is my daughter’s first year joining in on the festivities so I thought I’d get her involved in making a fun activity that Kindergarten could host for their game. And we decided on this awesome Halloween-themed DIY ring toss game. You won’t believe how easy it is to make! Even a Kindergartener can do it. 

fall-carnival-games-diy-ring-toss-idea-playing-the-game

What I love about this project is that it’s so versatile! So much so that when my husband accidentally recycled the glass wine bottles I had set aside to use for this project, I was able to make due with the plastic bottles we had left over from the party we hosted last week

How To Make A DIY Ring Toss Game

What you’ll need: 

  • 6 bottles – glass or plastic
  • washable paint in green and orange
  • Scotch® Create Double-sided Tape
  • Scotch® Expressions Washi Tape in black
  • Scotch® Expressions Glitter Tape in green
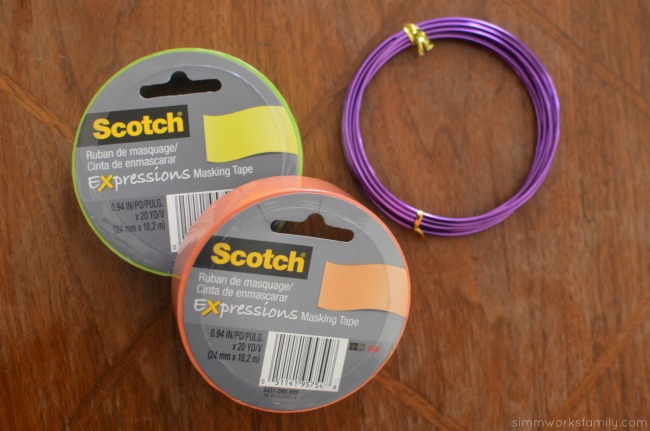
  • Scotch® Expressions Masking Tape in green and orange
  • Aluminum floral wire (found in the Walmart craft aisle)
  • Goggly eyes
  • scissors
  • Scotch® Create Glue Pen
  • large piece of cardboard or foam board in black
  • Scotch® Create Mounting Squares

What you do: 

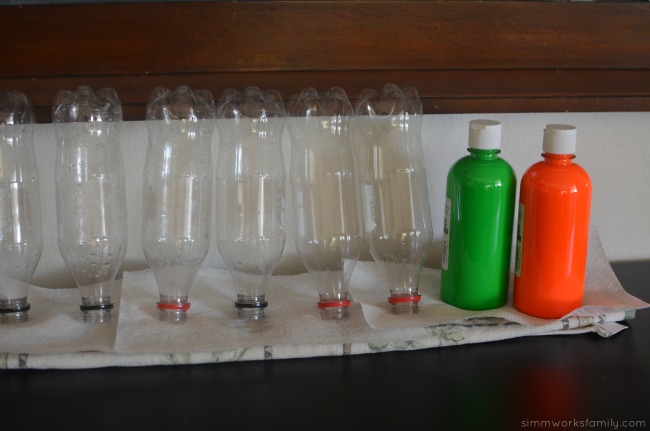
1. Remove the labels and rinse out the bottles you will be using. Let dry completely. 

fall-carnival-games-diy-ring-toss-idea-dry-bottles fall-carnival-games-diy-ring-toss-idea-make-the-rings

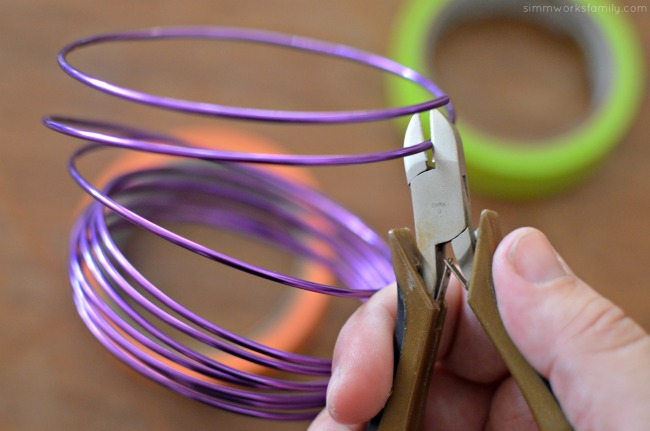
2. While bottles are drying, grab aluminum wire and cut into rings using wire cutters. 

fall-carnival-games-diy-ring-toss-idea-cut-wire fall-carnival-games-diy-ring-toss-idea-wrap-tape-around-wire

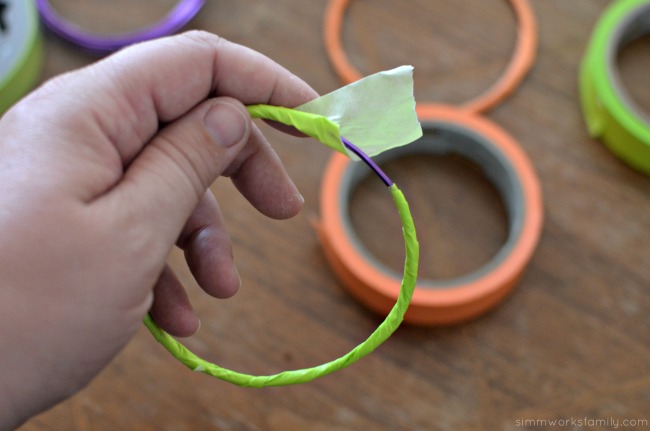
3. Use the Scotch® Expressions Masking Tape to secure the ends of the wire together and then completely cover the wire with tape. You can also decorate the wire in various places with tape instead of covering completely as long as the ends are secured. 

fall-carnival-games-diy-ring-toss-idea-pour-paint-into-bottle fall-carnival-games-diy-ring-toss-idea-put-paint-in-bottles-and-shake

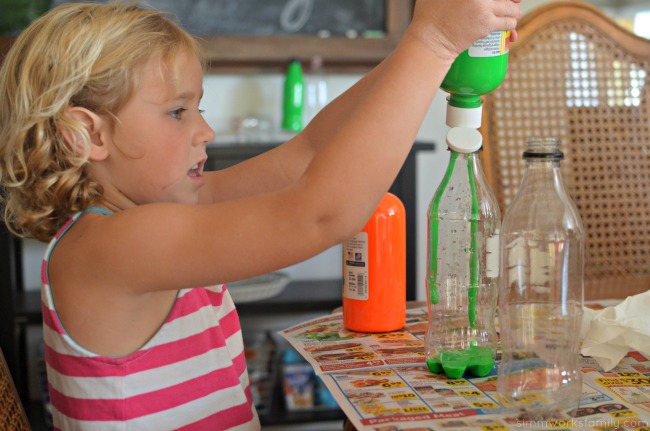
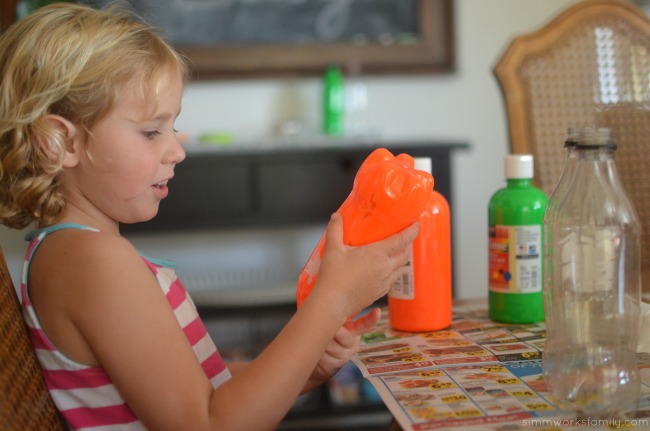
4. Squirt a good dollop of paint into each bottle. Secure the cap onto the bottle (if there is one) and shake the bottle until the paint has completely covered the inside of the bottle and you can’t see through anywhere. If you are using a glass bottle with no lid, simply use your thumb to cover the opening while shaking so the paint doesn’t go everywhere. Take cap off and let excess paint drip out. Let dry completely. 

This is the same technique I used to make my thumbprint ornaments for Christmas. 

5. Once paint is dry on the inside, glue cap onto top of bottle with Scotch® Create Glue Pen and let dry. Skip this step if you’re using a cap-less bottle.

fall-carnival-games-diy-ring-toss-idea-painted-bottles-and-rings fall-carnival-games-diy-ring-toss-idea-scotch-create-and-scotch-expressions fall-carnival-games-diy-ring-toss-idea-tape-top-of-bottles

6. Now for the fun part! Grab your Scotch® Expressions washi and glitter tape and start decorating! 

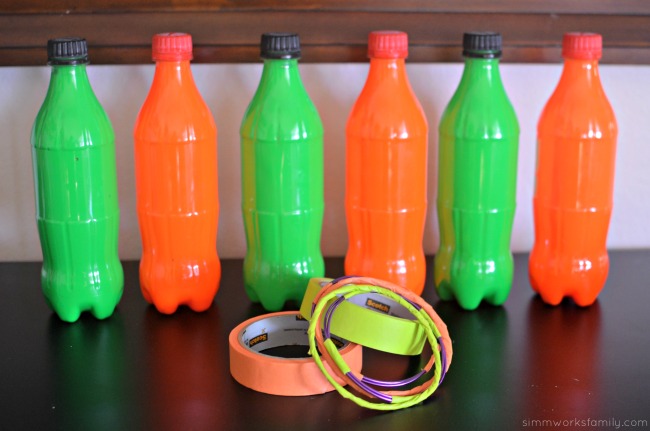
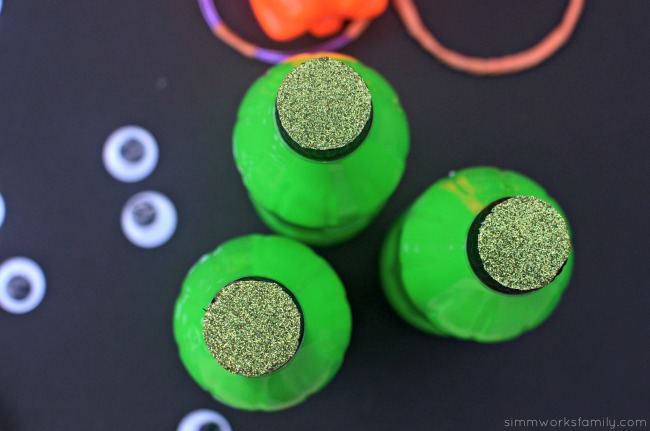
For the green bottles – Using the Scotch® Expressions Glitter Tape in green, cover the caps with two rows of glitter tape side by side. Then cut the excess around it so that there is a perfect circle on the top of the green bottles. You can use scissors or an xacto knife for this. If using an xacto knife, turn bottle upside down and cut around the edge of the cap on a piece of cardboard so you don’t cut anything else. 

For the orange bottles – cover the bottle cap with three pieces of tape in a star pattern on the top. This should completely cover the top of the bottle cap. Then use another piece of tape to go around the side of the bottle cap to cover the ends of the three pieces you put on the top. Now you have a cute pumpkin stem! 

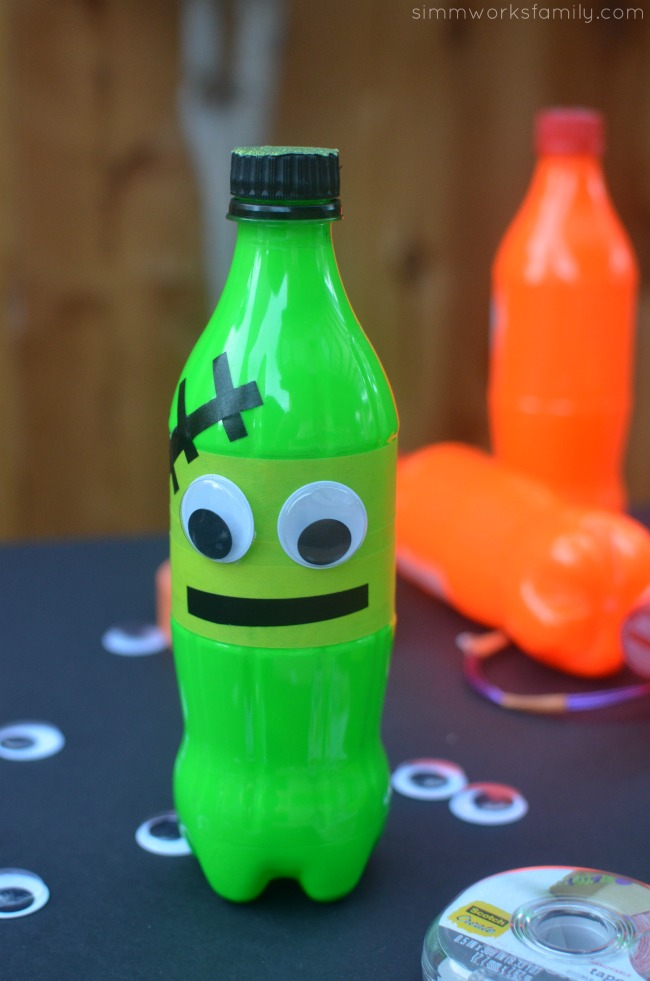
Then, using the green and orange Scotch® Expressions masking tapes, tape the middle of the bottles with three layers of tape. This will create the base for your bottle’s face. 

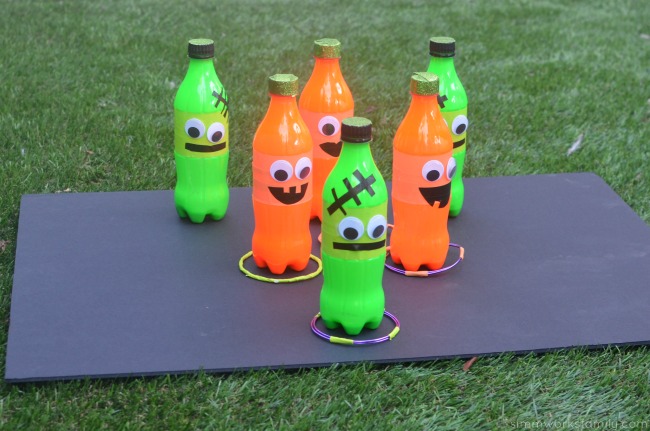
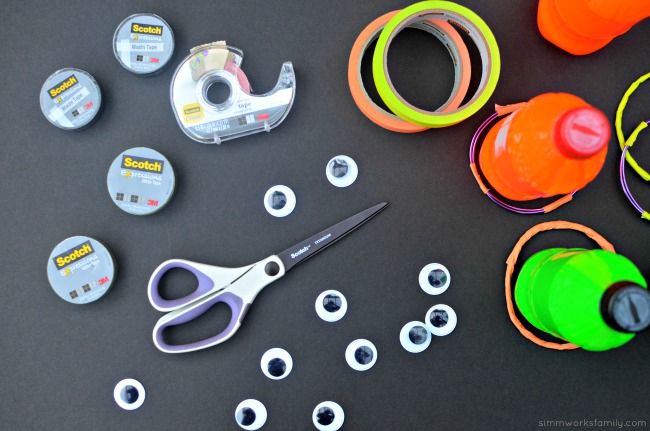
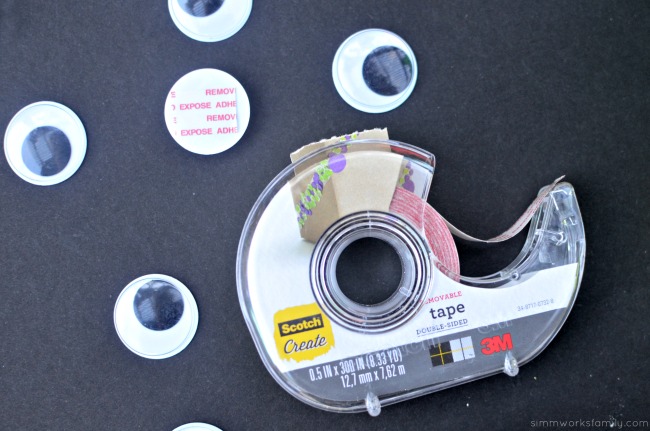
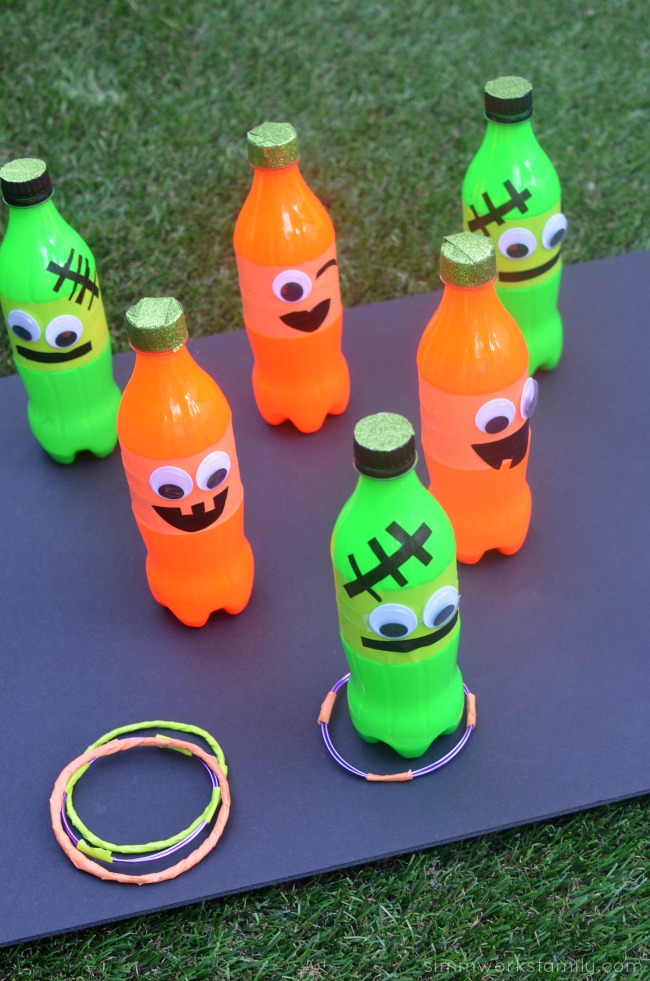
Grab the goggly eyes and Scotch® Create Double-sided Tape to secure the eyes onto the bottles. Now grab the Scotch® Expressions washi tape in black to make the mouth and any other decorations you’d like to add to your bottles. We layered two pieces of tape side by side and cut out mouths for our orange bottles and simply cut out lines for the mouths and “stitches” of our green bottles. Our end results were pumpkins and Frankensteins. 

fall-carnival-games-diy-ring-toss-idea-scotch-create-removable-tape fall-carnival-games-diy-ring-toss-idea-completed-bottle

7. Now that the bottles and rings are good to go, grab your black cardboard or foam board and space out your bottles so that the rings can be tossed onto them without any problems. Secure bottles to the board with Scotch® Create Mounting Squares

Once the bottles are secured in place, you’re ready to play! 

scotch-at-walmart

You can find everything you need for this project, including all of the Scotch® brand products, in the craft aisle at your local Walmart. How’s that for a one-stop shop? 

I love how the Scotch® Expressions washi and glitter tape were able to take my project to the next level. They were the perfect combo of versatility, function and fun! From masking tape in various colors to the easy to use Scotch® Create Glue Pen and everything in between, o matter the task, there’s a Scotch® Brand product to match AND make my life easier.

fall-carnival-games-diy-ring-toss-idea-ready-to-play

What’s your favorite school carnival game? 

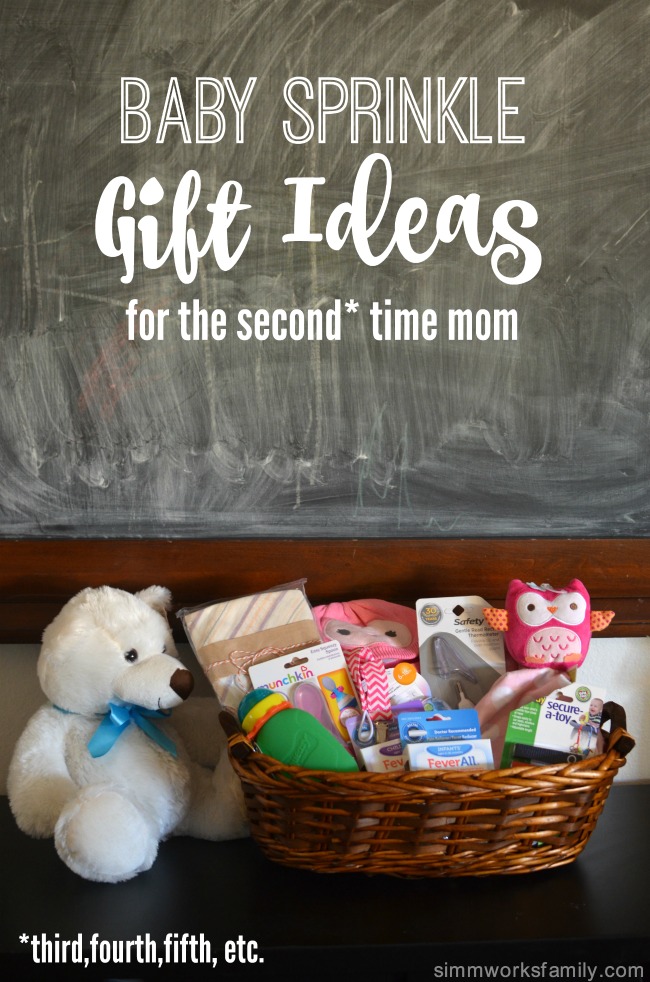
Baby Sprinkle Gift Ideas for the Second Time Mom

This post featuring great baby sprinkle gift ideas for the second (or third, or fourth) time mom is a product-provided, sponsored conversation written by me on behalf of FeverAll® Infants’ Strength Acetaminophen Suppositories.

baby-sprinkle-gift-ideas-for-the-second-time-mom

As a mom of 3, I’ve had quite a bit of experience with the necessities when bringing home a new baby. And while a lot of personal preference – and figuring out what works well with one baby may not work well with the next  – plays an important role in what is needed for a new baby for moms who’ve already had one, I’ve narrowed down a few areas that focus on necessities for every kid no matter if it’s your second, or your fourth!

No, I’m not pregnant (nor planning on being pregnant again) but my sister is pregnant with her 4th and we’re hosting a sprinkle for her next weekend. I don’t see any reason why every baby shouldn’t be celebrated and love any excuse to get family together so we’re very much looking forward to this event.

Sometimes when a family has already had kids (and they’re relatively close in age) they don’t need all of the big items they needed the first time around. But that doesn’t mean they don’t need things if you’re generous enough to send a gift. Below are some great ideas on what to get the second (or third, or fourth, etc) time mom their baby sprinkle!

Baby Sprinkle Gift Ideas for the Second Time Mom

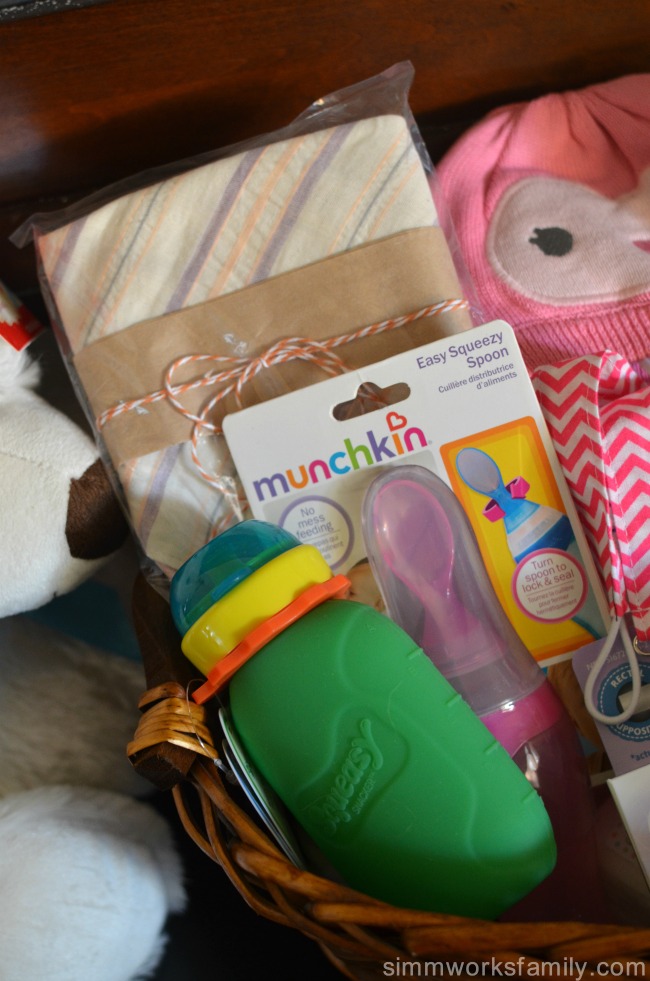
baby-sprinkle-gift-ideas-for-the-second-time-mom-feeding-gifts

Feeding

While you can definitely reuse items like bottles, bowls, plates, etc for each child, there’s always something new on the market that makes feeding baby easier for parents. We’re sharing our favorite feeding tools with my sister and her family as well as stocking her up with new nipples for bottles.

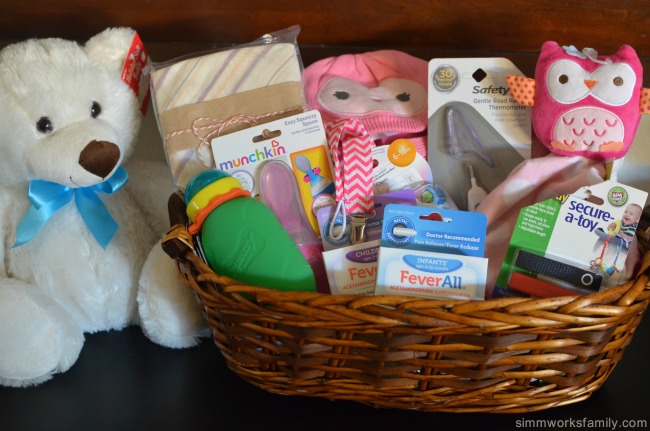
Here’s what we’ve included in our basket: 

  • Squeeze pouch feeder
  • Easy squeezy spoon (can fit on most squeeze pouch foods too)
  • Handkerchief bib
  • Pacifier & pacifier clip

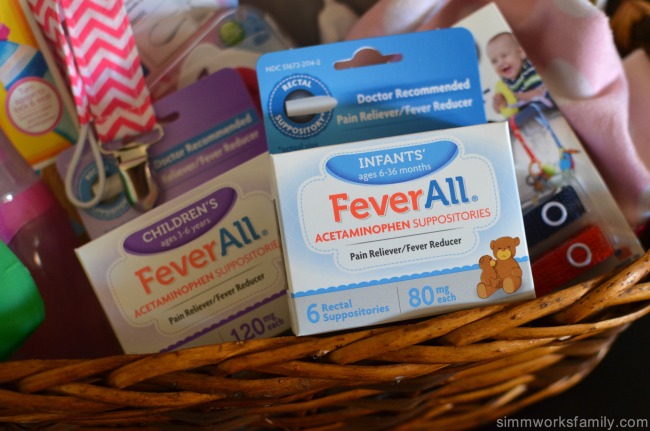
baby-sprinkle-gift-ideas-for-the-second-time-mom-feverall-acetaminophen-suppositories

First Aid

First aid is something that’s often overlooked when gifting a new baby. And while there are great baby first aid kits out there, some moms already have the nail clippers, useless bulb sucker, thermometer, etc. But it’s a great idea to stock the new parents up with the first aid items they might need in the first few years of life so if their baby does get sick, they don’t have to race out to pick up these essentials.

Here’s what we’ve included in our basket: 

  • FeverAll® Infants’ Strength Acetaminophen Suppositories – Be prepared! Make sure you have acetaminophen in both liquid and suppository forms on-hand for the cold/flu season. In the event your child is unable or unwilling to swallow oral medication, an acetaminophen suppository is a safe alternative to the liquid form and always provides an accurate dose with no mess.
  • Rectal thermometer (each child needs their own) – Using a digital rectal thermometer will provide the most accurate reading of a baby’s temperature.
  • Nose Frieda (not pictured) – those old bulb suckers just aren’t as effective. It may seem gross but is actually quite sanitary! And… it works.
  • Humidifier (not pictured) – we have a humidifier in each of the kids rooms to help out at night when they’re sick.

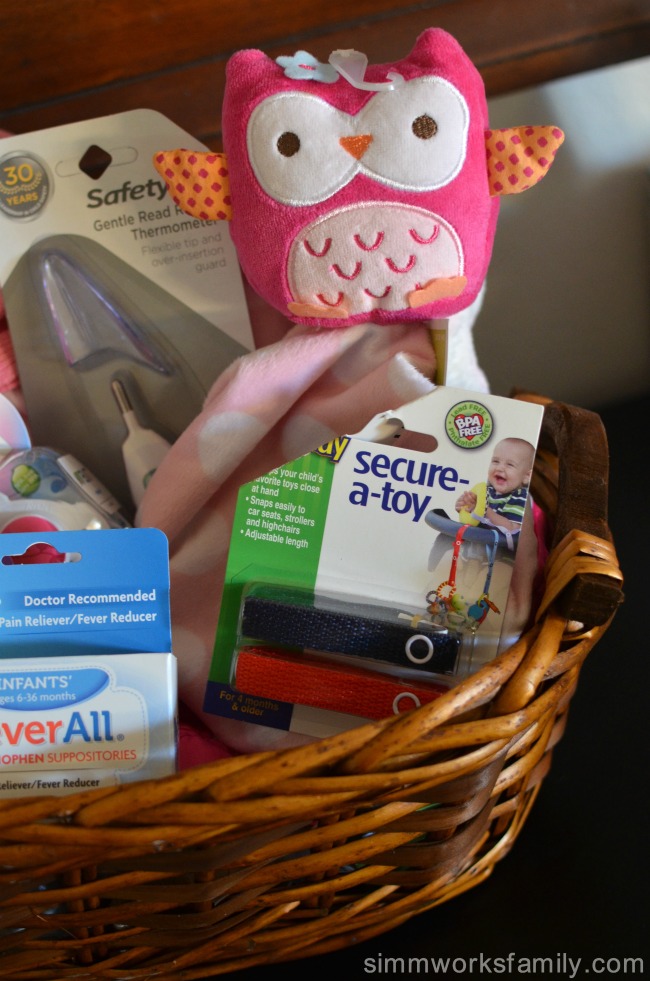
baby-sprinkle-gift-ideas-for-the-second-time-mom-fun-gifts-for-playtime

Fun & Play

The best part about a new baby is all of the fun things you can purchase for them to play with. We all know every new baby needs their own lovey! And, of course, a stuffie like the stuffed bear my kids chose for their new cousin. And as baby gets older, she’ll learn to throw her toys out of the stroller, car seat, etc. so it’s a good idea to have toy clips to secure those items.

Here’s what we’ve included in our basket: 

  • Stuffed teddy bear
  • Owl lovey
  • Toy strap

baby-sprinkle-gift-ideas-for-the-second-time-mom-feeding-first-aid-fun

While preparing for a new baby, there’s nothing better to do than make sure you take a peek into the medicine cabinet to make sure you’re stocked up on everything you might need for the new baby. Being prepared will help out when it’s 2am and baby isn’t feeling good. A baby or toddler with a fever is no fun, and Acetaminophen is one of the most recommended non-prescription medications by healthcare professionals – including pediatricians and pediatric nurse practitioners – for temporary fever reduction and relief of minor aches and pain in infants and children.

FeverAll® is the only national brand of acetaminophen in suppository form and is available in three strengths for children from 6 months to 12 years of age.

FeverAll® Infants’ Strength Suppositories (80 mg of acetaminophen) is the only acetaminophen product available with dosage instructions for children as young as six months of age.

For more than 30 years, caregivers have relied on the accuracy and convenience of FeverAll®. With FeverAll® Suppositories, caregivers can be assured that children will receive the accurate dose of acetaminophen labeled on the package vs. needing to measure liquid oral acetaminophen.

FeverAll® Acetaminophen Suppositories are an important option for caregivers because they permit the administration of fever and pain relieving medicine to children who cannot take medication by mouth due to illness/vomiting, or fussiness, for those who don’t like taking liquid medication or who have other health issues; they provide an accurate dosage of acetaminophen without measuring or causing a mess.

Purchase FeverAll® Infants’ Strength Suppositories in your local Rite Aid, CVS, Walgreens and Walmart stores. Ad follow along on social media by checking out the hashtag #FeverAllBeFeverReady for great fever reducing tips and tricks.

What was your favorite baby shower gift you’ve received?

Use FeverAll® only as directed. If you have specific questions about fever, acetaminophen or using FeverAll, speak with your child’s pediatrician. FeverAll Acetaminophen Suppositories are available at major retailers and drugstores across the U.S, such as Walmart, Rite Aid, CVS and Walgreens. For more information and current offers, visit www.FeverAll.com.

This is a product-provided, sponsored conversation written by me on behalf of FeverAll® Acetaminophen Suppositories. The opinions and text are all mine.

2-Ingredient Homemade Bubble Solution Plus Fun Bubble Activities

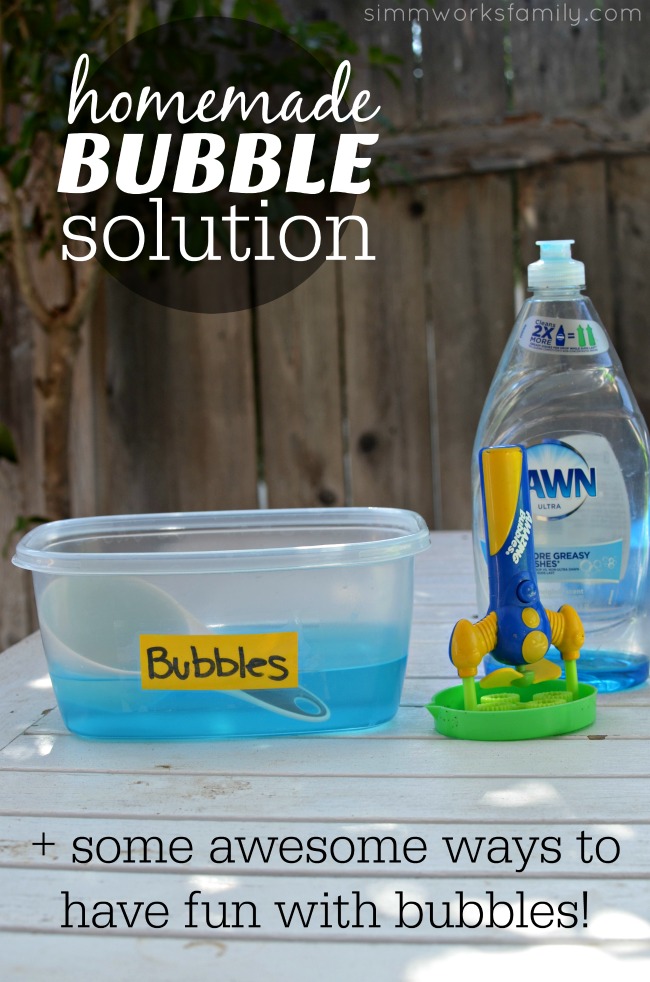
This 2-Ingredient Homemade Bubble Solution is the perfect thing to have on hand for a boredom buster! 

2-Ingredient Homemade Bubble Solution and other awesome ways to use bubbles!

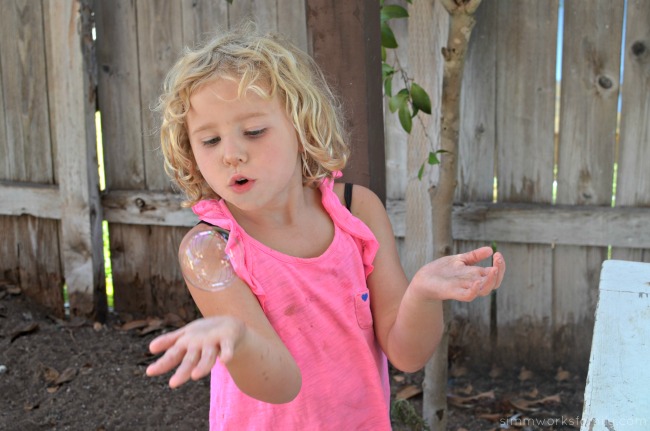
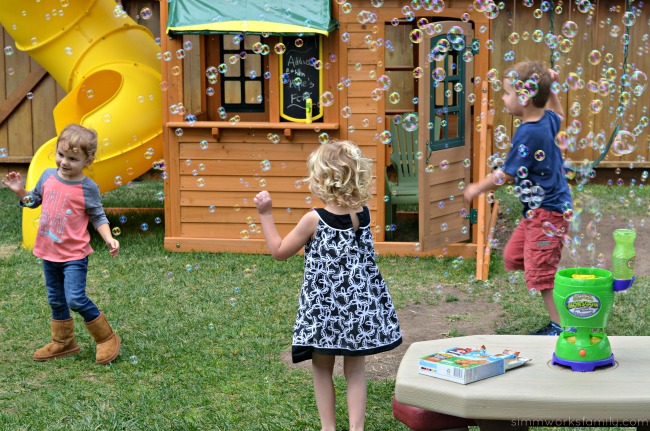
My girls are obsessed with bubbles. Completely obsessed. Every day they head outside, grab the bubbles, fill up the bubble maker, turn it on, and dance around in the bubbles. Hearing the joy and squeals that come out of them as they play is the best. But when the bubbles run out, sadness hits. Hearing my little 18 month old asking for more “buh-bowls” is the cutest thing ever but she’s serious when she says she wants more. 

So the last time we ran out of bubble solution I decided to see if there was an easy recipe to make them at home. We tried a few out and changed some around but honestly this recipe below was the best homemade bubble solution that worked perfectly both with a wand and our bubble maker. The best part? Our girls can help make it with me! 
And it’s a lot less expensive than bubble solution. Unless we find bubble solution on clearance (PS… it’s on clearance now at Target!). 

2-Ingredient Homemade Bubble Solution

2-Ingredient Homemade Bubble Solution

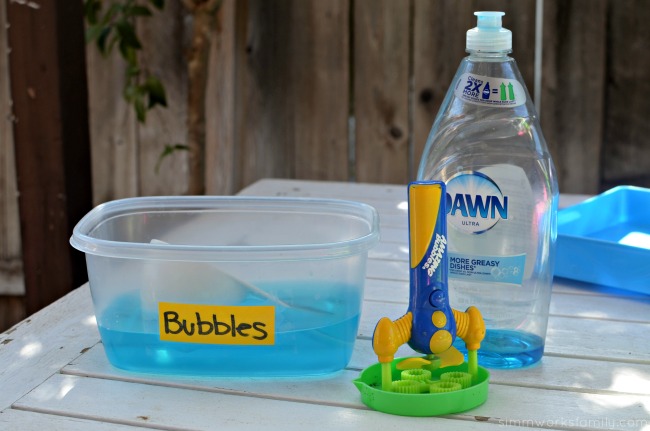
  • 1/2 cup dish soap
  • 3 cups water

Add water to a container (preferably with a lid). Then slowly add in soap and stir gently. Try not to create too many suds while you incorporate the soap completely into the water. Use right away or place lid on bubble solution. 

2-Ingredient Homemade Bubble Solution - playing with bubbles

Other Fun Ways To Use Bubbles

Tips for Hosting A Playdate - bubbles and other activites

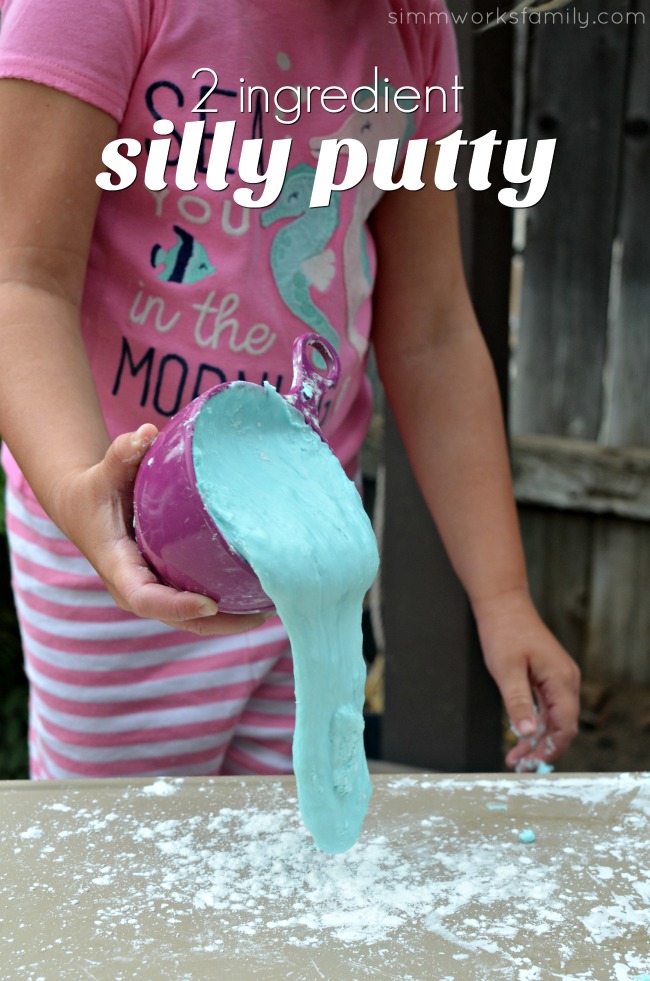
2 Ingredient Silly Putty

This post featuring how to make 2 Ingredient Silly Putty was sponsored by WaterWipes as part of an Influencer Activation for Influence Central. I received complimentary products to facilitate my review.

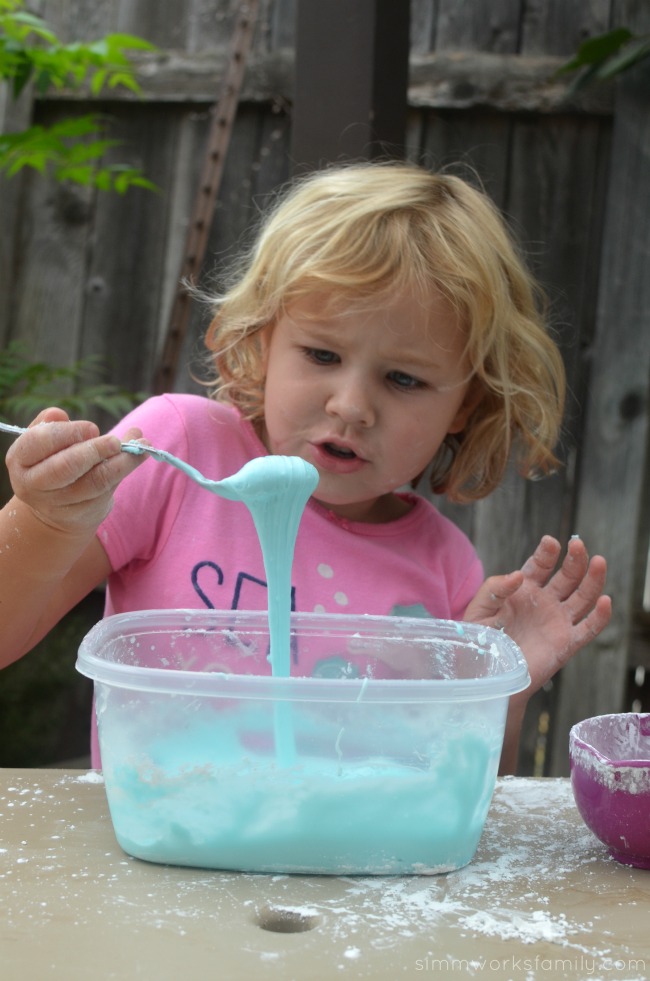
2 Ingredient Silly Putty - a quick and easy activity for kids

All summer the kids and I have been finding fun ways to stay busy together. Whether they’re messy crafts, DIY jewelry or other projects, or taking road trips to fun new places. So when my daughter came to me this morning and asked if we could do something together before the baby and her brother woke up, I knew I had to get a little creative and make it happen. 

With ingredients we found around the house, we experimented a bit in finding a way to make 2 ingredient silly putty right in our back yard. And we cleaned everything up afterwards with the WaterWipes I purchased at Babies R Us a few weeks ago. We were able to do this fun craft in less than 15 minutes and she’s still playing with the silly putty now! So fun. 

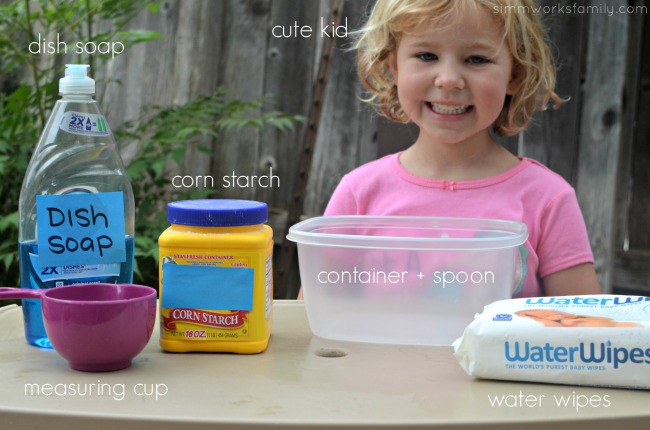
2-Ingredient Silly Putty supplies

2 Ingredient Silly Putty

What you need: 

  • 1 part corn starch
  • 1 part dish soap 
  • measuring cup
  • mixing container 
  • spoon
  • WaterWipes

What you’ll do: 

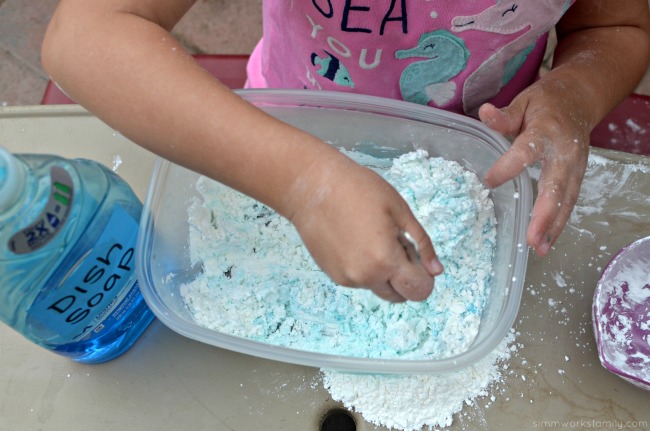
1. Add equal parts dish soap and corn starch to mixing container. Start with 1 cup of each. 

2-Ingredient Silly Putty stirring ingredients together

2. Stir ingredients together until combined. Add corn starch if more structure is needed.

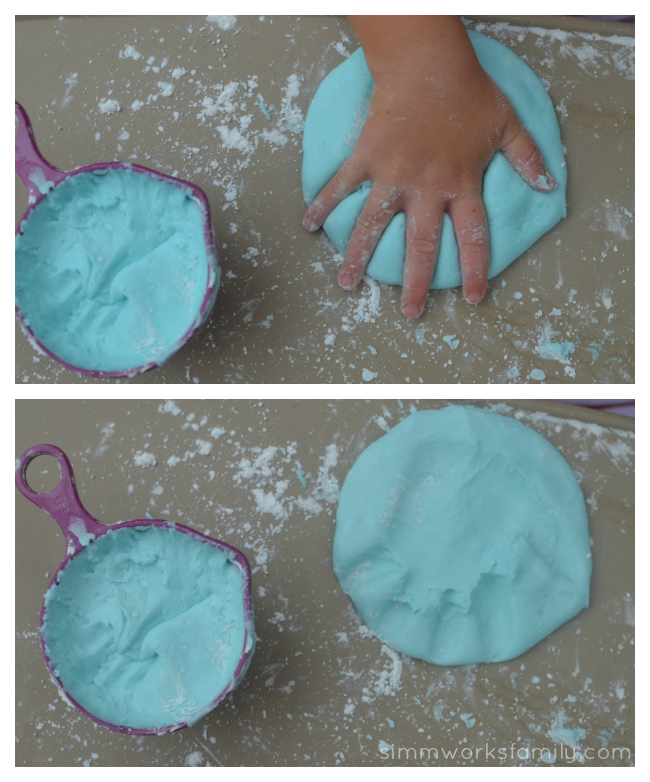
2-Ingredient Silly Putty - playing with silly putty

3. Play with your silly putty!

2-Ingredient Silly Putty - playing with silly putty

2 Ingredient Baby Wipes

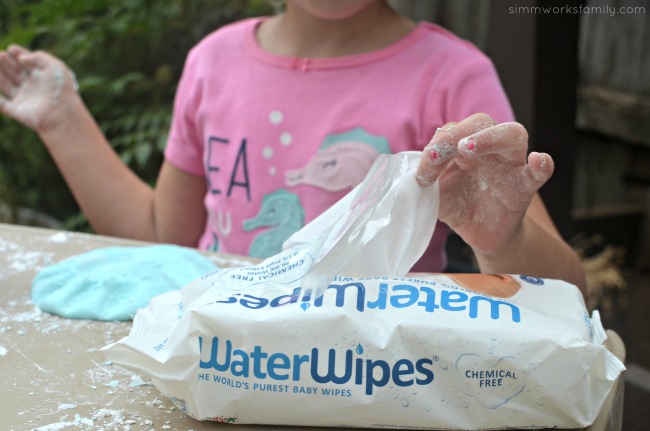
Just like this silly putty, WaterWipes contains only two ingredients, 99.9% pure Irish water and 0.1% grapefruit seed extract. It’s also chemical free which is a huge plus in a baby wipe. 

And it’s durability? Well lets just say that it can withstand my 18 month old, 5 year old, and 7 year old! Not just for wiping during diaper changes but after messy projects like this one as well! It’s definitely a safer, natural option for our kids.
2-Ingredient Silly Putty clean up with Water Wipes

How do you deal with messy situations? 

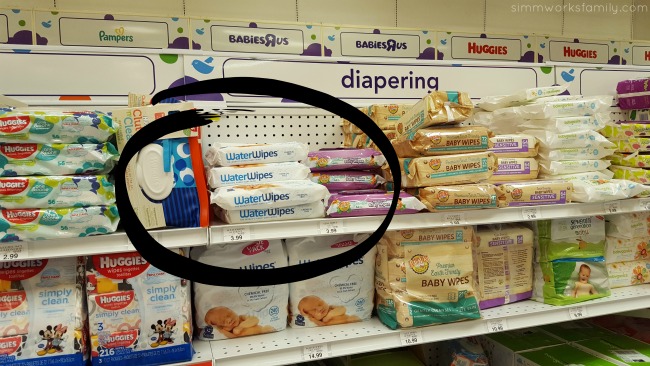
Water Wipes at Babies R Us
You can find Water Wipes right by the diapers in your local Babies R Us store! They come in this convenient 60 count size that I keep in the diaper bag, next to the changing table, or near the craft area. 

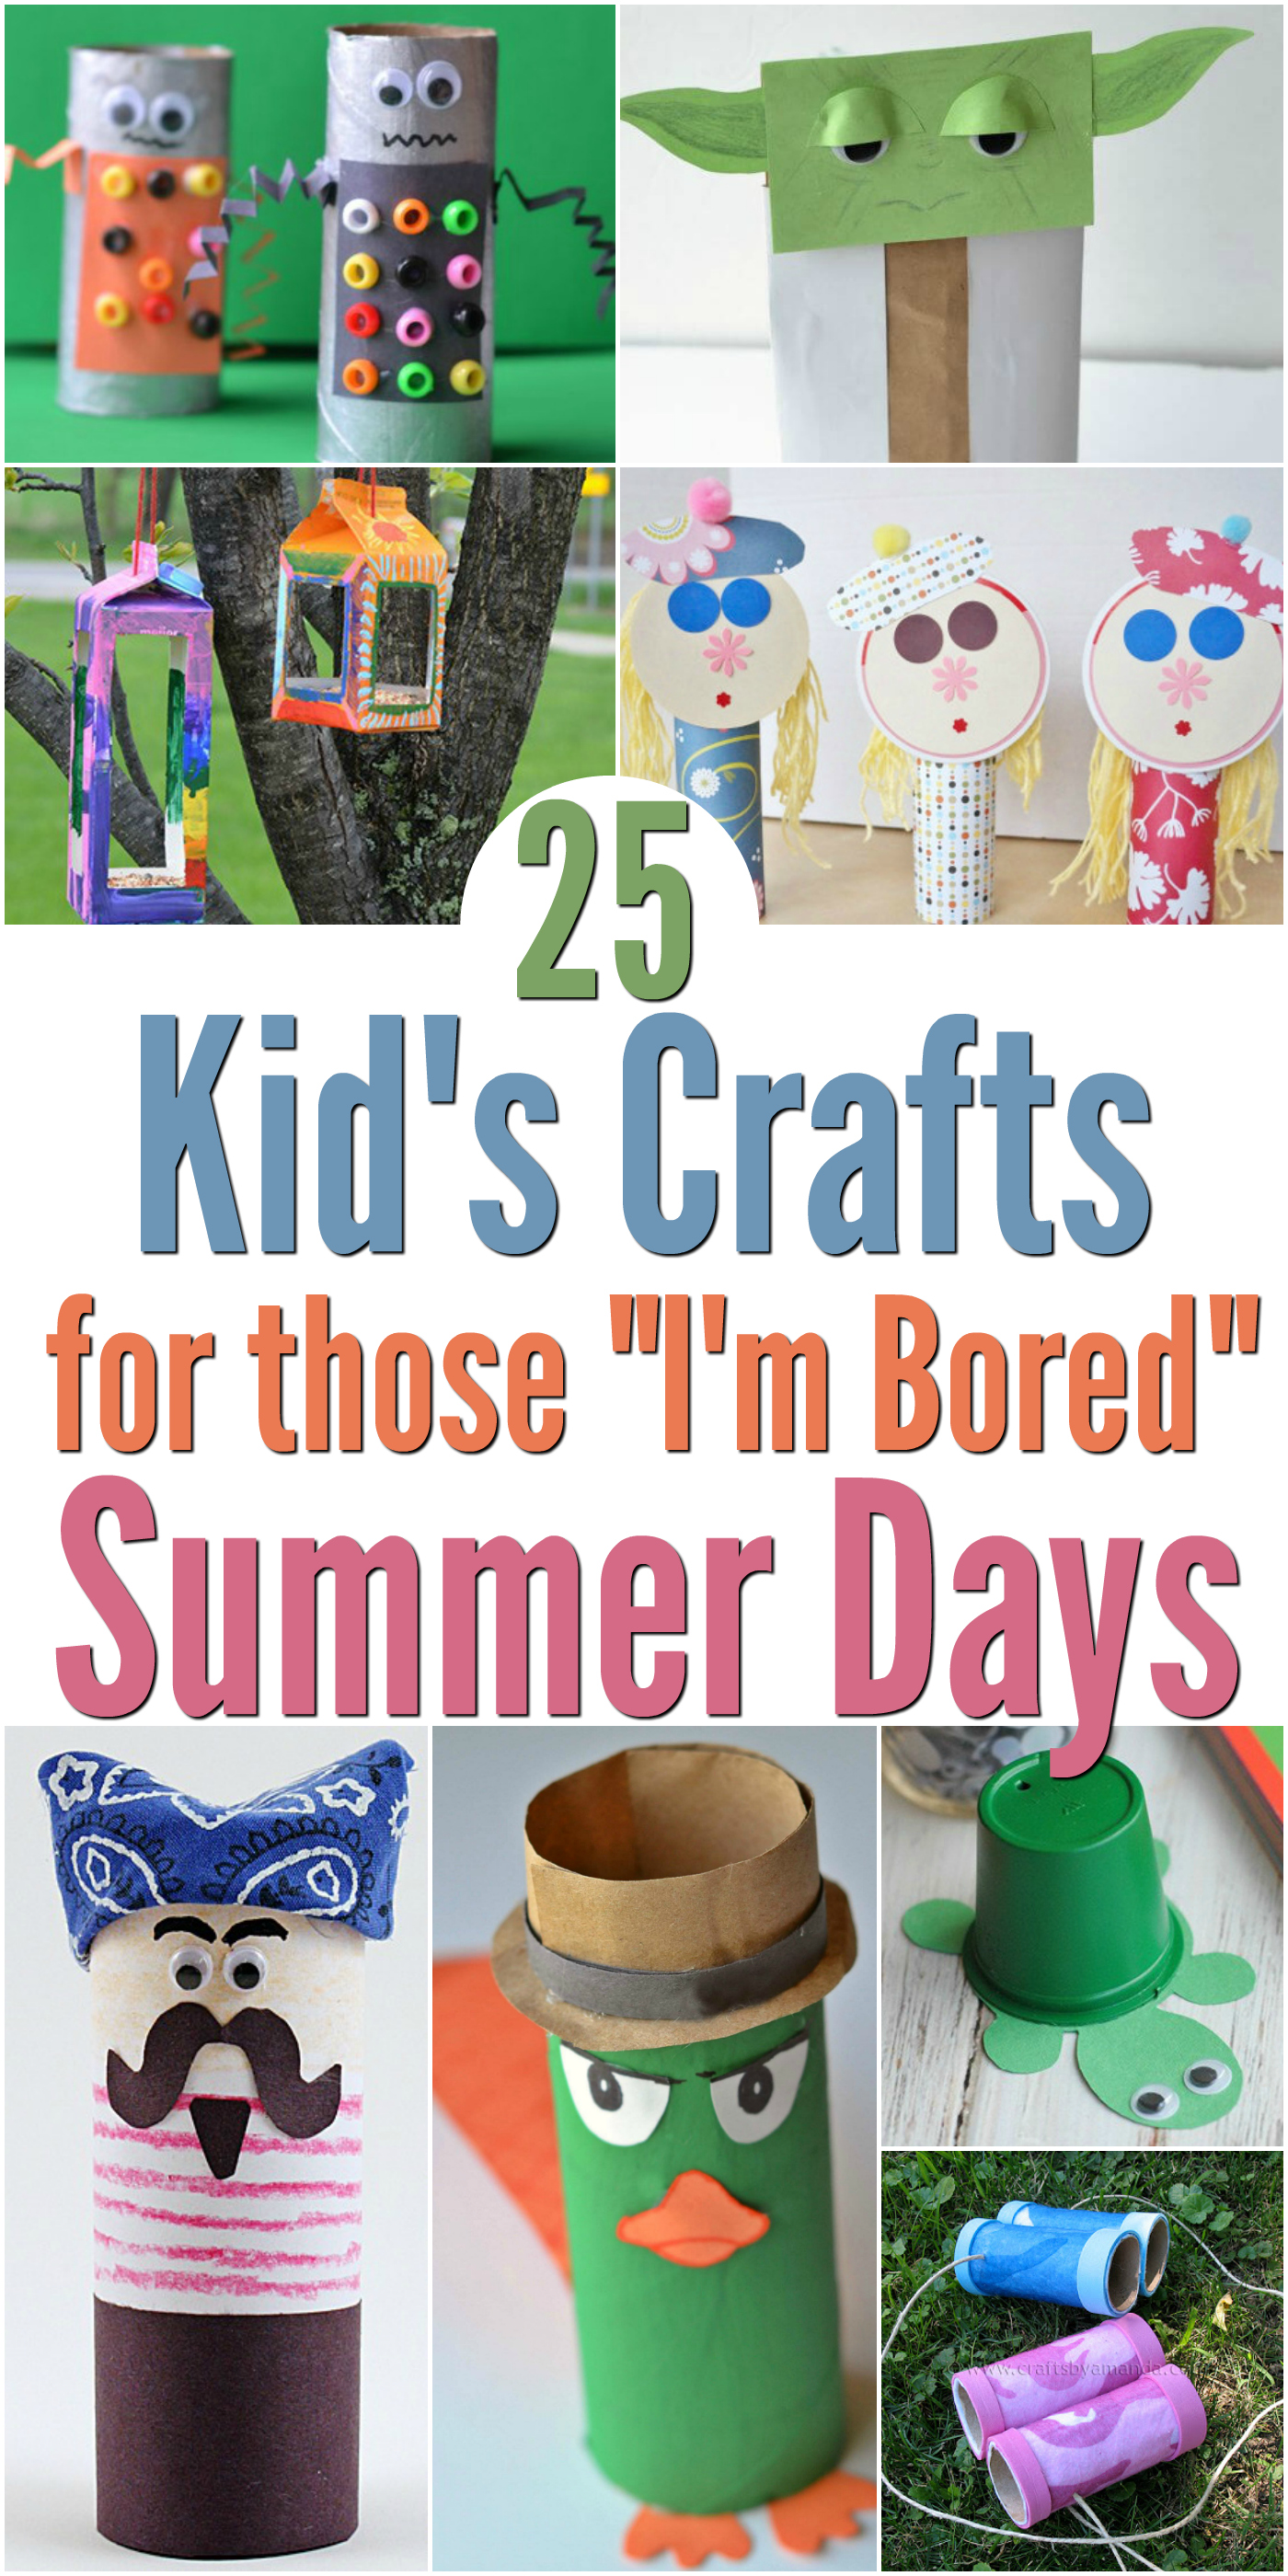
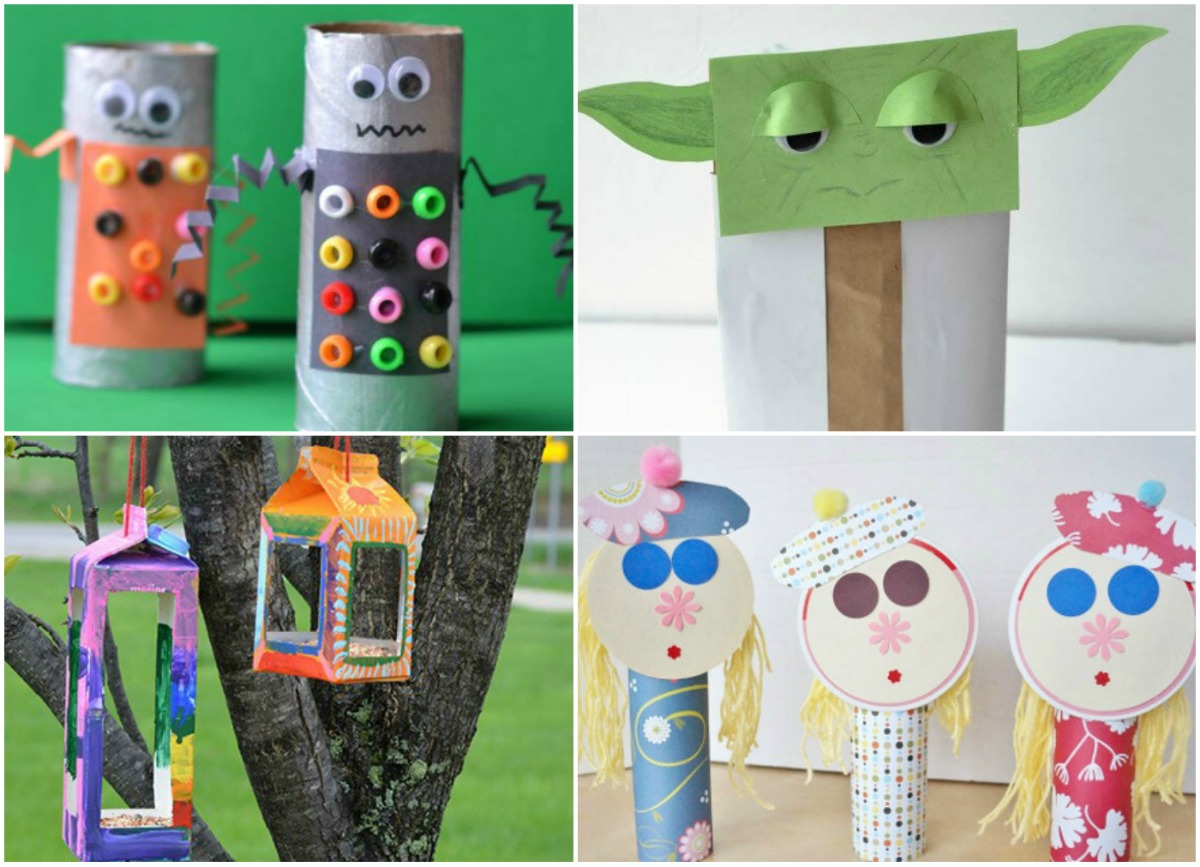
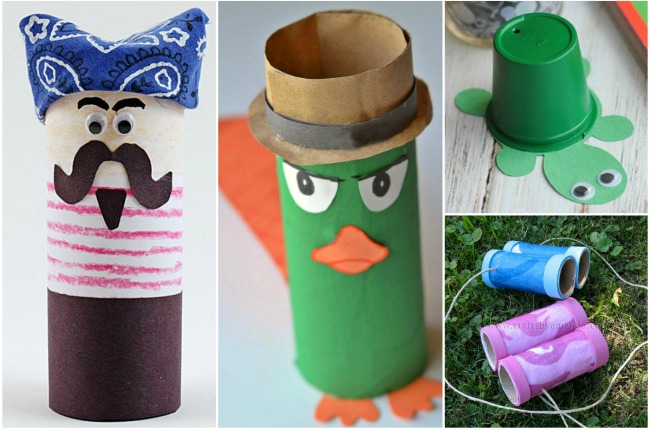
25 Kids Crafts for Those “I’m Bored” Summer Days

Summer Crafts for Kids

Both kids are out of school for the summer and it’s the first time I’ve had them both home all day. And while I love summer and all of the fun adventures we get to have, I still need to work during the day. So I’ve checked out a few of my favorite crafts from some awesome sites and am going to start setting up crafting kits for the kids on the weekend so they have 2-3 crafts to do during the week. These summer crafts for kids are great for all ages and you can make them with your child or let your child do it themselves with some guidance.

Summer Crafts for Kids FB

25 Summer Crafts for Kids

  1. Airplane Clothespin Craft – DIY Inspired
  2. Hand Puppet Paper Craft – DIY Inspired
  3. Recycled Paper Dolls – DIY Inspired
  4. Perry the Platypus (Phineas & Ferb) Toilet Paper Roll Craft – Glue Sticks & Gumdrops
  5. Robot Toilet Paper Roll Craft – Glue Sticks & Gumdrops
  6. Yoda Paper Bag Craft – Glue Sticks & Gumdrops
  7. How to Make Pipe Cleaner Flowers – Life With Lovebugs
  8. 4 Simple Ways to Make Yarn Pom Poms – Life With Lovebugs
  9. Bottle Cap Bug Magnets – Quirky Inspired
  10. Make a Floating Pirate Ship (Out of Recyclables) – Milk and Cuddles
  11. Easy Flowered Headband Tutorial – One Creative Mommy
  12. Pet Rock Tic Tac Toe – One Creative Mommy
  13. Epsom Salt Painting – One Creative Mommy
  14. Homemade Sidewalk Chalk Paint Recipe – Passion for Savings
  15. Washable Chalk Paint for Kids – Passion for Savings
  16. Birdhouse Crafts for Kids – Craft Create Cook
  17. Upcycled K-Cup Turtle Craft – Craft Create Cook
  18. Sand Cast Starfish – Crafts by Amanda
  19. Rainbow Jellyfish Craft – Crafts by Amanda
  20. Toilet Paper Roll Binoculars – Crafts by Amanda
  21. DIY Cat Bookmarks (Made from Paint Chips) – DIY Candy
  22. Paper Plate Summer Ocean Craft – JDaniel4’s Mom
  23. Paper Straw Bracelets – Kids Activities Blog
  24. How to Make a Pyramid Kite – Kids Activities Blog
  25. Cardboard Tube Pirate Craft – Kids Activities Blog

Summer Crafts for Kids toilet roll crafts

What activities do you have planned this summer?

Looking for more great activities? Check these out! 

DIY Dinosaur Toothbrush - a simple upcycled project to make teeth brushing fun
DIY Dinosaur Toothbrush

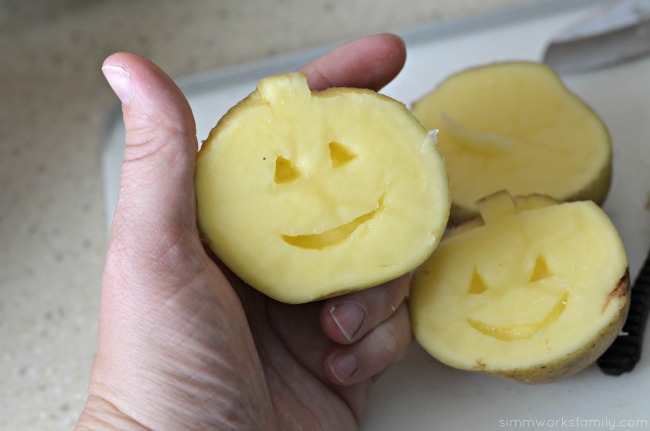
potato stamps cut out details
DIY Potato Stamps

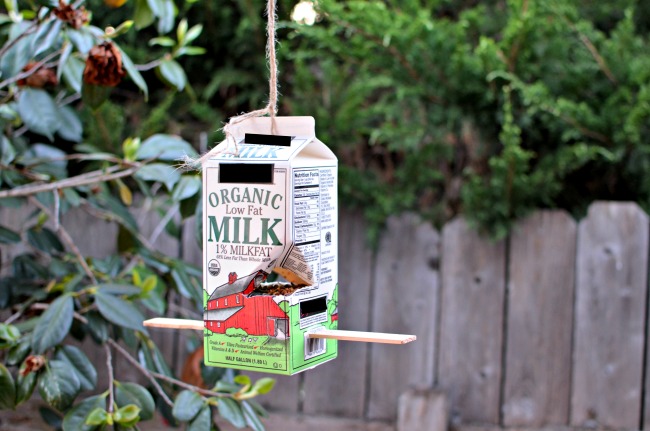
DIY Milk Carton Bird Feeder - a quick and easy DIY project for kids
DIY Milk Carton Bird Feeder

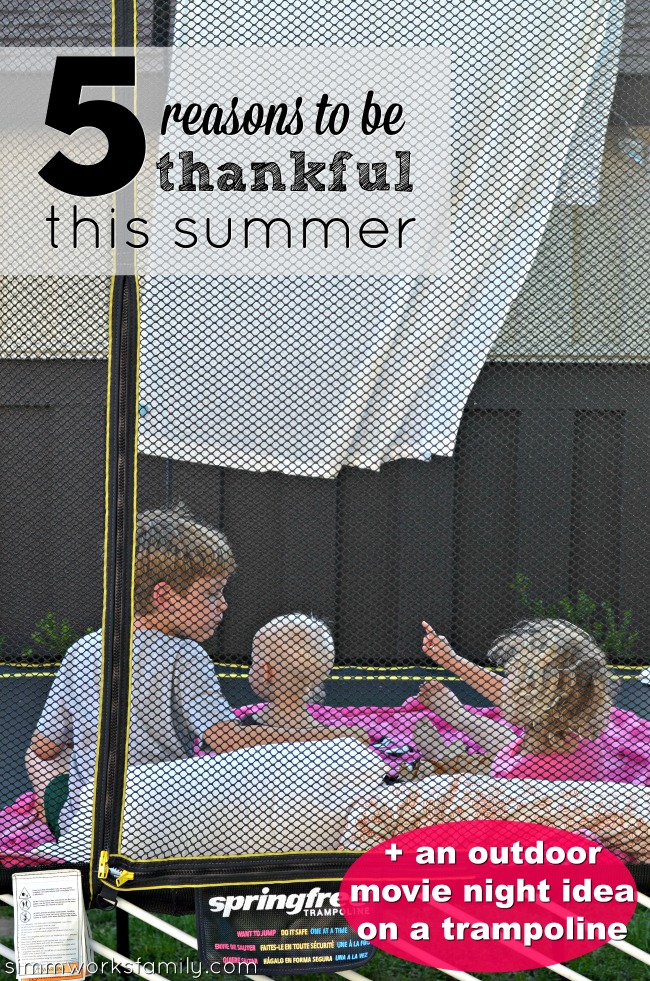
5 Reasons To Be Thankful For Summer + an outdoor movie night idea on a trampoline

We’re thankful for summer and sharing a great way to get outdoors with an outdoor movie night idea brought to you thanks to our partnership with Hershey’s via MomTrends.  

5 Reasons To Be Thankful For Summer + an outdoor movie night idea on a trampoline

Summertime always comes and immediately the one thing that runs through my head as a work from home mom is: how in the world am I going to take care of the kids all day AND get work done?

But this summer I’m approaching things differently. I’m not resenting the fact that our school cancelled their summer program right after all of the local museum classes filled up, or the fact that I don’t have a backup child care set in place because I didn’t think about it in February when apparently everyone else did. I’m going to make the best of our summers together and really strive to be thankful for summer.

At the end of the day, summer is the only real time I have to fully enjoy my kids until they move out of the house. That means 10 summers left with my oldest, 12 with my middle, and 17 with my youngest. Those are going to go by FAST!

5 Reasons To Be Thankful For Summer + an outdoor movie night idea on a trampoline with siblings

5 Reasons To Be Thankful For Summer

1. More Time With The Kids – 

While having the kids home all summer will be hard to balance my work/life workload, having more time with the kids is always a good thing and something to be thankful for. Even though I still have to work, I can take an afternoon or morning off each week to really spend one on one time with the kids. Plus we have some help from family so they can have fun adventures with Grandma, their great aunts, or their cousins throughout the summer too. 

2. Later Bedtime – 

Because we don’t have to wake up early, I can choose to spend more time with the kids at night (watching movies outside!) or catch up on work after bed time. The kids love having the freedom of no bedtime and actually get to bed by 9pm when this happens so they’re not up too late. And everyone is in a better mood when we go to bed and get up when our bodies tell us to. 

3. No Alarm Clock – 

Ok, confession: I don’t use an alarm clock. But I do have to wake up at 6:30am every day during the school year to make sure the kids get out the door and to school on time. Because we don’t have to actually get up and go somewhere (if we choose not to), we can sleep in. AND? We can have pajama days. Lots and lots of pajama days! 

4. Warm Weather – 

I love that we get to enjoy all summer together when the weather is nice. Sure there’s a few weeks where it’s unbearably hot. But living here in San Diego means that we can take full advantage of the beaches, pools, and other outdoor (and some indoor) areas to keep cool. I fully plan on taking advantage of our location this year and have quite a few beach days planned for us. Even if that means I have to get my keyboard a little sandy while I work and they play. 

5.  Fun Adventures – 

With the warmer weather and lack of an actual place we have to be, we can have fun adventures this summer (and every summer) that we wouldn’t have had the freedom to do during the school year. As I mentioned previously, we’ll take full advantage of our location. But I’m also planning at least one road trip and a few staycations to enjoy ourselves this year. I’m also hoping to schedule at least one activity outside the home a week. That way I’m not too stressed about too many activities but we still get to do fun things. 

So far here are some of my ideas for summer fun adventures: hikes, beach/pool days, zoo trip, free days at museums, movies in the middle of the day, trip to the water park, trip to the mountains, gardening club, city clean up days, trip to the aquarium

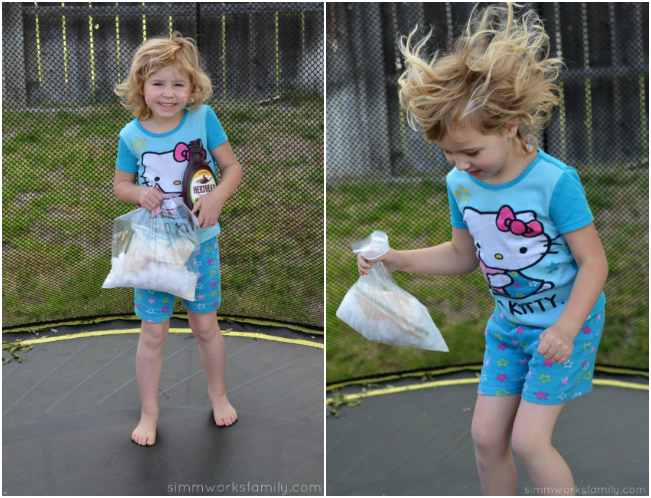
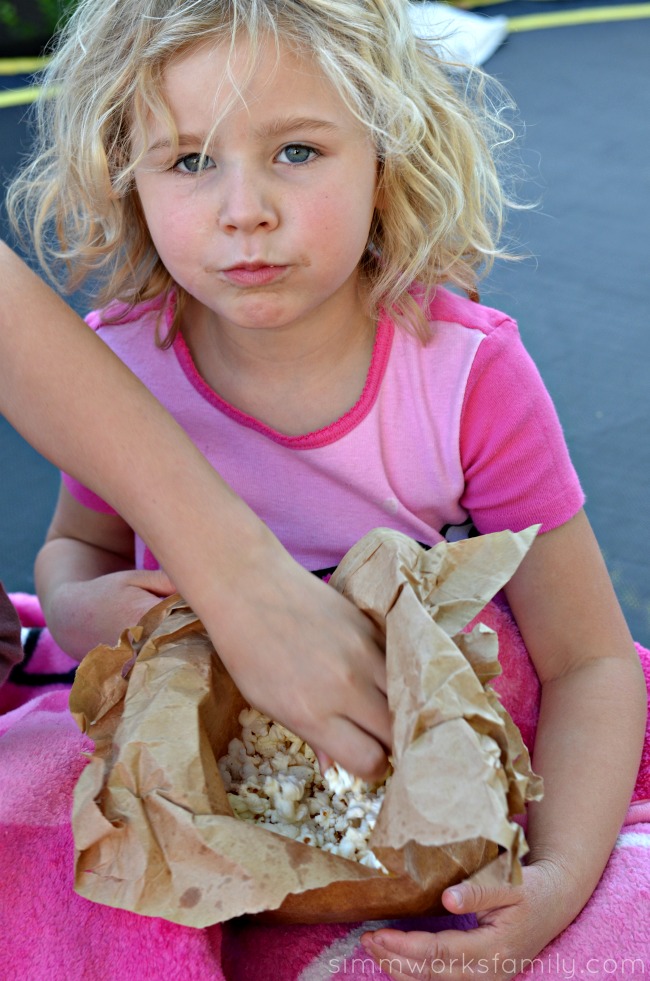
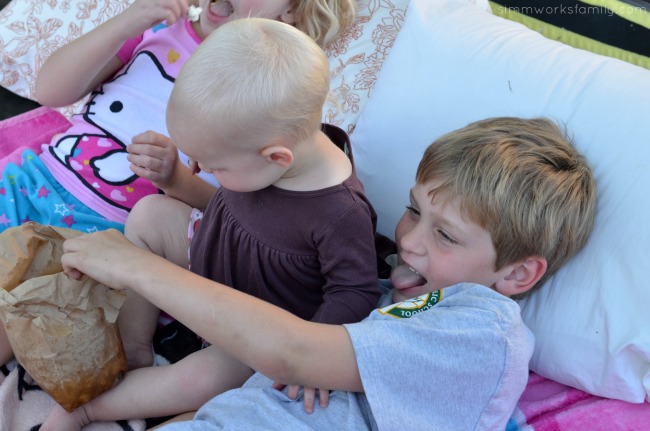
5 Reasons To Be Thankful For Summer + an outdoor movie night idea on a trampoline and making homemade ice cream5 Reasons To Be Thankful For Summer + an outdoor movie night idea on a trampoline with homemade popcorn

One of our fun adventures this summer will be getting outdoors and enjoying movie night on our trampoline. And it’s SUPER simple! 

Outdoor Movie Night On A Trampoline

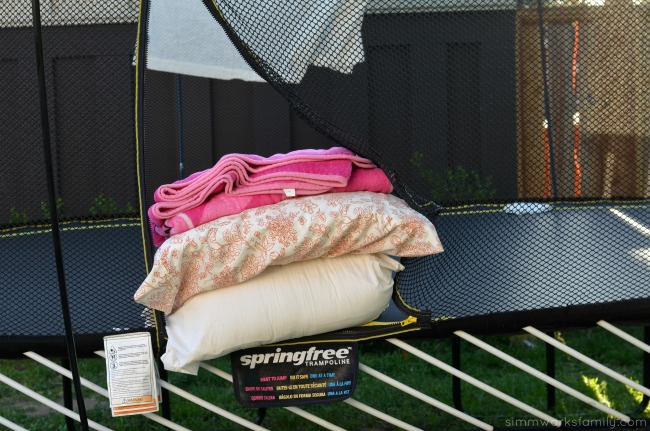
  1. Grab a white sheet plus a pile of blankets and pillows.
  2. Hang the white sheet over one side of the net on your trampoline and clamp down with clamps (I just use the clamps I use for my photo backdrops here).
  3. Set out the blankets and pillows so everyone is comfy. 
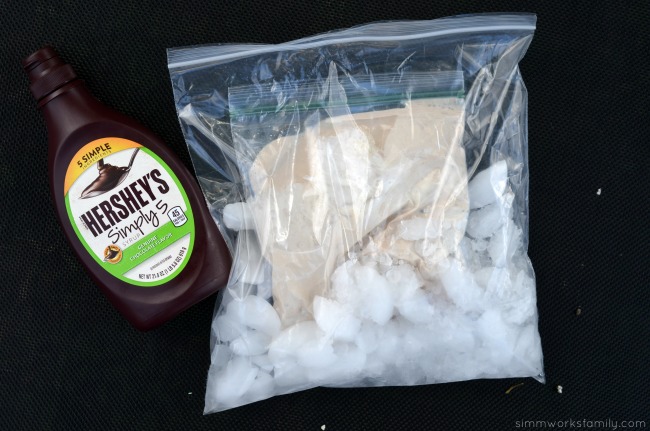
  4. Make some fun snacks with the kids like this delicious homemade chocolate ice cream in a bag with Hershey’s Simply 5 Syrup or popcorn in a bag.
  5. Grab a projector and start playing the movie! 


5 Reasons To Be Thankful For Summer + an outdoor movie night idea on a trampoline with blankets and pillows

What #Simply5 words describe a sweet memory that’s made your day special? 

Sometimes, even the process of enjoying the little things in life – like movie night – becomes complicated. It shouldn’t require a year-long commitment or tons of planning.

In honor of the sweet and simple ingredients in Hershey’s Simply 5 Syrup and the sweet and simple memories that it inspires, we want people to share the sweetness in everyday moments. Take a moment to “stop and smell the chocolate” and share your #Simply5 – a five word recount of what makes your day sweet.

Post your #Simply5 on social media by sharing a five word recap of what makes your day special! 

5 Reasons To Be Thankful For Summer + an outdoor movie night idea on a trampoline with Hershey's Simply 5

Hershey’s Simply 5 Syrup is a sweet and simple take on original Hershey’s Syrup, now made with five simple ingredients. You can find more recipes and fun things to do with Hershey’s by visiting them on Facebook or following along on Twitter.

Disclaimer: Compensation was provided by Hershey’s via MomTrends.  The opinions expressed herein are those of the author and are not indicative of the opinions of Hershey’s or Momtrends.

Finding Teachable Moments With Our Kids

This conversation featuring 10 places to find teachable moments is brought to you by Vroom

Finding Teachable Moments With Our Kids

Over the past few years I’ve come to realize how important it is to turn average, everyday moments into teachable moments with our kids. Not only are they the most relaxed when we’re just doing our own thing and going through our day, they’re also more apt to ask questions and really take in what you’re telling them when you share something with them in the moment.

In an effort to take advantage of these moments, I’ve listed our top 10 places to find teachable moments below.

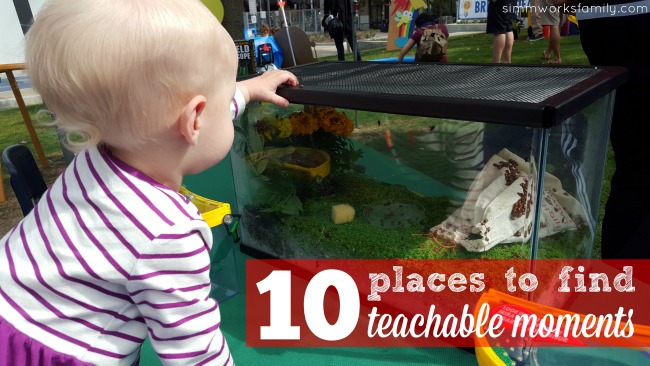
10 Places To Find Teachable Moments

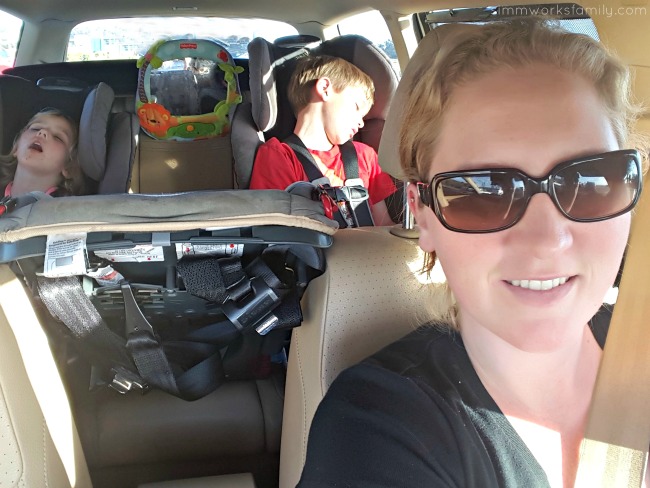
Finding Teachable Moments in the Car

1. In The Car

The one place that I find ourselves the most disconnected from tablets and computers and phones is the car. For one… no wifi! And we’re in the car at least twice a day to and from school for drop off and pick up. While we don’t necessarily talk the whole time we’re in the car, we are together in a confined space with no where else to go until we get to our destination.

I’ve found that this is the great time to not only ask about their day, but to open up about topics we might not have thought about. And what’s most crazy is that those topics don’t just pop up… they’re provoked by the one thing that is on in the car: the radio. Whether it’s a song that comes on, or something the announcer says, my kids and I have had great talks about everything from racism to politics to math after a topic was sparked by what we hear on the radio.

2. On A Walk

We love taking family walks. It’s important for us to get outdoors with the kids so we try and make time for walks as a family. Whether we’re heading out to the park or up the road to grab an ice cream cone after dinner, it’s a great time to bring things up. We also love talking about what’s going on in our neighborhood and what we see around us.

3. After School

I don’t know if this is the same for everyone but my son never gives me any information about what’s going on at school or what’s coming up. My daughter, on the other hand, gets in the car after school ready to share about her day. But when I do want to know what’s going on with him I don’t just ask what he did at school. I find ways around the obvious question and ask him other things that might lead to a conversation about his day. I found some really great conversation starters here.

4. During Dinner Time

Dinner time in our home is family time. And it doesn’t just start when we sit at the table to eat. By getting the kids involved in making dinner with me, I can teach them little things in the kitchen that they can continue to learn as they get older. Whether its dumping in the ingredients into a bowl like my 15 month old, chopping up veggies like the older kids, or unloading the dishwasher like my husband, everyone has something to do when we get dinner ready. This gives us the opportunity to spend time with one another while we teach each other new things. You can find more tips for creating a family table at meal time here.

5. On A Trip

When we leave home for trips, whether it’s for vacation or a simple get away for the day, we try to take any opportunity we can to teach our children about something. If we’re heading to Boston to visit family, we make sure to schedule a few historical stops along the way, or if we’re going to the San Diego Zoo, we try and get the kids involved in learning more about the animals we see. By just exploring the world around them, they soak in everything.

6. In The Bathroom

So if you’re a parent you know that you can’t do anything alone anymore. And that includes going to the bathroom. While it may not be the most enjoyable thing, I’ve found that my kids curiosity in the bathroom has helped open our channels of communication about things we might not have discussed until a later age. I’m pretty open about the birds and the bees with my kids. While I do make sure to keep it at an age appropriate level, most of the talks I’ve had with my son and daughter have started in the bathroom.

Finding Teachable Moments in the back yard

7. In The Back Yard

Our back yard is our oasis. Whether we’re gardening together, playing together, or taking care of our many animals, having an active back yard has allowed us the opportunity to continue to teach our children about how to grow their own food and how to take care of another being. By just making things available to them, like a few planters to plant whatever veggies or flowers they want to plant, I’ve come to realize how independent they become and how much they’ve learned by just observing us.

8. In The Classroom

Now this might sound like a no-brainer but it’s not on the list for why you think. If you work outside of the home it may be hard to do, but volunteering in your child’s classroom can really open the doors of communication and help in teaching them at home.

I’ve found that by observing my son in class and seeing how he learns things there has helped how I approach teaching him certain things at home. Homework time is also a great time to check in with them and see how they’re doing.  By being active and in communication with his teacher, I’ve been able to see what his strengths are academically and what he needs help with.

9. At A Friend’s House

Growing up I learned so much about the differences between each family after heading to a friend’s house for a playdate or sleep over. The family dynamics are so different between one household and another and by going to friends houses to see their family dynamic, we’ve been able to teach our kids that being different is great. We also make sure they feel comfortable in asking questions they have about those differences.

10. With Family Members

One thing I absolutely love about living close to family are the different life lessons their grandparents and aunts and uncles can teach them. Whether it’s just hanging out at Grandma’s house or going on an adventure with their Great aunts or uncles, being able to learn different ways from different people has allowed our kids to get a bigger perspective on the world around them.

Finding Teachable Moments with Family Members

In an effort to inspire every caregiver to think more about teachable moments, the Bezos foundation has started a fun campaign called the Vroom initiative. Vroom was developed based on the premise that every child is born with enormous potential, and every parent can help them realize that potential. The Vroom Superhero campaign demonstrates the heroic role that every parent and caregiver plays in the lives of children, and reinforces the message that anyone can be a Vroom Superhero to a child.

You can find a little more about the campaign in the video below:

Vroom was designed to give parents and caregivers simple tools that turn everyday activities, like mealtime and bath time, into brain building moments. We want to empower parents and caregivers like Camellia to interact with their children during their daily routines, engaging them in activities that require no additional time or resources but have outsize long-term benefits.

Become a superhero and join Vroom today!

How do you make teachable moments fun?

DIY LEGO Side Table

 This shop featuring how to make a DIY LEGO side table has been compensated by Collective Bias, Inc. and its advertiser. All opinions are mine alone. #MyPledgeCastle #CollectiveBias 

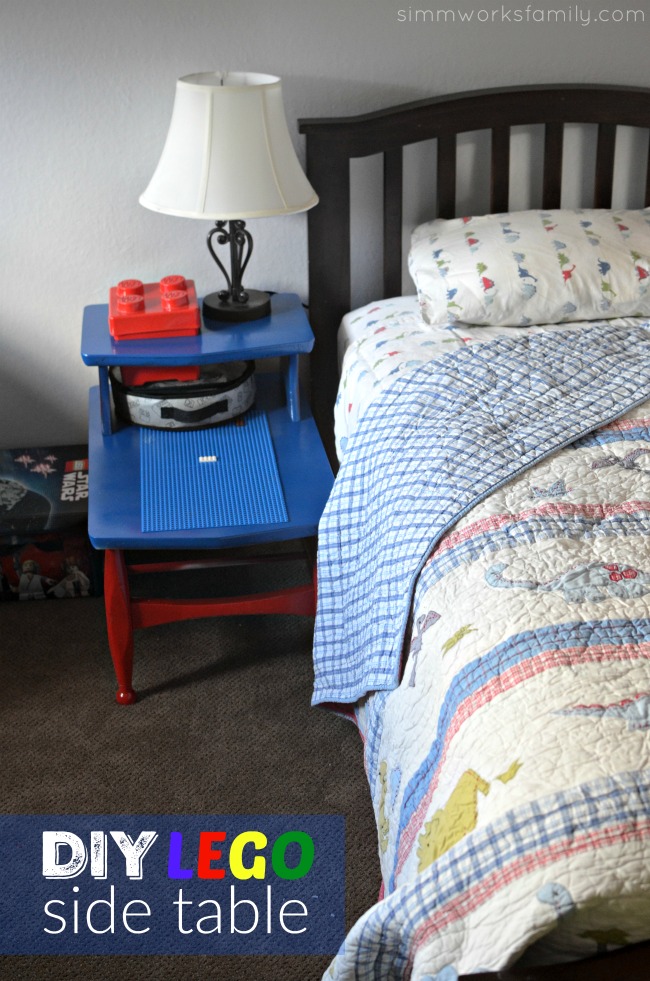
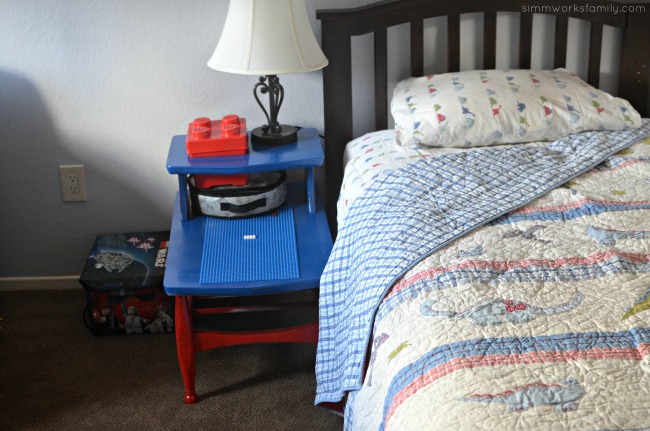
DIY Lego Side Table - the perfect addition for a LEGO loving boy room

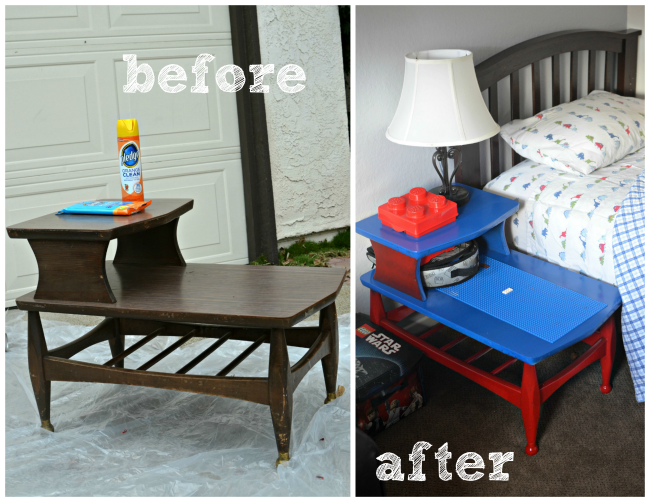
I learned pretty quickly after becoming a boy mom that boys are messy. And as they get older, they make bigger messes. In an effort to organize the messes, I have been wanting to create an activity table like this LEGO side table to take care of the piles of LEGO bricks I always find around his bed.

So when we switched him to the room upstairs (our old guest bedroom) the first project I tackled after painting was to turn a side table I found at the thrift store into a DIY LEGO side table.

Not only was it easy to make, it took only a few hours to put together!

Pledge at Ralphs

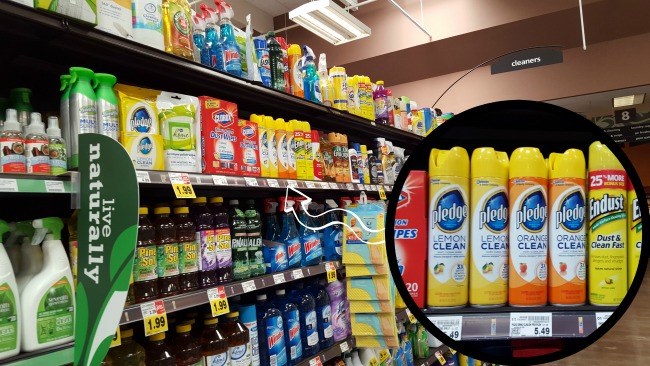
Like the piles of LEGO bricks I find left all over, there’s also always a thin film of dirt trailed wherever my son goes. He treks in so much sand, dirt, and debris from his adventures outside and it ends up on everything. Luckily, with Pledge® Orange Clean Spray I can control the dust and clean up smudges and messes while safely leaving the finishes alone. You can find Pledge® Orange Clean Spray in the cleaning aisle at your local Ralph’s.

When I’m cleaning his room (after he attempts to clean it, of course) I just go at it and wipe down his bed frame, side tables, dresser, and bookshelf. The Pledge® Orange Clean Spray features Allergens Trappers® to remove dust and up to 90% of the allergens found in dust. Not only do I get a clean bedroom, but I can reduce my son’s asthma flare ups too!

DIY Lego Side Table before and after

DIY Activity Side Table

What you’ll need:

  • side table or small end table
  • no prep spray paint
  • drop cloth
  • small box for toy bricks that fits width of table
  • measuring tape
  • pencil
  • painters or masking tape
  • drill
  • jigsaw
  • sandpaper
  • spray adhesive
  • LEGO baseplate

What you do:

1. Using the no prep spray paint, paint the table in whatever color or pattern you choose. Let dry completely.

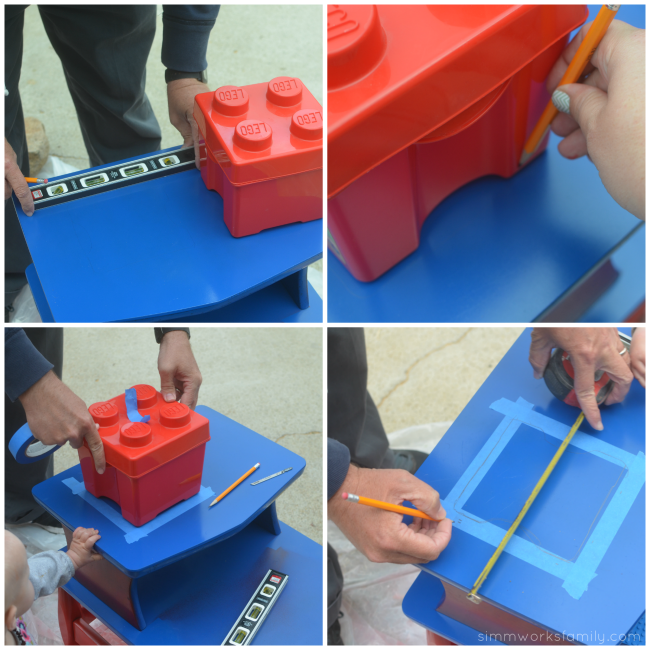
2. Measure the spot on the table where you want to place the box. If you’re leaving room for a lamp, etc, make sure to put the box on one side vs. in the center of the table. Trace the box with a pencil.

3. Once you have traced the spot, place masking tape down on the pencil line. The masking tape will help lessen splintering when you’re cutting. Then re-measure the top of the box and measure out where to cut. Note: if your box tapers down like ours did, make sure to account for that.

DIY Lego Side Table - measure twice, cut once

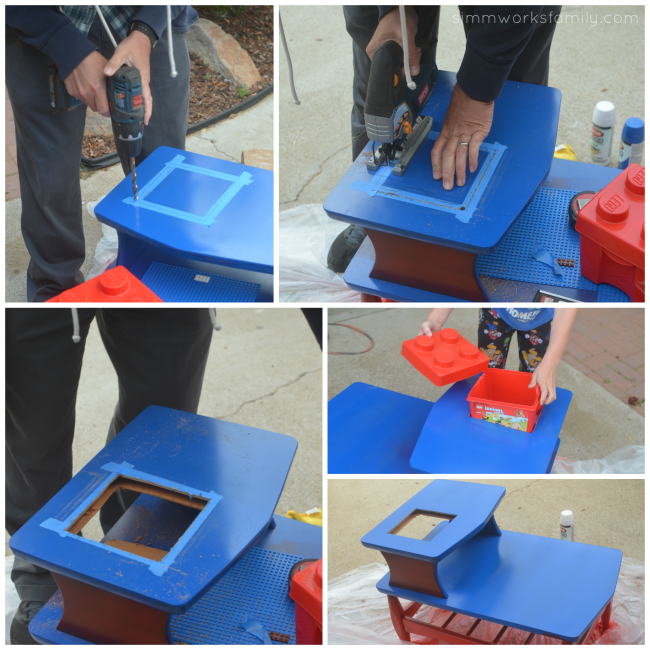
4. Using the drill, drill a hole on two of the opposite corners. This will provide a place to start the jigsaw without making a huge mess of things.

5. Once the two holes are drilled, use the jig saw and cut a straight line to the corner without the hole. Then do the same for the other lines until all 4 sides are cut.

6. Sand the edges of the hole until smooth and then remove the tape. Clean off the table with Pledge® and remove any dirt or debris left over. Spray a little touch up paint in any area that needs to be touched up. When dry, add the box to the hole.

DIY Lego Side Table - cut out hole for box

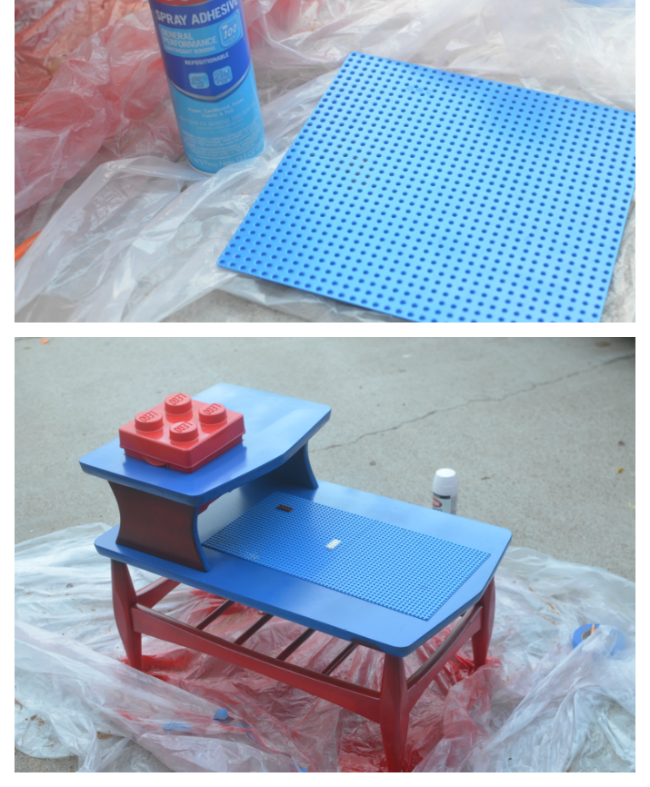
7. Now measure where you want the LEGO baseplate(s) to go. Make a small mark with pencil on either side of the plate so you know where to put it.

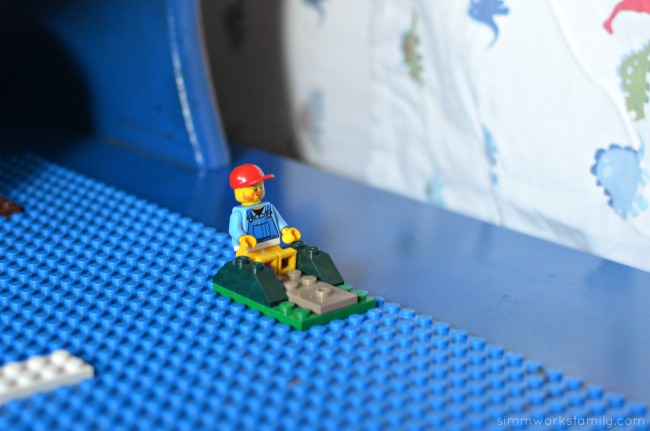
8. Using the spray adhesive, spray the back of the LEGO baseplate. Then place back on the table where you marked it and firmly press down. Let dry completely before playing on it.

DIY Lego Side Table - use spray adhesive to secure square lego pad

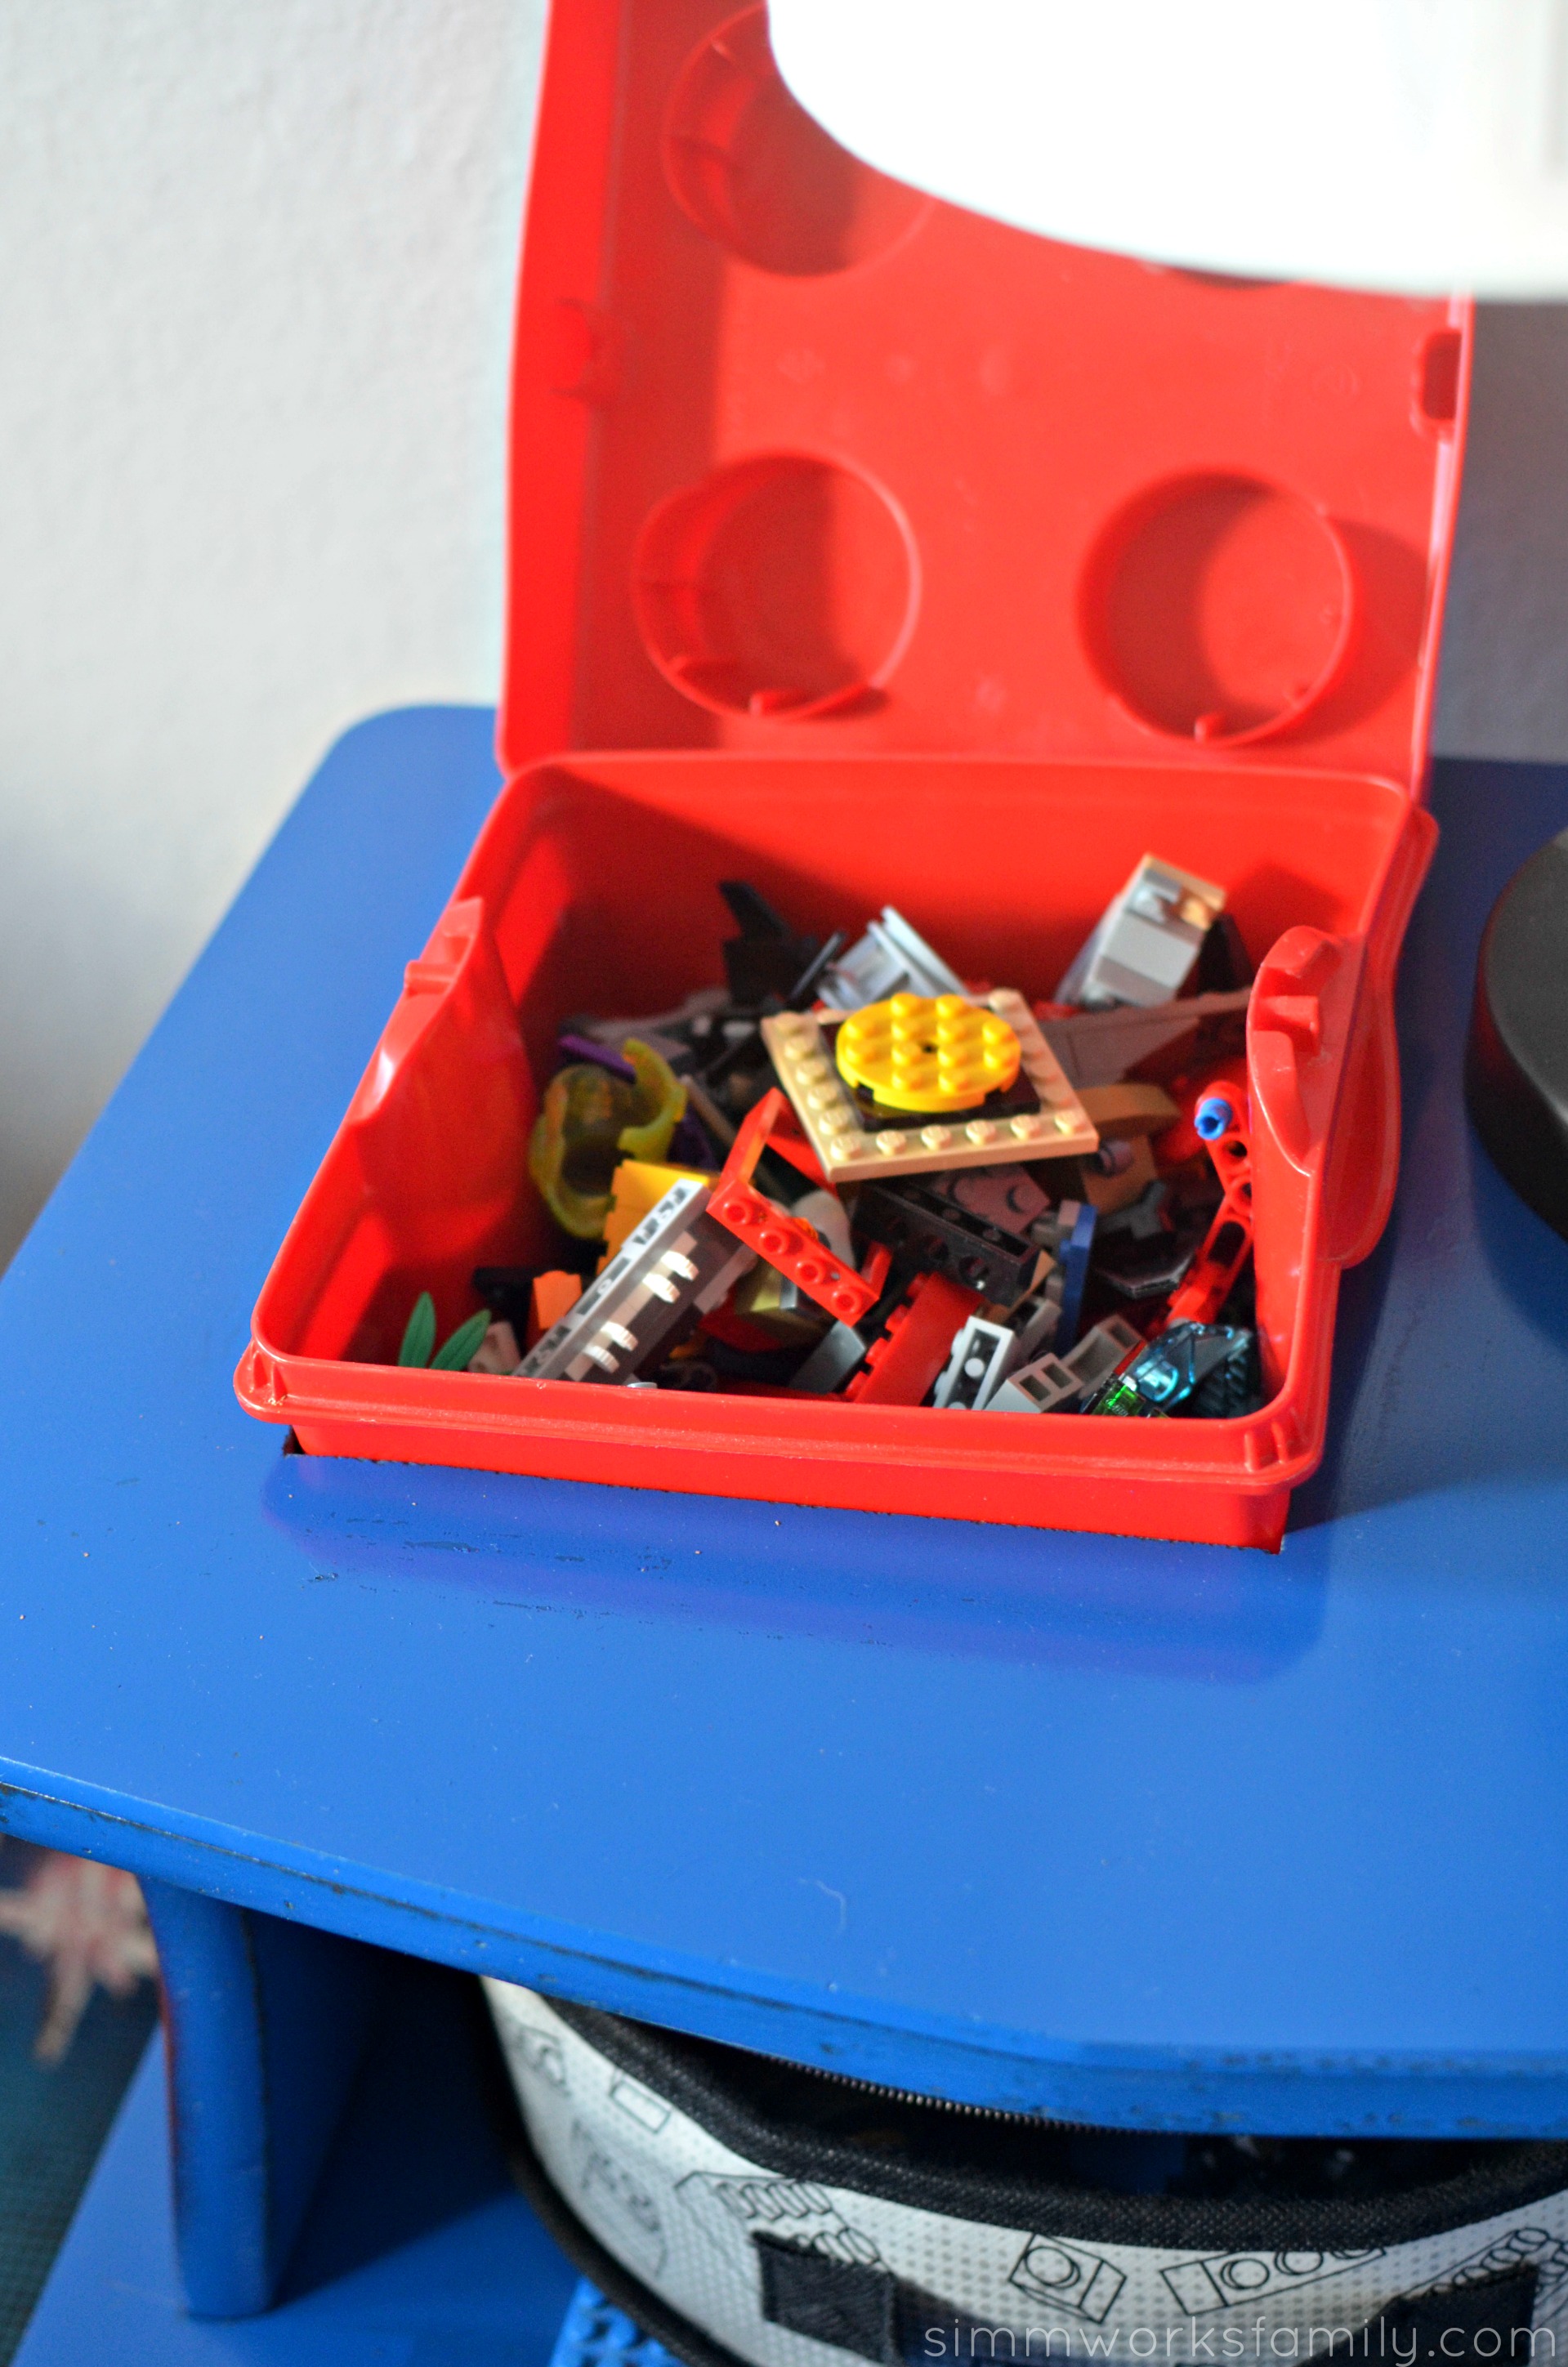
And your DIY LEGO side table is complete! Fill the box up with toy bricks and let your child go at it!

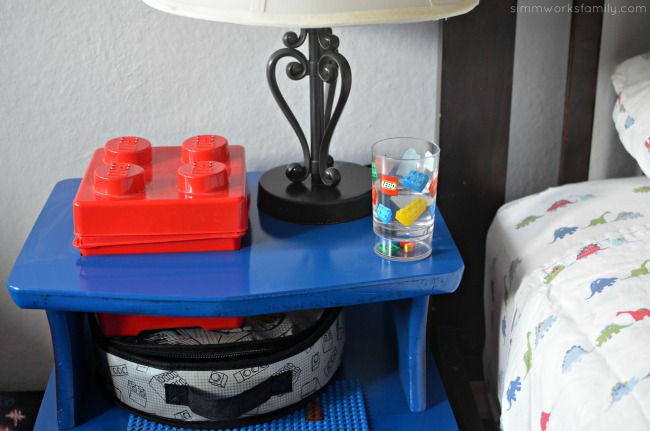
DIY Lego Side Table - turn a thrift store find into an awesome tableDIY Lego Side Table - built in LEGO boxDIY Lego Side Table - with room for lamp and water glass

Because this is a side table next to my son’s bed, I wanted to leave room for a lamp and the glass of water he always has to have right before bedtime. There’s even a little more room for a snack or book.

Next up on our DIY room adventure? A minifigure LEGO lamp! Stay tuned…

DIY Lego Side Table - a fun way to play with LEGO bricks

How do you organize your child’s small toys?

Upcycled Toys Idea: DIY Dinosaur Toothbrush

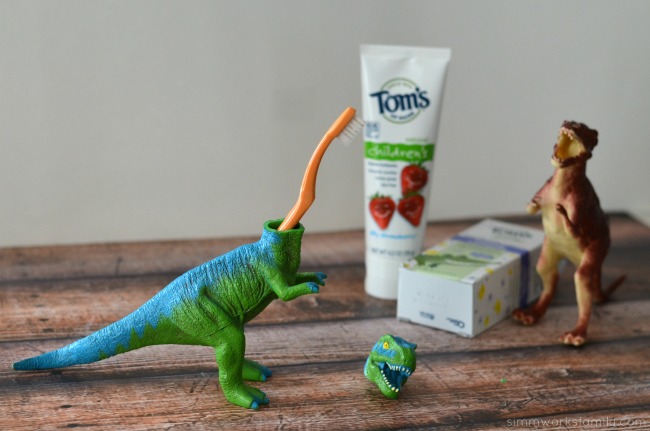
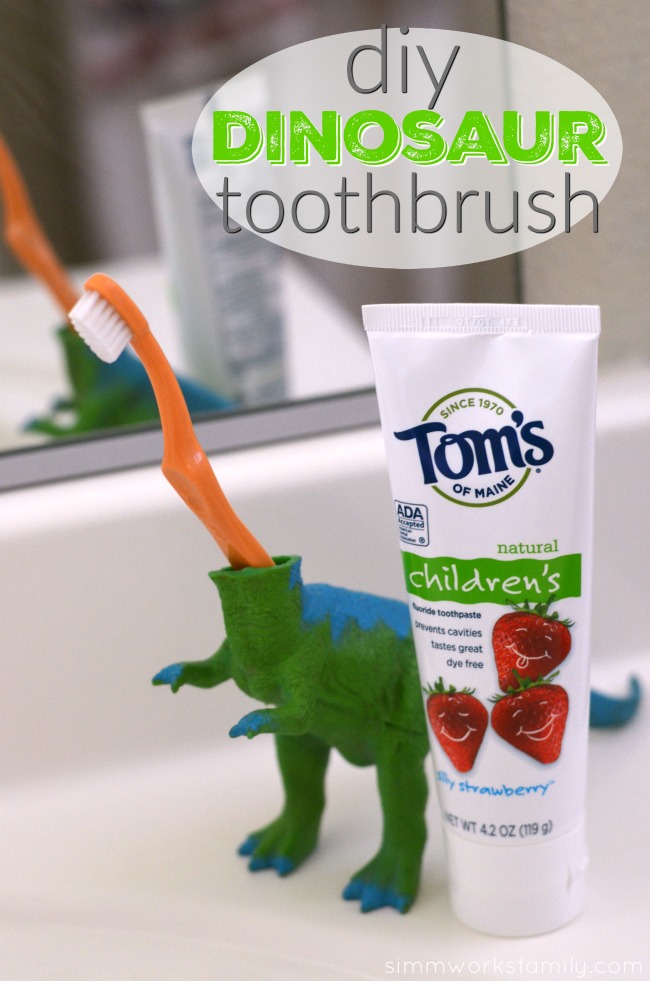
Earth day is right around the corner and, like every day, we love finding new ways to repurpose and reuse old things around the house in an effort to reduce the waste we send to the landfills. This DIY Dinosaur Toothbrush, brought to you by our sponsor Toms of Maine, is the perfect way to upcycle old toys AND get the kids excited about brushing their teeth. Win-win!

*No real dinosaurs were harmed in the making of this project*

DIY Dinosaur Toothbrush - an easy way to make brushing teeth fun

I’m pretty lucky. After dinner is over my husband completely takes over with the older kids while I put the baby to bed. He makes sure the homework is done, takes care of the bedtime routine, and then lays with them for a bit before they go to sleep. But I was noticing a little more struggle over the past few weeks with getting the kids to do one thing… brush their teeth!

So when I was purging the kids toys, I saved a few for an idea I had to spark some excitement back in their routine. And since it’s so close to Earth Day I figured it’d be the perfect time to recycle and reuse some of the items I was getting rid of. I grabbed some of the dinos from the giveaway pile (don’t worry… my son still has PLENTY of dinosaurs in his collection) and here’s what I came up with! Now the kids love playing while they make their dinos brush their teeth and we’ve helped create less waste. 

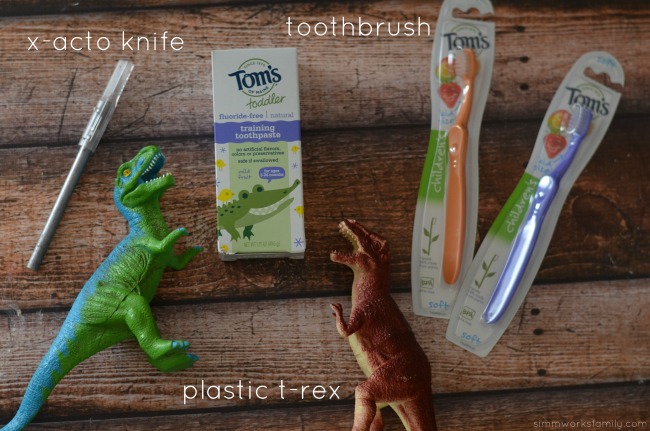
DIY Dinosaur Toothbrush supplies

DIY Dinosaur Toothbrush

What you’ll need: 

  • Plastic T-Rex or Brachiosaurus dinosaurs
  • x-acto knife or other craft knife
  • Tom’s of Maine kids toothbrush

What you do: 

1. Make sure the dinosaur you choose has a body that’s around the same size of the toothbrush handle.

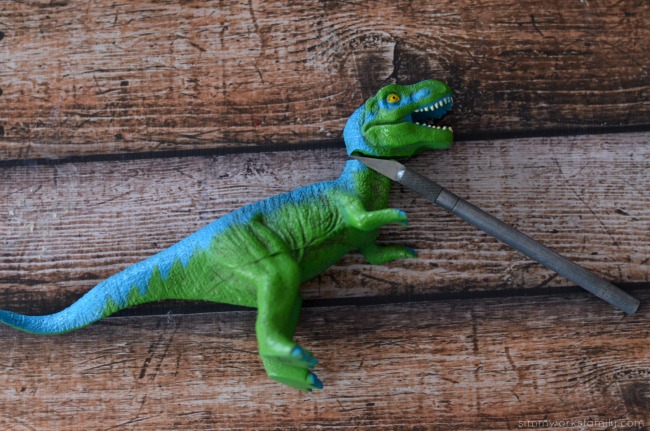
DIY Dinosaur Toothbrush - cut off dinosaur's head

2. Then grab the x-acto knife and cut off the dinosaur’s head. Try and trim/even up the cut on the top of the body.

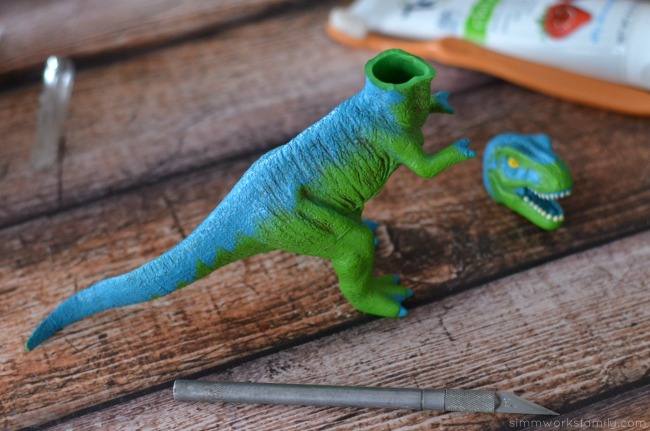
DIY Dinosaur Toothbrush - even out cut

3. Stick the toothbrush into the hole and angle it to fit into the body cavity.

DIY Dinosaur Toothbrush - a simple upcycled project to make teeth brushing fun

There are so many ways you can repurpose the toys in your home! Find some other great ideas of toy repurposing on my Upcycled Toys pinterest board.

With more than 250 million tons of waste generated every year in the United States,1 Tom’s of Maine, is teaming up with recycling leader, TerraCycle, to decrease the amount of trash ending up in landfills by launching the #LessWasteChallenge pledge. The pledge is meant to inspire families to reduce their household waste by one pound per week. You can join Tom’s of Maine by taking the simple pledge with just one click at www.tomsofmaine.com/lesswaste.

In Maine, the company is working to get to zero waste by 2020. Learn more in the Goodness Report here. Find ways you can help out by following the #LessWasteChallenge and taking the pledge! Then share how you’re making less waste by sharing on social media and using the hashtag!

Looking for more ways to product less waste? Check out these awesome videos:

How have you upcycled toys?

1 Environmental Protection Agency. (2016). Municipal Solid Waste. Retrieved from http://www3.epa.gov/epawaste/nonhaz/municipal.

Find more great upcycled projects right here!

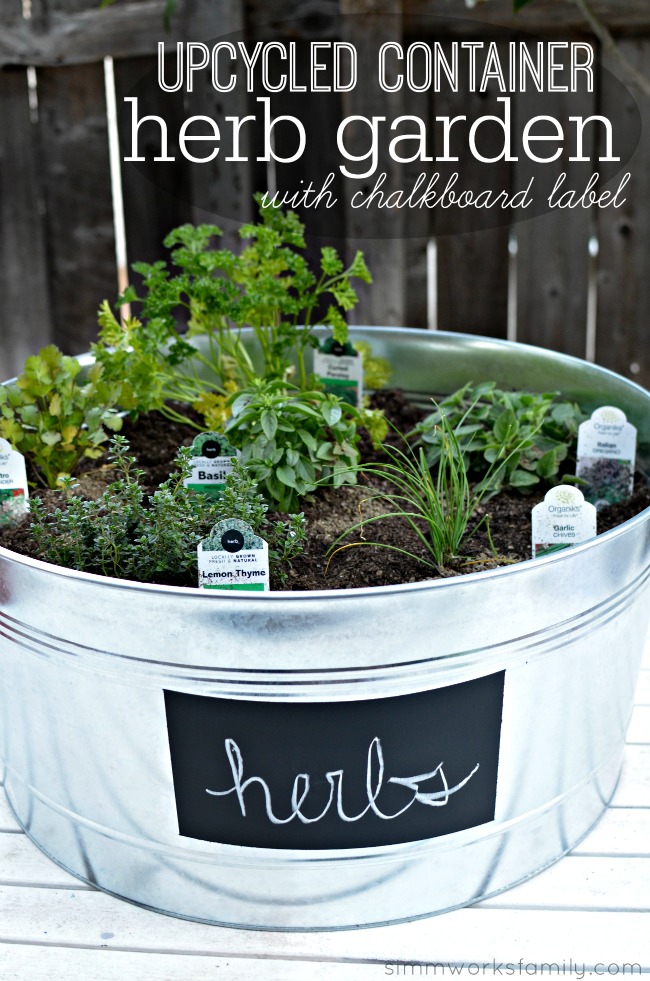
Upcycled Container Gardens Housing Your Herbs

Upcycled Herb Garden

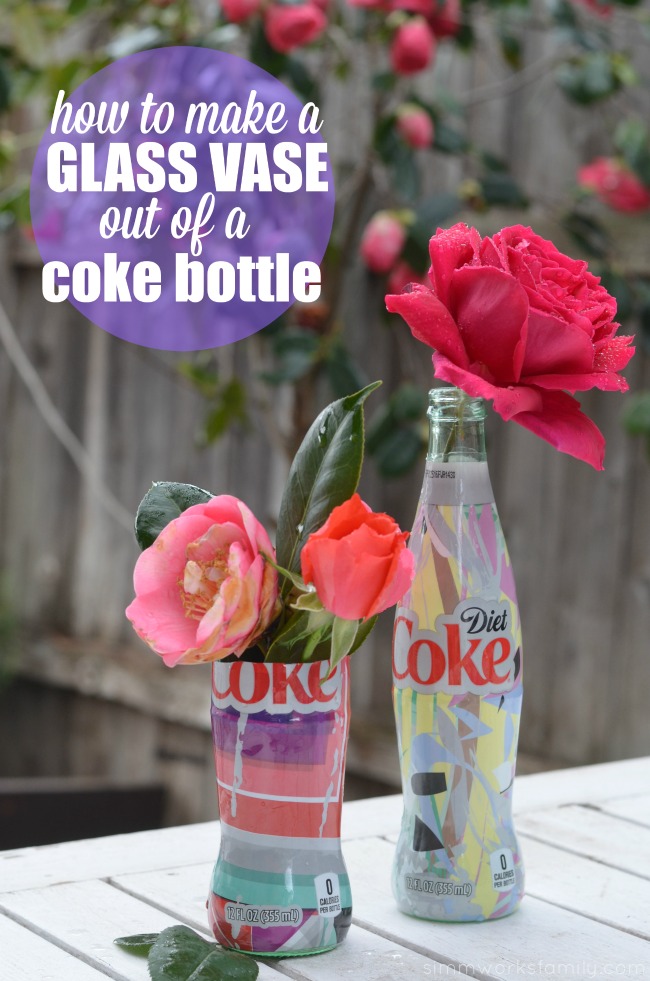
How To Make A Glass Vase Out Of A Coke Bottle - the perfect way to display garden roses

Upcycled Coke Bottle Vase

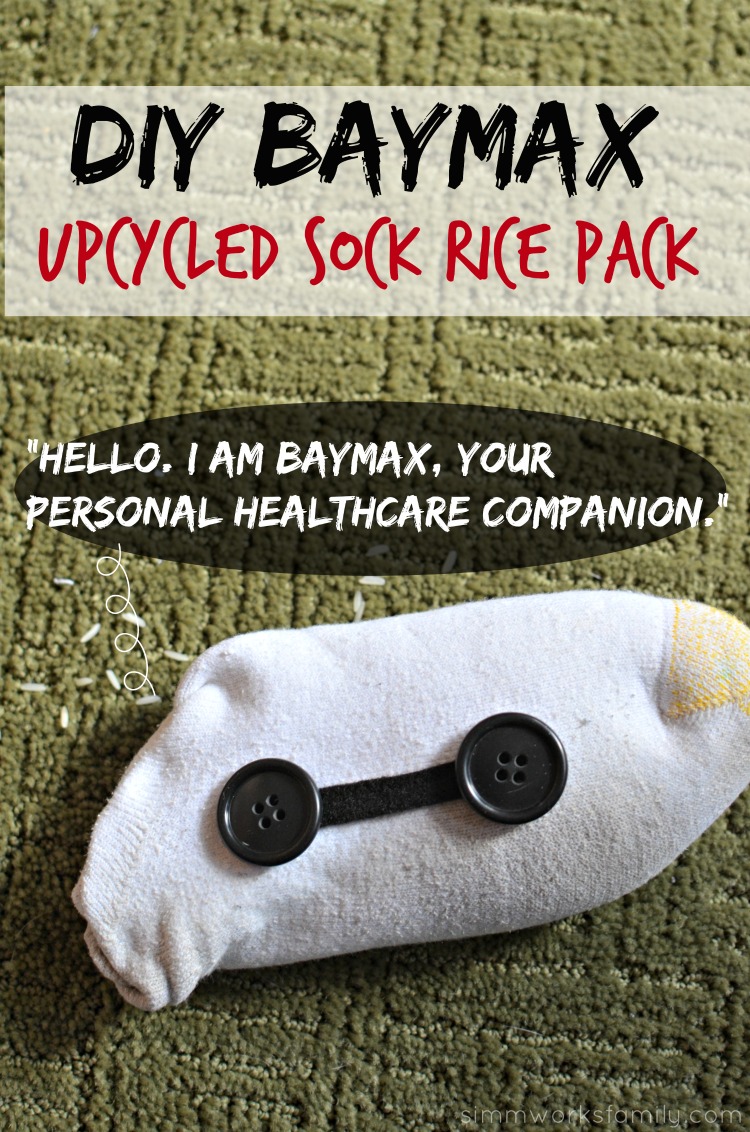
DIY Baymax Upcycled Sock Rice Pack

Upcycled Sock Rice Pack

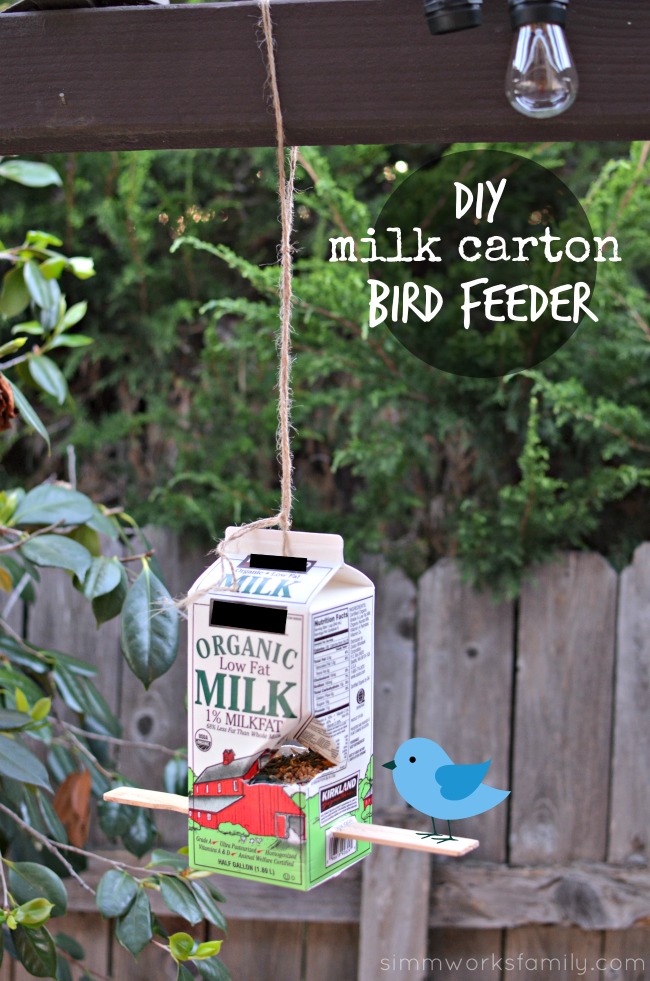
DIY Milk Carton Bird Feeder

Upcycled Milk Carton Bird Feeder


© A Crafty Spoonful - All Rights Reserved
It is OK to use one of my photos provided a link back and/or proper credit is given. It is NOT ok to copy and paste a whole post including instructions. Please do not remove watermarks or alter images in any way. Please contact me with any questions at danielle@acraftyspoonful.com

.