13 Thanksgiving Crafts and Decoration Ideas

Turkey Day Ideas - crafts and decor projects for Thanksgiving

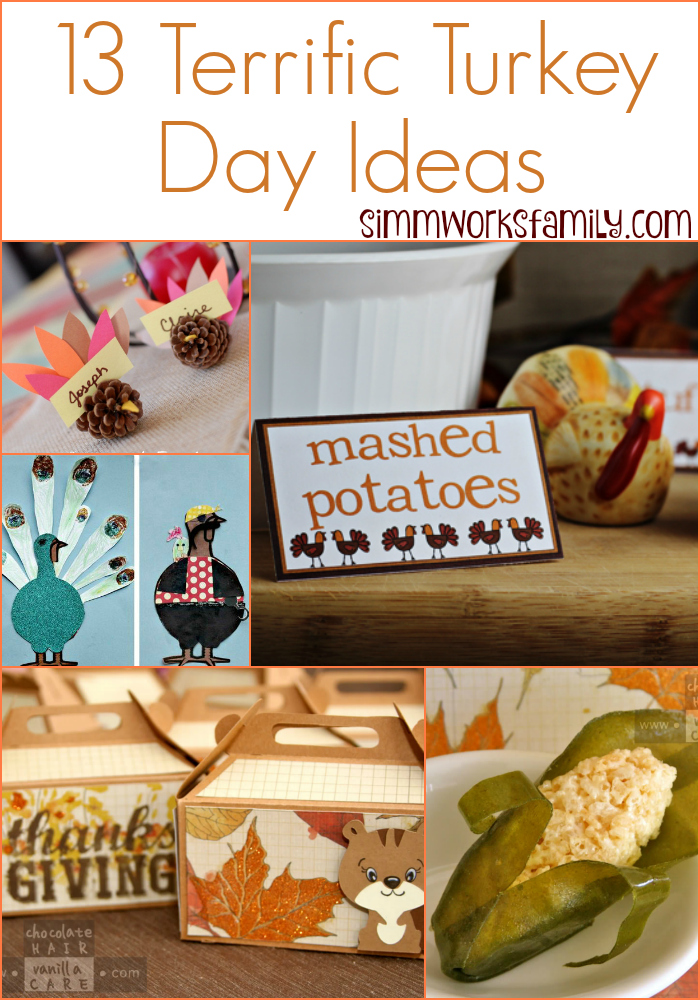
Yes, I know Halloween is right around the corner and I haven’t even finished my son’s Minecraft Spider costume, but my mind is skipping over to Thanksgiving already and I’m planning out our Thanksgiving meal. In addition to planning out the meal, I also want to include a few handmade crafts and decor ideas to the table and home to create a festive time for everyone! I’m already eyeing those rice krispy treat corns and our pinecone turkeys for the kiddy table dessert.

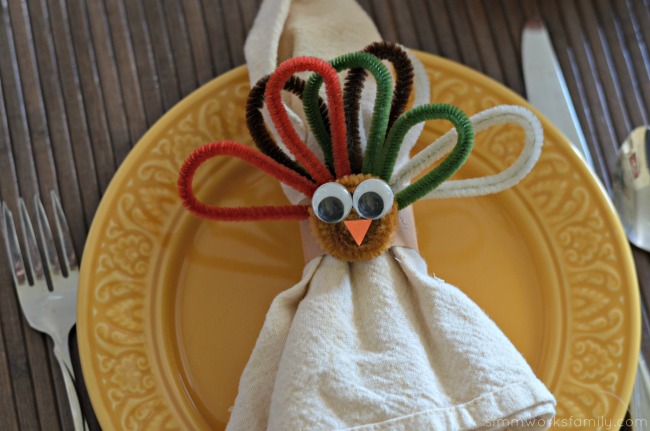
Turkey Napkin Rings - the perfect adornment to your holiday table

A few years ago we also had great response to our turkey napkin rings as well. They aren’t just for the kiddy table either! The adults enjoyed them as well.

We’re also going to help set up a fun Thanksgiving meal for my son’s school so we’ll be using a few of these crafts as things the kids can do after their party. Keeping things simple and creative will make them even more excited about what we have in store. Plus their parents will have a cute momento from that year’s holiday.

Pinecone Turkey Placecards play kids table

13 Thanksgiving Crafts and Decoration Ideas

Yellow Inspired Thanksgiving Table from Made with Happy

Disguise a Turkey from Create-Celebrate-Explore

Easy Thanksgiving-Themed Rice Krispies Treats from Chocolate Hair Vanilla Care

Thanksgiving Treat Boxes from Chocolate Hair Vanilla Care

Pine Cone Turkey Craft Place Cards from The Simple Parent

Grateful Turkey Box with Printable Note Cards from About A Mom

DIY Hanging Turkey Hands from JadeLouise Designs

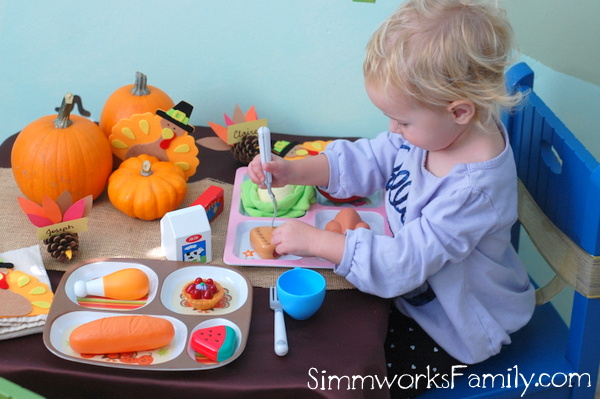
Fun Ways to Eat Healthy For Kids During the Holidays from Simmworks Family

Turkey Craft for Little Kids from Family Food and Travel

Handprint Thankful Trees from Adventures in Wunderland

DIY Thanksgiving Hot Wheels from Desert Chica

Thanksgiving Place Cards – Free Printable from Home Cooking Memories

Thanksgiving Humor: Turkey as it was never meant to be from Still Blonde After All These Years
Do you decorate the home for Thanksgiving?

10 Easy DIY Baby Costumes

10 Easy DIY Baby Costumes

Halloween is just around the corner and I cannot wait! Not only because it’s Halloween but it’s my youngest’s first Halloween. I love the holidays with a new baby! So many fun things to experience and do. I remember my oldest’s first Halloweentime. He absolutely loved the pumpkin patches, carving his first pumpkin (and eating the raw squash inside), and the fun party we went to with his friend.

In the spirit of Halloween, I love making my kids costumes most years. Sometimes they’re more difficult than others. However for the first Halloween? I love simple! Because babies don’t need a crazy, bulky, uncomfortable costume for their first Halloween. Here’s a list of easy baby costumes for your little one’s first Halloween!

10 Easy DIY Baby Costumes

Easy DIY Charlie Brown from Simmworks Family

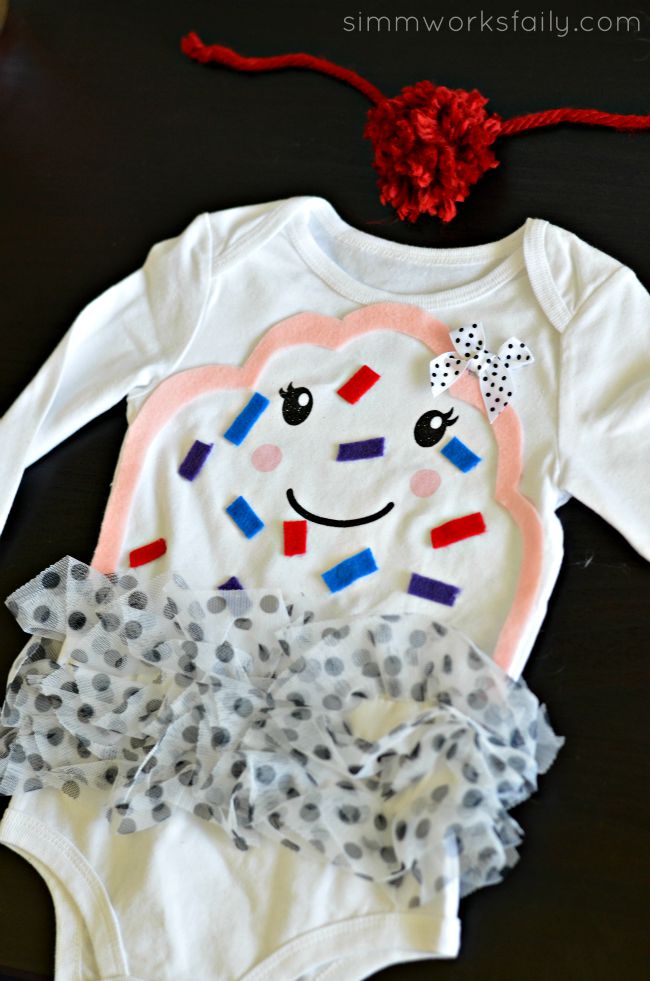
DIY Infant Cupcake from Simmworks Family

DIY Fabric Tutu Lion Costume from SlapDash Mom

No-Sew DIY Elmo Halloween Costume from Do Try This at Home

Where The Wild Things Are Costumes from Tried & True

Easy DIY Infant Bear Costume from It Happens in a Blink

Baby Shark Costume from At Home with Sweet T

DIY Cute Little Bee Costume from At Home with Sweet T

A Robber (parent or older sibling) and A Bag of Money (baby) from Domestic Imperfection

DIY Infant Mermaid Costume from The Pinning Mama

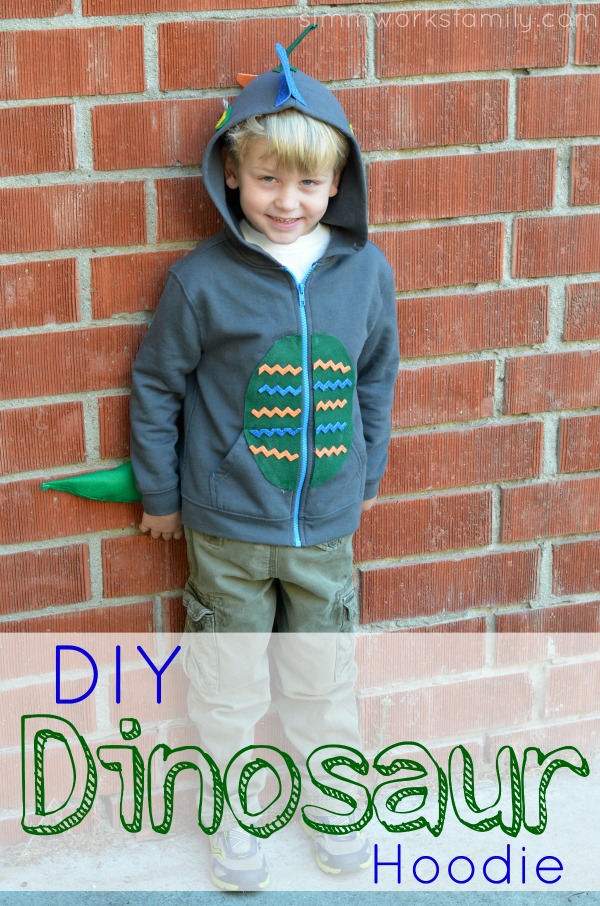
DIY Dinosaur Hoodie

DIY Dinosaur Hoodie

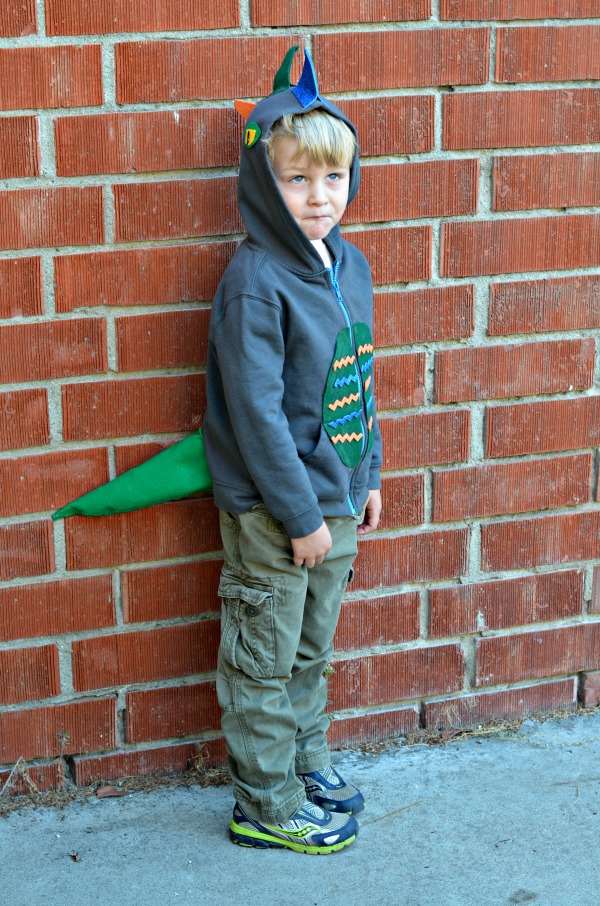
Last Halloween when I was busy figuring out costumes for the kids to wear I got a request from my son for a dinosaur costume. Since I know he doesn’t like big, full body costumes I thought that trying my hand at a DIY dinosaur hoodie would be easier for him to wear. Well a few months later and the hoodie is getting great use… as a fabulous addition to our dress up closet! And it’ll be the perfect thing to wear to The Good Dinosaur movie when it comes out on November 25th! 

Not only is this hoodie easy to make, it’s almost no-sew! With only a small bit of sewing needed (thanks to the wonderful product that is No Sew), even the amateur crafter can pull off this simple costume. All you need are some matching pants and some socks to cover your shoes and you have the perfect DIY costume for Halloween.

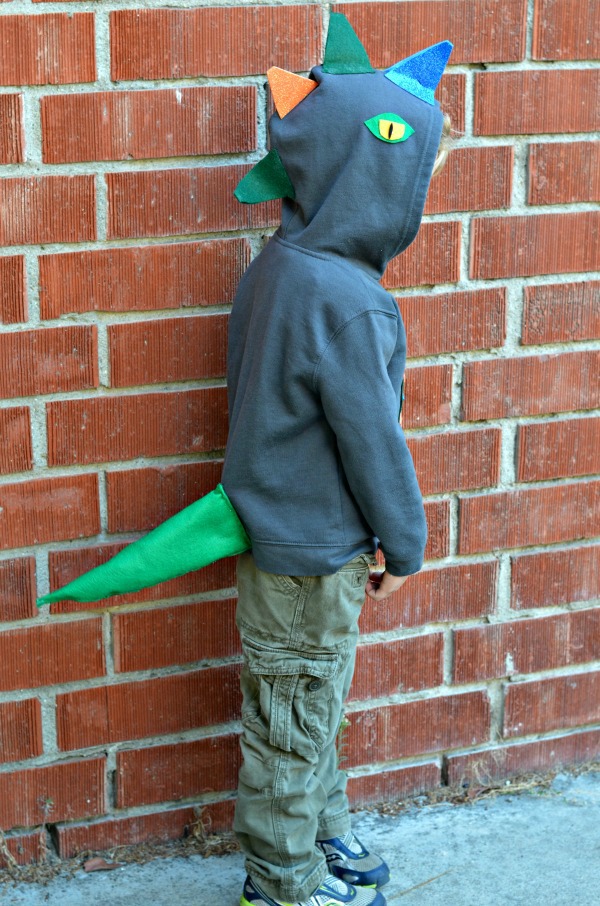
DIY Dinosaur Hoodie side profile

DIY Dinosaur Hoodie

What you need:

  • zip up hoodie jacket
  • adhesive felt in different colors (for spikes, eyes, and belly)
  • 1 piece regular felt (for tail) + more for stuffing tail
  • No Sew adhesive for fabric
  • needle and thread

What you do:

  1. Cut out 8 triangle shapes for spikes.
  2. Cut out a circle in one color felt. Cut that circle in half and adhere to either side of zipper on belly of jacket. Cut out zig zag pattern for decoration for belly in different colors and adhere to half circles.
  3. Cut out eyes using one color for the eye lid, one color for the eyeball, and one color for the pupil.
  4. Take felt for tail and create a cone. Using No Sew adhesive, glue cone in shape so that it stays. Trim away any additional felt.
  5. Stuff tail cone with additional felt and use No Sew to close cone opening.
  6. Using needle and thread, adhere cone tail to bottom back of jacket to secure in place.
  7. Add spikes to the hoodie of the jacket by taking two triangles, removing the adhesive backing, and placing together on the seam of the hoodie.
  8. Make sure about 1/2 an inch is attached to the jacket hoodie with the rest adhering to the other triangle. Use No Sew if additional adhesion is needed. Repeat with other three spikes.
  9. Adhere eyes to side of hood to give the illusion of dino eyes when the jacket is on.
  10. Let No Sew dry completely before letting your child wear the jacket.

Diy Dinosaur Hoodie 2

What themed hoodie would you love to create for Halloween?

THE GOOD DINOSAUR opens in theatres everywhere on November 25th!

Like THE GOOD DINOSAUR on Facebook | Follow @THEGOODDINOSAUR on Twitter | Visit the official THE GOOD DINOSAUR website

A little sneak peek at the movie:

DIY Potato Stamps for Kids

DIY Potato Stamps

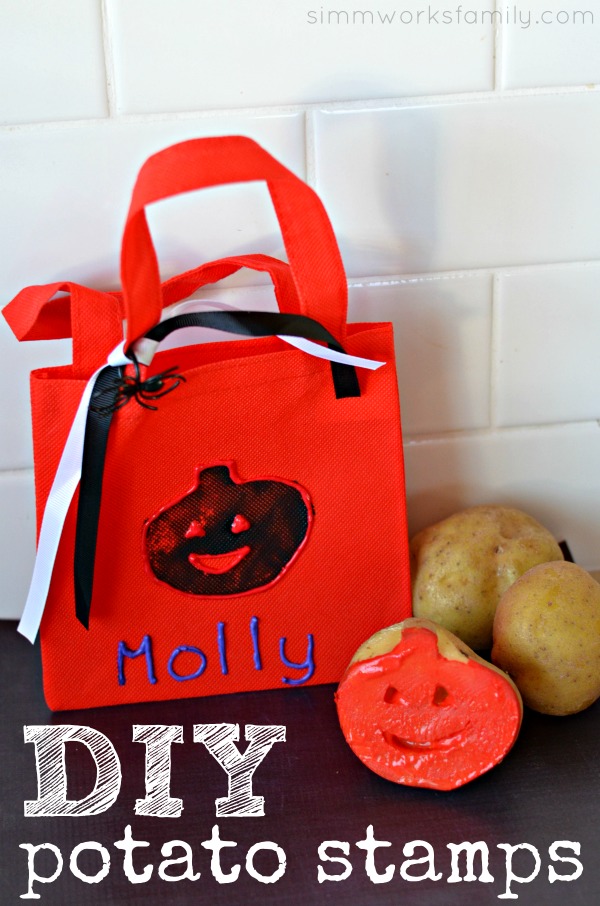
Ever have potatoes lying around that are starting to grow eyes and you just grab them and toss them? Well stop! I’ll show you how you can turn those questionable spuds into a fun craft for your kids with these DIY potato stamps!

Simply grab some washable paint, some paper plates, a few taters and a small knife for carving. Then decide what you want to stamp on.

Get ready for some fun…

DIY Potato Stamps

What you need:

  • potatoes
  • small pairing knife or pumpkin carving knife
  • paper plates
  • washable paint
  • surface to stamp (paper, cloth, etc)

What you do:

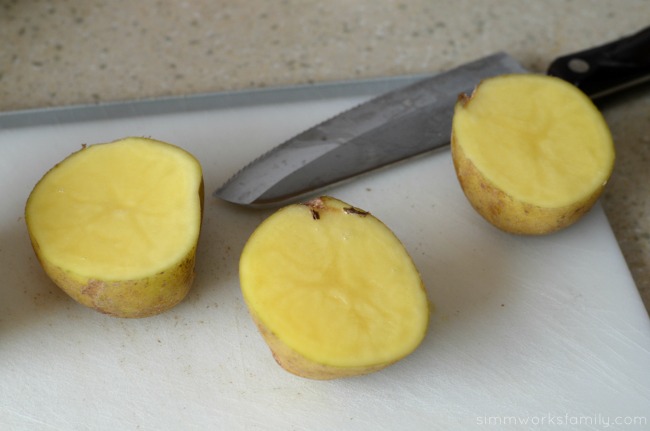
1. Cut the potato in half.
potato stamps potatoes

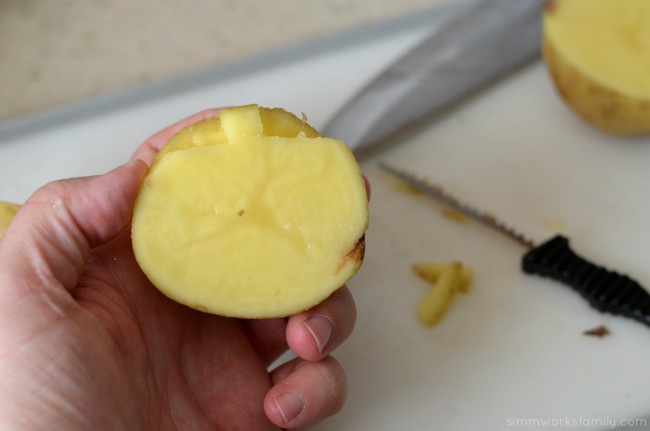
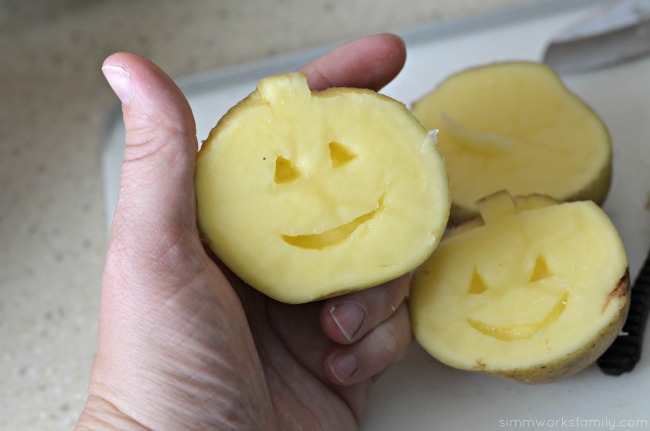
2. Decide what you’re going to cut and cut out the outline leaving a good portion of the potato left to grab onto. Since we were making Halloween treat bags on Halloween we went with pumpkins.

*Tip: Use a small cookie cutter to make your shape. Push the cookie cutter in about 1/4 of an inch deep and then while the cookie cutter is still in the potato, use a knife to cut off the excess.

potato stamps cut out shape

3. Cut out the design you want in your potato. We went festive with these jack-o-lanterns for the treat bags. But anything can be carved out and made into a stamp!

potato stamps cut out details

4. Grab the paper plates and paint and get stamping!

What would you stamp out with your potato stamp?


DIY Infant Cupcake Costume: An Easy Way For Baby To Dress Up

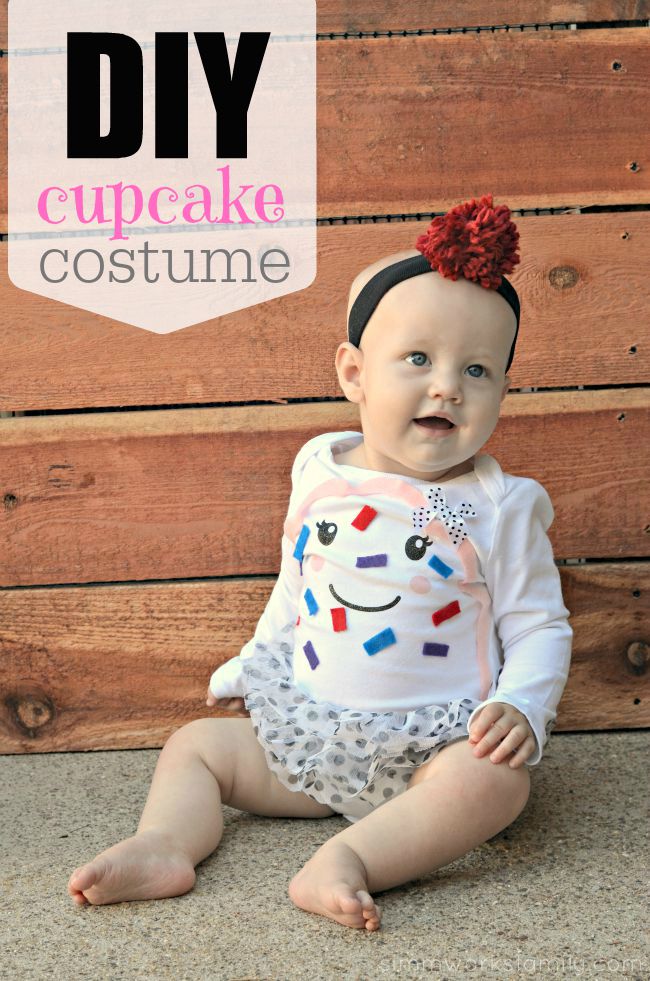
Looking for a cute costume for your baby? This DIY cupcake costume is a no-sew option that is absolutely perfect for baby.

DIY Infant Cupcake Costume with a onesie
One thing I’ve never been a fan of are big, awkward costumes for babies and little kids. I like something that’s breathable, moveable, and comfortable. Because each of my little ones has been mobile around the time their first Halloween came around, I’ve chosen to either make or purchase simple costumes that feel more like clothes than costumes for the little ones. My son was Charlie Brown for his first Halloween and my oldest daughter was a sushi roll.


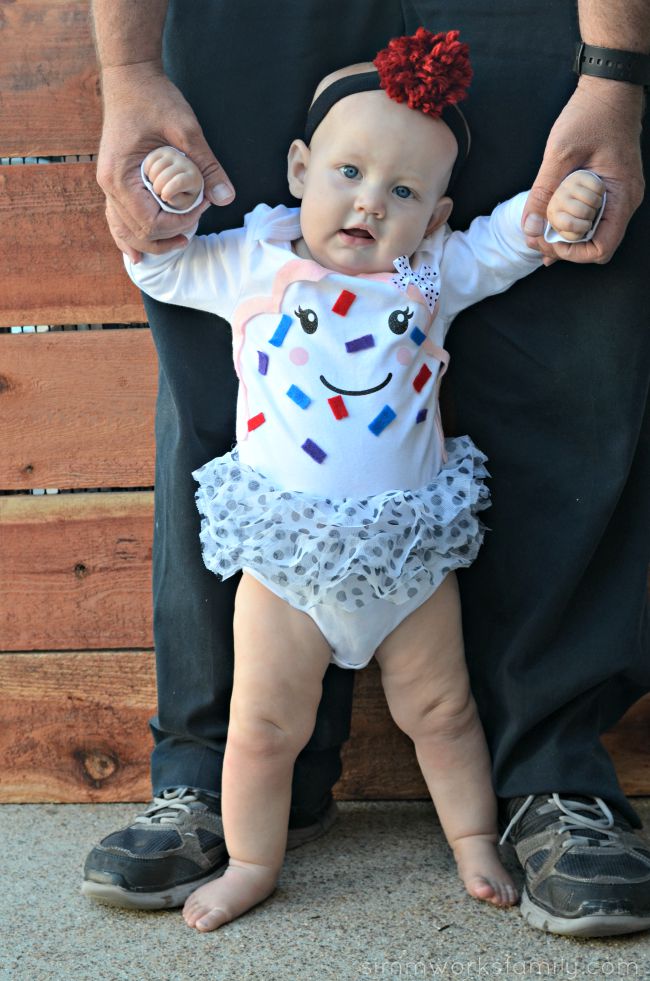
This year is Norah’s first Halloween and just like her older brother and sister, I want her costume to be just as comfortable to move around with. However I got a little excited last year and purchased a cupcake costume on clearance after Halloween. The cupcake costume is simple but comes with a little hat. Since I wasn’t sure if she’d care for the costume, I decided to make a onesie to match. That way if we need to take her costume off at any point during the festivities we partake in, she’ll still be in costume! And? It was SO simple to make.

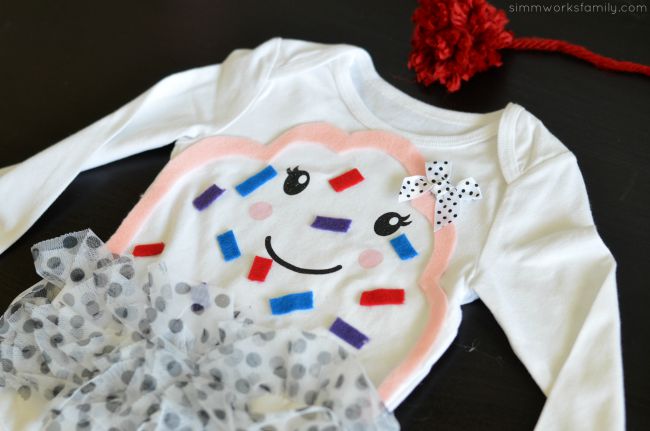
DIY Infant Cupcake Costume details

After heading to the store for some diapers, I was perusing the costumes and Halloween items they had up front and found the most adorable ghost onesie that would be perfect to match the cupcake costume! It’d just take a little felt and some hot glue to turn it into a cute cupcake onesie. The other onesies they had there would also be great for alternative costumes to wear under big costumes.

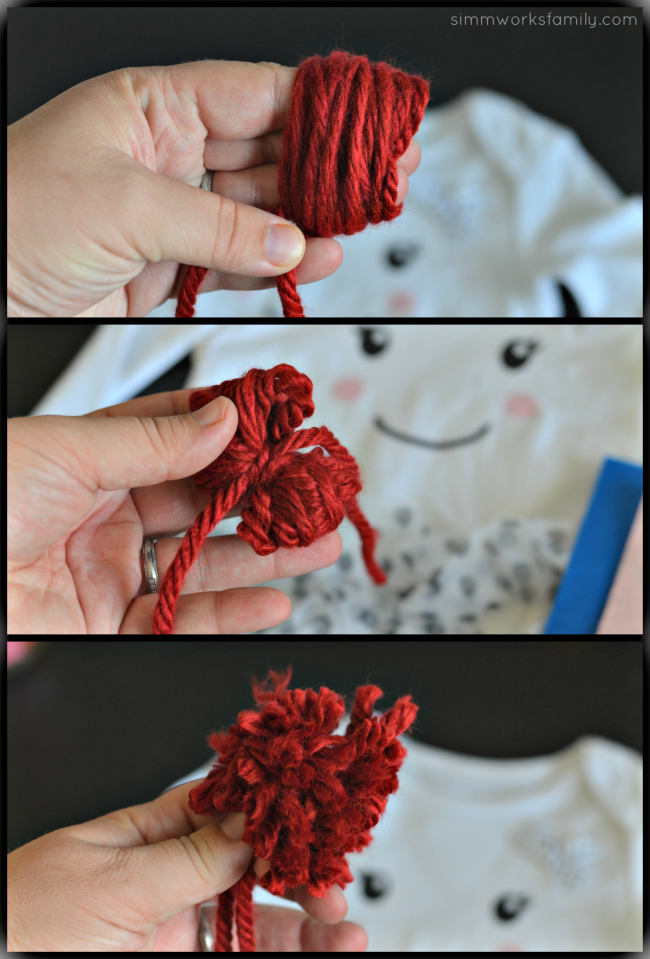
I started with making a cute pom out of red yarn to attach to a headband to act as a cherry on top to complete her outfit. Since I know she’ll wear a headband as long as she forgets about it, I thought this would be perfect for her costume as well in case she doesn’t wear the hat that came with it. Making poms out of yarn is super simple! Here’s how:

DIY Infant Cupcake Costume - cherry poof

Easy DIY Pom Ball

What you’ll need: 

  • yarn
  • scissors
  • fingers

What you do: 

1. Take 2-3 fingers (depending on the size you want the pom to be) and wrap the yarn around your fingers a few times. More if you want a thicker pom, less if you want a thinner pom. Make sure to leave a tail on either end that’s about 3 inches long.

2. Take the wrapped yarn off your fingers and wrap in the center with the end of the yarn. Tie both ends together to secure the pom with a knot or two.

3. Cut the loops in each side and fluff up. Using the scissors, even up the pom so it’s somewhat level all around. Leave the ends longer so you can tie to a headband or sew to a hat.

Now it’s time to make the onesie! And, confession, this took less than 10 minutes to make from start to finish. So it’s the perfect last minute costume

DIY Infant Cupcake Costume with Cherry

DIY Infant Cupcake Costume

What you’ll need: 

  • onesie
  • fabric marker
  • scissors
  • felt in a variety of colors (brown too if you don’t have a onesie with ruffles at the bottom)
  • hot glue gun w/ hot glue sticks

What you do: 

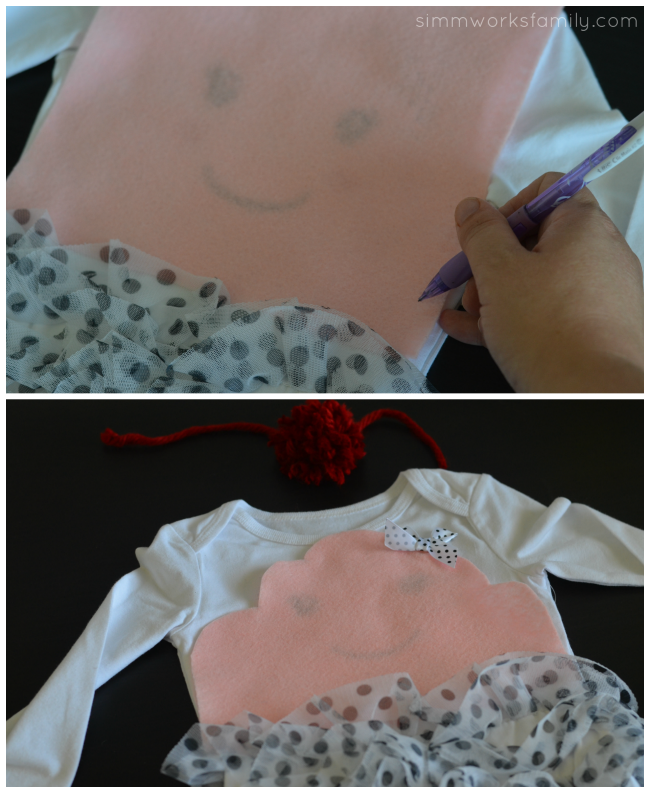
1. Grab a piece of felt to make the outline of a cupcake top for your costume. Choose whatever color you want the outline to be.

DIY Infant Cupcake Costume - trace cupcake form

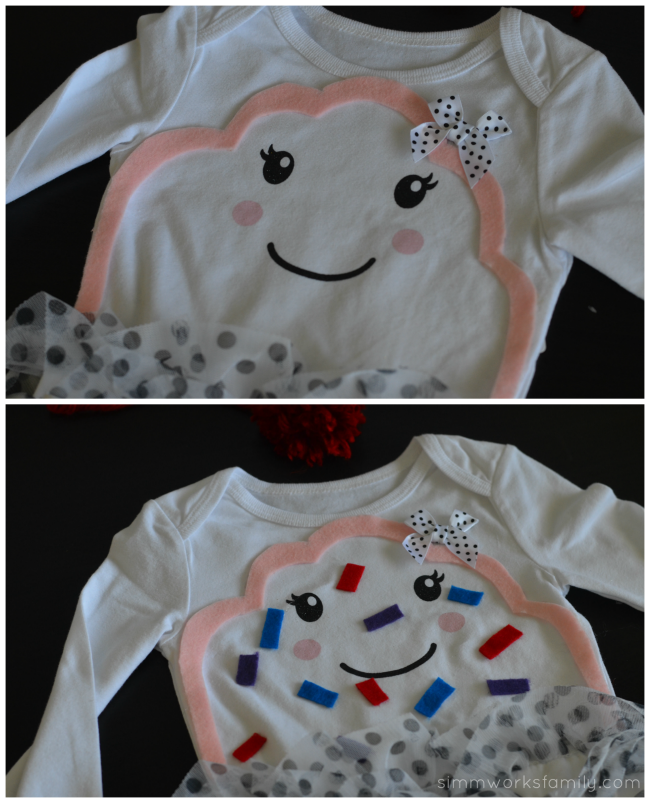
2. Once you have the outline traced, cut out the cupcake top and place on the onesie to get an idea of how thick you want the outline to be. Then cut out the outline and glue down to the onesie.

DIY Infant Cupcake Costume - glue on felt

3. Take a few other felt colors and cut into small rectangles. Glue inside the cupcake top outline to look like sprinkles on the cupcake.

All done! Add a pair of black pants to the outfit to complete it on Halloween night if you need something a bit warmer.

DIY Infant Cupcake Costume An Easy Way For Baby To Dress Up

What are your favorite infant costume idea!

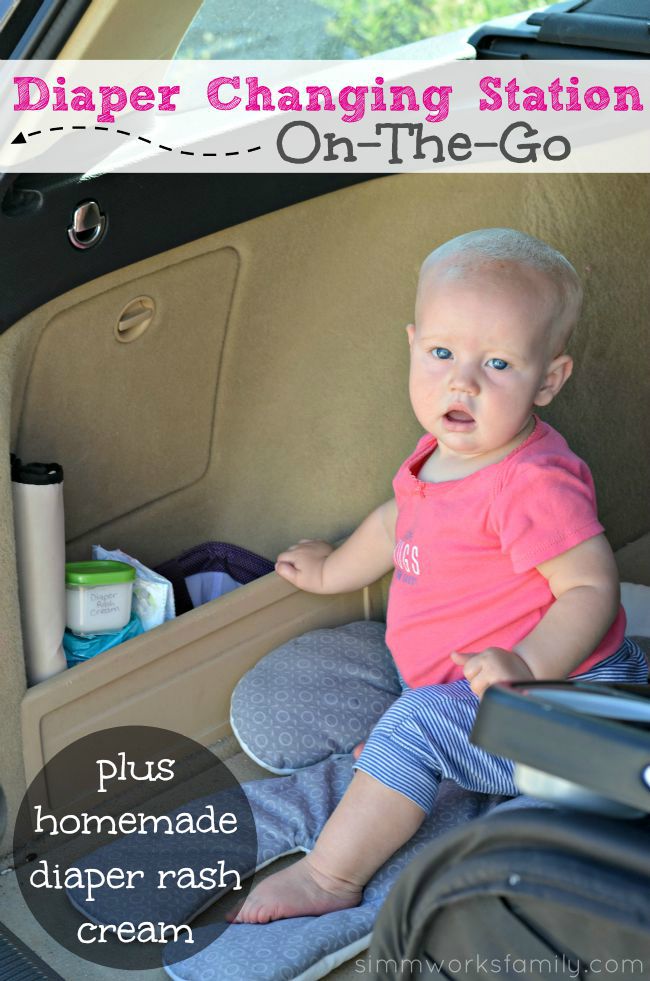
Diaper Changing Station On The Go For Busy Moms

Today we’re sharing how to create a simple and easy diaper changing station on the go for busy moms! This post was sponsored by Sam’s Club®, however, the text and opinions are all my own.

Diaper Changing Station On The Go For Busy Moms

I love being busy. I love having places to go, people to see, and things to do. But traveling with a baby means traveling with a lot of stuff. Or does it?

By making my trunk into a diaper changing station (and gear storage for the stroller) I’m able to take less with me when we leave the car. Talk about a mommy survival kit! And stocking my diaper changing station is made easier with the awesome deals Sam’s Club® has on baby essentials. Diapers, wipes, diaper cream, baby wash, and more!

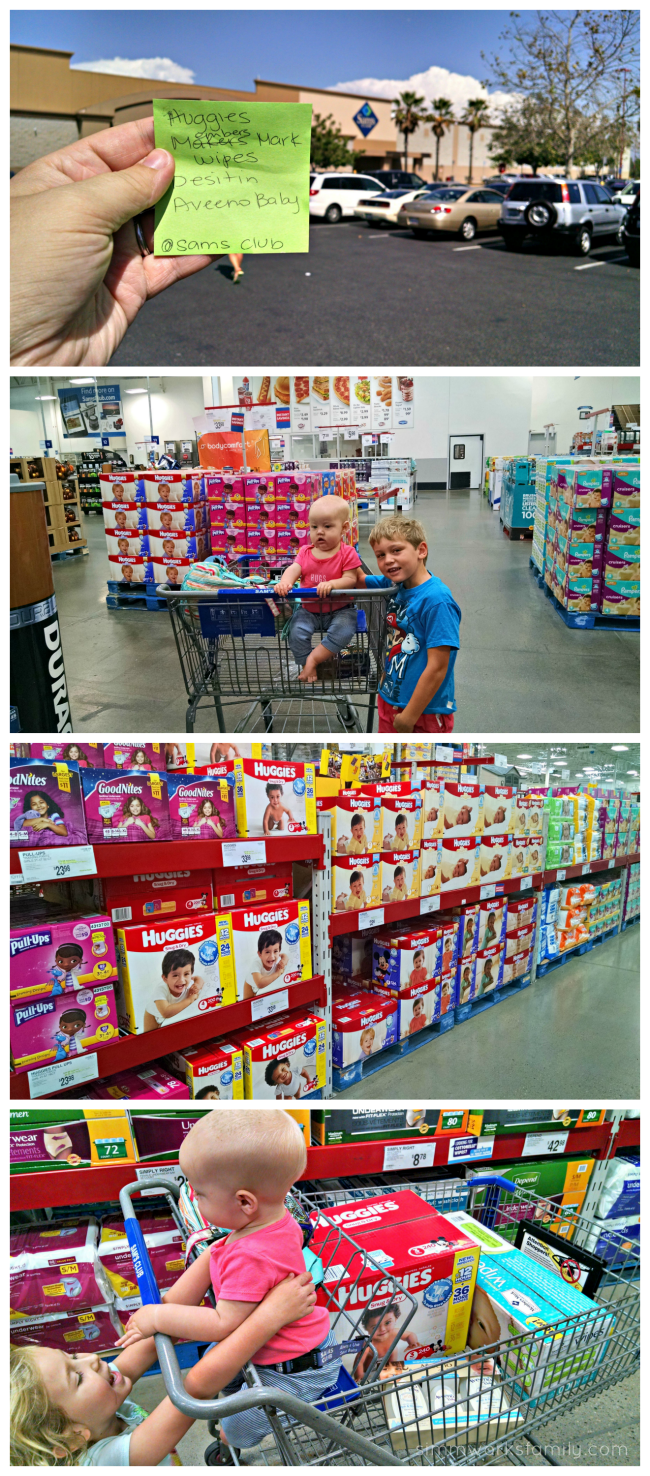
Savings on diapers is huge right now and they not only have Huggies snug & dry but they have their new little movers as well! And since my little mover just started moving, this is a great diaper to have on hand.

Sam's Club Essentials for Mom

And yes, I totally wrote Makers Mark first when I was writing my list. It’s been that kind of a week. But thanks to Sam’s Club, I won’t have to worry about going on a diaper or wipes run for a while. Yay! Not only am I saving money but I’m saving time too. I can  easily stock up on exactly what I need for the kids and my baby every time I go there.

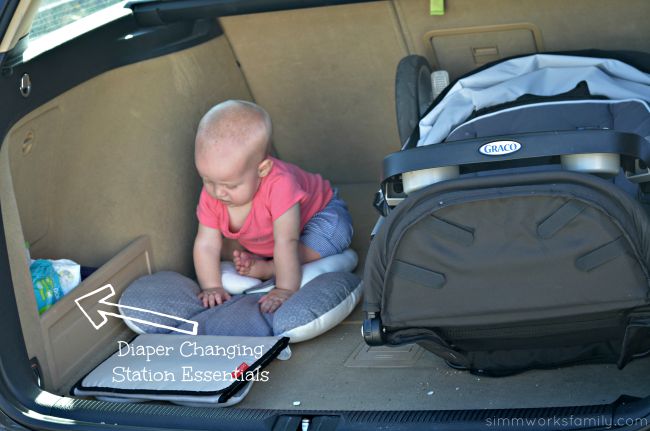
In addition to saving time and money by shopping at Sam’s Club, I also save room in my diaper bag by keeping the kids essentials in the trunk. We have a change of clothes for each child in a wet bag just in case, we have a light jacket for each kid as well, and we have various hats. And when Norah came along I also made a diaper changing station in the back too. Here’s what we have back there: 

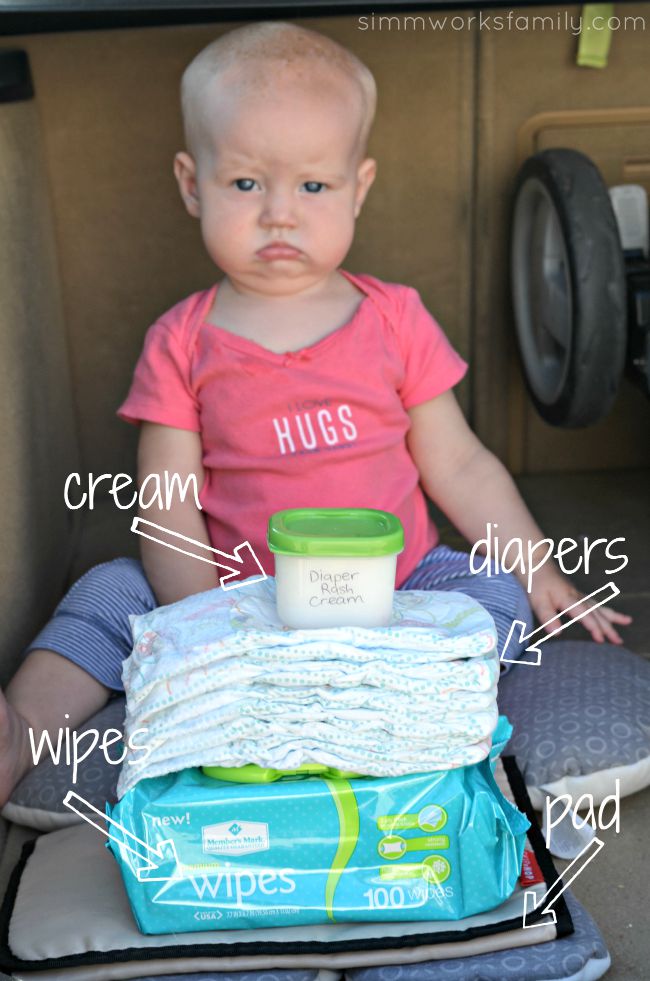
Diaper Changing Station On The Go EssentialsDiaper Changing Station On The Go For Busy Moms - what's needed

Diaper Changing Station

What You Need: 

  • Huggies Diapers
  • Member’s Mark Wipes
  • Homemade Diaper Rash Cream (you can also find Desitin at Sam’s Club)
  • Old Changing Pad found in any diaper bag (or a reusable shopping bag)
  • Small trash can/bin

What You Do:

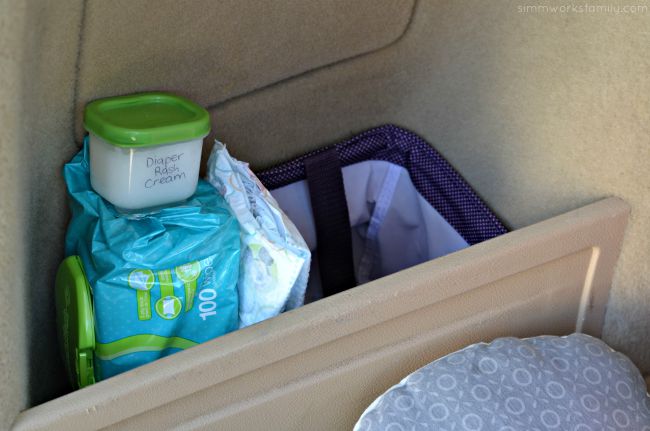
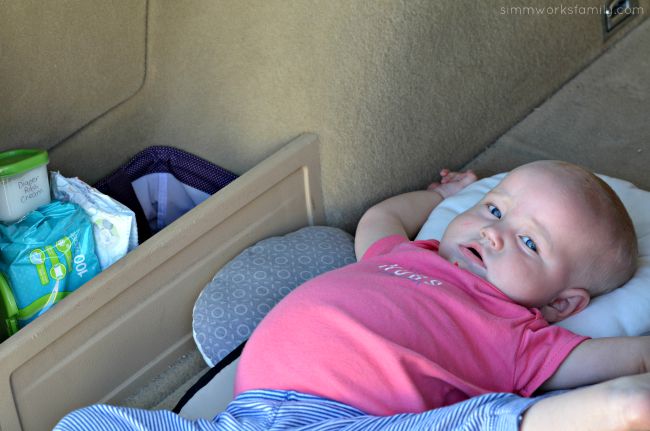
To keep everything together I stack everything in the small compartment to the side of my trunk. If I didn’t have this compartment I’d use a wet bag to hold everything in when I needed it.

By keeping extra diapers, wipes, and diaper rash cream in the back alongside a small trash pail from Thirty One, we have a one stop shop any time we need it. That means when we can’t find a diaper changing station in the restroom at a restaurant or we’re at the local park or museum hanging out, I can just step over to the car to change the baby.

My shoulder thanks me. When I don’t have to lug all of this stuff around. In my diaper bag currently are 2 Huggies diapers, 1 small pack of wipes, a onesie, my wallet, and some snacks. That’s a LOT less than what I carried when I had my first child. Oy. I would have brought the kitchen sink if I could have when I had him! And I started making some diaper rash cream to have on hand for the little rashes that come about. It’s super easy to make too!

Diaper Changing Station On The Go with homemade diaper rash cream

Diaper Rash Cream

  • 1/2 cup coconut oil
  • 3 drops tea tree oil
  • 3 drops lavender oil

Mix together coconut oil and essential oils well. Place in a container and seal well.

Use a small amount and rub over the affected areas to soothe your child’s skin.

Please note that coconut oil turns from a liquid to a solid state and it’s completely normal! Do not use essential oils directly on the skin.

Diaper Changing Station On The Go For Busy Moms - cushion and pad

Sam’s Club is the perfect place for moms! They carry our favorite brands AND high quality private brands at an equal quality for a lower price. We purchase Huggies diapers and Member’s Mark wipes. They also have baby wash, diaper cream, and more. When you join through this link you start saving –  you get $80 in Instant Savings on baby items like diapers, wipes, formula, etc.* – on top of the every day savings. And for only $45, I feel like I’m already saving money as soon as I sign up. 

Plus with the convenience of SamsClub.com we can spend more time with our family at home and we get free standard shipping on most diapers and wipes! The subscription service lets us set shipping intervals on most baby items we use most when we need them so we don’t have to worry about running out. Talk about a life saver.  And with Club Pickup we can shorten our shopping trips by saving shopping lists online for easy repeat purchases. We complete our order online for pickup and receive a text when the order is ready. You can get details at samsclub.com/pickup

Diaper Changing Station On The Go in the car

Are you a Sam’s Club member? What’s your must-have item every time you go?

*New members must join through this link in order to receive the $80 special savings. This is a special offer that is only available for moms who join through the link.

Sam’s Club provides big savings for growing families, join and get $80 in special savings on baby basics.

This post was sponsored by Sam’s Club, however, the text and opinions are all my own.

Water Conservation Tips: What Can You Do?

Tracking Pixel

In California right now we’re in a serious drought. That means water conservation is at an all time high. With these few simple water conservation tips, sponsored by Scotts® EveryDrop™, we can reduce water usage and maximize other options. 

Water Conservation Tips What Can You Do

I’ve lived in San Diego all of my life. And for as long as I can remember, we’ve always been in a drought. Water conservation is just something we do. I remember learning about 2 minute showers at 6th Grade Camp. And actually trying to recreate them at home. And we’ve never had a lush green lawn during the summer and fall months unless there was a good rain storm. Brown lawns with a hint of green is just normal.

Adjusting to this way of life may be easy for our family, but for others it can be a hard adjustment. So I’ve compiled a list of everything we’re doing at our home to reduce our water usage and reuse the water that we do use. Keep in mind that we are a family of 5 with multiple pets (including a large pond outside with fish and a turtle). Every water used in this house is considered precious.

Water Conservation Tips: What Can You Do?

rain barrel rebate program san diego

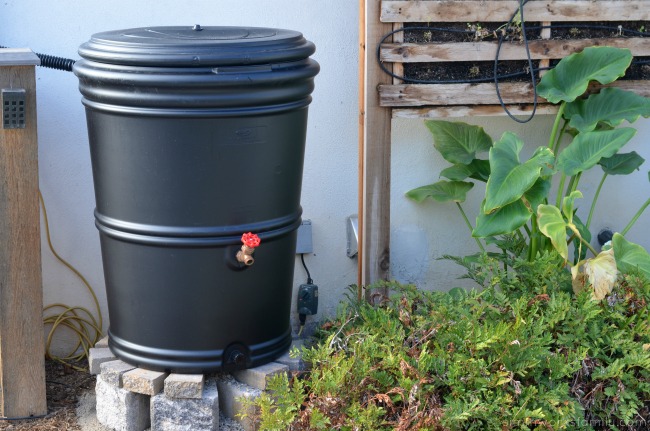
1. Rain Barrels

After the City of San Diego offered rebates for rain barrels, my husband went out and picked up two for our old house. After the first big rain storm both were filled to the brim with water we could use for our lawn, plants, and vegetable garden. Talk about a savings in water. We were stoked! Each rainfall would easily fill our rain barrels and we found that we’d need even MORE room to store all of the rain. So we considered upgrading. Until we decided to move to a new home.

So whe we moved to our new house and found out that the rebate was per residence, and not per family, we jumped at getting a few more rain barrels for the new home as well. And we went up in size. The rain barrels we first got were 2 70 gallon barrels. This time we’re upgrading to 3. Since we have a larger house, we have a larger roof and more water collecting potential. By utilizing the rain we collect to water our plants and edibles, we are saving on using water from our sprinkler system. But first we have to put up rain gutters…

Adding Desert Plants to Your Garden xeriscaping

2. Greywater Reuse

In addition to using the water from our rain barrels, we’re also going to be taking advantage of using the greywater from our washer in the garage to keep our lawns green. With kids, we know we want to have a green space for them to play. And while most of our landscaping is drought resistant plants or edibles (more on those later), having a patch of lawn IS doable in a drought area by utilizing all of the water we have available.

I’ll be posting about our greywater collection system and what we use to collect the water and how we use it to water our grass. We’ll steer clear of using it to water the garden due to the soap residue from our eco-friendly laundry soap.

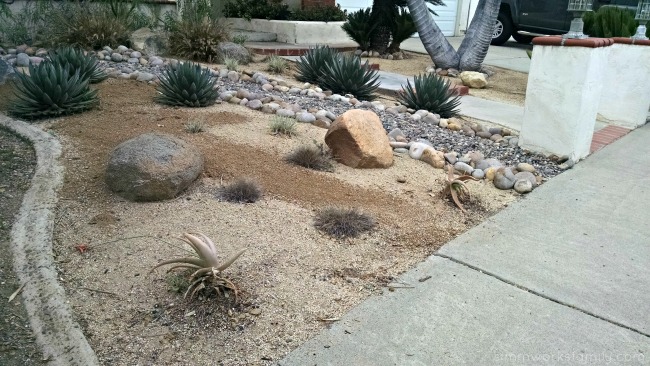
3. Desert Scaping | Drought Resistant Plants

Even though we want to have a patch of green lawn for our kids, the rest of our landscape – except the edibles – are drought resistant plants. I was able to get some great ideas on what plants to use in our design on one of my many visits to City Farmer’s Nursery. I highly suggest heading to a local nursery to talk to them about your options.

I love that I can still have a beautiful landscape while saving on our use of water. Plus I’d rather be using the water we do use on our edibles or the lawn so choosing plants native to Southern California was important. And there are quite a lot of plants that are native to this area to use in our yards. The added bonus? Because they’re so used to this climate, they take less care. Most of the plants, once they have been established, can survive by just waiting for the little rainfall that comes and some pruning a few times a year.

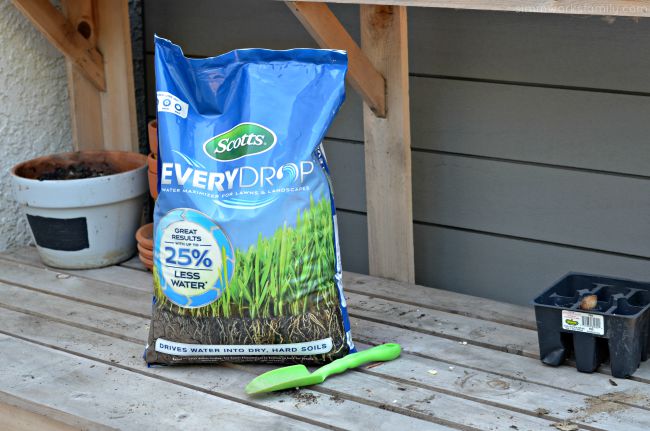
Water Conservation Tips What Can You Do - Scotts EveryDrop Water Maximizer

4. Water Maximizer

When we do water our lawn, we want to make sure that each drop of water we put in it is used efficiently. Especially because we’re limited to watering only two days a week and 5 minutes per station based on the new Mandatory Water Use Restrictions in the City of San Diego.

By using Scotts® EveryDrop™ in our yard we can do just that. EveryDrop™ is a unique blend of wetting agents designed to help move water into the soil, consistently and evenly. This helps to reduce wasteful runoff and pooling. Whether relying on rain, sprinklers or hoses from our greywater, EveryDrop™ helps to make the most of available water. 

Well-fed lawns and plants are more efficient at using available water so make sure to feed your plants and edibles with fertilizer to maximize their potential.

5. Plant Edibles Instead

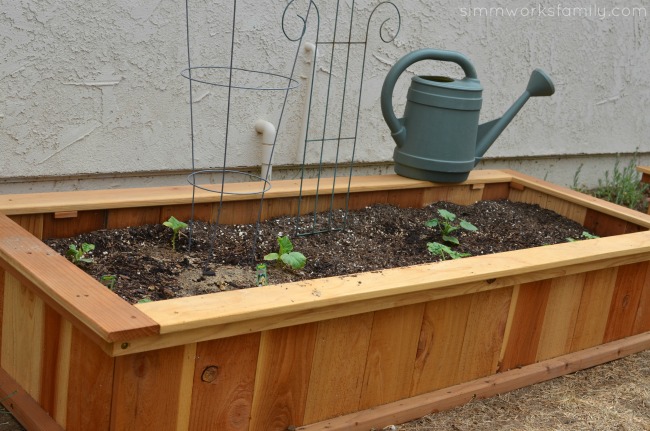
While other plants may look better, planting edibles instead means that your using that rainwater you are collecting to feed your family, not just water some random plants in your yard to keep them green and looking pretty. By planting edibles in your yard, you can create a beautiful landscape while providing a food source. Plus, gardening with kids can make their backyard (or front yard!) into a learning experience that’s fun!

You’d be surprised at how pretty some edibles are. I have two planters out front filled with various lettuces because they’re so pretty. And you’d be surprised at just how pretty an artichoke is when it turns into a flower and goes to seed. Gorgeous!

Green Work of Art in the Garden

How do you conserve water?

Disclaimer: This is a sponsored post written by me on behalf of Scotts® EveryDrop™.

How to Build a Vertical Garden Using Pallets

 This post contains affiliate links. 

How to Build a Vertical Garden Using Pallets

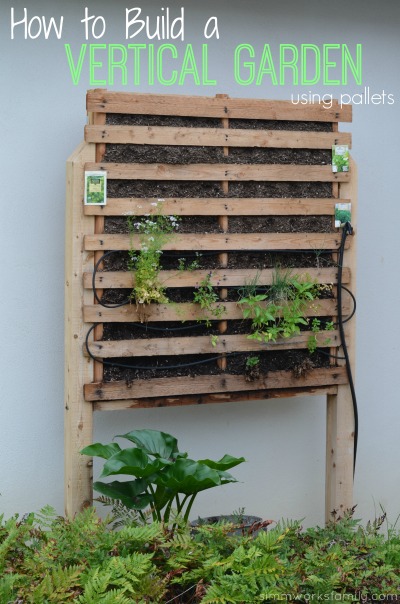
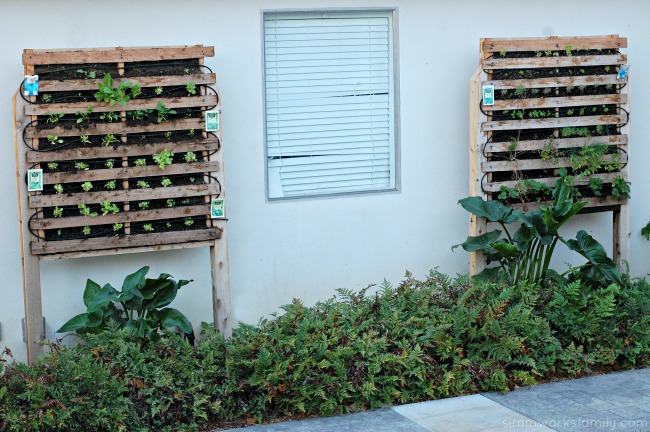
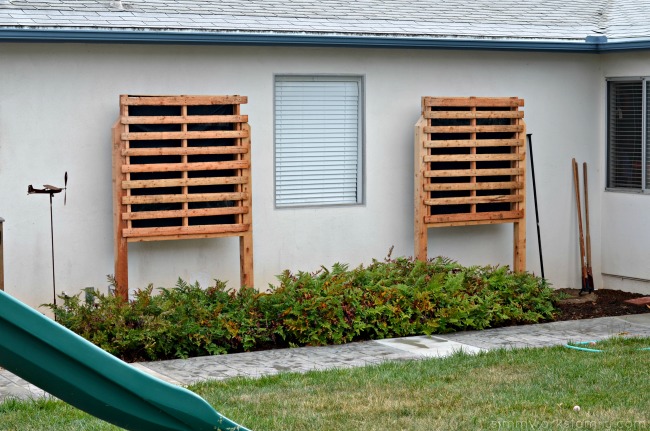
Ever wonder what else you can do with pallets? I mean besides the thousands of other ideas you find all over the interwebs? Well, my husband and I figured out how to build a vertical garden using pallets. And they’re quite fun!

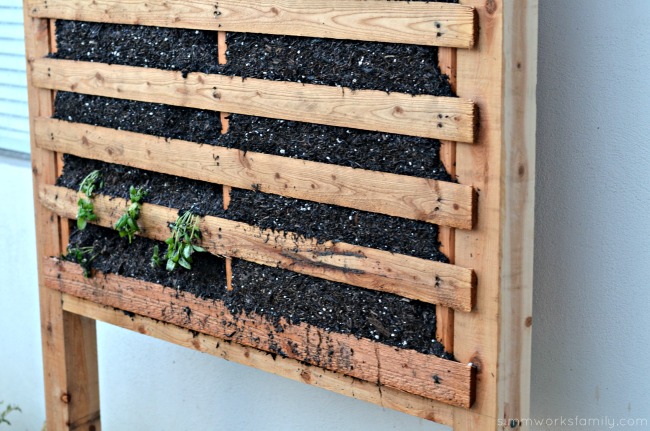
Now, I want to tell you right now that we’ve had some interesting finds when building these. The first? It’s really difficult to get dirt to stay IN the pallets once you start watering them. Especially if you don’t use a soaker hose line and just spray them with the garden hose.

My son had fun with the muddy clumps that came with that! But once the dirt is settled into the pallets it’s actually quite a good way to grow fun things and makes an awesome display for your yard.

build a vertical garden using pallets - before

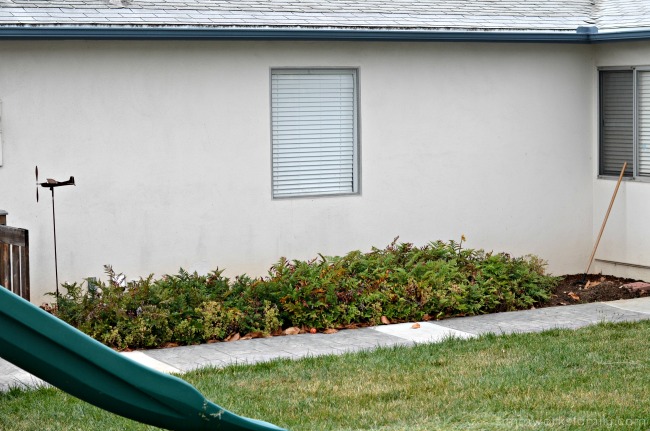
This above was the side of our house in the front yard before we put the pallets in. I hated how empty and plain the space was and wanted to use the vertical garden to spruce it up and bring life to this part of the yard.

I don’t think my husband quite understood exactly what I was envisioning in my head but with some team work, a few dirty looks and rolling eyes, and some muddy kids, we got it done.

Oh… and if you’re having trouble finding pallets because everyone and their mom is grabbing them up to make things like this, go to Home Depot or whatever other hardware stores you have around and ask for their sod pallets. They’re more flimsy/rickety (hence the support added) but are perfect for this type of project!

Here’s how!

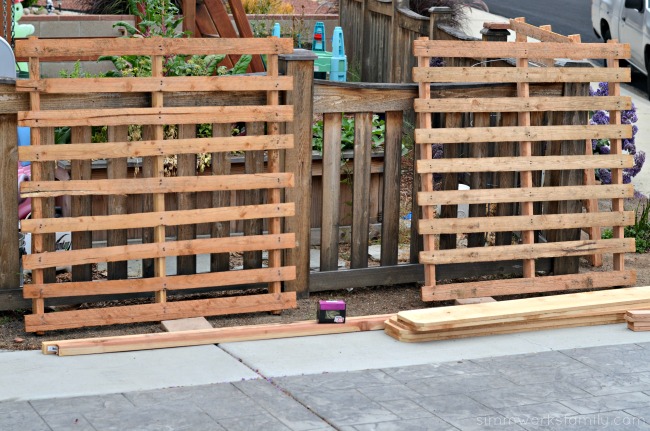
build a vertical garden using pallets - pallets

How to Build a Vertical Garden Using Pallets

Supplies:

Wood

  • wooden pallet
  • 2×2 doug fir
  • 2×4 doug fir
  • 1×8 cedar fence board
  • 2 4×4 cedar posts

Materials

What you do:

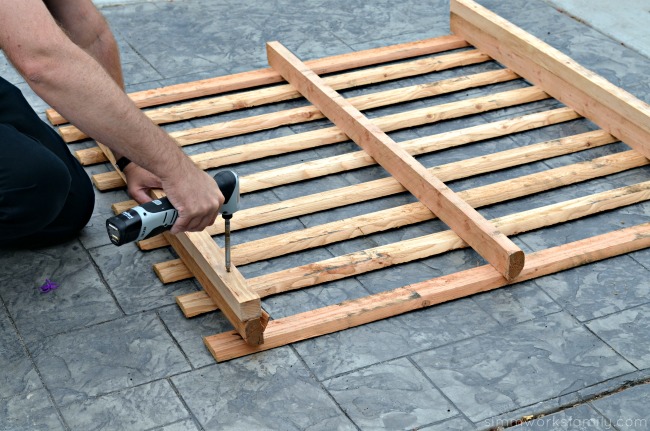
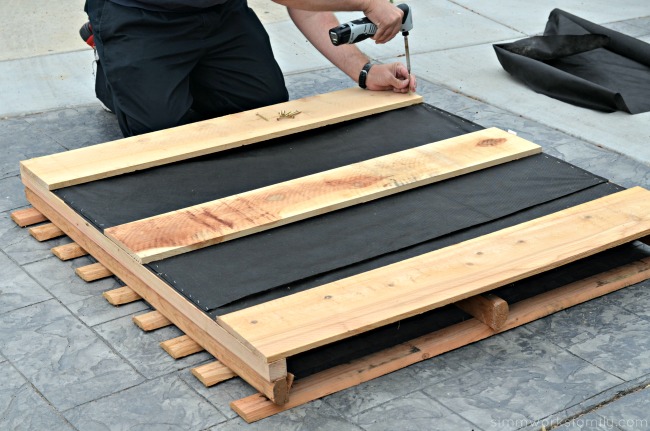
build a vertical garden using pallets - drilling on support beams1. Measure length of pallet and cut 2x2s to that length. These will give extra support to the pallet.

build a vertical garden using pallets - staple black garden cloth

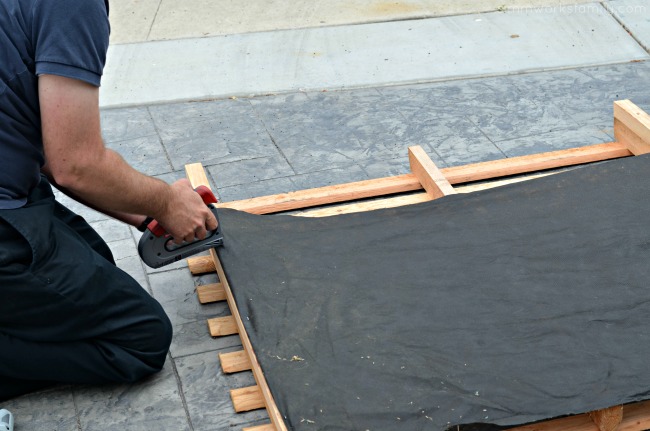
2. Staple weed block fabric to the back of the pallet, pulling taut to make sure it’s stretched all the way across. Layer if needed to cover the full back.

build a vertical garden using pallets - add support panels

3. Measure the width of the pallet from 2×2 to 2×2 and cut 1×8 fence boards to that length. Screw in place over the weed block fabric.

build a vertical garden using pallets - dig post holes and level post

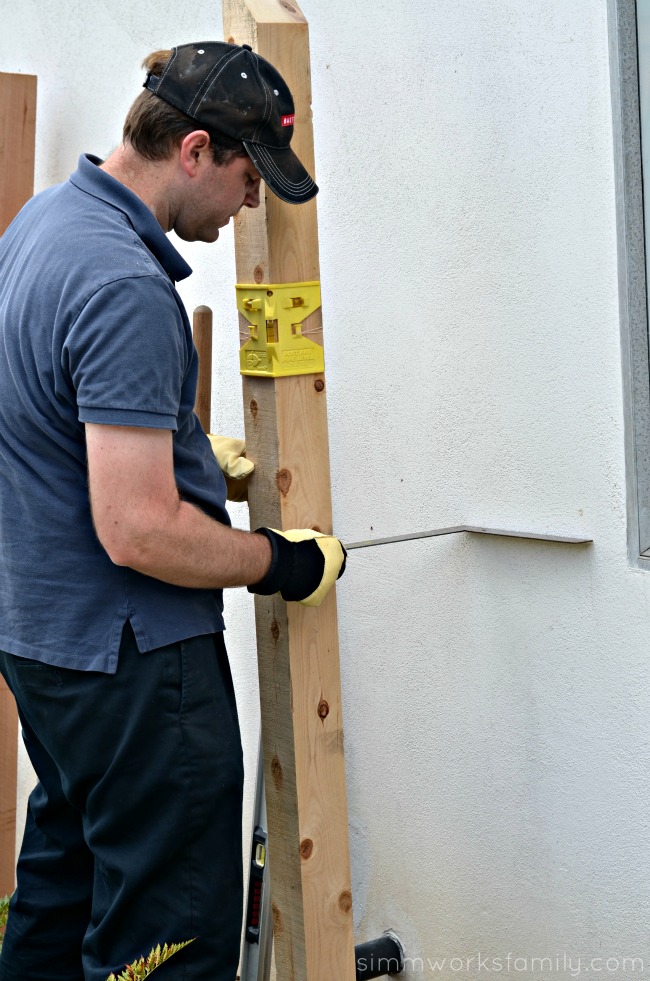
4. Measure the distance you need your posts to be installed on the ground and dig holes for posts. Cut posts to size depending on how far above the ground you want the pallets to be. Make sure to bury them about 1-2′ in the ground to provide a sturdy base.

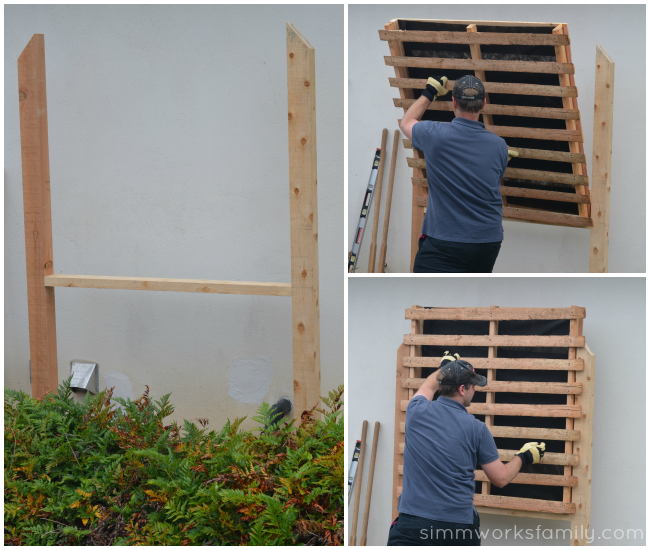
5. Set posts in the ground by covering with dirt and using a level to determine if you need to move or shift the posts. Measure the back dimensions of the pallet to determine exactly how far apart the posts should be. This will vary with every pallet.

build a vertical garden using pallets - attaching pallet to posts

6. Measure where you want the bottom of hte pallet to be and mark off that height on each post with a pencil. Then cut the 2×4 to the width between the posts. This board will act as a frame for the pallet to sit on. Screw the 2×4 into position directly underneath the line you’ve drawn.

7. Lift pallet into place on the frame and screw to secure.

build a vertical garden using pallets - fill with dirtHow pretty are they??

Next up is the hard part… this is where we had the most trouble… trying to pack in the soil to make sure it stayed in place and didn’t spill all out.

Now you’re probably asking why we didn’t start our pallet garden on the ground and then lift it into place once the plants were established. Well.. you *could* do that but just think of how heavy those pallet gardens would be. Crazy heavy! So we did it this way.

build a vertical garden using pallets - dirt in pallet

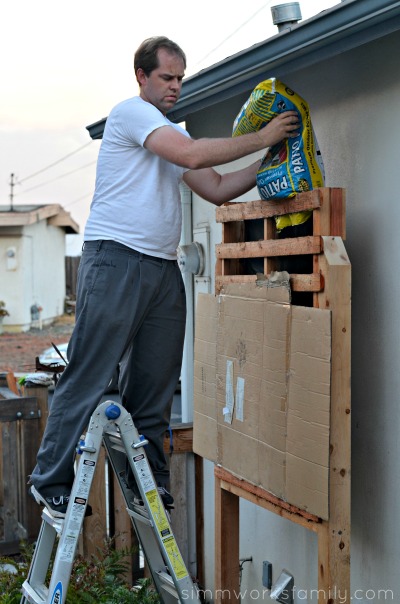
8. Using the cardboard stapled to the front of the pallet, fill the pallet with mulchy garden soil. Pack down each layer as you go to make sure it’s secure. There will be some dirt that falls out, simply fill it back again or leave it as is to settle more and fill later.

9. Plant with whatever seeds you think will grow best! We stick to lettuce in one planter and herbs in another with a few strawberries at the bottom. It’s pretty fun to step out and grab herbs whenever I need them!

build a vertical garden using pallets - planting from startersAnother problem we ran into was using starter plants we purchased instead of seeds. While in theory this would work great, when you put a plant that’s been growing vertically in a horizontal planter into a vertical planter and ask it to grow horizontally it looks like this above… droopy.

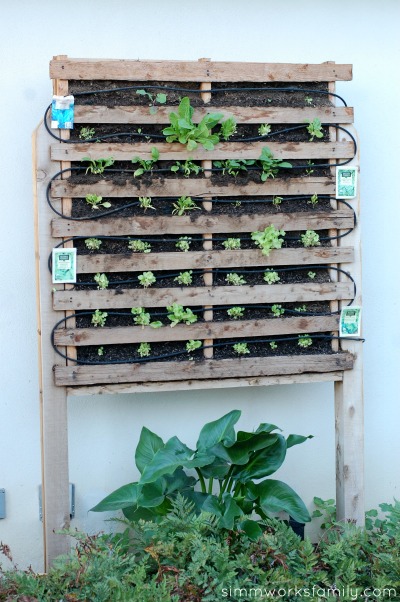
It’s also quite messy and hard to get the starter plants IN the planter and you spill a TON of dirt everywhere. Our solution? Seeds… start from seed and install an irrigation system with a soaker hose. You can find everything you need for the soaker hose in the irrigation aisle at your local hardware store.

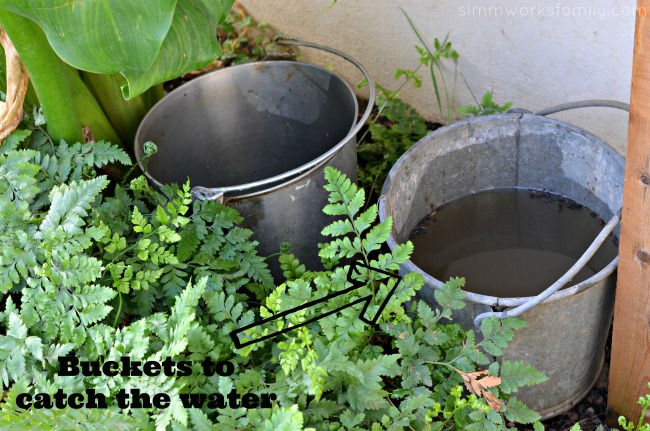
build a vertical garden buckets for run offIf you’re going to use an irrigation system with your garden, know that there will be water that drips down constantly. In order to conserve that water to use on our other plants and in our raised garden beds, we simply put buckets underneath to catch the excess water.

You know what else we found? Bees LOVE to come and drink the water that pools on the last rung of the pallet because they love mineral rich water. That means you’re helping the bees with your vertical garden too! Here’s a close up of a bee drinking. This is a regular sighting.

build a vertical garden using pallets - plant from seed

While it’s been a crazy process, I absolutely love how the vertical gardens make the side of our house look. I consider them more of a decorative piece in our front yard but love that we also get the benefits of growing our own herbs and lettuce.

And since our pallets are in the shade for most of the day, we had to choose plants that would work well in these conditions. I’m sure there are other things one could grow if their vertical garden were directly in full sunlight.

build a vertical garden using pallets - planted

What would you plant in a vertical garden?

DIY 3-D Dinosaur Wall Art

This shop featuring a DIY 3-D Dinosaur Wall Art tutorial has been compensated by Collective Bias, Inc. and its advertiser. All opinions are mine alone. #ProjectAmazing #CollectiveBias

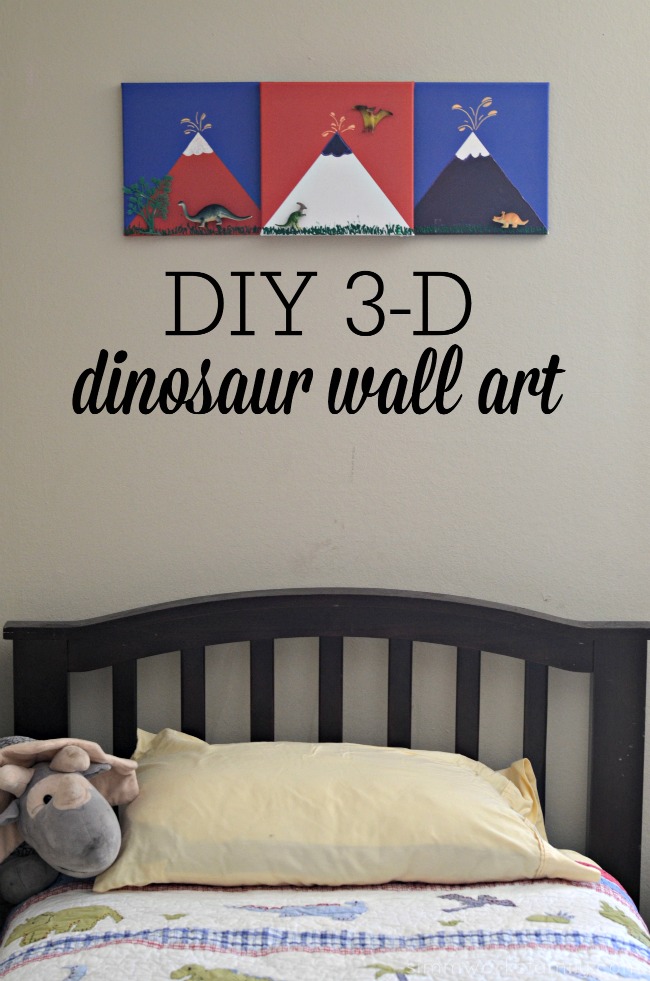
DIY 3-D Dinosaur Wall Art

A few weeks ago we were perusing IKEA in search of… honestly I completely forget what. But I’m sure it was something we needed. While we were there we also found a nice duvet, a rug for right by our sliding glass door, and a set of 3 geometric canvases that my son desperately wanted. Turns out the canvases were on clearance so all we had to do was figure out what we wanted to do with them.

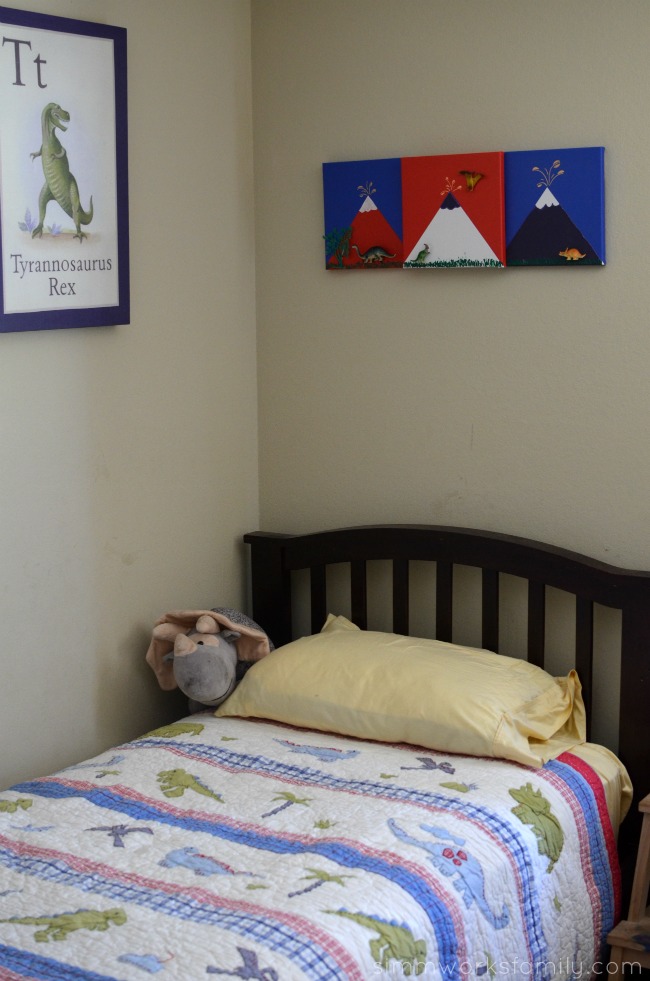
My son didn’t want to paint over them. He loved the triangles and the colors. So we had to think of some way to incorporate the triangles into our idea. I went with him into his room and looked at what we already had going on. Some large canvas pieces from Pottery Barn Kids (clearance, of course) with a rocket on one and a t-rex on the other, his 1 year cake smash photo, and the cross stitch his great aunt made him with his birth date and stats on it.

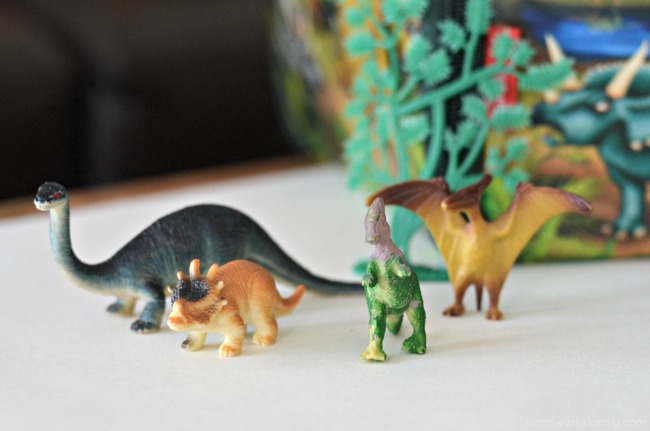
Then I looked down and saw what he had on the floor. Dinos spread out everywhere…

DIY 3-D Dinosaur Wall Art - dinosaur toys

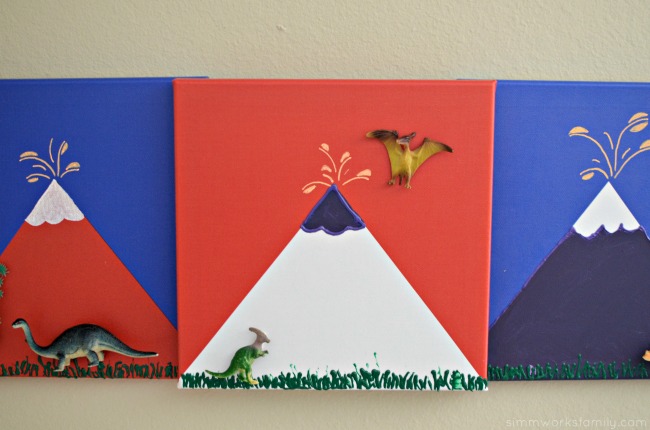
And the idea popped in my head! Those triangles were going to turn into volcanoes and a few extra dinos from the dinosaur box would add to the scenery. But how to attach everything together? Do I cut open the dinos? Use glue?

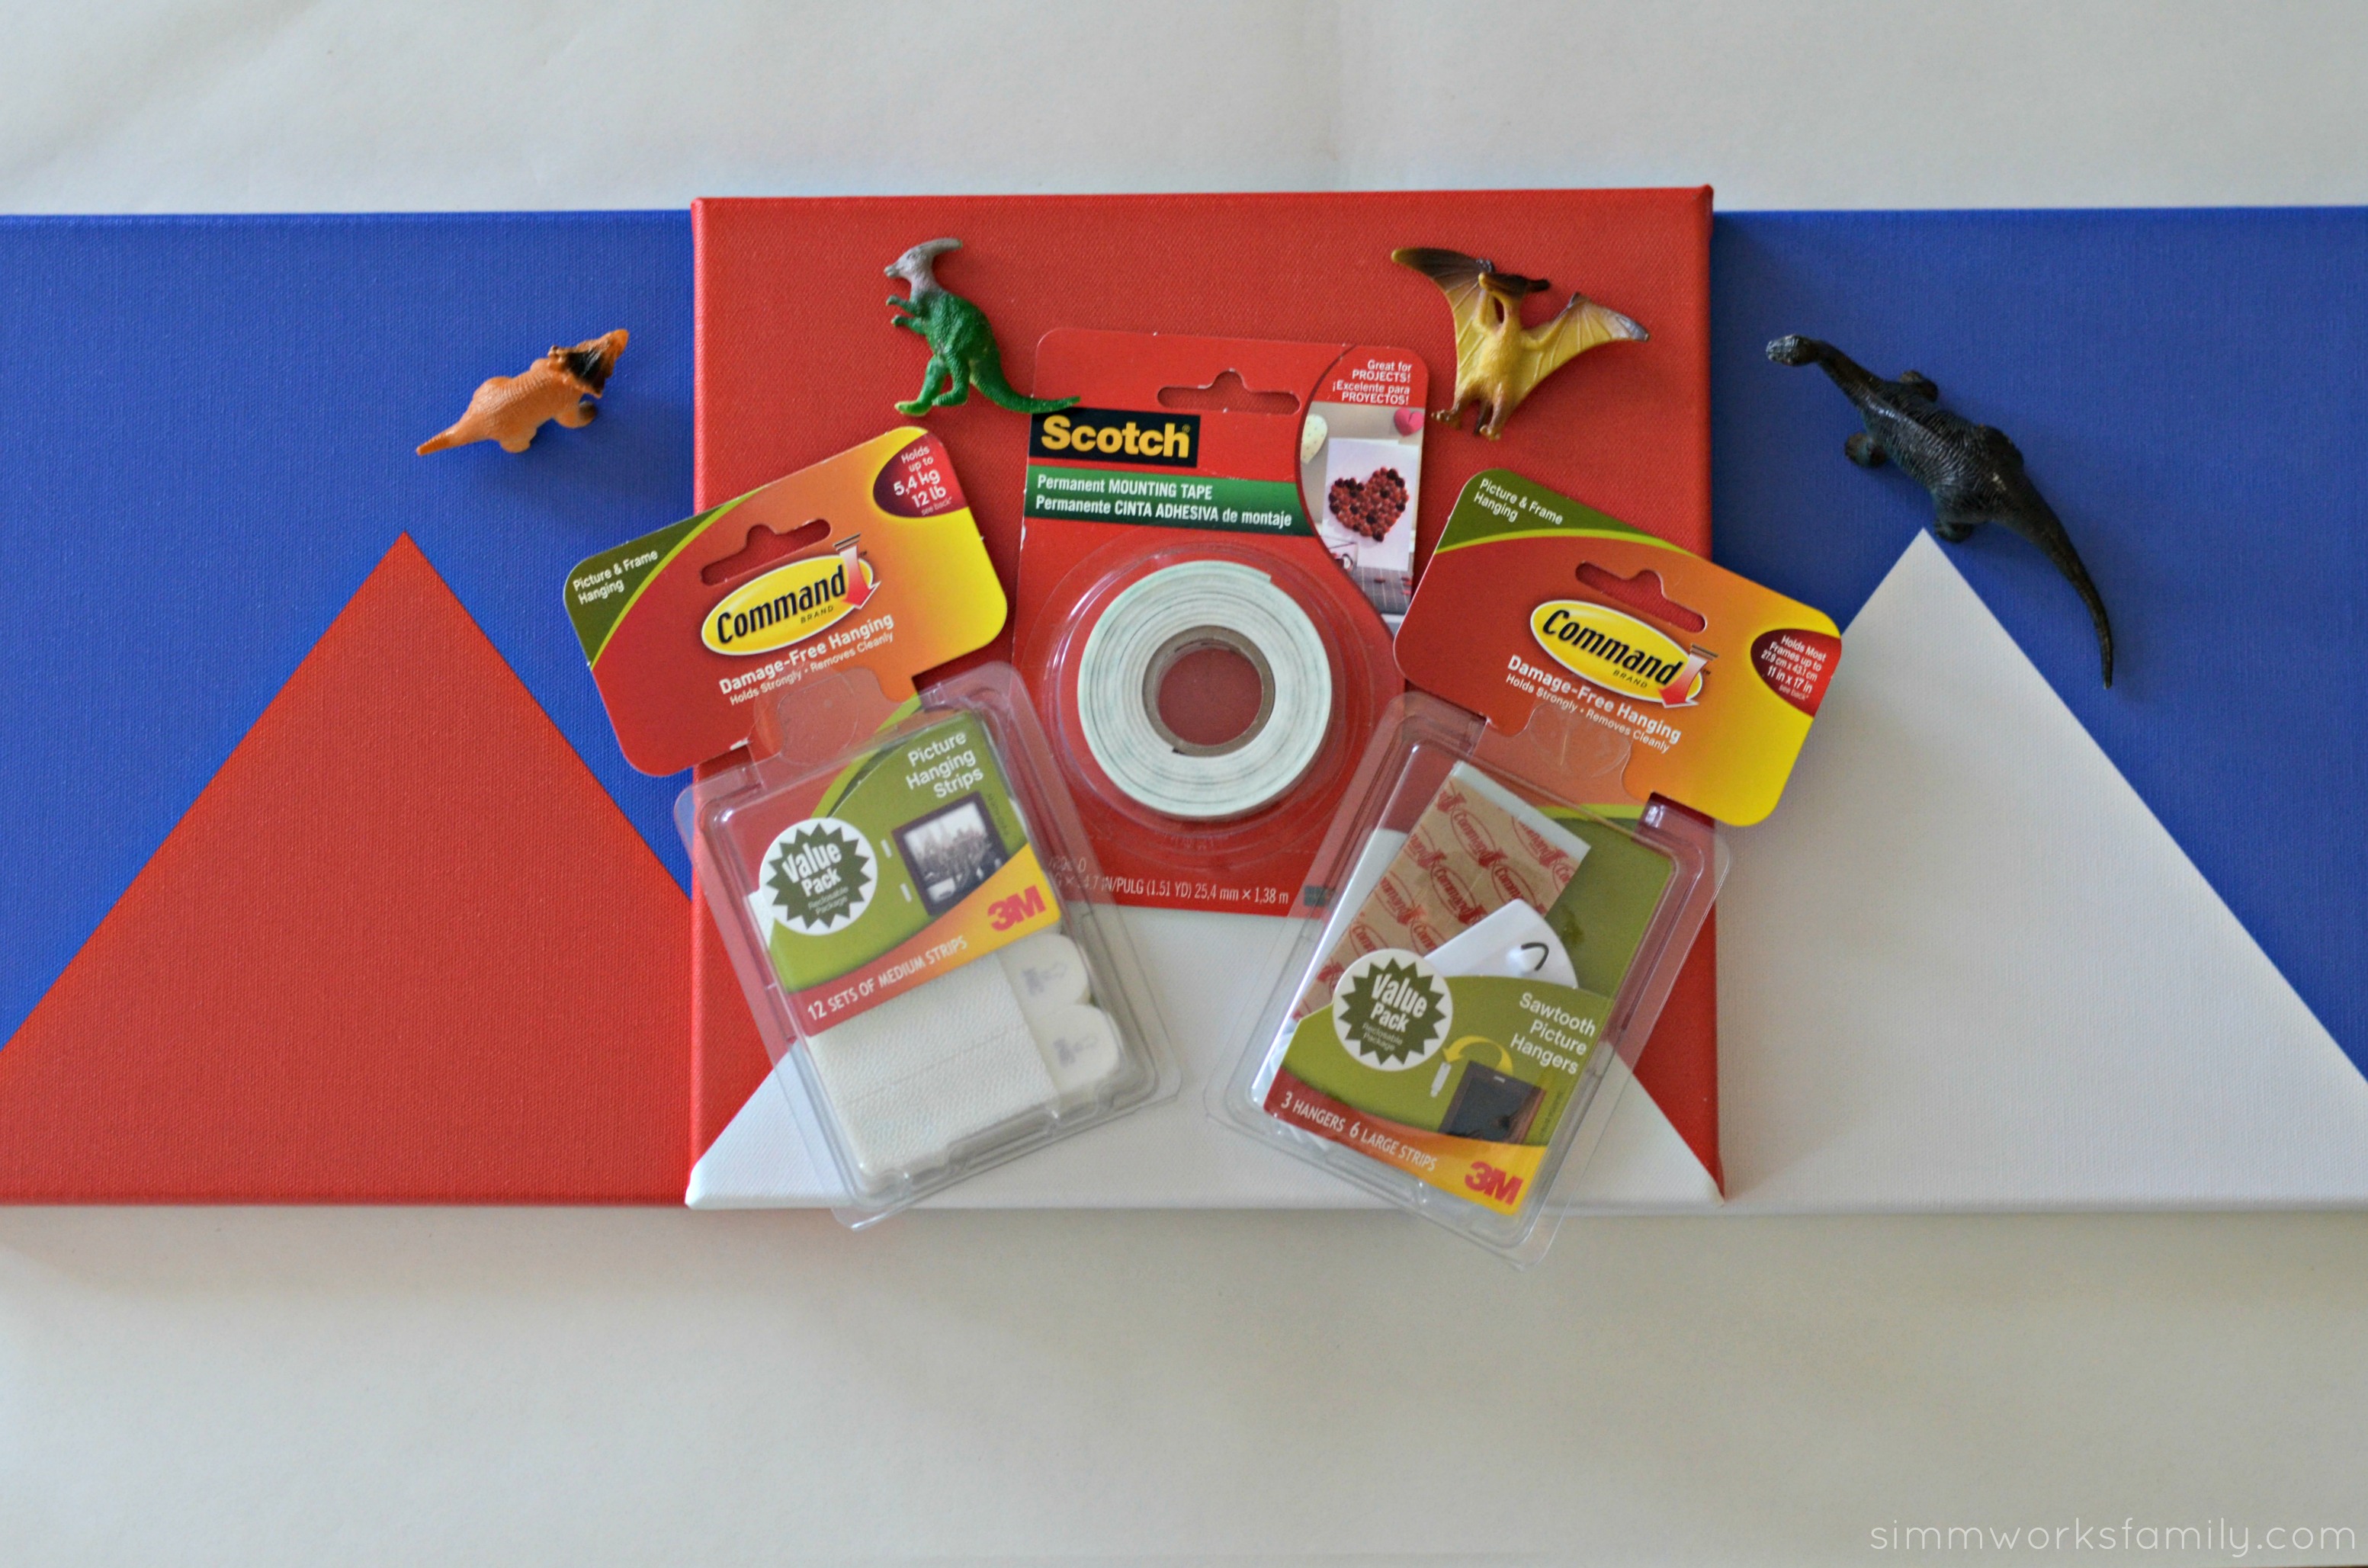
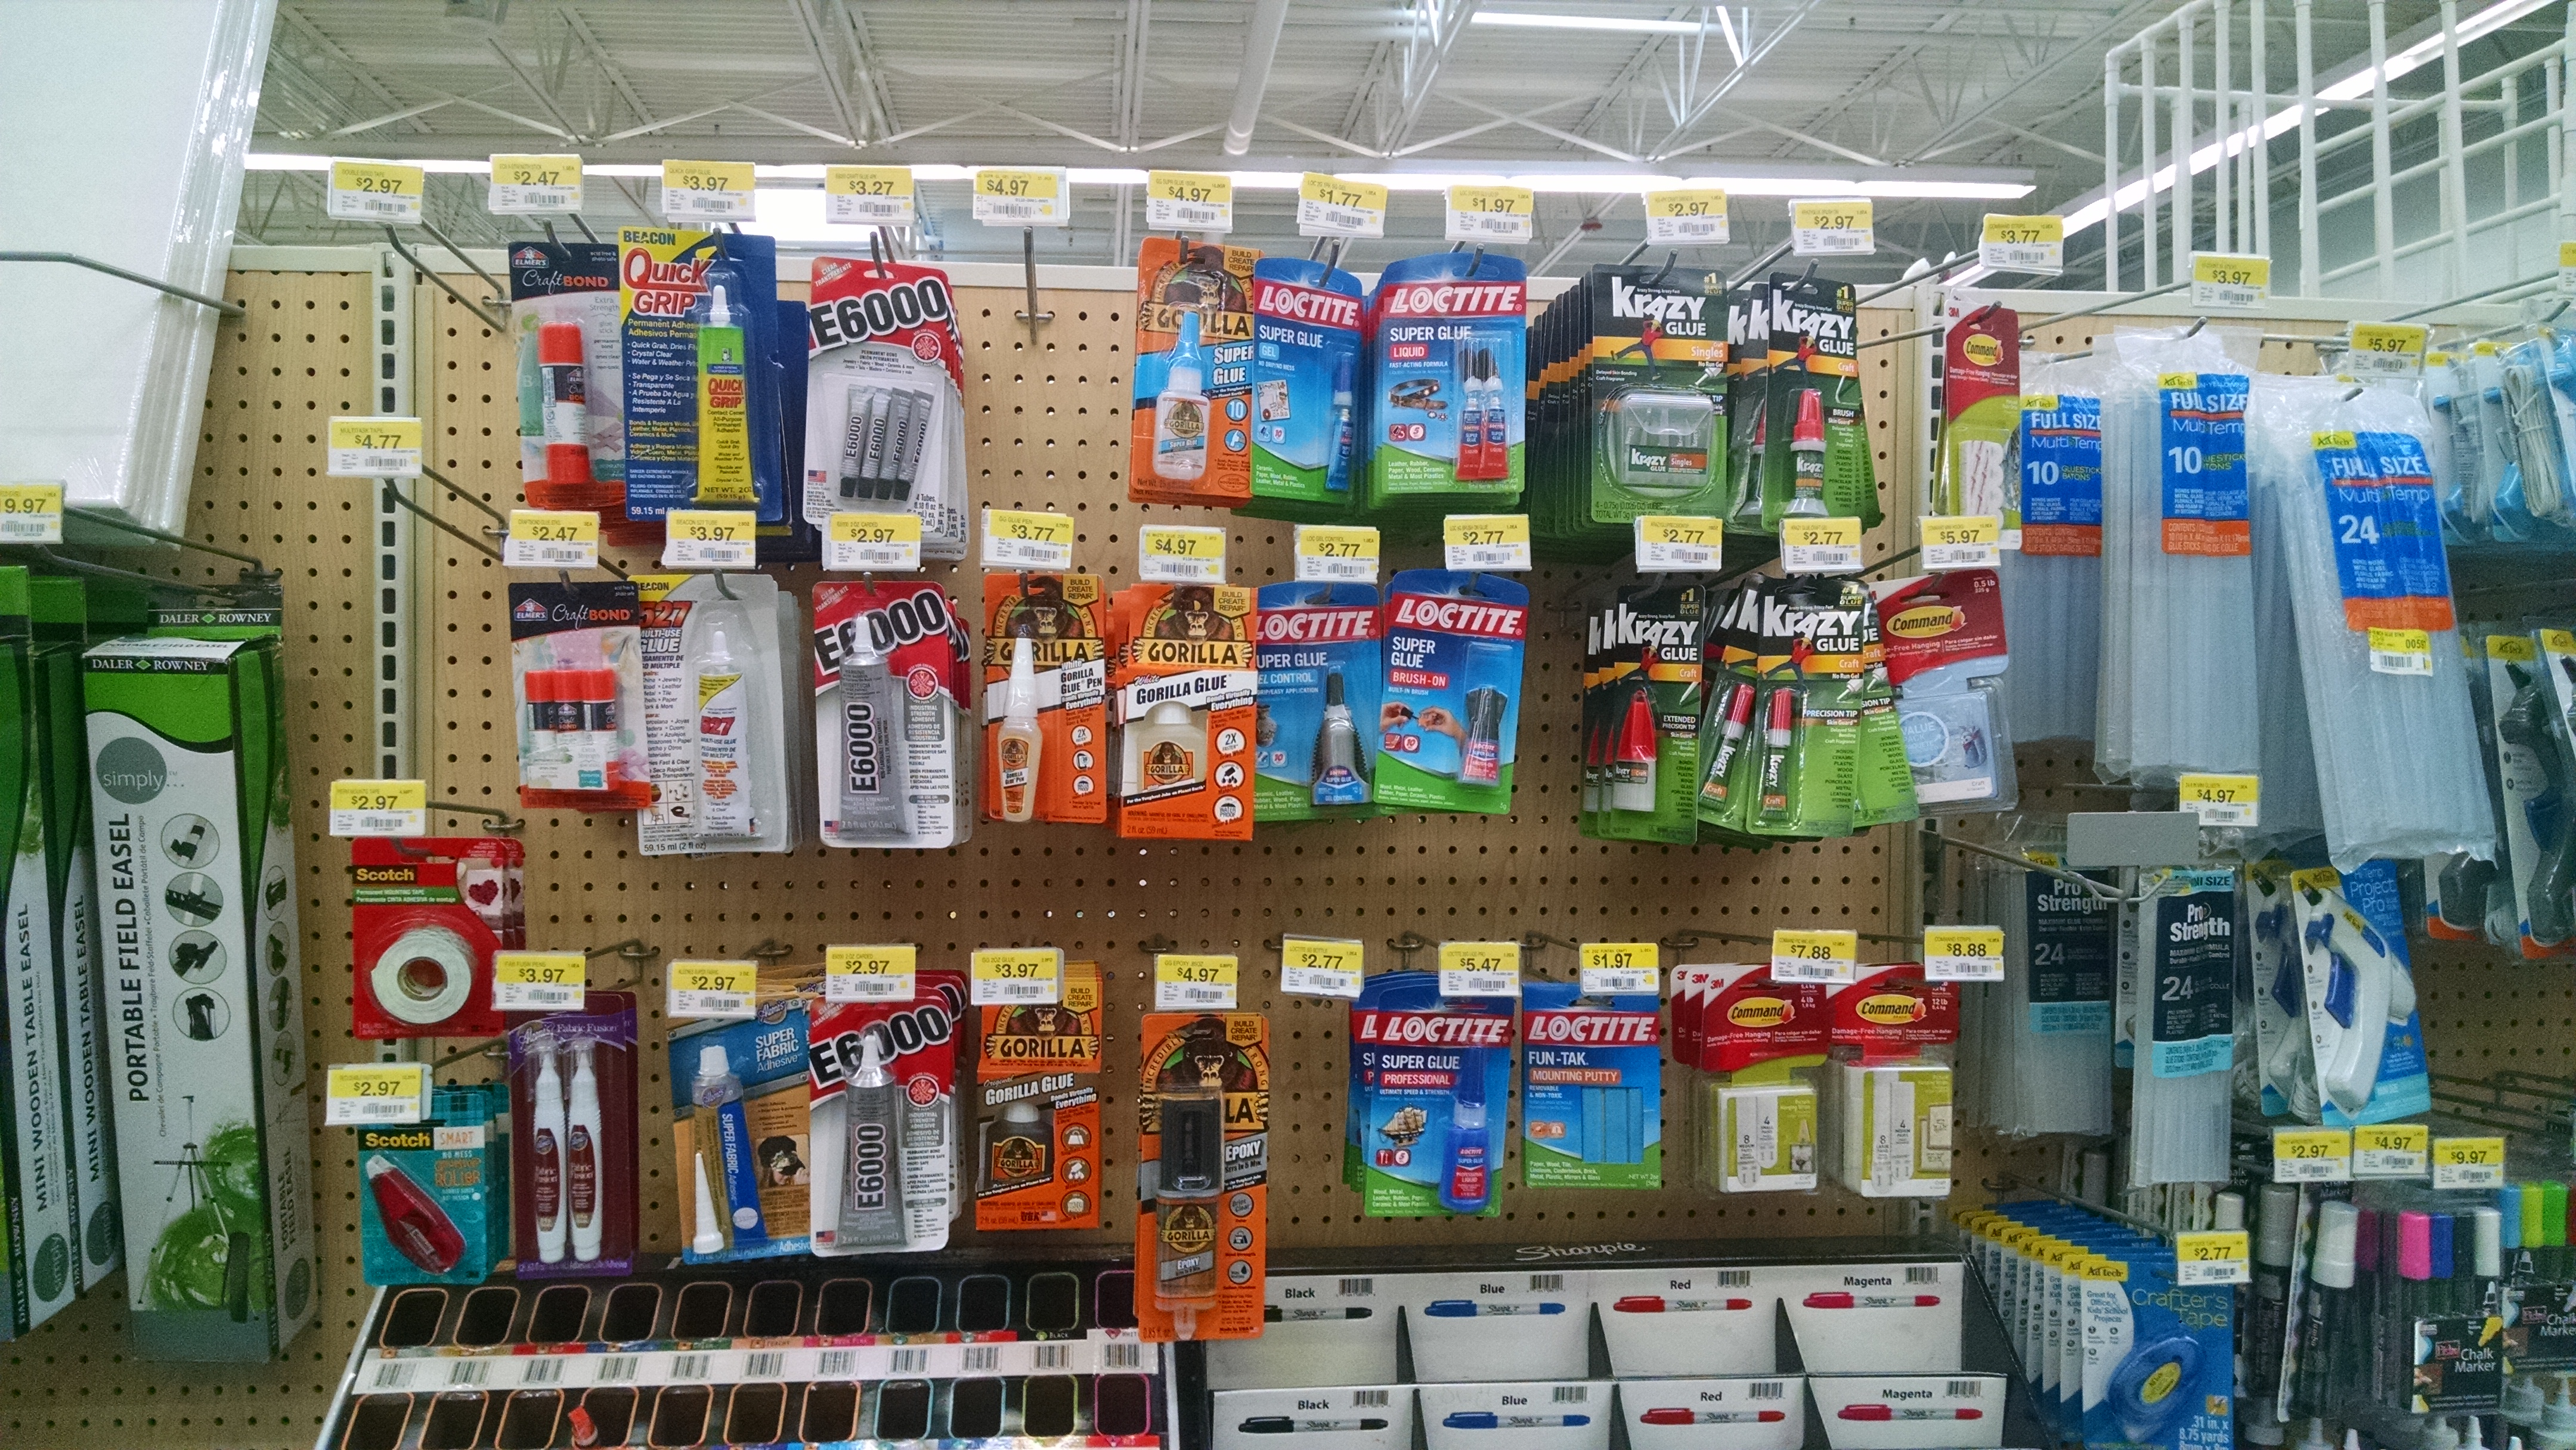
I really didn’t want to make a mess everywhere. Especially since the kids wanted to help out. So I kept it simple. I grabbed some Command™ picture hanging strips and Command™ Clear Hooks as well as some Scotch® Permanent Double Sided Tape to adhere the dinos onto the canvas.

The Command™ picture hanging strips would be the perfect way to layer the canvases on top of one another to create a 3-D effect. Plus, if we ever wanted to display the 3 canvases seperate, there’s no worry about ruining the canvas underneath.

Here’s how I did the rest:  

DIY 3-D Dinosaur Wall Art - supplies needed

DIY 3-D Dinosaur Wall Art

What you’ll need:

  • 3 square canvases with sawtooth mounting
  • a handful of small dinos and greenery
  • paint or paint markers
  • green puffy paint
  • Scotch® Permanent Double Sided Tape
  • Command™ picture hanging strips
  • Command™ saw tooth picture hangers

DIY 3-D Dinosaur Wall Art - painting canvasesDIY 3-D Dinosaur Wall Art - paint grass

What you do:

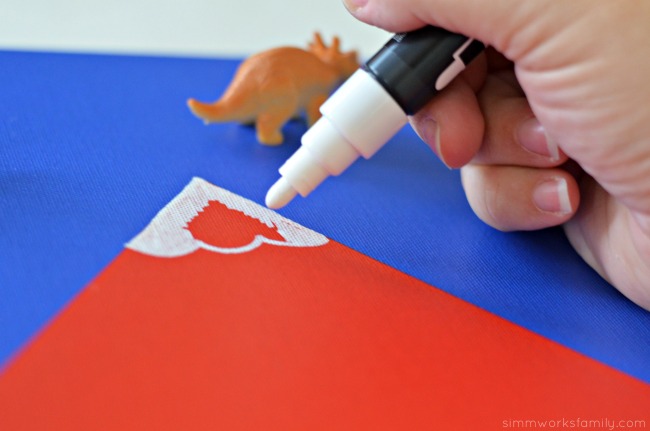
  1. On the canvas, paint out the scenery you want for your dinos. As I mentioned before, we turned our triangles into volcanoes by adding tops to each volcano and some lava spurting out with an orange paint pen. I outlined one of the triangles I painted in with puffy paint to make it stand out.
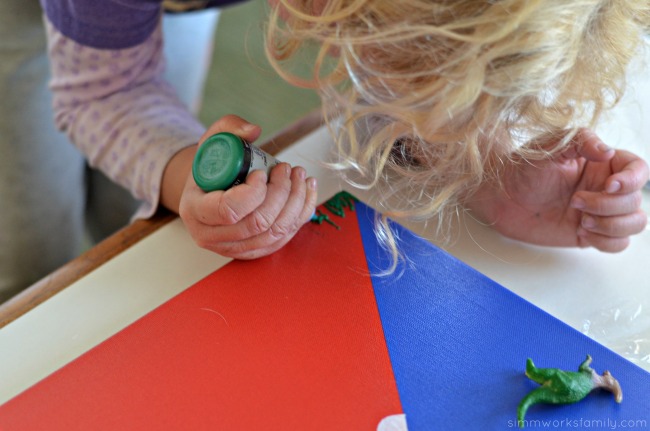
  2. Once the mountain scenery is dry, add grass by using the puffy paint. You could also use regular green paint to do this but since everything else is 3-D I think the puffy paint gives it a nice touch.
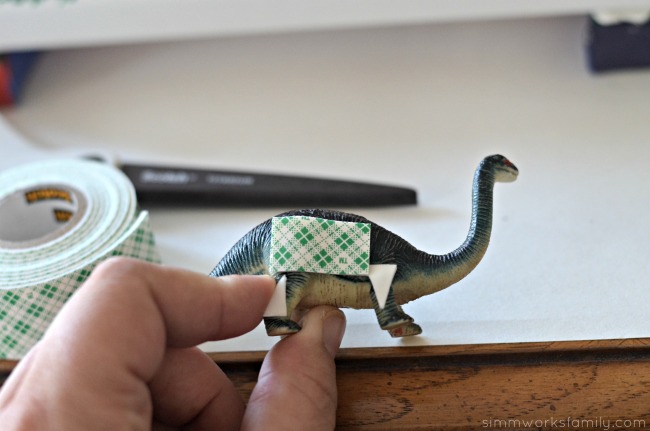
  3. After the grass is dry, figure out where you want to mount the dinos. Then add pieces of the Scotch® Permanent Double Sided Tape to each dino and mount onto the canvas. 
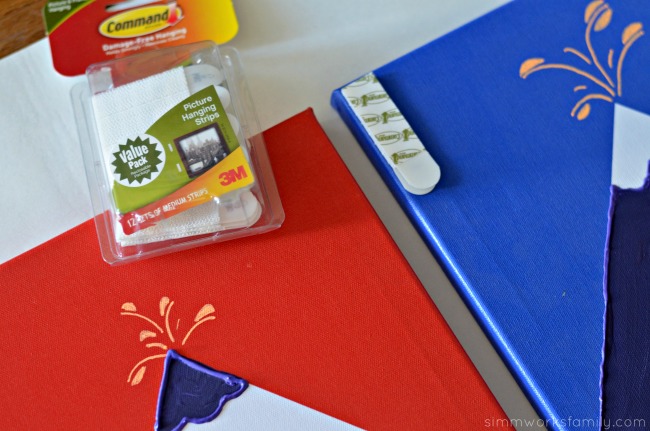
  4. Next up, grab 4 sets of Command™ picture hanging strips (8 strips total) and put each set together. You’ll hear them connect together with a satisfying click. Once each set has been clicked together, remove the backing on one side and add two to the left edge of one canvas (the one you want to be on the right hand side), and add the other two to the right edge of one of the other canvases (the one you wnt to be on the left side). 
  5. Now remove the backing from all 4 sets and set the third canvas on top of the other two overlapping the edges by the width of the Command™ picture hanging strips.
  6. Using the Command™ saw tooth picture hangers, mount the canvases to the wall where you’d like to hang them. 

Tada! Now you have fantastic 3-D Dinosaur Wall Art to display for all to see. 

DIY 3-D Dinosaur Wall Art - command stripsDIY 3-D Dinosaur Wall Art - add tapeDIY 3-D Dinosaur Wall Art - attach dinos to canvas

Command™ Brand provides damage-free hanging solutions for a wide variety of uses for your craft projects. Their products hold on strongly, remove cleanly. That way I don’t worry about damage to my walls, holes left in random places, or a mess left in it’s place. Find more inspiration for amazing summer project ideas here.

Now shoppers no longer have to search Walmart for these 3M products, as they are now available in the crafting aisle. Both Scotch® Brand and Command™ products are available in this aisle at Walmart. I found mine near the adhesives!

Command and Scotch products at Walmart

DIY 3-D Dinosaur Wall Art - simple and easy to make

Where do you find inspiration when crafting?

How To Make A Simple Succulent Terrarium

How To Make A Simple Succulent Terrarium

This past Tuesday was my 8 year wedding anniversary. So much has happened in the past 8 years and I couldn’t be more in love with my husband or more excited about the years to come. Our family has expanded, we’ve moved to a great home in the perfect area of town, we’ve become involved in our community and have expanded our friendships. Life is good.
In celebration of our anniversary I wanted to make something for my husband. I remember him seeing a succulent terrarium at a restaurant or a business somewhere and mentioning that he’d like one for his desk. I had filed it away in my head as a project to make for his birthday or another special occasion. So when this anniversary snuck up on me, I thought that a homemade gift would be perfect.

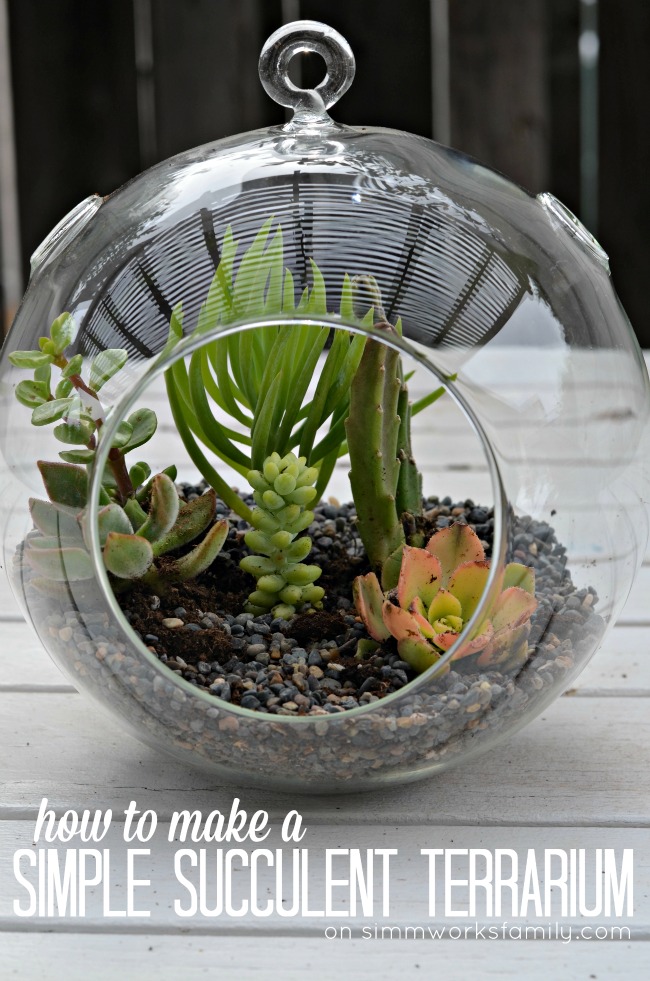
After visiting City Farmers Nursery with the kids one day to pick up some chicken feed, I saw that they sold all of the components to make your own succulent terrarium. And the options were perfect for creating my own vision and design. Plus? This gift cost less than $20 AND took less than 15 minutes to put together. I’d call that an awesome win! And my husband? He LOVED it. It’s already on his desk at work.
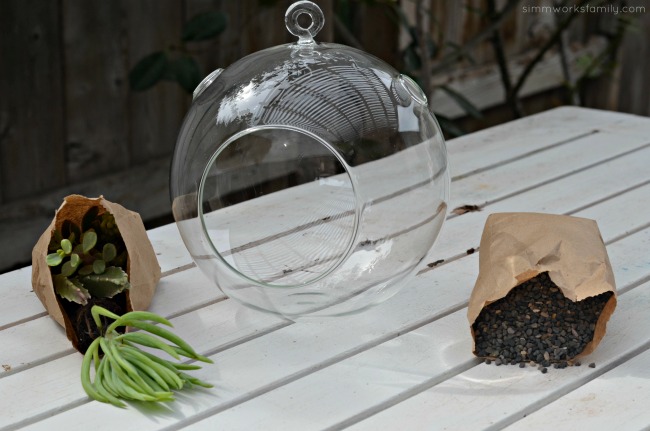
How To Make A Simple Succulent Terrarium - 3 simple things

How To Make A Simple Succulent Terrarium

What you’ll need:

What you do:

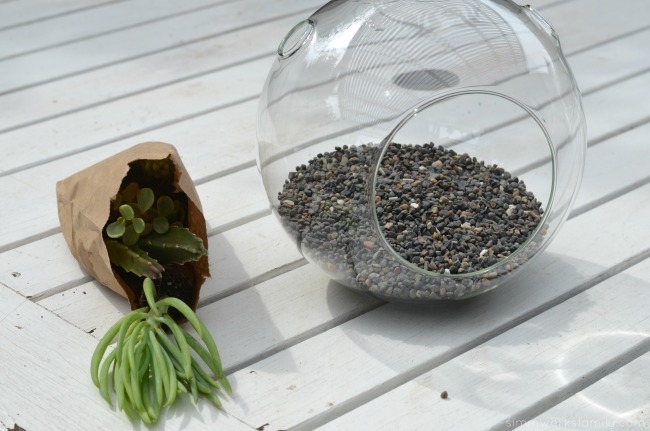
1. Place a layer of rocks/sand/dirt of choice in terrarium.

How To Make A Simple Succulent Terrarium - add rocks

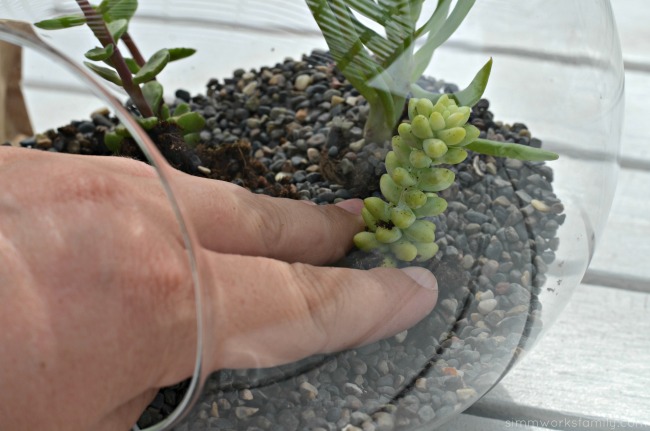
2. Plan out where you want your succulent plugs to go. Try and look at the height of each succulent when mapping out your design. Have fun with mixing different types of succulents together.

How To Make A Simple Succulent Terrarium - place succulents in terrarium

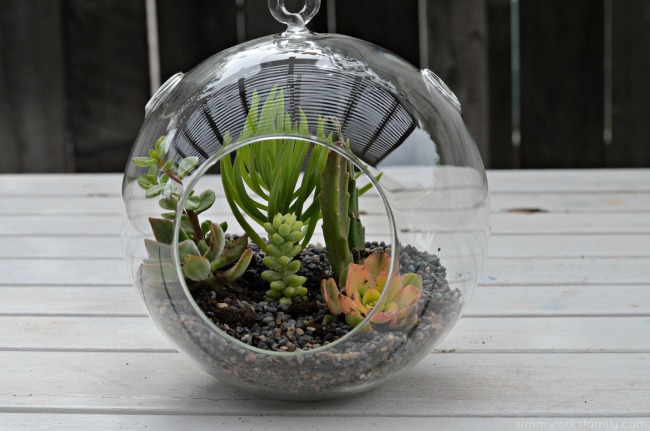
3. Add additional rocks around the succulents and include any trinkets you may wish to include as decoration in your terrarium. Sea shells, star fish, pottery pieces, signs, etc. are all great ways to spruce up your succulent terrarium.

How To Make A Simple Succulent Terrarium - perfect for your desk or patioHow To Make A Simple Succulent Terrarium - an easy and quick gift idea

Where will you put your new succulent terrarium? What will you add to it?


© A Crafty Spoonful - All Rights Reserved
It is OK to use one of my photos provided a link back and/or proper credit is given. It is NOT ok to copy and paste a whole post including instructions. Please do not remove watermarks or alter images in any way. Please contact me with any questions at danielle@acraftyspoonful.com

.