Fall Harvest Party Ideas

We love to travel. And we love to entertain. So we’re sharing our Fall harvest party ideas along with two regional recipes featuring our sponsor, Ritz. Read ahead to find out how to marry your favorite destinations all on one tablescape!

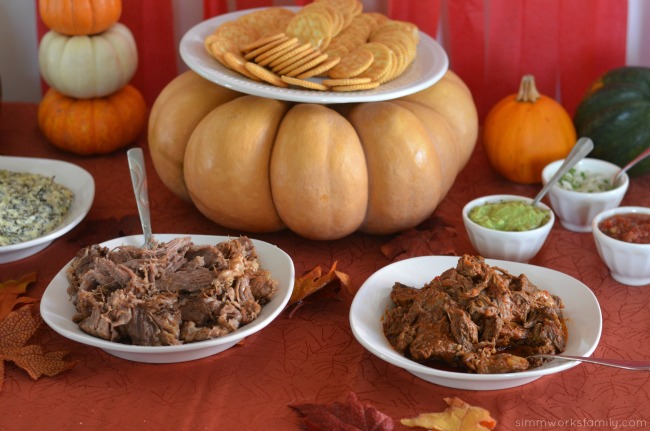
Fall Harvest Party Ideas - a simple spread perfect for any holiday get together

Hosting our family for a fun party is always a fun way to celebrate the holidays. And I do enjoy hosting people over at my home. With the weather changing and the leaves starting to fall, I almost get a glimpse of seasons changing. Living in San Diego, I have to travel to another part of the country to truly see seasonal changes. I don’t mind it. I love living in San Diego and love travel so it’s a win-win for me!

One place that definitely sees the change of seasons, and somewhere I haven’t been yet, is Atlanta. Now I don’t know why but I’ve never visited the south. Not that it isn’t on my list of places to go! I would love to do a little tour of the southern states one day with my family. At our fall harvest party I created a delicious dish to remind me of where I’m from and a dish to represent a place that I want to visit. And with such great rates on airfare from Southwest Airlines, I’m sure I’ll visit soon!
Fall Harvest Party Ideas - street taco on a ritz bar

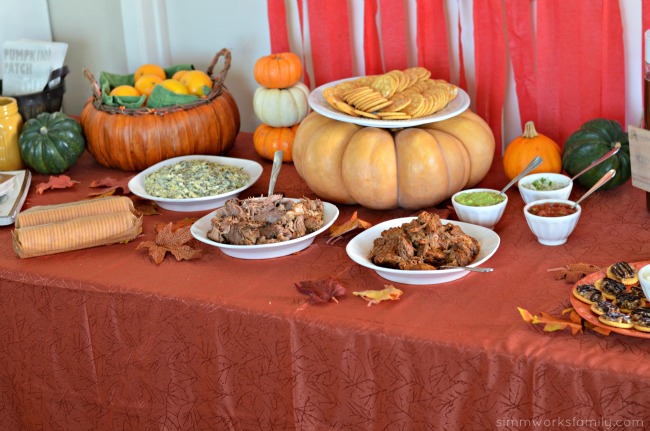
In celebration of fall, I created a fall harvest tablescape incorporating the colors and seasonal decor of fall. I was inspired by the squash and pumpkins we had left over from Halloween and used them to create the colorscape for our table. I love being able to use various items over and over again throughout the season. And the cinderella style pumpkin was the perfect way to raise my serving platter.  

I tried to keep the food simple but delicious. I always have some sort of fruit for the kids so I went with some tangerines and placed them in a pumpkin basket I had. Since the tangerines look very similar to pumpkins the kids got a kick out of them. To make serving a group of people easier, I also made a street taco (on a Ritz) bar instead of making up individual carnitas bites. That way the guest can choose what type of meat they use and what toppings they want to enjoy. 
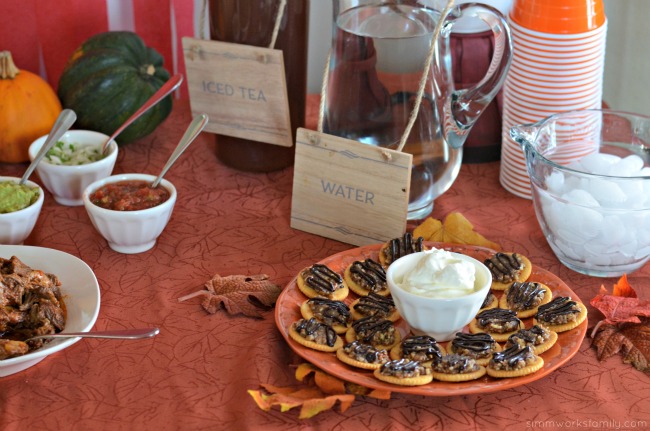
Fall Harvest Party Ideas - mini pecan pie bites and drinksFall Harvest Party Ideas - street taco bites
Now I know that street tacos don’t scream fall, but in San Diego mexican food makes it’s way into just about any celebration. But one thing that does scream fall is pecan pie. After having it for the first time a few years ago, I’ve come to love the flavors in a pecan pie. So these pecan pie bites not only remind me of the upcoming holiday, they’re also the perfect dessert for parties because they’re easy to eat and simple to make.

This whole spread was absolutely delicious and pleased a variety of palettes including the kids. And if you’re a parent you know how hard that is! You can find the recipes for my carnitas bites and mini pecan pie bites here. And voting is now open for the best travel-inspired Ritz creation! You can vote for either of my recipes at LuvRitz.com.
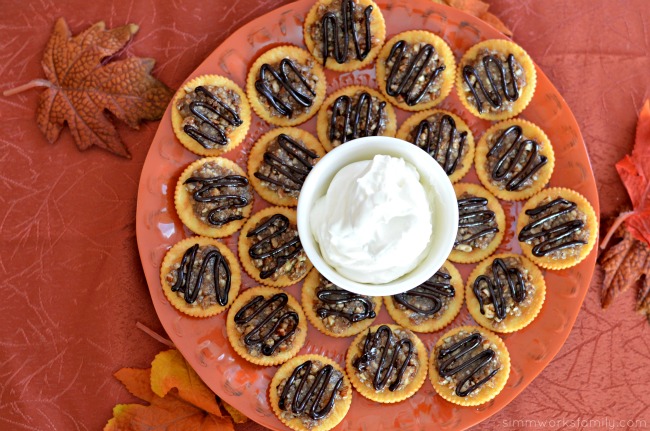

Fall Harvest Party Ideas - Mini Pecan Pie BitesFall Harvest Party Ideas - the spread

What are your favorite flavors of fall?
Fall Harvest Party Ideas

How To Make Salt Dough Ornaments

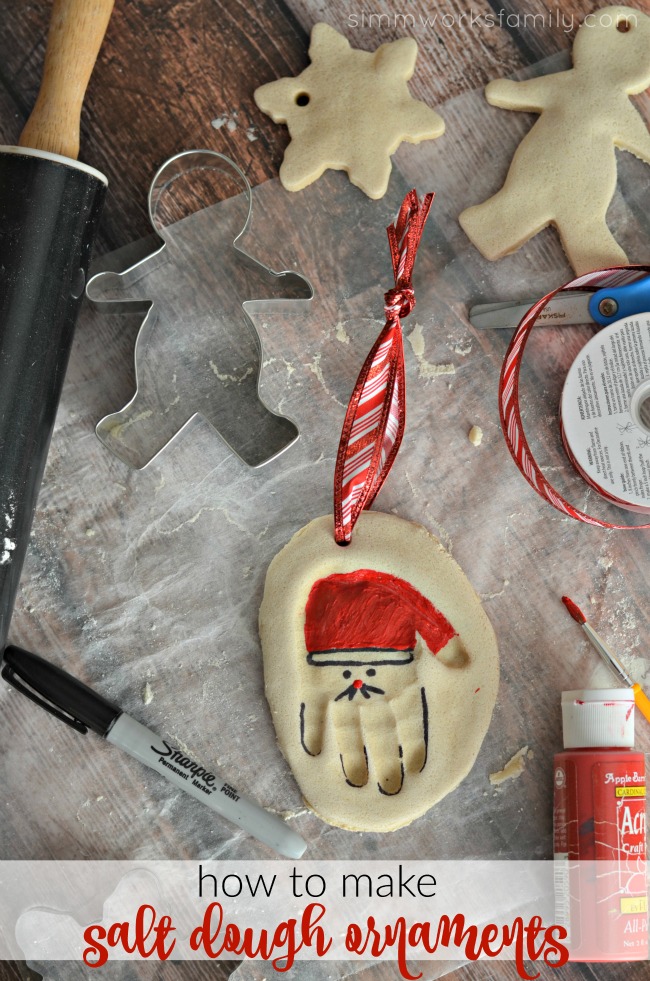
How To Make Salt Dough Ornaments - a simple craft for kids of any age
E year my son’s school has each class decorate and create ornaments for the kids to gift to their parents. Last year we had fun making reindeer thumbprint ornaments along with a few other great ornament designs. And this year we’re going to be making salt dough ornaments with the first graders. There are so many great ideas and techniques to incorporate when making salt dough ornaments with kids. You can get as creative as you like by simply incorporating different mediums when decorating your ornaments.

Since this year is my youngest’s first Christmas, I decided to make an example for the kids by using her hand print and turning it into Santa. My other daughter wants to use her footprint to make a reindeer but I’ll be sticking with hands for the first graders. I’ll also be using cookie cutters for the kids who don’t want to do hand prints and I’ll have them add two thumbprints to create hearts in the middle of their cut out. They’ll get to color and decorate their ornaments after I bake them up.

How To Make Salt Dough Ornaments - decorate ornament after baking

How To Make Salt Dough Ornaments

What you’ll need:

  • 1 cup flour
  • 1/2 cup salt
  • 1/2 cup water (more or less depending on dough)

What you do: 

Preheat your oven to 250 degrees.

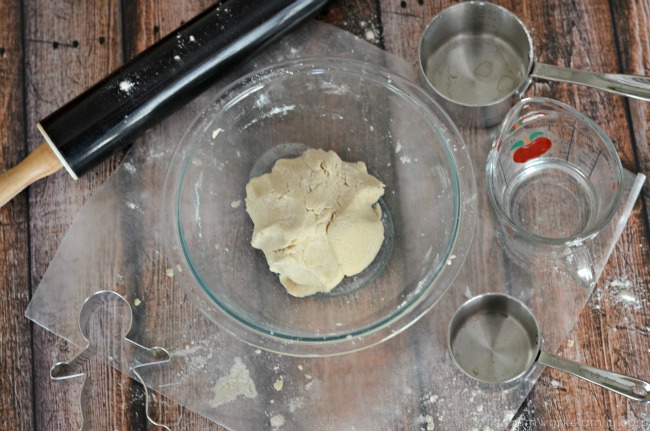
Grab a medium bowl and mix flour and salt until well incorporated.

Slowly add in water. Start with 1/4 cup and mix in, then add in a bit more until the dough forms and is lightly tacky but not sticky.

How To Make Salt Dough Ornaments - combine ingredients into dough

Grab a piece of parchment paper and lightly flour. Turn dough onto floured surface and knead a little more until the dough is smooth.

Roll dough out with rolling pin to 1/4 inch thickness.

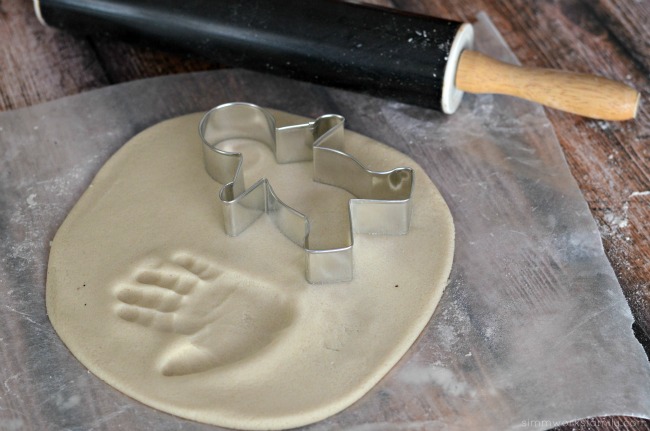
Grab a kid and put a hand print in the dough and/or use some cookie cutters to cut out some designs.

How To Make Salt Dough Ornaments - make a handrpint

If you’re using a hand print, make sure to cut a circle around the hand print leaving room for a hole at the top.

Remove excess dough and set aside. Place parchment paper with ornaments on a cookie sheet. Using a plastic straw, poke a hole at the top of each ornament (for Santa, make sure you put the hole at the palm/bottom  of the hand). Now grab a kid and let them blow on the straw until the little ball of dough that was just punched out pops onto the counter.

How To Make Salt Dough Ornaments - make hole with straw before baking

Bake ornaments for 2-3 hours or until hardened. Let cool completely before decorating.

How To Make Salt Dough Ornaments - decorate ornament after baking

What is your favorite part about the holidays?

stockingstufferhopbutton

*** This giveaway is closed ***

Congrats Janet!

Tips For Hosting A Photobooth At Your Next Event

Tips For Hosting A Photobooth - using a smartphone to print photos
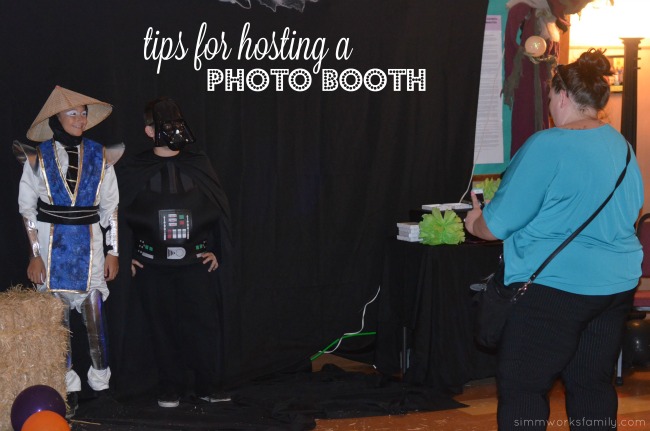
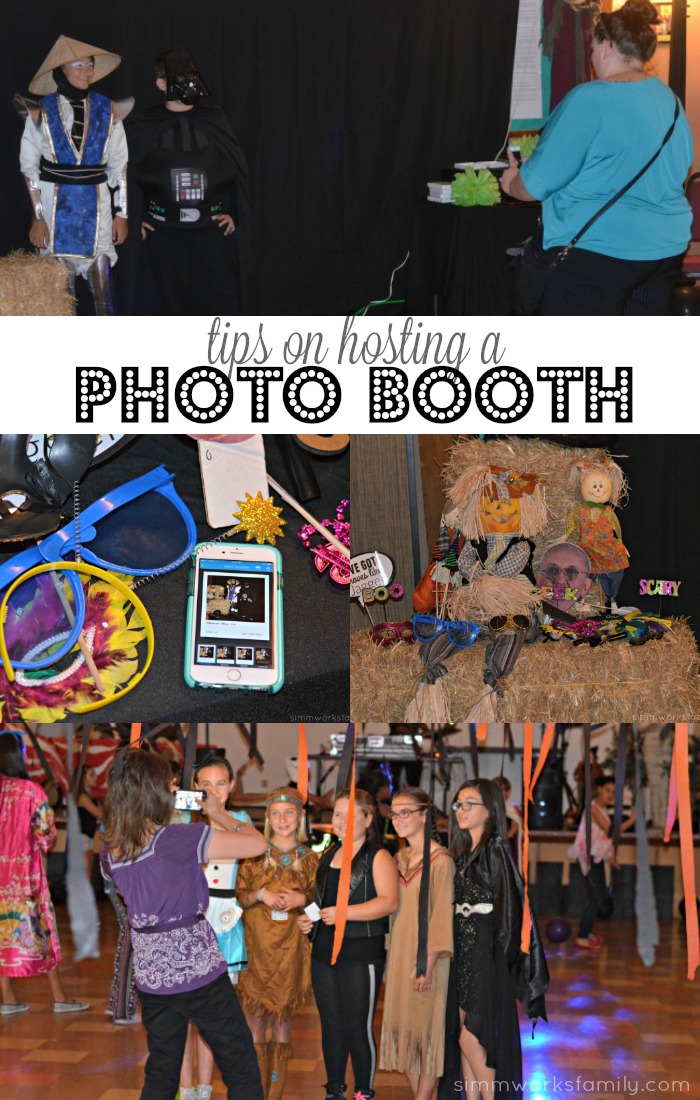
Photobooths are very popular right now. Kids love them, adults love them, and they make great momentos from events attended. And there are a lot of things you can do to change a photobooth up to make it relevant for the event you’re at or the group you’re with. From including fun props to changing up the backgrounds to match the theme or season,

After joining the PTG I started to realize that a photobooth was a great way to document the special events we host every year. From our Fall Festival to our Junior High dances, having an easy way for parents and kids to make memories is a big plus. Photo booths are also very simple to set up nowadays and fairly inexpensive with the use of technology.

Tips For Hosting A Photobooth - printer and props

Tips For Hosting A Photobooth

1. Find A Good Location –

Make sure to find a spot at the event with the best lighting. If your event is at night, consider additional lighting to light up the photo booth area. Because you’ll be having guests use their phones to snap photos you don’t want them to have to worry if their flash will be enough light.

2. Set Up The Printer

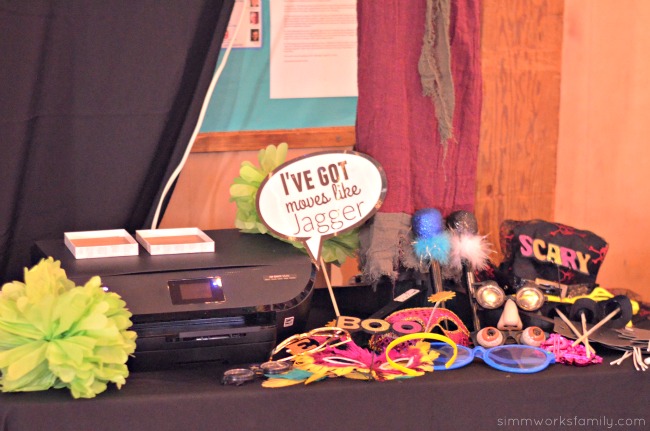
At the dance I had a whole table for props and another table for the printer and photo paper. You’ll want to choose a location that has a good WiFi connection so that you’ll be able to set up the printer and so that you can connect the phones to the printer as well on the WiFi connection. We made sure to test out our printer during set up when we first arrived so we could confirm that everything worked before guests started showing up. 

Tips For Hosting A Photobooth - props

3. Provide Lots Of Props

A quick visit to the dollar store can provide very helpful with props. I was able to find huge glasses, silly masks, signs, and more in the aisles of the dollar store. I also made a few signs on my own through PicMonkey and laminated them so they wouldn’t get ruined after multiple uses.

4. Use The HP Social Media Snapshots App

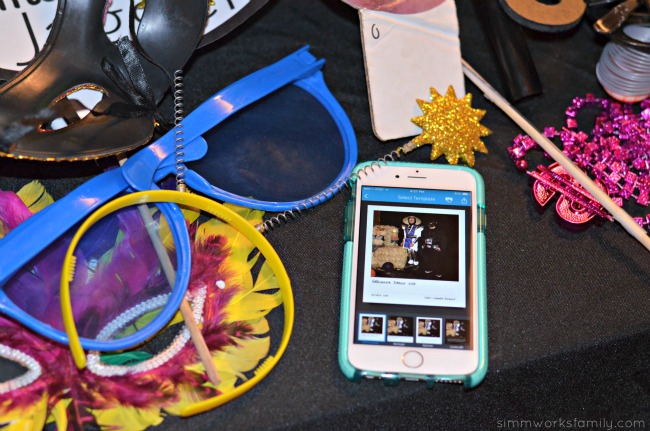
We had a few signs around with instructions on how to download the HP Social Media Snapshots app and use the app to print out photos from the event. We shared how easy it was to write new captions if they were using photos from their social media accounts and how to print photos from their galleries that they took that night. The kids loved being able to get with their friends and customize their photos.

Tips For Hosting A Photobooth - use Social Media Snapshots

5. Print Memories Easily Onto HP Social Media Snapshots

I cannot say how much I love HP Social Media Snapshots! Not only are they awesome for printing out Instagram and social media photos, they’re also awesome to have for parties and events at a photo booth. Not only can you take photos at the photo booth and have them print out, but you can capture photos all over the event and print them out. Simply select your favorite images straight from social media, print them out onto the 4×5 paper, and stick them anywhere.

HP Social Media Snapshots are available now at Staples and they’re BOGO free until 11/30. Grab a few packs for your next party or event!

Tips For Hosting A Photobooth - thinking outside the booth

What events do you have coming up?


Tips For Hosting A Photobooth

Keto Friendly Grilling Meals: Hatch Green Chile Chicken Drumsticks

This shop has been compensated by Collective Bias, Inc. and its advertiser. All opinions are mine alone. #LegendaryTailgate #CollectiveBias

Keto Friendly Grilling Meals- Hatch Green Chile Chicken Drumsticks

So it’s been a little over a month since I’ve switched over to a low carb high fat lifestyle (LCHF) and I’m starting to get the hang of things. I’m a bit obsessed with experimenting in the kitchen and love to find great meals that I can tweak. One of my favorite recipes to make over and over again is mashed cauliflower. I don’t know why… maybe it’s the heavy whipping cream and butter? Yeah, it’s definitely the heavy whipping cream and butter!

But I can’t just eat mashed cauliflower for dinner. Or serve it to the family. They might riot.

This weekend I was doing my grocery run sans kids (yay!) with coffee in hand (double yay!) and I headed down the marinade and sauces aisle. It’s one of my favorite aisles to peruse for help for dinner. Not only are there plenty of lower carb/sugar options, but they help make tasty meals in little to no time. This time around I found a delicious green chile marinade in Stubbs Anytime Sauces. Paired with the Foster Farms drumsticks I picked up on sale, I was ready for grilling!

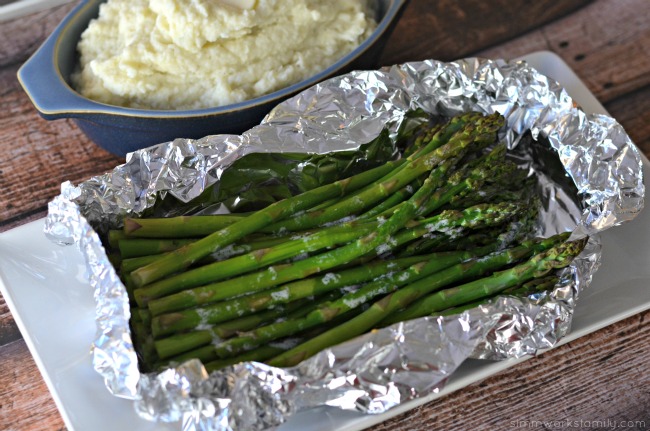
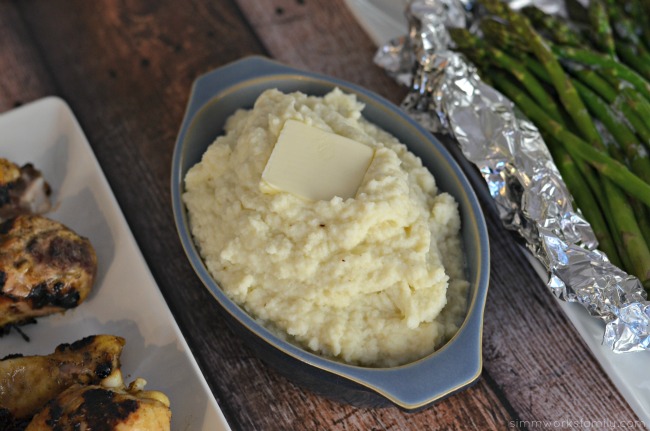
Keto Friendly Grilling Meals - foil wrapped asparagus Keto Friendly Grilling Meals Mashed Cauliflower with Butter

One thing I love about grilling, even in November, is that I can prepare just about anything on the grill. What’s not to love about a full meal being cooked outside while I don’t have to dirty up the kitchen? Less dishes in my sink. With the help of some foil, I was able to cook up the asparagus and the cauliflower right on the grill along side the drumsticks as they cooked. 

And? It’s perfect for tailgating meals too. When we head out to watch our team play on the field when they’re here in town we love enjoying a meal on the grill before heading into the stadium. Or when we’re hosting family over to watch the game on TV. Grilling makes it easier for us to host our family and enjoy time with them while they’re visiting with us. 

Keto Friendly Grilling Meals BBQ Hatch Green Chile Chicken Drumsticks

Hatch Green Chile Chicken Drumsticks

  • 1 jar Stubb’s Anytime Sauces in Green Chile
  • 1 package (24oz) Foster Farms Fresh & Natural Chicken Drumsticks
  • Olive Oil

Place the drumsticks in a 9×13 baking dish. Pour Stubbs Anytime Sauces over chicken. Cover dish with saran wrap or lid and marinate for 4-24 hours.

Preheat grill. Grab a paper towel and blot with olive oil. Rub on grates to prevent meat from sticking.

Once grill is heated, add drumsticks to the grill. Barbecue for 30-35 minutes or until completely cooked.

Let rest for 5 minutes and serve with veggies.

Serves 8 | Nutritional Info: 123 calories, 2 Net Carbs, 2g Carbs, 5g Fat, 16g Protein, 0g Fiber

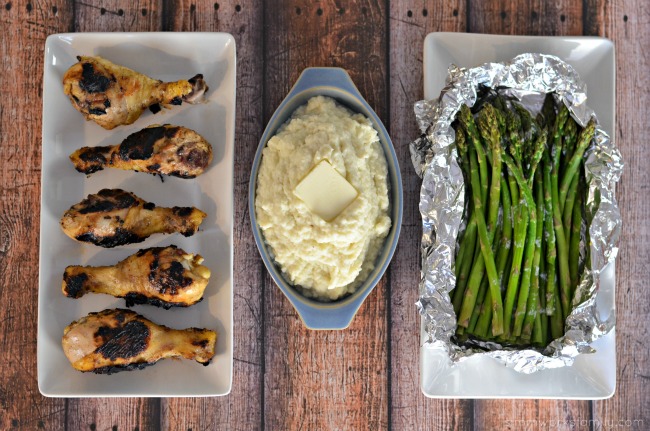
Keto Friendly Grilling Meals Hatch Green Chile Chicken Drumsticks, Mashed Cauliflower, Asparagus

What’s your favorite thing to grill on the barbecue?

Looking to make grill time easier? Check out Stubbs anytime sauces at Vons! I found mine in the BBQ Sauce and Vinegar aisle.

When you’re in the store, check for an Instant Redeemable Coupon that can be found in-store on the Foster Farms chicken packaging for a discount on Stubbs BBQ sauce so you can save instantly. The coupons expire on 12/31/15.

Stubbs Anytime Sauces at Vons

Creating The Perfect Thanksgiving Tablescape

Today we’re sharing our tips on creating the perfect Thanksgiving tablescape. Insight for this post was provided by GE Café™ Series.

Creating The Perfect Thanksgiving Tablescape

With Thanksgiving around the corner, I’m starting to plan out our Thanksgiving table. I love being able to create a festive tablescape for the holidays even if we don’t host Thanksgiving at our home. It keeps things fun for dinnertime. Why leave all the fun to my mother-in-law, right? And why not keep the house festive all month long? Plus if we get unexpected guests we can entertain easily without worrying about decor.

I haven’t talked much about our new home but one of the things that frustrates me is the fact that we don’t have enough room in our home, nor do we have an adequate kitchen, to host a holiday meal… yet. Luckily we have plans to remodel our kitchen and dining room so that we have the space, and appliances, to accomodate entertaining along with our every day meals.

So for now I focus on what I can control – the decor and festive tablescapes!

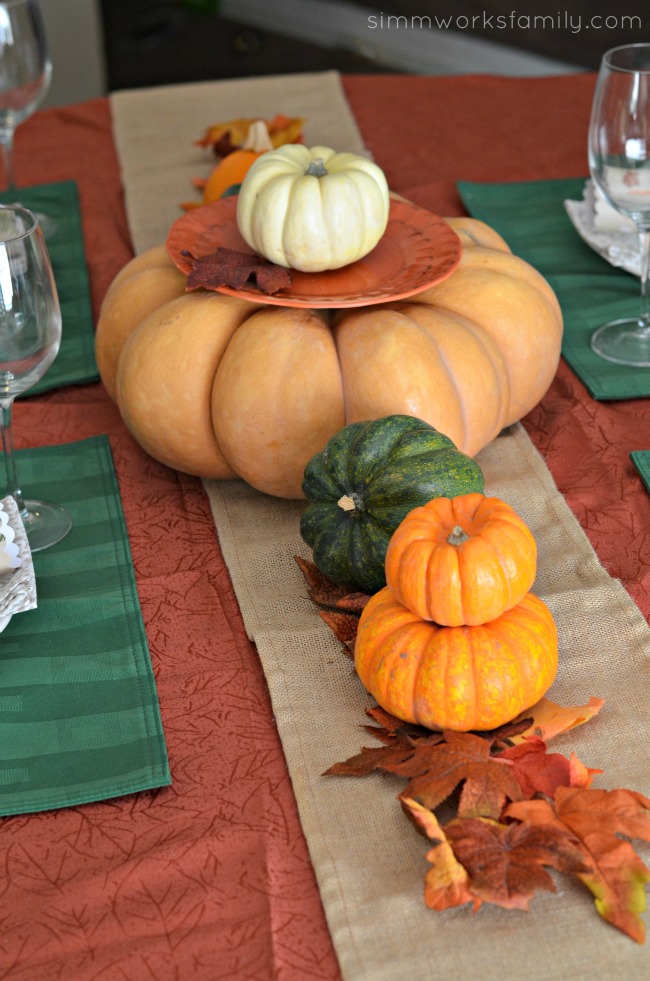
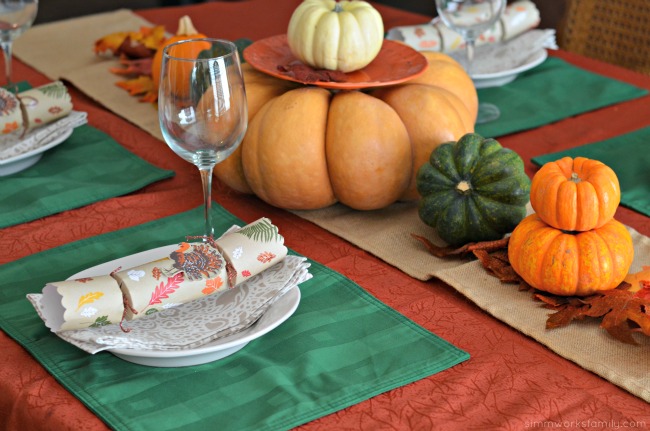
Last year we went with a simple centerpiece to decorate the table so this year we’ve continued with the simple approach. By using pumpkins and squash we picked up at the pumpkin patch right before Halloween, I was able to repurpose a few of our fall decor into a nice tablescape that was festive and coordinated with everything else I had.

Creating The Perfect Thanksgiving Tablescape - fall foliage and squash

Keep The Center Simple

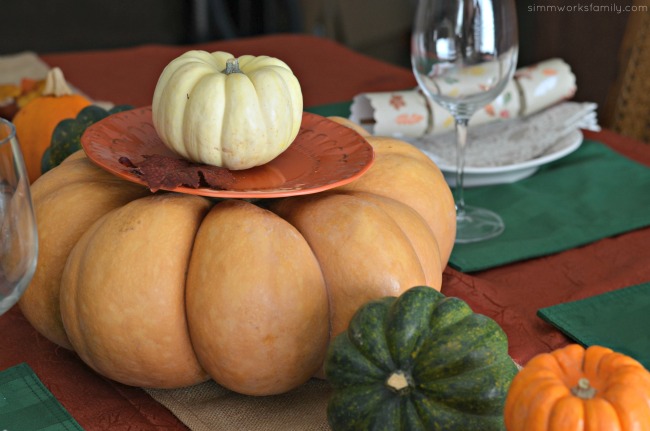
Since we typically keep a buffet of food in the kitchen, the center of the table is for decorative pieces to keep things festive. By utilizing some gourds and squash and placing them along with some leaves on top of a burlap runner, I can create the look of Fall without too many pieces.  I was able to utilize the orange leaf print table cloth that I use for Halloween again for our Thanksgiving tablescape. I’ve also used a cinderella pumpkin here to serve not only as a centerpiece, but as a place to put the pie for dessert at the end of the meal.

When you want to keep conversation flowing, keep the centerpiece low. That allows guests to converse across the table. If there are a few taller pieces, make sure they’re seperated out so there are spaces between to make eye contact. Also, if you’re using candles, make sure they’re unscented. There’s nothing that’ll ruin a dinner more than a scented candle when you’re trying to eat food. 

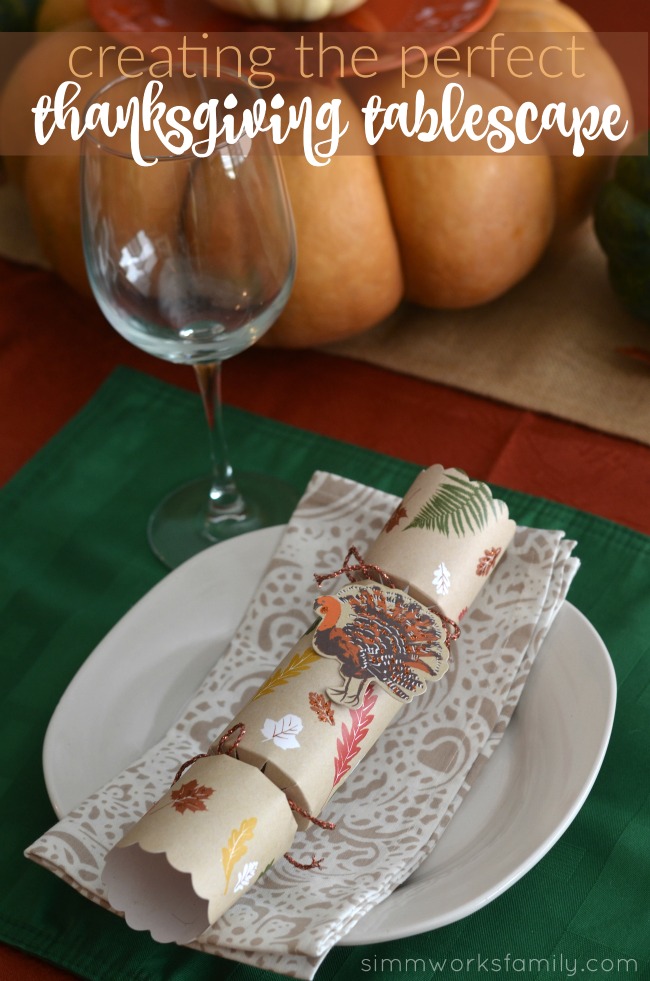
Creating The Perfect Thanksgiving Tablescape - place settings

Have Fun With Place Settings

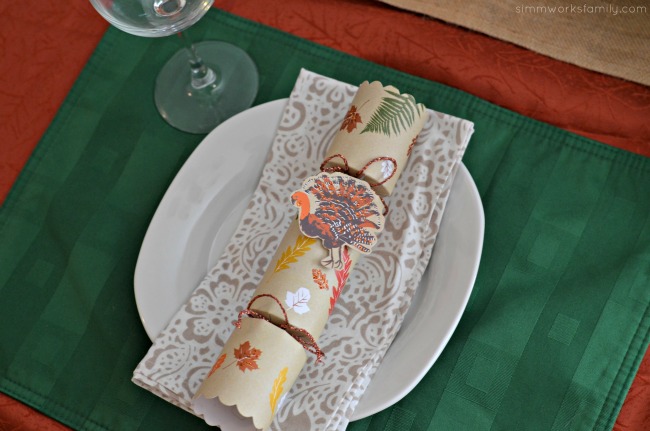
I love creating fun place settings for my guests to enjoy. This year we found some party poppers from our most recent trip to one of our favorite cooking sho that had a festive turkey theme. These are great conversation starters when guests sit down because they want to open them and discuss what they got inside. Sure they’re normally at the kiddy table but why can’t the adults have fun too? I’ve also created fun place cards and napkin rings to keep the table fun and entertaining for everyone.

While I do keep our plates and silverware near the food at the buffet, I leave a bowl for the guests to take to the buffet with them for their salads so they have room on their plate for other foods. Don’t you hate when you put the salad on your place first and it takes up a ton of room? No? Just me? I also like to leave a napkin at each place setting. I’m always that person who gets to the table after getting her food, sits down, and has to get back up to grab a napkin because I forgot it or didn’t have any hands free.

Creating The Perfect Thanksgiving Tablescape - centerpiece

Keep Versatile Pieces

It’s a great idea to have some key pieces from your tablescape to utilize from one holiday to the next. Consider investing in some timeless colors or colors that work with various seasons. Green can work for the fall and winter seasons depending on what you pair it with. Orange works for Halloween and Thanksgiving. And red can work from Christmas to Valentines Day to patriotic hoidays. I also keep a few basic colors of place mats as well on hand to switch it up. Cream, green, and blue are in my current rotation. 

Creating The Perfect Thanksgiving Tablescape - a simple, easy idea for Thanksgiving dinner

Now that I’ve taken care of our tablescape, I can focus on testing out a few of our favorite recipes to contribute to our holiday meals. And next year I’m hoping that I’ll be preparing a holiday meal in our new kitchen. With the research I’ve done on appliances, I’m starting to narrow down exactly what I want. And first things first, out with the electric stove and in with a gas stove!

Since I love to cook, I am aiming to purchase appliances that will last a while and keep up with my passion in the kitchen. I also have to keep in mind my husband’s love of baking. Luckily I can “Take Food Further” through the power of GE Café™ appliances. These appliances bring the expertise of the restaurant, home, during holiday timing.

With the GE Café™ Series I’ll be able to get the details designed to help the meals I make become masterpieces. From slow roasts to quick sears, from soups to sauces, the advanced cooking technology and intuitive design of our ranges can take every meal further. And boy do I need that! With each burner specialized for precise boiling, simmering and searing I won’t have to put up with the frustration that I feel with our current kitchen.

How do you simplify the holidays?

Disclosure: Insight for this post was provided by GE Café™ Series.

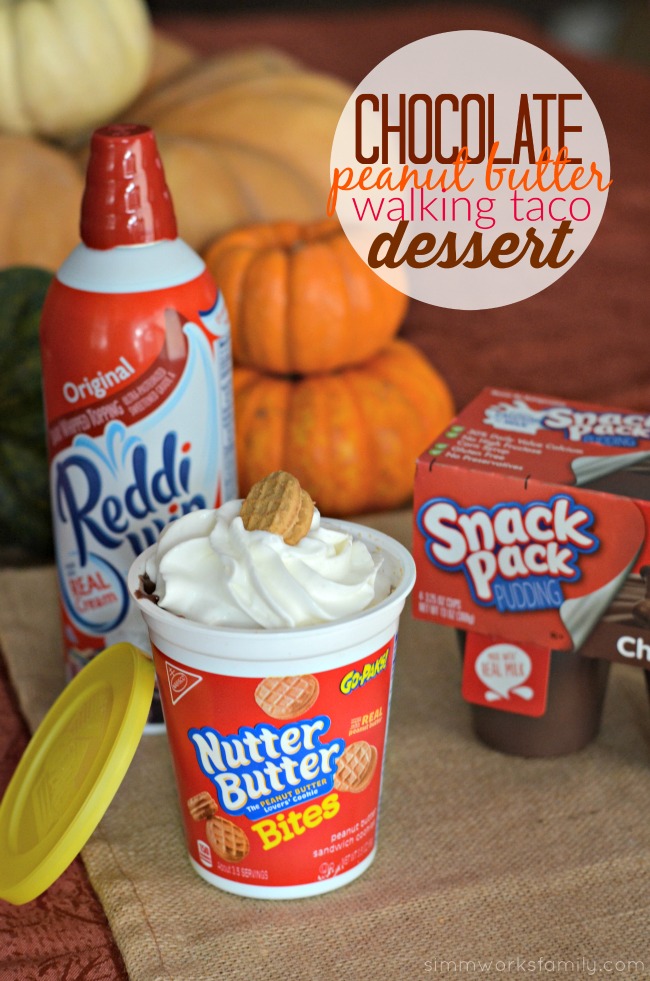
Chocolate Peanut Butter Walking Taco Dessert

This shop featuring how to make a chocolate peanut butter walking taco dessert has been compensated by Collective Bias, Inc. and its advertiser. All opinions are mine alone. #SnackAndGo #CollectiveBias

Chocolate Peanut Butter Walking Taco Dessert

Since having our youngest, my daughter Molly has been feeling a bit left out. She is starting to show a little jealousy and really just doesn’t know why she isn’t getting all of the attention like she once did. In an effort to make sure she knows just how much we love her and enjoy spending time with her, I’ve been trying to go out of my way to make special moments with her. And now that the holidays are upon us I’ve had to make extra effort to find those little moments in our day.

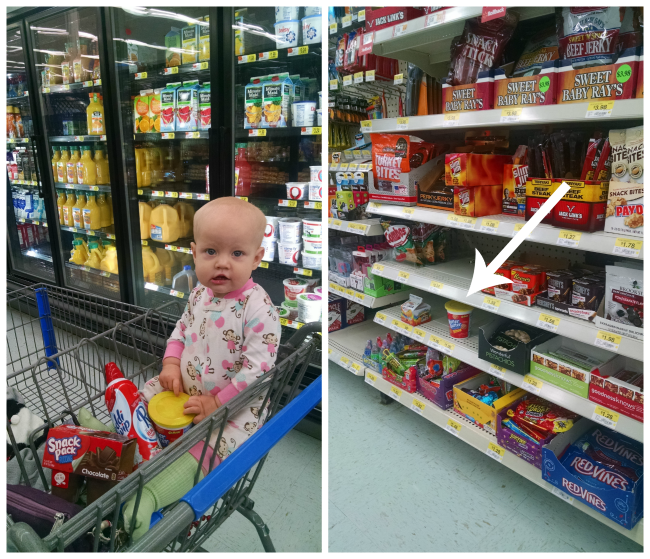
As a fun experiment I decided to pick up a few things from Walmart while she was at school to make an after school snack she’d love. Since we normally save sweets for after dinner, she’d be excited to have dessert after school. Norah and I had a fun time finding all of the ingredients we needed for our chocolate peanut butter walking taco dessert.

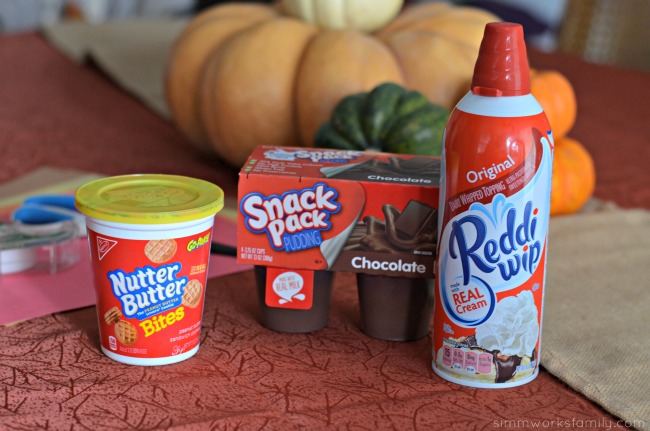
Chocolate Peanut Butter Walking Taco Dessert ingredients

Haven’t heard of a walking taco? Neither had I! But I have been eating them since I was younger and just didn’t know they were called something specific. I don’t know about you but when the ice cream man came around our neighborhood we didn’t always get ice cream. Most times we would get a bag of chips (whatever we decided) and the ice cream man would open the bag and pour in cheese. We’d get the same thing at lunch time and sometimes for breakfast when I was in high school (along with a sugary soda to wash it down with) although instead of chips I remember choosing flaming hot cheetos most of the time.

Well I guess  someone decided to start adding more to their chips and created a walking taco you ate right out of the bag. However they were a bit smarter and used a fork to consume their deliciousness. We just used our fingers and licked off the excess cheese. 

And now I’m making a spin on that walking taco with this walking taco dessert! Using a few simple ingredients I can create a delicious dessert that incorporates all of my daughter’s favorites: peanut butter, chocolate, and of course whipped cream! And making these walking taco desserts in the Go-Paks! means no mess or leaks so it’s easy to take on the go. She just needs a spoon and she’s set. 

Here’s how I made it: 

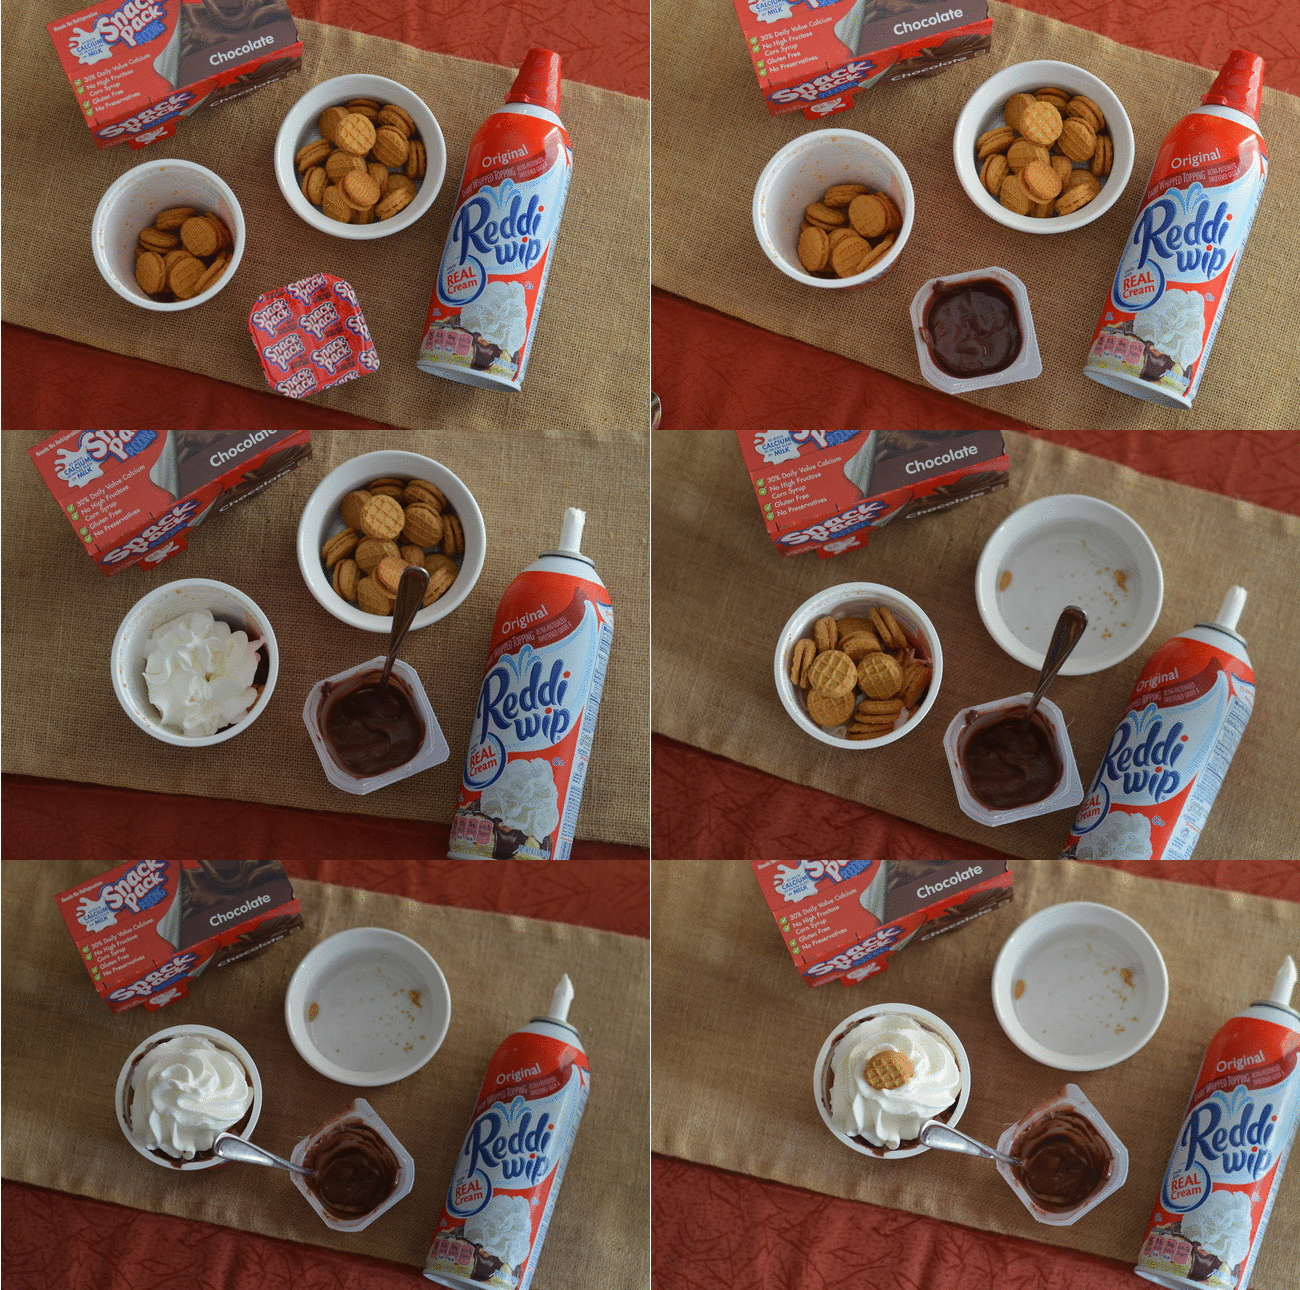
How To Make A Peanut Butter Chocolate Walking Taco Dessert

Chocolate Peanut Butter Walking Taco Dessert

What you need: 

  • NABISCO Go-Paks! NUTTER BUTTER Bites Sandwich Cookies
  • Snack Pack® Pudding Cups in chocolate
  • Reddi Wip Original

What you do: 

1. Open the Go-Paks! and empty out 1/2 of the cookies inside into a seperate bowl (save one on the side).

2. Open one Snack Pack® Pudding Cup and scoop 1/2 of the container into the Go-Paks! on top of the cookies.

3. Top the pudding off with some Reddi Wip Original.

4. Repeat the process ending with the Reddi Wip Original and add that one cookie you saved on the side on top to share what’s inside.

5. Surprise your kid with a fun dessert treat!

Enjoying a Chocolate Peanut Butter Walking Taco Dessert

Be sure to check out more delicious Go-Pak recipes at DeliciousMomentsOfJoy.com.
What’s your favorite combo?

You can find all of the ingredients to make your own walking taco dessert cups at Walmart! Reddi Wip Original can be found in the Dairy aisle by the milk, Snack Pack® Pudding Cups are in the snack aisle, and a variety of Go-Paks! are at the check out counter.

Nabisco products at Walmart

Handmade Holidays: Toy Animal Necklaces

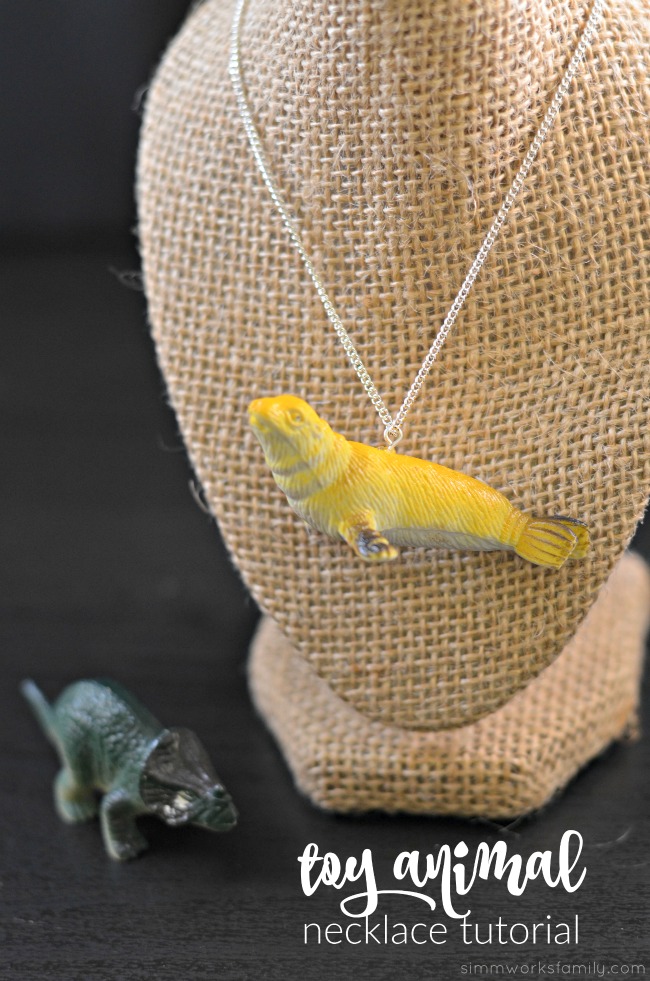
Toy Animal Necklace Tutorial

My kids have a LOT of toys. And as the holidays are coming up (as is my daughter’s 5th birthday) I’m trying to see how I can repurpose old toys as gifts to give to them as well as other relatives and friends.

My daughter is obsessed with my jewerly. She loves trying it on, playing with it, and picking out what pieces I should wear when I go out. So I decided to gift her with a few pieces of her own. Including a handmade toy animal necklace I made just for her.

These toy animal necklaces are super easy to make and take about 10 minutes to actually put together. How’s that for a simple DIY gift?

Toy Animal Necklaces - a quick and easy DIY gift to upcycle old toys

Toy Animal Necklaces

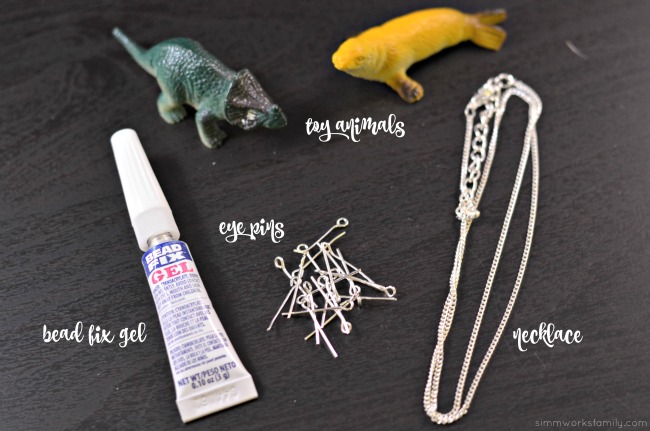
What you need:

Toy Animal Necklaces - supplies

What you do:

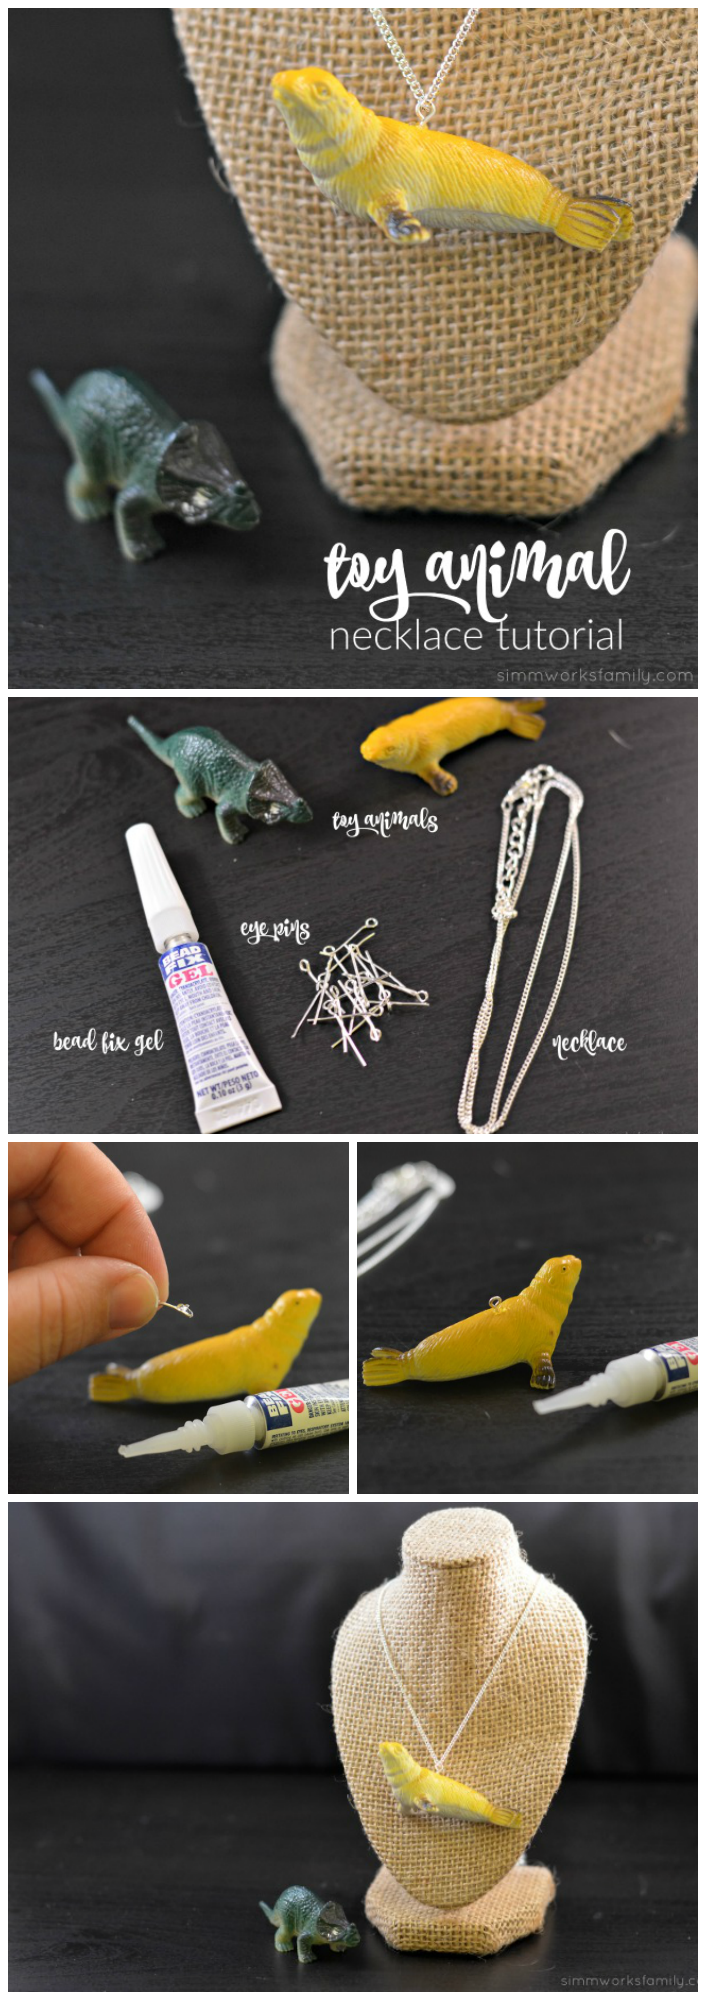
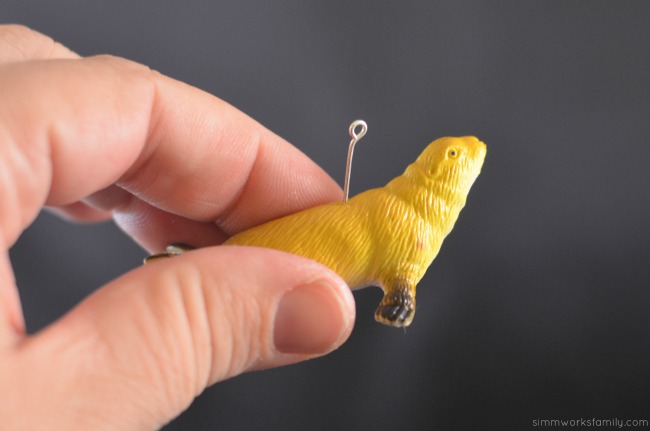
1. Take an eye pin and poke a hole into your toy. If you are having difficulty getting it in, or if the pin is bending, you may need to use a small drill to drill a hole. Or you can simply get a small nail and create a small hole to get the pin going.

Please note: I had to cut my pin in half to allow it to fit inside the body of the toy. 

Toy Animal Necklaces - stick pin in toy

2.  Add a small amount of glue onto the pointed end of the eye pin. Place eye pin in the toy and make sure it’s secured with glue. Let set. 

Toy Animal Necklaces - glue eye pin to animalToy Animal Necklaces - glued on

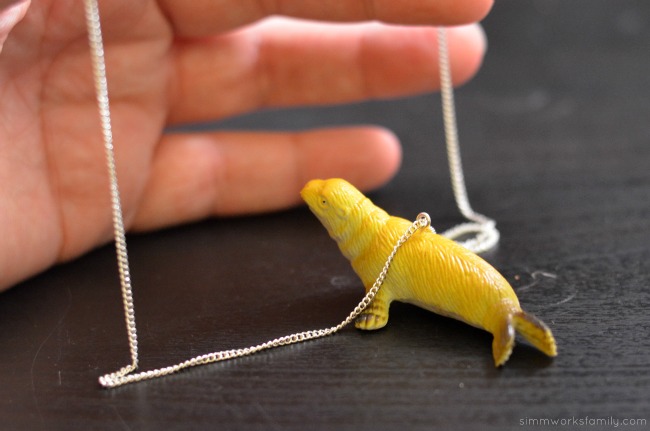
3. Grab the necklace. If the top circle of the eye pin is too small for one end of your necklace to go through, you may need to remove the link of the chain attaching the chain to the clasp. Once you can fit the necklace chain through the round eye of the eye pin, re-secure chain to necklace and clasp. 

Toy Animal Necklaces - necklace threaded through

That’s it! How easy is this project? For the next batch I’m going to spray paint the animals before I put them on the chains. And I’m going to try and dig around and find smaller animals! 

HANDMADE HOLIDAYS hop - HORIZONTAL

I’m part of the 5th Annual Handmade Holidays. You can find some other great gift ideas, crafts, and more by visiting the awesome blogs linked up.

We are having a giveaway of over $600 in craft supplies to help you make this holiday handmade. Enter to win using the widget below:

Handmade-Holidays-2015-Prize-Pack-1600-wide

a Rafflecopter giveaway

Toy Animal Necklaces - an easy DIY upcycled necklace

Spaghetti Squash Chicken Lasagna

Tracking Pixel

Finding an alternative to comfort foods has never been easier. I’m getting creative with making my favorite dishes with help from our sponsor Foster Farms and their Sauté Ready chicken like this Spaghetti Squash Chicken Lasagna recipe.

Spaghetti Squash Chicken Lasagna

For months I’ve felt trapped in my post partum body. While I knew having a third baby would change me yet again, I didn’t realize how much harder I’d have to work after my c-section to get my body back. And when I was finally ready to tackle my weight once Norah turned 6 months old, I got hit with a gallbladder attack and my interest in starting a LCHF (Low Carb High Fat) way of eating was curbed. High fat isn’t good when your gallbladder is full of stones. I’d much rather wait it out than feel the wrath of another gallbladder attack.

However I did finally have it removed and felt amazing afterwards. After having my gallbladder removed I was finally able to hop on board and start eating healthier. While I was twiddling my thumbs waiting until my surgery, I read everything I could about keto friendly diets and why butter and cream are actually good for me. During my pregnancy I didn’t care much for sweets. In fact, they made me feel sick. After I had Norah, that didn’t go away. Anytime I ate sweets or carbs I would feel gross and sluggish. So when I finished reading this book, I was able to change my way of thinking and have laid off the carbs and increased my fat intake. Boy does my body prefer this way of eating!

Foster Farms Sauté Ready in the freezer

I stay focused and on plan with the help of planning. I keep a simple list of foods that I call my “go-to” menu stocked up in the pantry, fridge, and freezer to stick with a keto friendly diet. And with Foster Farms Sauté Ready Chicken in my freezer I can make a delicious dinner that’s on plan while still appeasing my family. They’re the perfect high-protein (21g protein/serving) option to keep on hand for quick, healthy mid-week meals. Plus the chicken is 100% natural and cooks in about 10 minutes with no thawing required. Talk about a time saver! And it takes the guesswork out of dinner – it’s homemade made easy.

But when cravings hit and all I want is comfort food, I don’t mind taking a little more time to create a delicious dish. And this Spaghetti Squash Chicken Lasagna sure does hit the spot! All of the flavors of my favorite chicken lasagna with a considerable decrease in carbs. Plus, it’s something the kids would actually try. Like one bite. Hey! It’s better then them turning their noses up, telling me that it’s gross, and then demanding that dad go take them to get chicken nuggets. Yes… that has happened. And yes, dad did give in.

What I love about this recipe is that it really isn’t that difficult. It just has a few extra steps. But if you aren’t watching your carbs you could totally use jarred marinara to make it easier. It’s protein packed, delicious, and full of cheesy goodness. Exactly what I was hoping for when I started cooking. And since I only use 1/2 of the spaghetti squash in this dish, I have more for other recipes throughout the week.

Spaghetti Squash Chicken Lasagna with Foster Farms

Spaghetti Squash Chicken Lasagna

  • 1 spaghetti squash
  • 1 tablespoon butter
  • salt and pepper
  • 1 15 ounce can of Italian diced tomatoes
  • 1/2 cup whole milk ricotta cheese
  • 1/2 cup cottage cheese
  • 1 cup whole milk mozzarella
  • 1/2 tablespoon Italian seasoning plus more for sprinkling
  • 6 ounces Foster Farms Sauté Ready Garlic Herb Marinated chicken

Preheat oven to 400 degrees. Line a baking sheet with foil. Grab your spaghetti squash, a cutting board, a large knife and your muscles (depending on the squash). Cut your squash in half lengthwise. Remove the seeds (toss or save a few to plant in the garden next year). Put the squash on the foil flesh side down. Bake for 40-50 minutes or until squash is cooked.

While squash is cooking, take 1/2 of the tomatoes and blend until pureed. Set aside. Mix together the ricotta and cottage cheese with the Italian seasoning. Grate the mozzarella.

Once the squash is done, remove from oven and turn around. Reduce heat to 375 degrees. Grab one half of the squash and, while using a fork, scrape out the “noodles” into a bowl. Mix in butter and salt and pepper into the squash.

Add back in 1/2 of the squash. Cover with 1/2 the ricotta/cottage cheese mixture and sprinkle with 1/3 cup of mozzarella. Pour some of the tomato sauce over the cheese and sprinkle with diced tomatoes. Add the chicken. Repeat and cover with remaining mozarella. Sprinkle with Iralian seasoning and bake for 20 minutes.

Serves 4 | Nutritional Info: 309 calories, 8 Net Carbs, 9g Carbs, 19g Fat, 25g Protein, 1g Fiber

Spaghetti Squash Chicken Lasagna with cheesy goodness

Looking to save a little on dinner? Simply download and print the coupon you can find here to get $1 off any 1 ONE (1) package of Foster Farms Sauté Ready, or share the coupon with a friend (via Facebook, Twitter or email) for get $2 off any ONE (1) package of Foster Farms Sauté Ready.

Spaghetti Squash Chicken Lasagna - low carb and keto friendly

What’s your comfort food?

This is a sponsored post written by me on behalf of Foster Forms.

Simple Holiday Bento Box Ideas

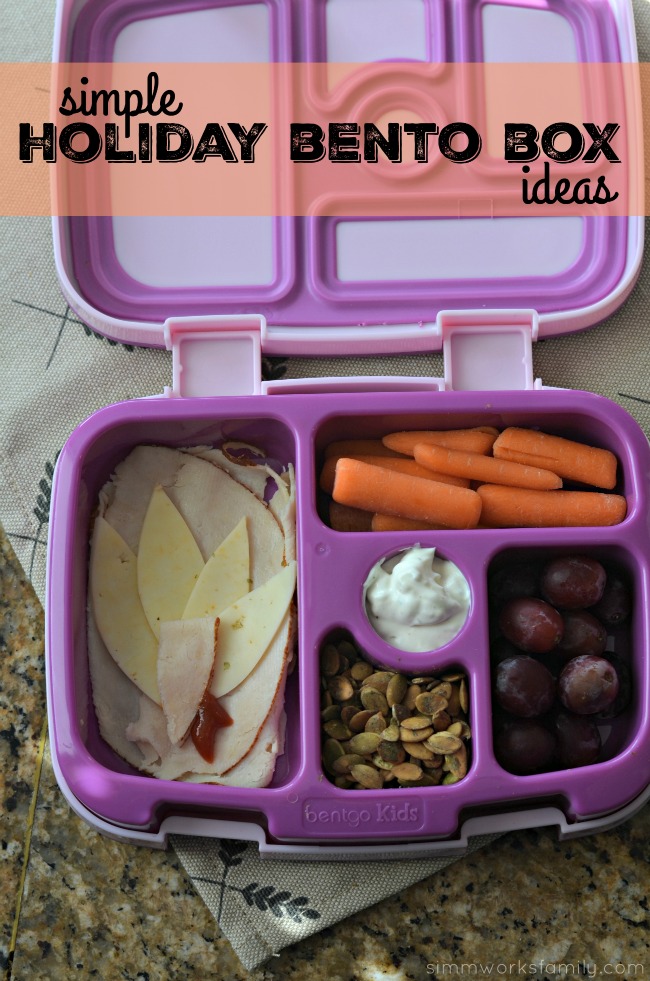
Simple Holiday Bento Box Ideas

My kids have fallen in love with bento boxes (affiliate link). I started making them when I started packing my lunch (even though I work from home) and they look forward to seeing what I’m going to pack them next. Gone are the days of wanting the same thing for lunch every.single.day like before.

Now I’ll be the first to admit that I don’t do elaborate bento boxes for my kids lunches. Instead, I choose one thing to make special or cut up and then the rest just goes with the theme of the bento I’m doing. And I always include foods my kids will actually eat. Because even if the baby eats seaweed, the big kids refuse it.

Luckily coming up with simple holiday bento box ideas isn’t difficult. And when you really get down to basics like I do, you can turn just about any classic lunch into a cute bento idea. Just grab a protein, a snack, some fruit and a few veggies and you’re on your way to an awesome bento lunch for your kids.

You can find these simple ideas featured today on Bentgo’s blog.

How do you add a little holiday cheer to your bento box?

Pinterest Inspiration

How to Create a Smart Home: DIY Home Energy Efficiency Tips

The reviewer has been compensated in the form of a Best Buy Gift Card and/or received the product/service at a reduced price or for free. This post contains affiliate links.
home energy efficiency tips

One bill I hate to see every month is our electric bill. Not only can the amount fluctuate from month to month but I feel as if now that I’m working from home I am the sole cause of the increases to our bill. But after doing my research I feel confident in applying these home energy efficiency tips in our home to help lower our electric bill.

And this couldn’t be a better time to start thinking about energy efficiency in our homes. Especially since our cost of electricity is expected to rise greatly come Winter.

If you’re concerned about high electric bills and want to do something to make your home more energy efficient (as well as save on your monthly bill!) consider making a few simple DIY changes around the home to help conserve your electrical usage.

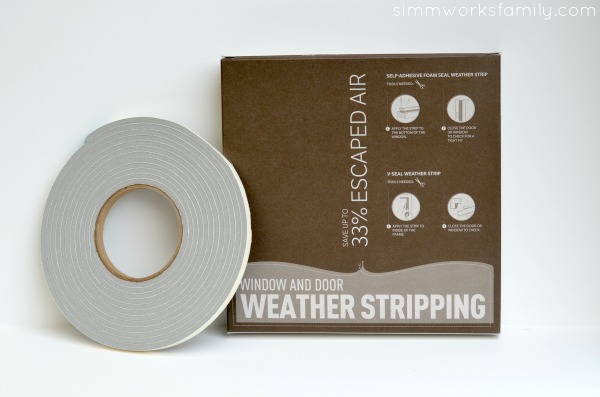
home energy efficiency tips weather stripping

Home Energy Efficiency Tips

1. Close up the air gaps!

Talk a walk around your house and inspect the outer perimeter of your home to find where air can get in. Using weather stripping around doors and windows, eliminate air from getting in and out.

2. Replace your light bulbs

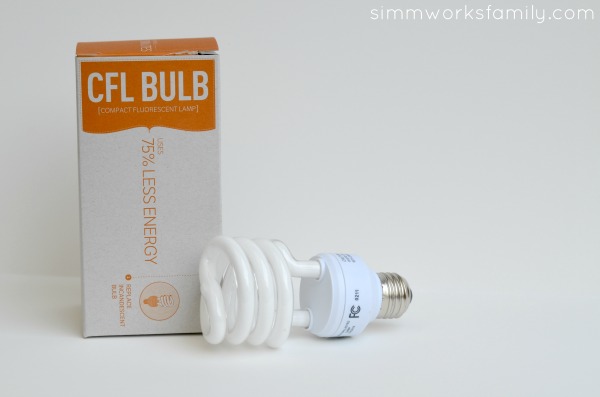
By replacing your light bulbs to CFLs or LEDs you can save up to 75% in lighting cost. An added bonus? They last longer too!

home energy efficiency tips cfl bulbs

3. Look at your HVAC system

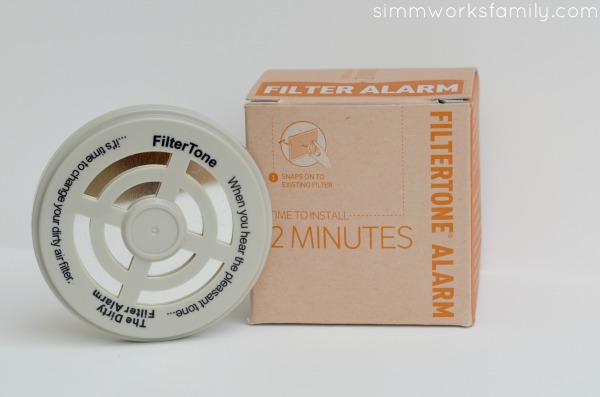
Your HVAC system consists of the heating/cooling equipment, the thermostat, the pipes, the filters, and the duct work found in a central forced air system. Inspect your HVAC system to make sure it’s been properly maintained. If you aren’t sure when the last time it was checked is consider contacting a certified HVAC contractor to do an inspection.
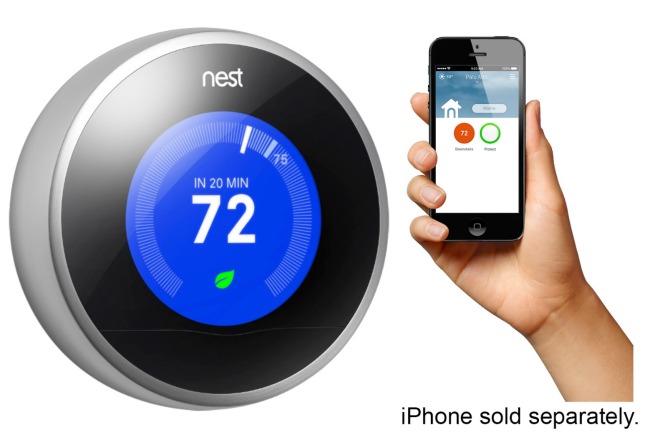
If you don’t already have a programmable thermostat I suggest picking up a Home Nest Smart Thermostat. This is the new 3rd generation version, which is thinner, sleeker in design, and allows for a bigger, crisper display than the prior 2nd generation version.

Not only can you set where the temperature should stay throughout the day and night but you can save money by having your system run only when you want it to. We like to keep our air off until it reaches 78 in the house in the summer. We normally keep the house between 75 and 78 degrees when we’re home. And the heater doesn’t kick on until it’s 65 degrees in the house. But usually the temperature is between 65-70 depending on who’s home. With the Nest there is no need to set preferences – within a week, the Nest learning thermostat starts programming itself. It learns your habits and adjusts automatically, regulating your home’s temperature based on your schedule – which can save you energy and money.


Programmable Nest Thermometer

When used with the new Netgear exclusive router (on store shelves 11/4) you’ll be able to increase or decrease the temperature whenever you need to, even if you’re upstairs! This is a brand new router that was exclusively developed between Netgear, an industry leader in the networking world, and Best Buy, to help provide consumers with an easy, all-in-one solution to support their home’s connected devices.

Best Buy makes it easy with this new high performance Wi-Fi router, which includes a Wi-Fi extender and Geek Squad Set Up and Support via phone & web, for one full year. The Geek Squad service via phone & web allows customers to call or get help 24/7 whenever they want, vs. the need to schedule an appointment. Plus they’re always so friendly and helpful when you do connect with them!

home energy efficiency tips filtertone alarm

4. Check your appliances

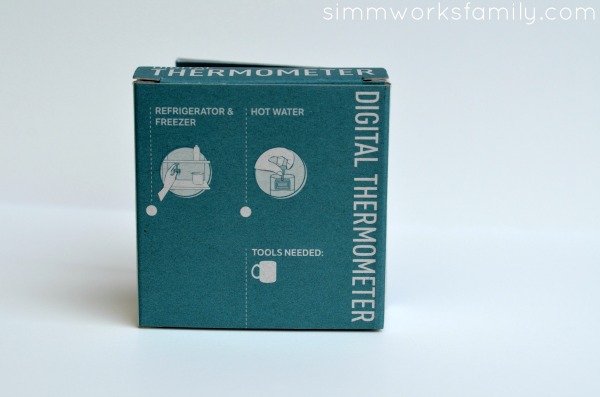
Appliances make up about 17% of the average home’s energy usage. Refrigerators, clothes washers and dryers are at the top of that list. Make sure that your fridge temperature is set between 38-40 degrees F and your freezer is set to 0 degrees F. Use a digital thermometer to check the temperature.

If you have appliances older than 10 years you should consider investing in a newer, more energy efficient model.

5. Test your hot water

Heating water for bathing, washing clothes, and dishes accounts for as much as 15-30% of your household energy use. And the temperature setting of the hot water heater determines the energy used to heat your water. Make sure to check your hot water temperature with a digital thermometer. The temperature should be between 120 and 130 degrees F.

Don’t forget the insulation! Hot water heaters also need to be insulated. If the shell of the heater feels warm to the touch then it should be wrapped in an insulating blanket.

If your hot water heater is 15 years old it might be time to replace it. Look for replacement tanks that have an energy factor of over .62 for gas and .93 for electric. Gas-heated tankless water heaters save about 320% on your yearly energy usage.

home energy efficiency tips digital thermometer

6. Turn off your lights and computer

By simply turning off your lights when not in use, or installing timers to turn them off for you, you can save a lot on your utility bill!

Consider solar lights for the outside of your home or in your garden. Not only will they not be using electricity but you can still feel safe knowing the lights are on outside. We love our solar powered motion censored light out in our front and back yards.

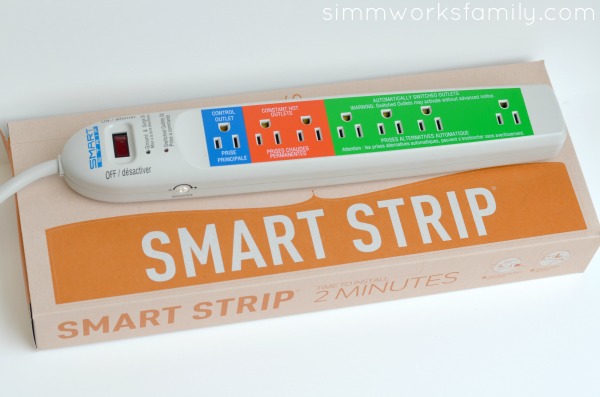
Take a walk around the house and make note of the equipment that is plugged in but not being used. Consider unplugging these devices or investing in a smart strip. Smart strips are easy and convenient to use and will shut off the power to devices that are plugged into it but not in use. You can reduce your energy output by 21$ with just one smart strip installed!

home energy efficiency tips smart strip

Incentives from your local utility, plus federal tax credits and other options, can save you thousands of dollars on your Energy Upgrade. It takes a little bit of research and some work but you, too, can reap the rewards of having an energy efficient home and feel good about saving money and conserving energy.

If you decide to do a whole house energy upgrade it’s best to start with a professional home audit. Your local utility company can provide you with a list of auditors and may even cover all or some of the cost!

How do you save on your utility bill?


© A Crafty Spoonful - All Rights Reserved
It is OK to use one of my photos provided a link back and/or proper credit is given. It is NOT ok to copy and paste a whole post including instructions. Please do not remove watermarks or alter images in any way. Please contact me with any questions at danielle@acraftyspoonful.com

.