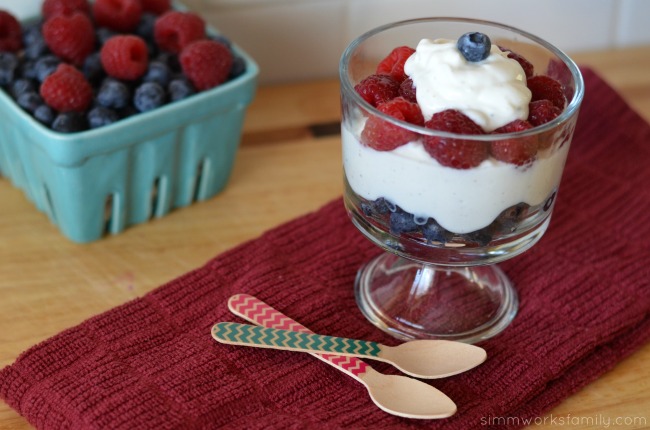
Top 5 Questions To Ask the Orthodontist on the First Visit

My baby is growing up. And that means starting to do big kid things like visit an orthodontist for the first time. This post sharing our questions to ask the orthodontist on the first visit is sponsored by WildSmiles Braces.

Top 5 Questions To Ask the Orthodontist on the First Visit

My oldest is quickly approaching age 7 and I do not know where these years have gone.  From watching him get his first tooth, to just recently losing his fourth, and everything in between there’s one thing that doesn’t change. That amazing, radiant, toothy smile. It’s something I get to see everyday and I am so blessed for it. And he’s losing teeth left and right now – two more are becoming more loose only shortly after he lost his fourth (and first front) tooth. 

We started taking him to the dentist at age 18 months. He had most of his baby teeth come in by then and they all seemed to have come in correctly so we weren’t too worried. Just like anything that has to do with our children, the perfect time to see the dentist ranges from 6 months after the first tooth appears to after 1 years old. And some people wait until later then that. Now that we’re pass that stage and focused on how his adult teeth are coming in, one thing is clear. His obsession with his thumb will mean heading to an orthodontist sooner rather than later. 

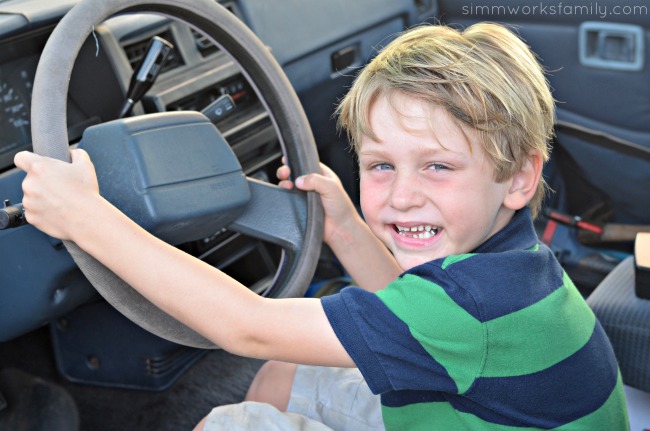
Preserving My First Car For My Son

And as I recently found out, age seven is an excellent time to have your child evaluated for the first time by an orthodontist. This is the age when the first permanent molars and the incisors should have come in properly. And at the rate my son is going with losing his teeth, he’ll probably be ahead of the game once he reaches his 7th birthday. But why go to an orthodontist? 

Orthodontists are braces specialists that do not treat regular dental patients. They receive 2-3 years of specialty training after completing dental school and have a more efficient system to produce excellent results. This makes the braces treatment cost lower, especially if you consider the shorter time in the office. Orthodontists often offer affordable payment plans. Plus the cost of braces varies little these days from community to community so one of the important factors is to find an orthodontist you feel comfortable with.

Early evaluation allows for proper diagnosis and treatment, if necessary, of possible risk factors. Orthodontists can determine if there are any problems that may develop in the future, giving the parent and doctor an opportunity to plan future treatment. The American Association of orthodontists recommends age seven for the first orthodontic consult. So we’re planning for our first visit early next year. And that means research. Making sure we’re going to the best orthodontist for our family and we know what to prepare for and ask at that first visit. 

Thumb Sucking

Here are a few things to ask on that first visit: 

Top 5 Questions To Ask the Orthodontist on the First Visit

  1. Does my child have any missing or strangely shaped teeth?
  2. Do the jaws and teeth match with each other?
  3. Will my child benefit from early treatment? Why?
  4. Will my child require complete orthodontics later? Why? When?
  5. Do you have university orthodontic training after your dental school graduation?

Once you’ve visited your orthodontist, check out WildSmiles braces! WildSmiles is the first and only proven corrective appliance that allows patients to design their custom smile. With specially designed orthodontic brackets that come in a variety of fun shapes including Stars, Hearts, Sports Balls, Footballs, Flowers and Super Diamonds, WildSmiles is available nationwide to moms and kids. Plus? They’re available online!

Have you visited an orthodontist before? How old were you?

Planning Ahead: Meal Delivery Service For Busy Weeks

Disclaimer - Review Posts
Planning Ahead Meal Delivery Service For Busy Weeks

After recovering from gallbladder surgery last week and this week, there’s one thing I was grateful for. Ok, two. My mother-in-law and husband’s help AND Charlie’s Classic Cooking meal delivery service.

I love to cook. I love to eat. I love to watch my family enjoy what I eat. But after going through surgery, or even just having a super busy week schedule, having pre-made meals in the fridge that I know are going to be delicious just takes a huge weight off my shoulders. And when it’s food as good as Charlie’s? Well… lets just say my family was very happy.

We first heard about Charlie’s Classic Cooking when my son and I took two awesome classes a few months back with Stone & Glass as part of their Fire and Fettucini classes. Perfect for just about any coupling you could think of – mother son, father daughter, significant others, girlfriends, “bros” … hahaha – Stone & Glass paired with Charlie’s Classic Cooking to bring together a glass making class and a cooking class. I did the glass making class and Ethan made some amazing fettucini for us to enjoy together after the class ended. I’ve been thinking about that fettucini ever since.

Planning Ahead Meal Delivery Service For Busy Weeks - packaging

Meal Delivery Service From Charlie’s Classic Cooking

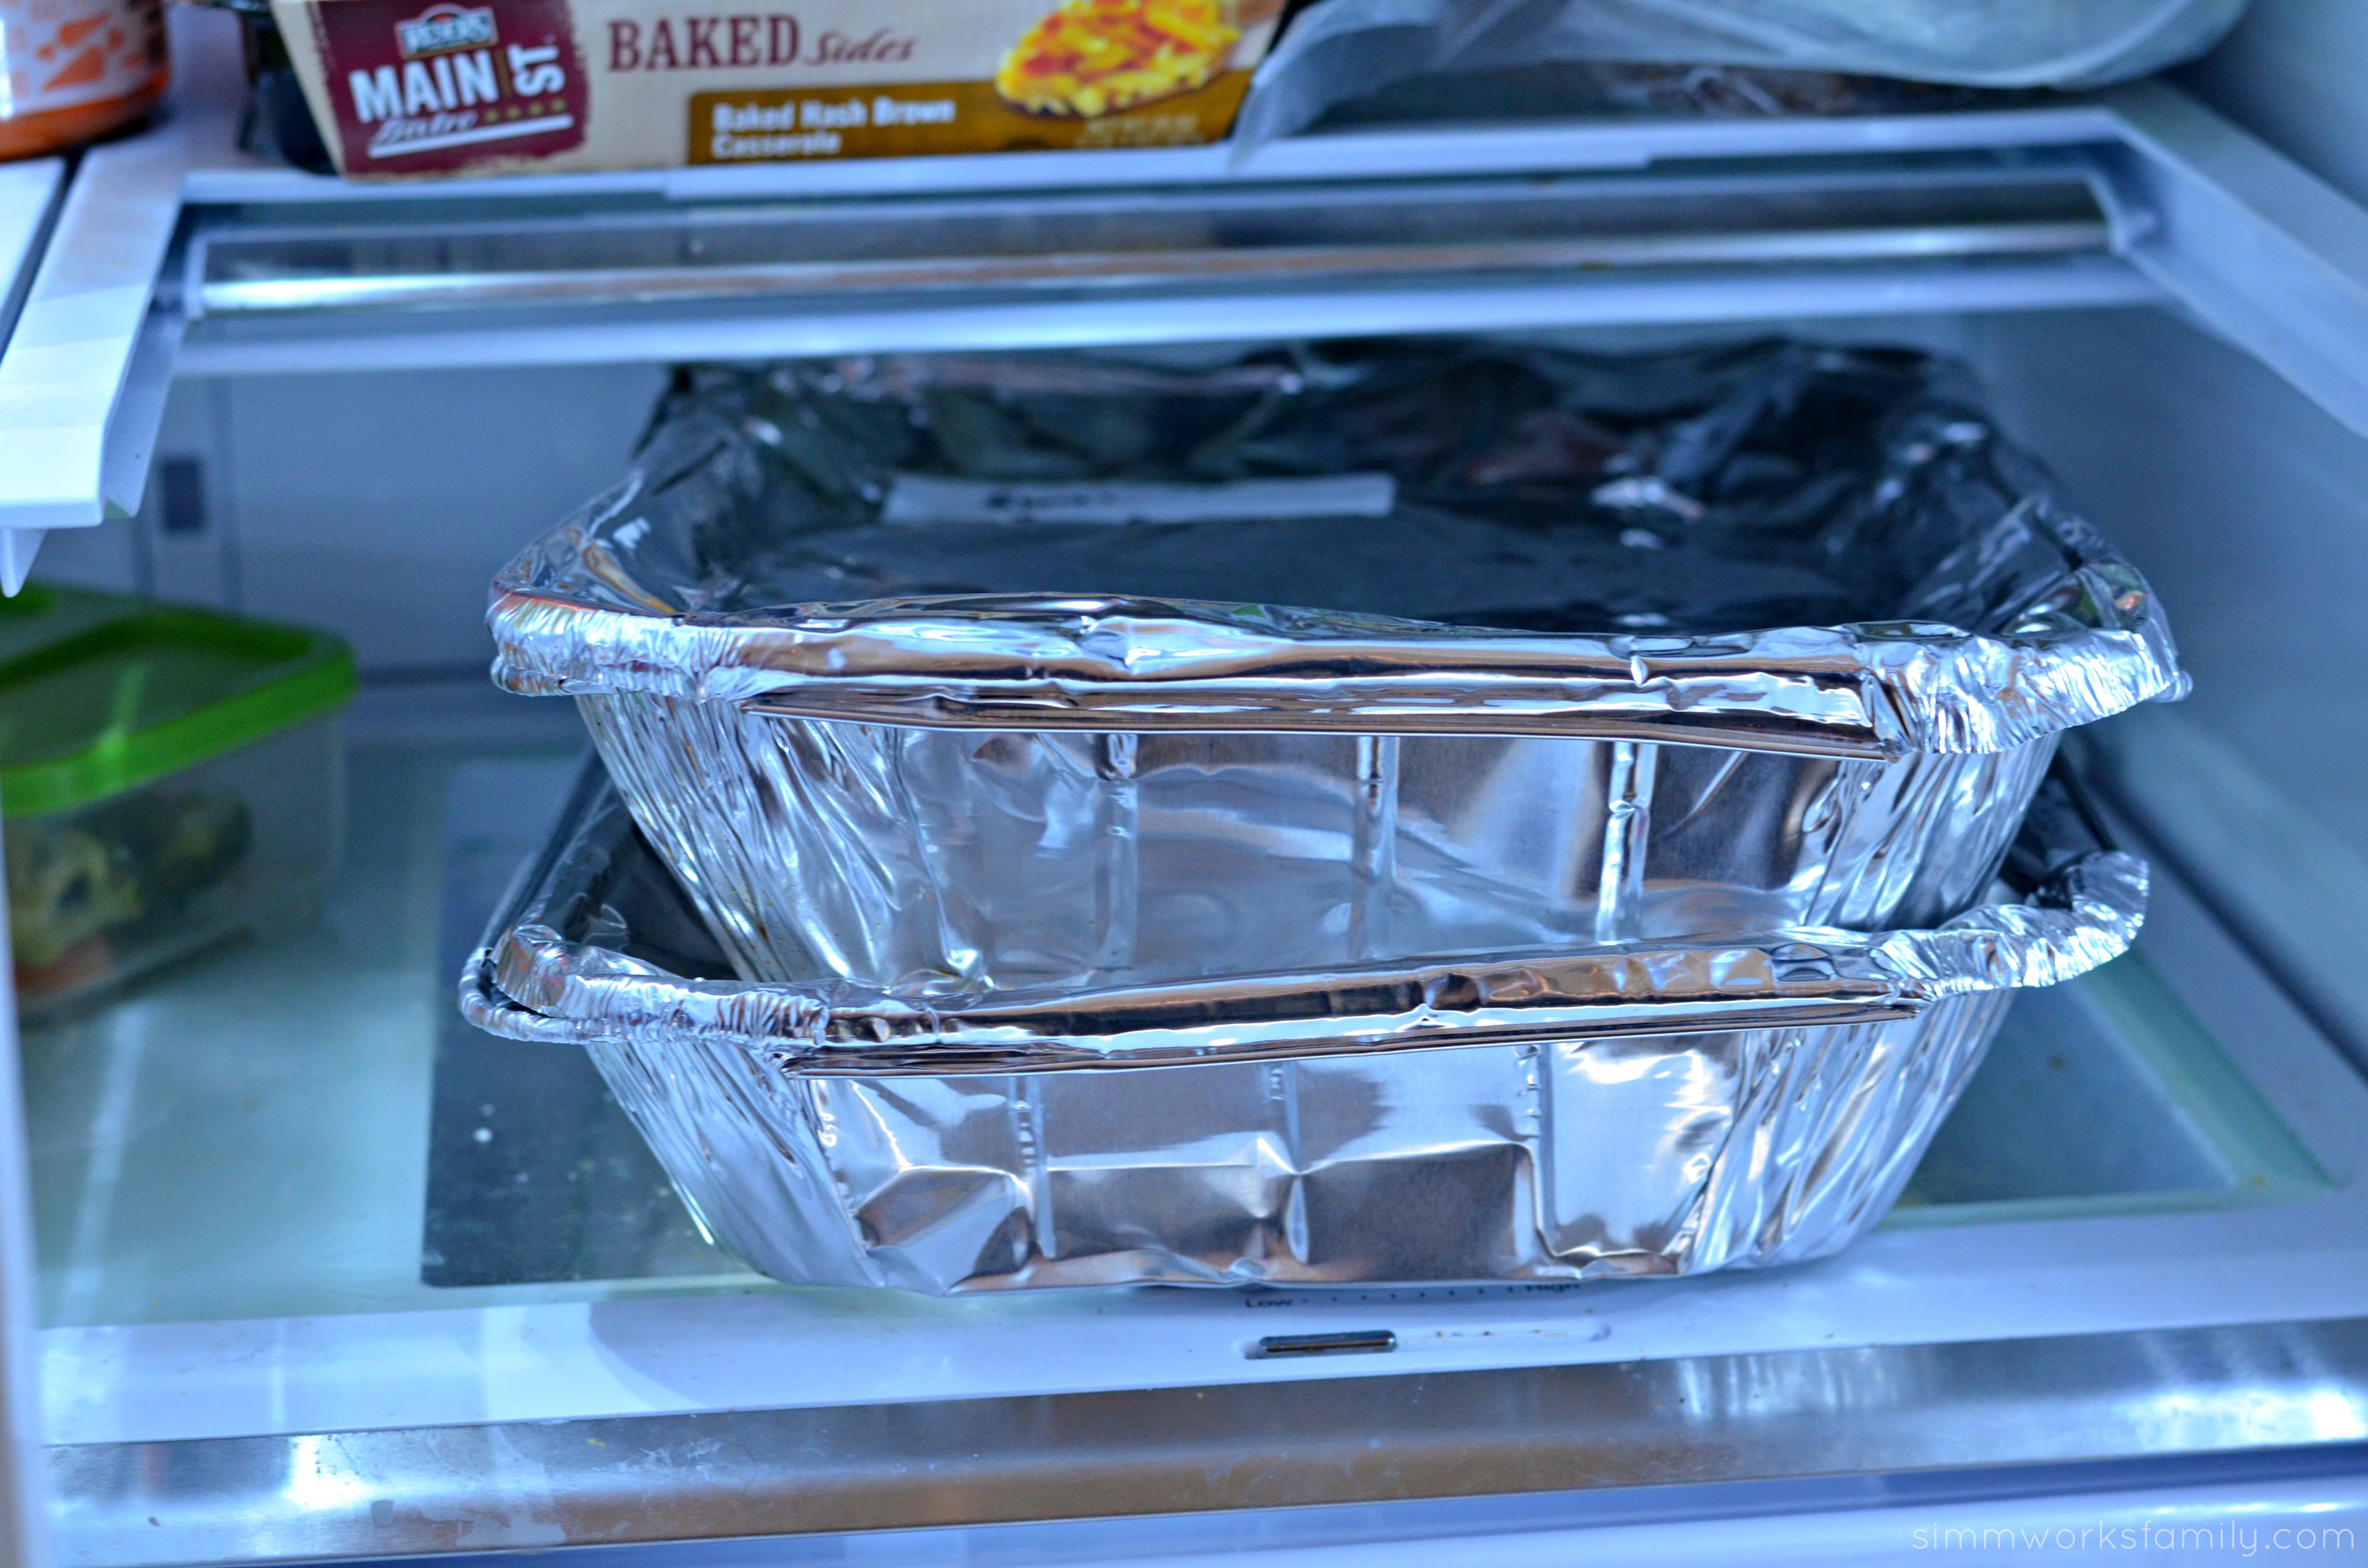
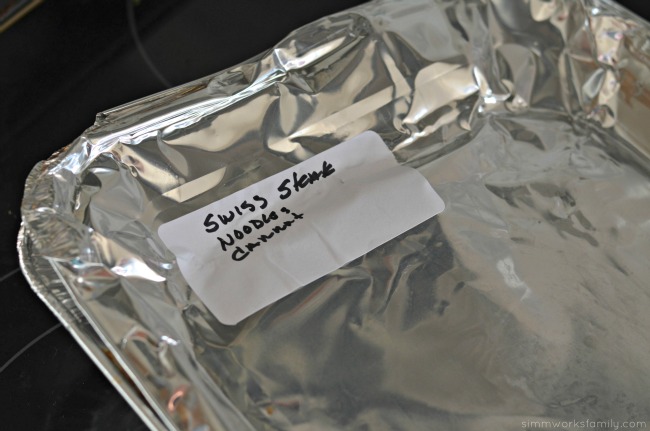
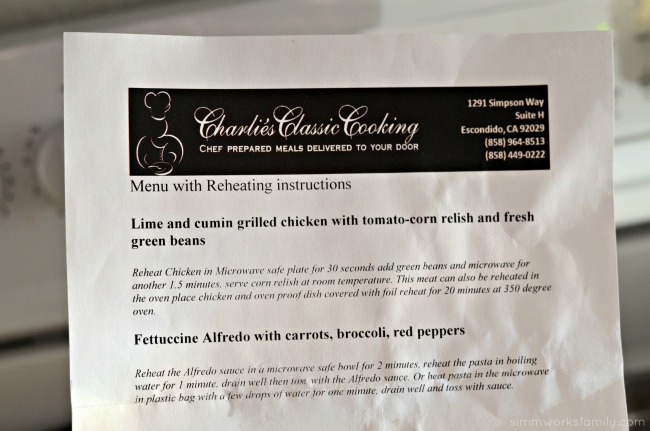
The meals were delivered to our door step and my husband was able to take them inside and put them in the fridge. Each one was labeled with what was inside and we were given our menu with reheating instructions. This made it easy to plan which meal to make on what day depending on what the kids and my husband had going on each night.

Here’s a peek at our menu: 

  • Lime and cumin grilled chicken with tomato-corn relish and fresh green beans;
  • Fettuccine alfredo with carrots, broccoli, red peppers and mushrooms;
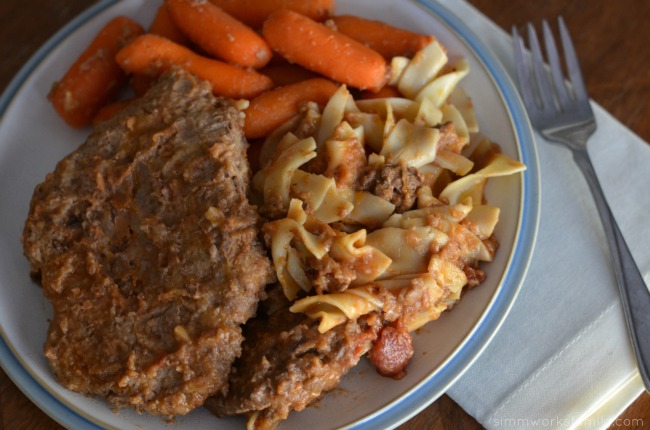
  • Swiss steak with egg noodles and baby carrots; and
  • Sheppard pie with mashed potatoes and spinach salad. 

It was hard for me to choose a favorite as I already LOVE Chef Charlie’s fettucini, but the lime and cumin grilled chicken was so juicy and flavorful that it won me over! And I was able to turn leftovers into chicken enchiladas a day later. YUM! My husband, however absolutely loved the Sheppard pie and swiss steak.

Planning Ahead Meal Delivery Service For Busy Weeks - instructions

At Home Prep | Enjoying Our Meals

Once the meals were delivered, all we had to do was store them in the fridge and pull whenever one we wanted to enjoy that night out and follow the directions. It was easy enough to simply leave the choices in my husband’s capable hands, give him the menu with reheating instructions, and let him prepare the meals for the family. He literally had to look at what temperature the oven had to be at and heat up the meals. And if pinched for time, we could use the simple microwave instructions.

What I loved, besides the ease in which these meals came together, was the fact that I could still customize them to my family’s liking. Take the Swiss Steak for example. My daughter does not eat most meats (besides bacon, salmon, and chicken nuggets) at dinner. So my husband simply set aside some carrots and noodles for her to heat up seperately. Even my choosy eaters were able to pick and choose what parts of the meals to enjoy.

Planning Ahead Meal Delivery Service For Busy Weeks - swiss steak

These home delivery meals start at $175 for a family of four, receiving four dinners for four people weekly. The weekly meal service allows you to have chef prepared meals weekly. The meals are delivered right to your door (home or office) weekly and monthly menus are sent via email or on their website as a weekly reminder of what’s for dinner each week. You can check out the Charlie’s Classic Cooking website or email charles@charliesclassiccooking.com for more info! 

What would you love to taste from Charlie’s Classic Cooking? 

*** This giveaway is now closed ***

Congrats to Linda Appleby! 

Chef Charlie doesn’t just want my family to enjoy a good meal, he’s also giving one away to one lucky reader on the Simmworks Family Blog! 

One winner will receive a dinner-for-four delivered right to your door (a value of $75).  

Open to US only, 18+. Must live in San Diego County. This giveaway ends October 16th, 2015 at 11:59EST.

Mandatory Entry
Please comment* below with what you would love to taste from Charlie’s Classic Cooking. Take a look at this sample menu of what others are being delivered in their weekly meal service drop offs. 

Thank you and good luck!

*Important: By completing any entry in our giveaways, you agree to ALL of our giveaway terms and conditions. Comments such as “Thank you for the giveaway” “I want to win” etc will not be counted as the mandatory entry and will be deleted along with all corresponding bonus entries. Please be aware that comments are moderated and may not appear right away. Make sure you use a valid email address so we may notify you if you’ve won! Giveaway winners will receive their meal directly through the sponsor. Winner must provide mailing address within 48 hours to receive their meal.


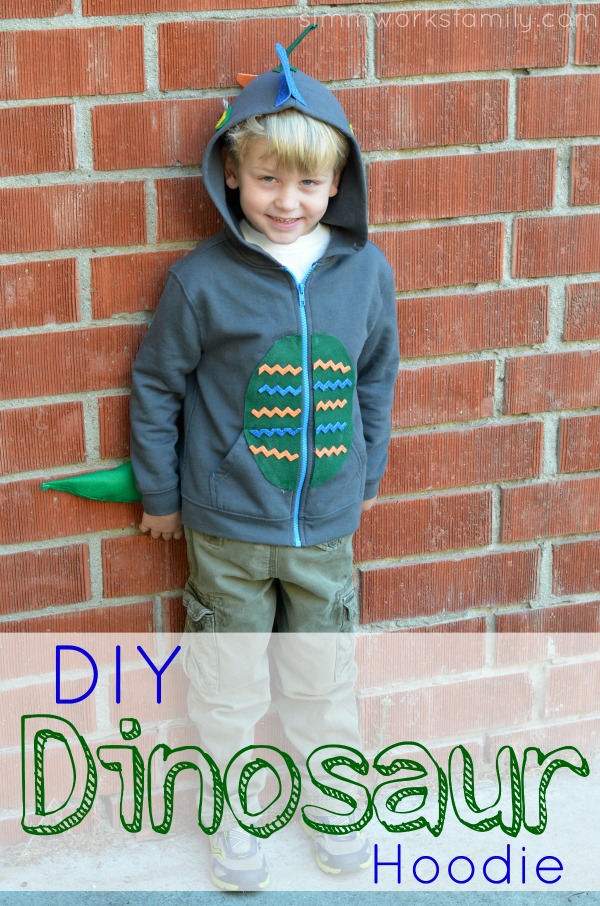
DIY Dinosaur Hoodie

DIY Dinosaur Hoodie

Last Halloween when I was busy figuring out costumes for the kids to wear I got a request from my son for a dinosaur costume. Since I know he doesn’t like big, full body costumes I thought that trying my hand at a DIY dinosaur hoodie would be easier for him to wear. Well a few months later and the hoodie is getting great use… as a fabulous addition to our dress up closet! And it’ll be the perfect thing to wear to The Good Dinosaur movie when it comes out on November 25th! 

Not only is this hoodie easy to make, it’s almost no-sew! With only a small bit of sewing needed (thanks to the wonderful product that is No Sew), even the amateur crafter can pull off this simple costume. All you need are some matching pants and some socks to cover your shoes and you have the perfect DIY costume for Halloween.

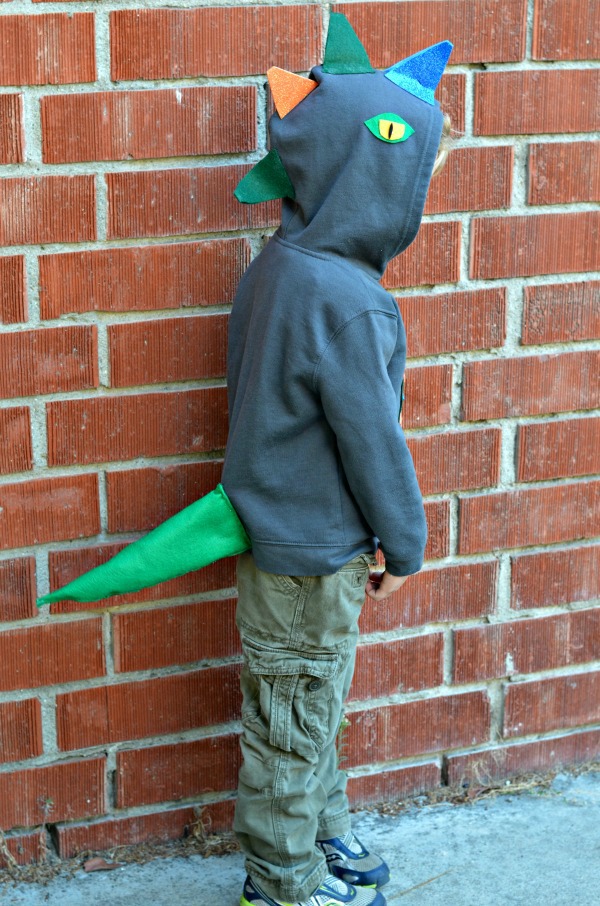
DIY Dinosaur Hoodie side profile

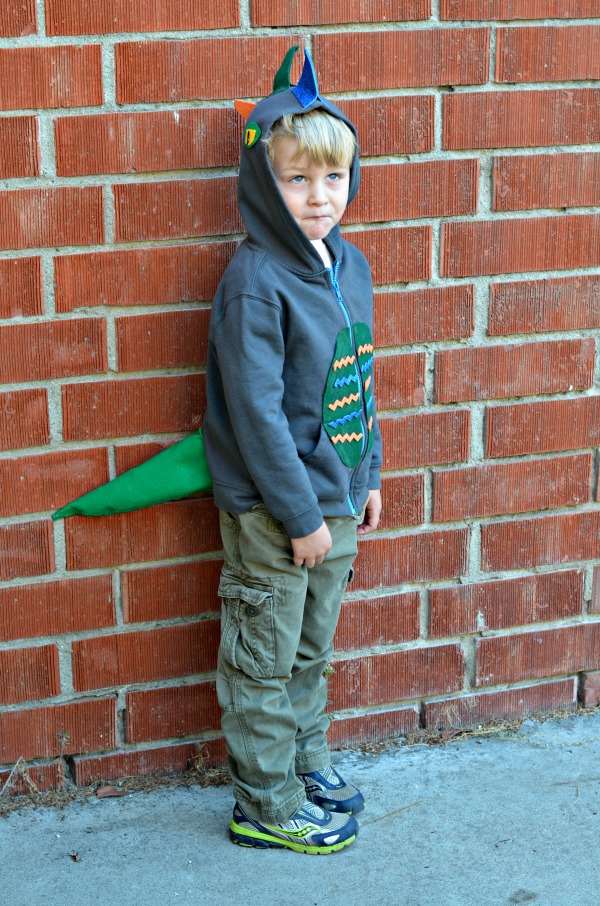
DIY Dinosaur Hoodie

What you need:

  • zip up hoodie jacket
  • adhesive felt in different colors (for spikes, eyes, and belly)
  • 1 piece regular felt (for tail) + more for stuffing tail
  • No Sew adhesive for fabric
  • needle and thread

What you do:

  1. Cut out 8 triangle shapes for spikes.
  2. Cut out a circle in one color felt. Cut that circle in half and adhere to either side of zipper on belly of jacket. Cut out zig zag pattern for decoration for belly in different colors and adhere to half circles.
  3. Cut out eyes using one color for the eye lid, one color for the eyeball, and one color for the pupil.
  4. Take felt for tail and create a cone. Using No Sew adhesive, glue cone in shape so that it stays. Trim away any additional felt.
  5. Stuff tail cone with additional felt and use No Sew to close cone opening.
  6. Using needle and thread, adhere cone tail to bottom back of jacket to secure in place.
  7. Add spikes to the hoodie of the jacket by taking two triangles, removing the adhesive backing, and placing together on the seam of the hoodie.
  8. Make sure about 1/2 an inch is attached to the jacket hoodie with the rest adhering to the other triangle. Use No Sew if additional adhesion is needed. Repeat with other three spikes.
  9. Adhere eyes to side of hood to give the illusion of dino eyes when the jacket is on.
  10. Let No Sew dry completely before letting your child wear the jacket.

Diy Dinosaur Hoodie 2

What themed hoodie would you love to create for Halloween?

THE GOOD DINOSAUR opens in theatres everywhere on November 25th!

Like THE GOOD DINOSAUR on Facebook | Follow @THEGOODDINOSAUR on Twitter | Visit the official THE GOOD DINOSAUR website

A little sneak peek at the movie:

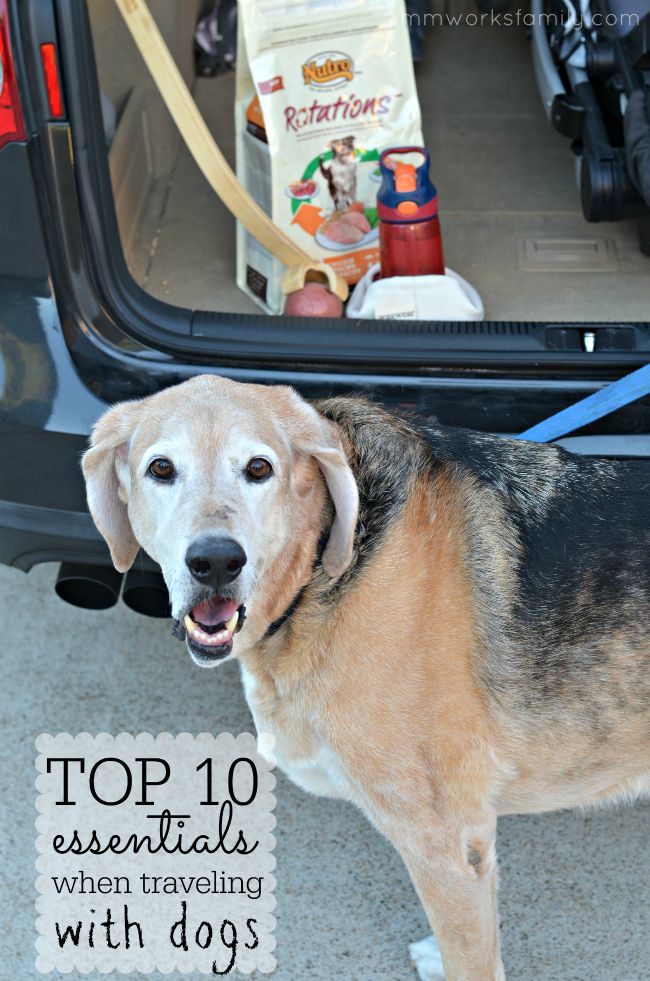
Top 10 Essentials When Traveling with Dogs

Traveling with the family dog doesn’t have to be difficult. It’s just as easy as traveling with kids. Maybe even easier! We’re sharing our must have essentials when traveling with dogs including a few products from The Nutro™ Company as part of a sponsored series with Socialstars. #HonestToDog

Top 10 Essentials When Traveling with Dogs

I still remember the first day we brought Scout home from the pound. We had just met him the day before and as soon as I got to his cage he put his paw up as if saying hello. I played with him a bit through the fence while my husband Joseph (who was only my boyfriend at the time) went to go see if he was available. They said he was a coonhound beagle mix so we assumed we were getting a medium sized dog. But those paws. Those paws said something else! They were HUGE.

Joseph had to work that day and couldn’t get off early so I had the pleasure of heading down to pick him up after he got the snip snip. He was only 3 months old at the time and came out from behind the corner with a cone of shame around him. I didn’t even bring a collar or a leash. I was so new to this whole pet owner thing. He would be living at Joseph’s house since I lived with my dad and did not have room for another dog. But that didn’t stop me from loving on him and staying with him that first night. Staying up and sleeping on the couch to make sure he was ok and all his needs were met.

Needless to say, Scout was a very important part of my life. He was my first real big responsibility outside of chinchillas, rats, and hampsters. And he depended on me and Joseph to take care of him. We took him just about everywhere. Road trips, the beach, hiking, walks around the neighborhood, etc. Wherever we went, he went. And as we got married, added to our family – gained 3 kids, gained and lost a dog, and added many more pets after that, and as Scout got older, the trips have slowed down. But we still get out and about for a little fun. And over the years we’ve figured out the essentials when traveling with dogs.

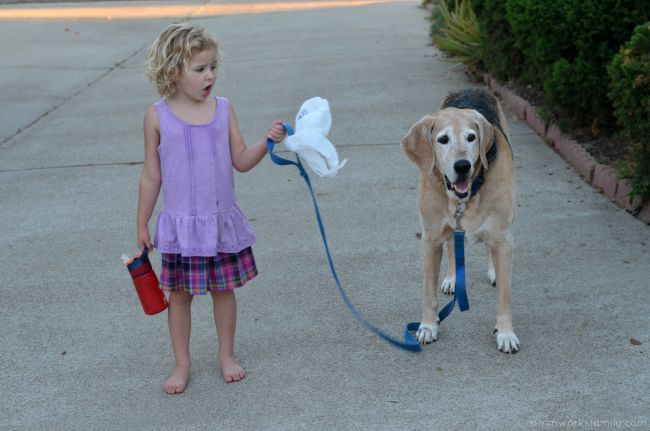
Top 10 Essentials When Traveling with Dogs - walking the dog

Now depending on the size and personality of your dog, some of these may vary a bit. However the basics are all there! And sometimes it doesn’t matter if you’re going on a cross country trip with your pooch or simply taking a day trip to the beach. First above all, though, is to get your dog used to the car at a young(er) age. We’d take Scout on trips to the hardware store with us, to the pet store to grab food, and even to a few dog-friendly restaurants to not only get him socialized but to get him used to the car. One dog I had growing up, Simba, would get car sick every car ride and did NOT like to be in the car. I don’t think I’d attempt a long car ride with him if it could be avoided.

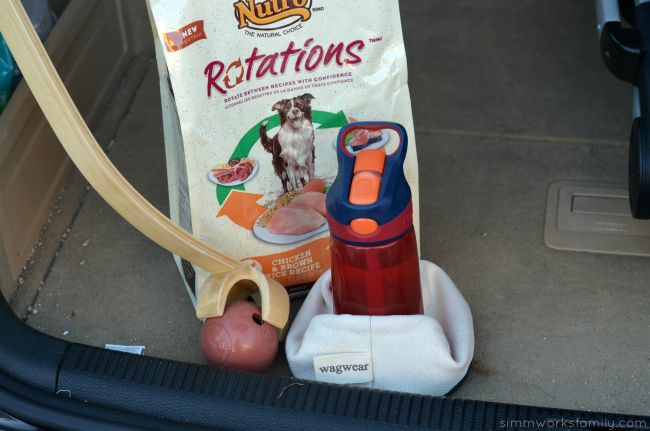
Top 10 Essentials When Traveling with Dogs - packing for your pooch

Top 10 Essentials When Traveling with Dogs

  1. Water – You always need to bring water with you when you’re traveling with Fido. Whether it’s a 20 minute drive to the park, a walk around the neighborhood, or a longer trip, water is essential to have with you when you have your pooch at your side.
  2. Poop Bags – Even if your dog is a once a day pooper in the same spot every day (don’t laugh… some dogs are very, er, regular) it’s good to have poop bags on hand (or even attached to their leash) at all times.
  3. Leashes – And that leads me to the next important essential, your dog’s leash. I would suggest keeping the leash attached to their collar even when in the car. It not only is convinient for getting out of the car, but should someone else need to go into your car, they can quickly secure your dog by grabbing the leash.
  4. Car Harness – Just like securing your children in a carseat, a car harness or crate is important to keep your dog safe in case of an accident or emergency. It can also act as a calm place for your dog to retreat to (the crate) if they’re feeling nervous on the trip when you reach your destination. Always keep your dog in the crate when the car is in motion OR harnessed.
  5. Towel/Bedding – if your pooch is sitting in the back seat, putting a towel down underneath them can act as some padding for them, protection for the seat, and an easy way to dry them off if you have an accident or are coming home from the beach. We’ve also found this to be an easy way to make them feel more comfortable if the car seat has an awkward angle. It also comes in handy in the back of the car as it acts like a makeshift bed.
  6. Food – Sometimes bringing food for your dog isn’t needed. But when you’re on a long road trip, or even a day trip to the beach, remembering your dog’s food is important. A food like NUTRO™ Rotations™ dog food can add a bit of variety to their diet and you can even pair it with what you’ve brought for the family to eat so your pooch can enjoy the same meal.  
  7. Food/Water Containers – Even though this is kind of a given, having a few food/water containers with you can help out in a pinch. We like the soft, collapsable containers that will fit in a purse or diaper bag. I keep one in my trunk at all times along with a small tupperware container that holds the collapsable dish, extra leash, poop bags, and a water bottle. Just in case.
  8. Toys – Not only are toys great for your destination to keep your dog happy and entertained, but a favorite toy, blanket, or chew toy can help calm your dog while you’re on your adventure. Something that reminds them of home and security. 
  9. Medications – Not all dogs are on medication however if your dog does need his daily meds, don’t forget to bring them along. I like to bring the whole bottle that includes the prescription information instead of a pill saver just in case. That way I have all of my dog’s info with me. You could also write out a list of medications to keep with you just as you would for yourself when traveling. 
  10. Treats – Keeping a little stash of treats you know your dog likes can be handy when you want to get their attention, have them respond to your commands in new situations, or simply praise them for being good on your trip.

STAINMASTER PetProtect running at the beach

This old boy has definitely left an impact on my life and I’m so happy to have his companionship. We might not be doing cross country trip anytime soon but our beach days are far from over.

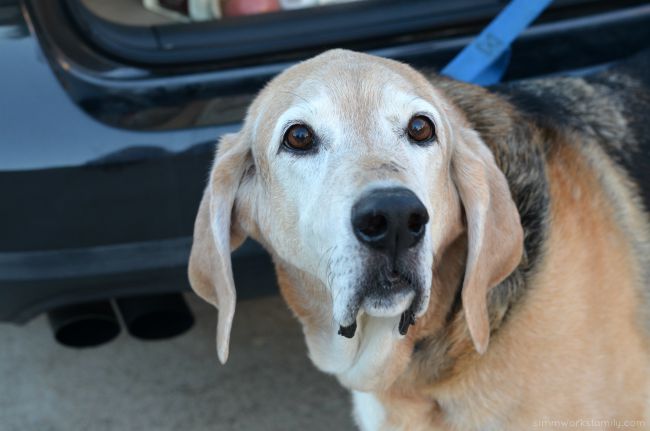
Top 10 Essentials When Traveling with Dogs - Scout at 12 years old

Do you travel with your dog?

Find more great travel tips by liking The Nutro Company on Facebook or following on twitter.

®/™Trademarks of © The Nutro Company 2015

Keeping Baby Entertained On The Go

After having our third kid, we realized that keeping baby entertained on the go isn’t as hard as it was with the first and second child. It’s even easier with Playskool’s new on-the-go line! I participated in an Influencer Activation on behalf of Influence Central for Playskool. I received product samples to facilitate my review and a promotional item to thank me for my participation.
Keeping Baby Entertained On The Go

I don’t know if this is how it is for all third babies but our little Norah has turned out to be very adaptable. She just goes with the flow and takes to change easily. As long as her mama or dada are with her, and she has something to entertain her, she’s pretty cool with just about any new situation. So when I had to have my gallbladder out last week, I wasn’t too concerned about her being without me. Except  for the fact that she hadn’t successfully taken a bottle in quite a while.

Well she did absolutely awesome with her dad when I spent the night at the hospital the night after my surgery. She surprised us in not only taking one bottle, but taking two for her dad. And she was in high spirits when she came to visit me around 9:30am the next morning. Better yet, she just wanted to play! And luckily we saved some new toys for her to enjoy as I recovered.

SAMSUNG CAMERA PICTURES

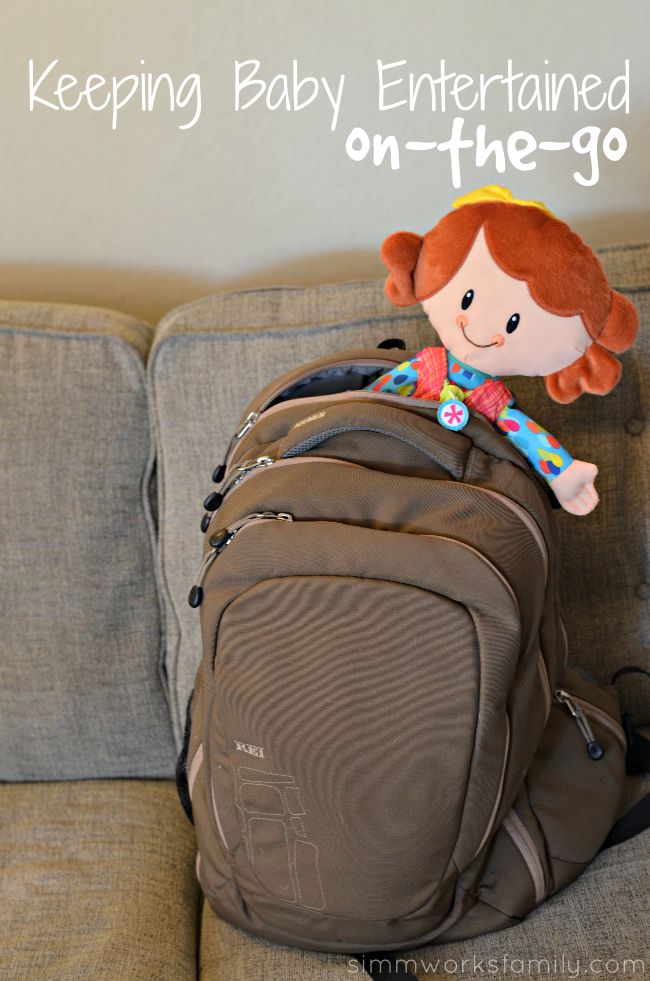
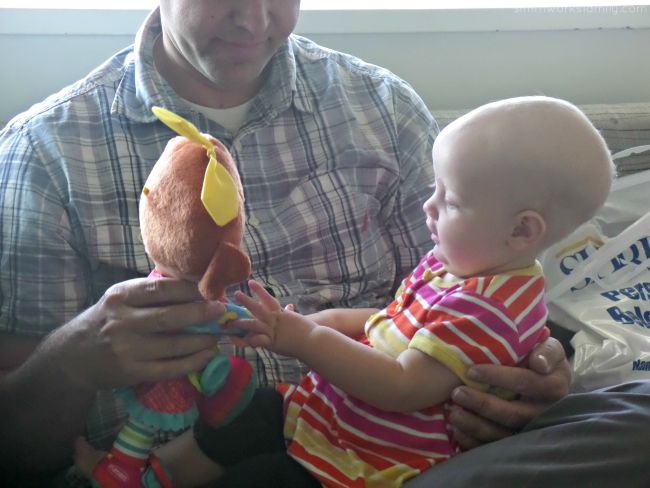
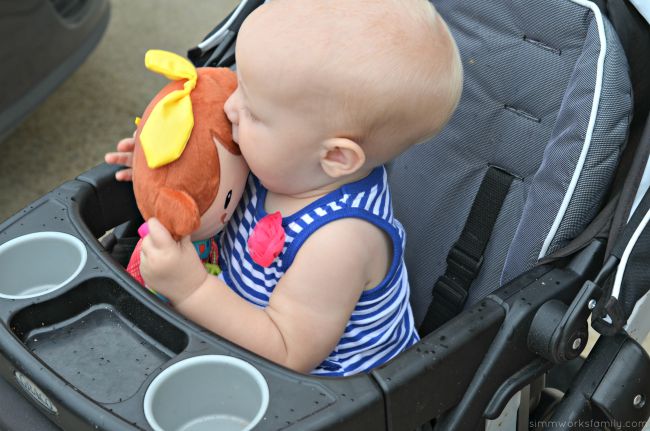
I have a little confession… Norah really hasn’t had any new toys purchased for her. She plays with a few hand-me-downs from her cousins and friends. And she loves playing with her siblings’ toys. So when my husband busted out a few fun toys from Playskool’s new on-the-go line out of his backpack to keep her entertained at the hospital, she just about tackled her new Dressy Bessy to play with her zipper and button. It was absolutely adorable to see Norah play with Dressy Bessy’s button, then go and find her buttons on her dress as she played in the hospital room.

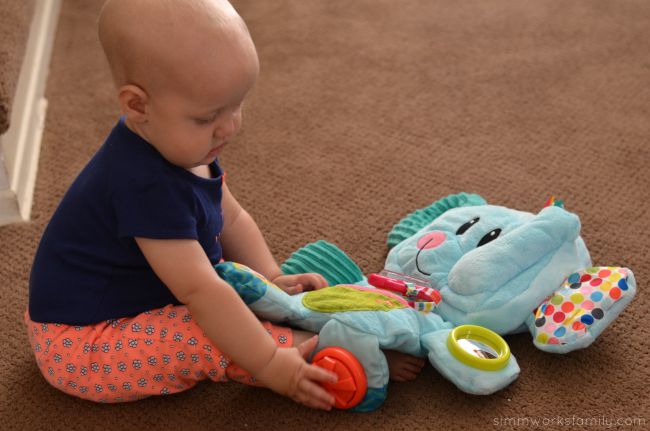
And? Dressy Bessy comes with a secure clip that we can use to attach to the stroller or my diaper bag. That way we can take her wherever we go and she takes up little to no room. Clipping her onto the stroller also means that Norah can play and have fun and I won’t have to worry about Bessy being thrown overboard. And her Fold N Go Elepant? It folds up into a cute little package for easy storage. Talk about convinience. Great for staycations or travelling around.

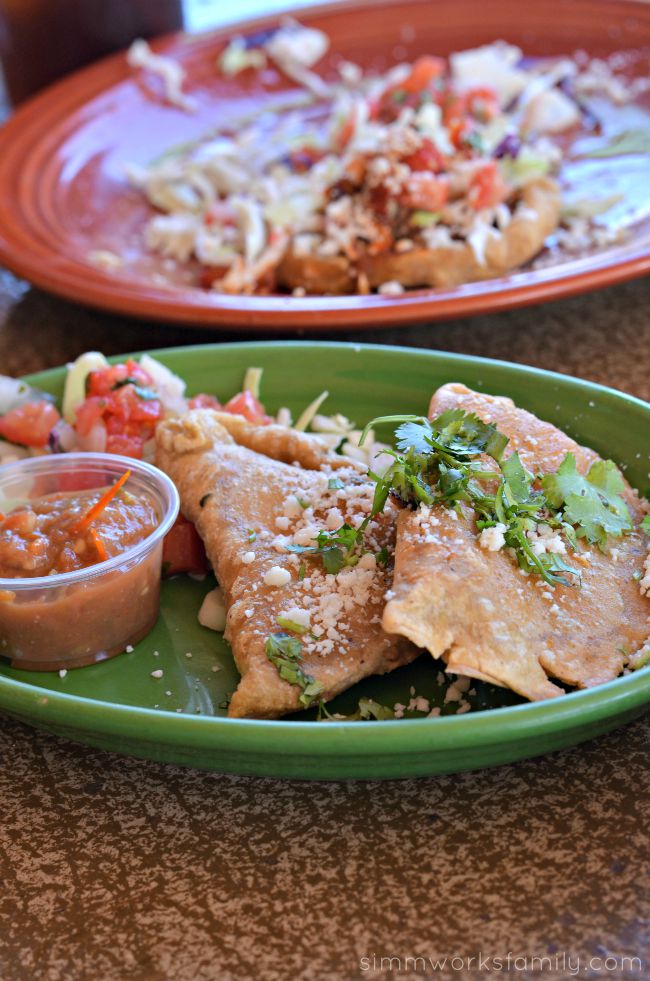
Keeping Baby Entertained On The Go - Fold N Go Elephant

Keeping Baby Entertained On The Go

  1. Distractions… er… Toys – Toys are an important part of keeping baby occupied on the go. Whether on a road trip and stopped at a rest stop (toys should not be played with in a moving car), or during a day trip to the park or beach, having a fun toy like Playskool’s Dressy Bessy clipped onto the stroller or the Fold N Go Elephant stashed away in the diaper bag can turn into a great distraction for baby to keep them happy and occupied.
  2. Snacks and Drinks – One of the best ways to keep Norah entertained while we’re out and about is to offer her a sippy cup. It doesn’t even have ot have water in it. At this age she just loves playing and chewing on it. Water makes it more fun. And little snacks like puffs or yogurt melts keeps her distracted and working on her pincer grip for quite some time.
  3. A Change Of Scenery – I’ve found that keeping babies in the same position with little to no change drives them crazy. It’s probably the one reason why my kids always hated the carseat at that age. They couldn’t see the changes taking place outside the window! So whether it’s moving them from the stroller to the carrier (change in view) or simply walking around a bit with them to show them some new cool things to explore, a change of scenery is very inportant when keeping baby entertained on the go.
  4. Music – If you’re trapped in the car for a few hours and can’t resort to toys or snacks, playing a little music and singing along may get baby to focus on the sounds vs. complaining about being trapped in their carseat. We put on a little Hulabaloo and start singing along to get Norah distracted enough to start enjoying herself.
  5. Games – Even though babies might not understand the games, the repetition of some games like patty cake, peek-a-boo, etc can help baby learn how to interact with you and react to what you say. Plus, when you start playing a game that’s familiar to them, they are immediately interested and distracted from what they were doing before. Which is super helpful when you’re on the go.

Keeping Baby Entertained On The Go - Dressy Bessy

How do you keep baby busy on-the-go?

Now your baby can enjoy Playskool’s new on-the-go line too! Influence Central (I-C) is hosting a contest for the new Playskool on-the-go line through which you can enter to win one of five Playskool Prize Packs. Contest opens on September 9, 2015 and closes September 30, 2015

Enter by choosing a social media sharing option from the social media amplification tool below!

Playskool Audience Engagement Tool

*I-C will randomly select five winners from all program entries and will handle fulfillment of the winning prizes.

Easy Weekend Lunch Ideas

This is a sponsored post written by me on behalf of Campbell’s Soup Company . All opinions are 100% mine.

Easy Weekend Lunch Ideas For Kids

Weekend meals can be tricky. While the kid aren’t heading to school, there are a ton of different activities planned over the weekends. Some planned and some spur of the moment. I like to have a great list of lunch ideas handy so that lunch time on the weekends is easy and simple. Luckily, Campbell’s makes that easier for me with their delicious soups.

Now that the kids are older, I’ve simply expanded on our quick toddler lunches to include additional items like Campbell’s Organic soups and fuits or veggies to create the perfect lunch time meal. And most times all I have to do is set out the ingredients and let the kids make their own plates up. Then I serve them the soup when they have everything else on their plate. This is even more helpful when we have last minute guests, like when the kids cousins come over to play.

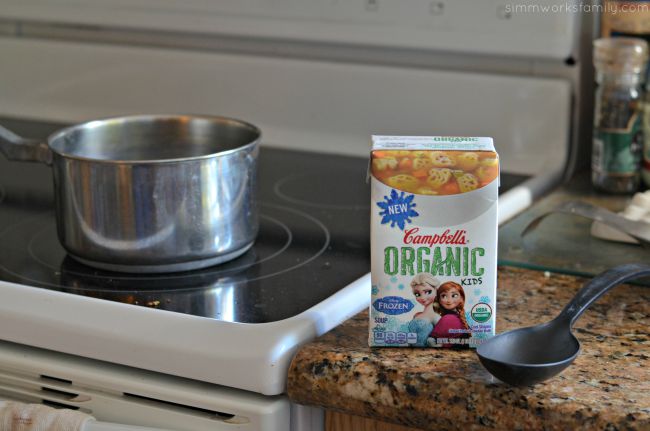
Easy Weekend Lunch Ideas For Kids - Campbell's Organic Kids

Campbell’s® Organic Soups are crafted from certified organic ingredients and no preservatives. These soups are perfect for a heart-warming, healthy lunch or dinner. Plus there are nine delicious varieties. My daughter’s favorite? The Frozen noodles. She goes crazy over the fun Frozen-themed shapes and will actually eat her soup (instead of just the noodles) when I serve it up. The boy cousins eat it begrudgingly because they enjoy the soup. Their request? A minecraft version! 

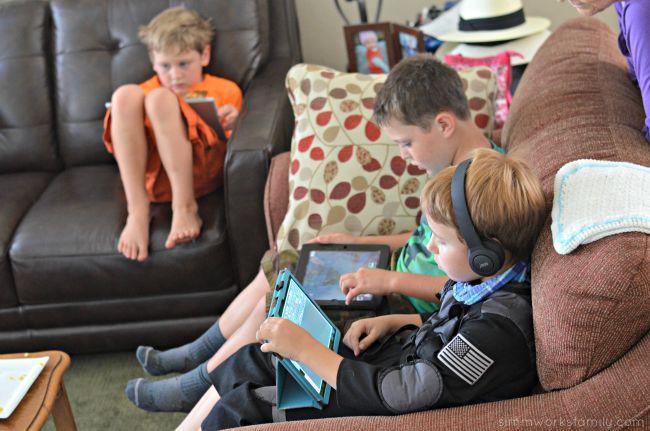
Easy Weekend Lunch Ideas - feeding the cousins

Easy Weekend Lunch Ideas

Quesadillas + Soup

Quesadillas are awesome. You can put just about anything in them and by taking the flavors of the kids favorite Cambell’s soups, we can make complimentary quesadillas. My daughter opts for the classic cheese quesadilla but will add a little grilled chicken when enjoying chicken noodle soup. Plus it’s the perfect cold weather meal with the warm soup and quesadilla.

Sandwiches + Soup

What’s great about sandwiches are they’re so versatile. You can serve them hot in cold weather and cold in warm weather. We always keep some lunch meat on hand along with a few cheeses for the kids to fix up their own perfect sandwich creation. Then we’ll make paninis if the kids request it.

Wraps and Roll Ups

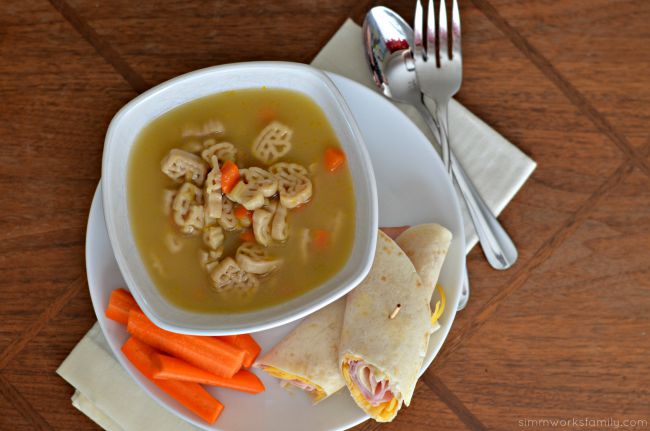
Grab tortillas, pitas, or other flat wraps and grab the same ingredients you’d put in a sandwich or quesadilla! By just changing how the kids eat their food, they can get quite experimental with what they put inside. Add a hummus spread or some avocado to give a little added flavor to your child’s wrap.

Soup + Salad

Don’t knock a good salad bar when you’re serving kids. You’d be surprised at how many kids will choose to eat salad when given the option to make their own. Just put together a good list of toppings and a few different dressings and be amazed at the kids who will start munching on their greens.

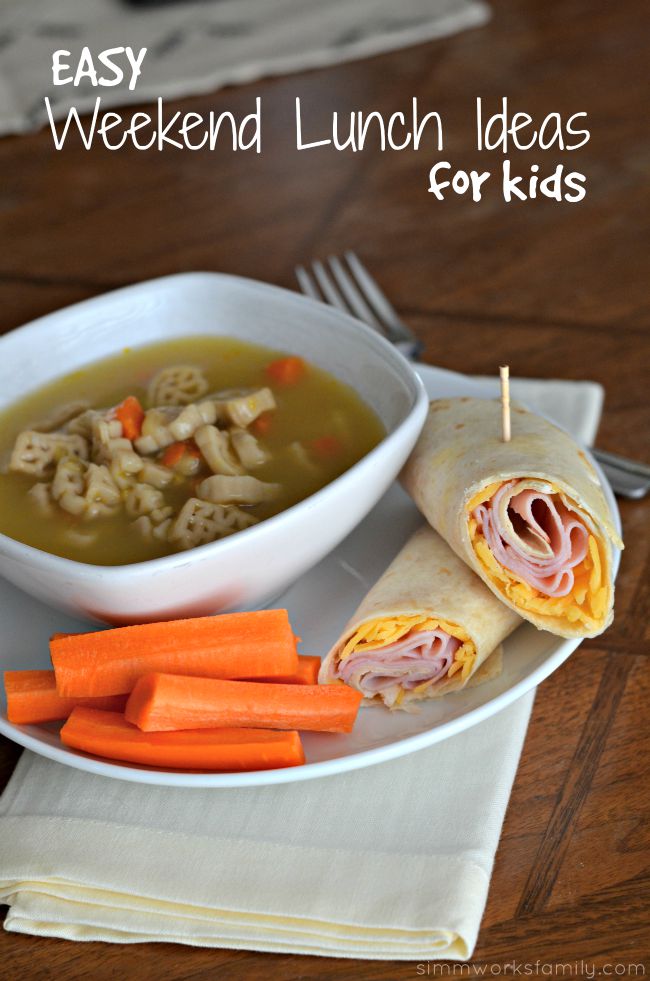
Easy Weekend Lunch Ideas For Kids - Campbell's soup, ham wrap, and carrots

Don’t forget to check out these Delicious Campbell recipes for more great ideas on what to enjoy at lunch time with @Campbells. 

What easy weekend lunch ideas does your family serve up?

Visit Sponsors Site

DIY Potato Stamps for Kids

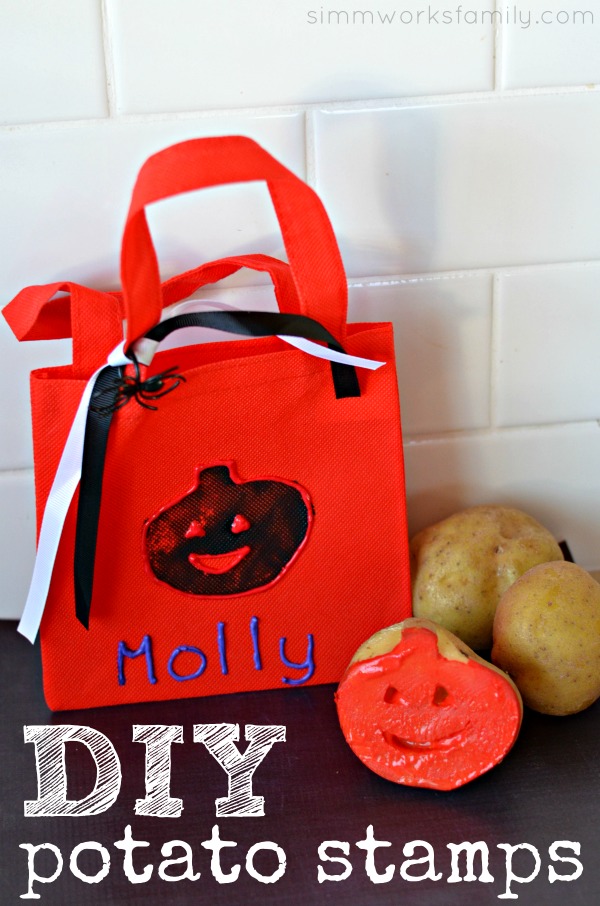
DIY Potato Stamps

Ever have potatoes lying around that are starting to grow eyes and you just grab them and toss them? Well stop! I’ll show you how you can turn those questionable spuds into a fun craft for your kids with these DIY potato stamps!

Simply grab some washable paint, some paper plates, a few taters and a small knife for carving. Then decide what you want to stamp on.

Get ready for some fun…

DIY Potato Stamps

What you need:

  • potatoes
  • small pairing knife or pumpkin carving knife
  • paper plates
  • washable paint
  • surface to stamp (paper, cloth, etc)

What you do:

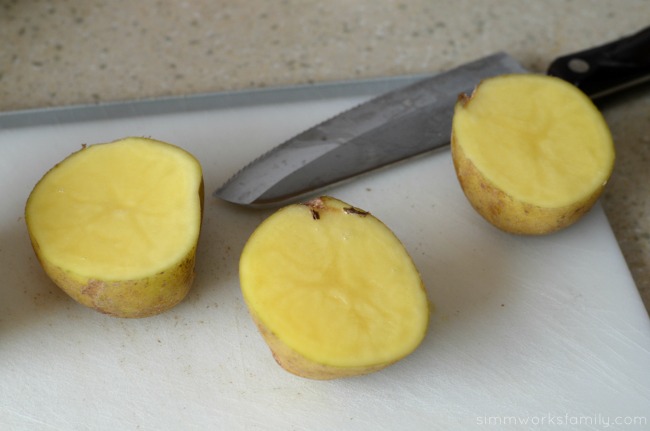
1. Cut the potato in half.
potato stamps potatoes

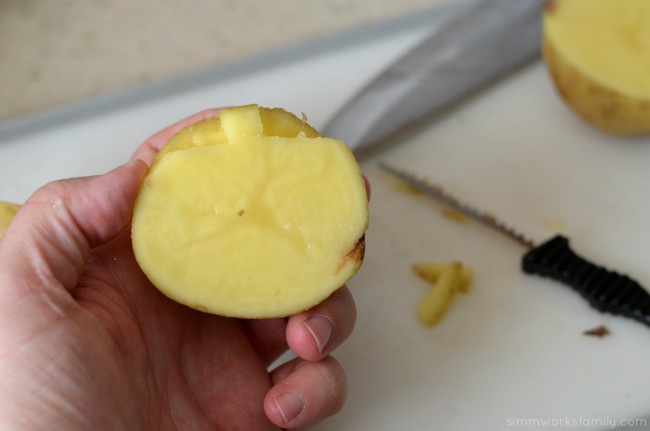
2. Decide what you’re going to cut and cut out the outline leaving a good portion of the potato left to grab onto. Since we were making Halloween treat bags on Halloween we went with pumpkins.

*Tip: Use a small cookie cutter to make your shape. Push the cookie cutter in about 1/4 of an inch deep and then while the cookie cutter is still in the potato, use a knife to cut off the excess.

potato stamps cut out shape

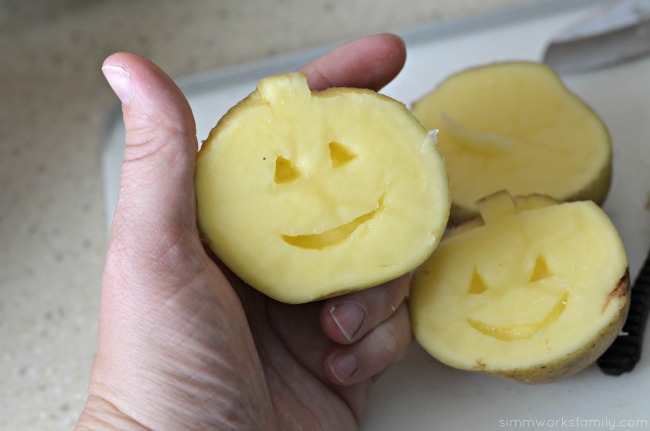
3. Cut out the design you want in your potato. We went festive with these jack-o-lanterns for the treat bags. But anything can be carved out and made into a stamp!

potato stamps cut out details

4. Grab the paper plates and paint and get stamping!

What would you stamp out with your potato stamp?


Cafe Coyote Old Town Celebrates Mexican Independence All Month

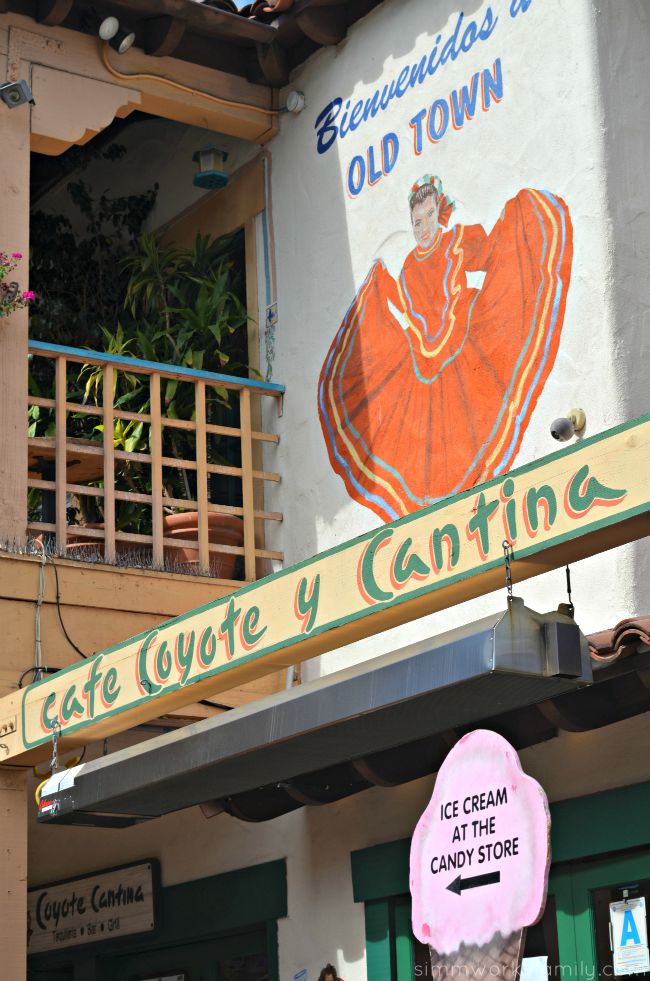
Cafe Coyote Old Town

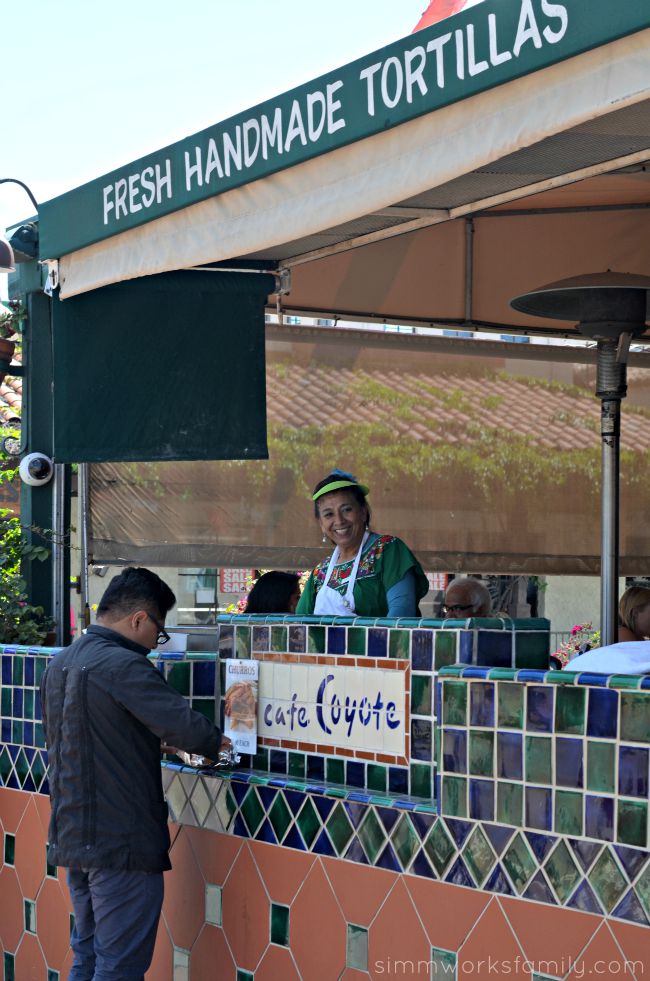
One thing I always remember about growing up is how my dad raved about his father’s homemade tortillas on the weekends. He always was bummed that he never got the chance to learn how to make them himself. The pre-packaged ones just aren’t the same. Luckily here in San Diego, we can pick up fresh, homemade tortillas anytime when we stop by Cafe Coyote Old Town. Not only do they sell them to passersby on the street, they also serve them in their restaurant. And boy are they good!

This month Cafe Coyote is celebrating Mexican Independence Day all month long with delicious specials that’ll tantalize your taste buds and leave you feeling satisfied. And this week, on Mexican Independence Day, I was invited to head out and try a few of the specials they have created for this special occasion. How could I say no? Mexican food is pretty much my favorite food in the world.

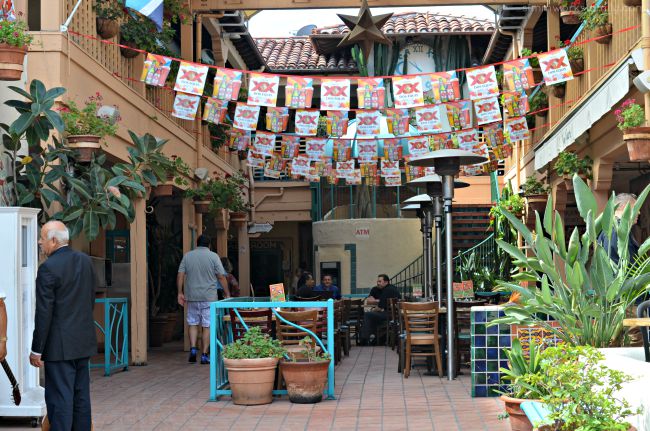
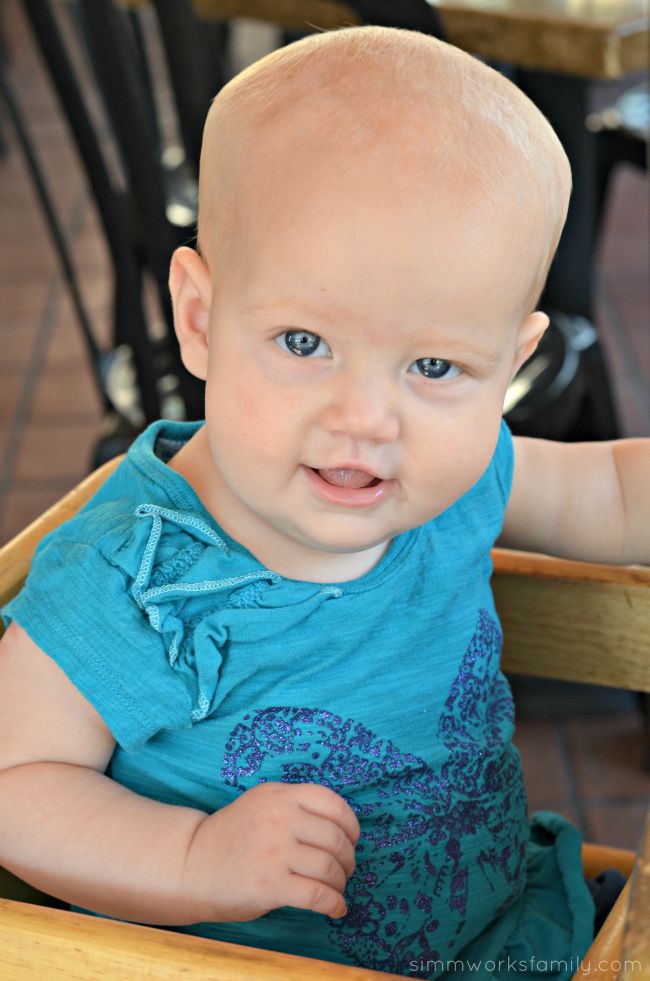
Cafe Coyote Old Town patioCafe Coyote Old Town - fresh handmade tortillasCafe Coyote Old Town - eating with baby

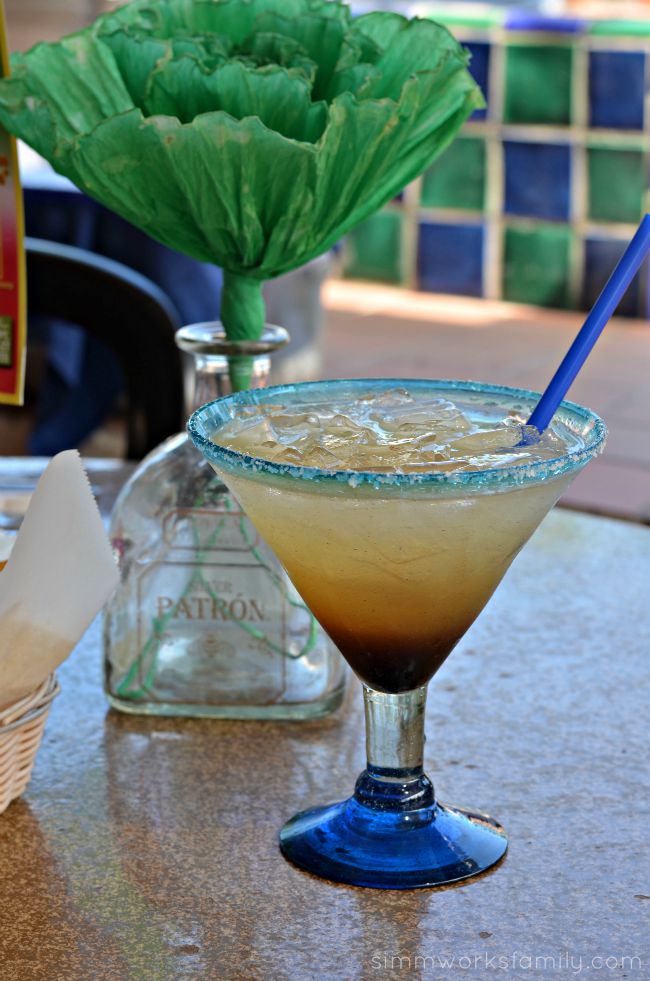
With my little buddy in tow, and help from my mother-in-law, I excited to check out the extensive margarita menu I had heard so much about. They’re just as famous for their margaritas as they are for their handmade tortillas. At quick glance, and after talking to the waitress helping us out, I decided on a delicious tamarindo margarita called “El Grito”. It’s a sweet and spicy combo that’s sure to  bring back memories of childhood if you were like me and my siblings running after the ice cream truck getting our fill of Lucas and other tamarindo candies. The “El Grito” includes Gold Tequila, Triple Sec, Tamarindo, Sweet-N-Sour, & Fresh Lime Juice.

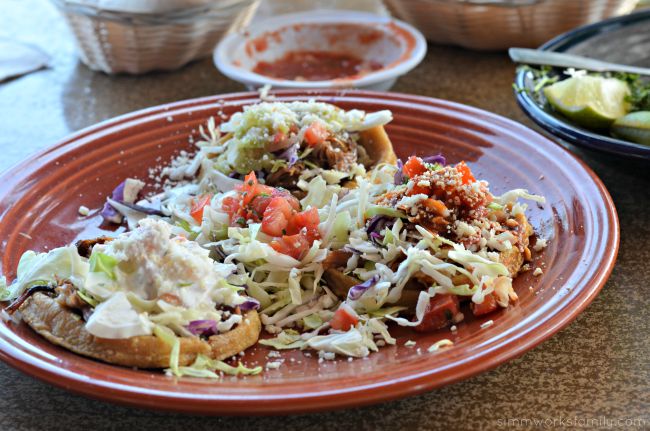
Cafe Coyote Old Town - “El Grito” Tamarindo margaritaCafe Coyote Old Town - Sopes De Carnitas

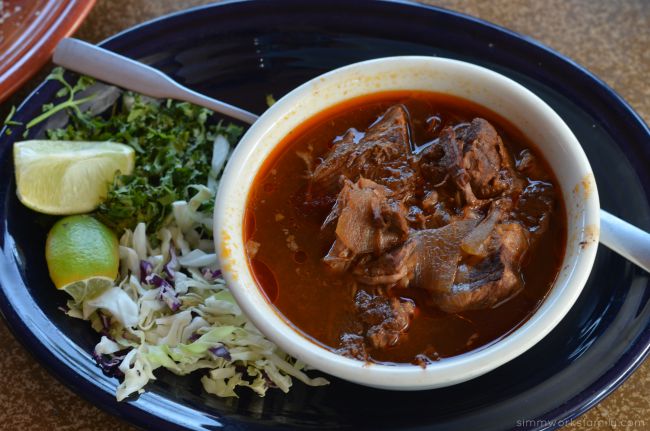
To start out, we ordered a few of the specials celebrating Mexican Independence Day including the sopes de carnitas, birria, and Zucchini Flower Stuffed Empanadas. We enjoyed everything family style and shared so that we could taste everything. I think this is an awesome way to enjoy lunch out with friends and family and makes it easy to feed everyone, including baby.

The baby’s favorite dish? The birria. She LOVED how tender and delicious the meat was and enjoyed the broth as well. I used the fresh tortillas we ordered to help eat the soup instead of using a spoon. It was quite fun. And my favorite dish had to be the sopes de carnitas. Each was topped with a different sauce – red, green, and white in celebration of the Mexican flag – and topped with carnitas. If you’re not familiar with sopes, think of them as an open faced sandwich made with thick corn masa.

Cafe Coyote Old Town - BirriaCafe Coyote Old Town - Zucchini Flower Stuffed Empanadas

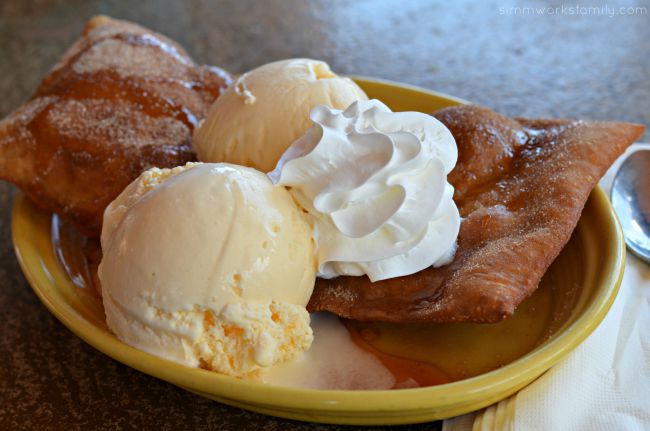
We ended our meal by indulging in the sopapillas. They’re perfect for a couple or family of 4 to share for a sweet treat. Even if you’re overly stuffed from lunch or dinner, just having a bite is well worth it. The sopapillas are dusted with cinnamon sugar, drizzled with honey, and served with ice cream and whipped cream. So good!

Cafe Coyote Old Town - Sopapillas

You can find these specials at Cafe Coyote Old Town all month along with the rest of their delicious menu. I can’t wait to come back and try one of their other dishes. It’s definitely a relaxed, family friendly atmosphere that my family would enjoy visiting. And it’s just a short walk from the sights and attractions of historic Old Town.

Cafe Coyote is also participating in San Diego Restaurant Week and from September 21st through the 27th you can indulge in lunch (choose from an appetizer and entree or entree and dessert for $10) or dinner (appetizer, entree, and dessert for $20). This is a great way to sample Cafe Coyote’s menu or try new things if you’ve already been here.

Have you visited Old Town recently?

DIY Infant Cupcake Costume: An Easy Way For Baby To Dress Up

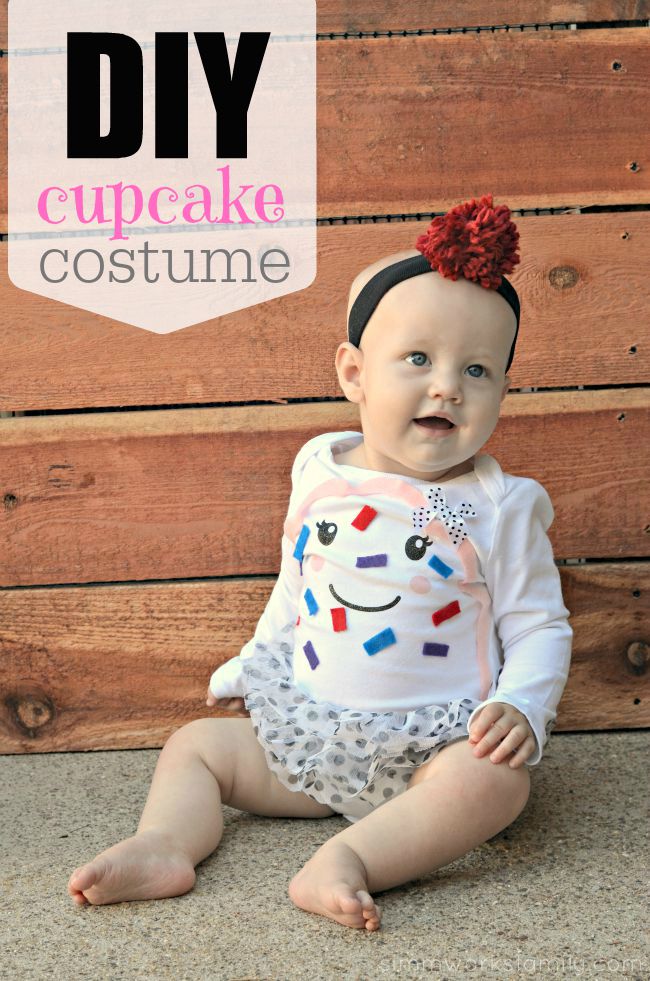
Looking for a cute costume for your baby? This DIY cupcake costume is a no-sew option that is absolutely perfect for baby.

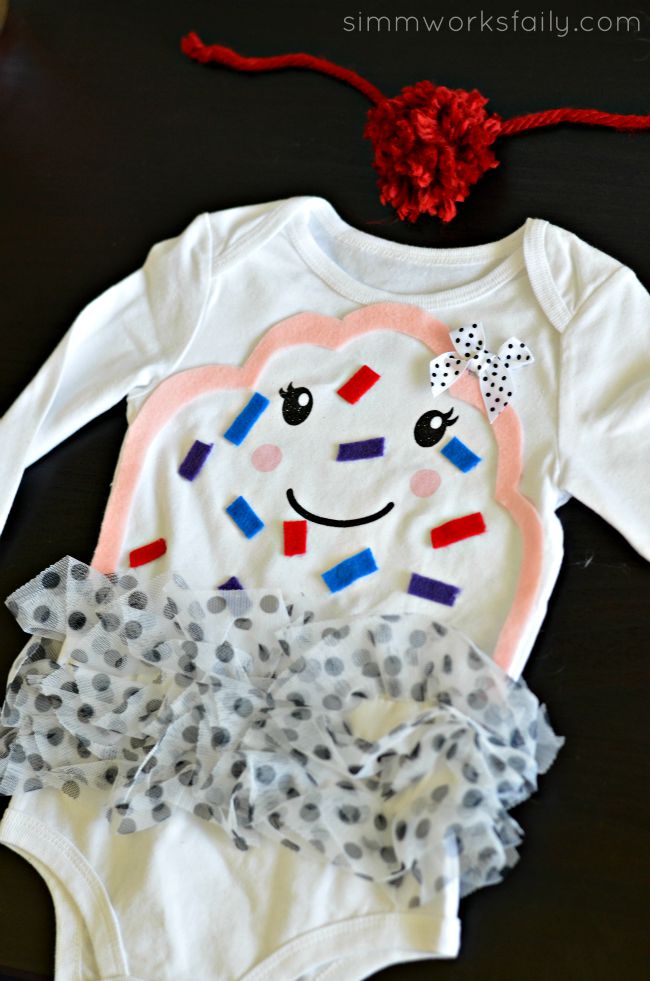
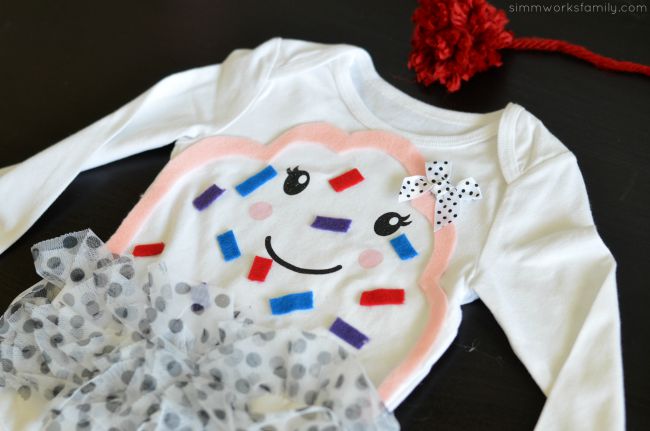
DIY Infant Cupcake Costume with a onesie
One thing I’ve never been a fan of are big, awkward costumes for babies and little kids. I like something that’s breathable, moveable, and comfortable. Because each of my little ones has been mobile around the time their first Halloween came around, I’ve chosen to either make or purchase simple costumes that feel more like clothes than costumes for the little ones. My son was Charlie Brown for his first Halloween and my oldest daughter was a sushi roll.


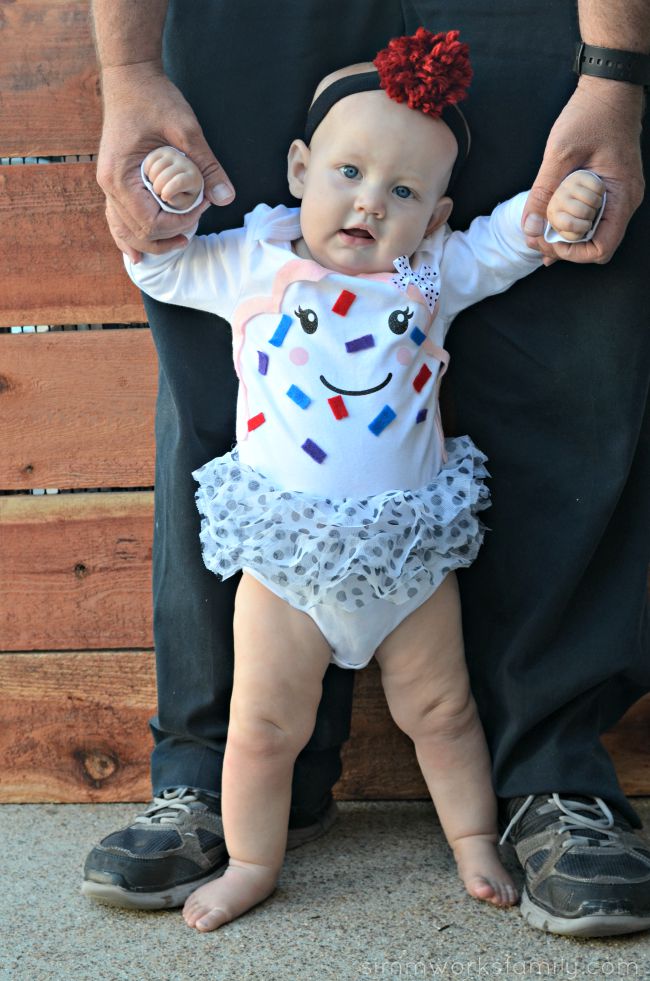
This year is Norah’s first Halloween and just like her older brother and sister, I want her costume to be just as comfortable to move around with. However I got a little excited last year and purchased a cupcake costume on clearance after Halloween. The cupcake costume is simple but comes with a little hat. Since I wasn’t sure if she’d care for the costume, I decided to make a onesie to match. That way if we need to take her costume off at any point during the festivities we partake in, she’ll still be in costume! And? It was SO simple to make.

DIY Infant Cupcake Costume details

After heading to the store for some diapers, I was perusing the costumes and Halloween items they had up front and found the most adorable ghost onesie that would be perfect to match the cupcake costume! It’d just take a little felt and some hot glue to turn it into a cute cupcake onesie. The other onesies they had there would also be great for alternative costumes to wear under big costumes.

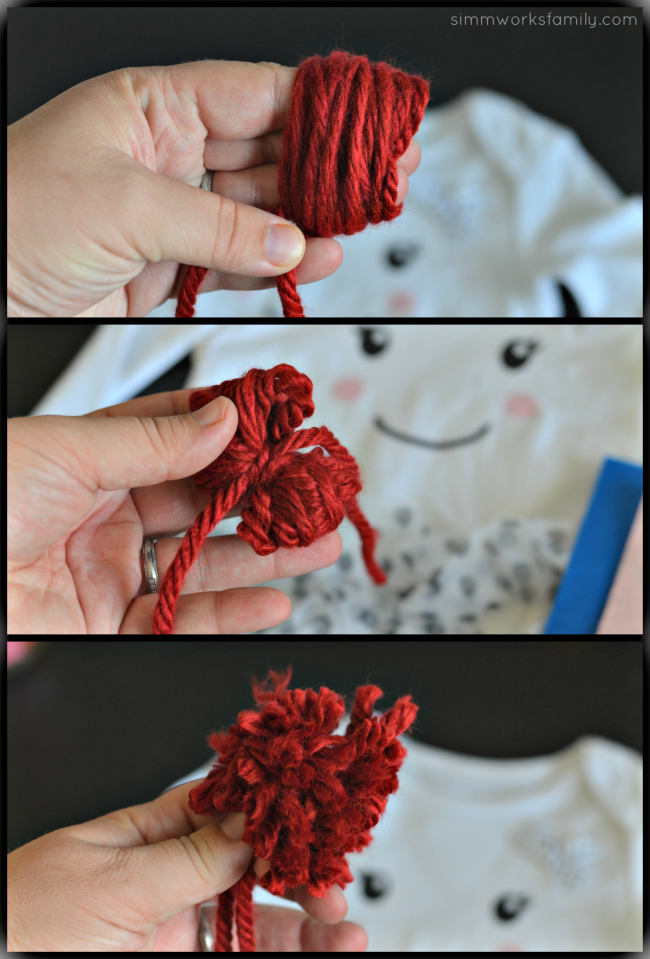
I started with making a cute pom out of red yarn to attach to a headband to act as a cherry on top to complete her outfit. Since I know she’ll wear a headband as long as she forgets about it, I thought this would be perfect for her costume as well in case she doesn’t wear the hat that came with it. Making poms out of yarn is super simple! Here’s how:

DIY Infant Cupcake Costume - cherry poof

Easy DIY Pom Ball

What you’ll need: 

  • yarn
  • scissors
  • fingers

What you do: 

1. Take 2-3 fingers (depending on the size you want the pom to be) and wrap the yarn around your fingers a few times. More if you want a thicker pom, less if you want a thinner pom. Make sure to leave a tail on either end that’s about 3 inches long.

2. Take the wrapped yarn off your fingers and wrap in the center with the end of the yarn. Tie both ends together to secure the pom with a knot or two.

3. Cut the loops in each side and fluff up. Using the scissors, even up the pom so it’s somewhat level all around. Leave the ends longer so you can tie to a headband or sew to a hat.

Now it’s time to make the onesie! And, confession, this took less than 10 minutes to make from start to finish. So it’s the perfect last minute costume

DIY Infant Cupcake Costume with Cherry

DIY Infant Cupcake Costume

What you’ll need: 

  • onesie
  • fabric marker
  • scissors
  • felt in a variety of colors (brown too if you don’t have a onesie with ruffles at the bottom)
  • hot glue gun w/ hot glue sticks

What you do: 

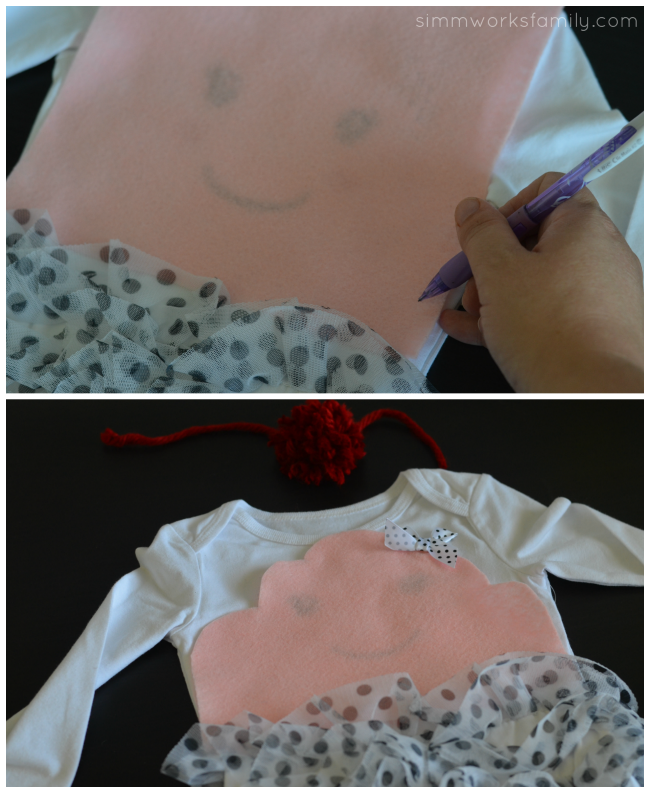
1. Grab a piece of felt to make the outline of a cupcake top for your costume. Choose whatever color you want the outline to be.

DIY Infant Cupcake Costume - trace cupcake form

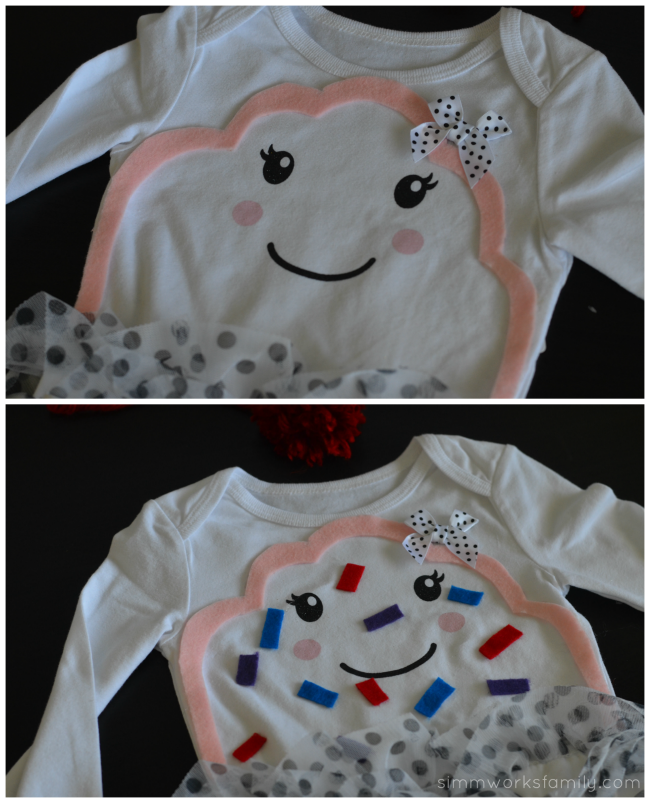
2. Once you have the outline traced, cut out the cupcake top and place on the onesie to get an idea of how thick you want the outline to be. Then cut out the outline and glue down to the onesie.

DIY Infant Cupcake Costume - glue on felt

3. Take a few other felt colors and cut into small rectangles. Glue inside the cupcake top outline to look like sprinkles on the cupcake.

All done! Add a pair of black pants to the outfit to complete it on Halloween night if you need something a bit warmer.
DIY Infant Cupcake Costume An Easy Way For Baby To Dress Up

What are your favorite infant costume idea!

Tips For Serving The Rainbow: Healthy Breakfast Options For Picky Eaters

Tracking Pixel

Today we’re talking about delicious and healthy ways to help our kids taste the rainbow. I include a few healthy breakfast options for picky eaters that are easy to change up depending on your child’s tastes and pair perfectly with our sponsor, 100% Florida Orange Juice.

Tips For Serving The Rainbow Healthy Breakfast Options For Picky Eaters

Since my kids started school and we found ourselves rushing around during the mornings just trying to get everything ready to start the day, I’ve found that it gets harder and harder to make sure the kids leave the house with a healthy breakfast. So I’ve been trying out different ideas and asking others what they do to keep healthy foods in front of their kids.

I’ve found that having a balance of make ahead recipes and some quick grab-and-go options have helped us full when we head out the door to start our day. Plus the kids aren’t as hungry when snack time rolls around at school. By planning ahead a little and prepping a few things, I’ve been able to offer the full rainbow to the kids and can battle the “I don’t like that” phrase I hear often from the two of them.

Research reports that many children fall short of meeting their daily fruit intake recommendations. One quick way to start the day off is to drink 8 ounces of 100% Florida Orange Juice (it counts as 1 cup of fruit!). Based on the 2010 Dietary Guidelines for Americans and MyPlate, citrus fruits and 100% fruit juices (including 100% Florida Orange Juice) are considered a fruit serving. Serve it alongside these delicious breakfast options for a great start to your child’s morning! 

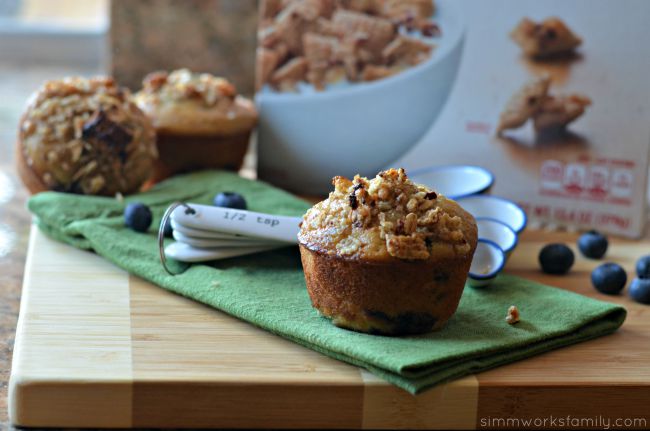
Blueberry Granola Muffins with Chex

In the morning I love being able to have a variety of foods for the kids. But sometimes there’s just not enough time. So I’ve started to prep breakfasts on the weekends and in the evenings before I go to bed. What I try and do is include at least one food the kids love. For example, my daughter loves strawberries and blueberries, so when I make muffins I tend to include those in the mix. My son is more of an egg fan so I choose some veggies to add to egg cups or a quiche and he’s a happy camper.

By giving them one thing they love at breakfast, they usually tend to try other things I offer. It’s the same trick I use at dinner when we enjoy family meals at the dinner table. I always have at least one side, or entree, that they love so they can eat one thing for dinner. If they don’t try anything else, that’s ok. As long as it’s offered.

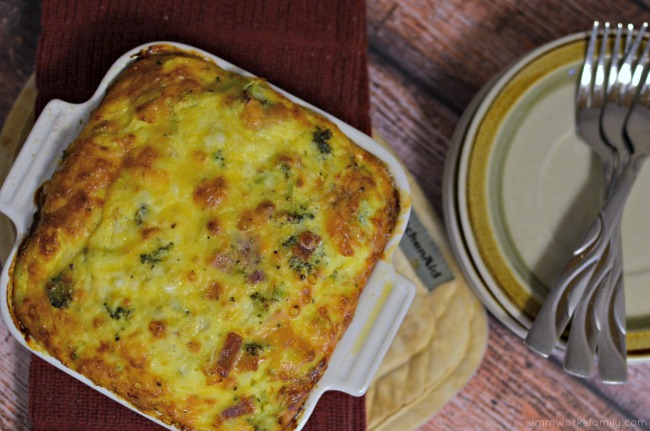
Quick and Easy Egg Bake Recipe with Bacon perfect for brunch

Planning Ahead: Recipes To Make On The Weekend For Weekday Breakfasts

Egg Cups – 

Egg cups are an awesome way to get some protein and veggies into the kids. Plus when you make them ahead on the weekend, all you have to do is heat them up in the toaster oven or microwave in the morning.

Egg Bake/Quiche –

Quiche is just a larger version of the egg cup. But sometimes it’s easier if you have a larger family to just make a quiche (with crust or without) ahead of time to heat up individual portions throughout the week. Plus you can throw just about any veggies or cheeses inside.

Muffins – 

Muffins are an awesome way to sneak in fruit. These blueberry muffins are one of my kids favorites but I’ve also been known to add strawberries, mangos, apples, and more fruit to muffins. I’ve even thrown in a few veggies.

Quick Bread – 

Just like with eggs, instead of muffins, you can also make a quick bread too and incorporate fruit or veggies into the batter. This zucchini bread is super tasty and tastes great on its own or toasted up with a little butter.

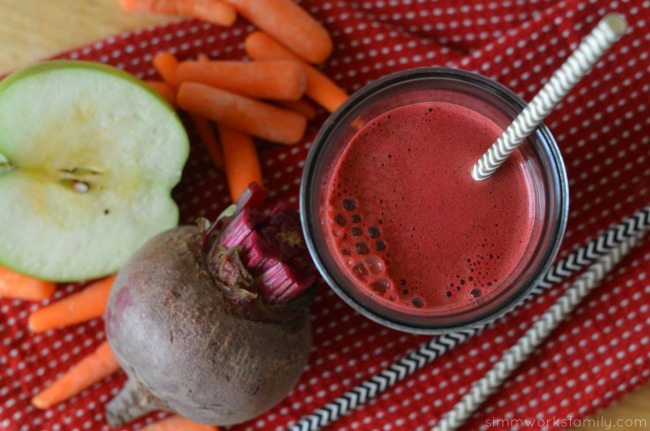
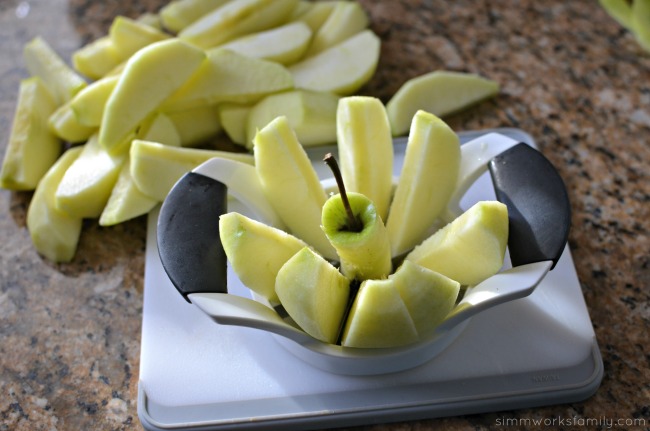
Apple Carrot Beet JuiceOatmeal Recipes Quick and Delicious Apple Crisp - cut and core apples

Planning Ahead: Preparing Breakfast The Night Before

Smoothies – 

My son’s favorite breakfast is a smoothie. We use a base of 100% Florida Orange Juice and then I let him choose the fruits he wants to add in. Finish off with either some ice, or some ice and yogurt, and you have a delicious drink that you can take on the go. Plus? Sometimes you can sneak in some spinach.

Parfaits – 

Parfaits are another favorite in our home. We grab some berries or bananans, layer them with yogurt and granola, and can put them in various reusable containers to eat quickly as we make our way to schoool. 

Overnight Oats – 

Now I love cereal for breakfast but this year I’ve been a little obsessed with overnight oats. They’re so quick to make the night before AND are already in a jar ready to go for hte monring. Plus they’re very versatile. 

Weight Watchers Simple Start anytime snack

In addition to these great make-ahead ideas for breakfast and learning more about healthy breakfast options, I was also able to sit down with Dr. Jen Arnold and ask her a few questions about life, kids, and how to stay healthy and active while balancing life and kids.

You can probably tell I was completely nervous in the beginning because… hello! I’m talking to Dr. Arnold of The Little Couple! I may or may not have had a small fan-girl moment and freaked out a little. She was fabulous to talk and I appreciated that i could get a pediatrician’s opinion as well as her own personal experirence as a mom. You can watch our interview below: 
Amazing-5-Glass-Hero Blend-TEXT

For more information on how you can start your day off right with 100% Florida Orange Juice, visit here!
Do you find it difficult to get in a good breakfast?


© A Crafty Spoonful - All Rights Reserved
It is OK to use one of my photos provided a link back and/or proper credit is given. It is NOT ok to copy and paste a whole post including instructions. Please do not remove watermarks or alter images in any way. Please contact me with any questions at danielle@acraftyspoonful.com

.