How to Make 11 Awesome Thanksgiving Desserts That Your Kids Will Love

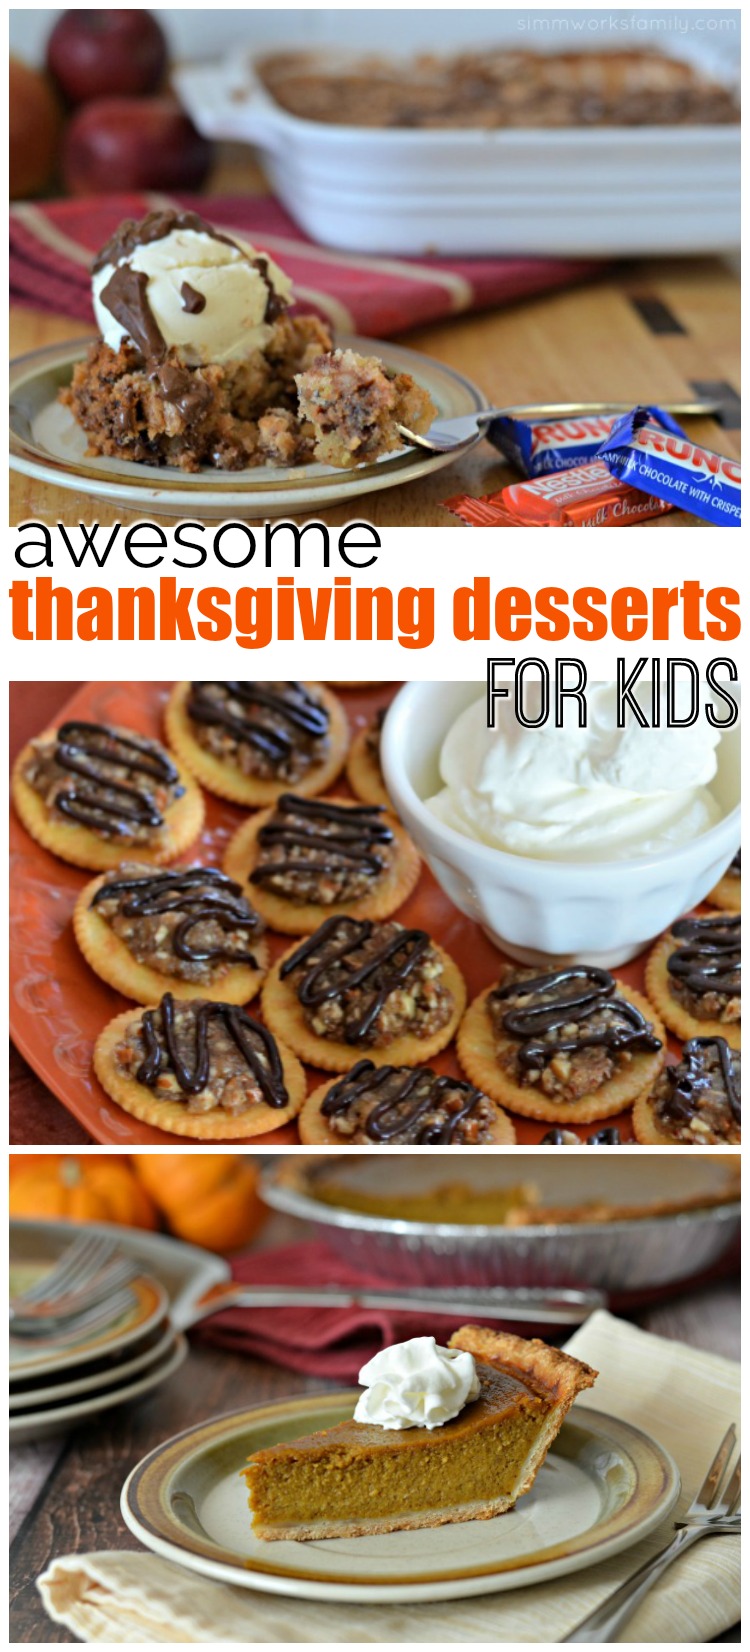
Finding a dessert that makes all of the kids happy can be a difficult challenge. So we’ve rounded up 11 awesome Thanksgiving desserts for kids that meet a handful of kid-friendly requirements! 

Kids are weird. No, no, listen. They really are. One minute they hate whipped cream, and the next they’re trying to shoot it straight into their mouths because they love it so much. And trying to find a dessert to make them happy can sometimes be difficult during the holidays when the options aren’t cake, brownies, or ice cream. So we put together a few of our favorite Thanksgiving desserts for kids so everyone has options this holiday season. But make sure you have plenty of whipped cream. 

pumpkin pie with coconut milk, pumpkin pie made with coconut milk, dairy free pumpkin pie filling

11 Thanksgiving Desserts for Kids

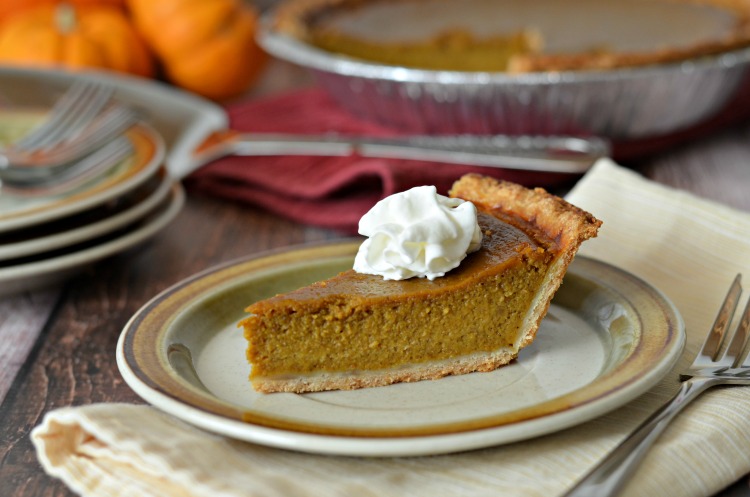
Pumpkin Pie with Coconut Milk from A Crafty Spoonful

This pumpkin pie is great for those who may have dairy allergies. It tastes just like regular pumpkin pie but is made with coconut milk instead. And no, you can’t taste the coconut in the filling. Pair it with some coconut whipped cream and you are set for the holidays! This recipe is also perfect to use for mini pumpkin pies as well if you don’t want to make the whole pie. 

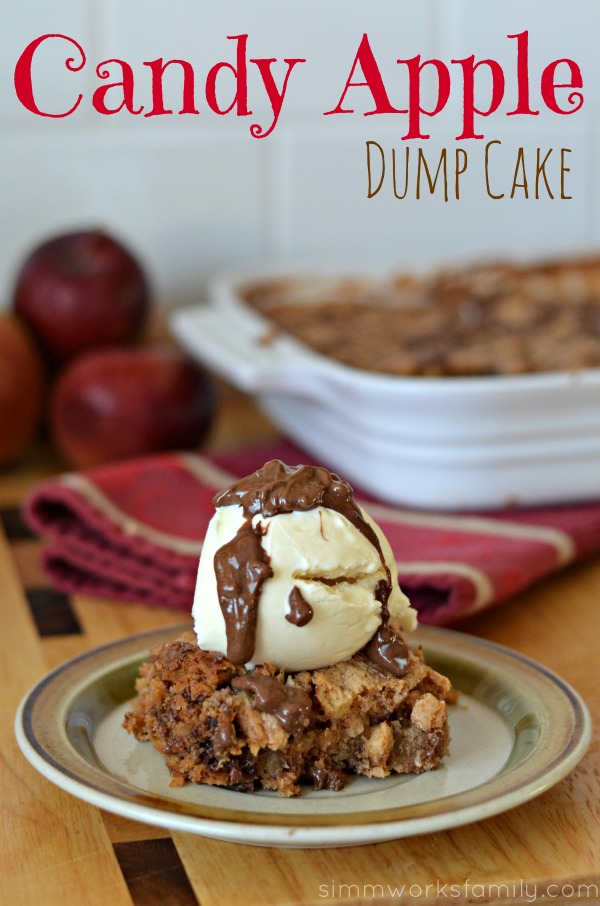
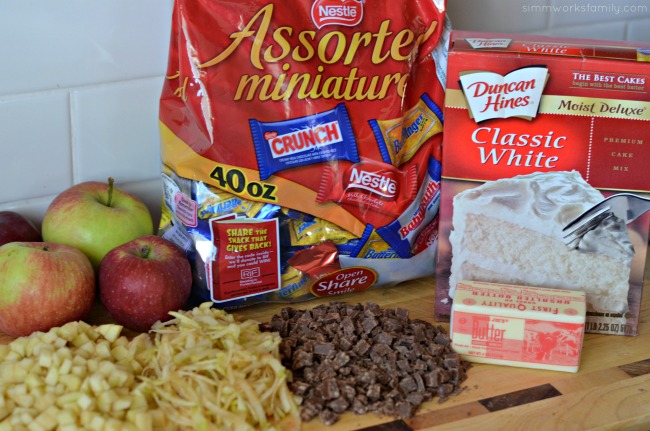
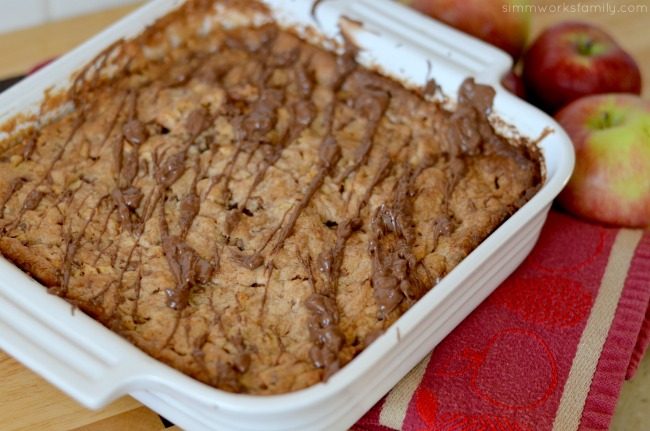
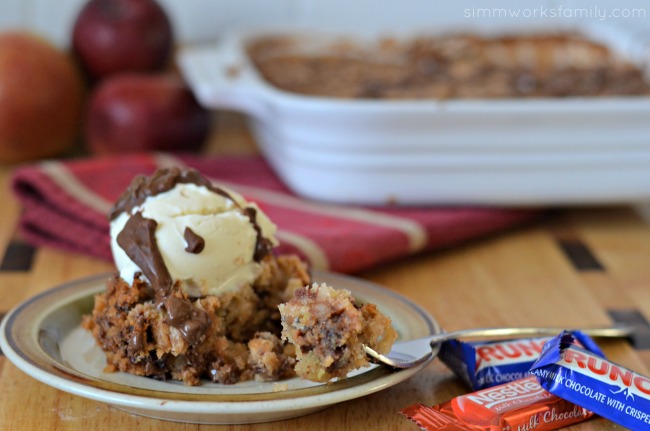
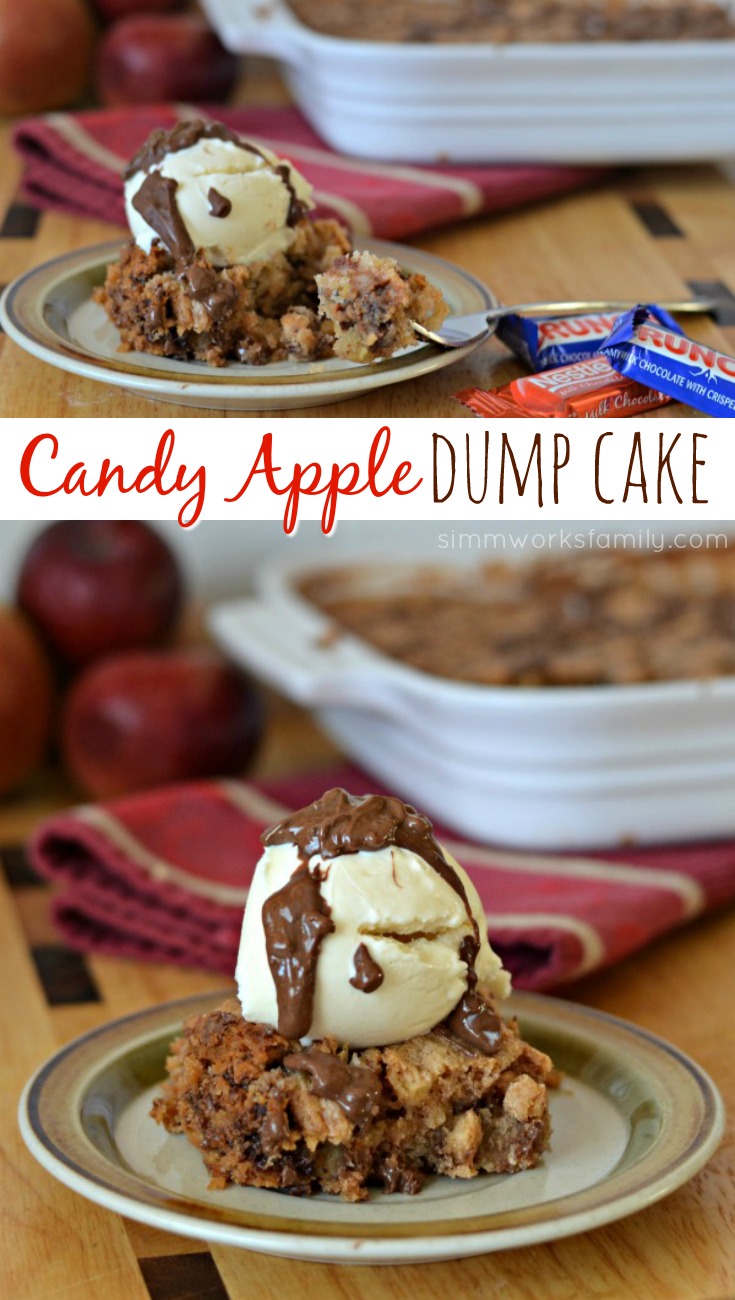
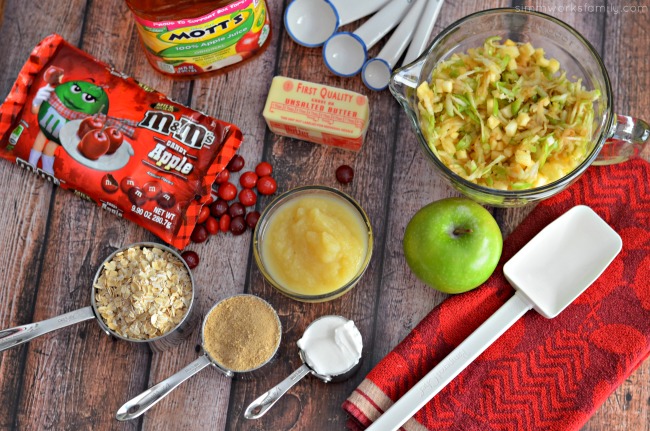
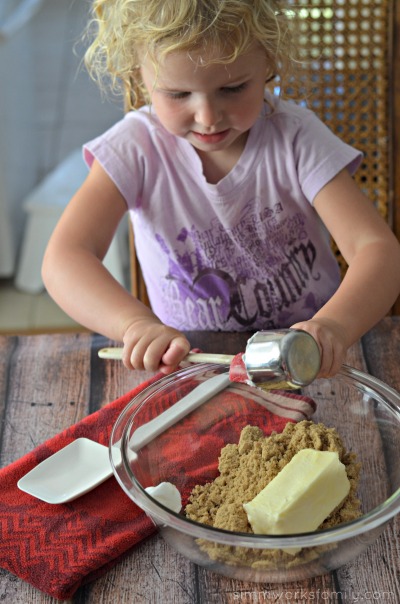
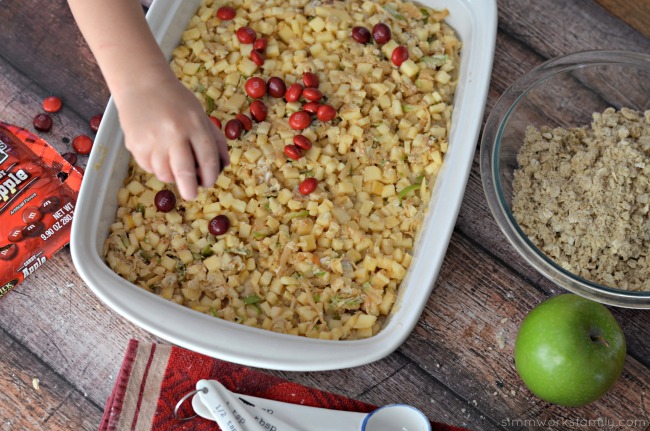
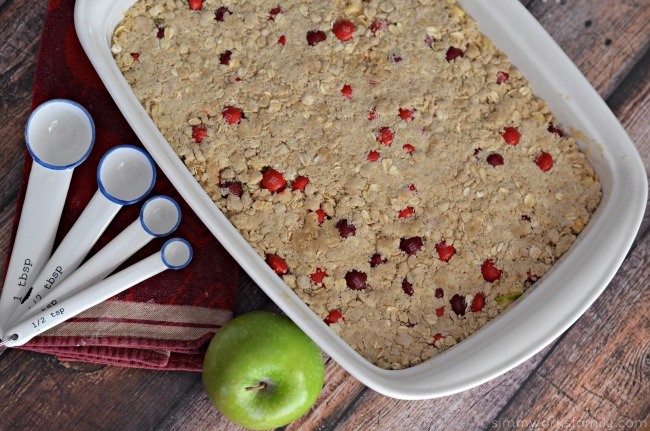
Candy Apple Dump Cake from A Crafty Spoonful

Still have leftover Halloween candy you’re hoarding away? I’m not judging. But if you want to get rid of some of it, this is the recipe to try! This dump cake is not only easy, all you need is one pan (no separate bowls) to make it! Less dishes = winning in my book. And the kids go crazy over the chocolate + apple combo. 

Mini Pecan Pie Bites from A Crafty Spoonful

Oh, these sinfully sweet little bites of heaven are the perfect grab-on-the-go dessert for the littles. The butter cracker hooks the kids and the chocolate drizzle on top of the pecan filling keeps them coming back. Plus, there’s not too much mess with this recipe. 

Pumpkin Cheesecake Bites from My Suburban Kitchen

For those with a more sophisticated palate, these pumpkin cheesecake bites totally hit the spot. They’re very portable, just like the mini pecan pie bites, and pack a punch of flavor with a combo of gingersnaps and pumpkin. 

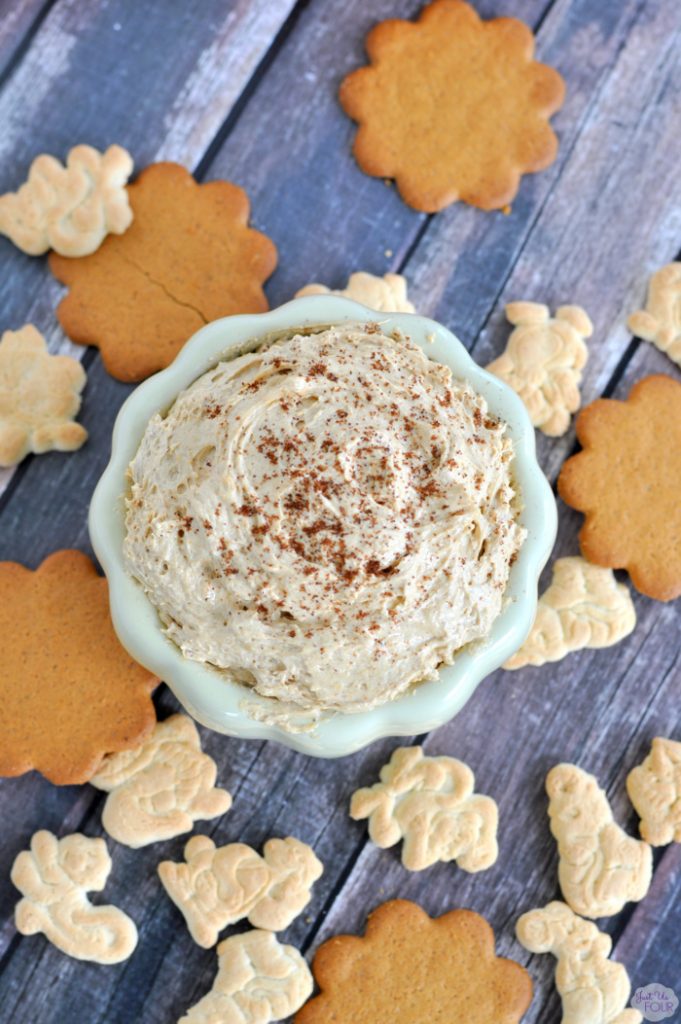
Four Ingredient Pumpkin Pie Dip from My Suburban Kitchen

What kid doesn’t love dip? And this deliciously sweet pumpkin pie dip is the perfect way to enjoy those holiday cookies or a few graham crackers. Just make sure there isn’t any double dipping.  

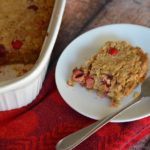
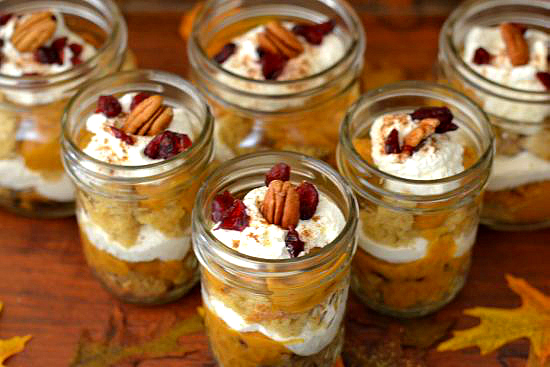
Pumpkin Spice Cranberry Trifle from Flour on My Face

Who doesn’t love a good layered trifle? Kids can dig in and eat a layer at a time or go for the gold and scoop all the way down for a few layers of goodness in one bite. Plus these are a fun recipe to let the kids help assemble! 

Gluten Free Pumpkin Cake from Flour on My Face

In case your child has a gluten allergy, or if they’re just avoiding gluten as part of an elimination diet, you need to try this pumpkin cake. You can still stay festive and enjoy all the flavors of the holidays even when you’re gluten-free! 

Pumpkin Pecan Bundt Cake from Flour on My Face

Speaking of cake, if your kids are more in a cake and frosting kind of mood, this pumpkin pecan bundt cake is a delicious option. I’ve made mini bundtlets for individual kid portions before and it’s turned out great! 

Pumpkin Spice Dessert Bars from {Not Quite} Susie Homemaker

Another quick and easy go to that you can make ahead and bring with you are these pumpkin spice dessert bars. They’re made with pumpkin and applesauce AND have a delicious cream cheese frosting! 

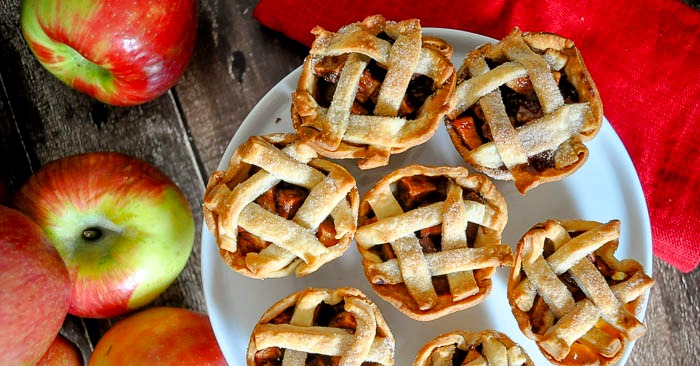
Individual Apple Pies from The Love Nerds

What’s Thanksgiving without apple pie? In our house we always have pumpkin and apple pies in addition to the other dessert options so these individual apple pies are perfect for the kids table. A classic recipe with a fun spin. 

Favorite Pecan Pie from Unexpected Elegance

And if your kid loves the classics, you can’t go wrong with a pecan pie. Some kids are turned off by this tasty dessert but for those who want to venture out and try new things, this is a great recipe to start with! 

What are your go-to Thanksgiving desserts for kids? 

Love what you read? Check out these great posts! 

Pin this article for later! 

Click the Pin button on the image below to save for later. 

Candy Apple Dump Cake {Fall Recipe}

This candy apple dump cake is perfect for last-minute desserts that bake while you’re eating dinner or for potlucks with friends and family.

Candy Apple Dump Cake

One of my favorite fall pastimes to do before Halloween is apple picking with the family. Something about the cool crisp air, the delicious juicy apples right off the tree, and the smiles on my kids faces when they pick that first apple off.

But it doesn’t end at the orchard! Then you get to go home and bake yummy goodies with all the apples you managed not to eat on the drive back home.

When deciding what to bake with the apples we picked in Boston on our trip back a few years ago I knew I wanted to incorporate Halloween and the fun of the season. Since I had just recently stopped by Smart and Final for our Halloween candy stash I decided to incorporate the delicious Nestle goodies I picked up in this Candy Apple Dump Cake.

Candy Apple Dump Cake Nestle Candy

Once I got home it was time to start baking. Now, this candy apple dump cake is literally what the name alludes to. Chopped up candy, apples, cake, and butter all dumped into the pan, stirred up, and baked! So simple yet so delicious.

Since I purchased a few extra bags of candy to bake with I decided to chop up my favorite Nestle crunch bars and Nestle chocolate bars to add to the mix. The combo of the apples and chocolate reminded me of our favorite candy apples.

And the kids had a great time unwrapping the chocolate (one for you, one for me…).

Candy Apple Dump Cake ingredients

Candy Apple Dump Cake

  • 3 apples, 2 diced & 1 grated
  • 1 cup Nestle chocolate, diced (I used Nestle Crunch and Nestle chocolate bars)
  • 1 tablespoon pumpkin pie spice
  • 1 package cake mix
  • 1 stick (1/2 cup) butter, melted

Preheat the oven to 350 degrees.

Add apples and chocolate to a 9×9 pan. Sprinkle with pumpkin pie spice. Pour cake mix over apples. Drizzle melted butter over mixture.

Stir ingredients in the pan and smooth top.

Bake in the oven for 35-40 minutes or until top is golden brown and toothpick comes out clean.

Let cool 5-10 minutes before serving.

Candy Apple Dump Cake baked

Add a big scoop of vanilla ice cream and a drizzle of melted Nestle Crunch bar for an added bonus!

How easy is that? Perfect for last-minute desserts that bake while you’re eating dinner or for potlucks with friends and family. And you can make this with just about any fruit! So depending on the season, pick out your favorite fruit and enjoy.

Candy Apple Dump Cake close up

Love what you read? Check out these great posts! 

Pinterest Inspiration

Pin this article for later! 

Click the Pin button on the image below to save for later. 

candy-apple-dump-cake

Baby Shower Gifts with Diapers: A Tutorial on How to Make Diaper Cupcakes

How to Make Diaper Cupcakes - a simple and easy tutorial for the perfect baby shower gift

Running a playgroup means that I know a lot of expecting mamas. Whether it’s their second, third, or fourth child, I always love to have a gift to give the expecting mama-to-be can use! Now usually I have a stock pile of handmade gifts ready to grab and go to include with something the mom has registered for to put a more personal touch on the gift.

With this pregnancy and the craziness of our lives lately I haven’t had a chance to make anything and my stockpile is dwindling. So I figured I’d do myself a favor and get started on an easy baby shower gift with diapers for one of my friends who’s expecting her third in November.

This diaper cupcake tutorial is not only easy but includes all of the essentials needed for a newborn… diapers, socks, and washcloths! Because once you get to the third child you need new socks and washcloths!

Don’t want to make your own? Purchase a set of 9 diaper cupcakes here from our Etsy store! 

How to Make Diaper Cupcakes - what you need

How to Make Diaper Cupcakes

What You’ll Need: 

What you do: 

How to Make Diaper Cupcakes - start with socks, diaper, and washcloth

1. Grab a pair of socks, a diaper, and a washcloth.

How to Make Diaper Cupcakes - roll sock

2. Roll the socks up from the toes to the heel.

How to Make Diaper Cupcakes - fold diaper in half lengthwiseHow to Make Diaper Cupcakes - wrap folded diaper around sock

3. Flatten the diaper and fold in half lengthwise. Wrap diaper over socks tightly.

How to Make Diaper Cupcakes - wrap with washcloth and cover with rubberband

4. Fold washcloth into thirds. Wrap washcloth over top of diaper and wrap with a rubber band on the bottom third of the cupcake.

How to Make Diaper Cupcakes - cupcakes in cake box

5. Place cupcake into a cupcake liner and put in cake box. Wrap cake box with festive ribbon and add a card for the recipient!

How to Make Diaper Cupcakes with Parent's Choice Diapers

Once you’re all done making these cute diaper cupcakes you can give the rest of the diapers to the expecting mama. I know how important it is to be well stocked on diapers when baby comes home!

What’s your favorite way to doctor up baby shower gifts?

This post was originally featured on September 8th, 2014.

Love this gift idea? Check out a few others!

Pin this article for later! 

Click the Pin button on the image below to save for later. 

Here’s a Quick Way to Make Turkey Napkin Rings for The Kids Table

Looking for ways to make your Thanksgiving table festive? These turkey napkin rings will do just that! Grab a few supplies and get crafting!

Turkey Napkin Rings resized

Looking for ways to make your Thanksgiving table more festive? Well, these turkey napkin rings will do just that!

Plus it’s an easy craft to get the kids involved in and they’ll be able to tell everyone around the table how they helped.

This is a craft you can easily do ahead of time if you already have the napkins you’re going to use. So check one more thing off of your holiday list and start crafting!

Don’t want to make them yourself? Buy a set of 4 for $10 on Etsy

Turkey Napkin Rings close up

Turkey Napkin Rings

What you’ll need:

Turkey Napkin Rings materials

What you do:

1. Cut brown paper widthwise into 2″ strips. Cut as many strips as you need napkin rings. Set aside.

Turkey Napkin Rings cut strips of brown paper

2. Grab pipe cleaners and start making feathers. Bend pipe cleaner in half and then make two loops. Use ends to wrap everything together so the loops stay closed.

Turkey Napkin Rings making feathers

3. Repeat with rest of colors (I used 4 colors). Using the excess of one colored pipe cleaner, wrap all feathers up together.

  Turkey Napkin Rings attach feathers together

4. Using a light brown pipe cleaner, make a circle by spinning the pipe cleaner around in a spiral. Tuck in the end of the pipe cleaner so that it stays together and is not visible.

Turkey Napkin Rings pipe cleaner turkey head

Turkey Napkin Rings glue gun

5. Grab your glue stick or glue gun and adhere brown circle to the feathers. (side note: I became frustrated with my glue stick and opted for the glue gun but my kids used the glue sticks.)

Turkey Napkin Rings fold paper in half

6. Grab brown strips of paper and fold in half lengthwise.

Turkey Napkin Rings measure and cut paper

7. Wrap around napkin and cut off any excess (ends of paper should overlap by about an inch).

Turkey Napkin Rings tuck in ends

8. Tuck one end of the paper into the other end to secure it.

Turkey Napkin Rings glue turkey to napkin ring

9. Add a dab of glue on the seam of the tucked in paper and adhere turkey body to the napkin ring.

Turkey Napkin Rings glue turkey eyes and beak

10. Add googly eyes, beak, and anything else you might want to include onto the face of the turkey.

Turkey Napkin Rings close up

You’re all set! Now repeat this until you have enough napkins for everyone coming over. Once everyone is ready for dinner all they have to do is tear the back of the paper to access their napkins or simply tug the napkins out.

How awesome is that?

What’s your favorite turkey craft?

Looking for more Thanksgiving inspiration? Read on! 

Pin this article for later! 

Click the Pin button on the image below to save for later. 

This post was first published on October 30, 2013

The Best Homemade Vanilla Cream Cold Brew Coffee Recipe + How to Make Large Batch Cold Brew Coffee

Have you tried cold brew? You need this homemade vanilla cream cold brew coffee recipe in your life. Plus, learn how to make large batch cold brew coffee! 

I know I’ve said it before but I love coffee. When I wake up, it’s one of the first things on my mind. So when our school’s Fall Festival planning was starting to get underway, and one of the chairs mentioned there wouldn’t be a Cougar Cafe booth, I knew I had to step up and take it on. How could there be a festival without coffee? And where would I get my caffeine fix as I worked that weekend? 

Last year, the Cougar Cafe (yes… that’s the name, but before you giggle, our school mascot is a cougar) sold a sweet iced coffee mix that was already made. It was good but not amazing, kwim? So I decided to expand our selection but keep things simple. 4 basic items – hot coffee, cold brew, hot tea, and iced tea. Then the customer could doctor it up however they’d like! 

I grabbed some assorted syrup flavors, cream, sugar, etc  and then made a large batch of cold brew and iced tea to keep on hand. With the heat we have in October, it was absolutely perfect! And I’m already planning what we’ll be doing at the Cougar Cafe next year. 

Making large batch cold brew isn’t as hard as it sounds. But it does take some tools. And some patience. Because one batch of cold brew takes 24 hours to brew. Yup… it takes time for perfection. 

So to prep for the event, I got started ahead of time. I planned to make 2 large batches of cold brew in 48 hours. Here’s how! 

Large Batch Cold Brew Coffee

Makes 24 8oz servings of cold brew coffee

What you’ll need: 

What you do: 

1. Measure out 1 pound of ground coffee and add to one of the large food storage containers. 

2. Pour water over grounds and place lid on. Let brew for 24 hours. 

3. Layer cheesecloth over mesh strainer and position over food grade bucket. 

4. Pour brewed coffee into mesh strainer slowly to allow it to filter out the grounds. Discard grounds into the compost bin or trash. Repeat once more. 

5. Put cold brew in an air tight container and store in the fridge for easy access. 

6. Repeat if you’re hosting a coffee bar and need cold brew to last over a hot weekend. 

Now that you have your delicious cold brew, and know how easy it is to make, it’s time to get to the daily grind and find out how to customize your cold brew to mimic that of your favorite coffee shop. 

To make my favorite vanilla cream cold brew coffee recipe, I start by making a vanilla simple syrup. Then I follow the simple steps below to creating a delicious and refreshing cold brew drink to enjoy all day long! Especially when it’s October and the weather is over 100 degrees for 3 days in a row like it was this week! 

Vanilla Cream Cold Brew Coffee Recipe

Vanilla Cream Cold Brew Coffee Recipe

  • 8 oz cold brew coffee
  • 3 pumps vanilla simple syrup
  • 2 tablespoons heavy cream
  1. Grab a mason jar or glass and pour the cold brew coffee over ice

  2. Pump 3 pumps of vanilla simple syrup (or sugar free vanilla) into the cup over the coffee

  3. Add 2 tablespoons of heavy cream or half and half and swirl around

  4. Place a straw in the glass and enjoy! 

How do you take your cold brew? 

Love what you read? Check out these great coffee posts! 


Pin this article for later! 

Click the Pin button on the image below to save for later. 

Wow Guests with These Easy DIY Thanksgiving Door Decorations + a DIY Cornucopia Wreath Tutorial

This shop has been compensated by Collective Bias, Inc. and its advertiser. All opinions are mine alone. #DIYHolidayWithSCJ #CollectiveBias

With Thanksgiving right around the corner, we’re making sure our home is in tip-top shape for guests. As the holidays get nearer, you never know who might stop by at any given moment. And the first thing they see when coming up to our home is our front door. So we’re sprucing things up with these easy DIY Thanksgiving door decorations and a simple DIY Cornucopia Wreath.

When we first moved into our new home, the one thing that stuck out like a sore thumb was the ugly solid brown door that stood in the doorway of our home. I didn’t care for it much and it always bugged me that it didn’t show off the awesomeness that is our home. So when my husband found a door in the exact style we were looking for on clearance at Home Depot, we picked it up right away and he installed it. Instead of leaving the trim around the door brown, we brightened things up with a deep red color to really make the door pop. 

To keep the door in tip-top shape, we rely on our go-to cleaning products to spruce things up. With the door being the first thing all walk through to enter the home, it can get a bit beaten up over time and gather dust and grime from the outside elements. 

Since our new door has three windows in it, we keep Windex® Original close by. It has an Unbeatable Streak Free Shine and starts working on dirt and grime even before you wipe*. Trusted for generations, Windex® Original cleans and shines glass, mirrors, and more! 

Pledge® beautifies and enhances the appearance of your hard surfaces and our finished, sealed door always looks so much better after we wipe it down with Pledge®. Pledge® Lemon Clean can be used on furniture all around the house to quickly clean, condition and protect –all while leaving behind the classic, fresh lemon Pledge® scent. It also features Allergen Trappers® to remove dust and up to 90 percent of the allergens found in dust. That means in addition to cleaning the front door, we can clean up the other household hard surfaces including wood, laminate, stainless steel, leather, marble, granite and plastic.

Scrubbing Bubbles® Fantastik® 32 oz. All-Purpose Cleaner is the perfect cleaner for our door threshold. It gets a beating as the kids run in and out of the home so we need a powerful antibacterial solution cuts to the center of grease and grime and dissolves it on contact and disinfects the area. And the no-rinse solution means you don’t have to spend as much time cleaning.

Easy DIY Thanksgiving Door Decorations

Now that our door is all nice and clean, it’s time to spruce things up even more with a few easy DIY Thanksgiving Door Decorations. This DIY Cornucopia Wreath is not only easy to make, it can be saved to use year after year! 

DIY Cornucopia Wreath

What you’ll need: 

  • Wheat wreath (found at Home Depot)
  • chicken wire
  • twine
  • hot glue gun
  • hot glue sticks
  • plastic/fake fruit and veggies

What you do: 

1. Cut a wide triangle out of the chicken wire and form into a cornucopia shape. 

2. Using the twine, wrap around the cornucopia frame and secure twine to the form and itself with hot glue. 

3. Continue wrapping the twine all the way down the form to the smallest tip and then secure the end by sticking it back in the end of the form.

4. Secure the cornucopia onto the wheat wreath with hot glue. 

5. Add decor in and around the cornucopia by hot gluing it in place. Make sure to balance the size of each piece and the colors. 

6. Hang on the door and step back to enjoy your handiwork! 

We grabbed a fun scarecrow and stacked two of the pumpkins from our trip to the pumpkin patch next to it to complete the Thanksgiving door decorations.

Keeping things simple yet welcoming is key. The front door doesn’t need too many decorations so choosing the pieces you use wisely will help keep a nice balance.  

Be on the lookout for Windex® and Scrubbing Bubbles® Fantastik® product promotions on display in Home Depot stores until 10/31/17, and Pledge® products on display starting 11/1/17. You can find all products in the cleaning products aisle at your local Home Depot store. 

What do you do to spruce up your front door during the holidays? 

*Claim Based on Windex® Original lab testing against leading competitor glass cleaners per AC Nielsen 52 weeks ended 7/29/2017

Love what you read? Check out these great posts! 

Pin this article for later! 

Click the Pin button on the image below to save for later. 

Deliciously Tempting Candy Apple Bars with M&M’s

 These deliciously tempting candy apple bars with M&M’s are the perfect sweet treat to use up all of those apples you picked this season!  

Candy Apple Bars with M&M's - the perfect way to welcome fall and enjoy a delicious dessert

Oh my gosh you guys. I’m seriously melting right now and wondering where the heck fall is. Over 100 degrees today and the forecast does not look good over the next week. Oh, how I yearn for the cool crisp 75-degree air of fall.

With pregnancy cravings that have me wanting apple pie, hearty stews, and other fall recipes I can’t help but give into temptation and bake up a delicious treat for the family even when it’s a sauna inside and outside of the house. Did I mention we have no a/c in the new house? Yeah…

After finding some delicious Candy Apple M&M’s on our most recent trip to Walmart I was inspired to make these delicious candy apple bars that are part apple pie, part candy apple. 

Candy Apple Bars with M&M's ingredients

I made sure to gather most of the ingredients we needed and have it all pre-measured because another crazy girl in the house wanted to help mama out even in this heat.

I’ve found that when cooking or baking with kids a little prep work goes a long way. And makes things go a little smoother. And this recipe couldn’t be easier to make with kids. No mixer needed, no special measuring or ingredients. Easy peasy!

Candy Apple Bars with M&M's mixing

We mixed together the oat mixture and reserved a bit for the topping. The rest we mixed with some delicious applesauce 

Once the applesauce oat mixture was ready I let my daughter spread it on the bottom of our 9×13 pan while I tossed the apples in some flour.

Candy Apple Bars with M&M's spreading applesauce oat mixture

Next was my daughter’s favorite part. After I put a layer of apples down she was in charge of adding the Candy Apple M&M’s on top of the apples. Now normally I use a layer of caramel here for caramel apple bars but we wanted some chocolatey candy goodness.

Candy Apple Bars with M&M's adding apples and M&M's

Once she was done I spread the reserved oat mixture over everything and had her help push it down gently. Then we baked up this scrumptious dessert and enjoyed a little kiddy pool fun to cool down.

By dinnertime, these were perfectly cooled and ready to enjoy for our dessert. Boy, was this a good treat to end our hot day. Now let’s bring on some cooler temperatures!

Candy Apple Bars with M&M's ready to bake

Candy Apple Bars with M&M's

For the candy apple bars

  • 1 cup packed brown sugar
  • 1/2 cup butter (softened)
  • 1/4 cup vegetable shortening
  • 1 3/4 cups all-purpose flour
  • 1 1/2 cups old fashioned oats
  • 1 teaspoon salt
  • 1/2 teaspoon baking soda
  • 1 cup applesauce
  • 3 peeled fuji apples (finely diced)
  • 1 granny smith apple (grated)
  • 3 tablespoons all-purpose flour
  • 1 1/2 cup Candy Apple M&M's

For the drizzle

  • 1 cup powdered sugar (sifted)
  • 3 tablespoons apple juice
  1. Heat oven to 400ºF. Mix brown sugar, butter and shortening in large bowl. Stir in 1 3/4 cups flour, the oats, salt and baking soda. Reserve 2 cups oat mixture. Mix remaining oat mixture with applesauce and spread on the bottom of an un-greased 13×9 pan.
  2. Toss apples and 3 tablespoons flour; spread over mixture in pan. Spread Candy Apple M&M’s evenly over apples. Sprinkle with reserved oat mixture; press lightly.
  3. Bake 25 to 30 minutes or until topping is golden brown and apples are tender.
  4. While bars are baking, mix together powdered sugar and apple juice and set aside. Once bars are done, let cool before drizzling with icing and enjoy!


Grab What You Need:


Candy Apple Bars with M&M's

What’s your favorite fall-inspired dish?

*This post was originally featured on September 14t, 2014. 

Family Friendly Halloween Fun at Boomont Park

Why celebrate Halloween once when you can celebrate all weekend, all October long! We were invited to check out all the happenings at BOOmont Park over at Belmont Park last weekend and I have to tell you, I’m glad we went! BOOmont Park is fun for all ages. Starting Saturday, September 30th, activities will run every Friday, Saturday, and Sunday from 5pm to CLOSE plus Tuesday, October 31st.

BOOmont Park’s frighteningly-fun weekends include FREE trick-or-treating from 6:30-7:30 pm. Attractions include the Zombie Laser Tag where creatures will join you in this three-floor adventure, superhero Zip Line & Rock Wall and a pumpkin patch station with an option to purchase pumpkins to paint.

Family Friendly Halloween Fun at Boomont Park

Here is a list of frightenly-fun activities for the weekend: www.belmontpark.com/boomontpark. The costume contest starts at 5:30 pm and free Trick or Treating starts at 6:30 pm. There are various times for the other activities, please check the website. The rides will all be open throughout the day and evening. Make sure to check height restrictions for each game here.

Super Hero Zip Line & Rock Wall –

The rock wall was a huge hit with my kids. It’s 30 feet tall and has different routes to the top. Kids who are 40lbs or larger can decide which path to take and get harnessed in for a fun challenge (max 250lbs). 

My kids weren’t quite ready for the zip line* but it looked like a great time! If adrenaline filled adventure is your thing, strap in and soar through the midway!Plus, kids in full superhero costumes receive 50% off both the zip line and rock wall! *Must be 46″+ and 50-250lbs

Zip Line is $15 per person | Sky Climb Rock Wall is $8.00 per person

Belmont Park’s 3-level Tron-themed laser tag arena has been transformed into an apocalyptic war zone in Zombie Lazer Tag. Zombie Lazer Tag is located inside the Lazerblast Arcade and open from 5pm-close.

Each game is $8.00.

Enjoy Fall-Themed Treats – 

Belmont Park is your one-stop-shop for everything Fall!

Pumpkin Spice Funnel Cake
Get your fix at Belmonty’s

Specialty Caramel Apples
Purchase one at the Sweet Shoppe or Midway Snacks

Pumpkin Spice Latte
At Vibe Cafe, located next to Draft

Halloween-Themed Merchandise
Get yours at the Midway Kiosks

Pumpkin Patch – 

Come enjoy fun Halloween-themed crafts every Sunday from 5-7pm at the Pumpkin Patch. 

  • October 1: Make your own Trick-or-Treat bag
  • October 8: Pumpkin sand art
  • October 15: Cookie decorating
  • October 22: Make your own Halloween bracelet
  • October 29: Make a photo frame keepsake

While your kids are crafting, take your pick at a variety of pumpkins.

Belmont Park is your one-stop-shop for all of your fall needs: Pumpkins included! When you purchase a pumpkin from us, you can paint and decorate it for free! Let your inner artist out. The pumpkin patch is open from 12-8:30 pm. 

Cost per pumpkin is $2-12

Free Trick or Treating – 

Wear your costume and visit all of the shops for candy! Don’t forget to say “Trick-or-Treat”! You can grab a bag and a list of the shops participating at the Pumpkin Patch under the Giant Dipper. Trick-or-treating takes place throughout the Park from 6:30pm-7:30pm.

FREE for children 12 and younger

Come out and enjoy free admission and parking at Belmont Park. Print out these #OctoberSavings coupons to use on your next trip to Belmont Park!

For more information about BOOmont Park please visit http://www.belmontpark.com/ or call (858) 228-9283.

When’s the last time you rode the Giant Dipper?

Top 5 Things to Do At Knotts Spooky Farm This 2017 Season

Looking for a great way to celebrate the season and get into the Halloween spirit? My family was invited to come enjoy a day of fun at Knott’s Spooky Farm and let me tell you, it was great! 

This annual daytime, family-friendly Halloween celebration takes place weekends, September 30 – October 29 and Halloween Day. The kid-inspired “spooky” celebration will feature activities for ages 3-11, including trick-or-treating, a live show and costume contest with the Peanuts gang, and a Dia De Los Muertos Celebration.

Top 5 Things to Do At Knotts Spooky Farm 2017

Trick-or-Treating throughout Ghost Town

Kids ages 3 -11 can participate in Trick-or-Treating throughout Ghost Town, and interact with an array of spooky but friendly Shopkeepers. As you walk down the paths of Ghost Town you will see stations set out with friendly faces to pass out a few pieces of candy to each kid. Each station is marked with a unique door with a number on it that corresponds with your treat map. Make sure to grab your orange candy bag and treat map when you enter the park! 

Creepy Critters of Calico

New this year, Stanley Scarecrow has opened the Livery Stable for guests of all ages to get close and personal with the Creepy Critters of Calico. We were able to meet a beautiful boa, lizards of all shapes and sizes, see a few tarantulas, and meet a spooky skeleton horse. One of my favorite displays was the cute rats and their houses. Sure some say Eeeewwwww but we say Awwwww. The kids loved getting to touch and interact with the creepy critters on display. 

Camp Spooky

The Grand Sierra Railroad in Camp Snoopy takes riders on “A Trip To Camp Spooky” Presented by REESE’S, a one-of-a-kind experience which takes riders on an adventure, along with the Peanuts Gang, to Camp Spooky with added special Halloween theming effects. Then come to Camp Snoopy Theatre Presented by HERSHEY’S to show off your best Halloween costume at the Peanuts Costume Contest and afterward, join Peanuts characters in a Peanuts Dance Party!. Additionally, families can watch the Peanuts Gang in The Monsters Are Coming, Charlie Brown, where they’ll have guests of all ages singing and dancing along to classic Halloween tunes.

Halloween Hootenanny

This Halloween season, the Timber Mountain Log Ride mystically converts into the Halloween Hootenanny by adding a new family-friendly twist to a park favorite. Every year the citizens of the Timber Mountain invite the mysterious creatures that live out in the woods and caverns of the area to join them as they celebrate the season at the Halloween Hootenanny. The ride’s interior will feature new fun surprises as guests venture past the Calico Coffin Creeper band, the town’s green witch and splash down Skull Mountain through a labyrinth of jack-o-lanterns. The seasonal ride will also feature an original song performed by Krazy Kirk and the Hillbillies. Open for day and night guests, this is the perfect family experience for all to enjoy this Halloween season.

Dia de Los Muertos Celebration

In Fiesta Village, join the Dia de Los Muertos Celebration in the Fiesta Stage area for an interactive, non-scary, educational celebration of the season. The themed area offers a walk through a village filled with photo ops, educational activities and face paintings at a nominal fee. Then visit the Ghastly Gallery Presented By KIT KAT® in the Boardwalk Ballroom for a slate of entertaining activities including a live show and opportunities for your little ghouls to participate in drawing their best “monsterpiece.”

Have you gone to Knott’s Berry Farm during the Halloween season? 

Before leaving the park, make sure to try out a few delicious treats. Our favorites? Halloween-inspired bakery sweets at the Ghost Town Bakery and boysenberry and vanilla swirl ice cream. Yum! 

2018 Season Pass is the best way to experience Knott’s Spooky Farm. With a 2018 Season Pass you will get to enjoy all of the Seasons of Fun next year but will also receive one free admission to use in 2017. You can get your Season Pass now at the Best Offer of the Year! Regular passes are just $92 or nine easy payments of $10.22 and Gold Season Passes are $110 or nine payments of just $12.22. These offers end October 29, 2017. Applicable taxes and fees apply online. Payment plans are only available at knotts.com.

SeaWorld Halloween Spooktacular plus Kids Free in October

Whoever said Halloween is only a night of fright hasn’t celebrated this boootiful holiday at SeaWorld San Diego®! SeaWorld announces its Halloween Spooktacular®, San Diego’s premiere not-too- spooky family-fun extravaganza (geared for kids 12 years and under). This must-see fangtastic experience kicks off Sept. 24–25 and runs every weekend in October.

And how’s this for the ultimate treat without a trick: SeaWorld is offering one child, aged 3 to 9, free admission with one full-paid adult admission through October, making this fun-filled day at the park an even greater value! Thanks to SeaWorld for inviting my family out to check out the festivities and take part in the fun this year! 

New this year for Spooktacular will be a family-friendly celebration of the Mexican holiday Dia de los Muertos. Large, beautifully dressed Catrina statues will welcome guests as they discover ofrendas (offerings) of mementos and flowers honoring loved ones who have left us.

Children 12 and under are encouraged to dress up in their finest Halloween costumes for a howling good time at this year’s festivities that includes free candy at 12 underwater-themed trick-or- treating stations. Guests can also creep over to the Clyde & Seamore’s Big Halloween Bash performance at the park’s Sea Lion and Otter Stadium, where those prank-loving sea lions, Clyde® and Seamore® , and the always-mischievous O.P. Otter® get their Halloween on. 

Plus, Mission Bay Theater will be the ghostly home for Sesame Street’s Who Said Boo?, starring Elmo and his friends as they sing, dance and romp their way through Count’s Castle. Monsters of all sizes can do the mash at the Spooktacular dance party! DJ Cotton Candy will spin sweet beats that will set the bewitching vibe for the ghoulishly fun costume party! On the dance floor, guests can mingle with candy-inspired characters such as Colonel Candy Corn, Lolly Pop N’ Lockit, and Goody Gumdrop, the King of Candy, plus new this year, Tabitha Taffy and Timothy Toffee.

Youngsters can also let their creative Halloween juices run wild while decorating cookies, painting pumpkins, and, at the kinetic sand bar, building sandy masterpieces.

In addition to taking advantage of SeaWorld’s free single-day child ticket with one full-paid adult admission, dads and mummies can unwrap the same offer at Dine With Shamu ® where each child dines free with the purchase of a full-paid adult, all at poolside tables near SeaWorld’s family of killer whales. Plus, a child age 10 to 12 can participate for free in SeaWorld’s Dolphin Interaction Program or Beluga Interaction Program with one full-priced adult participant per interaction (children must be at least 4 feet tall to participate).

What are your kids dressing up as for Halloween?

Visit www.SeaWorldSanDiego.com or call (800) 257-4268 for hours and information.


© A Crafty Spoonful - All Rights Reserved
It is OK to use one of my photos provided a link back and/or proper credit is given. It is NOT ok to copy and paste a whole post including instructions. Please do not remove watermarks or alter images in any way. Please contact me with any questions at danielle@acraftyspoonful.com

.