Mini Corn Dogs: Perfect for the Big Game

Mini Corn Dogs

Mini Corn Dogs

With Super Bowl Sunday coming up the only thing on my mind is football appetizers! I’m all about celebrating the super bowl. As long as I don’t have to watch the game and get to enjoy my family and delicious food.

That’s right. While I root and cheer on whatever teams are playing, I’m usually cheering on both sides. Or I pick randomly between the two teams. I’m just not passionate about football. But I am passionate about food. And these mini corn dogs are sure to be a hit at your next party.

The best part? They’re the perfect size for little ones. Now my kids take 1-2 bites out of their hot dog or corn dog and call it a day. All that waste! With these they can finish one in a bite or two and eat more if they’re still hungry. Plus, since I used the Hillshire Farm Turkey Lit’l Smokeys they’re lower in fat without sacrificing the taste.

So if you’re looking to please a crowd and serve something tasty you should definitely try making some mini corn dogs.

[Read more…]

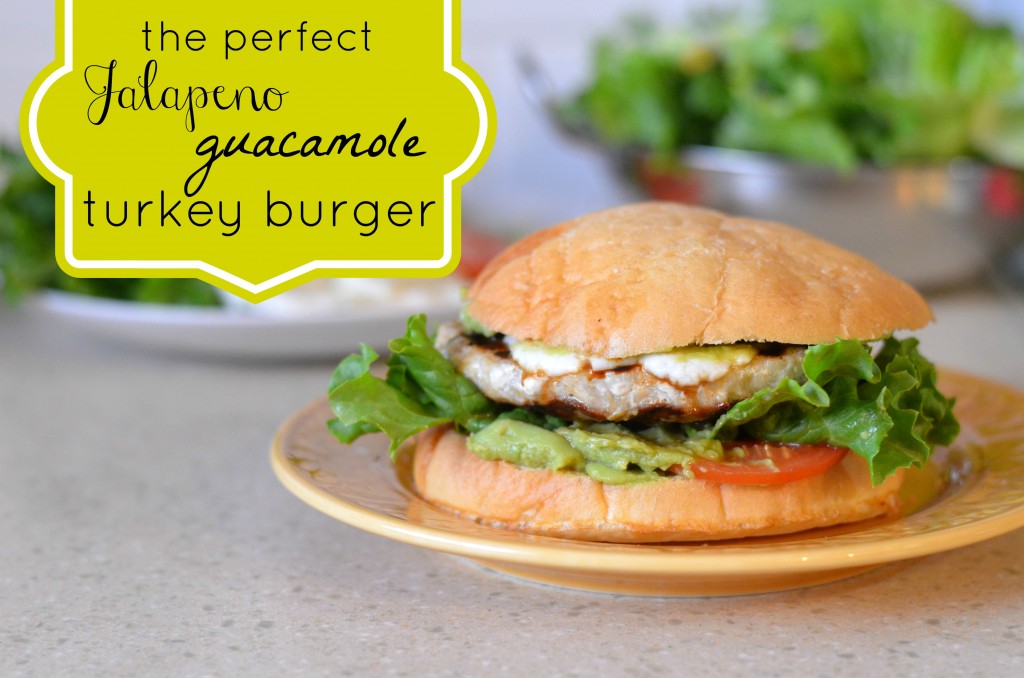
The Perfect Jalapeno Guacamole Turkey Burger

jalapeno guacamole turkey burger

Living in So Cal I am constantly craving something spicy to eat. This burger? It’s the perfect amount of mild heat I need to make the meal tasty. And the best part? I don’t have to shell out much money to create a restaurant-quality gourmet burger.

I was hoping to also include some delicious Wholly salsa as well but my store didn’t carry it. I’ll be heading out again to purchase some from another retailer before the super bowl because you better believe that these are going to be on the menu! With Wholly salsa.

[Read more…]

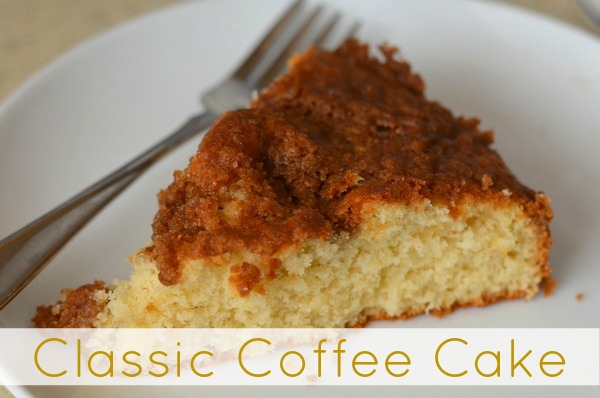
Classic Coffee Cake Recipe

Classic Coffee Cake Recipe

Classic Coffee Cake Recipe

Sometimes I just have a hankering for something sweet. But not too sweet. This classic coffee cake is the perfect solution! And it’s wonderful for any time of the day.

I love pairing it with my new International Delight Light Iced Coffee in the afternoon for a tasty treat. I’ve also subbed the vanilla light iced coffee in the recipe! But it also tastes wonderful in the morning with a nice hot cup of coffee or tea. The best part? It takes very little time to make.

If you need a great dish to bring in for a potluck, to surprise a friend, or to simply have on hand as a quick breakfast option, I highly suggest trying this classic coffee cake recipe!

Classic Coffee Cake Recipe

Recipe Type: Breakfast
Ingredients
  • 1 cup sifted all-purpose flour (sift before measuring)
  • 1/2 cup sifted whole wheat flour
  • 2 1/2 teaspoons baking powder
  • 1/2 teaspoon salt
  • 1 egg, beaten
  • 3/4 cup sugar
  • 1/3 cup melted butter
  • 1/2 cup milk or International Delight Vanilla Light Iced Coffee
  • 1 teaspoon vanilla extract
  • For the Topping:
  • 1/2 cup brown sugar
  • 1/4 cup sifted all-purpose flour (sift before measuring)
  • 1/4 cup butter, room temperature
  • 1 teaspoon cinnamon
  • 1/2 teaspoon nutmeg
Instructions
  1. In small mixing bowl, combine topping ingredients. Blend with fork until crumbly. Set aside.
  2. Sift sifted flour with baking powder and salt into a bowl. In a medium bowl, beat together beaten egg and 3/4 cup sugar and 1/3 cup melted butter. Add milk and vanilla. Stir in flour mixture and mix well.
  3. Pour batter into a greased and floured 8-inch square or 9-inch layer-cake pan. Sprinkle topping crumb mixture evenly over batter.
  4. Bake at 375° for 25 to 30 minutes, or until cake tests done. Partially cool in pan on wire rack. Cut coffee cake into squares or wedges while still warm.


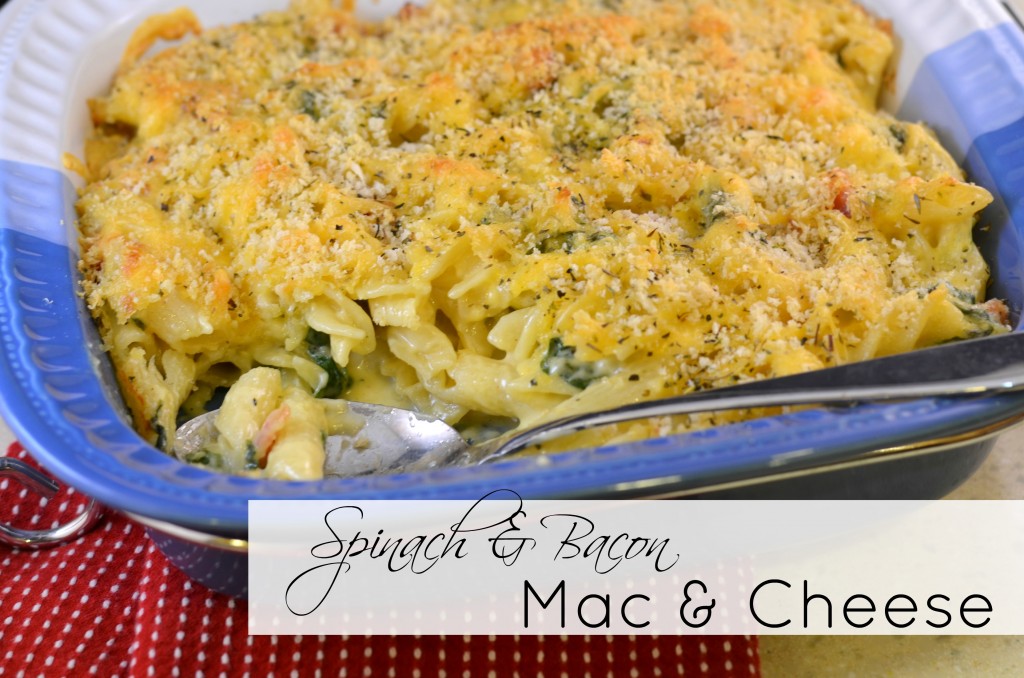
Spinach and Bacon Mac and Cheese

Spinach and Bacon Mac and Cheese

Spinach and Bacon Mac and Cheese

One of my favorite comfort foods is mac and cheese. There’s just something about the creamy goodness of the sauce and the filling, tasty noodles that screams satisfaction. I know that after every serving of mac and cheese I’ll have a smile on my face and a very full belly.

A few years back I was watching Ina Garten and she made her Grown Up Mac & Cheese. After watching her make this dish I’ve never made mac and cheese the same again! With a few key tips I took from Ina I’ve created a family favorite that we make at least once a month: Spinach and Bacon Mac and Cheese.

What I absolutely love about this dish is, like many of my favorite dishes, it’s a “whats left in the fridge” kind of meal. You can use just about any cheese you have on hand and throw in any vegetable you think might be tasty. Some nights it’s broccoli, other nights it’s frozen peas. Last night it was spinach.

So skip the boxed mac and try something that is sure to become a quick family favorite. You will not be disappointed!

[Read more…]

How To Make Subway Art on PicMonkey

affiliate link disclaimer

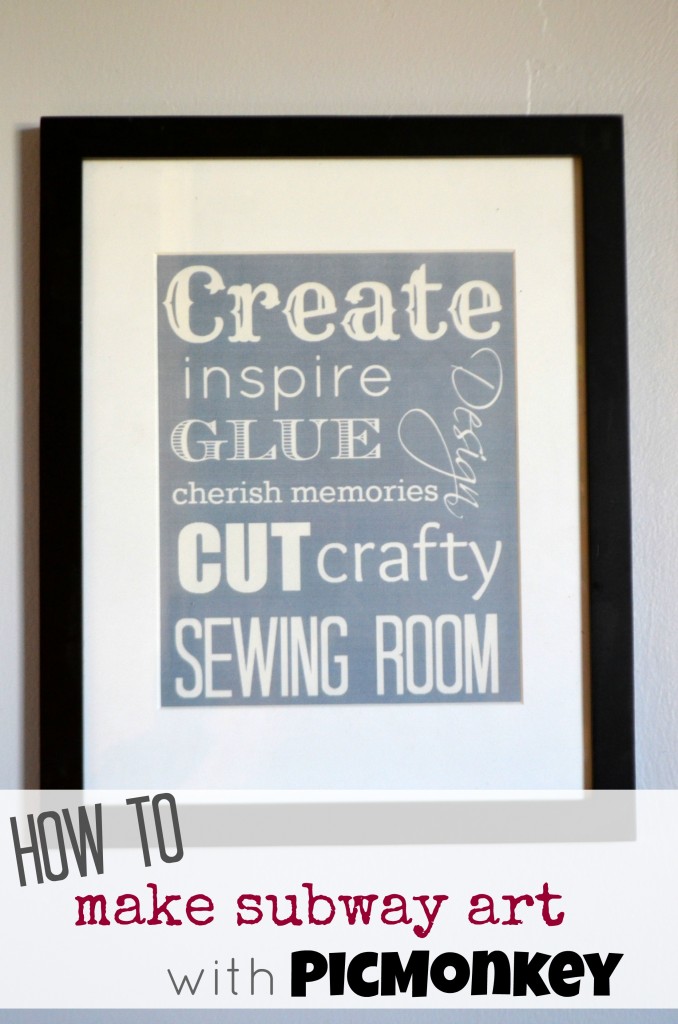
PickMonkeySubwayArt

When I started to put the final touches on my home office and craft area I knew I wanted to add some personalization to the space to really make it mine. I scoured over Etsy and other designers to find the perfect wall art but nothing screamed me. So I decided to put my creative skills to the test.

What I came up with was how to make subway art on PicMonkey! Not only did I get to personalize the words to what I wanted my space to reflect, it cost me nothing. Well… besides the monthly fee I’m already paying for the premium services.

Below is a step-by-step tutorial on how to make subway art on PicMonkey so you can create your own artwork to hang up!

How to Make Subway Art on PicMonkey

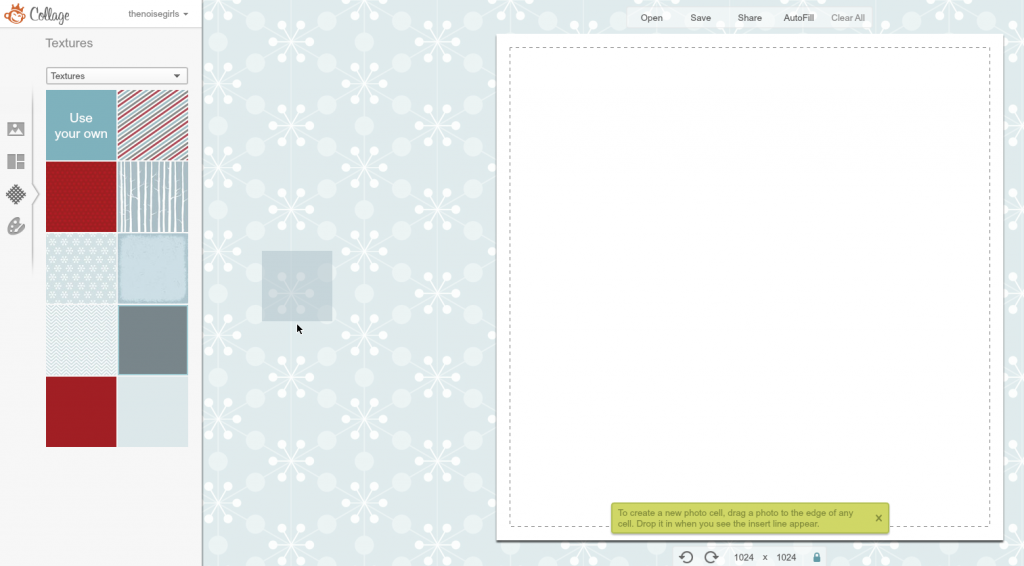
When you head over to PicMonkey click on Create a Collage. We’re going to create our template first before adding our words.

PicMonkeyClickOnCreateACollageCraftRoomSubwayArt

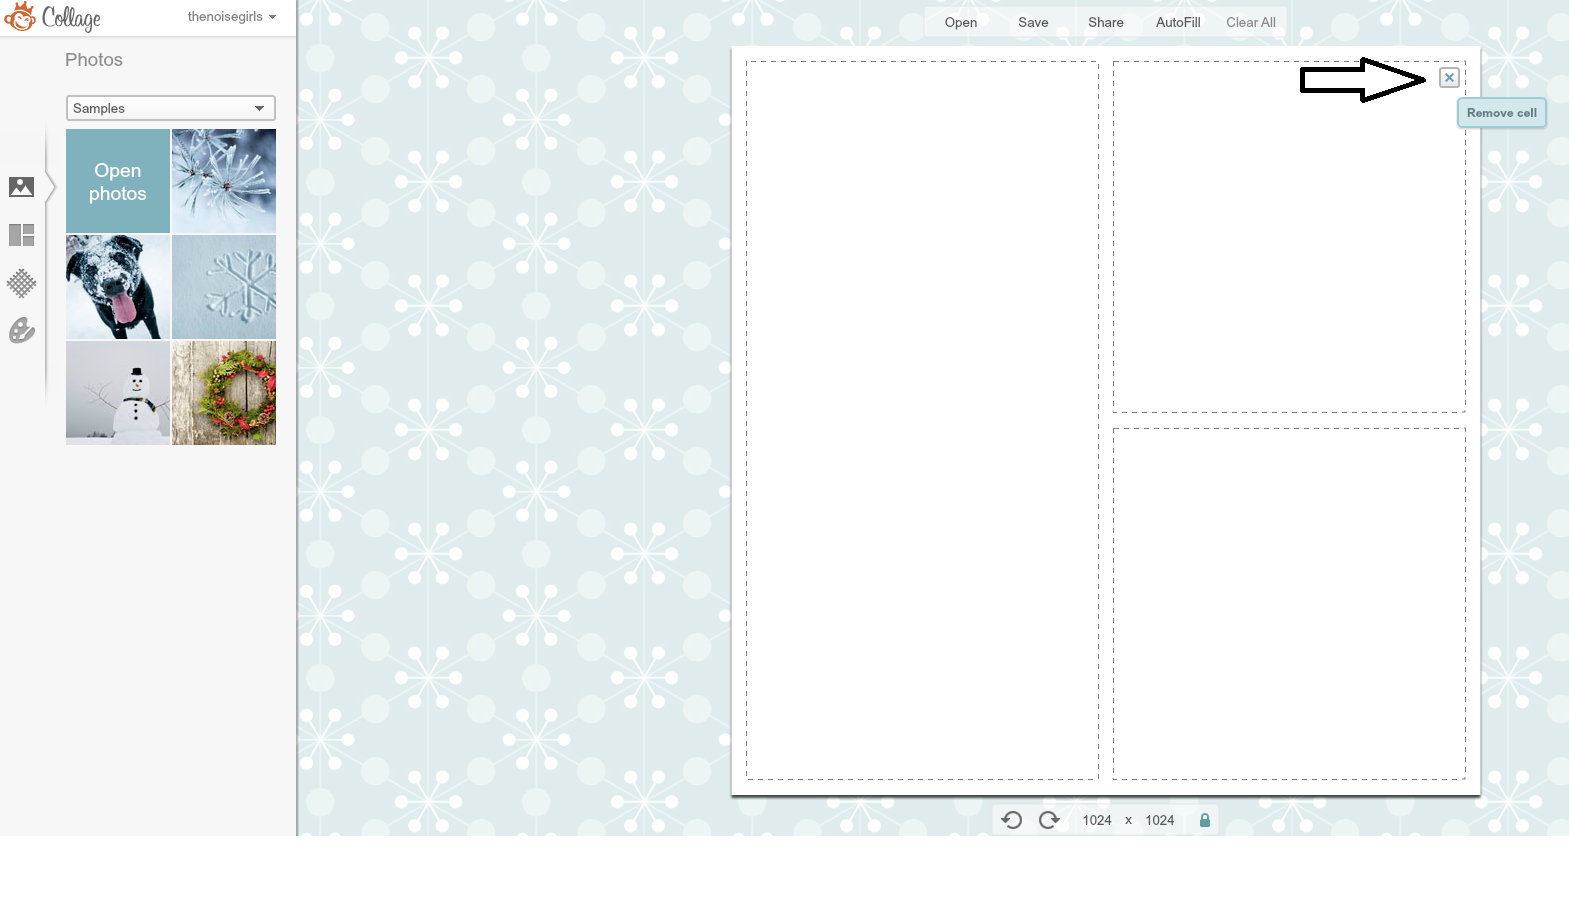
1. Delete all but one cell from your collage.

PicMonkeyClickOnRemoveCellCraftRoomSubwayArt

2. On the left hand side click on textures (diamond grid icon). Choose a texture.

PicMonkeyChooseATextureCraftRoomSubwayArt

3. Drag the texture to the cell.

PicMonkeyTextureCraftRoomSubwayArt

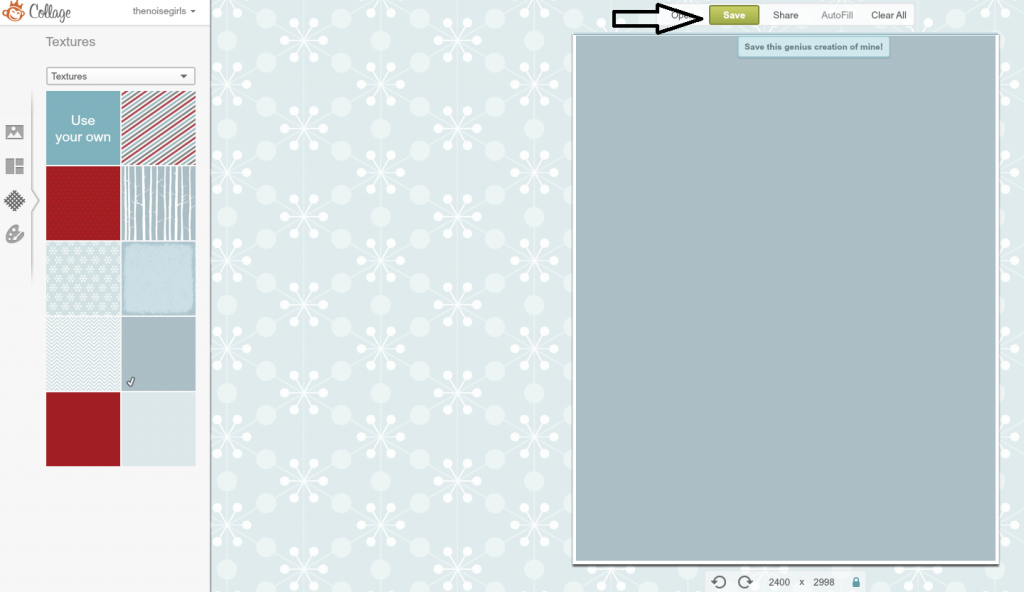
4. Resize the cell to match the resolution and size you want to print your photo. For an 8×10 photo it’s suggested to use a 2400×3000 pixel ratio.

PicMonkeyResizeTemplateCraftRoomSubwayArt

5. Save your re-sized template. This will be the base of your subway art.

PicMonkeySaveCraftRoomSubwayArt

PicMonkeySaveAsCraftRoomSubwayArt

6. Now that your template is saved, go to Edit a Photo and open it up.

PicMonkeyEditAPhotoCraftRoomSubwayArt

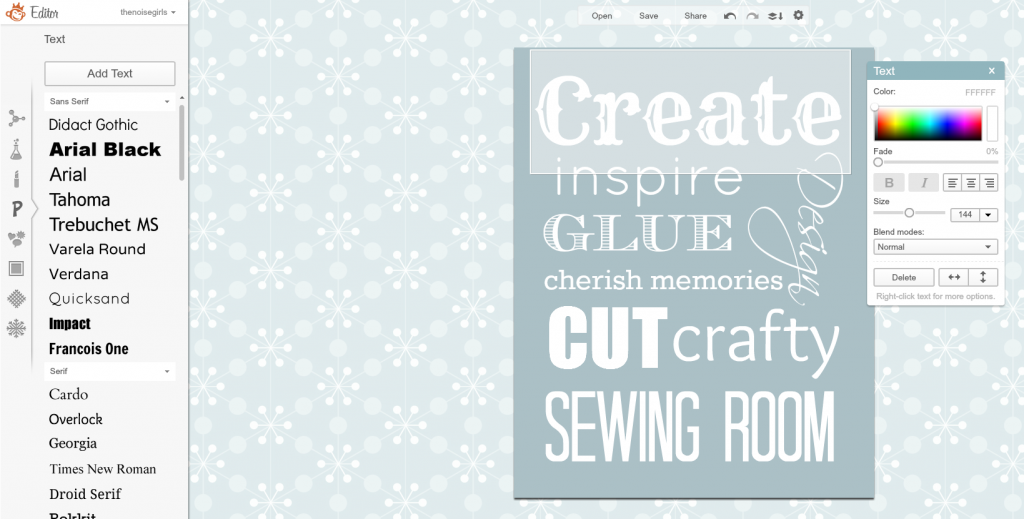
7. Using the words you want to display on your subway art, start adding different words and fonts to your page.

PicMonkeyOpenPictureCraftRoomSubwayArt

8. Play around with different sizes and colors to get the look and feel you’re going for. Remember that you can also turn words vertically if you prefer.

PicMonkeyEditingCraftRoomSubwayArt

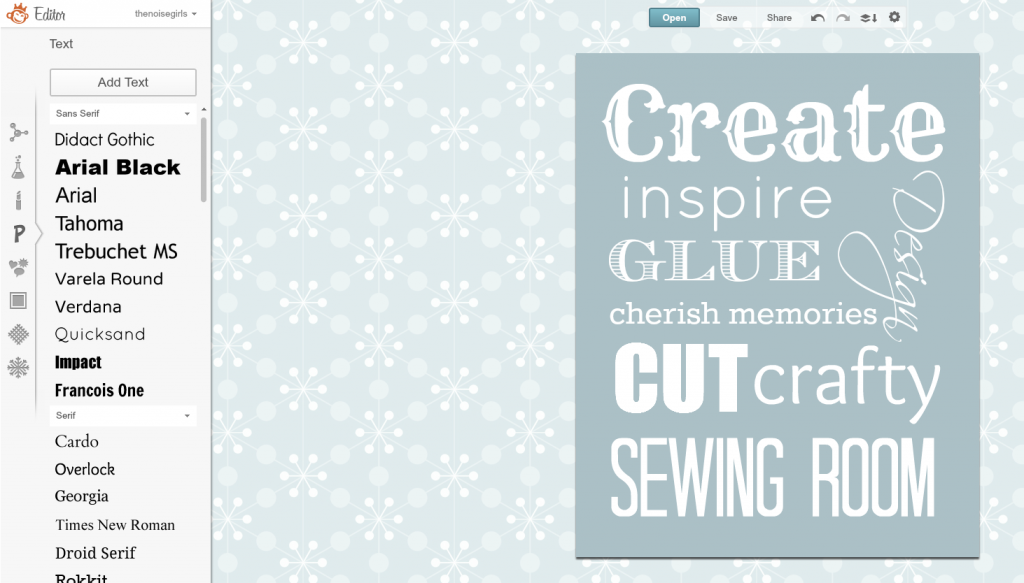
9. Once you’ve added all of the words and have them aligned the way you want, make sure there’s a nice 1/2 inch boarder around the wording to make room for framing.

PicMonkeyCraftRoomSubwayArt

10. Print out your subway art, frame it and enjoy!

Have you created subway art before? What was your focus or keywords?

Looking to play more with PicMonkey? Here are some fun projects to try out:

How to Make a DIY First Day of School Sign Using PicMonkey #BackToSchool

DIY First Day Of School Sign

how to make a recipe card with picmonkey pinterest

How To Make A Recipe Card With PicMonkey

How to Make Valentines with PicMonkey

How to Make Valentine’s with PicMonkey

Disclaimer: This post is contains affiliate links

Staying Organized In The Kitchen: Meal Planning

Meal Planning Kitchen Organization

One of my biggest resolutions this year is to get organized. I plan to organize the house, my work schedule, and, of course, my road to a healthier life.

In order to save time and money as well as stay on plan with my healthy eating, I like to meal plan once a week. This helps me gauge how many calories I’ll need left over in the evening and helps the husband know what we’re having for dinner every night.

And because I’m already going through the trouble of writing out a meal plan, I also write out a grocery list and print the recipes I’m going to use in advance so that I can cut coupons and grocery shop right after I’m done.

My system is simple but very efficient and I’d love to share it!

[Read more…]

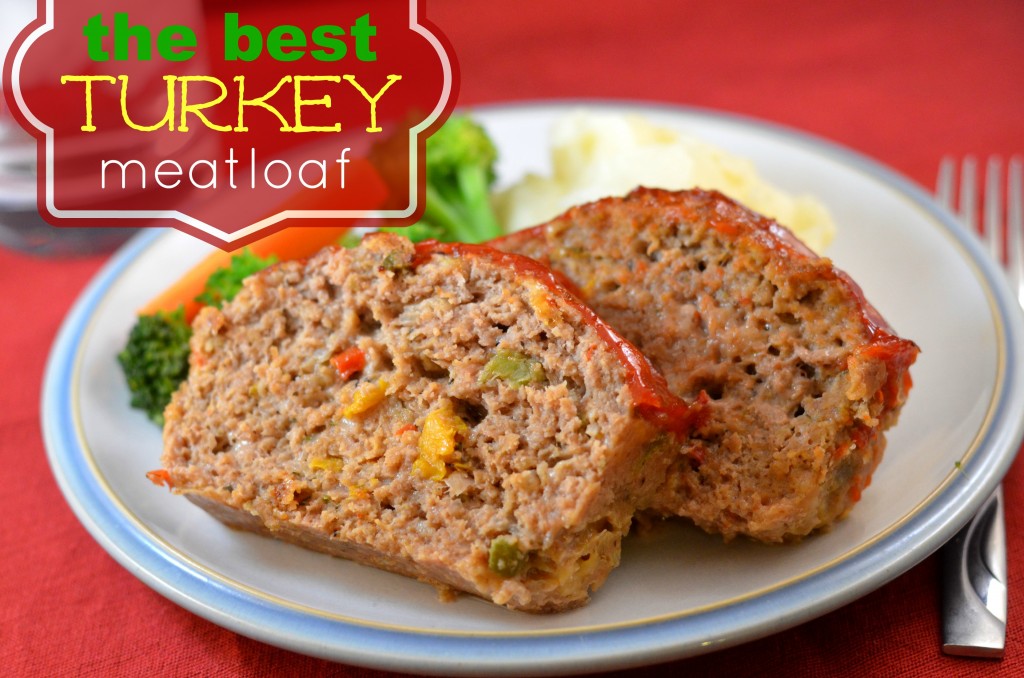
The Best Turkey Meatloaf Ever

the best turkey meatloaf ever

The Best Turkey Meatloaf Ever

When I first started Weight Watchers before my son was born I fell in love with making meatloaf from ground turkey. While I heard complaints about ground turkey being too dry and not as good as ground beef I was determined to make a tasty and healthy version of one of my favorites.

With a few additional ingredients to my original meatloaf recipe I created a delicious meal that I make over and over again. It truly is the best turkey meatloaf ever! I cheat a little and use the Trader Joe’s frozen fire roasted onions and peppers. Then I chop them up into smaller pieces. I think that the juices from the cooked veggies really add more flavor to the whole meal.

The best part is how versatile it is. While I always include the ingredients below I sometimes add extra veggies or different cheese to the mix to change it up. Well… and to clean out the fridge. Grated zucchini is probably the best addition to this recipe. But make sure to squeeze out all of the excess liquid first before adding it.

If you’re looking for a great way to incorporate veggies into you meal without having to pile on an extra serving, this is a great way to do it! Now I just wish my kids would start to gobble it up as much as my husband and I do. We think they might be warming up to it though.

The Best Turkey Meatloaf Ever
Ingredients
  • 1 1/4 pound lean ground turkey
  • 1/2 cup onions and peppers, diced
  • 1 clove garlic, minced
  • 1 egg
  • 1 tablespoon Worcestershire sauce
  • 1 tablespoon Italian seasoning
  • 1/2 cup panko bread crumbs
  • 1/4 cup swiss cheese (any type would work)
  • salt and pepper
  • 1/2 cup ketchup
  • 1 tablespoon mustard
  • 1 tablespoon brown sugar
Instructions
  1. Preheat oven to 375 degrees.
  2. Saute onions and peppers in a nonstick skillet on medium heat. Add garlic and cook until fragrant. Set aside to cool slightly.
  3. Grab a small cup or bowl and mix together ketchup, mustard, and brown sugar. Set aside to top meatloaf later.
  4. Place ground turkey in a large bowl, add sauteed veggies, egg, Worcestershire sauce, herbs, panko, swiss cheese, salt and pepper. Mix together well until everything is incorporated.
  5. Grab a loaf pan and add meat mixture to the pan forming a round dome on top. Cook for 40-45 minutes.
  6. Take meatloaf out of the oven and top with a thin layer of the ketchup mixture. Place back in the oven and cook for another 15 minutes or until fully cooked and the inside reads 160 degrees.
  7. Let rest for 5-10 minutes before serving.

Serves 5, 2 slices = 1 serving at 6 WW points

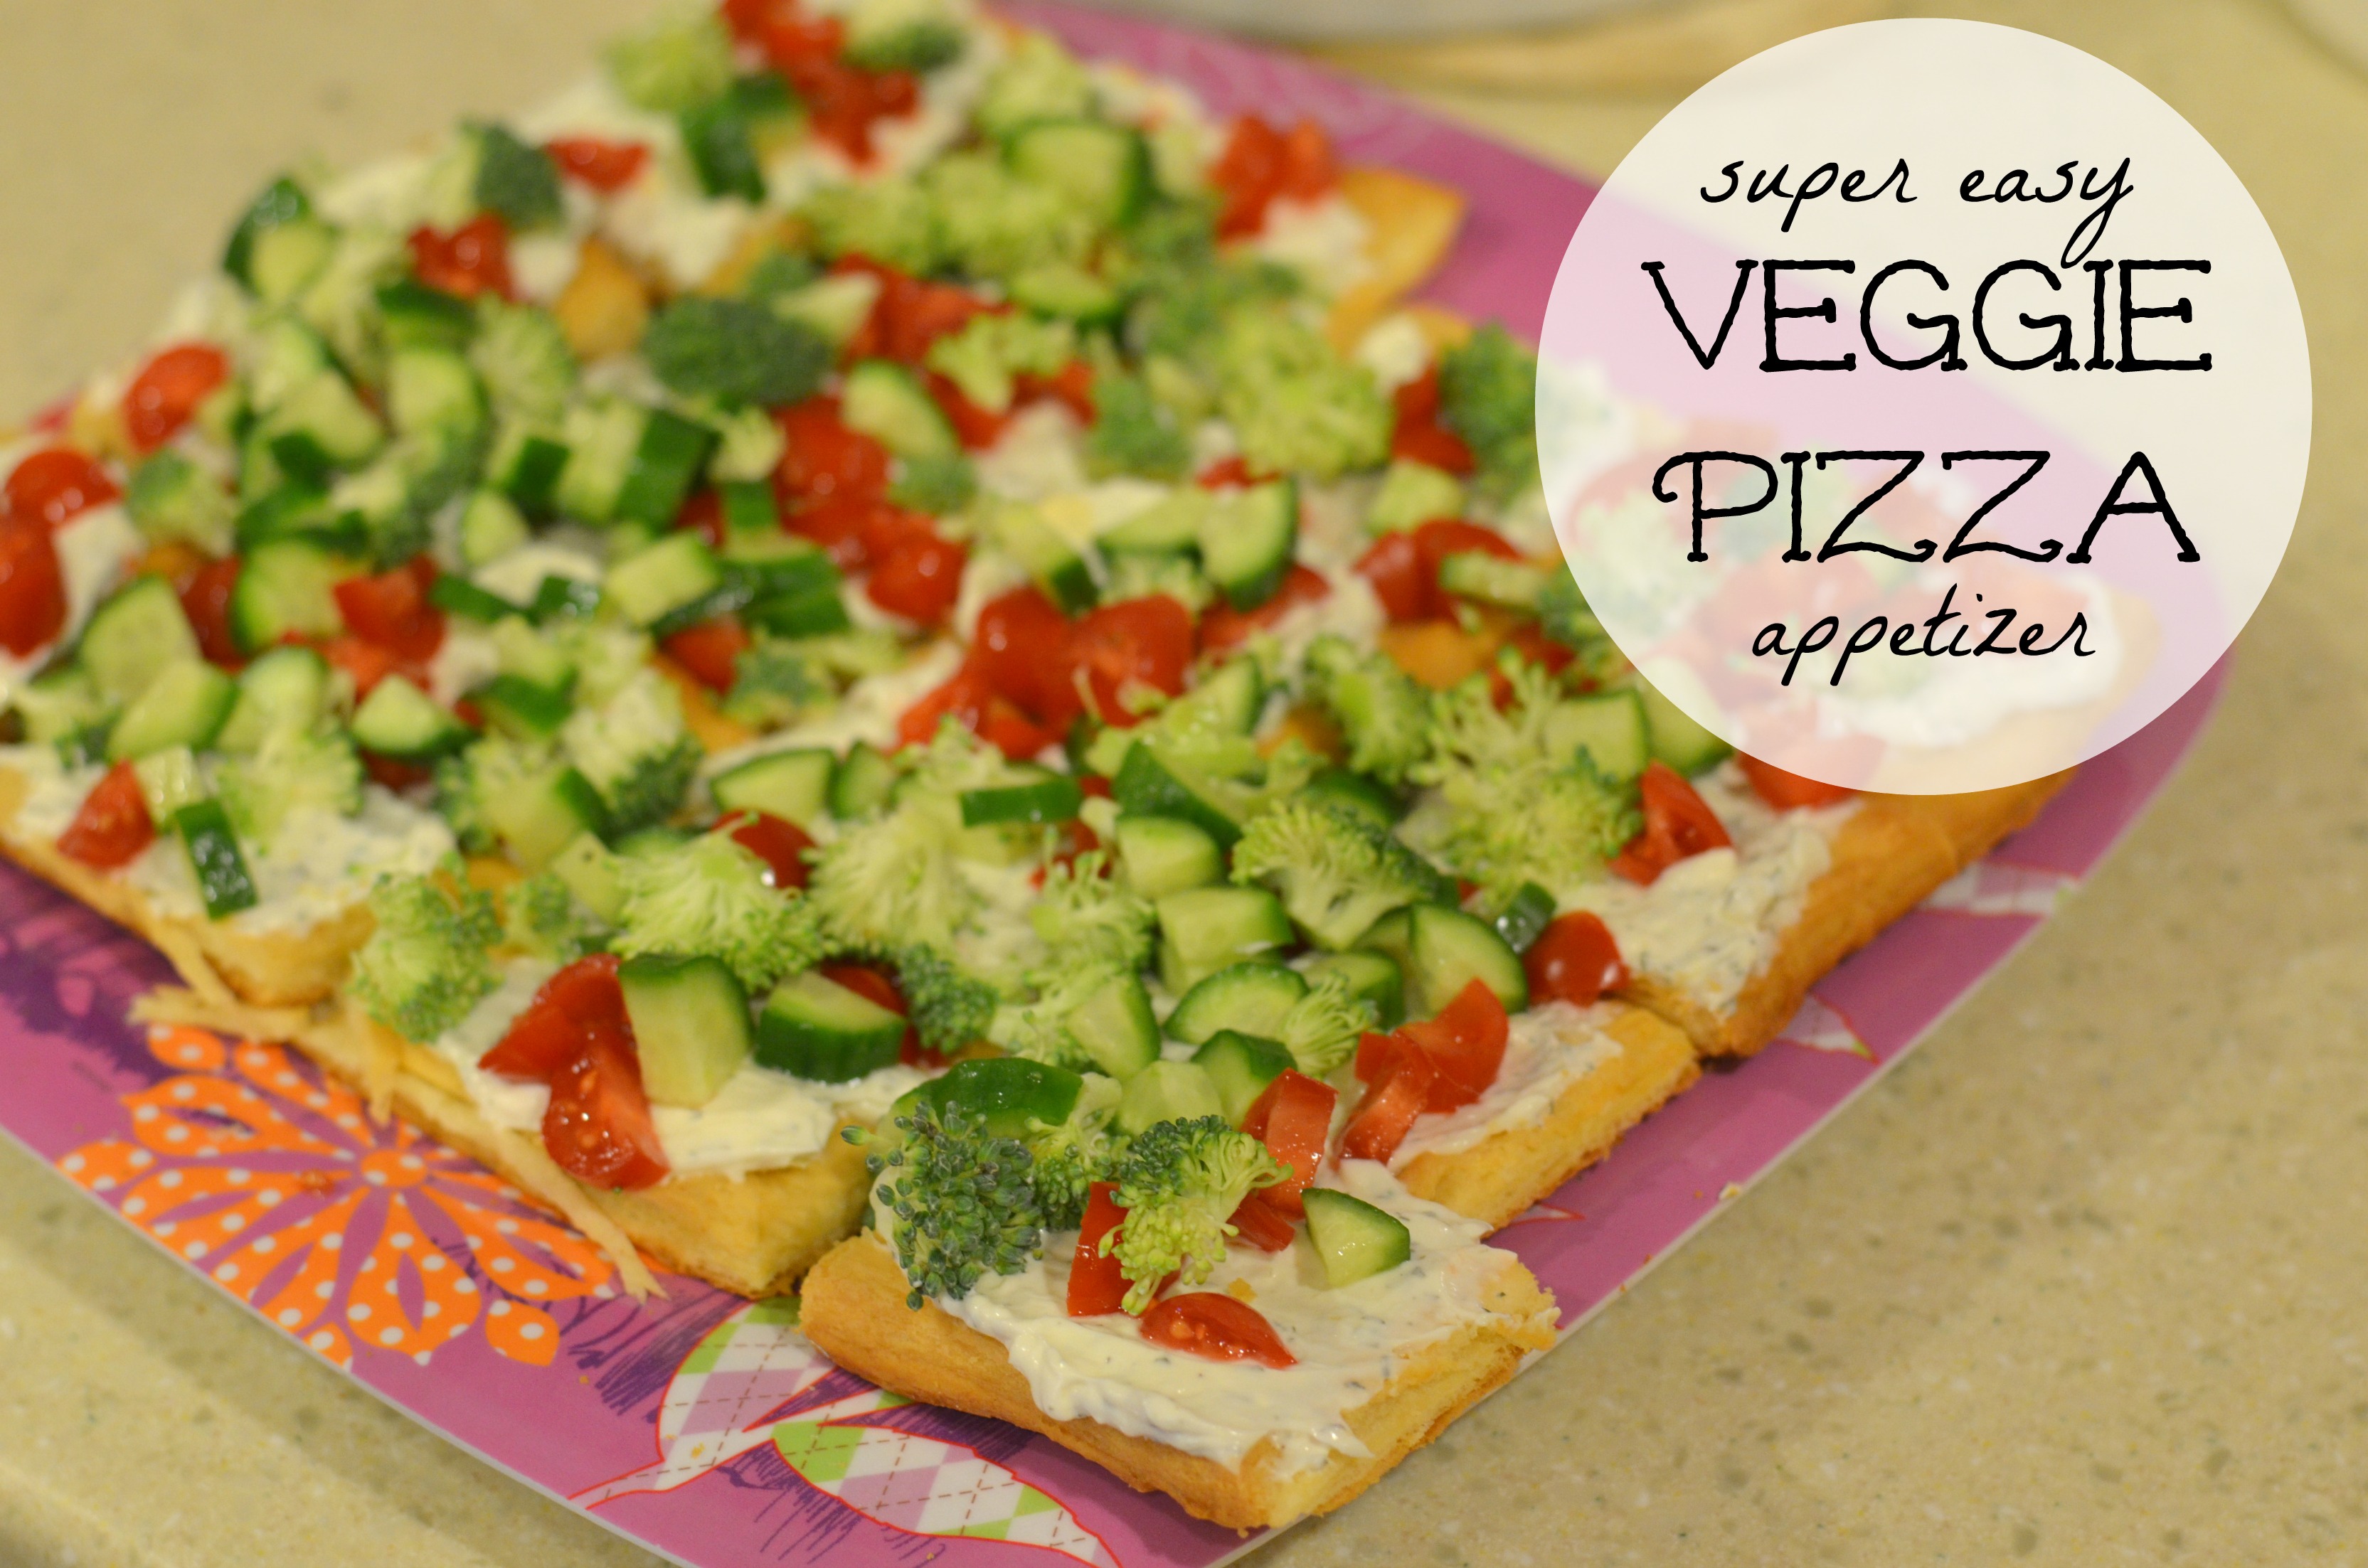
Veggie Pizza Appetizer Recipe with Ranch

Veggie Pizza Appetizer Recipe with Ranch

Veggie Pizza Appetizer Recipe with Ranch

With New Years Eve right around the corner the one thing on my mind are appetizers! Having an easy meal plan for this long night is the key to our success and easy appetizers are our #1 priority. This veggie pizza appetizer recipe with ranch is not only easy but there isn’t much cooking involved!

You cook the crust up separately and then add the ingredients minutes before the guests arrive. Plus with tons of fresh veggies on top this is a semi-healthy option for those who have already started on their New Year resolutions.

And we’re always serving ranch with chips and veggies so grabbing a 1/2 cup of the prepared dip before setting it out is super easy. And it gives this appetizer a delicious taste! Out of ranch dip mix? just use sour cream and it’ll still taste yummy.

Veggie Pizza Appetizer Recipe with Ranch

Recipe Type: Appetizer
Ingredients
  • 2 cans crescent rolls
  • 8oz light cream cheese, softened
  • 1/2 cup ranch dip mix, prepared
  • 1 teaspoon dill weed
  • 1/4 teaspoon garlic powder
  • 1 cup broccoli, chopped
  • 1 cup cherry tomatoes, chopped
  • 1 cup english cucumbers, chopped
Instructions
  1. Preheat oven to 350 degrees.
  2. Roll out both tubes of crescent roll dough onto a rimmed baking sheet. Press seams together to make one large piece of dough. Bake for 13-17 minutes or until golden brown.
  3. Set dough aside and let cool for 30 minutes.
  4. Mix cream cheese, ranch dip, dill, and garlic powder together. Spread over cooled dough.
  5. Sprinkle chopped veggies over the cream cheese spread evenly.
  6. Cut into even pieces and serve.


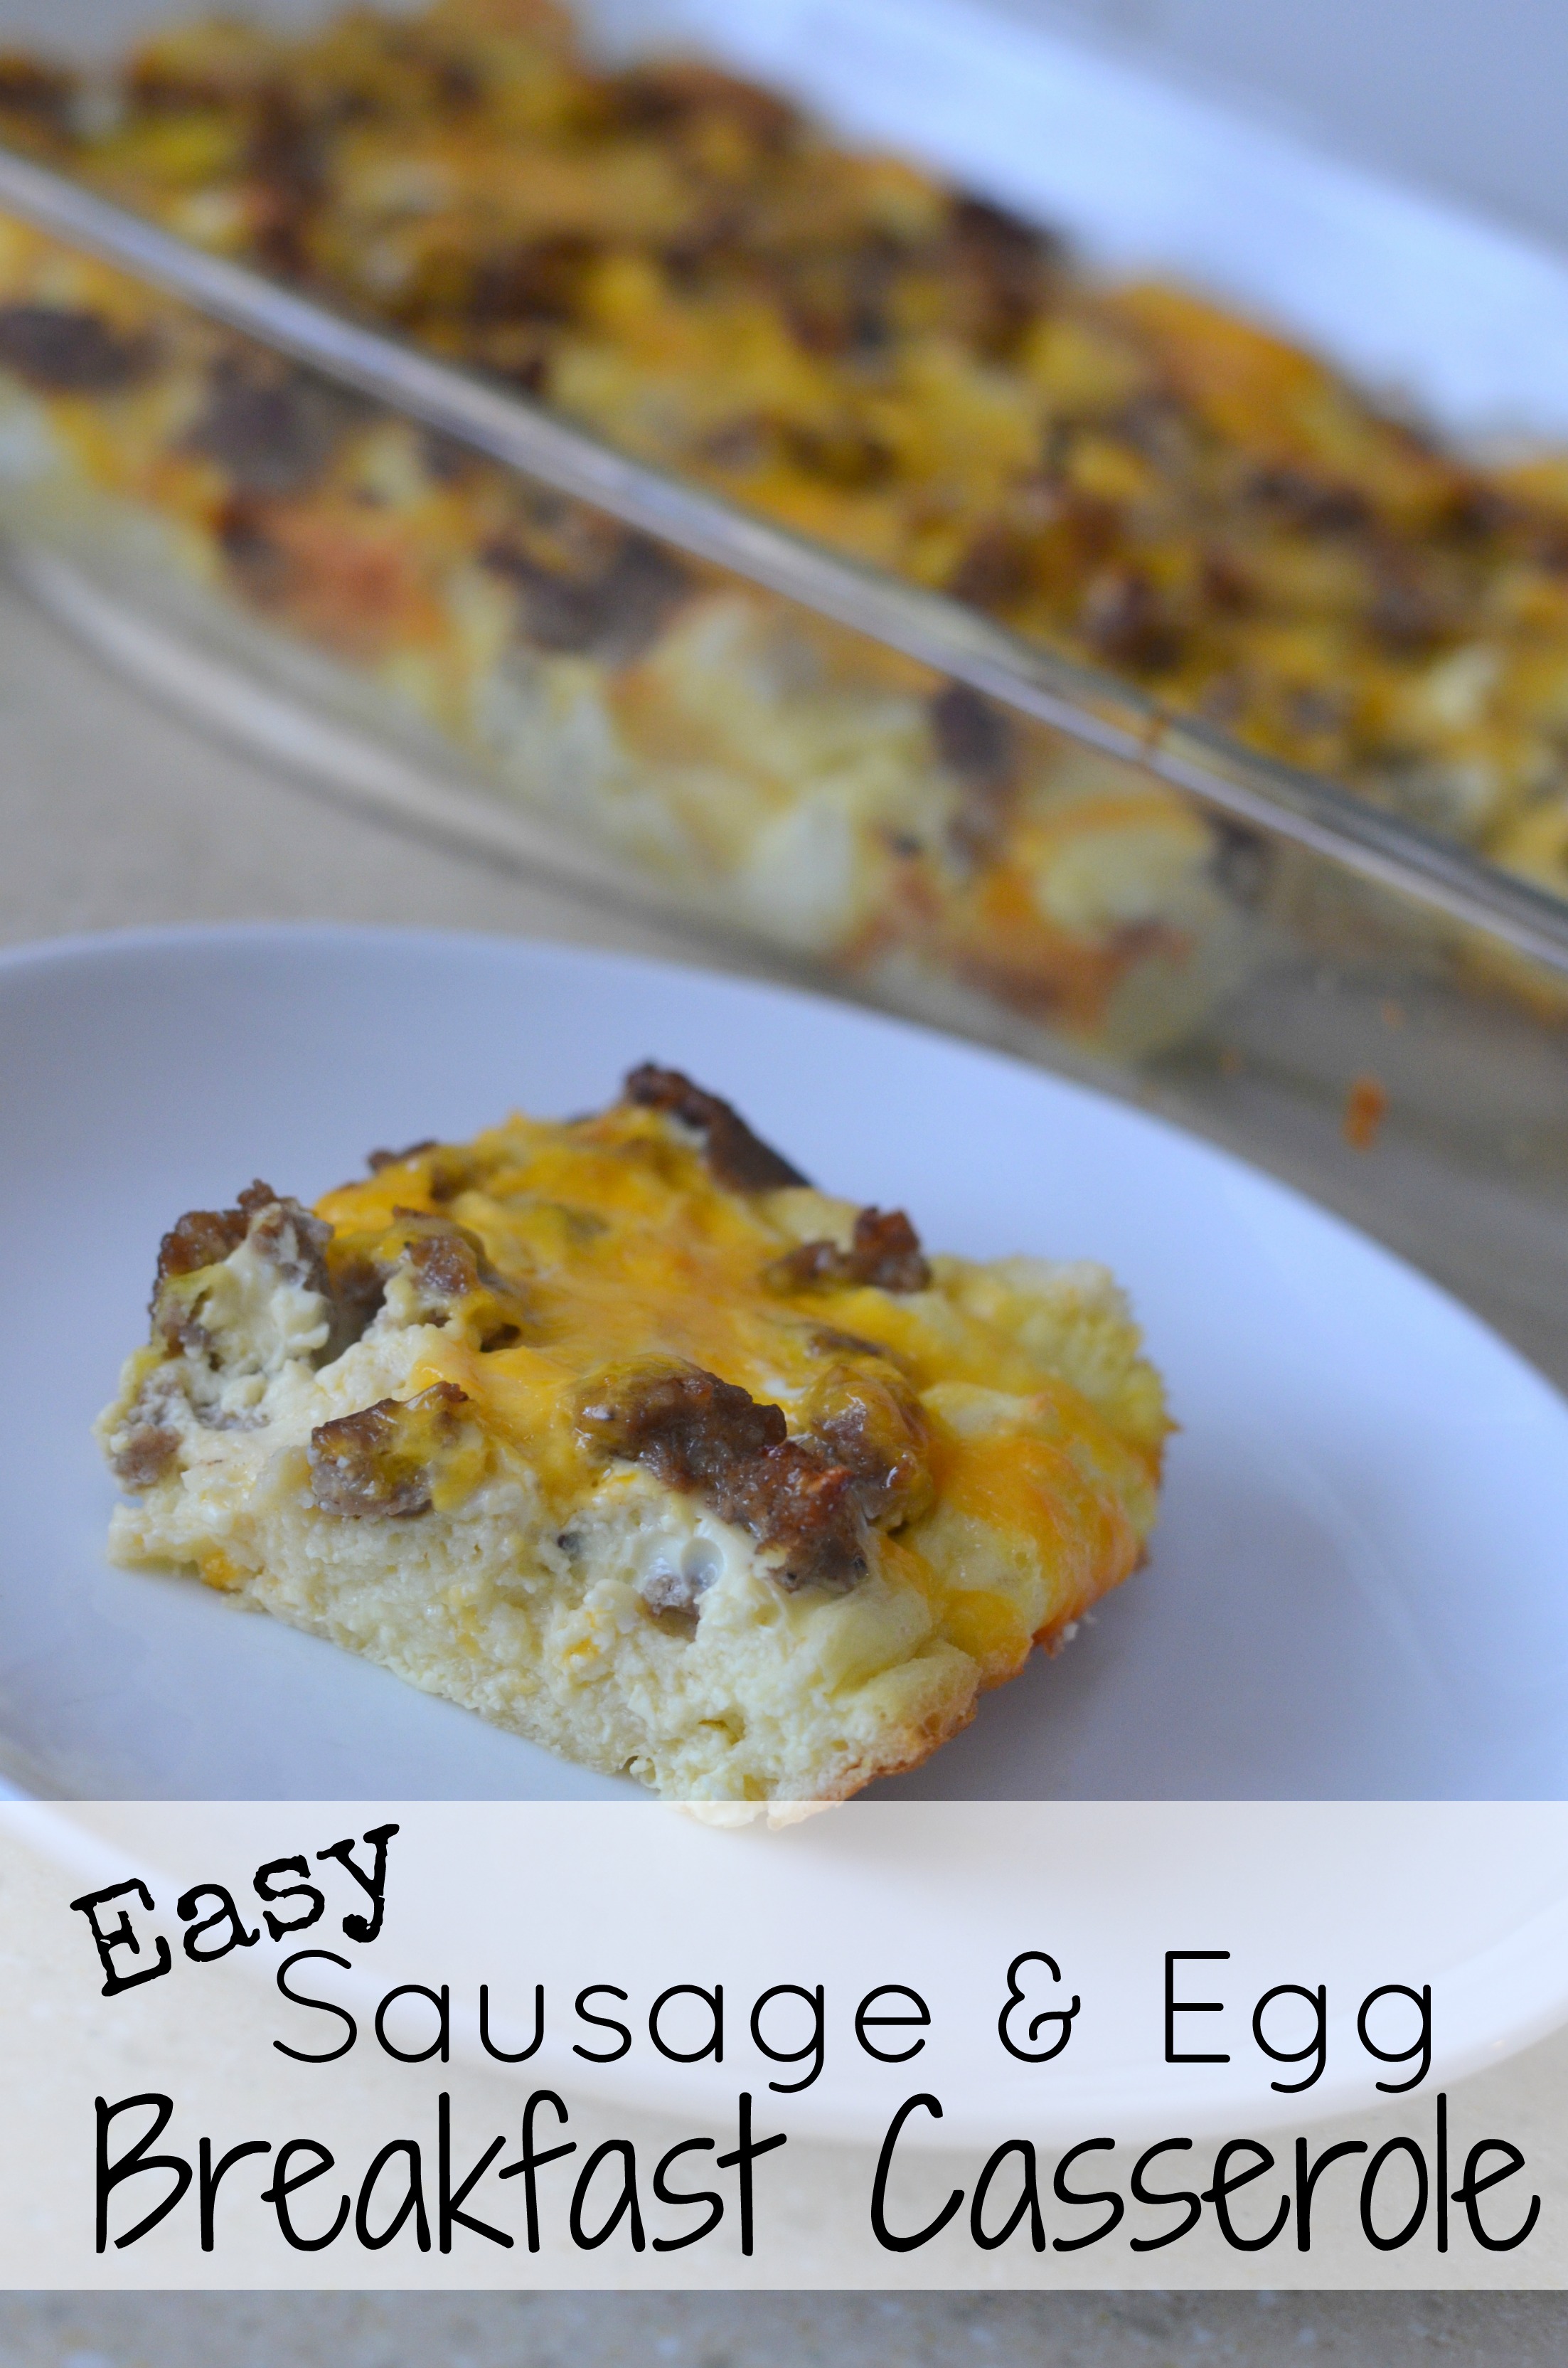
Easy Sausage and Egg Breakfast Casserole Recipe

sausage and egg breakfast casserole

Sausage and Egg Breakfast Casserole Recipe

One thing I love to have on hand are easy, throw together recipes for breakfast and brunch. With a playgroup playdate scheduled at our home at least once a month with our friends these easy recipes come in handy. And while my overnight french toast is our go-to for most events this easy sausage and egg breakfast casserole is just as simple and mighty tasty!

I try and stock up on breakfast sausage when I see it on sale so I always have a few packs in the freezer ready for such occasion. And day old bread is never a problem to find in this home. So if you’re hosting people over or simply want an easy dish to make on the weekend and reheat during the week, this breakfast casserole is for you.

Plus, just like the overnight french toast you simply make this casserole the night before and store it in the fridge till a few hours before you need it.

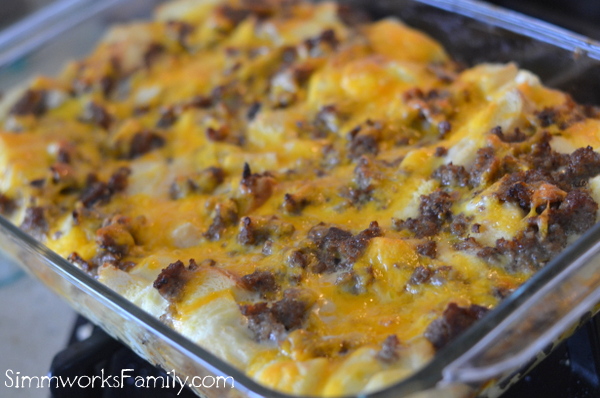
sausage and egg breakfast casserole baked

Sausage and Egg Breakfast Casserole Recipe

Recipe Type: Breakfast
Ingredients
  • 1 pound pork
  • 6 slices of bread, cubed
  • 1 cup shredded cheddar
  • 6 eggs
  • 1 1/2 cup milk
  • pinch of nutmeg
  • salt & pepper to taste
Instructions
  1. The night before place sausage in a large, deep skillet. Cook over medium-high heat until evenly brown. Drain, and set aside.
  2. Layer bread cubes, sausage, and cheese in a lightly greased 7×11 inch baking dish. In a bowl, beat together the eggs, milk, salt, pepper and nutmeg. Pour the egg mixture over the bread cube mixture. Cover, and refrigerate at least 8 hours or overnight.
  3. Remove the casserole from the refrigerator 30 minutes before baking. Preheat oven to 350 degrees.
  4. Bake 50 to 60 minutes in the preheated oven, or until a knife inserted in the center comes out clean. Let set 10 minutes before serving.
  5. Refrigerate leftovers and re-heat in the microwave or toaster oven for a quick and simple breakfast during the week.

*A special thanks to Kerri for sharing the original recipe with me. With a few modifications I made this a family favorite!

Last Minute Gifts for the Techie

It’s Christmastime and everyone is in a hurry to grab everything on their lists before time runs out!

I, for one, am completely done with my holiday shopping and couldn’t be happier. And there are a few people on my list who will be quite happy with what they’ll be receiving. If you have a tech loving family member or friend to purchase for this year, check out these great products for each tech lover in your life.

Last Minute Gifts for the Techie

Fitbit Zip Gift of Health

[Read more…]


© A Crafty Spoonful - All Rights Reserved
It is OK to use one of my photos provided a link back and/or proper credit is given. It is NOT ok to copy and paste a whole post including instructions. Please do not remove watermarks or alter images in any way. Please contact me with any questions at danielle@acraftyspoonful.com

.