How to Make Chocolate Peanut Butter Crinkle Cookies Your Guests Will Love

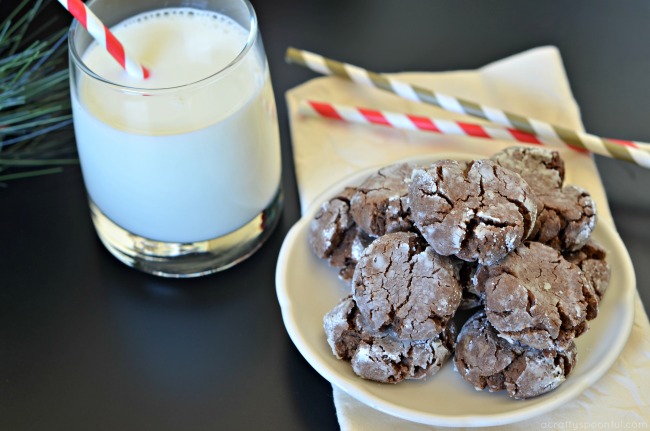
If you’re looking for the perfect holiday cookie this season then look no further than these Chocolate Peanut Butter Crinkle Cookies! Your guests will love their small perfection. Plus they pair perfectly with milk, cocoa, and coffee! 

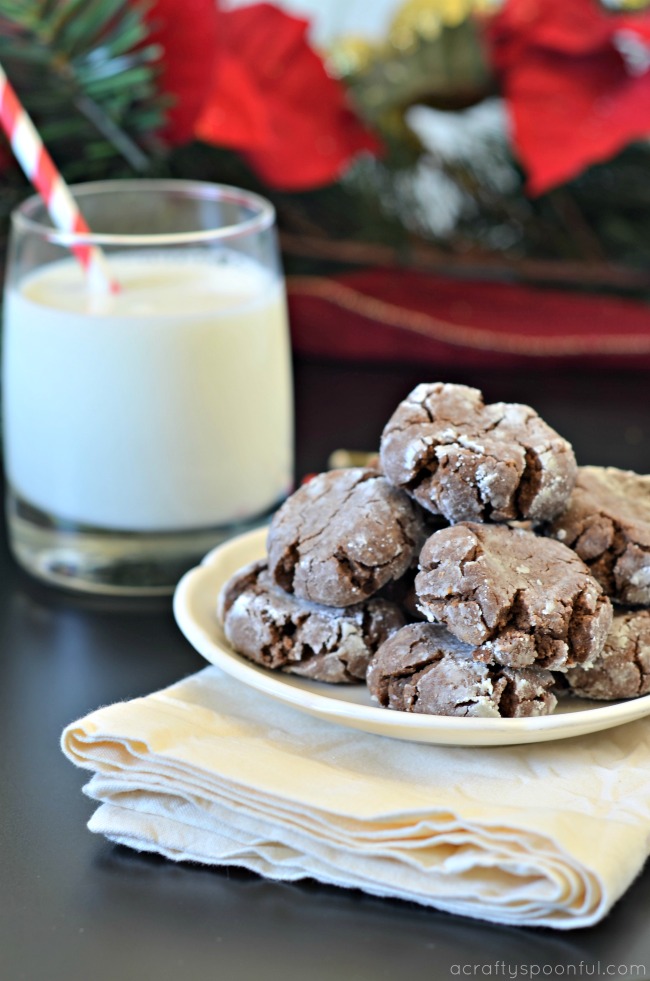
How was your Thanksgiving? We spent the day baking in the morning with the kids and then enjoying a wonderful meal with our extended family. It was perfect. One of the things we decided to bake up that morning to bring to dinner were these deliciously perfect chocolate peanut butter crinkle cookies. They’re small, bite-size cookies that aren’t too sweet so they were perfect to pair with the pies and enjoy with a cup of coffee or cocoa to drink. 

Normally we make chocolate crinkle cookies but this time my older daughter wanted to add something a bit different to them to change things up. The addition of peanut butter was the perfect touch and added a great flavor combo to these classic cookies. I may try adding a pinch of cinnamon next time too! 

This recipe is one of many we’re sharing on the Houseful of Cookies tour this year. Last year we made another fun cookie recipe: Pfeffernüsse Cookies. You have to try them if you haven’t made them yet! The rest of the cookies on this tour are linked at the bottom of this post. 

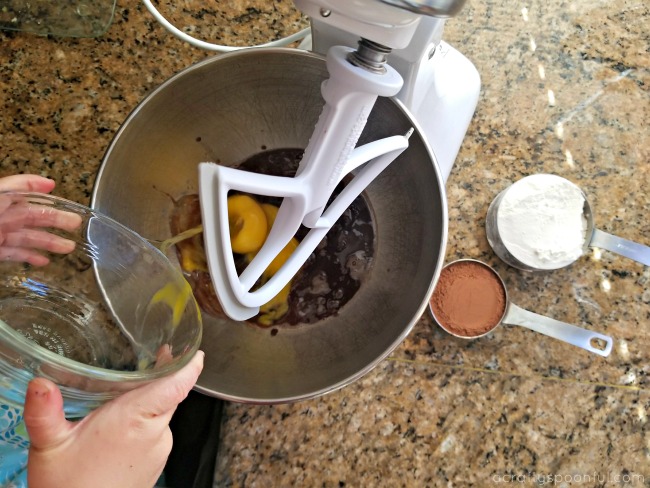
When making cookies with the kids I always try to measure everything out before we start mixing so they don’t just dump everything out without knowing what they’re putting in. It helps them to understand the quantities needed for each recipe. 

But one thing we are working on is adding one egg at a time while mixing so each can be incorporated before the other is added. The 2 year old prefers to dump them all in at once! 

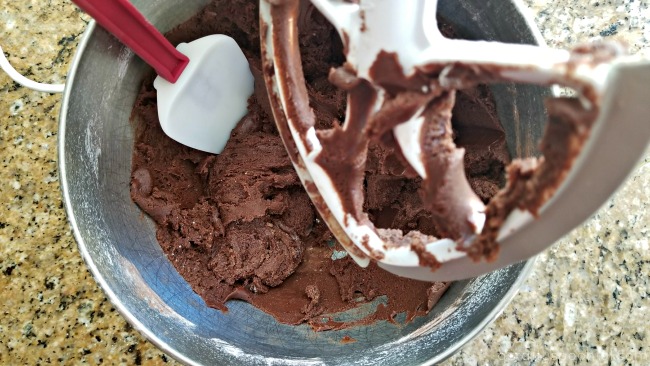
This dough is a thicker dough that, once all of the ingredients are combined, form a ball in the mixer. This makes it easier to get out to refrigerate once mixed up. 

And I’ll let you in on a little secret. Even though the recipe does say to chill for 1 hour… I don’t always let it chill. I’ll divide the dough up into two halves and place one in the fridge but will start rolling out the other right away. 

This is a great cookie to make before guests come over if you’re looking for something little to nibble on. Or to give as gifts during the holidays because they’re small and do well in an airtight container. 

Chocolate Peanut Butter Crinkle Cookies

  • 10 tablespoons butter (cut into 10 pieces (1/2 cup plus 2 tablespoons))
  • 1 1/4 cups light brown sugar (packed)
  • 10 ounces bittersweet chocolate (coarsely chopped)
  • 2 1/2 cups all-purpose flour
  • 1/2 cup unsweetened cocoa
  • 1 teaspoon baking soda
  • 1/2 teaspoon teaspoon salt
  • 2 eggs
  • 1/2 cup peanut butter
  • 1/2 cup powdered sugar
  1. Put the butter, sugar, and chocolate in that order into a 2-quart saucepan. Put the pan over low heat and warm the ingredients, stirring occasionally, until they are melted and smooth. Scrape everything into the bowl of a mixer.

  2. Sift together the flour, cocoa, baking soda, and salt.

  3. Working with a mixer with a paddle attachment, add the eggs, one at a time, beating until the eggs are well blended into the chocolate. With the mixer still on low, add the dry ingredients, mixing just until the dough is smooth and shiny; it will clean the sides of the bowl and form a ball. Then add the peanut butter and stir in until just combined. Turn the dough out onto a work surface, divide it in half, wrap each piece in plastic wrap and chill for at least 1 hour. 

  4. Preheat the oven to 350°F and line two baking sheets with parchment paper.

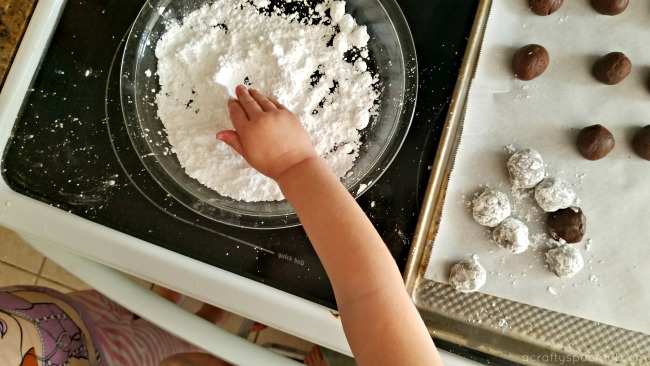
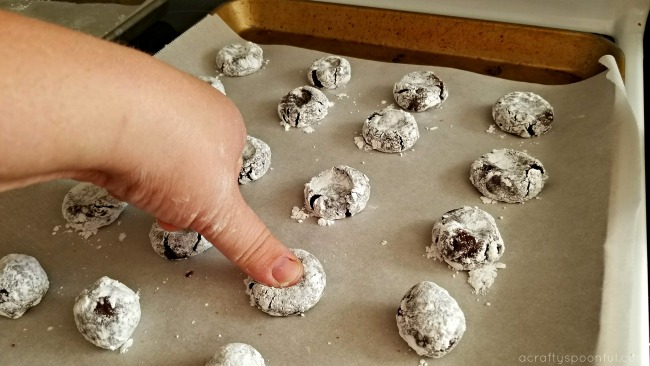
  5. Working with 1 tablespoon of dough at a time, roll the dough between your palms to form firm, shiny balls. (If the dough breaks as you work, squeeze and knead it a bit, then reroll it between your palms.) Add to a small shallow dish filled with powdered sugar and roll in sugar until lightly coated. Place the balls about 1 inch apart on the baking sheets and lightly press each one down a bit with your thumb.
  6. Bake the cookies for 9 to 10 minutes, rotating the baking sheets from top to bottom and front to back at the midway point. The cookies should be delicately firm and crackled across the top. (It’s better to under- than over bake.) Remove the sheets from the oven, let the cookies rest on the sheets for 2 minutes, then, using a wide spatula, gently transfer the cookies to a rack; cool to room temperature.

  7. Repeat with the remaining dough, cooling the baking sheets between batches. 

Looking for more deliciousness to enjoy this holiday season? Don’t forget to check out the rest of the stops on the Houseful of Cookies tour! 

Houseful of Cookies 2017 Blog List

Houseful Of Nicholes – Slow As Molasses Cookies

A Crafty Spoonful – Chocolate Peanut Butter Crinkle Cookies

A Real Urban Mom – Chocolate Chip Cookies

Dash Of Evans – Cranberry Hootycreeks

Divas With A Purpose – Houseful Of Cookies 2017

Everyday Party Magazine – Simple Caramel Cream Sugar Cookies Swirls

Fab Haute Mama – Belgian Waffle Cookies

Good Girl Gone Redneck – Perfect Holiday Saltine Toffee Treat

Happily Homegrown – Old Fashioned Hermit Bar Cookies

Her Life On Purpose – Red Velvet Cake Mix Cookies

Honest & Truly! – Triple Chocolate Dipped Cookie

How Was Your Day – Houseful Of Cookies 2017

Hysterical Mom – Lemon Sugar Cookies

I am the Maven® – Moldy Mice Cookies

Keep Calm & Teach Fifth Grade – Winter Wonderland Sugar Cookies

Kenya Rae – Pecan White Chocolate Chip Cookies

Kiss My Tulle – Chunky Christmas Cookies

Mom On The Side – Hopscotch Crunchies Holiday Cookies

More Than Thursdays – Mint Surprise Sugar Cookies

Mother Of The World – Houseful Of Cookies 2017

Our Crafty Mom – Houseful Of Cookies 2017

Peyton’s Momma – Houseful Of Cookies 2017             

Simplify Live Love – Double Chocolate Pomegranate Cookies

Teachable Mommy – 3 Ingredient Peanut Butter Cookies

The Analytical Mommy – Favorite Lactation Cookie Recipe

The Biswolds – White Chocolate Chip Toffee Cookies

The Olive Blogger – Gingerbread Biscotti

We’re Parents – Cranberry Cheesecake Cookies  

How to Make Moana Kakamora Coconut Ornaments

how-to-make-moana-kakamora-coconut-ornaments

Moana has been and continues to be both of my daughter’s favorite movie. Each of them is glued to the screen as the story unravels every time they watch it. Three thousand years ago, the greatest sailors in the world voyaged across the vast Pacific, discovering the many islands of Oceania. But then, for a millennium, their voyages stopped – and no one knows why.

The story of Moana goes through the history of her people and the reason why they never leave their island. As Moana takes off on a new adventure, we come to learn more about this missing pieces of her story and watch as she creates a story of her own. 

Throughout her adventures, my daughter’s favorite part in the movie is when Moana and Maui encounter the Kakamora. Seemingly sweet and gentle creatures in the beginning, Moana quickly learns of their fierce, warrior-like side. We’re recreating the Kakamora in these fun Kakamora Christmas ornaments for the holiday season.

Don’t want to make these yourself? Purchase one here in our Etsy store! 

how-to-make-moana-kakamora-coconut-ornaments-supplies

How to Make Moana Kakamora Coconut Ornaments

What you’ll need: 

What you do: 

1. Paint a circle around the edge of the wood slice with brown paint leaving the middle wood exposed. 

2. Using the black paint, make two circles for eyes. 

3. With the white paint, make a mouth full of teeth. Outline in black if you’d like. 

4. Add the final touches to the face by adding some designs with red paint.

5. Screw eye screw on top of the ornament and string with ribbon. 

Let dry and hang on the tree to enjoy during the holiday season! 

how-to-make-moana-kakamora-coconut-ornaments-on-the-tree

* This post was originally published on Nov 21, 2016

How to Make 11 Awesome Thanksgiving Desserts That Your Kids Will Love

Finding a dessert that makes all of the kids happy can be a difficult challenge. So we’ve rounded up 11 awesome Thanksgiving desserts for kids that meet a handful of kid-friendly requirements! 

Kids are weird. No, no, listen. They really are. One minute they hate whipped cream, and the next they’re trying to shoot it straight into their mouths because they love it so much. And trying to find a dessert to make them happy can sometimes be difficult during the holidays when the options aren’t cake, brownies, or ice cream. So we put together a few of our favorite Thanksgiving desserts for kids so everyone has options this holiday season. But make sure you have plenty of whipped cream. 

pumpkin pie with coconut milk, pumpkin pie made with coconut milk, dairy free pumpkin pie filling

11 Thanksgiving Desserts for Kids

Pumpkin Pie with Coconut Milk from A Crafty Spoonful

This pumpkin pie is great for those who may have dairy allergies. It tastes just like regular pumpkin pie but is made with coconut milk instead. And no, you can’t taste the coconut in the filling. Pair it with some coconut whipped cream and you are set for the holidays! This recipe is also perfect to use for mini pumpkin pies as well if you don’t want to make the whole pie. 

Candy Apple Dump Cake from A Crafty Spoonful

Still have leftover Halloween candy you’re hoarding away? I’m not judging. But if you want to get rid of some of it, this is the recipe to try! This dump cake is not only easy, all you need is one pan (no separate bowls) to make it! Less dishes = winning in my book. And the kids go crazy over the chocolate + apple combo. 

Mini Pecan Pie Bites from A Crafty Spoonful

Oh, these sinfully sweet little bites of heaven are the perfect grab-on-the-go dessert for the littles. The butter cracker hooks the kids and the chocolate drizzle on top of the pecan filling keeps them coming back. Plus, there’s not too much mess with this recipe. 

Pumpkin Cheesecake Bites from My Suburban Kitchen

For those with a more sophisticated palate, these pumpkin cheesecake bites totally hit the spot. They’re very portable, just like the mini pecan pie bites, and pack a punch of flavor with a combo of gingersnaps and pumpkin. 

Four Ingredient Pumpkin Pie Dip from My Suburban Kitchen

What kid doesn’t love dip? And this deliciously sweet pumpkin pie dip is the perfect way to enjoy those holiday cookies or a few graham crackers. Just make sure there isn’t any double dipping.  

Pumpkin Spice Cranberry Trifle from Flour on My Face

Who doesn’t love a good layered trifle? Kids can dig in and eat a layer at a time or go for the gold and scoop all the way down for a few layers of goodness in one bite. Plus these are a fun recipe to let the kids help assemble! 

Gluten Free Pumpkin Cake from Flour on My Face

In case your child has a gluten allergy, or if they’re just avoiding gluten as part of an elimination diet, you need to try this pumpkin cake. You can still stay festive and enjoy all the flavors of the holidays even when you’re gluten-free! 

Pumpkin Pecan Bundt Cake from Flour on My Face

Speaking of cake, if your kids are more in a cake and frosting kind of mood, this pumpkin pecan bundt cake is a delicious option. I’ve made mini bundtlets for individual kid portions before and it’s turned out great! 

Pumpkin Spice Dessert Bars from {Not Quite} Susie Homemaker

Another quick and easy go to that you can make ahead and bring with you are these pumpkin spice dessert bars. They’re made with pumpkin and applesauce AND have a delicious cream cheese frosting! 

Individual Apple Pies from The Love Nerds

What’s Thanksgiving without apple pie? In our house we always have pumpkin and apple pies in addition to the other dessert options so these individual apple pies are perfect for the kids table. A classic recipe with a fun spin. 

Favorite Pecan Pie from Unexpected Elegance

And if your kid loves the classics, you can’t go wrong with a pecan pie. Some kids are turned off by this tasty dessert but for those who want to venture out and try new things, this is a great recipe to start with! 

What are your go-to Thanksgiving desserts for kids? 

Love what you read? Check out these great posts! 

Pin this article for later! 

Click the Pin button on the image below to save for later. 

Here’s a Quick Way to Make Turkey Napkin Rings for The Kids Table

Looking for ways to make your Thanksgiving table festive? These turkey napkin rings will do just that! Grab a few supplies and get crafting!

Turkey Napkin Rings resized

Looking for ways to make your Thanksgiving table more festive? Well, these turkey napkin rings will do just that!

Plus it’s an easy craft to get the kids involved in and they’ll be able to tell everyone around the table how they helped.

This is a craft you can easily do ahead of time if you already have the napkins you’re going to use. So check one more thing off of your holiday list and start crafting!

Don’t want to make them yourself? Buy a set of 4 for $10 on Etsy

Turkey Napkin Rings close up

Turkey Napkin Rings

What you’ll need:

Turkey Napkin Rings materials

What you do:

1. Cut brown paper widthwise into 2″ strips. Cut as many strips as you need napkin rings. Set aside.

Turkey Napkin Rings cut strips of brown paper

2. Grab pipe cleaners and start making feathers. Bend pipe cleaner in half and then make two loops. Use ends to wrap everything together so the loops stay closed.

Turkey Napkin Rings making feathers

3. Repeat with rest of colors (I used 4 colors). Using the excess of one colored pipe cleaner, wrap all feathers up together.

  Turkey Napkin Rings attach feathers together

4. Using a light brown pipe cleaner, make a circle by spinning the pipe cleaner around in a spiral. Tuck in the end of the pipe cleaner so that it stays together and is not visible.

Turkey Napkin Rings pipe cleaner turkey head

Turkey Napkin Rings glue gun

5. Grab your glue stick or glue gun and adhere brown circle to the feathers. (side note: I became frustrated with my glue stick and opted for the glue gun but my kids used the glue sticks.)

Turkey Napkin Rings fold paper in half

6. Grab brown strips of paper and fold in half lengthwise.

Turkey Napkin Rings measure and cut paper

7. Wrap around napkin and cut off any excess (ends of paper should overlap by about an inch).

Turkey Napkin Rings tuck in ends

8. Tuck one end of the paper into the other end to secure it.

Turkey Napkin Rings glue turkey to napkin ring

9. Add a dab of glue on the seam of the tucked in paper and adhere turkey body to the napkin ring.

Turkey Napkin Rings glue turkey eyes and beak

10. Add googly eyes, beak, and anything else you might want to include onto the face of the turkey.

Turkey Napkin Rings close up

You’re all set! Now repeat this until you have enough napkins for everyone coming over. Once everyone is ready for dinner all they have to do is tear the back of the paper to access their napkins or simply tug the napkins out.

How awesome is that?

What’s your favorite turkey craft?

Looking for more Thanksgiving inspiration? Read on! 

Pin this article for later! 

Click the Pin button on the image below to save for later. 

This post was first published on October 30, 2013

Wow Guests with These Easy DIY Thanksgiving Door Decorations + a DIY Cornucopia Wreath Tutorial

This shop has been compensated by Collective Bias, Inc. and its advertiser. All opinions are mine alone. #DIYHolidayWithSCJ #CollectiveBias

With Thanksgiving right around the corner, we’re making sure our home is in tip-top shape for guests. As the holidays get nearer, you never know who might stop by at any given moment. And the first thing they see when coming up to our home is our front door. So we’re sprucing things up with these easy DIY Thanksgiving door decorations and a simple DIY Cornucopia Wreath.

When we first moved into our new home, the one thing that stuck out like a sore thumb was the ugly solid brown door that stood in the doorway of our home. I didn’t care for it much and it always bugged me that it didn’t show off the awesomeness that is our home. So when my husband found a door in the exact style we were looking for on clearance at Home Depot, we picked it up right away and he installed it. Instead of leaving the trim around the door brown, we brightened things up with a deep red color to really make the door pop. 

To keep the door in tip-top shape, we rely on our go-to cleaning products to spruce things up. With the door being the first thing all walk through to enter the home, it can get a bit beaten up over time and gather dust and grime from the outside elements. 

Since our new door has three windows in it, we keep Windex® Original close by. It has an Unbeatable Streak Free Shine and starts working on dirt and grime even before you wipe*. Trusted for generations, Windex® Original cleans and shines glass, mirrors, and more! 

Pledge® beautifies and enhances the appearance of your hard surfaces and our finished, sealed door always looks so much better after we wipe it down with Pledge®. Pledge® Lemon Clean can be used on furniture all around the house to quickly clean, condition and protect –all while leaving behind the classic, fresh lemon Pledge® scent. It also features Allergen Trappers® to remove dust and up to 90 percent of the allergens found in dust. That means in addition to cleaning the front door, we can clean up the other household hard surfaces including wood, laminate, stainless steel, leather, marble, granite and plastic.

Scrubbing Bubbles® Fantastik® 32 oz. All-Purpose Cleaner is the perfect cleaner for our door threshold. It gets a beating as the kids run in and out of the home so we need a powerful antibacterial solution cuts to the center of grease and grime and dissolves it on contact and disinfects the area. And the no-rinse solution means you don’t have to spend as much time cleaning.

Easy DIY Thanksgiving Door Decorations

Now that our door is all nice and clean, it’s time to spruce things up even more with a few easy DIY Thanksgiving Door Decorations. This DIY Cornucopia Wreath is not only easy to make, it can be saved to use year after year! 

DIY Cornucopia Wreath

What you’ll need: 

  • Wheat wreath (found at Home Depot)
  • chicken wire
  • twine
  • hot glue gun
  • hot glue sticks
  • plastic/fake fruit and veggies

What you do: 

1. Cut a wide triangle out of the chicken wire and form into a cornucopia shape. 

2. Using the twine, wrap around the cornucopia frame and secure twine to the form and itself with hot glue. 

3. Continue wrapping the twine all the way down the form to the smallest tip and then secure the end by sticking it back in the end of the form.

4. Secure the cornucopia onto the wheat wreath with hot glue. 

5. Add decor in and around the cornucopia by hot gluing it in place. Make sure to balance the size of each piece and the colors. 

6. Hang on the door and step back to enjoy your handiwork! 

We grabbed a fun scarecrow and stacked two of the pumpkins from our trip to the pumpkin patch next to it to complete the Thanksgiving door decorations.

Keeping things simple yet welcoming is key. The front door doesn’t need too many decorations so choosing the pieces you use wisely will help keep a nice balance.  

Be on the lookout for Windex® and Scrubbing Bubbles® Fantastik® product promotions on display in Home Depot stores until 10/31/17, and Pledge® products on display starting 11/1/17. You can find all products in the cleaning products aisle at your local Home Depot store. 

What do you do to spruce up your front door during the holidays? 

*Claim Based on Windex® Original lab testing against leading competitor glass cleaners per AC Nielsen 52 weeks ended 7/29/2017

Love what you read? Check out these great posts! 

Pin this article for later! 

Click the Pin button on the image below to save for later. 

Pumpkin Pie with Coconut Milk

Looking for a dairy-free pumpkin pie filling? This pumpkin pie with coconut milk is perfect for those who are dairy-free or who just don’t have condensed milk in the pantry! 

pumpkin pie with coconut milk, pumpkin pie made with coconut milk, dairy free pumpkin pie filling

I am a huge pumpkin pie fan. Like I’ll do just about anything for a slice. It’s my favorite pie and I look forward to Fall every year because of the fact that pumpkin pie is everywhere. But sadly I have never actually made a pumpkin pie. Let alone a pumpkin pie recipe with coconut milk

So I decided to rectify that right away and this year tackled making a pumpkin pie. Except when I went in my cupboard to get the ingredients I realized I had no evaporated milk. Then when googling alternatives for evaporated milk I realized I could sub coconut milk in and it’d be even healthier! Win win for everyone once I got the perfect recipe figured out.

So now I just need to figure out a gluten-free, dairy-free crust that’ll work for this gluten-free, dairy free pumpkin pie filling. Got any ideas?

Oh, and by the way? This pie? To die for! You can’t taste the coconut milk at all. Just rich, creamy pumpkin pie filling. And it’s even better with a dollop of whipped cream. If you prefer to go all organic and natural try your hand at pumpkin puree. It’s super easy to make and is great in a lot of different dishes.

pumpkin pie with coconut milk close up, pumpkin pie with coconut milk, pumpkin pie made with coconut milk, dairy free pumpkin pie filling

Pumpkin Pie with Coconut Milk

  • 2 cups pumpkin puree
  • 2/3 cup light coconut milk
  • 3 eggs
  • 3/4 cup sugar
  • 1 tablespoon pumpkin pie spice
  • 1/2 teaspoon salt
  • 1 unbaked 9-inch pie shell

Preheat oven to 425.

Whisk eggs in a large bowl and mix in the sugar and pumpkin pie spice. Gently stir in pumpkin and coconut milk.

pumpkin pie with coconut milk measured, pumpkin pie with coconut milk, pumpkin pie made with coconut milk, dairy free pumpkin pie fillingPour into pie shell. Be careful not to overfill the shell.

Bake in oven at 425 degrees for 15 minutes. Reduce temperature to 350 degrees and bake for 50-60 minutes or until knife inserted comes out clean.

If crust is browning too quickly, wrap edges with foil.

Let cool completely before serving and serve with a dollop of whipping cream.

tetra pac pumpkin pie

Pumpkin Pie with Coconut Milk

  • 2 cups pumpkin puree
  • 2/3 cup light coconut milk
  • 3 eggs
  • 3/4 cup sugar
  • 1 tablespoon pumpkin pie spice
  • 1/2 teaspoon salt
  • 1 unbaked 9-inch pie shell
  1. Preheat oven to 425.
  2. Whisk eggs in a large bowl and mix in the sugar and pumpkin pie spice. Gently stir in pumpkin and coconut milk.
  3. pumpkin pie with coconut milk measuredPour into pie shell. Be careful not to overfill the shell.
  4. Bake in oven at 425 degrees for 15 minutes. Reduce temperature to 350 degrees and bake for 50-60 minutes or until knife inserted comes out clean.
  5. If crust is browning too quickly, wrap edges with foil.
  6. Let cool completely before serving and serve with a dollop of whipping cream.

What’s your favorite pie flavor? Have you used coconut milk in pumpkin pie before?

Like this post? Read more! 

Pin this article for later! 

Click the Pin button on the image below to save for later. 

pumpkin pie with coconut milk, pumpkin pie made with coconut milk, dairy free pumpkin pie filling

10 Best Kids Costumes to Make On A Budget

So you want to make your child’s costume this year but you don’t want to spend a whole lot? Don’t worry! We have you covered with these 10 best kid costumes to make on a budget! 

Making your child’s costume does not have to be a daunting task. In fact, I’ve made at least one homemade or semi-homemade costume for each of my kids every year. Now that doesn’t mean that they always end up wearing it, but it does mean that I’ve had at least 8 years experience in DIY halloween costumes for kids. And I’ve found that the less expensive costumes tend to end up being the easiest and more fun costumes of the lot! 

Below are a few great tutorials on the 10 best kid costumes I’ve found including two of our top costumes for my oldest. But I’ve also included a link to the other DIY homemade costumes we’ve done in years past at the end of this post in case you don’t see something you want below. 

The biggest thing to remember when tackling a DIY costume is to keep it simple. If you don’t sew regularly, don’t choose something you’ll have to sew! That’s why they created no sew glue. And if you don’t have a huge budget, or no budget at all, rest assured that there are a ton of different supplies you can find right inside your home (or closet) already! Ok, enough of that… here are some awesome DIY kid costumes for you to check out! 

Now to get my kids to actually decide on a costume idea without changing it 10 times after I already start in on it…

10 Best Kids Costumes to Make On A Budget

DIY Dinosaur Costume from Simmworks Family

DIY Inexpensive Octopus Costume from Simmworks Family

DIY Star Wars Costumes – Jedi and Princess Leia from Mission to Save

Dr. Seuss Cat in the Hat & Thing 1 and Thing 2 Costumes from Mission to Save

Football Themed Family Costumes from Bare Feet on the Dashboard

Easy Greek Goddess Costume from Uncommon Designs

Easy $3 Medusa Costume from SlapDash Mom

DIY Peacock Tutu Tutorial from 365 Days of Crafts

Mermaid Costume (with a No-Sew Version) from Creative Green Living

No-Sew Pirate Costume from Artsy Momma

What are the best kids costumes you’ve seen recently? 

Like this post? Read more! 

Pin this article for later! 

Click the Pin button on the image below to save for later. 

Hard Boiled Eggs in the Instant Pot

Want to make your life easier? Try these hard boiled eggs in the instant pot and watch the shells slide off! Plus no more grey ring around the yolk. 

One of the biggest uses I get out of my Instant Pot when I am not making dinner is making hard boiled eggs. I use the 5/5/5 method where I cook them for 5 minutes with a cup of water, let the pot naturally release steam for 5 minutes, then put the eggs in an ice bath for 5 minutes.

The shells fall off and the eggs are cooked beautifully! When I make them on the stove I always end up with gray rings around my yolk. No more gray rings! [Read more…]

How To Make Confetti Eggs + Cute Easter Outfit Ideas

With Easter right around the corner, these confetti eggs are a great way to celebrate. With the help of our sponsor, Kohl’s, we’re sharing how you can make them at home! This post is sponsored by Kohl’s.  I was paid for this post and received the included Carter’s clothing as compensation.

Every year for our kids school festival the most popular booth for the kids is the confetti egg booth. Now before we went to our first festival, I had no idea what confetti eggs were. Then my husband explained it and shared how his grandmother would have egg cartons and eggs all over the house because she’d make confetti eggs all throughout the year in preparation of their school’s festival. 

Guess what? I’ve turned into that person. I may or may not have stashed egg shells in egg cartons all around the house to start getting ready for confetti eggs. And with Easter coming up, it’s time to start making them! Good thing these are super easy to make and fun for the kids to get involved. 

While we’re on the topic of Easter prep, in an effort to get ahead of the game, I had the girls come with me to Kohl’s to pick out some cute outfits for Easter. This year instead of the pretty dresses they normally turn to, they decided to chose more comfy, playful outfits in beautiful spring colors. I love how these Carter’s outfits we picked out allow the kids to play and create without being limited or uncomfortable. 

You can check out a few of the looks we chose below! 

How to Make Confetti Eggs

What you’ll need: 

  • eggs
  • butter knife
  • bowl
  • tissue paper
  • confetti
  • scissors
  • glue stick
  • egg dye or markers (optional)

What you do: 

1. Taking your egg, carefully tap the top of the egg in a circle with butter knife. Once tapped around the top of the egg, remove egg shell from top. Using knife, scramble the egg in the shell a bit and pour out into bowl. 

Rinse egg with water and let dry completely. Scramble up the eggs and enjoy a protein-filled snack! 

2. OPTIONAL: Once egg has completely dried, you may decorate your egg with markers or egg dye. We just leave ours the same color as the eggs. 

3. Fill egg with confetti about 1/2 to 2/3rds of the way full. 

4. Cut out squares and/or rectangles out of your tissue paper. Then, using the glue stick, add glue to the edges of the tissue paper square. 

5. Add tissue paper square to top of the egg to cover the hole completely. Let dry and then enjoy going crazy with the eggs! 

Cute Easter Outfit Ideas

Looking for some outfit ideas for Easter? We’ve picked out some cute outfit ideas you can pick up at your local Kohl’s or online from the Carter’s line. How cute are these? 

We’re huge Carter’s fans. We’ve been clothing our kids in Carter’s since they were first born. No, seriously! Each of their newborn outfits was Carter’s brand. I love that I can get the girls coordinating outfits since many of the outfits and pieces I found come in both toddler sizes and kid sizes. Perfect for siblings!

From 3/17 – 4/2 you will $10 off a $40 Carter’s purchase with promo code KIDSALE10! Take advantage of this great deal and score some adorable outfits for the kids. Win-win, right?

shirt | shorts

outfit 1 | outfit 2

shirt | pants

outfit 1 | outfit 2

Have you made confetti eggs before? 

My blog may contain links to other websites. I am not responsible for the privacy policies of those other websites. When you click on a link, your information may be collected by those websites so I encourage you to read their privacy policies. These affiliate links are not associated with Kohl’s.

Easy Mardi Gras Masks for Kids

Can anyone else believe how fast this year is going? It’s already Mardi Gras and Lent is right around the corner. Now we don’t do huge celebrations for Mardi Gras but we do love letting the kids get involved with some masks and beads. And while the big kids get to celebrate Mardi Gras at school with some Mardi Gras bingo, the little one and I stayed home and made some masks. 

These mardi gras masks for kids are super easy to make and take only a few supplies to put together. Don’t have paint? Use colored construction paper or felt and trace your child’s hand to cut out. Don’t have a paper straw? Use a dowel, stick, or unsharpened pencil for the holder instead! Crafting with the kids means using what we have on hand to have a little fun. 

Here’s how we made these:

Mardi Gras Masks for Kids

What you’ll need: 

  • white construction paper
  • purple and green paint (can also use gold)
  • hole punch
  • scissors
  • paper straw (or unsharpened pencil)
  • feathers and pom pomps
  • tape
  • glue

What you do: 

1. Paint your child’s hand with one of the two colors you’ve selected. Take your construction paper and put it long ways in front of your child. Have them put their handprint on the paper. Clean off your hand. 

2. Repeat with the second color and second hand. Make sure that the second hand print butts up against the first (you can overlap as well). 

3. Let hands dry. 

4. Cut out dried handprints. 

5. Using a hole punch, punch a hole for the eyes on either side. Then line holes up with eyes and cut out bigger eye holes. 

6. Tape straw and feathers to back of mask and glue pom poms onto front of mask. Let dry. 

Enjoy! 

Do you celebrate Mardi Gras? 


© A Crafty Spoonful - All Rights Reserved
It is OK to use one of my photos provided a link back and/or proper credit is given. It is NOT ok to copy and paste a whole post including instructions. Please do not remove watermarks or alter images in any way. Please contact me with any questions at danielle@acraftyspoonful.com

.